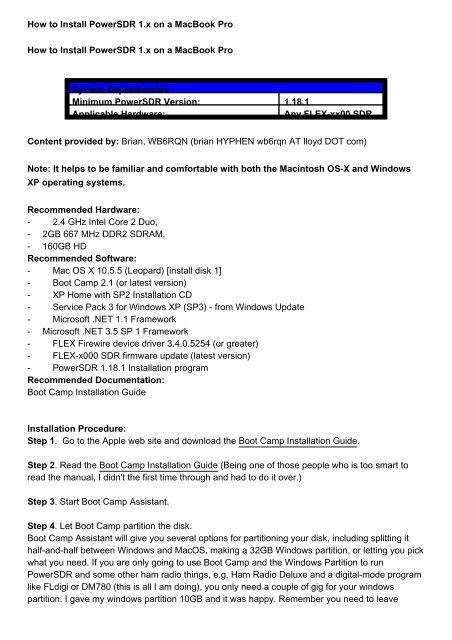
How to Install PowerSDR 1.x on a MacBook Pro How to Install ...
How to Install PowerSDR 1.x on a MacBook Pro How to Install ...
How to Install PowerSDR 1.x on a MacBook Pro How to Install ...

Create successful ePaper yourself
Turn your PDF publications into a flip-book with our unique Google optimized e-Paper software.
<str<strong>on</strong>g>How</str<strong>on</strong>g> <str<strong>on</strong>g>to</str<strong>on</strong>g> <str<strong>on</strong>g>Install</str<strong>on</strong>g> <str<strong>on</strong>g>PowerSDR</str<strong>on</strong>g> <str<strong>on</strong>g>1.x</str<strong>on</strong>g> <strong>on</strong> a <strong>MacBook</strong> <strong>Pro</strong><br />
<str<strong>on</strong>g>How</str<strong>on</strong>g> <str<strong>on</strong>g>to</str<strong>on</strong>g> <str<strong>on</strong>g>Install</str<strong>on</strong>g> <str<strong>on</strong>g>PowerSDR</str<strong>on</strong>g> <str<strong>on</strong>g>1.x</str<strong>on</strong>g> <strong>on</strong> a <strong>MacBook</strong> <strong>Pro</strong><br />
System Dependencies<br />
Minimum <str<strong>on</strong>g>PowerSDR</str<strong>on</strong>g> Versi<strong>on</strong>: 1.18.1<br />
Applicable Hardware:<br />
Any FLEX-xx00 SDR<br />
C<strong>on</strong>tent provided by: Brian, WB6RQN (brian HYPHEN wb6rqn AT lloyd DOT com)<br />
Note: It helps <str<strong>on</strong>g>to</str<strong>on</strong>g> be familiar and comfortable with both the Macin<str<strong>on</strong>g>to</str<strong>on</strong>g>sh OS-X and Windows<br />
XP operating systems.<br />
Recommended Hardware:<br />
- 2.4 GHz Intel Core 2 Duo,<br />
- 2GB 667 MHz DDR2 SDRAM,<br />
- 160GB HD<br />
Recommended Software:<br />
-<br />
-<br />
-<br />
-<br />
-<br />
-<br />
-<br />
-<br />
-<br />
Mac OS X 10.5.5 (Leopard) [install disk 1]<br />
Boot Camp 2.1 (or latest versi<strong>on</strong>)<br />
XP Home with SP2 <str<strong>on</strong>g>Install</str<strong>on</strong>g>ati<strong>on</strong> CD<br />
Service Pack 3 for Windows XP (SP3) - from Windows Update<br />
Microsoft .NET 1.1 Framework<br />
Microsoft .NET 3.5 SP 1 Framework<br />
FLEX Firewire device driver 3.4.0.5254 (or greater)<br />
FLEX-x000 SDR firmware update (latest versi<strong>on</strong>)<br />
<str<strong>on</strong>g>PowerSDR</str<strong>on</strong>g> 1.18.1 <str<strong>on</strong>g>Install</str<strong>on</strong>g>ati<strong>on</strong> program<br />
Recommended Documentati<strong>on</strong>:<br />
Boot Camp <str<strong>on</strong>g>Install</str<strong>on</strong>g>ati<strong>on</strong> Guide<br />
<str<strong>on</strong>g>Install</str<strong>on</strong>g>ati<strong>on</strong> <strong>Pro</strong>cedure:<br />
Step 1. Go <str<strong>on</strong>g>to</str<strong>on</strong>g> the Apple web site and download the Boot Camp <str<strong>on</strong>g>Install</str<strong>on</strong>g>ati<strong>on</strong> Guide.<br />
Step 2. Read the Boot Camp <str<strong>on</strong>g>Install</str<strong>on</strong>g>ati<strong>on</strong> Guide (Being <strong>on</strong>e of those people who is <str<strong>on</strong>g>to</str<strong>on</strong>g>o smart <str<strong>on</strong>g>to</str<strong>on</strong>g><br />
read the manual, I didn't the first time through and had <str<strong>on</strong>g>to</str<strong>on</strong>g> do it over.)<br />
Step 3. Start Boot Camp Assistant.<br />
Step 4. Let Boot Camp partiti<strong>on</strong> the disk.<br />
Boot Camp Assistant will give you several opti<strong>on</strong>s for partiti<strong>on</strong>ing your disk, including splitting it<br />
half-and-half between Windows and MacOS, making a 32GB Windows partiti<strong>on</strong>, or letting you pick<br />
what you need. If you are <strong>on</strong>ly going <str<strong>on</strong>g>to</str<strong>on</strong>g> use Boot Camp and the Windows Partiti<strong>on</strong> <str<strong>on</strong>g>to</str<strong>on</strong>g> run<br />
<str<strong>on</strong>g>PowerSDR</str<strong>on</strong>g> and some other ham radio things, e.g. Ham Radio Deluxe and a digital-mode program<br />
like FLdigi or DM780 (this is all I am doing), you <strong>on</strong>ly need a couple of gig for your windows<br />
partiti<strong>on</strong>. I gave my windows partiti<strong>on</strong> 10GB and it was happy. Remember you need <str<strong>on</strong>g>to</str<strong>on</strong>g> leave
enough room for Windows <str<strong>on</strong>g>to</str<strong>on</strong>g> do an upgrade <str<strong>on</strong>g>to</str<strong>on</strong>g> SP3 so there needs <str<strong>on</strong>g>to</str<strong>on</strong>g> be room for the SP3<br />
installer <str<strong>on</strong>g>to</str<strong>on</strong>g> do a backup.<br />
Step 5. Let the Boot Camp Assistant start the Windows XP installati<strong>on</strong> process. NOTE: You<br />
must use a WinXP SP2 (service pack 2) install CD.<br />
Step 6. Go through the normal XP installati<strong>on</strong> process including letting Windows <str<strong>on</strong>g>to</str<strong>on</strong>g> a quick format<br />
of partiti<strong>on</strong> "C: ... [FAT32] ...".<br />
Important: Remember you need <str<strong>on</strong>g>to</str<strong>on</strong>g> let Windows format the new partiti<strong>on</strong> even though Boot<br />
Camp formatted the partiti<strong>on</strong> as FAT32 when it created it.<br />
This is needed <str<strong>on</strong>g>to</str<strong>on</strong>g> ensure that Windows XP has a proper boot block in the partiti<strong>on</strong>. If you fail <str<strong>on</strong>g>to</str<strong>on</strong>g><br />
do this, Windows will not reboot after the first phase oft the Windows installati<strong>on</strong>.<br />
Step 7. Once Windows is completely installed and running, insert the "MacOS X <str<strong>on</strong>g>Install</str<strong>on</strong>g> Disk 1",<br />
and let it install all the drivers.<br />
Step 8. Download and install all the Apple MacOS X updates.<br />
Step 9. <str<strong>on</strong>g>Install</str<strong>on</strong>g> the .Net Framework 1.1 and the .Net Framework 3.5 SP1 from Microsoft (needed<br />
by <str<strong>on</strong>g>PowerSDR</str<strong>on</strong>g>).<br />
Step 10. Download and <str<strong>on</strong>g>Install</str<strong>on</strong>g> all the Windows updates stating first with Service Pack 3. If you get<br />
an error about needing 4MB more disk space, then do the following. The soluti<strong>on</strong> was <str<strong>on</strong>g>to</str<strong>on</strong>g> add an<br />
entry <str<strong>on</strong>g>to</str<strong>on</strong>g> the registry. Here is the process:<br />
- Run regedit form a command prompt<br />
- Navigate through the tree <str<strong>on</strong>g>to</str<strong>on</strong>g> the Registry key:<br />
HKEY_LOCAL_MACHINE\Software\Microsoft\Windows\CurrentVersi<strong>on</strong>\Setup<br />
- Right-click and select "New" and "string value"<br />
- Name the new entry "BootDir" and assign it the value "C:\"<br />
Here is a link <str<strong>on</strong>g>to</str<strong>on</strong>g> the support discussi<strong>on</strong> that had the soluti<strong>on</strong>:<br />
http://discussi<strong>on</strong>s.apple.com/thread.jspamessageID=8242489<br />
<str<strong>on</strong>g>Install</str<strong>on</strong>g> the Firewire Hotfix for XP Service Pack 3<br />
http://support.microsoft.com/kbid=955408 ohci1394.sys versi<strong>on</strong>: 5.1.2600.3311<br />
Step 11. In the Windows Device manager, disable;<br />
- Blue<str<strong>on</strong>g>to</str<strong>on</strong>g>oth transmitter<br />
- IR remote interface<br />
- IEEE 1394 network card ("1394 C<strong>on</strong>necti<strong>on</strong>")<br />
- Disable the WiFi card ("Airport")<br />
Step 12. <str<strong>on</strong>g>Install</str<strong>on</strong>g> the FLEX-5000 Firewire device driver 3.2.0.1556<br />
Step 13. <str<strong>on</strong>g>Install</str<strong>on</strong>g> the latest FLEX-5000 firmware update if you haven't d<strong>on</strong>e so previously.<br />
Step 14. <str<strong>on</strong>g>Install</str<strong>on</strong>g> <str<strong>on</strong>g>PowerSDR</str<strong>on</strong>g> 1.14.0<br />
This KB article may reference additi<strong>on</strong>al files that are available <strong>on</strong> the FlexRadio Systems web site
Downloads page. Please use the URL(s) below <str<strong>on</strong>g>to</str<strong>on</strong>g> download the referenced materials.<br />
An Adobe Acrobat Reader may be required <str<strong>on</strong>g>to</str<strong>on</strong>g> open the file. You can download Adobe Acrobat<br />
from here.<br />
KB Source Document(s):<br />
N<strong>on</strong>e Referenced<br />
Last Modified By: Administra<str<strong>on</strong>g>to</str<strong>on</strong>g>r, Tuesday, June 30, 2009<br />
http://kc.flex-radio.com/KnowledgebaseArticle50373.aspx<br />
Saturday, August 15, 2009