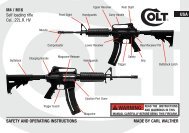
Bushmaster Carbon 15 .22
Bushmaster Carbon 15 .22
Bushmaster Carbon 15 .22

Create successful ePaper yourself
Turn your PDF publications into a flip-book with our unique Google optimized e-Paper software.
Please Practice Safe Firearms Handling<br />
This Operation Manual should always accompany this firearm.<br />
When you lend, give, or sell this firearm,<br />
be sure this manual goes with it.<br />
To obtain a replacement manual, write to:<br />
<strong>Bushmaster</strong> Firearms, Inc.<br />
999 Roosevelt Trail • Windham, Maine • 04062<br />
or call 800-883-6229 and include the serial number<br />
or have it available when making a phone request.<br />
Model:<br />
Serial Number:<br />
Purchased From:<br />
Date Purchased:
Before disassembling, loading, or using this firearm,<br />
please Read, Understand, and Follow all the instructions<br />
in this manual regarding proper handling and safe use!<br />
Caution: If unfamiliar with firearms, seek further advice through Gun<br />
Safety Organizations, Local Gun Clubs, NRA Approved Instructors,<br />
or similar qualified organizations.<br />
Warning: If this firearm is carelessly or improperly handled, unintentional<br />
discharge could result and could cause injury, death, or damage<br />
to property.<br />
Warning: This Firearm could chamber and fire a round if it is dropped<br />
or jarred with or without a loaded magazine in place – with<br />
the bolt carrier assembly locked to the rear, or in its forward<br />
position.<br />
Caution: Use only clean, dry, high quality commercially manufactured<br />
ammunition. Use only ammunition that is appropriate for the<br />
<strong>.22</strong> LR caliber of this <strong>Bushmaster</strong> firearm.<br />
1
Mission Statement<br />
Our mission is to manufacture quality firearms, made with Pride in the USA, and<br />
using the best American made parts. We value our customers, and do our best to<br />
assure quality and friendly service. <strong>Bushmaster</strong> Firearms, Inc. is always striving to<br />
make great firearms even better.<br />
The safety warnings in this booklet are very important. By understanding the<br />
dangers inherent in the use of any firearm, and by taking the precautions<br />
described herein, you can enjoy the use of your <strong>Carbon</strong> <strong>15</strong> <strong>.22</strong> LR Rifle. Failure to<br />
do so may result in serious injury to you or others, as well as severe damage to<br />
the firearm and/or property.<br />
2<br />
Note: For any information or details not covered in this<br />
Operating Manual, contact our Tech Support Staff at:<br />
techsupport@bushmaster.com<br />
800 883 6229
Table of Contents<br />
Fundamental Rules & Procedures........................................................4<br />
Facts About Your <strong>Carbon</strong> <strong>15</strong>............................................................... 6<br />
Getting Ready to Shoot .......................................................................7<br />
Immediate Action.................................................................................8<br />
Remedial Action...................................................................................8<br />
Bullet Stuck in Bore..............................................................................9<br />
Disassembly of Firearm ......................................................................10<br />
Cleaning Procedures ..........................................................................12<br />
Disassembly of Bolt Carrier................................................................14<br />
Inspection ...........................................................................................<strong>15</strong><br />
Lubrication of Parts............................................................................16<br />
Trouble Shooting................................................................................17<br />
3
4<br />
Fundamental Rules and Procedures<br />
for Safe Firearms Handling<br />
• Always treat every gun as if it were loaded!<br />
• Always keep the firearm pointed in a safe direction!<br />
• Always be sure the barrel is clear of any obstruction.<br />
• Always be sure of what lies beyond your target and the safety of bystanders<br />
before you shoot.<br />
• Always wear ear & eye protection when shooting.<br />
• Always carry your gun so that you can control the direction of<br />
the muzzle if you fall or stumble.<br />
• Always keep your finger off the trigger and leave the safety on until ready<br />
to shoot!<br />
• Never load the firearm until ready to shoot!<br />
• Never leave a firearm unattended. Guns and ammunition should always be<br />
secured and stored separately, and beyond the reach of children and adults<br />
unfamiliar with firearms.<br />
• Never allow your firearm to be used by anyone who has not read this instruction<br />
and safety manual.<br />
• Never point any gun, loaded or unloaded, at anything you do not intend to<br />
shoot.
• Never touch the barrel after firing - it could be very hot!<br />
• If your rifle stops firing with a live round still in the chamber (a misfire),<br />
quickly remove the round, keeping your face away from the ejection port.<br />
If you cannot remove it within 10 seconds, remove the magazine, and wait<br />
<strong>15</strong> minutes with the rifle pointed in a safe direction. At this point, the rifle<br />
could still fire the round.<br />
• If your bolt fails to unlock, and you try to free it by tapping the butt stock<br />
on the ground, while pulling on the charging handle, point the muzzle away<br />
from yourself, and in a safe direction.<br />
• If there is water in the barrel, do not fire the rifle, it could explode!<br />
• If a noticeable difference in sound or recoil is experienced, Stop Firing!<br />
This condition could indicate an incomplete powder burn and/or a bullet<br />
stuck in the bore.<br />
5
Facts About Your New<br />
<strong>Bushmaster</strong> <strong>Carbon</strong> <strong>15</strong> <strong>.22</strong>LR Rifle<br />
The <strong>Bushmaster</strong> <strong>Carbon</strong> <strong>15</strong> <strong>.22</strong> LR rifle system consists of a firearm, 10 round magazine,<br />
and instruction manual. It is a very light weight firearm – blow back operated, magazine<br />
fed, and operates in semi-automatic mode (i.e., a single shot fired each time the trigger is<br />
pulled). Retracting the charging handle cocks the internal hammer and compresses the<br />
recoil spring. When the charging handle is released, it moves the bolt forward (driven by<br />
the recoil spring), strips a cartridge from the magazine, and chambers the cartridge. The<br />
bolt is held against the chambered cartridge by the recoil spring.<br />
When the trigger is pulled, the hammer is released and strikes the firing pin. The firing pin<br />
indents the cartridge case rim and ignites the priming compound inside the rim and a<br />
great volume of gas is instantly generated which acts on the cartridge case in all directions.<br />
The bullet moves out of the cartridge case, and exits the muzzle. The bolt then moves<br />
rearward automatically, extracting and ejecting the fired cartridge case, and at the same<br />
time cocking the hammer and compressing the recoil spring, as described above. Once the<br />
trigger is released the firearm is ready to fire again. The firearm will fire if there is a<br />
cartridge in the chamber whether or not there is a magazine place. The rifling is R.H. twist,<br />
1 turn in 16” – 6 lands & grooves.<br />
6
Getting Ready to Shoot:<br />
• With magazine well empty, pull back the charging handle and release to cock<br />
hammer so safety can be engaged.<br />
• Put safety lever on SAFE.<br />
• Insert the loaded magazine into the magazine well, always making sure the<br />
muzzle is pointed in a safe direction!<br />
• Pull charging handle to rear and release. Move safety lever from SAFE to FIRE.<br />
Note: If the rifle is not going to be fired immediately, make<br />
sure the selector lever is still on safe.<br />
Charging Handle<br />
Safety Lever<br />
Bolt Catch<br />
7
8<br />
Immediate Action in Case of Trouble…<br />
If your rifle stops firing perform the following immediate actions…<br />
1. Remove the magazine.<br />
2. Pull charging handle all the way back.<br />
3. Check chamber for any obstruction or unfired cartridge.<br />
4. Insert the magazine and make sure it is seated properly.<br />
5. Pull the charging handle all the way back. RELEASE charging handle to feed<br />
a new round. Don’t ride the charging handle forward.<br />
6. Now fire. If the rifle won’t fire, look for trouble and apply remedial action.<br />
Remedial Action…<br />
If your rifle stops firing with a live round in the chamber of a hot barrel, remove<br />
the round fast. However, if you cannot remove it within 10 seconds, remove the<br />
magazine and wait <strong>15</strong> minutes with rifle pointing in a safe direction with the<br />
safety on during that time. This will help prevent injury if a round fires as a<br />
result of a hot barrel. Keep your face away from the ejection port while clearing<br />
a hot chamber.<br />
• If your Rifle still fails to fire after performing Steps 1 through 5 above, and<br />
check again for a jammed cartridge case.<br />
• If a cartridge case is in the chamber, open the receivers, remove the bolt<br />
carrier, and try to tap out the case with a cleaning rod.<br />
• If your rifle fails to fire, check the trouble shooting section in this manual - or<br />
take the rifle to a qualified gunsmith.
Bullet Stuck in the Bore…<br />
WARNING:<br />
If an audible “POP” or reduced recoil is experience during firing,<br />
IMMEDIATELY CEASE FIRE:<br />
Then:<br />
• Remove the magazine<br />
• Lock the bolt to the rear<br />
• Place the selector lever on SAFE<br />
• Check for a bullet in the bore<br />
Do not apply the “Immediate Actions” previously described.<br />
If a bullet is stuck in the barrel of the weapon, do not try<br />
to remove it. Take the rifle to a qualified gunsmith.<br />
9
Disassembly Of Firearm…<br />
• Make sure firearm is not loaded and is pointed in a safe direction.<br />
• Remove magazine and clear the chamber.<br />
• Open the bolt by pulling the charging handle completely to the rear. While<br />
holding the charging handle in this position, use your other hand to lock<br />
the bolt in the rearward position by pushing the lower end of the bolt catch<br />
lever.<br />
• The bolt carrier should lock in the rearward position. Push charging handle<br />
forward until it latches.<br />
• If there was a round in the chamber it should have been ejected...make sure<br />
there is not a round in the chamber by LOOKING INTO THE CHAMBER from<br />
THE EJECTION PORT AND VISUALLY CONFIRMING THAT THERE IS NOT<br />
A ROUND IN THE CHAMBER!<br />
• Now that you are sure the gun is unloaded, proceed in the disassembly.<br />
• Send the Bolt “Home” by releasing the Bolt Catch.<br />
• Rotate the takedown lever 160° counter - clockwise (See Diagram #1 on next<br />
page). Grasp the rifle and stock in opposite hands and firmly pull stock directly<br />
rearward. Do not attempt to fire the rifle with stock removed. To do so<br />
is unsafe and could cause bodily injury.<br />
10
• Unscrew the buffer tube and remove the recoil spring and buffer.<br />
• Use a small diameter drive tool, push both takedown pins from left to right<br />
until they stop.<br />
• Separate the receivers by holding the grip with one hand and pulling the upper<br />
receiver up and forward. Note: The charging handle must be in the closed<br />
position; there will be some resistance due to the close tolerance fit between<br />
the upper and lower receivers.<br />
• You may now pull back on the charging handle to remove the bolt carrier<br />
assembly.<br />
Clean your rifle as soon as possible after firing, to<br />
make the job easier, and to avoid the development Diagram #1<br />
of any corrosion. When your firearm has not been<br />
Lever<br />
fired, you should clean it at least once or twice a<br />
year if you live in a temperate climate, or as often<br />
as once a week in a tropical climate. If you get your<br />
0000000<br />
firearm wet, clean it as soon as possible. Use only<br />
160<br />
high quality products which include a cleaning rod,<br />
swab holder, cotton flannel bore patches, pipe<br />
cleaners, a small toothbrush, brass wire bristle bore and chamber brushes, and CLP<br />
(Cleaner–Lubricant–Preservative). After disassembling the rifle/pistol, thoroughly clean,<br />
inspect and lubricate all parts according to the techniques described in this manual.<br />
11
Cleaning:<br />
Note: the procedures below describe<br />
cleaning with a standard military issue<br />
multi-piece rod cleaning kit. Other<br />
commercial cleaning kits may include<br />
alternate instructions, which may be<br />
just as effective.<br />
Clean the Bore…<br />
• Always clean from chamber to muzzle in the natural<br />
direction of the bullet.<br />
• Attach the three cleaning rod sections together,<br />
but leave each one about two turns short<br />
of being tight.<br />
• Attach the bore brush, leaving it two turns short<br />
of being tight.<br />
• Never run a brush down the barrel first<br />
or dip the brush in solvent.<br />
• Swab out the bore with a patch moistened<br />
with “CLP”.<br />
• Point muzzle down. Hold the upper receiver in one<br />
hand while inserting the end of the rod without the<br />
brush into the chamber. Do not let either rub the bore,<br />
12<br />
Diagram #2
this will scratch the bore. About 2 - 3 inches of the rod should protrude out<br />
of the muzzle end.<br />
• Attach the handle section of the cleaning rod to the threaded end that<br />
is sticking out of the muzzle. Diagram #2<br />
• Pull the brush through the bore and out the muzzle. You should be able<br />
to see the rod twisting as you pull it. This is the brush “tracking” in the<br />
rifling. Never reverse the brush in the chamber or bore.<br />
• After one pull, take the handle section off , and repeat the process.<br />
• After three or four pulls, the three rod sections and the bore brush may<br />
become screwed tightly together. Loosen them up and repeat the process.<br />
• Send a patch through the bore occasionally to help clean out the debris<br />
that the brush has loosened. Just replace the bore brush with the rod tip<br />
(patch holder) and a wet patch. Pull it through. If you leave the rods loose<br />
again the patch will “track” in the rifling as before. But remember, always<br />
have the bore wet with cleaner before trying to pull a brush through.<br />
13
Disassembly of Bolt Carrier Assembly…<br />
• Clean the bolt carrier assembly and components in a suitable cleaning solvent<br />
and remove any built-up carbon from the bolt.<br />
• Clean the rifle using a commercially available gun cleaner (WD-40 works well<br />
for cleaning exterior surfaces of the receivers.) Clean bore with bore brush and<br />
wipe out with cleaning patch.<br />
• Re-assembly is reverse of disassembly.<br />
Bolt Carrier<br />
Extractor<br />
1. Remove bolt assembly from carrier.<br />
Pin<br />
2. Remove firing pin and spring.<br />
3. Remove extractor pin, extractor,<br />
and extractor spring.<br />
Firing Pin<br />
Cartridge Guide<br />
Extractor<br />
Spring<br />
Extractor<br />
4. Remove cartridge guide, by removing end from hole and pulling<br />
wire from slot. Pull wire down to remove.<br />
14<br />
Bolt assembly should be disassembled only when dirty or damaged.<br />
Always replace damaged parts or see a qualified gunsmith.
Inspection Before Lubricating…<br />
• Check the bolt: Look for cracks or fractures. Bolts<br />
with any pitting extending into the firing pin<br />
hole should be replaced.<br />
• Check the firing pin: If it is bent, cracked, too sharp,<br />
it should be replaced.<br />
• Check the extractor and extractor spring. If the extractor<br />
is chipped, or has broken edges in the area of the lip<br />
that engages the cartridge rim, it should be replaced.<br />
• Check the cartridge guide for wear or damage. To reassemble,<br />
make sure cartridge guide is pressed back in place and the<br />
end should pop into hole.<br />
<strong>15</strong>
Upper and Lower Receivers:<br />
Lubrication…<br />
Lightly Lubricate<br />
• The inside of the upper receiver, bore and chamber (using cleaning rod<br />
and patch).<br />
• The firing pin with CLP.<br />
• The charging handle and the inner and outer surfaces of the bolt carrier.<br />
Generously Lubricate<br />
• All moving parts inside the lower receiver (trigger, hammer, safety, bolt catch,<br />
etc), and all its various pins and detents. Don’t forget the takedown, pivot<br />
pins, and their detents.<br />
• Wipe off fingerprints (they can start the corrosion process on any metal parts)<br />
from exterior surfaces with a soft oiled black rag (black rag prevents<br />
visible lint).<br />
16
Trouble Shooting…<br />
Problem:<br />
Won’t Fire<br />
Check For:<br />
Selector lever on SAFE<br />
What To Do:<br />
Put it on FIRE<br />
Too much oil in firing pin<br />
recess<br />
Defective ammunition<br />
Too much carbon on firing pin<br />
or in firing pin recess<br />
Wipe out with pipe cleaner<br />
Remove and discard<br />
Clean<br />
Won’t Extract<br />
Dirty or corroded ammo<br />
Remove stuck round -<br />
push out with cleaning rod<br />
17
Won’t feed<br />
<strong>Carbon</strong> in chamber<br />
Fouling or carbon in<br />
extractor recess or lip<br />
Dirty or corroded ammo<br />
Dirty magazine<br />
Defective magazine<br />
Too many rounds in<br />
magazine<br />
Action of buffer assembly<br />
is restricted<br />
Magazine not fully<br />
seated<br />
Clean chamber<br />
Clean extractor<br />
Clean<br />
Clean<br />
Replace<br />
Take out excess<br />
Take out buffer and<br />
spring. Clean them.<br />
Adjust magazine catch: turn<br />
catch clockwise to tighten<br />
and counter clockwise to<br />
loosen.<br />
18
Double Feed<br />
Won’t Chamber<br />
Won’t Lock<br />
Defective magazine<br />
Dirty or corroded ammo<br />
Damaged ammo<br />
<strong>Carbon</strong> in chamber<br />
Dirt, corrosion, or carbon<br />
buildup in barrel or bolt face.<br />
Frozen extractor<br />
Restricted buffer assembly<br />
Replace<br />
Clean<br />
Clean<br />
Clean<br />
Clean<br />
Remove & clean<br />
Remove & clean<br />
Won’t Extract<br />
Restricted movement of<br />
bolt carrier group<br />
Remove, clean, & lube.<br />
19
Selector Lever Binds<br />
Needs oil<br />
Dirt or sand under trigger<br />
Lubricate with CLP<br />
Clean<br />
Bolt Carrier<br />
“Hung up”<br />
Round jammed between<br />
bolt & charging handle<br />
or is double feeding<br />
Remove magazine. Push<br />
in on the bottom of the bolt<br />
latch. While pulling down<br />
on the charging handle, tap<br />
the rifle butt on the ground.<br />
Bolt should lock to the rear.<br />
Warning: Keep clear of muzzle.<br />
Caution: After round is removed, bolt is under tension.<br />
Note: If this procedure fails, use a section of cleaning rod to push the bolt<br />
fully to the rear through the ejection port.<br />
20
Limited One Year Warranty<br />
<strong>Bushmaster</strong> Firearms, Inc. products are warranted to be free from defects in<br />
material and workmanship. Warranty cards are included with all firearms and<br />
should be completely filled out and sent to <strong>Bushmaster</strong> Firearms, Inc. to activate<br />
the terms of the warranty. Any such defect of which <strong>Bushmaster</strong> Firearms, Inc. is<br />
given written notice, as provided below, within one year and ten days from the<br />
date of first purchase by a customer will be remedied by <strong>Bushmaster</strong> Firearms,<br />
Inc. This warranty is granted by <strong>Bushmaster</strong> Firearms, Inc., 999 Roosevelt Trail,<br />
Windham, Maine 04062.<br />
To initiate a warranty claim call <strong>Bushmaster</strong> Firearms, Inc. at 1-800-883-6229,<br />
between 8:30 am and 6:00 pm E.S.T., Monday through Friday to get a “Return<br />
Merchandise Authorization” number. Warranty claims (transportation charges<br />
prepaid), should state the model and serial number of the gun concerned, a<br />
description of the difficulty experienced, and the date of purchase. It is recommended<br />
that shipment be insured by the owner, since <strong>Bushmaster</strong> Firearms, Inc.<br />
will accept no responsibility for loss or damage in transit. Transportation and<br />
insurance charges for return to owner will be paid by <strong>Bushmaster</strong> Firearms, Inc.,<br />
if the related claim is a proper claim for warranty work. The firearm should then<br />
be sent to the Warranty Service Department, <strong>Bushmaster</strong> Firearms, Inc., Lake<br />
Havasu Division, 1070 Metric Drive, Lake Havasu City, AZ. 86403.