You also want an ePaper? Increase the reach of your titles
YUMPU automatically turns print PDFs into web optimized ePapers that Google loves.
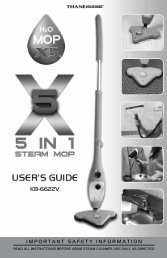
US E R ’ S G U I D E<br />
U S E R ’ S G U I D E<br />
SELECTING THE PROPER CLEANING TOOL<br />
1. Upholstery crevice tool may be used for carved furniture, table tops, books, lamps, lighting fixtures,<br />
Venetian blinds, baseboards, to mention a few.<br />
2. Upholstery tool may be used for upholstered furniture, draperies, tapestries, mattresses, clothing and<br />
carpet stairs.<br />
3. Crevice tool may be used in tight spaces, corners and along edges in such places as dresser drawers,<br />
upholstered furniture, stairs and base baseboards.<br />
4. Carpet cleaning system includes:<br />
(a) Sprayer bottle - creates foaming action when mixed with water and/or cleaning solution to get deep<br />
down into dirt and help lift stains.<br />
(b) Carpet cleaning brush - specially designed tool to extract excess liquid from carpet and/or upholstery.<br />
(c) Little brush - helps clean most tough stains.<br />
Extension Tubes(s) used to give extra length to your hose. Use it with any of the above tools.<br />
Cord storage/holder the vacuum is fitted with two brackets located at the back of the vacuum. This is used to<br />
neatly wrap the cord around before storing.<br />
USING THE CARPET/FLOOR NOZZLE<br />
The floor nozzle can be used for both hard floors and carpets, carpets rugs and the like.<br />
Depress the left hand lever on the floor nozzle in order to lower the bristles to the down position. This is best<br />
suited for carpets. Lift the left hand lever in order to lock the floor brush in the up position, which is used for<br />
floors and hard surfaces.<br />
SUCTION CONTROL ON THE HANDLE<br />
You can be adjusted the suction on the handle using the fingertip control on the handle (Fig.6).<br />
Closed: For full suction power<br />
Open: To reduce the suction power and to stop large objects getting stuck in the pipe<br />
There is also a suction control lever on the motor and is used to increase or decrease the suction power of the<br />
vacuum by moving the lever to the left or right.<br />
EMPTYING THE DUST/WATER TANK<br />
There is no dust full indicator on your vacuum as it is a bagless vacuum. The dust canister is transparent and as<br />
such you can see at all times how much dust/dirt has accumulated in the tank. When the dust canister looks full,<br />
turn the vacuum OFF and disconnect from the mains socket. Disconnect the hose from the hose inlet duct.<br />
Remove the water tank by moving the cradle car locking handle to the down position. Empty the contents and<br />
refill with clean water.<br />
If too much dirt accumulates in the water tank, your cleaner will not operate effectively.<br />
Note: UNPLUG THE VACUUM CLEANER BEFORE CLEANING/REPLACING THE DUST FILTER. NEVER PLACE<br />
A DUST FILTER IN A WASHING MACHINE OR DRY CLEAN.<br />
5<br />
HEPA FILTER<br />
Your HEPA filter is located on the left hand side of the motor (Part 5) and is there to reduce dirt, dust and other<br />
types of particles from entering back into a room. We recommend you check the filter on a regular basis as it will<br />
affect the suction power and smooth running of your vacuum. The HEPA filter should be replaced at least once<br />
every four months. However this will depend on the frequency of use and may need replacing more often.<br />
To replace the HEPA filter follow these instructions:<br />
1. Disconnect the vacuum from the power supply.<br />
2. Move the cradle car lock (Part.11) to the down position.<br />
3. Remove the motor from the cradle.<br />
4. The motor protection filter is located on the left hand side of the motor<br />
when standing in front of the unit.<br />
5. Press the lever at the bottom which will expose the filter.<br />
6. Remove the filter by simply pulling the tag at the top of the filter and<br />
replace with new one. (Fig.7)<br />
7. Re-assemble the vacuum by putting the cover back in and placing the<br />
motor back on to the vacuum water tank.<br />
REPLACEMENT HEPA FILTERS ARE AVAILABLE FROM THE CUSTOMER SERVICES WHERE YOU<br />
PURCHASED THE UNIT FROM.<br />
NOTE: NEVER USE THE VACUUM CLEANER WITHOUT THIS FILTER IN PLACE. USE ONLY ORIGINAL FILT E R S .<br />
UNPLUG CLEANER BEFORE CLEANING/REPLACING THE DUST FILTER & BRACKET. NEVER PLACE A CLOTH<br />
BAG IN A WASHING MACHINE OR DRY CLEAN.<br />
Care and Maintenance<br />
Your vacuum cleaner is manufactured to withstand normal day-to-day use, but an occasional wipe over with<br />
a damp cloth will help maintain its goods looks. Abrasive cleaners should NOT be used.<br />
Caution: Always disconnect the appliance from the mains socket<br />
before performing any cleaning or maintenance operations.<br />
After the appliance has been used, take out the rubber plug first,<br />
then pour away the dirty water and clean the water tank. If you<br />
used the machine to clean liquid waste, there will be some liquid<br />
residue left in the flexible hose and extension tube. To clean<br />
inside of the hose and tube, empty the water tank completely<br />
and then vacuum up about 1 liter of clean water.<br />
Repeat if necessary.<br />
After emptying and rinsing the water tank, remove the foam<br />
filter, wash it under running water and let it dry completely<br />
before re-positioning (the filter must be kept dry to prolong its<br />
life). Periodically check that the float is free to move. (Fig.8)<br />
STORAGE<br />
Store your vacuum in a cool dry place.<br />
6<br />
(fig. 8)<br />
(fig. 7)