
You also want an ePaper? Increase the reach of your titles
YUMPU automatically turns print PDFs into web optimized ePapers that Google loves.
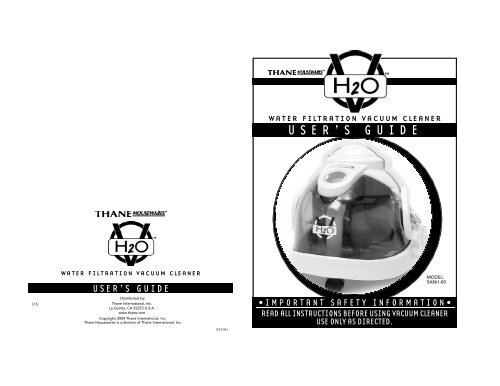
W A T E R F I L T R A T I O N V A C U U M C L E A N E R<br />
U S E R ’ S G U I D E<br />
U.S.<br />
W A TE R F I L T RA T IO N V A CU U M CLEANER<br />
U S E R ’ S G U I D E<br />
Distributed by:<br />
Thane International, Inc.<br />
La Quinta, CA 92253 U.S.A.<br />
www.thane.com<br />
Copyright 2004 Thane International, Inc.<br />
Thane Housewares is a division of Thane International, Inc.<br />
(V12/04)<br />
MODEL:<br />
SA861-80<br />
• I M P O R T A N T S A F E T Y I N F O R M A T I O N •<br />
READ ALL INSTRUCTIONS BEFORE USING VACUUM CLEANER<br />
USE ONLY AS DIRECTED.
US E R ’ S G U I D E<br />
U S E R ’ S G U I D E<br />
IMPORTANT SAFEGUARDS<br />
PLEASE READ CAREFULLY<br />
Notes<br />
Thank you for purchasing our Water Filtration Vacuum Cleaner. Each unit has been manufactured to ensure<br />
safety and reliability. Before first use, please read the following instructions carefully and keep for future reference.<br />
It will help you assemble and operate your new vacuum in the safest and most effective way.<br />
READ ALL INSTRUCTIONS BEFORE USING<br />
DANGER – To reduce the risk of electrocution:<br />
1. Read all instructions, safeguards, and warnings before using the appliance.<br />
2. Do not place appliance where it can fall or be pulled into water or other liquid.<br />
3. Do not place in or drop into water or other liquid.<br />
4. Do not reach for an appliance that has fallen into water. Unplug immediately!<br />
WARNING – To reduce the risk of burns, electrocution, fire, or injury to persons:<br />
1. The appliance is not intended for use by young children or infirm persons without supervision.<br />
2. Check that the main voltage corresponds to the voltage indicated on the rating label, see specifications below:<br />
UL/CUL 120V 60Hz 1200W<br />
TUV/UK 220-240V 50-60Hz 1300W<br />
3. Do not leave the appliance unattended while plugged in. Unplug from outlet when not in use and before<br />
cleaning.<br />
4. This appliance should not be used by children. Close supervision is necessary when this product is used<br />
near children or invalids.<br />
5. Use this appliance for its intended use as described in this manual. Do not use any other accessories or<br />
attachments not recommended by the manufacturer. They may result in fire, electrical shock, or personal<br />
injury.<br />
6. Never operate this appliance if it has a damaged cord or plug, if it is not working properly, if it has been<br />
dropped or damaged, or dropped into water. Return the product to an authorized customer service center<br />
for inspection, repair, or adjustment.<br />
7. Keep the cord away from heated surfaces.<br />
8. Always grab by the plug to remove from outlet. DO NOT pull on cord.<br />
9. Never force the plug into an outlet.<br />
10. Do not use outdoors or operate where aerosol (spray) products are being used or where oxygen is<br />
being administered.<br />
11. Do not let the cord hang over the edge of a table or counter, or touch hot surfaces.<br />
12. Before removing plug from wall, turn UNIT OFF.<br />
13. Do not use this appliance for anything other than it is intended.<br />
14. Check all electrical wiring. Beware of damaged cord or plug.<br />
15. Never block the air openings of the product or place it on a soft surface, such as a bed or couch, where<br />
the air openings may be blocked. Keep the air openings free of lint, hair, and the like.<br />
16. Do not pull, lift, or carry by the power cord. Do not use the cord as a handle, close a door on the cord,<br />
or pull the cord around or against sharp edges or corners. Do not run vacuum over power cord.<br />
1<br />
10
US E R ’ S G U I D E<br />
U S E R ’ S G U I D E<br />
Notes<br />
17. Do not use to pick up flammable or combustible liquids, such as gasoline, or use in areas where they<br />
may be present.<br />
18. Do not pick up anything that is burning or smoking, such as cigarettes, matches, or hot ashes.<br />
19. Do not pick up toxic material such as chlorine bleach, lighter fluid, etc. with this vacuum.<br />
20. Do not suck plaster powders and lime or cement, especially in a dusty room when decorating.<br />
21. Do not pick up hard or sharp objects such as glass.<br />
22. Do not use without filter in place.<br />
23. Replace the filter when necessary.<br />
24. The use of an extension cord is not recommended.<br />
25. Do not operate if cleaner appears to be faulty.<br />
26. Never attempt to open any part or dismantle the controls. Responsibility for failure cannot be accepted<br />
if this instruction has been ignored.<br />
27. Do not try to over-extend or stretch the main cable.<br />
28. Do not allow unit to be exposed to rain.<br />
29. Keep hair, loose clothing, fingers, and all parts of the body away from openings and moving parts.<br />
30. Unplug this product before filling.<br />
31. Do not use without water in the water tank.<br />
32. Special care must be taken when using the appliance to clean stairs.<br />
33. Do not handle the plug or appliance with wet hands.<br />
34. Do not overfill the water tank. Note the “Maximum Level” marking.<br />
35. Do not vacuum up soapy liquid or detergents as this causes frothing inside the water tank.<br />
36. Connect to a properly grounded outlet only. See Grounding Instructions.<br />
37. Never drop or insert any object into any opening or hose.<br />
38. This appliance is for household use only. Industrial or commercial use invalidates the warranty.<br />
39. Do not disassemble the product.<br />
40. For indoor use only.<br />
SAVE THESE INSTRUCTIONS.<br />
9<br />
2
US E R ’ S G U I D E<br />
PARTS DIAGRAMS<br />
1) ON/OFF button<br />
11) C radle car locking handle<br />
2) Suction power control<br />
U S E R ’ S G U I D E<br />
Assembly Instructions for<br />
Carpet Cleaning System<br />
N O T E : When assembling and preparing for use, make sure that the H2O unit is NOT plugged into the power sourc e .<br />
12) Cord holder<br />
5) Motor unit<br />
How to attach sprayer bottle with H2O unit:<br />
1. Remove HEPA filter and HEPA filter cover from the H2O unit.<br />
Sprayer bottle<br />
adaptor<br />
10) Cradle car<br />
9) Removable suction tube<br />
2. Attach air outlet cover to the same place where you remove<br />
HEPA filter cover.<br />
3. Attach flexible hose to air outlet cover.<br />
8) Foam filter with safety float<br />
7) Tank handle<br />
13) Flexible hose<br />
4. Attach sprayer bottle adaptor to the other end of the flexible hose.<br />
5. Attach sprayer bottle to sprayer bottle adaptor.<br />
Air outlet cover<br />
Hose adaptor<br />
3) Inlet port<br />
6) Removable water tank<br />
15) Upholstery crevice tool<br />
18) Siphon<br />
4) Inlet nozzle<br />
Crevice tool<br />
16) Upholstery tool<br />
14) Telescopic extension tube<br />
17) Standard head attachment<br />
Bonus<br />
FLOOR SQUEEGEE<br />
Great for picking<br />
up wet spills on<br />
tile, wood, and<br />
other hard<br />
surfaces.<br />
3<br />
Optional Bonuses<br />
1. STORAGE BAG<br />
2. CARPET CLEANING SYSTEM<br />
Sprayer Bottle<br />
Carpet Cleaning<br />
Brush<br />
Little Brush<br />
8
US E R ’ S G U I D E<br />
Problem<br />
The vacuum cleaner does not start.<br />
The suction power reduces and the noise increases.<br />
Leakage of water during wet vacuuming.<br />
SERVICE/ PROBLEM SOLVING<br />
TROUBLESHOOTING<br />
Possible Cause and Solution<br />
The power supply is not properly connected.<br />
Check the power cord, plug and socket.<br />
The maximum level of water collection has been<br />
reached. Turn the H2O unit off and disconnect the<br />
power cord from the electrical outlet. Empty the<br />
water.<br />
There is a blockage. Check that the flexible hose,<br />
extension tool, or accessory are not blocked and<br />
remove any causes of blockage.<br />
The HEPA filter requires replacement.<br />
Float blocked and/or no float filter. Release the<br />
float, clean and/or dry the foam filter.<br />
There are no user serviceable parts in this appliance. If the appliance is not operating correctly, please check that:<br />
1. You have followed the instructions correctly.<br />
2. The wall socket is switched on.<br />
3. The mains power supply is ON.<br />
If the appliance still does not work: In the first instance, consult your retailer for possible repair or replacement.<br />
U S E R ’ S G U I D E<br />
Assembly & Operating Instructions<br />
N O T E : When assembling and preparing for use, make sure that the H2O unit is NOT plugged into the power sourc e .<br />
1. Completely lower the handle that<br />
locks the motor unit. (Figure 1)<br />
2. Remove the motor unit. (Figure 2)<br />
3. Lift out the removable water tank<br />
using its handle. (Figure 3)<br />
(Note: Water tank should easily<br />
lift out. If it does not, please unwind<br />
the power cord from the two holders<br />
on the cradle car.)<br />
(fig. 1)<br />
(fig. 2)<br />
4. To use the H2O unit for dry or wet vacuuming please pour in<br />
water using the maximum/minimum markings on the side of the<br />
(fig. 3)<br />
water tank for reference. Do not fill below the minimum line or above the maximum line.<br />
A minimum of 1.8 litres of water should be poured into the tank: do not exceed the maximum level of<br />
3.3 litres marked on the tank.<br />
Note: The suction tube can be removed making it easier to pour water into the tank. (Figure 4)<br />
5. Replace the tank on the cradle car, position the motor unit in place and raise the<br />
handle that locks the motor unit until it clicks into place.<br />
6. Fit the flexible hose to the appliance, inserting the white end into the opening<br />
and turning it clockwise. (Figure 5) To remove it, turn it counterclockwise.<br />
7. Fit the extension tool onto the end of the flexible hose, pushing it fully into place.<br />
8. Choose an attachment, and fit it snugly over the end of the telescoping extension tool.<br />
(fig. 4)<br />
NOTES<br />
For hard floors, carpets and rugs use the standard head attachment (Part 17.)<br />
and connect to the metal telescopic tube.<br />
You can use one of the other accessories provided, such as the crevice tool or the<br />
upholstery tool, by fitting it directly on to the siphon (Part 18.)<br />
Plug the appliance into the power socket.<br />
Turn the unit on by pressing the silver ON/OFF button on the top of the unit.<br />
To switch the vacuum OFF simply press the same button once again.<br />
The siphon on the flexible hose is fitted with a mechanical suction power to be varied<br />
by simply moving the slide knob. (Fig.6)<br />
Adjusting the telescope extension tube to suit your needs by pushing the locking knob.<br />
(fig. 5)<br />
(fig. 6)<br />
7<br />
4
US E R ’ S G U I D E<br />
U S E R ’ S G U I D E<br />
SELECTING THE PROPER CLEANING TOOL<br />
1. Upholstery crevice tool may be used for carved furniture, table tops, books, lamps, lighting fixtures,<br />
Venetian blinds, baseboards, to mention a few.<br />
2. Upholstery tool may be used for upholstered furniture, draperies, tapestries, mattresses, clothing and<br />
carpet stairs.<br />
3. Crevice tool may be used in tight spaces, corners and along edges in such places as dresser drawers,<br />
upholstered furniture, stairs and base baseboards.<br />
4. Carpet cleaning system includes:<br />
(a) Sprayer bottle - creates foaming action when mixed with water and/or cleaning solution to get deep<br />
down into dirt and help lift stains.<br />
(b) Carpet cleaning brush - specially designed tool to extract excess liquid from carpet and/or upholstery.<br />
(c) Little brush - helps clean most tough stains.<br />
Extension Tubes(s) used to give extra length to your hose. Use it with any of the above tools.<br />
Cord storage/holder the vacuum is fitted with two brackets located at the back of the vacuum. This is used to<br />
neatly wrap the cord around before storing.<br />
USING THE CARPET/FLOOR NOZZLE<br />
The floor nozzle can be used for both hard floors and carpets, carpets rugs and the like.<br />
Depress the left hand lever on the floor nozzle in order to lower the bristles to the down position. This is best<br />
suited for carpets. Lift the left hand lever in order to lock the floor brush in the up position, which is used for<br />
floors and hard surfaces.<br />
SUCTION CONTROL ON THE HANDLE<br />
You can be adjusted the suction on the handle using the fingertip control on the handle (Fig.6).<br />
Closed: For full suction power<br />
Open: To reduce the suction power and to stop large objects getting stuck in the pipe<br />
There is also a suction control lever on the motor and is used to increase or decrease the suction power of the<br />
vacuum by moving the lever to the left or right.<br />
EMPTYING THE DUST/WATER TANK<br />
There is no dust full indicator on your vacuum as it is a bagless vacuum. The dust canister is transparent and as<br />
such you can see at all times how much dust/dirt has accumulated in the tank. When the dust canister looks full,<br />
turn the vacuum OFF and disconnect from the mains socket. Disconnect the hose from the hose inlet duct.<br />
Remove the water tank by moving the cradle car locking handle to the down position. Empty the contents and<br />
refill with clean water.<br />
If too much dirt accumulates in the water tank, your cleaner will not operate effectively.<br />
Note: UNPLUG THE VACUUM CLEANER BEFORE CLEANING/REPLACING THE DUST FILTER. NEVER PLACE<br />
A DUST FILTER IN A WASHING MACHINE OR DRY CLEAN.<br />
5<br />
HEPA FILTER<br />
Your HEPA filter is located on the left hand side of the motor (Part 5) and is there to reduce dirt, dust and other<br />
types of particles from entering back into a room. We recommend you check the filter on a regular basis as it will<br />
affect the suction power and smooth running of your vacuum. The HEPA filter should be replaced at least once<br />
every four months. However this will depend on the frequency of use and may need replacing more often.<br />
To replace the HEPA filter follow these instructions:<br />
1. Disconnect the vacuum from the power supply.<br />
2. Move the cradle car lock (Part.11) to the down position.<br />
3. Remove the motor from the cradle.<br />
4. The motor protection filter is located on the left hand side of the motor<br />
when standing in front of the unit.<br />
5. Press the lever at the bottom which will expose the filter.<br />
6. Remove the filter by simply pulling the tag at the top of the filter and<br />
replace with new one. (Fig.7)<br />
7. Re-assemble the vacuum by putting the cover back in and placing the<br />
motor back on to the vacuum water tank.<br />
REPLACEMENT HEPA FILTERS ARE AVAILABLE FROM THE CUSTOMER SERVICES WHERE YOU<br />
PURCHASED THE UNIT FROM.<br />
NOTE: NEVER USE THE VACUUM CLEANER WITHOUT THIS FILTER IN PLACE. USE ONLY ORIGINAL FILT E R S .<br />
UNPLUG CLEANER BEFORE CLEANING/REPLACING THE DUST FILTER & BRACKET. NEVER PLACE A CLOTH<br />
BAG IN A WASHING MACHINE OR DRY CLEAN.<br />
Care and Maintenance<br />
Your vacuum cleaner is manufactured to withstand normal day-to-day use, but an occasional wipe over with<br />
a damp cloth will help maintain its goods looks. Abrasive cleaners should NOT be used.<br />
Caution: Always disconnect the appliance from the mains socket<br />
before performing any cleaning or maintenance operations.<br />
After the appliance has been used, take out the rubber plug first,<br />
then pour away the dirty water and clean the water tank. If you<br />
used the machine to clean liquid waste, there will be some liquid<br />
residue left in the flexible hose and extension tube. To clean<br />
inside of the hose and tube, empty the water tank completely<br />
and then vacuum up about 1 liter of clean water.<br />
Repeat if necessary.<br />
After emptying and rinsing the water tank, remove the foam<br />
filter, wash it under running water and let it dry completely<br />
before re-positioning (the filter must be kept dry to prolong its<br />
life). Periodically check that the float is free to move. (Fig.8)<br />
STORAGE<br />
Store your vacuum in a cool dry place.<br />
6<br />
(fig. 8)<br />
(fig. 7)