Sheet 17 Letter E Lab
Sheet 17 Letter E Lab
Sheet 17 Letter E Lab

You also want an ePaper? Increase the reach of your titles
YUMPU automatically turns print PDFs into web optimized ePapers that Google loves.
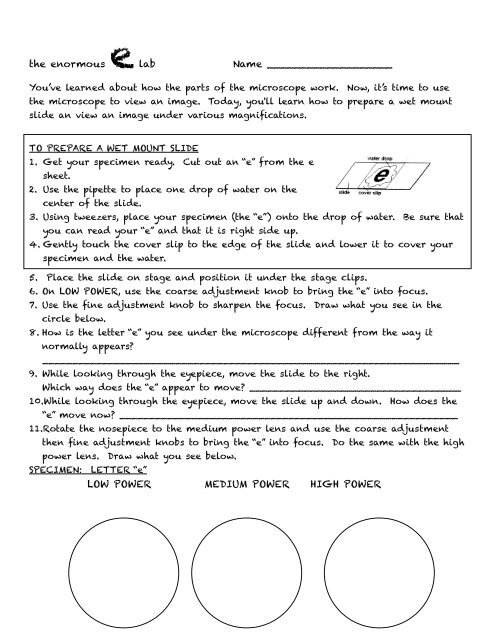
e the enormous<br />
lab<br />
Name ___________________<br />
You’ve learned about how the parts of the microscope work. Now, it’s time to use<br />
the microscope to view an image. Today, you'll learn how to prepare a wet mount<br />
slide an view an image under various magnifications.<br />
TO PREPARE A WET MOUNT SLIDE<br />
1. Get your specimen ready. Cut out an “e” from the e<br />
sheet.<br />
2. Use the pipette to place one drop of water on the<br />
center of the slide.<br />
3. Using tweezers, place your specimen (the “e”) onto the drop of water. Be sure that<br />
you can read your “e” and that it is right side up.<br />
4. Gently touch the cover slip to the edge of the slide and lower it to cover your<br />
specimen and the water.<br />
5. Place the slide on stage and position it under the stage clips.<br />
6. On LOW POWER, use the coarse adjustment knob to bring the “e” into focus.<br />
7. Use the fine adjustment knob to sharpen the focus. Draw what you see in the<br />
circle below.<br />
8. How is the letter “e” you see under the microscope different from the way it<br />
normally appears<br />
_____________________________________________________________________<br />
9. While looking through the eyepiece, move the slide to the right.<br />
Which way does the “e” appear to move ___________________________________<br />
10.While looking through the eyepiece, move the slide up and down. How does the<br />
“e” move now ________________________________________________________<br />
11.Rotate the nosepiece to the medium power lens and use the coarse adjustment<br />
then fine adjustment knobs to bring the “e” into focus. Do the same with the high<br />
power lens. Draw what you see below.<br />
SPECIMEN: LETTER “e”<br />
LOW POWER MEDIUM POWER HIGH POWER
PART 2 PROCEDURE:<br />
1. Cut out part of a color newspaper cartoon or a picture from a magazine.<br />
2. Place the section on your slide.<br />
3. Place a drop of water on the paper.<br />
4. Place a cover slip of the picture.<br />
5. Look at the picture under low, medium and high power.<br />
QUESTIONS:<br />
1. What does the diaphragm control<br />
2. What do you notice about the color in the newspaper or magazine<br />
3. Explain why more detail is seen under the high power lens than the low power<br />
lens.<br />
4. Why is it always a good idea to locate a specimen under low power