


Create successful ePaper yourself
Turn your PDF publications into a flip-book with our unique Google optimized e-Paper software.
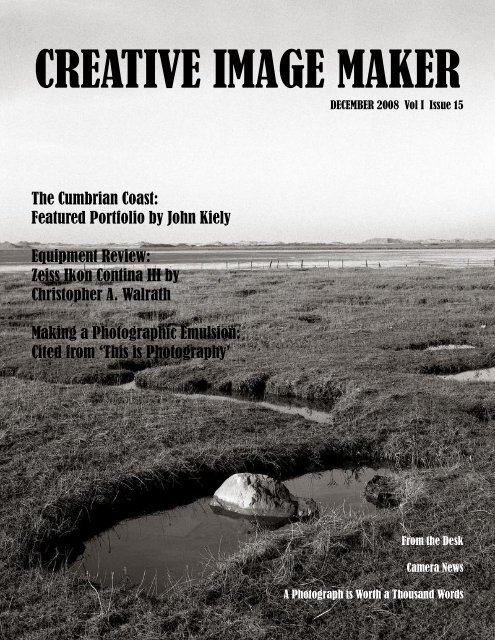
<strong>CREATIVE</strong> <strong>IMAGE</strong> <strong>MAKER</strong><br />
DECEMBER 2008 Vol I Issue 15<br />
The Cumbrian Coast:<br />
Featured Portfolio by John Kiely<br />
Equipment Review:<br />
Zeiss Ikon Contina III by<br />
Christopher A. Walrath<br />
Making a Photographic Emulsion:<br />
Cited from ‘This is Photography’<br />
From the Desk<br />
Camera News<br />
A Photograph is Worth a Thousand Words
<strong>CREATIVE</strong> <strong>IMAGE</strong> <strong>MAKER</strong> <strong>MAGAZINE</strong><br />
Dedicated to traditional photographic processes.<br />
29 NOVEMBER 2008<br />
IN THIS ISSUE . . .<br />
The Cumbrian Coast<br />
Featured Portfolio by John Kiely<br />
Equipment Review: Zeiss Ikon Contina III<br />
by Christopher A. Walrath<br />
Making a Photographic Emulsion<br />
An excerpt from ‘This Is Photography’ by the Kodak Eastman Co.<br />
-From the Desk of the Editor<br />
-Camera News<br />
-A Photograph Is Worth a Thousand Words<br />
Creative Image Maker Magazine is produced online on a monthly basis and is written and illustrated by<br />
regular photographers for regular photographers. This is your magazine. It is the mission of this publication<br />
to produce straightforward film photography and related articles. This is not for the purpose of exclusion<br />
of any mode of capture, rather to focus attention to one particular area in the photographic field. This<br />
magazine was created with the intention of providing new and fresh information for photographers. Older<br />
and hard to find information will be made available here from time to time as well. Topics you will find covered<br />
here may include color film photography, black & white film photography, equipment and gear reviews,<br />
chemistry recipes, alternative processes, photographic theory and principles, editorials, excerpts<br />
from older articles, featured portfolios and anything else imaginable as relates to film photography. You<br />
may contact the magazine in any of the following ways.<br />
http://home.comcast.net/~creativeimagemaker<br />
creativeimagemaker@comcast.net<br />
www.flickr.com (the group ‘Creative Image Maker)<br />
A downloadable .pdf file is available online in different languages by request only. See the ‘News’ page on<br />
the magazine’s website for more details.<br />
Website hit count for October/November 2008-790<br />
SUBMISSION GUIDELINES. ARTICLES may be a single short article or a longer article that might be<br />
broken up written on basically any subject relating to any aspect of FILM PHOTOGRAPHY. I ask that the<br />
writing of the articles be concise and grammatically correct, regardless of language. This will help to insure<br />
that the translation software will be able to translate properly. Anywhere from 400 words on up would<br />
be good. Anything over 700 words might be split up depending on space constraints. File format preferred<br />
is .doc. I should be able to get information from most formats. It is important to include at least a<br />
couple of illustrative photographs to accompany articles. These should be submitted in .jpg and be no larger<br />
than 500 pixels on the long side. <strong>IMAGE</strong>S. We will be running some new features, PORTFOLIOS<br />
and 'A Picture is Worth a Thousand Words'. PORTFOLIOS will consist of anywhere from three to six<br />
photographs and a small write up on each image with an overview of the portfolio such as equipment<br />
used, memories from the images, just good accompanying text. 'PICTURE' will be a single image and a<br />
story to go along with it about the who, what, how, where, when and why of the image. Images should be<br />
submitted as .jpg and be no longer than 1200 pixels on the long side. BIOS. A small four to ten line autobiography<br />
and a small portrait of yourself is required for posting both in the magazine and also on this<br />
website on the contributors page. The portrait should be submitted as a .jpg file and be no longer than<br />
200 pixels on the long side. All article and image submissions should be accompanied by a bio. All submissions<br />
should be sent to creativeimagemaker@comcast.net
From the desk of the editor . . .<br />
FIND YOURSELF<br />
I know. Easier said than done. Some photographers can<br />
spend an entire lifetime chasing themselves without ever<br />
actually catching up.<br />
I have personally taken my photography everywhere conventionally possible. I started with a<br />
Minolta XG-M and assorted lenses. As I became more technically proficient I moved to an sr-T101<br />
and flew that mechanically with a hand held Weston Master IV light meter. I then tried medium format<br />
with an old German Wirgin Deluxe, a post-war 6x6 folder. It has since become a 6x6 pinhole<br />
camera in the name of photographic experimentation. I then moved into a Mamiya M645j setup as<br />
indicated by a former article. I then obtained a homemade Aletta 4x5 view camera. I have gone<br />
from WalMart color processing to black and white film to processing my own black and white film this<br />
year.<br />
However my photography has been very slow this year. In chasing my photographic tail I<br />
worked myself out of cameras. You must understand something here. I’m generous to a fault and if<br />
a friend shows a genuine interest in photography I will have generally accumulated enough gear to<br />
get them started with a camera body, a bag and a couple of lenses. Well, I have ended up with my<br />
Wirgin 6x6 pinhole, my Zeiss Ikon Contina III 35mm RF and my Alleta 4x5. That is all. All different<br />
but not all that exciting to me lately. Until my latest appendage arrived in the post just yesterday.<br />
Enter the Nikon. I picked up an N65 35mm AF SLR on eBay. I have been reborn and exhilarated.<br />
I bought a couple of CR2 3V batteries and today I hit the street. And it occurred to me.<br />
I’m back where I belong. I am a photographer but I think first and foremost a 35mm photographer.<br />
And I think I’m OK with that. I have the other stuff. But I think I have finally found myself. You see, I<br />
may have made about fifteen photographs since June excepting my brother’s wedding Saturday. I<br />
made twenty today. I just may make more tomorrow. At least there’s a better chance of that happening<br />
now than a week ago.<br />
We’ve got a great lineup this month as we seem to have finally found ourselves as well. So<br />
enjoy the fruits of your labor. You deserve it.<br />
Thank you so much.<br />
Christopher A. Walrath, Acting Editor<br />
22 October 2008<br />
P.S. I finished that roll the next day and made more the two days after that. Sounds like progress to<br />
me.
THE<br />
CUMBRIAN<br />
COAST<br />
by John Kiely<br />
The Cumbrian Coast in the North West of England is often overlooked<br />
by photographers. The Lake District National Park is just a few miles<br />
inland and draws photographers, including myself, like a magnet. The<br />
lakes are a beautiful area, but every now and then it does me good to<br />
get away from the hills. This may be because the light is going as the<br />
day passes or I just need a break from mountains.<br />
The coast is not the most beautiful part of the country, there are<br />
no long, golden beaches, or charming old piers. Instead there are a lot<br />
of muddy beaches and the remains of industries and defences past.<br />
This is part of the attraction for me.
Cumbrian Coast 2<br />
This was shot close to Ulverston on the south Cumbrian coast looking out across cockle<br />
beds. There is a quality of light that is totally different to that in the National Park. The wide expanses<br />
of grey sand mixed with silt give great tones in black and white photography, combined with<br />
the misty hills in the distance. The posts in the foreground are the remains of defences to try to stop<br />
the sand and mud being washed away from the fore shore.
Piel Castle<br />
The remains of this castle are on the tiny Piel Island. The island can be reached by car on low tides,<br />
but a boat is the easiest way there. The island has the distinction of still being a kingdom, but it is not<br />
an inherited title, it comes with the land lordship of the local pub! The landlord gets to rule over a<br />
population of about six people and some sheep.<br />
The island is only a few feet above the sea so there are many of these scars in the land that<br />
fill with water. This is quite common in the area.
Saltcoats 2<br />
Saltcoats is a small community that makes their living from cockle picking and tourism. The area is<br />
popular with bird watchers as the rich mud and sand attract waders and other birds. The area is<br />
covered in these strange depressions worn by the high tides. This gives the shore a strange, almost<br />
lunar feel.
Ravenglass<br />
A tender stranded on the muddy shore, when the tide is out at Ravenglass on the Cumbrian coast.<br />
The shore in the far distance is Saltcoats, across the river from the larger Ravenglass. This was one<br />
of the ports used by the Romans and has the remains of the old barracks. From here the soldiers<br />
would travel in an almost straight line across through the Lake District. Part of this route is also served<br />
by a narrow gauge railway leading to Eskdale. This makes it one of the more popular coastal<br />
destinations in this part of Cumbria and is a reasonably busy mooring place for small yachts.
EQUIPMENT AND MATERIALS<br />
The majority of my landscapes are shot on Ilford FP4+ on Hasselblad 503 cx with a 65m,<br />
80m, 150mm and 250m lenses. I also shoot on Fuji Provia and occasionally Velvia or NPS Pro 160.<br />
I regard the later as the film version of RAW, you can get the exposure way out, and still print the results.<br />
I regularly use large format, when I can cope with carrying it around the hills. I favour an old<br />
MPP Mk VII for its portability, and a Sinar Norma for its flexibility. I use 5x4 and 5x7 on the Norma.<br />
Last year I was introduced to Adox CHS 25 Art which has now become a firm favourite when processed<br />
in Rodinal at 1-50.<br />
I have nothing against digital photography, I just prefer film. In the studio I use an old Carousel<br />
2020 back on the Hasselblads and have Canon and Nikon DSLRs, I’m just an old film lover at<br />
heart.<br />
(John says that Cumbrian Coast 2 and Piel Castle were made on Ilford’s FP4 using a Hasselblad<br />
503cx outfitted with a 80m lens, processed in Ilford ID11 diluted 1-1 and printed on Ilford multigrade<br />
fiberbased paper. Salt Coats 2 and Ravenglass were made on Ilford’s FP4+ using a Hasselblad<br />
503cx outfitted with a 65mm lens, processed in Rodinal 1-50 and printed on Kentmere Fineprint VC.)<br />
I’ve been involved in Photography most of my life, encouraged<br />
by my Mother at a early age. Originally I was going<br />
to study fine art, my Dad was a painter, but after taking<br />
photographs as studies for my paintings I got hooked. I<br />
studied creative photography under John Blakemore and<br />
Paul Hill in the early ‘80s. You can still see how they influence<br />
me today.<br />
Nowadays I teach photography full time to both<br />
beginners and those entering the profession and I love<br />
my job. I get to work with some truly interesting people. I<br />
stopped producing my own work for several years, it was<br />
a group of students that rekindled my passion. I now<br />
spend a very large percentage of my free time out shooting,<br />
thanks to my very patient wife Jan. I now shoot from<br />
Easter to Autumn in Wales, then from Autumn to Easter in<br />
the Lake District. When I can’t get to either of these, then<br />
there is always the Peak District National Park which I live<br />
just outside. A good life, don’t you agree? (Bio photo by<br />
Nikki Harrison) John Kiely<br />
To see more of John’s work visit his website at http://www.jaykayphoto.co.uk/. You may also check<br />
out his flickrstream by going to www.flickr.com and searching for John Kiely.
Equipment Review: Zeiss Ikon Contina III<br />
By Christopher A. Walrath<br />
In 2002 I picked up a little camera on eBay<br />
for probably about $20.00 U. S. , post<br />
included. It came in a leather case that<br />
is about 51 years old and requires<br />
extreme care. A couple of years ago I gave<br />
It to my daughter, Emily. She was 10.<br />
But she would not let me use it when I<br />
wanted for a change of pace so what’s<br />
a film photographer to do? Buy another one.<br />
I am referring to my Zeiss Ikon Contina III. It is a simple camera by today’s<br />
standards of electronics and computers. However it is still a very comprehensive<br />
camera in the hands of a photographer who knows how to use it.<br />
The German optical company Zeiss produced numerous models of 35mm<br />
rangefinder cameras in the forties, fifties and sixties. Among them the Ikonta, the<br />
Contarex, and many, many others. However I want to give you the rundown on<br />
the Contina III.<br />
As I indicated earlier, the Contina III is a 35mm rangefinder style camera.<br />
They came with various lenses. Mine has a Novicar Anastigmat f/2.8 45mm focal<br />
length lens mounted in a Prontor SVS shutter. The lens on my daughter’s camera<br />
has a Novar Anastigmat f/3.5 45mm lens. Shutter speeds available on my Contina<br />
are 1/300, 125 through 1 second, B, 4’, 8’, 15’, 30’ and 60’. Apertures range<br />
from f/2.8 through f/22. By turning the outer ring of the lens you adjust your aperture/shutter<br />
speed combination. The shutter speed and aperture are marked on<br />
separate rings on the lens barrel and can be easily viewed from the top of the<br />
camera. The shutter speed ring has an EV alignment mark on it and the aperture<br />
ring has the range of EV numbers (3-18) for easy adjustment of exposure using<br />
the Exposure Value Index. An exposure lock mechanism prevents you from accidentally<br />
changing the exposure value. This can be done by pressing a tab that is<br />
located on the right side of the lens barrel on the aperture ring.<br />
Located on the left side of the lens barrel is your flash mode selector. You<br />
may choose between V for use with the timer, X for normal synchronizing when<br />
the shutter is all the way open and M for use with flash bulbs. Located on the<br />
camera body on the front face is your flash sync chord port.<br />
On top of the camera body front face you will notice a couple of windows.<br />
The one on the right is your viewing window. The one on the left is your light meter.<br />
It is covered by a hinged door that latches in the closed position and is<br />
opened by sliding the hinge pin slightly to one side to open the door and expose<br />
the photocell to incoming light.
Now we move to the top of the camera for the light meter<br />
and how it works. There is a circular dial marked with the exposure<br />
value index numbers and small notches beside each<br />
one. As you aim your camera at objects of varying luminance<br />
you will notice the needle in the curved window starting to<br />
move depending on the amount of light present. If you rotate<br />
the dial you will also notice a circle moving within the window.<br />
Line this circle up with the meter needle and you will provide<br />
average exposure provided you adjust your camera’s settings<br />
to the exposure value indicated next to the little red arrow on<br />
the center part of the dial. The center portion of the dial also<br />
rotates so that you can select the film speed you are presently<br />
using. It has film speed ratings indicated both in DIN<br />
(Deutsche Industrie Norm) and ASA (American Standards Association) which is<br />
the exactly the same as ISO (International Standards Organization).<br />
On top of the camera to the left of your EV dial is your flash mount. For<br />
flash photography you need both a sync cable and a flash sync cord. Further to<br />
the left is the film rewind knob that is turned clockwise to draw the film back into<br />
the cartridge. On the right side on top is the film advance/exposure counter.<br />
There is a small black wheel that turns as the film is wound on and total exposures<br />
are indicated by a small white dot that moves around and rests on the number<br />
of the exposure you are now currently on. When you finish a roll you must fire<br />
the shutter and wind on until you arrive back at zero before you load the next roll<br />
so as to have an accurate count. It does not reset automatically.<br />
The left side of the camera has the camera back slide release. Simply slide<br />
the plate down and the back of the camera pops<br />
open. The bottom of the camera houses the<br />
standard ¼”-20 tripod bush and also the film rewind<br />
button. Push and hold this button in order to rewind<br />
the film in the camera.<br />
When you open the camera things should<br />
look pretty familiar. You place the cartridge on the<br />
left, pull the film leader out to the right and slide the<br />
leader into notched slots on the take-up spool.<br />
Close the back. Press the shutter and wind a<br />
couple of times and you’re good to go. Also on the<br />
back of the camera body is the viewfinder.<br />
Sometimes you just need a break in pace<br />
from the fast paced bump and grind of technology.<br />
I recommend picking up a smaller and ‘simpler’<br />
camera that still affords you complete control over<br />
exposure and hit the streets, just you and your camera.<br />
Make some photographs and have some fun.<br />
Made in December 2002 with Zeiss Ikon Contina<br />
III in Hartford Co. Maryland.
(I thought you all might like this little bit of info from the past. From time to time I may insert information<br />
such as this to fill things out. For those of you who may be interested, information on processes<br />
such as this are readily available on the web at places such as www.apug.org.)<br />
MAKING A PHOTOGRAPHIC EMULSION<br />
Taken from This Is Photography<br />
Miller & Brummitt Garden City Publishing<br />
Garden City, N. Y.<br />
Copyrighted 1945 1 st ed p58<br />
(illustrations taken from searches through Google)<br />
Materials Required:<br />
1. GELATIN. A good photographic grade gelatin can be purchased from leading photographic<br />
supply houses in 1 lb. lots. While not a photographic grade, gelatin suitable for the experiment<br />
can be purchased from the Chemical Sales Division, Eastman Kodak Company, Rochester,<br />
N. Y., in 100 gram lots for about 55c.<br />
2. POTASSIUM BROMIDE Available at any<br />
3. POTASSIUM IODIDE large photo-<br />
4. SILVER NITRATE graphic store<br />
5. GLASS. Any high grade thin glass will be satisfactory.<br />
Proceed as follows:<br />
1. Dissolve 10 grams of gelatin in 360 cc. warm water. A stirring paddle of hardwood should be<br />
used; avoid resinous woods.<br />
2. Add 32 grams of potassium bromide and 0.8 grams potassium iodide and dissolve. Raise<br />
the temperature to 55 degrees Centigrade (131 F.) and maintain it there. So far the work<br />
may be done in white light, but all subsequent steps must be carried out under the ruby light<br />
of the darkroom.<br />
3. Dissolve 40 grams of silver nitrate in 400cc. Water. Add this to the potassium bromide solution<br />
at the rate of 20 cc. every half minute for ten minutes. Stir continuously.<br />
4. Hold the temperature at 55 degrees Centigrade for 10 minutes to allow ripening, then let the<br />
temperature drop slowly.<br />
5. Add 40 grams gelatin to set the emulsion. Keep the mixture<br />
cool until it has set thoroughly. This requires from 3 to 4 hours.<br />
6. Shred the emulsion by forcing it through<br />
a cheesecloth. Onto the shreds pour 3 litres<br />
(approximately 3 quarts) of water, leave 2 ½<br />
minutes, pour off 2 liters, and add 2 litres<br />
more. Repeat five times. This washes out<br />
the excess potassium bromide, potassium<br />
iodide and potassium nitrate.<br />
7. Heat for 15 minutes at 55 degrees Centigrade for further ripening. Slowly cool to 40 degrees<br />
Centigrade (104 F.).<br />
8. Pour 4 cc. Of the emulsion onto a clean 3 ¼ X 4 ¼ –inch glass plate, spread to form a uniform<br />
coat, place on a level chilled metal plate until the emulsion sets, and is dry. The plate is<br />
now ready for use.<br />
The Exposure:<br />
Outdoors in bright sunlight an exposure at f/8 and 1/25 second will be approximately correct. For development,<br />
use any of the active, fast-working film developers. See formulas in the following chapter.<br />
Questions:<br />
1. Have you made a regular, orthochromatic, or a panchromatic emulsion?<br />
2. List the relative advantages and disadvantages of glass plates and the flexible types of film<br />
support.
CAMERA NEWS<br />
GETTY <strong>IMAGE</strong>S AND JUPITER<strong>IMAGE</strong>S MERGE<br />
In today’s troubled economic times it is all about getting it done for less. So when Getty Images and<br />
Jupiterimages announced a merger not many people were surprised. Getty pays out $96 million for<br />
all Jupitermedia outstanding stock and in return they receive Jupiterimages. As of 31 October, Jupiterimages<br />
shareholders must still approve the merge but the union would not mean the end of Jupiterimages<br />
as a whole. The tradename and logos would still remain intact for their digital stock libraries<br />
and other facets not already operated by Getty Images. Ed.<br />
VOIGTLANDER INTRODUCES BESSA III 667 AT PHOTOKINA<br />
The second film camera ever to be introduced at Photokina, the Bessa III 667 is a new 120/220 MF<br />
camera that sports a 88mm f/3.5-4 Heliar attached to a collapsible bellows. That’s right, this latest in<br />
the storied Voigtlander line of film cameras is to be the rest of the world’s answer to the Japanese<br />
long heralded Fuji GF670 medium format folder, announced earlier this year and being produced under<br />
the Fujifilm brand in Japan only, according to news stories released by the Japanese film company.<br />
Pricing is yet to be announced. Ed.<br />
KODAK ANNOUNCES THIRD QUARTER FIGURES<br />
Kodak reports that their third quarter figures and sales are down $164 million in Film, Photo Finishing<br />
and Entertainment from $928 million in the quarter one year ago. That is an 18% drop in film related<br />
sales coupled with 14% and 15% in first and second quarter sales respectively. From $764 million in<br />
film related sales for the quarter, Kodak Manufacturing Co. reported a profit of $77 million. That is<br />
just under 10% in profits from their film sector. The profit is down from last year’s third quarter that<br />
showed $113 million in profit, a $36 million hit. However the percentage of profit increased from only<br />
8.2% profit from film related sales 3Q last year up to 9.9% 3Q this year. Ed.<br />
<strong>CREATIVE</strong> <strong>IMAGE</strong> <strong>MAKER</strong> <strong>MAGAZINE</strong> IS CURRENTLY LOOKING FOR CONTRIBUTORS<br />
If you have an interest in both participating in film photography and in passing on that which you have<br />
learned to others then this is the forum for your knowledge. We accept articles and images/portfolios<br />
such as you see in this issue from regular photographers like you. As a matter of fact we depend<br />
upon it. So, no matter how basic you may deem your information, please consider composing an article<br />
or submitting photographs in accordance with the guidelines laid out on the magazine’s website<br />
at http://home.comcast.net/~creativeimagemaker. Thank you in advance for your cooperation. Ed.
A Photograph is Worth a Thousand Words<br />
Bodie Island Lighthouse, Oregon Inlet, south of Nags Head, N.C. – 2001<br />
By Christopher A. Walrath<br />
Sometimes your life changes before your eyes. And you don’t even see it. I was in a rough spot in<br />
my life and I needed to get away so Pop and I headed for the Outer Banks on October 26, 2001. We<br />
checked in at Kill Devil Hills around 3:30 and I figured we had enough time to get down to Hatteras<br />
for some shooting before sunset. It was cold and windy and I didn’t get many good photographs at<br />
all. We had dinner at the Qua’deck (Quarterman’s Deck). Best fresh seafood, even in late October.<br />
The next morning we got up and drove around a few old vacation haunts and ended up at<br />
the Oregon Inlet Marina to peruse the shop and stand out in front of the huge shark jaw like we did<br />
when I was a kid. We drove over to the lighthouse. The clouds were keeping everything flat all<br />
weekend so I snapped off a couple of ok shots. We got into the Jeep to leave and as I was backing<br />
up in reverse the sun reared its beautiful head. I still had the 28-80 on my ill-used Minolta XG-M and<br />
stumbled out nearly backing over myself in the process. No adjusting of exposure, just compose and<br />
press the shutter. Purely by chance.<br />
It was when I received my pictures I spied that someone had snuck in a photograph. I mean,<br />
WOW! I had never seen a photograph of this lighthouse look as good as this. (And very few since in<br />
my humble opinion.) It was then that I began to truly take this tool I had in my hand seriously. It was<br />
this one photograph, made on October 27, 2001, with my father on holiday that changed my horizons<br />
forever.