Instruction Manual LEVO KID & JR - Levo AG
Instruction Manual LEVO KID & JR - Levo AG
Instruction Manual LEVO KID & JR - Levo AG

Create successful ePaper yourself
Turn your PDF publications into a flip-book with our unique Google optimized e-Paper software.
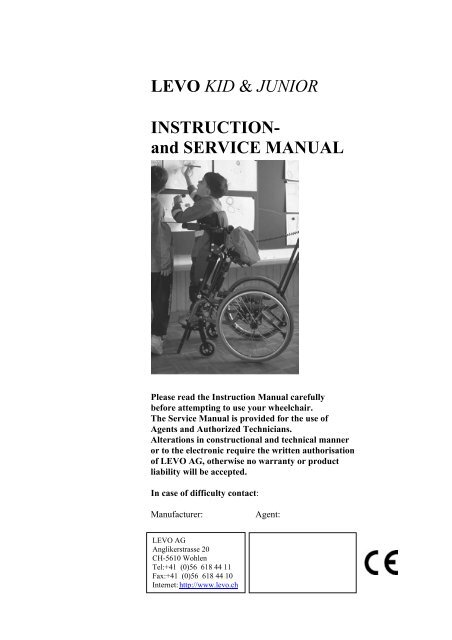
<strong>LEVO</strong> <strong>KID</strong> & JUNIOR<br />
INSTRUCTIONand<br />
SERVICE MANUAL<br />
Please read the <strong>Instruction</strong> <strong>Manual</strong> carefully<br />
before attempting to use your wheelchair.<br />
The Service <strong>Manual</strong> is provided for the use of<br />
Agents and Authorized Technicians.<br />
Alterations in constructional and technical manner<br />
or to the electronic require the written authorisation<br />
of <strong>LEVO</strong> <strong>AG</strong>, otherwise no warranty or product<br />
liability will be accepted.<br />
In case of difficulty contact:<br />
Manufacturer:<br />
Agent:<br />
<strong>LEVO</strong> <strong>AG</strong><br />
Anglikerstrasse 20<br />
CH-5610 Wohlen<br />
Tel:+41 (0)56 618 44 11<br />
Fax:+41 (0)56 618 44 10<br />
Internet: http://www.levo.ch
Dear Customer,<br />
We would like to thank you for putting your trust in <strong>LEVO</strong> stand-up<br />
wheelchairs.<br />
The <strong>LEVO</strong> stand-up wheelchair is a unique aid for use by those facing<br />
difficulties walking and standing up. As well as performing all the<br />
functions of an active wheelchair, the <strong>LEVO</strong> enables you to stand up<br />
on your own.<br />
Please read these operating instructions carefully before using<br />
your <strong>LEVO</strong>. They contain important information necessary for<br />
successful operation of the wheelchair.<br />
Whether you use your <strong>LEVO</strong> as a stand-up aid at work in everyday<br />
life, or to help with standing exercises, it guarantees you optimum<br />
independence, mobility and health.<br />
As a <strong>LEVO</strong> customer, you have a valuable contribution to make to the<br />
on-going further development of our products. We put great store by<br />
your suggestions, which ensure that <strong>LEVO</strong> still offers the most<br />
comprehensive service available and provides for the widest possible<br />
range of needs.<br />
Yours faithfully,<br />
<strong>LEVO</strong> <strong>AG</strong><br />
3
Contents<br />
Kid’s page ....................................................................................................................................6<br />
Declaration of Conformity...........................................................................................................8<br />
Declaration of Conformity...........................................................................................................9<br />
USERMANUAL ...............................................................................................................................12<br />
1. Introduction................................................................................................................................13<br />
2. Guarantee ...................................................................................................................................13<br />
3. Delivery......................................................................................................................................14<br />
4. Accessories ................................................................................................................................14<br />
5. Warnings ....................................................................................................................................14<br />
6. Basic adjustments.......................................................................................................................16<br />
6.1. Rear wheels..........................................................................................................................16<br />
6.2. Rear wheel position .............................................................................................................16<br />
6.3. Backrest inclination .............................................................................................................16<br />
6.4. Armrests...............................................................................................................................17<br />
6.5. Adjusting the seat height .....................................................................................................17<br />
6.6. Skirt guard............................................................................................................................17<br />
6.8. The calf/heel strap................................................................................................................18<br />
6.9. Seat cushion (optional) ........................................................................................................18<br />
6.10. Backrest extension (optional) .............................................................................................19<br />
6.11. Seating systems....................................................................................................................19<br />
6.12. Stroller handle (optional).....................................................................................................19<br />
6.13. Stand-up operation for accompanying person (optional) ....................................................19<br />
6.14. Other options.......................................................................................................................20<br />
7. The brakes (wheel locks) ...........................................................................................................20<br />
7.1. Adjusting the brakes ............................................................................................................22<br />
8. Standing .....................................................................................................................................23<br />
8.1. General tips..........................................................................................................................23<br />
8.2. Knee support........................................................................................................................23<br />
8.2. Knee support........................................................................................................................23<br />
8.3. Chest strap............................................................................................................................23<br />
8.4. Standing up ..........................................................................................................................24<br />
8.5. Sitting down.........................................................................................................................24<br />
8.6. Emergency cut-out switch ...................................................................................................26<br />
9. Batteries .....................................................................................................................................26<br />
9.1. Recharging the batteries ......................................................................................................27<br />
10. Handling a wheelchair ...............................................................................................................27<br />
10.1. Getting into the wheelchair..................................................................................................27<br />
10.2. Getting out of the wheelchair ..............................................................................................27<br />
10.3. Sideways transfer.................................................................................................................27<br />
10.4. Driving the wheelchair ........................................................................................................28<br />
10.5. Danger of tipping over.........................................................................................................28<br />
10.6. Driving on a gradient .........................................................................................................29<br />
10.7. Negotiating obstacles...........................................................................................................29<br />
10.8. Picking up objects from the wheelchair .................................................................................30<br />
4
11. Storage .......................................................................................................................................32<br />
11.1. Folding down the backrest...................................................................................................32<br />
11.2. Removing battery and electronic unit..................................................................................32<br />
11.3. Removing the rear wheels...................................................................................................32<br />
11.4. Removing the front castors..................................................................................................33<br />
12. Lifting the wheelchair ................................................................................................................33<br />
13. Transport in a motor vehicle ......................................................................................................33<br />
13. Transport in a motor vehicle ......................................................................................................34<br />
14. Cleaning .....................................................................................................................................34<br />
15. Maintenance...............................................................................................................................34<br />
16. Disposal......................................................................................................................................35<br />
17. Trouble shooting ........................................................................................................................35<br />
17.1. Trouble shooter – general operation....................................................................................35<br />
17.2. Trouble shooter – stand-up mechanism...............................................................................36<br />
SERVICE MANUAL.......................................................................................................................37<br />
1. Introduction................................................................................................................................38<br />
2. Accident prevention & safety ....................................................................................................38<br />
3. Adjustments – general instructions............................................................................................38<br />
4. Repairs – general instructions....................................................................................................38<br />
5. Tools & torques..........................................................................................................................39<br />
6. Important notes ..........................................................................................................................39<br />
7. Recommended safety checks .....................................................................................................39<br />
8. Adjustments ...............................................................................................................................40<br />
8.1. The backrest and seat upholstery.........................................................................................40<br />
8.2. The rear axle ........................................................................................................................40<br />
8.3. The castor axle.....................................................................................................................40<br />
8.4. The leg supports...................................................................................................................41<br />
8.5. Backrest inclination .............................................................................................................41<br />
8.6. Armrests...............................................................................................................................42<br />
8.7. The footrest..........................................................................................................................42<br />
9. Repairs .......................................................................................................................................42<br />
9.1. Replacing tire/inner tube of rear wheels..............................................................................42<br />
9.2. Repairing the inner tube.......................................................................................................43<br />
9.3. Replacing the actuator (lifting motor) .................................................................................43<br />
9.4. Replacing the control switch ...............................................................................................44<br />
9.5. Replacing the batteries.........................................................................................................44<br />
10. Testing the wheelchair ...............................................................................................................45<br />
11. Cleaning .....................................................................................................................................45<br />
12. Technical Data ...........................................................................................................................46<br />
5
Kid’s page<br />
My name is BERNIE and I am your<br />
friend. I know a lot of kids which<br />
use a wheelchair. I like to sit beside<br />
them and put my head on their lap.<br />
If you stand up in your wheelchair<br />
and put a delicacy in the air I will<br />
jump up to catch it. This is my<br />
favorite game! And what is your<br />
favorite game<br />
Paint or write:<br />
In the instructions you will find<br />
me on various pages. Look for<br />
me! I have a lot of interesting<br />
things to tell you!<br />
Color my fur!<br />
6
Stroller handle<br />
(optional)<br />
Backrest<br />
Back bag<br />
(optional)<br />
Armrest<br />
Handring<br />
Skirt guard<br />
Brake<br />
Seat upholstery<br />
/ seat cushion<br />
Quick-release<br />
axle<br />
Footrest<br />
Double-head<br />
screw<br />
Leg support<br />
<strong>LEVO</strong> <strong>KID</strong> & JUNIOR<br />
Stand-up wheelchair<br />
(seating position)<br />
That’s what the<br />
parts of your<br />
wheelchair are<br />
called.<br />
7
Stand-up<br />
operation for<br />
accompanying<br />
person<br />
(optional)<br />
Plug & cable<br />
for stand-up<br />
mechanism<br />
Armrest<br />
Chest strap<br />
Control switch<br />
Battery and<br />
electronic unit<br />
Knee support<br />
Double-head<br />
screw<br />
Calf strap<br />
<strong>LEVO</strong> <strong>KID</strong> & JUNIOR<br />
Stand-up wheelchair<br />
(standing position)<br />
With your wheelchair<br />
you can stand up and<br />
make yourself really<br />
tall.<br />
8
<strong>LEVO</strong><br />
Declaration of Conformity<br />
As manufacturer of the <strong>LEVO</strong> Stand-up wheelchair, the company<br />
<strong>LEVO</strong> <strong>AG</strong><br />
Anglikerstrasse 20<br />
CH-5610 Wohlen<br />
Switzerland<br />
Tel.: +41 (0)56-618 4411<br />
Fax:+41 (0)56-618 4410<br />
Email: office@levo.ch<br />
Internet: http://www.levo.ch<br />
declares in all responsibility that the product hereby mentioned (see following list) corresponds<br />
with the valid direction of the EC instructions for medical products determined 14th June, 1993<br />
(93/42/EWG).<br />
Moreover we declare valid the correspondence of this products with following norms / nominal<br />
documents:<br />
ISO 7176-1 EN 12182<br />
ISO 7176-3 EN 12183<br />
ISO 7176-8 EN 12184<br />
ISO 7176-15 EN 60601-1<br />
ISO 7176-16 EN 60601-1-2<br />
UNI 14971<br />
Wohlen, July 1, 2004 Markus Burger Thomas Räber<br />
9
Seating and Standing Assessment<br />
Seat depth: correct Seat depth: too long Seat depth: too short<br />
Knee support attachment<br />
screw even with center of knee<br />
Knee support attachment<br />
screw beyond center of knee<br />
Knee support attachment<br />
screw short of center of knee<br />
Ankle/Knee/Hip joint straight<br />
Knee joint hyper extended<br />
Incomplete knee extension<br />
10
Correct position<br />
Seat cushion too high<br />
Back too deep/thick<br />
Backrest<br />
cushion<br />
Seat<br />
cushion<br />
Cushion for pressure relief<br />
in seated position<br />
Backrest cushion or solid<br />
back for more comfort or<br />
stability<br />
Spine<br />
physiological<br />
Legs straight<br />
Hyper<br />
Lordosis<br />
Seat<br />
cushion<br />
High<br />
pressure<br />
Backrest<br />
cushion<br />
Hyper extended<br />
spine<br />
Pelvis tilt <br />
incomplete hip<br />
extension<br />
11
<strong>LEVO</strong> <strong>KID</strong> & JUNIOR<br />
USERMANUAL<br />
Please read this <strong>Instruction</strong> <strong>Manual</strong> carefully,<br />
before you start to use your wheelchair.<br />
12
1. Introduction<br />
Thank you for purchasing a <strong>LEVO</strong> stand-up wheelchair.<br />
The <strong>LEVO</strong> <strong>KID</strong> & JUNIOR has been developed for children to drive a wheelchair independent<br />
while they are able to, want to or should stand up.<br />
This is a unique aid for all children who have problems to stay or to walk. The motorized seat<br />
assembly raises the user to the standing position just by touching a button. The wheelchair is very<br />
easy to drive because of the two rear driving wheels and the two steering wheels in the front. The<br />
backrest can be folded down for transport. For a transfer to the side of the wheelchair you can fold<br />
up the armrests.<br />
The maximum load for the user together with its personal luggage should not be over 50 kg.<br />
2. Guarantee<br />
Your <strong>LEVO</strong> product has from the date of sales a guarantee for:<br />
• Two years on all material and manufacturing defects of mechanical parts.<br />
• One year on all electronical components including the motor.<br />
• Not included in the warranty are the batteries.<br />
<strong>LEVO</strong> <strong>AG</strong> will not repair or replace any part free of charge which is defective because of abuse,<br />
misuse or lack of maintenance.<br />
Warranty claims should be directed to:<br />
• In Switzerland: to <strong>LEVO</strong> <strong>AG</strong><br />
• In all other countries: to your local agent<br />
Addresses and telephone numbers are on the front page.<br />
13
3. Delivery<br />
Because of the complex nature of this wheelchair it will be delivered and demonstrated by the local<br />
agent.<br />
The wheelchair has to include the following components:<br />
Components<br />
Quantity Yes No<br />
1.<br />
Wheelchair with stand-up mechanism incl. leg support &<br />
footrests<br />
1<br />
2. Seat cushion 1<br />
3. Backrest cushion 1<br />
4. Knee support 1<br />
5. Chest strap 1<br />
6. Calf strap 1<br />
7. Battery charger 1<br />
8. Accessories mentioned in the delivery note<br />
4. Accessories<br />
A list of accessories is available from your local agent.<br />
This chapter is very<br />
important. I am sure<br />
your parents will<br />
explain it to you.<br />
5. Warnings<br />
For your own safety and the safety of your child you should read<br />
and follow all instructions in the manual.<br />
• Before using the <strong>LEVO</strong> <strong>KID</strong> & JUNIOR please go trough the instruction with your <strong>LEVO</strong><br />
dealer. It is also helpful if a friend will listen at well. Study the <strong>Instruction</strong> <strong>Manual</strong> yourself or<br />
let somebody explain it to you if you do not understand something.<br />
14
• A wheelchair is a complicated piece of machinery. Do not try to maintain it yourself. Please<br />
contact an authorized dealer for all maintenance work. The <strong>LEVO</strong> wheelchair should be<br />
serviced annually by an authorized dealer.<br />
• Standing up strains the body in ways your child might not be used to. Therefore please visit<br />
the doctor of your child before it stands up the first time in the <strong>LEVO</strong> <strong>KID</strong> & JUNIOR<br />
• The <strong>LEVO</strong> <strong>KID</strong> & JUNIOR should only be brought into the stand-up position on firm, level<br />
ground (risk of tipping over)<br />
• The <strong>LEVO</strong> <strong>KID</strong> & JUNIOR should only be brought into the stand-up position with the brakes<br />
applied.<br />
• Before standing up it is absolutely necessary to fit the knee support and chest strap correctly<br />
(see section 8). You must not stand up without these safety straps (risk of accidents).<br />
• Followed symbols are attached to the wheelchair:<br />
Warning, risk of pinching! Make sure no parts of the body, clothes or other items get<br />
jammed.<br />
• In case of strong or sudden spasms, cramps or similar the user should only stand up under<br />
supervision of another person.<br />
• You should under no circumstances try to stand up without following these safety<br />
precautions.<br />
• In situations where special care and attention is asked like by a transport (in motor vehicles,<br />
airplanes, etc.) or when the chair is left unattended in the presence of children or similar<br />
situations, be sure to press the emergency cut-out switch and disconnect the controller and/or<br />
motor leads from the battery and electronic unit (see chapter 13) (risk of accident).<br />
• The wheelchair may be susceptible to electromagnetic interference emitted from sources like<br />
cellular phones and other electronic devices.<br />
• The wheelchair itself may cause problems in other electromagnetic fields.<br />
• The wheelchair has been designed for use by only one person.<br />
• This wheelchair is not a toy. Never allow children to play on the wheelchair or to stand on the<br />
footrests, anti-tip rollers or the battery and electronic unit. Never hang items like bags or<br />
similar on push handles.<br />
• Adjustments to the stand-up mechanism and its connected parts are to be carried out by<br />
qualified personnel only (risk of accident).<br />
• For changes and adjustments on the wheelchair mechanics and also any maintenance work,<br />
please contact your <strong>LEVO</strong> dealer.<br />
15
It is possible to adjust<br />
many things on your<br />
wheelchair and you can<br />
even take some parts away.<br />
6. Basic adjustments<br />
With the <strong>LEVO</strong> <strong>KID</strong> & JUNIOR you owe a wheelchair, which offers your child the handling<br />
qualities and comfort of an active wheelchair. In this section you will read how the <strong>LEVO</strong> <strong>KID</strong> &<br />
JUNIOR can be adjusted to the needs of your child. These adjustments must be carried out by your<br />
<strong>LEVO</strong> dealer. Before attempting adjustments yourself, please consult your <strong>LEVO</strong> dealer.<br />
6.1. Rear wheels<br />
1<br />
The <strong>LEVO</strong> <strong>KID</strong> & JUNIOR standard is fitted with pneumatic<br />
tyres. The diameter of the wheels depends on the seat height of<br />
the wheelchair. Thanks to the quick-release axles, the rear<br />
wheels can be easily removed and set back in place (see photo<br />
1).<br />
6.2. Rear wheel position<br />
By re-setting the wheel axle in the wheel adapter plate, you are<br />
able to increase or decrease respectively your <strong>LEVO</strong> <strong>KID</strong> &<br />
JUNIOR’s tendency to tip over (see photo 2).<br />
2<br />
6.3. Backrest inclination<br />
The standard pre-set angle between the backrest and seat is 90°.<br />
It is possible to re-set this angle either by 5° further forward or<br />
5° further back.<br />
16
3<br />
6.4. Armrests<br />
The armrest can be folded up for a better transfer to the side.<br />
Attention: For lifting up the wheelchair do not take hold of the<br />
armrests!<br />
4<br />
The armrests are adjustable and can trough moving on the<br />
backrest be infinitively variable changed from 10 cm by the seat<br />
support to maximum 22 cm (see photo 5).<br />
5<br />
6.5. Adjusting the seat height<br />
The seat depth is adjustable and grows like that with your child.<br />
It is changeable in 6 various positions from minimum 24 cm to<br />
maximum 35 cm, in distances of 2.25 cm (see photo 6).<br />
6<br />
6.6. Skirt guard<br />
The skirt guard protects your clothes from dirt from the wheels.<br />
They also prevent the clothes or other items from getting<br />
trapped in spokes.<br />
7<br />
• To take away the skirt guard, push it back soft and lift it up on<br />
the back.<br />
17
• To mount it again, first attach them at the front and then at the<br />
back (see photo 7).<br />
6.7. Footrest<br />
The height of the footrest is adjustable (see photo 8) and has to<br />
be suited to get the best standing position. It is also depending<br />
on the choice of the seat cushion.<br />
8<br />
With a <strong>LEVO</strong> <strong>KID</strong> the footrest can be re-set in 6 positions<br />
within a range of 10.8 cm, and with a <strong>LEVO</strong> JUNIOR in 12<br />
positions within a range of 21.6 cm.<br />
The footrest is in an angle of 90° to the leg support. This means<br />
an angle of 20° with the floor (backward inclination). The<br />
footrest is also in the angle adjustable by plus/minus 5° (see<br />
photo 9).<br />
9<br />
6.8. The calf/heel strap<br />
10<br />
The calf/heel strap serves to prevent the legs and/or feet from<br />
slipping backwards. The calf strap is fitted to both leg support<br />
tubes and fixed using a Velcro fastening (see photo 10). The calf<br />
strap should be fixed that it is just touching your heel or calf<br />
when your feet rest on the footrest in the seating position.<br />
Because of the Velcro fastening it can be adjusted in the length<br />
so that the feet are in the ideal position. This is very important<br />
for a good standing position.<br />
6.9. Seat cushion (optional)<br />
Depending of the individual needs of your child it is possible to use different seat cushions. On the<br />
surface of the seat are Velcro fasteners which allow you to attach the majority of seat cushions<br />
securely. Because of the Velcro fasteners the seat cushion will not move in a standing position. The<br />
height of the footrest has to be adjusted depending on the seat cushion. Please contact your <strong>LEVO</strong><br />
dealer!<br />
6.10. Backrest extension (optional)<br />
18
It is possible to use a backrest extension to suit the needs of your child. This increases the backrest<br />
by 6-16 cm. Please consult your <strong>LEVO</strong> dealer!<br />
6.11. Seating systems<br />
It is possible to use seating systems of other manufacturers, as example a fixed back shell. Please<br />
contact your <strong>LEVO</strong> dealer!<br />
6.12. Stroller handle (optional)<br />
The stroller handle allows you comfortable handling when<br />
pushing your child in the wheelchair. Height and angle of this<br />
angle are adjustable (see photo 11). Please consult your <strong>LEVO</strong><br />
dealer!<br />
11<br />
The stroller handle is removable.<br />
12<br />
• To remove the handle, release clamping levers left and right<br />
and pull out the stroller handle on both sides of the frame.<br />
• To set the handle back in place, insert handle in both sides of<br />
the frame tubes until the clamping levers fully lock in the<br />
side openings of the frame (see photo 12).<br />
• Firmly tighten clamping levers.<br />
Attention: Observe the direction of thread of clamping levers! Both levers have right-hand<br />
threads. Therefore, turn clockwise to fasten the levers (side view).<br />
Attention: Ensure each time when you push or pull the wheelchair that the clamping levers<br />
and stroller handle are securely fastened!<br />
6.13. Stand-up operation for accompanying person (optional)<br />
This control unit enables the accompanying person to operate<br />
the stand-up mechanism from behind. It is attached on the<br />
stroller handle and therefore just available together!<br />
13<br />
• To switch to the stroller handle control unit, simply pull out<br />
plug from the armrest and reconnect to the socket at the<br />
19
stroller handle (see photo 13). Make sure that the small lug<br />
on the plug is inserted into the guide way of the socket!<br />
6.14. Other options<br />
There are more important and useful accessories like the table tray or the anti-tip rollers. Please<br />
contact your <strong>LEVO</strong> dealer.<br />
The brakes stop the<br />
wheelchair from<br />
driving away.<br />
7. The brakes (wheel locks)<br />
The brakes lock the rear wheels fast and the <strong>LEVO</strong> <strong>KID</strong> & JUNIOR is secure against unintended<br />
movement.<br />
By pushing both brake levers forward as far as they will go, you should be able to lock the brakes.<br />
When using your wheelchair in situations where increased stability is particularly important, be sure<br />
to lock the brakes. This is important when as example you child stands up, sits down or transfers<br />
from the wheelchair into another seat. Note that even if the rear wheels are locked by the brakes<br />
when transferring the wheelchair can easily slip sideways if it is not carrying a load.<br />
The efficiency of the brakes is dependent on tyre pressure and tread. Insufficient tyre pressure or<br />
heavily worn tyre tread has a detrimental effect on braking efficiency. Tyre pressure and tread<br />
should be regularly checked (see section 15).<br />
Caution: Wet surfaces or tyres can also reduce the efficiency of the brakes.<br />
When changing the position of the wheels the brakes have to be adjusted too.<br />
20
7.1. Adjusting the brakes<br />
When dismantling a brake the wheelchair has to be unoccupied. The wheelchair has to be so<br />
secured that after taking away a brake the wheelchair should not move.<br />
• Fully unlock the brakes.<br />
• Loosen the cylindrical screw on the brake mounting using a<br />
5 mm Allen key (see photo 14).<br />
14<br />
15<br />
• Adjust the position of the brake and the mounting to leave a gap<br />
of approximately 25 mm between the brake shoe and tyre, then<br />
screw the cylindrical screw tight again (see photo 15).<br />
• Test the strength of the brake.<br />
• Should you need to tighten up the brakes, push the brake shoe<br />
closer to the tyre; to relax the brake tension, leave a larger gap<br />
between shoe and tyre.<br />
Standing is healthy<br />
for you! Stand up<br />
often with your<br />
wheelchair and make<br />
yourself tall like a<br />
giant.<br />
21
8. Standing<br />
The <strong>LEVO</strong> <strong>KID</strong> & JUNIOR is not only an active wheelchair. It is also a standing aid which enables<br />
your child to stand up quick and easy whenever and wherever it needs to.<br />
8.1. General tips<br />
• Standing up stresses the body in a way you might not be used to. Therefore consult your<br />
doctor or physiotherapist before your child will stand up in the <strong>LEVO</strong> <strong>KID</strong> & JUNIOR,<br />
and ensure that your child does not suffer from conditions (e.g. strong contractures) which<br />
make standing potentially harmful.<br />
• Just bring the <strong>LEVO</strong> <strong>KID</strong> & JUNIOR into the standing position on firm, level ground (risk of<br />
tipping over).<br />
• Apply both brakes on the <strong>LEVO</strong> <strong>KID</strong> & JUNIOR before standing up.<br />
• Please beware of parts of the wheelchair where one might conceivably trap or catch parts of<br />
the body when sitting down, in the space between the backrest and the skirt guard as well as<br />
between seat and chassis frame. Be sure to protect yourself and accompanying persons from<br />
possible injuries.<br />
• The most important safety features are the knee support and chest strap. Always ensure<br />
that these items are fastened correctly before your child stands up in the <strong>LEVO</strong> <strong>KID</strong> &<br />
JUNIOR (risk of accident).<br />
Think about the knee<br />
support and chest strap<br />
before you stand up.<br />
22
8.2. Knee support<br />
The knee support holds the knees in an extended position and prevents your child from slipping out<br />
of the wheelchair while standing up.<br />
• Attach the two eyes of the knee support to the double-head<br />
screws on both sides of the wheelchair.<br />
16<br />
17<br />
• For the personal adjusting of the knee support remove the ribbon<br />
on the front. Center the knee support in front of your knees, so<br />
that the wedge of the knee support is positioned between your<br />
legs. Before pushing the ribbon on the Velcro fastening, check<br />
that the distance between the two eyes is the same. If necessary<br />
move it to one side. The knee support should be just below the<br />
knee cap (ca. one or two inches below). There should be enough<br />
space between knee support and knee to put a hand in between<br />
(see photo 17).<br />
8.3. Chest strap<br />
The chest strap is there to hold the upper body in place. The height of the chest strap is adjustable.<br />
• Check that the chest strap is secure on the backrest at the<br />
required height (velcro fastening).<br />
• Close the catch on the chest strap and pull it tight (not too tight)<br />
(see photo 18).<br />
18<br />
• To open it again, press the red button in the middle of the catch.<br />
• To slacken, open the catch and hold it at a right angle of the<br />
strap and pull (see photo 19).<br />
19<br />
Are the knee support and chest strap fastened correctly, your child<br />
is ready to stand up!<br />
23
8.4. Standing up<br />
The standing mechanism is powered by an electrical actuator system (lifting motor). The actuator is<br />
fed by two recharcheable batteries (see section 9).<br />
Trough using the control switch on the armrest the actuator will be pushed up or down.<br />
20<br />
• To stand up push the control switch up (see photo 20). The<br />
actuator engages and will drive up the seat as long as you press<br />
the switch.<br />
• The motor stops automatically as soon as the maximal standing<br />
position is reached. The leg supports sit firmly on the ground<br />
what ensures the child’s stability while standing.<br />
8.5. Sitting down<br />
To drive back in the seating position, push the control switch down. The actuator engages and<br />
drives the seat down as long as you push the control switch.<br />
• Hold the control switch until you have reached the lowest possible seated position and the motor<br />
stops from alone.<br />
Press the switch up to stand<br />
up. Let go to stop. Push the<br />
switch down if you want to sit<br />
down.<br />
24
8.6. Emergency cut-out switch<br />
21<br />
Trough pressing the red emergency cut-out switch on the right<br />
side of the battery box the circuit will be interrupt and it will<br />
stop the lifting of the seat in the case of an emergency (see<br />
photo 21). You can switch on power again, by turning the red<br />
emergency cut-out switch clockwise. The standing mechanism<br />
is again ready to use.<br />
We recommend pressing the emergency cut-out switch to switch off the power when the standing<br />
mechanism will not be used or if the wheelchair is left unattended.<br />
Please note: You can also cut out the power by disconnecting motor/control panel leads to secure<br />
the stand-up mechanism against unintentional or unauthorized switching on.<br />
From time to time you have to<br />
reload the batteries so you<br />
are able to stand up countinuously<br />
with your wheelchair.<br />
9. Batteries<br />
Your wheelchair will be delivered with maintenance-free, rechargeable dry batteries. They do not<br />
need any maintenance except for regular recharging.<br />
With total loaded batteries you can stand up approximately 60 times.<br />
A buzzer sounds to indicate when the batteries are down to 50 % of their full charge capacity. In<br />
this case they have to be recharged immediately.<br />
Important: Make sure that the batteries are never completely unloaded over a longer<br />
time! This could lead to a durable damage of the batteries!<br />
The standing mechanism must not be activated while the <strong>LEVO</strong> <strong>KID</strong> & JUNIOR is plugged in to<br />
the mains via the charger.<br />
25
In case of emergency (e.g. empty batteries) it is still possible to return the <strong>LEVO</strong> <strong>KID</strong> & JUNIOR<br />
to the seated position by plugging it into the mains via the charger.<br />
9.1. Recharging the batteries<br />
Your wheelchair will be supplied with an automatic 24 V charger which is easy to operate.<br />
• To charge the batteries pull the hand control cable out of the<br />
armrest and connect the charger plug and the hand control cable.<br />
Then plug the charger itself into the mains (see photo 22).<br />
22<br />
Recharge the batteries at any time you want, ideally overnight. It is recommended to charge the<br />
batteries daily. Recharging takes approx. 6-8 hours.<br />
The batteries can be loaded for an unlimited period of time. It is not possible to overload the<br />
batteries.<br />
The batteries can be damaged when they are fully discharged. If they have been fully discharged,<br />
reload your battery for a period of 24 hours. Use any possibility to charge the batteries. This will<br />
extend their service life considerably.<br />
10. Handling a wheelchair<br />
10.1. Getting into the wheelchair<br />
• Ensure that the brakes are applied.<br />
• Let your child transfer to the seat of the wheelchair on his own by using the armrest or lift it to<br />
the wheelchair.<br />
• Fasten the knee support and the chest strap.<br />
10.2. Getting out of the wheelchair<br />
• Ensure yourself that the brakes are applied.<br />
• Remove knee support and chest strap.<br />
• Let your child transfer from the wheelchair to another seat on his own by using the armrest or<br />
lift it out onto another seat.<br />
10.3. Sideways transfer<br />
• Drive as close as possible to the chair or bed which you want to transfer.<br />
• Check that the brakes are applied.<br />
26
• Fold up the armrest on this side on which you want to transfer to.<br />
• Let your child transfer from the wheelchair to another seat on his own by using the armrest or<br />
lift it out onto another seat.<br />
10.4. Driving the wheelchair<br />
Take your time to read all the instructions and to make yourself familiar with the handling of the<br />
<strong>LEVO</strong> <strong>KID</strong> & JUNIOR before you drive with your child or let your child drive in the wheelchair.<br />
To begin with driving exercises, select a place which your child is familiar with. We recommend a<br />
large even space such as your living room or a garage entrance. Do not let your child drive in small<br />
rooms or in areas with traffic before you are sure that you child can safely handle his <strong>LEVO</strong>.<br />
Be sure that the seat is in the lowest position when driving outside the house.<br />
Release the brakes. To drive forward hold the hand rings as far behind as possible, then push<br />
forward. Push evenly with both hands to move straight ahead with your wheelchair. If the right<br />
hand pulls more, the wheelchair turns to the left side driving in a curve. When you just pull with<br />
your right hand, it turns to the left right where you stand. If you put more strength on your left hand,<br />
the wheelchair turns to the right driving in a curve. If you push with your left hand only, it turns to<br />
the right right there where you stand.<br />
To stop you should hold the hand ring with both hands.<br />
10.5. Danger of tipping over<br />
Always remember that when pushing the wheelchair on the<br />
handrings the front castors will loose traction due to<br />
acceleration. Depending on the weight distribution, this may<br />
cause the castors to lift off the ground and the wheelchair to tip<br />
over backwards (see diagram 23).<br />
23<br />
This above situation may be made more critical by using, for<br />
example, a greater seat inclination by fixing the rear wheel<br />
further forward, or by using a cushion to sit higher up.<br />
Similar, when breaking from a backward movement the castors<br />
will again loose downforce, giving rise to backward tilting and<br />
the risk of tipping over.<br />
24<br />
Also note that any accompanying luggage (see diagram 24) will<br />
change the center of gravity of your wheelchair so that the<br />
steadfastness will be reduced.<br />
As an additional safety measure you can fit anti-tip rollers (see<br />
photo 25). We recommend to permantly fit such rollers.<br />
27<br />
25
Attention: If anti-tip rollers are required, check that they are<br />
fitted in extended position!<br />
10.6. Driving on a gradient<br />
When turning on a gradient, bear in mind you will have to sit square on to the slope before finally<br />
swiveling around to face straight downhill. In this side-on position there is a risk of slipping<br />
sideways down the slope. Either the child himself or the accompanying person should take this risk<br />
into account and steer accordingly to compensate. If possible, let your child sit leaning into the hill,<br />
whichever the intended direction of travel (see diagram 26).<br />
26<br />
As a safety precaution, always ask an able-bodied person to accompany your child when driving<br />
down a hill. Always remember that when your child wants to slow down the wheelchair with the<br />
hand rings it generates a great deal of heat between hands and handring and can lead to burns on the<br />
hands. Therefore always brake carefully and never drive faster than walking pace. Leaning back<br />
into the hill improves stability and increases rear wheel downforce, thus also improving braking<br />
efficiency.<br />
10.7. Negotiating obstacles<br />
Any obstacle, such as a kerb or threshold should be viewed as a potential source of danger. To<br />
negotiate an obstacle, your child should always ask an able-bodied person for assistance.<br />
If you as a helping person should negotiate such an obstacle,<br />
never lift the chair totally from the steps away. The big wheels<br />
should always be in contact with them.<br />
27<br />
To get over an obstacle (e.g. driving up over a kerb from the<br />
street), tilt the wheelchair just enough to lift the front castors<br />
onto the edge of the obstacle. Then push on until the large<br />
wheels are resting against the lip of the obstacle. Lift them up<br />
and onto it by taking hold of the backrest or the rear axle (see<br />
diagram 27).<br />
28
To descend over an obstacle (e.g. driving down from the kerb<br />
into the street), first tilt the wheelchair up onto the rear wheels,<br />
push it forward and let the wheelchair down over the edge of the<br />
obstacle on two wheels (see diagram 28).<br />
28<br />
When you have to carry the wheelchair over steps always take<br />
another person to help. Therefore the accompanying person<br />
should only take hold of and/or carry solid parts of the frame.<br />
They should under no circumstances take hold of any moving<br />
parts, such as the wheels or armrests (see diagram 29). Always<br />
ensure that the stroller handle is securely fastened with the<br />
clamping levers.<br />
29<br />
If the child wants to overcome an obstacle alone you should be<br />
aware of the tendency of the wheelchair to tip over backwards<br />
if, as the rear wheels contact the edge of the obstacle, the child<br />
attempts to surmount it by pushing down harder on the handring<br />
(see diagram 30).<br />
30<br />
Never drive onto escalators!<br />
10.8. Picking up objects from the wheelchair<br />
Always remember that when your child wants to lift up objects from the floor, the relative centre of<br />
gravity will change and affects stability. This can cause the wheelchair to tip over, either backwards<br />
(see diagram 31), sideways or forwards. In the last situation the stability can be enlarged by<br />
pointing the castors as if the wheelchair would move backwards (see diagram 32). Drive as close as<br />
possible to the object that you want to pick up.<br />
3<br />
32<br />
29
11. Storage<br />
11.1. Folding down the backrest<br />
The <strong>LEVO</strong> <strong>KID</strong> & JUNIOR has a foldable backrest which allows you to cut down significantly on<br />
the space required to store the wheelchair away. Certain parts are also detachable to warranty the<br />
lowest possible weight.<br />
• Before you fold down the backrest first remove the two skirt<br />
guards (see section 6.6)<br />
• Push up the two folding clasps and at the same time push the<br />
backrest forwards (see photo 33).<br />
33<br />
11.2. Removing battery and electronic unit<br />
The battery and electronic unit is removable.<br />
34<br />
• Pull out the actuator plug and the plug from the armrest.<br />
• Lift the battery unit at the bottom and take it up and out (see<br />
photo 34).<br />
• To refit it again, attach the two brackets to the cross linkage and<br />
let the two pins lock in the corresponding openings.<br />
11.3. Removing the rear wheels<br />
With the quick-release you can speedily remove and remount the rear wheels of the <strong>LEVO</strong> <strong>KID</strong> &<br />
JUNIOR, thus significantly reducing the volume and weight of the wheelchair.<br />
When removing a wheel, the wheelchair must be unoccupied. The wheelchair has to be supported<br />
that after taking away a wheel it should not fall over or roll away.<br />
35<br />
• Press the release button in the center of the wheel and pull off or<br />
mount the wheel (see photo 35).<br />
• After mounting the wheel pull and push several times on the<br />
wheel to check that the quick-release axle has definitely locked<br />
in.<br />
31
11.4. Removing the front castors<br />
To remove the castors together with the front forks, depress the<br />
quick-release axle from underneath, then pull off the forks<br />
(photo 36).<br />
36<br />
37<br />
Caution: Certain movements involved in folding down the<br />
wheelchair are, by their nature, potentially harmful. Please take<br />
care not to trap any clothing or parts of the body in the joints of<br />
the wheelchair as you are folding down the wheelchair. Your<br />
child should only resume his seat in the wheelchair once it has<br />
been fully unfolded and reassembled with all detachable<br />
components (e.g. rear wheels and castors) once again securely<br />
fixed in place. Always make sure beyond any doubt that the rear<br />
wheels have been securely reattached, and cannot work loose<br />
while the wheelchair is moving (see diagram 37).<br />
12. Lifting the wheelchair<br />
• For your own safety never lift the wheelchair alone when your child is sitting in the <strong>LEVO</strong>.<br />
• Only lift it up alone when nobody is sitting in the wheelchair. If possible, take off all the<br />
detachable parts from the wheelchair to reduce its weight.<br />
You can take your stand-up<br />
wheelchair with you when<br />
you go somewhere by car.<br />
32
13. Transport in a motor vehicle<br />
• The <strong>LEVO</strong> <strong>KID</strong> & JUNIOR should only be transported in sitting position.<br />
• The <strong>LEVO</strong> <strong>KID</strong> & JUNIOR has been crash-tested and can be used as a seat in a passenger car<br />
provided that following conditions are observed:<br />
38<br />
45°<br />
• Use should be made of commercial licensed fastening systems.<br />
• Location points on the wheelchair are marked with orange<br />
stickers.<br />
• Front: fix the wheelchair from below on both the left and right<br />
side frame tube (see picture 38).<br />
39<br />
• Rear: fix the wheelchair from below on both the left and right<br />
wheel adapter plate (see picture 39).<br />
• Tighten the fixation ropes in an angle of 45° to the ground (see<br />
picture 38).<br />
When transporting an unoccupied wheelchair in the trunk of a motor vehicle make sure that the<br />
wheelchair is so secured as to prevent it sliding about or tipping over.<br />
Caution: When transporting the <strong>LEVO</strong> <strong>KID</strong> & JUNIOR in a motor vehicle, be sure to switch off<br />
the emergency cut-out switch and/or to disconnect the motor lead from the battery and electronic<br />
unit!<br />
14. Cleaning<br />
• In the case of normal soiling clean the wheelchair with a moist cloth and thoroughly wipe dry.<br />
• In the case of stubbed soils use a mild detergent and warm water for cleaning.<br />
• Never use furniture polish, spirit or solvents to clean the frame.<br />
15. Maintenance<br />
Your wheelchair is maintenance-free with the need for further maintenance except for the following<br />
guidelines detailed below. Please note that the wheelchair has to be serviced by your local <strong>LEVO</strong><br />
dealer at least once a year to warranty safe and reliable function.<br />
Following tasks can be easily carried out by family or friends:<br />
• Keep your wheelchair clean. Never store it when damp.<br />
• Keep the batteries charged.<br />
• Check that all fittings, harness, etc. are working properly.<br />
• Check that the stroller handle (optional) is securely fastened and that the clamping levers are<br />
properly tightened.<br />
33
• Check the state of the tread weekly. If necessary, pump up the tyres in line with<br />
manufacturer’s recommendations (see service manual, Technical Data, section 12).<br />
• Check the state of the tread on the tyres of rear wheels and front castors monthly. If a tyre is<br />
heavily or unevenly worn, it should be replaced immediately.<br />
• Every month check that the brakes still work cleanly: Having applied the brakes, the wheels<br />
should stop turning completely. If the brakes are ineffective, they should be tightened up by<br />
your dealer.<br />
• If you have found any faults, immediately report them to your agent. He can advise you if you<br />
can continue using the chair or not, and what action you should take to repair the wheelchair.<br />
16. Disposal<br />
• At the end of its service life the wheelchair should be returned to your <strong>LEVO</strong> dealer for<br />
proper disposal.<br />
• Old batteries should be also returned to your <strong>LEVO</strong> dealer or to the place where you buy the<br />
new battery for proper disposal.<br />
17. Trouble shooting<br />
17.1. Trouble shooter – general operation<br />
17.1.1.<br />
17.1.2.<br />
17.1.3.<br />
17.1.4.<br />
Fault<br />
Wheelchair will not<br />
travel in a straight line or<br />
does not sit square in the<br />
ground<br />
Leg supports do not rest<br />
on the ground in the<br />
uppermost standing<br />
position.<br />
Wheelchair tips over<br />
backwards too easily<br />
Brakes do not brake<br />
efficiently<br />
Solution<br />
Pump up or repair the tyres (see Technical Data, section<br />
12).<br />
Have a technician check and if need be adjust wheelchair<br />
components.<br />
Caution: no warranty of stability when standing!<br />
Imperative! Have a technician check and if need be<br />
adjust wheelchair components.<br />
Have a technician check and if need be adjust wheelchair<br />
components.<br />
Attach anti-tip rollers (see accessories).<br />
Check air pressure (see Technical Data, section 12).<br />
Check tread on tyres.<br />
Have a technician check and if need be adjust the brakes.<br />
34
17.2. Trouble shooter – stand-up mechanism<br />
Fault<br />
17.2.1. Mechanism works only<br />
very slow<br />
17.2.2. Mechanism inoperable<br />
(neither up nor down, no<br />
perceivable motor noise).<br />
Solution<br />
Recharge batteries.<br />
Have batteries replaced.<br />
Connect actuator lead with battery and electronic unit.<br />
Connect plug of armrest with battery and electronic unit.<br />
Recharge batteries<br />
Have batteries replaced<br />
Have control switch replaced<br />
Have actuator replaced<br />
Have battery and electronic unit replaced<br />
Have charger replaced<br />
35
<strong>LEVO</strong> <strong>KID</strong> & JUNIOR<br />
SERVICE MANUAL<br />
This service manual is designed for use by your <strong>LEVO</strong> dealer and<br />
authorized service technicians.<br />
Please carefully read these instructions before carrying out<br />
maintenance work on your wheelchair.<br />
This service manual must be read in connection with the<br />
instruction manual.<br />
Alterations in constructional and technical manner or to the<br />
electronic require the written authorisation of <strong>LEVO</strong> <strong>AG</strong>,<br />
otherwise no warranty or product liability will be accepted.<br />
36
1. Introduction<br />
Your <strong>LEVO</strong> <strong>KID</strong> & JUNIOR is maintenance-free dispensing the user with the need for further<br />
maintenance work except for charging the battery and cleaning the wheelchair on a regular basis.<br />
Due to its complex design, the wheelchair should be checked for safety at least once a year by your<br />
<strong>LEVO</strong> dealer or authorized technician.<br />
This service manual has been designed for use by your <strong>LEVO</strong> dealer or authorized technician. It<br />
contains all information required to carry out safety checks and repair works on your <strong>LEVO</strong> <strong>KID</strong> &<br />
JUNIOR. It will ensure that your wheelchair is a reliable, safe and helpful means of transport.<br />
Always read and apply this service manual in connection with the instruction manual.<br />
2. Accident prevention & safety<br />
Accidents can happen. Be aware of possible dangers when carrying out tests or works on your<br />
wheelchair. You should take suitable preventive measures to ensure your own safety and that of<br />
other persons.<br />
3. Adjustments – general instructions<br />
Depending on the ability of the user’s friends and relatives, they may carry out some of the<br />
adjustment works themselves. This manual will tell you how to proceed. However, when delivered,<br />
your wheelchair should be adjusted to your personal needs by your <strong>LEVO</strong> dealer or authorized<br />
technician.<br />
4. Repairs – general instructions<br />
Service and repair works on the <strong>LEVO</strong> <strong>KID</strong> & JUNIOR should only be carried out by a <strong>LEVO</strong><br />
dealer or authorized technician.<br />
• Repairs: For advice in all repairs in Switzerland contact <strong>LEVO</strong> <strong>AG</strong> if in Switzerland. For all<br />
other countries contact your local <strong>LEVO</strong> agent. Addresses are given at the front of this<br />
instruction and service manual.<br />
• Major repairs: For all major repairs e.g. bent or damaged frame always replace complete<br />
components. Never try to repair damaged steelwork or components.<br />
• Replacement parts: Factory replacement components should be used in all repairs, these are<br />
available from <strong>LEVO</strong> <strong>AG</strong>. To order parts see the parts list drawings at the end of this manual.<br />
37
5. Tools & torques<br />
The following tools are required to carry out maintenance work:<br />
Allen key<br />
3mm<br />
4 mm<br />
5 mm<br />
6 mm<br />
8 mm<br />
3 / 16 ″<br />
Spanner<br />
10 mm<br />
13 mm<br />
17 mm<br />
27 mm<br />
Screw size<br />
Torque in Nm<br />
M4 3<br />
M5 6<br />
M6 10<br />
M8 25<br />
M10 50<br />
Cross blade<br />
screwdriver<br />
Soft headed hammer<br />
Flat blade screwdriver<br />
Torque wrench: 0 - 50 Nm<br />
6. Important notes<br />
• Do not reuse Nyloc nuts. Always replace with a new Nyloc nut.<br />
• Always use thread locking compound.<br />
• Always use recommended components and parts available from <strong>LEVO</strong> <strong>AG</strong>.<br />
• Do not modify or repair the frame.<br />
• <strong>LEVO</strong> <strong>AG</strong> is responsible for any repairs on gas springs, motors and electronic parts.<br />
7. Recommended safety checks<br />
Please note that the following safety checks should be carried out at least on an annual basis.<br />
Have them carried out only by your <strong>LEVO</strong> dealer or an authorized technician. If a defect occurs,<br />
immediately discontinue using the wheelchair until the defect is remedied.<br />
1. Fold down the backrest and reset. Having put the backrest back in place, check that the clasp<br />
latches correctly. Rectify possible defects.<br />
2. Check the frame for possible defects. Replace defective parts if in need of repair.<br />
3. Check seat and backrest covers for possible wear and replace, if necessary.<br />
4. Check the condition of straps, belts and catches and replace, if necessary.<br />
5. Check that nuts, screws, joints and plastic parts are securely tightened as well as for proper<br />
condition. Rectify possible defects.<br />
6. Check that push handles and handle covers fit tightly. Rectify possible defects.<br />
7. Check brakes for adequate braking efficiency. Rectify possible defects.<br />
8. Check that front castors and rear wheels run smoothly and are securely fastened. Check tire<br />
pressure and the tread of the tire of rear wheels.<br />
9. Check all electrical cables for abrasion marks and safe operation. Rectify possible defects.<br />
10. Check all electrical connections for signs of corrosion and safe operation. Rectify possible<br />
defects.<br />
38
11. Clean batteries and connections. Check battery capacity and inform the customer of its<br />
condition. Recharge the battery before returning the wheelchair to the customer.<br />
12. Check the stand-up mechanism and its proper operation. Rectify possible defects.<br />
8. Adjustments<br />
8.1. The backrest and seat upholstery<br />
The surface flexibility of the backrest upholstery can be adjusted using the velcro fasteners. The<br />
backrest can be tautened (for a more upright seated posture) or relaxed (for more back support).<br />
The seat upholstery can be similarly tautened or relaxed by use of velcro fasteners. As a rule it<br />
should be as taut as possible. Depending on the height of the cushioning in question, it may be<br />
necessary to loosen upholstery surface tension to be able to sink the cushioning down between the<br />
two seat supports.<br />
8.2. The rear axle<br />
In your <strong>LEVO</strong> <strong>KID</strong> the rear axle is fitted as standard in the top rear edge of the axle adaptor and in<br />
your <strong>LEVO</strong> JUNIOR in the center of the lowest row of holes. This results in a seat inclination of 5°<br />
to the rear (see photo 38).<br />
JUNIOR<br />
• To increase the wheelchair’s tendency to tilt, set the axle one<br />
hole forward in the axle adaptor.<br />
• To decrease the wheelchair’s tendency to tilt set the axle one<br />
hole backwards in the axle adaptor.<br />
<strong>KID</strong><br />
38<br />
Attention: it is not permitted to fix the axle in holes further upwards or downwards to adjust the<br />
seat inclination. This will cause instability when standing (risk of tilting)!<br />
8.3. The castor axle<br />
Having made adjustments to the rear axle, be sure to adjust the castor height and angle accordingly.<br />
When carrying out these adjustments, it is important to bear the following points in mind:<br />
• The castor axle should stand at a right angle to the ground.<br />
• The castor should always remain in contact with the ground.<br />
• In the uppermost standing position, the leg supports must be resting on the ground.<br />
• Bring the <strong>LEVO</strong> <strong>KID</strong> & JUNIOR into the standing position.<br />
• Unscrew and remove the cylindrical screws using a 4 mm Allen<br />
key, then set the plastic leg plug either higher or lower so that<br />
39<br />
39
the leg supports are standing on the ground. You may have to<br />
turn the leg plug by 90° at most. (see photo 39).<br />
• Unscrew the two cylindrical screws using a 5 mm Allen key and<br />
turn the eccentric disc until the axle is sitting vertically (see<br />
photo 40). You may have to turn only one of the two eccentric<br />
discs. Screw the cylindrical screws tight.<br />
40<br />
8.4. The leg supports<br />
The leg supports should be replaced when the seat height of the wheelchair has been so greatly<br />
adjusted that they no longer reach the ground or reach the ground too soon in the uppermost<br />
standing position.<br />
41<br />
• Remove the footrest by loosening the four oval head screws on<br />
both the inner edges of the leg supports using a 4 mm Allen key<br />
(see photo 41).<br />
• Loosen the four oval head screws on both the outside edges of<br />
the leg supports using a 4 mm Allen key and remove them<br />
together with the spacer bushing.<br />
• Loosen the Allen screws on the upper portion of the leg supports<br />
using a 4 mm Allen key and pull leg supports out of the frame<br />
(see photo 41).<br />
• Replace the leg supports and reassemble in reverse order.<br />
8.5. Backrest inclination<br />
The backrest sits at an angle of 90° to the seat as standard but can be adjusted in either direction by<br />
5°. This adjusting mechanism is not stepless.<br />
42<br />
• Remove the rear wheels, then remove the skirt guards (see<br />
<strong>Instruction</strong> <strong>Manual</strong>, section 11).<br />
• Unscrew the countersunk screw on the outer joint using a 4 mm<br />
Allen key, remove the screw and the bushing (see photo 42)<br />
before adjusting to the desired position and tightening up the<br />
countersunk screw.<br />
40
Attention: Having adjusted the backrest angle, check that the clasp of the folding mechanism<br />
latches correctly!<br />
8.6. Armrests<br />
43<br />
• Remove the backrest cover as well as the velcro fasteners<br />
below.<br />
• Loosen the Allen screws of the armrest support using a 3/16″<br />
Allen key and adjust the armrest to the desired height (see photo<br />
43).<br />
• Attach the velcro fasteners above and below the armrest. You<br />
may have to adjust the height of the armrest to the position of<br />
the velcro fasteners.<br />
8.7. The footrest<br />
The height of the footrest is not only important for a good sitting position but even more so for the<br />
standing position. On delivery you will find the footrest at the second lowest position.<br />
• With the <strong>LEVO</strong> <strong>KID</strong> there is a choice of 6 different heights for mounting the footrest.<br />
• With the <strong>LEVO</strong> JUNIOR there is a choice of 12 different heights for mounting the footrest.<br />
44<br />
• With the <strong>LEVO</strong> <strong>KID</strong> and the JUNIOR unscrew the four oval<br />
head screws on both inner edges of the footrest using a 4 mm<br />
Allen key and set the footrest either higher up or lower down<br />
(see photo 44).<br />
• With the <strong>LEVO</strong> JUNIOR you additionally have the possibility<br />
to adjust the height of the footrest adapter by loosening the four<br />
oval head screws on both outer edges of the footrests using a 4<br />
mm Allen key (see photo 44).<br />
9. Repairs<br />
9.1. Replacing tire/inner tube of rear wheels<br />
• Remove the wheel and open the valve before pressing down on<br />
it to let out the air (see photo 45).<br />
• Using a bicycle tire wedge, ease both sides of the tire over the<br />
wheel rim and pull the inner tube out of the tire (see photo 46).<br />
45<br />
41
• Replace the inner tube by forcing one side of the tire back over<br />
the wheel rim, pump up the tire a little, ease the valve through<br />
into the hole and lay the inner tube along inside of the tire. Once<br />
the whole tube is snug inside the tire, force the other side of the<br />
tire back over the wheel rim (starting on the side opposite the<br />
valve).<br />
• Check lest the inner tube be caught between tire and rim before<br />
pumping it up in line with the manufacturer’s recommended tire<br />
pressure (see Technical Data, section 12).<br />
46<br />
9.2. Repairing the inner tube<br />
47<br />
• Remove inner tube and tire following the steps described under<br />
9.1.<br />
• Repair the hole using a bicycle puncture repair kit and follow<br />
the manufacturer’s instructions (clean the area around the hole<br />
and roughen the tube surface (see photo 47) before applying the<br />
vulcanized solution. Allow to dry, then firmly attach the rubber<br />
patch (see photo 48). Again, first allow to dry, then pump up the<br />
tube to check that the patch is airtight).<br />
• Replace the inner tube. Once the whole tube is snug inside the<br />
tire, force the tire back over the wheel rim (starting on the side<br />
opposite the valve).<br />
• Check lest the inner tube be caught between tire and rim before<br />
pumping it up in line with the manufacturer’s recommended tire<br />
pressure (see Technical Data, section 12).<br />
48<br />
9.3. Replacing the actuator (lifting motor)<br />
• Disconnect actuator plug from battery and electronic unit (see photo 49).<br />
• Loosen and remove locking nuts and Allen screws at the front and rear connecting rod using a 16<br />
mm spanner as well as an 8 mm Allen key (see photo 50).<br />
• Remove the faulty motor and install the replacement in the reverse order.<br />
49<br />
50<br />
42
9.4. Replacing the control switch<br />
51<br />
52<br />
• Pull out battery lead at the back of the armrest (see photo 51).<br />
• Loosen Allen screw and locking nut of the armrest support using<br />
a 10 mm spanner and a 4 mm Allen key and remove the armrest<br />
(see photo 51).<br />
• Loosen the two small oval head screws at the outer edge of the<br />
armrests on both sides (at the front edge under the foam cover)<br />
using a flat blade screwdriver (see photo 51).<br />
• Loosen the hexagon thin nut on the front of the control switch<br />
using a 14 mm spanner (see photo 52). Remove thin nut and<br />
washer.<br />
• Pull out control switch to the rear.<br />
• Cut-off defective control switch by use of a cable cutter and<br />
solder on new control switch. Be sure to take into account the<br />
different cable colors.<br />
• Install the control switch in the reverse order.<br />
9.5. Replacing the batteries<br />
53<br />
• Switch off the emergency cut-out switch.<br />
• Depress the four plastic tabs on the battery cover and remove<br />
the cover from the battery and electronic unit (photo 53).<br />
• Caution: depress all four tabs simultaneously, not only the<br />
two upper ones. The two lower ones may break off!<br />
• Take out the batteries. In so doing, disconnect the pin contacts.<br />
• Install the batteries in reverse order.<br />
Attention: Always replace both batteries together, never just one!<br />
Caution: When working on the batteries take care not to short-circuit them with metal tools etc.<br />
Always take off wrist watches and jewelry. When reconnecting the batteries check that the cables<br />
are connected to the correct terminals.<br />
Caution: Getting into contact with acid is dangerous. After contact with acid immediately<br />
rinse off spilt acid from your body with water and consult your doctor. Immediately take off<br />
all clothes covered with acid.<br />
Always clean your hands after having carried out works on batteries.<br />
Attention: Of the battery-/ electronic box only the batteries and the cover can be replaced! It is not<br />
admissible to open the electronics or to remove parts thereof (no warranty)! In case of an electronic<br />
defect the complete battery-/ electronic box must be replaced!<br />
43
10. Testing the wheelchair<br />
After having carried repairs on a wheelchair, you should always check all functions for<br />
correct operation before returning the wheelchair to your customer. The wheelchair should<br />
only be returned after all defects have been rectified.<br />
11. Cleaning<br />
Before you return the wheelchair to your customer, make sure that the wheelchair is clean and dry:<br />
• Remove dirt with a damp cloth and wipe dry.<br />
• In the case of stubborn dirt use a mild detergent and warm water for cleaning.<br />
• Never apply furniture polish, spirit or solvents to clean the wheelchair.<br />
44
12. Technical Data<br />
Measurements<br />
Model <strong>KID</strong> JUNIOR /40 JUNIOR /44<br />
Seat width 30/35 30/35 30/35<br />
Total width 49/54 49/54 49/54<br />
Total length * 66-74 74-82 77-85<br />
Total height (with backrest) ** 55 63 68<br />
Back upholst. height 24 24 24<br />
Seat upholst. height front 33 40 44<br />
Rear wheels 16" 20" 22"<br />
Seat upholst. depth 24-35 24-35 24-35<br />
Foot rest - seat<br />
Weight without wheels<br />
Total weight 19<br />
height and angle adjustable<br />
24V/2 Ah rechargeable<br />
20 20<br />
Weight without detachable parts 13 14 14<br />
All measurements in cm and kg. Variations due to model-specific adjustments possible.<br />
* without stroller handle and anti-tip rollers (anti-tip rollers = + 6 cm)<br />
** without stroller handle and backrest extension<br />
Rear tires:<br />
Tire pressure (rear):<br />
Front castor:<br />
Pneumatic tires,16“/20“/22”<br />
7,5 bar<br />
Airless castors<br />
<strong>KID</strong>: 3“, ∅ 75x26 mm<br />
JUNIOR: 5“, ∅ 125x29 mm<br />
Power unit:<br />
Actuator motor: Linear drive, 24 VDC, Power ca 3000 N,<br />
Speed max. 9 mm/sec.<br />
Power consumption max. 5.0 A, Protection: IP 51<br />
with emergency cut-out and low voltage accoustic alarm<br />
Batteries:<br />
Charger:<br />
Operating temperature range: +5° - +40°<br />
Storage temperature range: -40° - +60°<br />
2 maintenance-free, rechargeable batteries<br />
24 V, 2.7 Ah<br />
Transformer 220V - 24V<br />
Clearance:<br />
Max. height of obstacle:<br />
max. 6 cm<br />
max. 2 cm<br />
Max. permissible gradient/<br />
Cross-fall: max. 3°<br />
Max. weight,<br />
incl. body and load:<br />
max. 50 kg<br />
45