MO72129A-Quick Start Guide.pdf - EtherWAN
MO72129A-Quick Start Guide.pdf - EtherWAN
MO72129A-Quick Start Guide.pdf - EtherWAN

Create successful ePaper yourself
Turn your PDF publications into a flip-book with our unique Google optimized e-Paper software.
72128A, 72129A Hardened Managed Ethernet Switch<br />
This quick installation guide describes how to install and use the 72128A and 72129A hardened Managed<br />
Gigabit Ethernet Switch. This is the switch of choice for harsh environments constrained by space.<br />
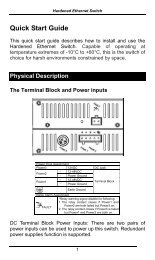
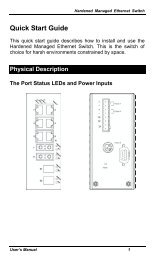
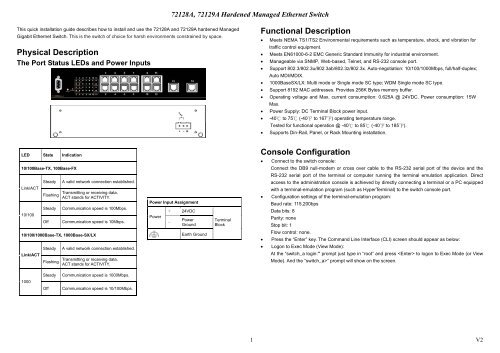
Physical Description<br />
The Port Status LEDs and Power Inputs<br />
Functional Description<br />
• Meets NEMA TS1/TS2 Environmental requirements such as temperature, shock, and vibration for<br />
traffic control equipment.<br />
• Meets EN61000-6-2 EMC Generic Standard Immunity for industrial environment.<br />
• Manageable via SNMP, Web-based, Telnet, and RS-232 console port.<br />
• Support 802.3/802.3u/802.3ab/802.3z/802.3x. Auto-negotiation: 10/100/1000Mbps, full/half-duplex;<br />
Auto MDI/MDIX.<br />
• 1000BaseSX/LX: Multi mode or Single mode SC type; WDM Single mode SC type.<br />
• Support 8192 MAC addresses. Provides 256K Bytes memory buffer.<br />
• Operating voltage and Max. current consumption: 0.625A @ 24VDC. Power consumption: 15W<br />
Max.<br />
• Power Supply: DC Terminal Block power input.<br />
• -40 ℃ to 75 ℃ (-40℉ to 167℉) operating temperature range.<br />
Tested for functional operation @ -40 ℃ to 85 ℃ (-40℉ to 185℉).<br />
• Supports Din-Rail, Panel, or Rack Mounting installation.<br />
LED<br />
State<br />
Indication<br />
10/100Base-TX, 100Base-FX<br />
Link/ACT<br />
10/100<br />
Steady<br />
Flashing<br />
Steady<br />
Off<br />
A valid network connection established.<br />
Transmitting or receiving data.<br />
ACT stands for ACTIVITY.<br />
Communication speed is 100Mbps.<br />
Communication speed is 10Mbps.<br />
10/100/1000Base-TX, 1000Base-SX/LX<br />
Link/ACT<br />
Steady<br />
Flashing<br />
A valid network connection established.<br />
Transmitting or receiving data.<br />
ACT stands for ACTIVITY.<br />
Power Input Assignment<br />
Power<br />
+<br />
-<br />
24VDC<br />
Power<br />
Ground<br />
Earth Ground<br />
Terminal<br />
Block<br />
Console Configuration<br />
• Connect to the switch console:<br />
Connect the DB9 null-modem or cross over cable to the RS-232 serial port of the device and the<br />
RS-232 serial port of the terminal or computer running the terminal emulation application. Direct<br />
access to the administration console is achieved by directly connecting a terminal or a PC equipped<br />
with a terminal-emulation program (such as HyperTerminal) to the switch console port.<br />
• Configuration settings of the terminal-emulation program:<br />
Baud rate: 115,200bps<br />
Data bits: 8<br />
Parity: none<br />
Stop bit: 1<br />
Flow control: none.<br />
• Press the “Enter” key. The Command Line Interface (CLI) screen should appear as below:<br />
• Logon to Exec Mode (View Mode):<br />
At the “switch_a login:” prompt just type in “root” and press to logon to Exec Mode (or View<br />
Mode). And the “switch_a>” prompt will show on the screen.<br />
1000<br />
Steady<br />
Off<br />
Communication speed is 1000Mbps.<br />
Communication speed is 10/100Mbps.<br />
1 V2
72128A, 72129A Hardened Managed Ethernet Switch<br />
Web Configuration<br />
• Login the switch:<br />
Specify the default IP address (169.254.1.1) of the switch in the web browser. A login window will be<br />
shown as below:<br />
• Logon to Privileged Exec Mode (Enable Mode):<br />
At the “switch_a>” prompt just type in “enable” and press to logon to Privileged Exec Mode<br />
(or Enable Mode). And the “switch_a#” prompt will show on the screen.<br />
• Logon to Configure Mode (Configure Terminal Mode):<br />
At the “switch_a#” prompt just type in “configure terminal” and press to logon to Configure<br />
Mode (or Configure Terminal Mode). And the “switch_a(config)#” prompt will show on the screen.<br />
• Enter the factory default login ID: root.<br />
Enter the factory default password (no password).<br />
Then click on the “Login” button to log on to the switch.<br />
2 V2