mega compact/Video - Hartenberger
mega compact/Video - Hartenberger
mega compact/Video - Hartenberger

You also want an ePaper? Increase the reach of your titles
YUMPU automatically turns print PDFs into web optimized ePapers that Google loves.
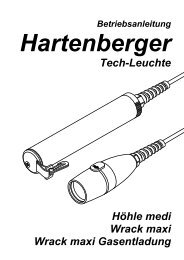
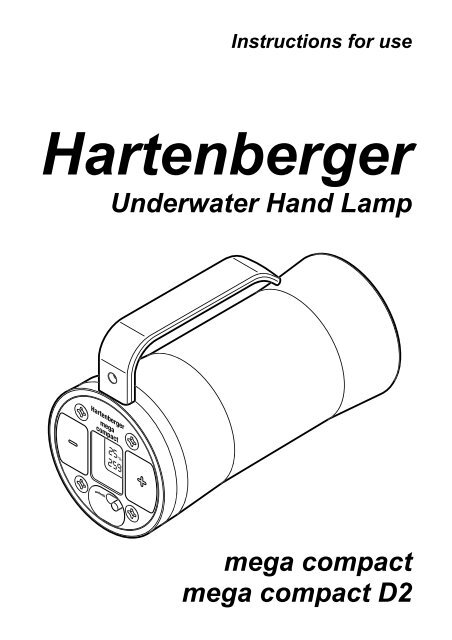
Instructions for use<br />
<strong>Hartenberger</strong><br />
Underwater Hand Lamp<br />
<strong>mega</strong> <strong>compact</strong><br />
<strong>mega</strong> <strong>compact</strong> D2
!<br />
2<br />
Instructions for use <strong>Hartenberger</strong> UW-lamp <strong>mega</strong> <strong>compact</strong> / <strong>mega</strong> <strong>compact</strong> D2 (HID)<br />
CONTENTS<br />
WARNING SIGNS....................................................................................................... 2<br />
SAFETY WARNING.................................................................................................... 2<br />
GUARANTEE.............................................................................................................. 3<br />
APPLICATIONS.......................................................................................................... 3<br />
ARTICLE DESCRIPTION ........................................................................................... 4<br />
TECHNICAL SPECIFICATIONS................................................................................. 7<br />
REAR SCREW FITTING............................................................................................. 8<br />
POWER PACK............................................................................................................ 9<br />
PREPARATION FOR USE ....................................................................................... 11<br />
USING THE UNDERWATER LAMP ......................................................................... 11<br />
AFTER EACH USE ................................................................................................... 17<br />
TRANSPORT............................................................................................................ 17<br />
STORAGE ................................................................................................................ 17<br />
CHARGING............................................................................................................... 17<br />
CHARGER OFF-SHORE I/12 ................................................................................... 19<br />
CHARGER OFF-SHORE II ....................................................................................... 20<br />
CARE AND MAINTENANCE .................................................................................... 21<br />
FAULT DIAGNOSIS.................................................................................................. 22<br />
SPARE PARTS......................................................................................................... 24<br />
ACCESSORIES ........................................................................................................ 24<br />
WARNING SIGNS<br />
!<br />
If not adhered to the parts of this instruction for use, which are marked<br />
with the above warning sign, there is a danger of property damages,<br />
physical damages or death.<br />
!<br />
Warning !<br />
If not adhered to the parts of this instruction for use, which are marked<br />
with the addition “Warning”, there is a great danger of property damages,<br />
physical damages or death.<br />
SAFETY WARNING<br />
Before attempting to use the underwater lamp, carefully read and<br />
adhere to these instructions for use.<br />
The use of the underwater lamp <strong>mega</strong> <strong>compact</strong> calls for the same amount of<br />
care and conscientiousness as is necessary in order to practice diving in a safe<br />
manner. If the instructions are not followed, there is a great danger of personal<br />
injury as well as injury to property (danger of explosion).<br />
© <strong>Hartenberger</strong> Unterwassertechnische Geräte GmbH Rights reserved for technical changes. Issue: 02.2005
!<br />
Instructions for use <strong>Hartenberger</strong> UW-lamp <strong>mega</strong> <strong>compact</strong> / <strong>mega</strong> <strong>compact</strong> D2 (HID)<br />
GUARANTEE<br />
When these instructions for use and the care and maintenance guidelines are<br />
adhered to, we will guarantee all mechanical parts made from steel, aluminium,<br />
glass and plastic for a period of 5 years against manufacturers defects and<br />
material failure. All electronic parts are guaranteed for a period of 2 years. The<br />
rechargeable cells have a guarantee against manufacturers defects and<br />
material failure for 6 months. If the accumulators are dealt with and handled<br />
correctly (see page 11), they are covered by our 2 year guarantee. Halogen<br />
bulbs and O-ring seals are expendable items and are therefore not covered by<br />
the guarantee. Any unauthorised work on the lamp, i.e. the removal or<br />
tightening of screws, or the removal of the guarantee seals, will make the<br />
guarantee invalid.<br />
APPLICATIONS<br />
The <strong>mega</strong> <strong>compact</strong> and <strong>mega</strong> <strong>compact</strong> D2 (HID) underwater lamps are for<br />
use in underwater lighting applications.<br />
Using the lamp in an environment other than water can lead to an<br />
overheating and consequently to a danger of explosion.<br />
In special cases please ask the manufacturer for release.<br />
© <strong>Hartenberger</strong> Unterwassertechnische Geräte GmbH Rights reserved for technical changes. Issue: 02.2005<br />
3
4<br />
Instructions for use <strong>Hartenberger</strong> UW-lamp <strong>mega</strong> <strong>compact</strong> / <strong>mega</strong> <strong>compact</strong> D2 (HID)<br />
ARTICLE DESCRIPTION<br />
HOUSING MEGA<br />
Abb. 1: housing<br />
A FRONT SEAL / FRONT GLASS PLATE<br />
The front glass plate with the 0-Ring is pressed into the housing during the<br />
assembly by the manufacturer. It can only be opened by an authorised<br />
workshop.<br />
B HOUSING / BODY (MEGA UND MEGA D2)<br />
The housing / body is sealed with the glass plate and the rear screw fitting.<br />
C D O-RINGS<br />
68 x 3,0 and 68x2,0 mm 50° hardness<br />
E PLUG-IN CONNECTION<br />
The plug in connection serves as an electrical and mechanical connection<br />
between the power pack and the electronic control panel.<br />
F REAR SCREW FITTING<br />
The rear screw fitting must be unscrewed to access the rechargeable cell<br />
pack for charging and/or to replace the halogen bulb.<br />
G REAR COVER<br />
The rear cover must be removed to allow the pressure switches to be<br />
cleaned (see page 23).<br />
H K BUTTON PAD (SWITCHES + AND -)<br />
The – (left) and + (right) switches select all the electronic controls and<br />
features.<br />
© <strong>Hartenberger</strong> Unterwassertechnische Geräte GmbH Rights reserved for technical changes. Issue: 02.2005
Instructions for use <strong>Hartenberger</strong> UW-lamp <strong>mega</strong> <strong>compact</strong> / <strong>mega</strong> <strong>compact</strong> D2 (HID)<br />
I TRANSPORT LOCK<br />
With the transport lock positioned to the right in the lock position, the +<br />
switch is deactivated preventing inadvertent use or activation.<br />
J LCD DISPLAY<br />
The LCD display shows the current programme mode, the state of charge of<br />
the cells, the current power setting and the resulting remaining burn time.<br />
The serial number, date of manufacture and more can also be viewed in the<br />
LCD Display<br />
L COVER SCREW<br />
The 4 cross head cover screws serve to secure the rear cover, the two<br />
switches and the transport lock.<br />
M HOLE FOR A LANYARD<br />
The hole in the handle provides an attachment point for a lanyard for better<br />
security during use and may prevent loss of the lamp.<br />
N HANDLE<br />
The handle provides a good hold on the lamp, even when wearing thick<br />
neoprene gloves or mittens. If required for video mounting, the handle can<br />
be drilled and an M8 thread cut for mounting to video rigs, (this feature is<br />
standard on the video models).<br />
POWER PACK MEGA<br />
R<br />
Abb. 2: power pack<br />
O<br />
Q<br />
N REFLECTOR MODULE<br />
The reflector module is located on the power pack or the gas discharge<br />
module. Flood for video / Spot for illumination.<br />
P<br />
© <strong>Hartenberger</strong> Unterwassertechnische Geräte GmbH Rights reserved for technical changes. Issue: 02.2005<br />
U<br />
D<br />
C<br />
N<br />
T<br />
S<br />
5
6<br />
Instructions for use <strong>Hartenberger</strong> UW-lamp <strong>mega</strong> <strong>compact</strong> / <strong>mega</strong> <strong>compact</strong> D2 (HID)<br />
CD SPARE O-RINGS<br />
Two spare O-rings for the rear screw fitting are stowed under the reflector<br />
module.<br />
P CHARGING SOCKET<br />
The plug from the charger is plugged into the charging socket for charging<br />
purposes.<br />
Q CELL PACK<br />
The cell pack is a plug-in unit and can be replaced within seconds with a<br />
second unit.<br />
R PLUG-IN CONNECTION<br />
The plug-in connection serves as an electrical and mechanical connection<br />
between the power pack and the electronic control panel.<br />
O HALOGEN BULB<br />
The halogen bulb is pushed into a standard socket (Type 6,35) and can<br />
easily be replaced.<br />
S D2 GAS DISCHARGE XENON BULB<br />
Curves of light as opposed to a glowing bulb produce a particularly efficient<br />
source of light.<br />
T GAS DISCHARGE ELECTRONICS<br />
Electronic module provides the necessary power conversion for gas<br />
discharge applications.<br />
U PLUG PINS<br />
The three plug pins have been designed so that a short circuit or false<br />
connection of the gas discharge electronics onto the cell pack is not<br />
possible.<br />
© <strong>Hartenberger</strong> Unterwassertechnische Geräte GmbH Rights reserved for technical changes. Issue: 02.2005
Instructions for use <strong>Hartenberger</strong> UW-lamp <strong>mega</strong> <strong>compact</strong> / <strong>mega</strong> <strong>compact</strong> D2 (HID)<br />
TECHNICAL SPECIFICATIONS<br />
APPROX. BURN TIME INCL. WARNING BLINKS IN MINUTES WITH NMH CELL<br />
PACK 14,4V / 4,5AH<br />
Halogen Bulb / D2 HID 30W 50W 100W* D2 35W**<br />
Time of use at 25% 390 260 120<br />
Time of use at 50% 210 130 60<br />
Time of use at 75% 150 95 40 90<br />
Time of use at 100% 110 65 30 70<br />
Time of use at 125% 80 48 22<br />
The heavily printed figures represent the burn times with the standard bulbs as<br />
delivered.<br />
Warning !<br />
* The nickel metal hydride cells are on the limit of their capabilities when<br />
used with a 100 watt halogen bulb. A reduced life expectancy can be<br />
expected.<br />
**discharge bulb 35W; the electronic module uses approx. 43Watts. The<br />
illumination is equivalent to a 100Watt halogen bulb.<br />
The burn time of a lamp is dependant upon water temperature, state of cell<br />
charge and the type of bulb.<br />
New NMH Cells only reach their full capacity after 2-3 charging cycles.<br />
The water temperature greatly affects the burn time. For example, in water<br />
temperatures of between 4 and 6 °C, (40 - 45 °F) the burn time will be at best<br />
90% of the stated capacity.<br />
An annual drop in capacity of 5%-10% is normal wear and tear.<br />
Halogen bulbs available in retail outlets often need up to 10% more power as<br />
stated. The stated burn times will therefore be shortened.<br />
DIMENSIONS/WEIGHT/PRESSURE PROOF<br />
Length & weight on weight in Resistance to<br />
Diameter land water water Pressure<br />
185mm x 89mm 1,6 kg 0,4 kg 100m<br />
<strong>mega</strong> <strong>compact</strong><br />
7” x 3½” 3 lbs 8 oz 14 oz 330 ft<br />
235mm x 89mm 1,9 kg 0,4 kg 100m<br />
<strong>mega</strong> <strong>compact</strong> D2<br />
10” x 3½” 4 lbs 10 oz 14 oz 330 ft<br />
FRONT GLASS PLATE<br />
The <strong>mega</strong> <strong>compact</strong> lamps have a tempered borosilicat-glass plate as standard.<br />
This glass plate has a temperature shock resistance of 300°C (570°F). It is<br />
therefore possible to use the lamps above and under water. A rapid cooling of a<br />
heated front glass is no problem (for example if used temporarily above water<br />
in order to orientate oneself on the surface of the water).<br />
© <strong>Hartenberger</strong> Unterwassertechnische Geräte GmbH Rights reserved for technical changes. Issue: 02.2005<br />
7
8<br />
Instructions for use <strong>Hartenberger</strong> UW-lamp <strong>mega</strong> <strong>compact</strong> / <strong>mega</strong> <strong>compact</strong> D2 (HID)<br />
REAR SCREW FITTING<br />
Abb. 3: Openning the screw fitting<br />
OPENING THE SCREW FITTING<br />
The housing is opened by unscrewing the fitting anti-clockwise, (thread length<br />
approx. 10 mm [3/8“]). Whilst opening the housing, it should be held in an<br />
upright position, thus preventing the power pack from inadvertently falling out.<br />
CLOSING THE HOUSING<br />
Before closing the housing, all threads, sealing surfaces and seals must be<br />
checked for integrity and cleanliness. Should the sealing surfaces and/or<br />
components be contaminated, then the O-rings and its groove should be<br />
thoroughly cleaned. Should the sealing surfaces and/or components be<br />
damaged, then all damaged parts should be replaced. If the O-ring is removed,<br />
care must be taken not to damage the groove in which the O-ring sits. A soft<br />
blunt tool should be used for the removal of the O-ring, i.e. a wooden tooth pick.<br />
Before the components are refitted it is recommended that a thin coating of<br />
silicone grease is applied as lubrication. It is recommended that after such work<br />
has been carried out, that the seal/integrity of the housing is first checked<br />
underwater without the power pack fitted. The housing is then closed by<br />
screwing the components clockwise together. The screw fitting should be<br />
tightened by hand only until the parts are mated together.<br />
© <strong>Hartenberger</strong> Unterwassertechnische Geräte GmbH Rights reserved for technical changes. Issue: 02.2005
Instructions for use <strong>Hartenberger</strong> UW-lamp <strong>mega</strong> <strong>compact</strong> / <strong>mega</strong> <strong>compact</strong> D2 (HID)<br />
POWER PACK<br />
Abb. 4: Removal of the power pack<br />
REMOVAL OF THE POWER PACK<br />
The power pack consists of the cell pack and the reflector. After unscrewing the<br />
housing from the rear screw fitting, the power pack can then be unplugged by<br />
simply pulling it away from the rear screw fitting. The 4 pins serve as a<br />
mechanical and electrical connection for the components. Warning! When<br />
using the gas discharge technology, first remove the gas discharge module<br />
from the power pack before removing the cellpack from the electronics. The<br />
assembly is the reverse procedure.<br />
REFITTING THE POWER PACK<br />
Hold the rear screw fitting with the pins pointing upwards. The power pack can<br />
then be plugged onto the fitting. Make sure that the locating pin (located next to<br />
one of the connecting pins), will be correctly located in the orifice of the power<br />
pack base. This ensures that the power pack cannot be incorrectly connected.<br />
REFLECTOR MODULE<br />
The reflector module can simply be pulled off the front end of the power pack<br />
(or gas discharge module). Caution must be taken to ensure that the reflector<br />
unit is not removed skew.<br />
This may result in damage to the halogen or gas discharge bulb. The 2 O-rings<br />
located on the reflector module can be used as spare O-rings for the housing<br />
(68mm x 3.0 mm and 68mm x 2.0mm).<br />
POWER PACK<br />
On the front end of the power pack there are 3 contact pins located for the plug<br />
on gas discharge module, the socket for the halogen bulb and two stowage<br />
housings for spare halogen bulbs. The charging socket is located behind an<br />
© <strong>Hartenberger</strong> Unterwassertechnische Geräte GmbH Rights reserved for technical changes. Issue: 02.2005<br />
9<br />
A
!<br />
10<br />
Instructions for use <strong>Hartenberger</strong> UW-lamp <strong>mega</strong> <strong>compact</strong> / <strong>mega</strong> <strong>compact</strong> D2 (HID)<br />
opening on the outside of the power pack. On the rear side of the power pack<br />
are the 4 contact plugs for the electronic module.<br />
SPARE HALOGEN BULB(S)<br />
Under the reflector module in the front of the power pack there are two stowage<br />
housings for spare halogen bulbs. These are accessed by turning open the<br />
heat protector shield (II).<br />
Danger to be seriously burned !<br />
After using the lamp, the reflektor module, the bulb and the heat<br />
protection shield remains hot for some time after the lamp has been<br />
turned off. The lamp should never be operated without the heat protector<br />
shield in the correct position.<br />
REMOVAL / REFITTING THE BULB<br />
Abb. 5: Removal/Refitting the bulb<br />
Do not touch the halogen bulb with your bare fingers. Residue on your fingers<br />
can remain on the glass during normal use may form carbon. This will reduce<br />
the efficiency of the bulb. Use a clean cloth or tissue to remove the bulb from<br />
the socket. When refitting or replacing the bulb, ensure that it is located all the<br />
way into the socket. To produce an even illumination, it is imperative to ensure<br />
that the bulb sits upright in the socket. Assemble the lamp and check for correct<br />
operation. The xenon gas discharge bulb should only be replaced by the<br />
manufacturer. Self assembly is possible but voids the warranty.<br />
© <strong>Hartenberger</strong> Unterwassertechnische Geräte GmbH Rights reserved for technical changes. Issue: 02.2005<br />
I<br />
II
!<br />
!<br />
Instructions for use <strong>Hartenberger</strong> UW-lamp <strong>mega</strong> <strong>compact</strong> / <strong>mega</strong> <strong>compact</strong> D2 (HID)<br />
PREPARATION FOR USE<br />
BEFORE THE LAMP IS USED FOR THE FIRST TIME<br />
Before the first use, the cells must be charged (see page 17). <strong>Hartenberger</strong><br />
underwater lamps are manufactured to a high degree of precision and each<br />
lamp is tested to a water pressure of 10 bars. The condition of the lamp and in<br />
particular the housing and sealing rings should however be checked before the<br />
first use (see page 8).<br />
Warning !<br />
Due to damage during transportation or hidden material defects, leakage<br />
can occur (not the fault of the manufacturer). To check if the housing is<br />
pressure tight, the first dive should be carried out without the housing<br />
insert, i.e. empty.<br />
BEFORE EACH USE<br />
The rechargeable NMH cells will slowly discharge naturally when not in use,<br />
(depending on the ambient temperature up to 60 % discharge in one month!).<br />
We recommend therefore that the cells are charged one day before each<br />
use.<br />
Before each use, the front threads, sealing surfaces and O-ring must be<br />
checked for integrity and cleanliness. (See Closing the housing, page 8). If the<br />
bulb has been removed for transport, it should be refitted into the socket. Refit<br />
the halogen bulb in the socket or the gas discharge module in the sockets,<br />
which may have been removed for transportation. Only release the transport<br />
lock to the unlocked position immediately before use. (See page 17).<br />
USING THE UNDERWATER LAMP<br />
Warning !<br />
Water inside the housing (especially sea water) can have fatal<br />
consequences after some reaction time. Therefore, during the use of the<br />
lamp please check repeatedly, whether water has found its way inside. Do<br />
this by holding the lamp on the slant pointing down, thus the ray of light<br />
pointing away from the body. Then look at the front glass from the side.<br />
If there is water inside the housing, bring the dive to an end by following<br />
the diving rules and open the housing as soon as possible (see page 22).<br />
SWITCH UNIT<br />
The switch electronics and the power pack are both controlled by<br />
microprocessors. This provides a large range of features and functions. A large<br />
emphasis has been placed on simply, user-friendly intuitive operation. The<br />
entire electronics are controlled via two switches, left minus (-) and right<br />
plus (+).<br />
PROGRAMME MODE<br />
To operate the lamp, individual preferences can be selected in different<br />
programmes (except for use with D2 gas discharge module).The programme<br />
set appears in the top right hand corned of the display when both switches are<br />
pressed simultaneously. (A, B, C, or T). If both switches (+/-) remain pressed,<br />
the programme will change approx. every 3 seconds to the next programme,<br />
(A, B, C, T, A, B, C, T,...). Releasing the switches will store the last displayed<br />
programme in the power pack. After replacing a power pack, the stored<br />
programme will be activated.<br />
© <strong>Hartenberger</strong> Unterwassertechnische Geräte GmbH Rights reserved for technical changes. Issue: 02.2005<br />
11
12<br />
Instructions for use <strong>Hartenberger</strong> UW-lamp <strong>mega</strong> <strong>compact</strong> / <strong>mega</strong> <strong>compact</strong> D2 (HID)<br />
Program A: Lamp only ON/OFF<br />
Program B: Lamp dimmer in 5 stages of 25% from 25% to 125%<br />
Program C: Lamp dimmer infinitely variable in 5% steps from 25% to 125%<br />
Program T: Lamp is only ON as long as the switches are pressed<br />
DESCRIPTION OF THE SWITCH UNIT<br />
Program A:<br />
By pressing the plus (+) switch, the lamp is turned on to 125% power. The<br />
minus (–) switch turns the lamp off.<br />
Program B:<br />
Each time the + switch is pressed for approx. ½ second, the lamp power will<br />
increase 25%. The – switch operates in the same way to reduce the power<br />
25%. When the lamp has reached the maximum or minimum power setting and<br />
the switch is pressed again, the lamp will blink once to show that the end of the<br />
scale has been reached. If the + switch is pressed for approx. 1 second, the<br />
lamp is turned on to its max. (125%) power setting. The – switch pressed for<br />
approx. 1 second will turn the lamp off.<br />
Program C:<br />
If the + switch is pressed continuously, the lamp will increase the power (in 5%<br />
steps) until the maximum power is reached (125%) when the lamp will blink<br />
once. Pressing the – switch continuously will reduce the power in 5% steps to<br />
the minimum power setting of 25% when the lamp will blink once.<br />
If the – switch is pressed for only approx. ½ second, the lamp will turn off.<br />
Pressing the + switch for only approx. ½ second will turn the lamp on to its last<br />
power setting.<br />
Programm T:<br />
In programme T, the lamp stays on as long as the + switch is pressed for<br />
sending Morse signals. The power is 125%.<br />
Program D2 Gas discharge module<br />
The micro processors immediately recognise that the gas discharge module is<br />
in place. No manual adjustment is necessary. Pressing the + switch will activate<br />
the electronics to 100% power. Thanks to a special technology, the gas<br />
discharge xenon bulb, which normally cannot be dimmed, can be operated at<br />
75% power. If the – switch is pressed for only approx. ½ second, the lamp will<br />
switch over to 75% power setting. Pressing the – switch again for only approx.<br />
½ second will turn the light off. If the – switch is pressed long for approx. 1<br />
second, the light will turn off from the 100% power setting. A feature of the gas<br />
discharge technology is the long warm up phase. In the first 45 seconds of<br />
operations the gas discharge bulb needs approx. 80% more power than when it<br />
has reached its working temperature. For this reason, it is recommended to use<br />
the gas discharge technology for continued operation. Constantly turning the<br />
lamp on and off will also reduce the life expectancy of the bulb.<br />
DIGITAL DISPLAY<br />
The percentage power setting of the halogen bulb is shown in the top line of the<br />
display. The resulting remaining burn time at this setting is shown in minutes in<br />
the lower line of the display. The remaining burn time can vary up to 1 or 2<br />
minutes due to technological reasons. Despite the prognosed remaining burn<br />
time being calculated with a high degree of technological data, the time shown<br />
may vary within a few minutes. When using the gas discharge module, the<br />
© <strong>Hartenberger</strong> Unterwassertechnische Geräte GmbH Rights reserved for technical changes. Issue: 02.2005
!<br />
!<br />
!<br />
!<br />
Instructions for use <strong>Hartenberger</strong> UW-lamp <strong>mega</strong> <strong>compact</strong> / <strong>mega</strong> <strong>compact</strong> D2 (HID)<br />
warm up phase produces high variances in the remaining burn time due to the<br />
high power drain. The remaining burn time is extended as the power drain<br />
reduces. For this reason, the remaining burn time display blinks during the<br />
warm up phase then using the gas discharge module. When the lamp is turned<br />
off, there is only a display in the bottom line which shows the charge state of<br />
the cells in %. The background display lighting is deactivated 15 minutes after<br />
the lamp is turned off. The display can be activated by pressing either the + or<br />
the – switch.<br />
LOW LEVEL CAPACITY WARNING<br />
When the lamp blinks 3 times, the user is warned of the immanent end of the<br />
burn time of the lamp. When the lamp is being used with the standard 50 watt<br />
halogen bulb at 125% power, this will be approximately 3 minutes after the 3<br />
blinks. If applicable, you should abort the dive as fast as possible and turn the<br />
lamp off (reduce the power setting).<br />
Further use of the lamp will cause increase the wear and tear on the cells.<br />
DISCHARGE WARNING<br />
Warning !<br />
At the latest, the lamp should be turned off and no longer operated when<br />
it starts to blink continuously. Further use of the lamp will damage the<br />
cells and should only be practised in an emergency.<br />
The duration of blinking with the standard halogen bulb set at 100% power is<br />
approx. 1-2 minutes. If the lamp is switched over to 25% power, then approx. 3<br />
minutes of continuous light is available. After this, the light will go into a blinking<br />
mode once again.<br />
DISCHARGE PROTECTION<br />
Warning !<br />
The discharge protection will turn shut down the lamp after the<br />
continuous blinking. In the case of an emergency where light is<br />
necessary, the lamp (if possible after a short pause) can be reactivated<br />
and will automatically turn on at 25% power setting. The cells are almost<br />
certainly damaged should this mode of operation be selected.<br />
EMERGENCY MODE<br />
Under certain unforeseeable circumstances such as extended periods of<br />
storage, high levels of self discharge or ageing of the cells, there can be a<br />
discrepancy between the remaining burn time in the display and the actual<br />
remaining burn time. In this case, the electronics will immediately recognise the<br />
imminent end of the burn time and that the display is showing an incorrect<br />
value. When the lamp is being used with a standard halogen bulb, the user will<br />
be warned by the lamp blinking 6 times and subsequently automatically<br />
switching over to 25% power. The remaining burn time is approx. 2 minutes.<br />
The display blinks continuously until the lamp is turned off. In gas discharge<br />
operation, the lamp blinks 6 times and the power is reduced to 75%. The<br />
remaining burn time is approx. 1 minute, after which the lamp will turn off<br />
automatically.<br />
After the lamp has operated in emergency mode, a reference cycle is<br />
recommended (see page 15). During this cycle the lamp can calculate the<br />
actual cell capacity and calibrate the remaining burn times.<br />
© <strong>Hartenberger</strong> Unterwassertechnische Geräte GmbH Rights reserved for technical changes. Issue: 02.2005<br />
13
14<br />
Instructions for use <strong>Hartenberger</strong> UW-lamp <strong>mega</strong> <strong>compact</strong> / <strong>mega</strong> <strong>compact</strong> D2 (HID)<br />
WARNINGS<br />
100%<br />
25%<br />
100%<br />
25%<br />
Gebrauch im Normalbetrieb<br />
A B C D<br />
A<br />
Gebrauch mit Notfallmodus<br />
I J<br />
© <strong>Hartenberger</strong> Unterwassertechnische Geräte GmbH Rights reserved for technical changes. Issue: 02.2005<br />
E<br />
G F G<br />
E<br />
F G<br />
A Use with normal brightness setting<br />
B Low charge warning, 3 flashes<br />
C Remaining burn time approx. 3 minutes<br />
D Low discharge protection warning with continuous flashing<br />
E Lamp shuts down in discharge protection mode<br />
F Lamp may be turned back on to 25% brightness setting<br />
G Continuous flashing<br />
H Lamp shuts down<br />
I Emergency mode signalled with 6 flashes<br />
J Remaining burn time approx. 1 minute<br />
RECALL MODE<br />
The micro processors in the switch electronic and the power pack correspond<br />
and exchange data with each other to allow a variety of functions and data<br />
storage. Some of this data can be recalled via the switches and shown in the<br />
display. The recall is then made by depressing the – switch and keeping it<br />
pressed. After approx. 4 seconds, the display will appear with all numbers as O.<br />
(ready for commands) While the left – switch is kept depressed, short actuation<br />
of the right + switch will call up the following data each one after the other:<br />
Command 1st line 2nd line<br />
1 Digit serial number 1xx xxx Num<br />
2 Date of manufacture 2 MM.J<br />
3 Manual set up of cell status to 100% 3 100 %<br />
4 Reference cycle for cell capacity 4 rEF<br />
5 Actual temperature 5 xx °C<br />
H<br />
H<br />
t<br />
t
!<br />
Instructions for use <strong>Hartenberger</strong> UW-lamp <strong>mega</strong> <strong>compact</strong> / <strong>mega</strong> <strong>compact</strong> D2 (HID)<br />
6 Max. Temperature value 6 xx °C<br />
7 No of charge cycles (every connection) 7 xxx Num<br />
8 No of full charges above 90% 8 xxx Num<br />
9 No of discharges to continuous blinking (0%) 9 xxx Num<br />
10 No of discharges up to shut down 10 xxx Num<br />
11 No of reactivations after shut down 11 xxx Num<br />
12 Total duration of use 12 xxx Std.<br />
13 Maximum charging current 13 xx.x A<br />
EXTENSION OF THE WARRANTY<br />
The current EEC regulations call for a 6 month warranty of rechargeable cells.<br />
If the cells in your lamp are handled with care the average life expectancy is<br />
4 - 6 years or 300 – 500 charge/discharge cycles. Incorrect handling of the cells<br />
will shorten this life expectancy drastically. The data stored in the electronics<br />
serves as a reference and can be analysed in the interest of the consumer to<br />
extend the warranty. Should the power pack fail within 2 years after purchase,<br />
and the data in the memory shows correct handling of the cells, a warranty<br />
repair or a fair offer will be made.<br />
DISPLAY CORRECTION<br />
If the display does not show 100% charge status after a correct charging cycle<br />
(charger has turned itself off and the cells are warm), then a re-calibration of<br />
the state of charge display is recommended to establish a 100% state of charge<br />
in the display. In the previous section of data recall, the 3rd recall function is the<br />
100% manual reset in the display. When the left – switch is released during this<br />
function in the display, the charge status will automatically be set to 100%.<br />
REFERENCE CYCLE<br />
After numerous charge/discharge cycles or extended periods of storage, it is<br />
possible that the remaining burn time in the display does not correspond to the<br />
actual remaining burn time. At the latest when the lamp goes into emergency<br />
mode (as previously described), a reference cycle should be carried out. The<br />
lamp must be fully charged and fitted with a 50 Watt halogen bulb. Remove the<br />
unit from the housing. The recall mode is then selected by pressing the left –<br />
switch and then pressing the right + switch until „rEF“ appears in the display<br />
(recall function no 4). Release the left – switch. In this moment, the lamp will<br />
turn on to 125%. Stand the lamp on its rear end until it turns itself off (after<br />
approx. 50 minutes). Do not touch any other switches.<br />
Warning !<br />
During this cycle when the lamp is standing on its end, a great deal of<br />
heat will be dissipated from the bulb.<br />
Caution is to be exercised. After the lamp has turned itself off, the correction<br />
factor will appear in the display which is then used for future remaining burning<br />
time calculation so that future values in the display will be as accurate as<br />
possible.<br />
SOS-EMERGENCY SIGNAL (NOT POSSIBLE WHEN USING THE D2 GAS<br />
DISCHARGE BULB)<br />
The electronic provides the facility to send an emergency signal SOS according<br />
to the Morse alphabet (3 x short, 3 x long, 3 x short). This is activated by<br />
pressing the + switch so long that the maximum power is selected, then<br />
© <strong>Hartenberger</strong> Unterwassertechnische Geräte GmbH Rights reserved for technical changes. Issue: 02.2005<br />
15
16<br />
Instructions for use <strong>Hartenberger</strong> UW-lamp <strong>mega</strong> <strong>compact</strong> / <strong>mega</strong> <strong>compact</strong> D2 (HID)<br />
keeping the + switch pressed for a further 4 seconds. After the SOS feature is<br />
selected, lamps in the B or C mode can adjust the power of the signal using the<br />
+/ - switches. The remaining duration of the emergency signal is shown in the<br />
display and is approx. 2-3 times longer than the continuous use remaining burn<br />
time of the halogen lamp being used. When the power pack is almost<br />
completely discharged, the brightness will be reduced. To deactivate the SOS<br />
signal, press the – switch for approx. 3 seconds. To initiate a pause in the SOS<br />
signal, both switches +/ - are pressed together. A short press of the + switch<br />
will reactivate the SOS mode to the previous setting.<br />
This feature should only be used in an emergency. Should you require the<br />
SOS distress signal in an emergency, we recommend that the signal is<br />
turned off when the intensity of the flashing reduces, and to turn the SOS<br />
signal back on should help be sighted.<br />
OVER-VOLTAGE / DIMMER<br />
The HLX bulbs which we use have a much greater efficiency than standard<br />
halogen bulbs. Using a 12 cell power pack, we have a power supply of 14,4<br />
volts. This allows the 12v bulb to be operated continually with an over-voltage<br />
of approx. 12,8 volts. The electronics switch the bulb on slowly thus preventing<br />
the coil in the bulb from burning out. The resulting increase in brightness is<br />
approx. 30% more than the stated power. The micro controller can accurately<br />
monitor the energy disserpation to the bulb and ensures a continuous colour<br />
temperature over the entire discharge process and operation. The life<br />
expectancy of the bulb of approx. 100 hours is reduced because of the overvoltage<br />
to approx. 70 hours. Using the lamp at reduced power settings saves<br />
energy and extends the burning time in a single charge cycle. Permanently<br />
operating the lamp at reduced power settings will however produce a grey<br />
coating on the bulb’s glass. If reduced brightness is required on an extended<br />
basis, then a lower power halogen bulb is recommended.<br />
GAS DISCHARGE MODULE D2<br />
In addition to the standard halogen bulb, the <strong>mega</strong> <strong>compact</strong> can also be used<br />
with a gas discharge xenon bulb. After removing the reflector and the halogen<br />
bulb, the gas discharge module (including electronic control and xenon bulb)<br />
can be plugged into the front of the power pack. The 3 contact pins prevent<br />
cross poling. The reflector is then fitted to the gas discharge module. For use<br />
with the gas discharge module, a 5,5 cm (2”) housing extension is required.<br />
The brightness of the 35 watt gas discharge xenon bulb is approx. equivalent to<br />
a 100 watt halogen bulb. The power drain of the gas discharge xenon bulb<br />
including the ignition and transformer is less than that of a 50 watt halogen<br />
bulb. The 4500° Kelvin colour temperature of the gas discharge xenon bulb is<br />
however much bluer than the warm 3600° Kelvin temperature of the halogen<br />
bulb. The ideal applications for gas discharge technology include industrial<br />
applications, cave diving, etc. A “holiday diver” will almost certainly miss the red<br />
spectrum of the gas discharge light. The gas discharge bulb allows operation<br />
with 100% and 75% of the available power. Further dimming is not technically<br />
possible. After turning the xenon bulb on, it takes about 45 seconds to reach its<br />
full brightness. During this so called ignition and warm up phase, the power<br />
drain is much higher than when the bulb has reached its working temperature.<br />
Although the electronics allow the lamp to be switched off and then immediately<br />
afterwards switched back on, it is recommended to leave the lamp on for the<br />
entire duration of the dive. The life expectancy is approx. 2000 hours although<br />
© <strong>Hartenberger</strong> Unterwassertechnische Geräte GmbH Rights reserved for technical changes. Issue: 02.2005
!<br />
!<br />
!<br />
!<br />
Instructions for use <strong>Hartenberger</strong> UW-lamp <strong>mega</strong> <strong>compact</strong> / <strong>mega</strong> <strong>compact</strong> D2 (HID)<br />
this will be drastically reduced when the lamp is frequently switched on and off.<br />
The SOS emergency signal mode is not possible with the xenon gas discharge<br />
module.<br />
AFTER EACH USE<br />
After use, the lamp must be thoroughly rinsed in clean fresh water. During the<br />
rinsing, the switches must be frequently operated to ensure contamination (salt<br />
water and/or sediment) is rinsed out of the mechanism.<br />
The cells should be charged as soon as possible after use.<br />
Warning!<br />
Check the lamp immediately after the dive for evidence of a possible<br />
flooding of the housing. Should the housing have flooded then refer to<br />
the problem diagnosis on page 22.<br />
TRANSPORT<br />
TRANSPORT LOCK<br />
During transport, the + switch must be secured against inadvertent<br />
operation. For this purpose, the transport lock is moved to the right into<br />
the “lock” position. The + switch should now not be able to be pressed.<br />
(Please check!).<br />
Warning!<br />
During extended unattended periods of transportation, we recommend<br />
removing the halogen bulb from the socket.<br />
The gas discharge module can be re-plugged onto the cell pack after<br />
approx. 160° rotation, thus preventing it from being activated. Caution: In<br />
this configuration, one of the plugs is located in one of the halogen bulb<br />
stowage housings, danger of breaking glass.<br />
STORAGE<br />
The lamp should be stored in a fully charged condition with the housing closed<br />
securely. An ideal storage temperature is between 15 and 25°C, (60 and 75°F).<br />
Under no circumstances should the lamp be subjected to temperatures above<br />
45°C (110°F). The rechargeable cells will slowly discharge when not in use,<br />
(depending on the ambient temperature up to 60% discharge in one month!).<br />
We recommend therefore that the cells be charged approximately once a<br />
month when the lamp is not in use. Do not keep connected the charger<br />
permanently with the cells in the trickle charge mode. For extended periods<br />
of storage, the power pack should be removed from the housing and stored<br />
separately in a suitable cool dry place, (see preparation for charging page 18).<br />
Regularly check the cells for signs of corrosion or gas leakage, (the<br />
protective skin showing signs of bubbling, floury or white residue<br />
between the cells or in the housing, corrosion around the charging<br />
socket). Should you discover signs of leakage or corrosion, return the<br />
lamp immediately to the manufacturer.<br />
CHARGING<br />
INTRODUCTION IN THE CHARGING OF NICKEL METAL HYDRIDE CELLS<br />
Nickel Metal Hydride (NMH) cells are generally described as being gas tight<br />
cells. The position of the cells during the charging process is therefore<br />
irrelevant as no electrolyte can escape. There is however no supplier of cells<br />
that will guarantee this feature for the entire life of the cells! During the charging<br />
or discharging process, the NMH cells may produce and over pressure inside,<br />
opening the integrated over pressure relief valve. Should this occur, the<br />
© <strong>Hartenberger</strong> Unterwassertechnische Geräte GmbH Rights reserved for technical changes. Issue: 02.2005<br />
17
!<br />
!<br />
18<br />
Instructions for use <strong>Hartenberger</strong> UW-lamp <strong>mega</strong> <strong>compact</strong> / <strong>mega</strong> <strong>compact</strong> D2 (HID)<br />
electrolyte, or Hydrogen can escape from the cells. Because the electrolyte is a<br />
very aggressive acid, and additionally conducts electricity, this may lead to the<br />
galvanic corrosion of the cells, and a destruction as a result of the contact with<br />
the acid. The escaping hydrogen can combine with oxygen in the air and form a<br />
highly explosive gas. A single cell the size of a standard D cell battery can<br />
produce up to 25 litres, (1 cu ft) of gas! It is for this reason that nickel metal<br />
hydride cells should always be removed form a housing before they are<br />
recharged. Only then is the safe use and longest possible life of the cells<br />
guaranteed.<br />
MEMORY EFFECT<br />
The so called Memory Effect is the common term for the reduction in the<br />
capacity of the cells as a result of charging the cells in a partially discharged<br />
condition. (e.g. a wireless telephone hand set has a battery life of 24 hours, but<br />
is replaced on the station and therefore charged after 3 hours). The common<br />
technique for overcoming this is to fully discharge the cells before charging. We<br />
regard this as being more harmful for underwater lamps with 10 cells. The<br />
constant discharge down to the cut-off voltage limit can overload individual cells<br />
and disrupt the balance within the matched cell pack. This may result in an<br />
individual cell “dropping out“. We recommend that for every 10 to 20 cycles<br />
where the cells are partially discharged, that the lamp is fully discharged until<br />
the Low Level Capacity Warning (when the lamp blinks 3 times). The more<br />
often the cells are taken to their maximum capacity, the higher the strain on the<br />
individual cells. NMH cells are considerably less sensitive to this memory effect<br />
than Nickel Cadmium cells.<br />
PREPARATION FOR CHARGING<br />
For the charging procedure you will need a clean, dry working area with a<br />
mains socket nearby. Charge the cells in an environment which is as dry<br />
and clean as possible, with a resistant work surface. (Sealed cells can<br />
also leak under poor conditions).<br />
The ambient temperature should not exceed 45°C (110°F). The power pack<br />
must be removed for charging. (See page 9). If the area to be used for charging<br />
is contaminated with dust or dirt, then we recommend that the cell pack should<br />
be removed from the rear screw fitting, and that the housing is subsequently<br />
closed protecting the O-rings and the sealing surfaces which would otherwise<br />
be exposed to possibly contamination. Stand the power pack in an upright<br />
position with the reflector down. This will avoid the collection of dirt and/or dust<br />
on the reflector and halogen bulb. The charging socket is located on the side of<br />
the power pack unit.<br />
When using the gas discharge technology, first remove the gas discharge<br />
module from the power pack before removing the cell pack from the electronics.<br />
The assembly is the reverse procedure.<br />
THE USE OF GENERIC CHARGERS<br />
Warning !<br />
Chargers other than those supplied by <strong>Hartenberger</strong> for use with this<br />
lamp must be checked by a qualified electrician for compatibility before<br />
attempting to use them. The guarantee will be lost due to improper use.<br />
Improper use may lead to the leakage of electrolyte and/or hydrogen gas.<br />
The guarantee will be lost due to improper use.<br />
© <strong>Hartenberger</strong> Unterwassertechnische Geräte GmbH Rights reserved for technical changes. Issue: 02.2005
!<br />
Instructions for use <strong>Hartenberger</strong> UW-lamp <strong>mega</strong> <strong>compact</strong> / <strong>mega</strong> <strong>compact</strong> D2 (HID)<br />
CHARGER OFF-SHORE I/12<br />
This charger utilises the latest in electronic charger technology with a wide<br />
range input voltage (100v - 250v) with frequencies of between 45 - 65 Hz.<br />
(There is no need to manually select the input voltage). All <strong>Hartenberger</strong> power<br />
packs with 10 and 12 cells (Nickel Cadmium or Nickel Metal Hydride) will be<br />
automatically recognised by the charger, and charged as fast as possible.<br />
The charging current can reach 1,0 amps.<br />
Charging time approx. 5 hrs.<br />
The charger cable should first be plugged into the charging socket. The charger<br />
is activated by plugging it into the mains supply. (There are adapters for the<br />
most common types of mains plugs which can be easily slotted onto the<br />
charger). All the functions of the charger are monitored via a LED.<br />
Signal from the LED:<br />
Red Input voltage is present, the charger isfunctioning properly.<br />
Blinks Red The cells are fully charged and maintained with a trickle<br />
charge.<br />
Blinks Red fast The cells are fully discharged (starting regeneration).<br />
Out No mains voltage present.<br />
Do not use overdue force when fitting the plug into the socket. Avoid any<br />
chance of short circuiting the contacts of the plug or the power pack. The<br />
charger has an integrated mechanism protecting it against overheating and<br />
large fluctuations in mains voltage. Should the protection cut in, the charging<br />
process will be interrupted. After the mains plug has been removed from the<br />
mains socket for a few minutes, the charger will then be ready for use again.<br />
Care must be taken to achieve adequate cooling in extreme environments.<br />
Warning!<br />
Do not operate the lamp immediately after the charging cycle is<br />
completed.<br />
Do not point the lamp at yourself or in the direction of other persons.<br />
© <strong>Hartenberger</strong> Unterwassertechnische Geräte GmbH Rights reserved for technical changes. Issue: 02.2005<br />
19
!<br />
20<br />
Instructions for use <strong>Hartenberger</strong> UW-lamp <strong>mega</strong> <strong>compact</strong> / <strong>mega</strong> <strong>compact</strong> D2 (HID)<br />
CHARGER OFF-SHORE II<br />
This charger utilises the latest in electronic charger technology with a wide<br />
range input voltage (110v - 250v) with frequencies of between 45 - 65 Hz.<br />
(There is no need to manually select the input voltage). All <strong>Hartenberger</strong> power<br />
packs with between 5 and 12 cells will be automatically recognised by the<br />
charger, and charged as fast as possible.<br />
The charging current can reach 1,8 amps.<br />
Charging time approx. 5 hrs<br />
The charger is activated by plugging it into the mains supply.<br />
The function of the charger is monitored via 2 light emitting diodes (LEDs) with<br />
varying colours and flashes.<br />
LED I :<br />
Green Input voltage is present, the charger is functioning properly.<br />
Red Input voltage is present, the charger is overloaded or defective.<br />
Out No input voltage present.<br />
The charger cable should now be plugged into the charging socket in the power<br />
pack. Do not use overdue force when fitting the plug into the socket. Avoid any<br />
chance of short circuiting the contacts of the plug or the power pack.<br />
LED II :<br />
Red No Cells are connected (interruption).<br />
Green blinking Rapid charge up to approx. 95% of capacity.<br />
Green Trickle charge with a reduced current.<br />
Out Maintenance charge, Cells are fully charged.<br />
All the functions of the charger are monitored by a controller in the charger.<br />
This monitoring has a time lag when the function of the charger changes, and<br />
may lead to a slight delay in the LED’s reacting, (1-5 seconds). The charger<br />
has an integrated mechanism protecting it against overheating and large<br />
fluctuations in mains voltage (LED I turns red). Should the protection cut in, the<br />
charging process will be interrupted. After the mains plug has been removed<br />
from the mains socket for a few minutes, the charger will then be ready for use<br />
again. Care must be taken to achieve adequate cooling in extreme<br />
environments.<br />
Warning!<br />
Do not operate the lamp immediately after the charging cycle is<br />
completed.<br />
Do not point the lamp at yourself or in the direction of other persons.<br />
© <strong>Hartenberger</strong> Unterwassertechnische Geräte GmbH Rights reserved for technical changes. Issue: 02.2005
Instructions for use <strong>Hartenberger</strong> UW-lamp <strong>mega</strong> <strong>compact</strong> / <strong>mega</strong> <strong>compact</strong> D2 (HID)<br />
CARE AND MAINTENANCE<br />
HOUSING<br />
We recommend that from time to time the housing surface is impregnated with<br />
silicone. The chance of calcium depositing on the surface of the lamp is<br />
reduced and the scratch resistance properties of the housing surface are also<br />
improved. (Action to be taken, Interval, By Owner, Workshop)<br />
Action to be taken Interval By Owner Workshop<br />
Impregnate Housing surface<br />
After repeated use<br />
After several dives X<br />
Visual inspection of the rear<br />
screw fitting O-Rings, clean<br />
and lubricate as necessary<br />
Thoroughly rinse and clean<br />
pressure switches with fresh<br />
water<br />
Replace rear screw fitting O-<br />
Rings<br />
After the housing is<br />
opened<br />
© <strong>Hartenberger</strong> Unterwassertechnische Geräte GmbH Rights reserved for technical changes. Issue: 02.2005<br />
X<br />
After each dive X<br />
annually or after 100<br />
dives, which ever comes<br />
first<br />
Replace Front Glass O-Ring 4-5 years X<br />
Replace Halogen Bulb<br />
Replace HID Bulb<br />
Replace NMH Cell Pack<br />
Life expectancy approx.<br />
100 hours<br />
Life expectancy approx.<br />
2000 hours.<br />
Life expectancy up to<br />
approx. 500 charging<br />
cycles<br />
RECORD OF DATES WHEN MAINTENANCE WORK WAS CARRIED OUT<br />
Rear screw fitting<br />
O-Rings replaced<br />
Notes/Comments:<br />
Front Glass O-Ring<br />
replaced<br />
LCD Display O-Ring<br />
replaced<br />
X<br />
X<br />
X<br />
X<br />
Halogen Bulb<br />
replaced<br />
21
!<br />
22<br />
Instructions for use <strong>Hartenberger</strong> UW-lamp <strong>mega</strong> <strong>compact</strong> / <strong>mega</strong> <strong>compact</strong> D2 (HID)<br />
FAULT DIAGNOSIS<br />
Problem Cause Action to be taken<br />
Water enters the Defective or contaminated * Abort the dive as soon as is<br />
housing:<br />
O-Ring.<br />
safely possibly. Open the lamp.<br />
1. A few drops are<br />
1. Dry the lamp and power pack<br />
present.<br />
with a clean cloth.<br />
2. Housing is flooded<br />
2. Dry the power pack and re-<br />
with fresh water.<br />
turn it to the manufacturer<br />
3. Housing is flooded<br />
3. Rinse the lamp and power<br />
with Saltwater.<br />
pack with ample fresh water<br />
and return the lamp to the<br />
manufacturer.<br />
Switches sticking Sand or salt residue in the<br />
mechanism<br />
Clean the switches (see below)<br />
Lamp does not 1. Cells are discharged 1. Charge cells<br />
illuminate.<br />
2. Bulb is defective 2. Replace halogen bulb<br />
Gas discharge (HID) 1. Cells are discharged 1. Charge cells<br />
lamp does not switch 2. Bulb is defective 2. Test the lamp with halogen<br />
on<br />
bulb. If lamp works, D2 gas<br />
discharge lamp or ignition is<br />
defective, return to<br />
manufacturer.<br />
Housing screw 1. Housing cover<br />
1. Clean and lubricate housing<br />
covers are hard to threads/O-rings are covers and/or O-rings<br />
unscrew<br />
contaminated<br />
2. Threads damaged 2. Return lamp to manufacturer<br />
LED does not 1. No Mains.<br />
1. Check mains supply<br />
illuminate.<br />
2. Charging cable not<br />
plugged in.<br />
2. Plug in charging cable.<br />
3. Bad contact on<br />
charging plug.<br />
3. Check charging plug security<br />
* Attention! Danger of explosion!<br />
If water got into the housing, it is possible that in the cause of oxidation<br />
the interior pressure is increased to a dangerous extent. If the rear screw<br />
fitting cannot be opened, unscrew the rear cover of the +/- switches.<br />
Puncture the O-ring of the LCD display with a needle or a small<br />
screwdriver and allow excess pressure to escape.<br />
Never look directly into the LCD display / front glass! If the increase in<br />
pressure is too high, they can come flying out explosively.<br />
© <strong>Hartenberger</strong> Unterwassertechnische Geräte GmbH Rights reserved for technical changes. Issue: 02.2005
Instructions for use <strong>Hartenberger</strong> UW-lamp <strong>mega</strong> <strong>compact</strong> / <strong>mega</strong> <strong>compact</strong> D2 (HID)<br />
CLEANING THE SWITCHES<br />
J<br />
K<br />
Abb. 6: switches<br />
CLEANING THE SWITCHES<br />
If the switches start to stick, they must be cleaned by rinsing the lamp under<br />
fresh clean water for an extended period. Operate the switches under running<br />
water to restore the correct function. If this is not successful, the switches must<br />
be removed by removing the entire rear cover. This work can be carried out by<br />
a technially trained lay person. Unscrew the 4 cross head screws and carefully<br />
remove the rear cover. The 2 switches and the transport lock can now be<br />
removed together with their springs which are located underneath. Sand<br />
granulkes and salt crystals can be removed by rinsing the switches. Assemble<br />
in the reverse order. Grease the screws with silicone grease and refit them<br />
tightening them good hand tight.<br />
© <strong>Hartenberger</strong> Unterwassertechnische Geräte GmbH Rights reserved for technical changes. Issue: 02.2005<br />
F<br />
H<br />
G<br />
23
24<br />
Instructions for use <strong>Hartenberger</strong> UW-lamp <strong>mega</strong> <strong>compact</strong> / <strong>mega</strong> <strong>compact</strong> D2 (HID)<br />
SPARE PARTS<br />
O-Ring Dimensions Elasticity Material<br />
Glass 68 x 3,0 50° shore Härte Viton blue<br />
Window LCD 56 x 3,0 50° shore Härte Viton blue<br />
Screw Fitting 68 x 3,0 50° shore Härte Viton blue<br />
Screw Fitting 68 x 2,0 50° shore Härte Viton blue<br />
Reflector unit 68 x 3,0 50° shore Härte Viton blue<br />
Reflector unit 68 x 2,0 50° shore Härte Viton blue<br />
Heat protection shield 20 x 2,0 50° shore Härte Viton red<br />
Bulb Power Output Socket Lifetime (hours)<br />
Halogen Bulb HLX 30W G 6,35 ca. 100<br />
Halogen Bulb HLX 50W G 6,35 ca. 100<br />
Halogen Bulb HLX 100W G 6,35 ca. 100<br />
D2 Xenon Gas (HID) 35W special D2 ca. 2000<br />
ACCESSORIES<br />
NEOPRENE SLEEVES<br />
Neoprene sleeves for the housing offer protection and a reduction in weight in<br />
the water and are available in the colours yellow and black.<br />
CARABINER CLIPS<br />
For securing the lamp to a suitable point on the diving equipment.<br />
SPARE CELL PACKS<br />
For rapid turn-around between dives, a spare 14,4v / 4,5Ah cell pack.<br />
FLOOD REFLECTOR MODULE<br />
For film or video use for an even illumination over the entire beam.<br />
SPOT REFLECTOR MODULE (STANDARD)<br />
Reflector unit with a narrow beam for penetrating illumination<br />
ELECTRONIC MODULE MEGA D2 WITH MEGA D2 HOUSING<br />
To modify a standard <strong>mega</strong> (Halogen bulb) to gas discharge D2 technology.<br />
HOUSING MEGA (HALOGEN)<br />
To modify the Mega D2 (gas discharge) to halogen technology.<br />
HOUSING MEGA VIDEO AND MEGA D2 VIDEO<br />
Housing <strong>mega</strong> and <strong>mega</strong> D2 with neutral buoyancy<br />
<strong>Hartenberger</strong><br />
Unterwassertechnische Geräte GmbH<br />
Rennebergstr. 19 D - 50939 Köln<br />
Tel.: +49 221-415000<br />
Fax.: +49 221-415050<br />
info@hartenberger.de<br />
www.hartenberger.de<br />
© <strong>Hartenberger</strong> Unterwassertechnische Geräte GmbH Rights reserved for technical changes. Issue: 02.2005