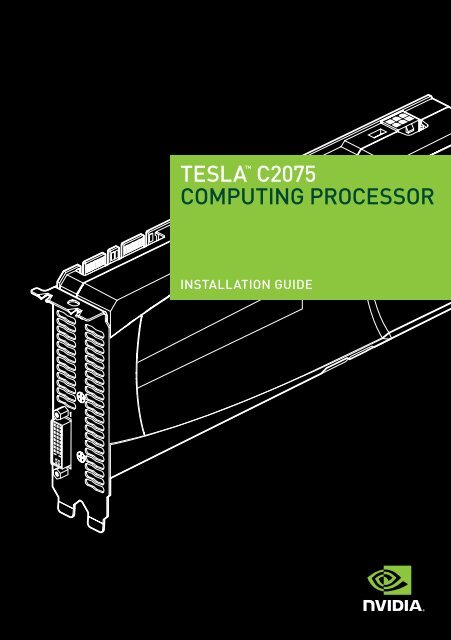
TESLA™ C2075 COMPUTING PROCESSOR
TESLA™ C2075 COMPUTING PROCESSOR
TESLA™ C2075 COMPUTING PROCESSOR
You also want an ePaper? Increase the reach of your titles
YUMPU automatically turns print PDFs into web optimized ePapers that Google loves.
TESLA <br />
<strong>C2075</strong><br />
<strong>COMPUTING</strong> <strong>PROCESSOR</strong><br />
INSTALLATION GUIdE
TESLA <strong>C2075</strong> inSTALLATion guidE<br />
NVIdIA Tesla <strong>C2075</strong>
TAbLE of ConTEnTS<br />
TAbLE Of CONTENTS<br />
Introduction 1<br />
About This guide 1<br />
Minimum System Requirements 2<br />
Unpacking 3<br />
Equipment 3<br />
Hardware Installation 5<br />
Tesla <strong>C2075</strong> installation 5<br />
Driver Installation 8<br />
Windows installation 8<br />
Verifying Windows installation 14<br />
Linux installation 15<br />
Verifying Linux installation 18<br />
References and Resources 19<br />
getting driver updates 19<br />
Registration, Support and Warranty 20<br />
Registering Your Tesla <strong>C2075</strong> Computing board 20<br />
Warranty and Support 20<br />
Compliance and Certifications 21<br />
1
inTRoduCTion<br />
01<br />
INTROdUCTION<br />
With many mainstream applications now taking<br />
advantage of the gPu computing found in the<br />
nVidiA ® Tesla <strong>C2075</strong>, leading-edge customers<br />
are producing breakthroughs in their industries<br />
by achieving better results in a shorter period<br />
of time. Adding the nVidiA Tesla <strong>C2075</strong> to an<br />
industry-standard workstation and configuring<br />
it with an nVidiA Quadro Professional graphics<br />
Solution enables performance scaling across a<br />
wide range of professional applications.<br />
About This Guide<br />
This installation guide discusses the installation and configuration of<br />
the Tesla <strong>C2075</strong> Computing Processor.<br />
1
01<br />
inTRoduCTion<br />
Minimum System Requirements<br />
Prior to unpacking your new Tesla <strong>C2075</strong>, confirm that your system<br />
meets all the system requirements for a smooth installation.<br />
> Operating System<br />
zz Microsoft Windows XP, Vista, Windows 7 (32-bit or 64-bit)<br />
zz Linux 32-bit and 64-bit on:<br />
zz Redhat Enterprise Linux 3.x, 4.x, 5.x<br />
zz SuSE Linux Enterprise desktop 11 and 10<br />
zz openSuSE 11.1, 11.0, 10.3, 10.2, 10.1<br />
zz fedora 10, 9, 8, 7<br />
zz ubuntu 9.04, 8.10, 8.04, 7.10, 7.04<br />
> Processor<br />
zz intel Pentium 4 or Xeon processor or higher<br />
zz AMd Athlon processor or higher<br />
> RAM<br />
zz 6 gb recommended per Tesla <strong>C2075</strong><br />
> PCI Express Slot<br />
zz PCi Express x16 slot, gen2 recommended but not required<br />
> Power Consumption<br />
zz 215 W maximum power consumption<br />
z<br />
z Power supply must have either a single 8-pin connector or<br />
two 6-pin power connectors. (it is ok to connect both an 8-pin<br />
and a 6-pin connector to the board, but not required)<br />
2
02<br />
UNPACkING<br />
unPACking<br />
be sure to inspect each piece of equipment.<br />
if anything is missing or damaged, contact<br />
your supplier.<br />
Equipment<br />
The following equipment is included in the Tesla <strong>C2075</strong> box.<br />
WELCOME<br />
Installation CD<br />
Contains this file (installation guide), Linux drivers,<br />
and links to additional information on the Tesla C-series<br />
product. To keep your drivers current, visit<br />
www.nvidia.com/drivers to download the latest drivers.<br />
Quick Start Guide<br />
Contains basic hardware and software installation<br />
instructions. Read carefully, and refer to the<br />
installation guide on the Cd for full installation<br />
instructions and troubleshooting.<br />
Registration Card<br />
Register to gain priority access to online and<br />
phone support. Take time to follow the instructions on<br />
this card to register your product to take advantage of<br />
customer support and warranty.<br />
3
02<br />
SLi<br />
and framelock<br />
connectors<br />
disabled<br />
dVi<br />
connector<br />
unPACking<br />
Tesla <strong>C2075</strong> GPU Computing Processor<br />
installs into the PCi Express x16 slot in your computer.<br />
Tesla <strong>C2075</strong> Computing Processor<br />
4<br />
Power connectors
HARdWARE inSTALLATionS<br />
03<br />
HARdWARE INSTALLATIONS<br />
installing the Tesla <strong>C2075</strong> hardware involves<br />
opening up your computer.<br />
Note: All hardware must be installed prior to installation of<br />
the drivers.<br />
Tesla <strong>C2075</strong> Installation<br />
A computer system with an available PCi Express ×16 slot is required<br />
for the Tesla <strong>C2075</strong>. for the best system bandwidth between the host<br />
processor and the Tesla <strong>C2075</strong>, it is recommended (but not required)<br />
that the Tesla <strong>C2075</strong> be installed in a PCi Express ×16 gen2 slot.<br />
because there are so many different computer systems on the<br />
market, the installation procedure for the Tesla <strong>C2075</strong> can vary<br />
from system to system. use the following instructions as a guideline<br />
and consult the system documentation for clarification of computer<br />
specific procedures.<br />
Note: it is important that all power to the computer be<br />
removed (unplugged) before you install the computing board.<br />
You must also discharge your body’s static electricity before<br />
handling sensitive components. Simply touch a grounded<br />
surface before beginning.<br />
Note: To simplify reconnections, label cables as they are<br />
disconnected.<br />
5
03<br />
HARdWARE inSTALLATionS<br />
1 Turn off your computer and monitor and disconnect the power cord at<br />
the outlet or at the back of your system (depending on the system).<br />
2 open your computer chassis (refer to your system documentation<br />
for details).<br />
3 Remove the slot bracket for the two adjacent slots, if they are still<br />
covered. The Tesla <strong>C2075</strong> computing board is a dual-slot board and<br />
will take up two (2) slots. Save any hardware (such as screws) to use<br />
to anchor the Tesla <strong>C2075</strong> computing board after it is seated properly.<br />
The Tesla <strong>C2075</strong> will occupy<br />
two slots.<br />
4 Connect the 8-pin connector or the two 6-pin connectors from the<br />
power supply to the 8-pin and 6-pin connectors on the board. (it is ok<br />
to connect both an 8-pin and a 6-pin connector to the board, but not<br />
required)<br />
6
03<br />
HARdWARE inSTALLATionS<br />
5 Reinstall the computer cover and any cables that were<br />
removed earlier.<br />
Note: If you are using one 8-pin power connector, you must<br />
ensure that the power supply can drive enough power<br />
through the 8-pins to the power connector. (up to 150W<br />
through a single 8-pin connector)<br />
7<br />
6-pin power connectors<br />
Connect one (1) 6-pin PCi Express<br />
power connector on the edge of the<br />
board<br />
8-pin power connector<br />
Connect one (1) 8-pin oR<br />
one (1) 6-pin PCi Express<br />
power connector on the<br />
edge of the board
dRiVER inSTALLATion<br />
04<br />
dRIVER INSTALLATION<br />
This section contains the instructions to<br />
install the software drivers within a Windows<br />
environment or within a Linux environment.<br />
Windows Installation<br />
1 Power up your computer<br />
2 Click Cancel when the found new Hardware Wizard window displays.<br />
3 insert the installation Cd included in the Tesla <strong>C2075</strong> package.<br />
4 Right-click on the Cd drive and select AutoPlay or explore the files<br />
on the Cd and double click setup.exe if it does not begin to auto play.<br />
5 Click Download Latest Drivers from the Tesla <strong>C2075</strong> main screen<br />
to be automatically directed to the nVidiA driver download page.<br />
8
04<br />
dRiVER inSTALLATion<br />
6 download the current display drivers for the Tesla <strong>C2075</strong> from<br />
www.nvidia.com/drivers (make sure to select Tesla as the Product<br />
Type and C-Class as the Product Series along with the appropriate<br />
operating System).<br />
7 Click Agree & Download then follow instructions. once you have<br />
downloaded the software, click the Run button to begin the<br />
installation.<br />
9
04<br />
dRiVER inSTALLATion<br />
8 double click on the Tesla <strong>C2075</strong> driver executable file you<br />
downloaded from www.nvidia.com/drivers. Click AgREE And<br />
ConTinuE when the NVIDIA software license agreement<br />
window displays.<br />
9 Select an install option and click nEXT.<br />
if you select the Express (Recommended) install option, the install<br />
process will begin.<br />
Note: it is recommended that you uninstall the<br />
existing driver from your system before you go through<br />
the Express install<br />
10
04<br />
dRiVER inSTALLATion<br />
Note: Express install loads all options listed under the<br />
custom install:<br />
> graphic drivers<br />
> 3d Vision Controller driver<br />
> 3d Vision drivers<br />
> nVidiA WMi<br />
if you select Custom (Advanced) install option, the Custom<br />
installation options screen displays to allow you to select options to<br />
be installed. if you would like to clean up your old profiles and<br />
settings, click the Perform a clean installation check box.<br />
Performing a clean install also removes all files related to the<br />
previous driver.<br />
11
04<br />
dRiVER inSTALLATion<br />
Note: if you are installing the Tesla <strong>C2075</strong> as a companion<br />
device to your primary Quadro board, a clean install is<br />
recommended.<br />
10 Click Continue Anyway (on Windows XP) or Install this driver<br />
software anyway (Windows Vista/7) if the Hardware installation<br />
warning is displayed.<br />
12
04<br />
dRiVER inSTALLATion<br />
Note: This warning tells you that the drivers you are about<br />
to install have not passed the Windows logo testing (WHQL).<br />
WHQL is a Microsoft testing procedure that is required before<br />
Microsoft approves the software. Clicking Continue Anyway will<br />
not harm your computer. The drivers are currently under WHQL<br />
testing. if you do not see this warning, the drivers have passed<br />
the testing requirements. This warning displays multiple times<br />
for each gPu in the system.<br />
11 Restart the computer if prompted by the user interface.<br />
12 Click Close to complete the installation.<br />
Note: it is highly recommended that you periodically visit<br />
www.nvidia.com/drivers to update to the latest<br />
driver versions.<br />
13
04<br />
dRiVER inSTALLATion<br />
Verifying Windows Installation<br />
it is recommended that you verify your installation by going to the<br />
Windows device Manager and verifying that the Tesla <strong>C2075</strong> has been<br />
installed correctly and is recognized by the drivers.<br />
use the following procedure to verify the installation of the board:<br />
1 go to Start > Computer<br />
2 Select System Properties<br />
3 go to Device Manager in the menu bar<br />
4 Expand Display Adapters in the list<br />
5 NVIDIA Tesla <strong>C2075</strong> will be shown in the list<br />
14
04<br />
dRiVER inSTALLATion<br />
Linux Installation<br />
While driver installation may be carried out using the enclosed<br />
installation Cd, it is recommended that the customer download the<br />
most recent drivers available at www.nvidia.com/drivers<br />
before you begin the installation, you should exit the X server and<br />
close all opengL applications (it is possible that some opengL<br />
applications persist even after the X server has stopped). You should<br />
also set the default run level on your system such that it will boot to a<br />
VgA console and not directly to X. doing so will make it easier to<br />
recover if there is a problem during the installation process.<br />
1 download the 32-bit or 64-bit Linux driver (the driver will have a<br />
similar naming convention as.NVIDIA-Linux-x86-100.14.11-pkg1.run<br />
or NVIDIA-Linux-x86_64-100.14.11-pkg2.run).<br />
2 Change to the directory containing the downloaded file.<br />
3 Run as root the nVidiA-Linux*.run file downloaded in Step 1.<br />
As the root user you can run the following executables:<br />
cd download_directory<br />
NVIDIA-Linux-x86-xxx-xx-xx.run or NVIDIA-Linux-x86_64-xxx-xx-xx.run<br />
The NVIDIA-Linux*.run file is a self-extracting archive. When<br />
executed, it extracts the content of the archive and runs the contained<br />
nvidia-installer utility, which provides an interactive interface to walk<br />
you through the installation.<br />
nvidia-installer will also install itself to /usr/bin/nvidia-installer<br />
which may be used at some later time to uninstall drivers, auto<br />
download updated drivers, etc.<br />
15
04<br />
dRiVER inSTALLATion<br />
4 Select Accept to accept the License Agreement.<br />
5 Select Yes if a warning window displays indicating that there are<br />
drivers already installed. Selecting Yes tells the installation process<br />
to overwrite the previously installed drivers.<br />
16
04<br />
dRiVER inSTALLATion<br />
6 Select Yes when the kernel interface window displays.<br />
When the installer is run, it will determine if it has a precompiled<br />
kernel interface for the kernel you are running. if it does not have one,<br />
it will check if there is one on the nVidiA fTP site and download it.<br />
7 Select OK to compile a kernel interface.<br />
if a kernel interface cannot be downloaded, either because the fTP<br />
site cannot be reached or because one is not provided, the installer<br />
will check your system for the required kernel sources and compile<br />
the interface for you. You must have the source code for your kernel<br />
installed for compilation to work. on most systems this means that<br />
you will need to locate and install the correct kernel source, kernel<br />
headers or kernel development package.<br />
17
04<br />
dRiVER inSTALLATion<br />
Linking of the kernel interface (in the case that the interface<br />
downloaded or compiled at installation) required you to have a linker<br />
installed on your system. The linker, usually /usr/bin/ld, is part of the<br />
binutils package. if a precompiled kernel interface is not found, you<br />
must install a linker prior to installing the nVidiA driver.<br />
8 Run nvidia-xconfig utility.<br />
nvidia-xconfig will find the X configuration file and modify it to use the<br />
nVidiA X driver. in most cases, you can answer Yes when the installer<br />
asks if it should run it. if you need to reconfigure your X server later,<br />
you can run nvidia-xconfig again from a terminal. nvidia-xconfig will<br />
make a backup copy of your configuration file before modifying it.<br />
9 installation is complete.<br />
Note: The X server must be restarted for any changes to its<br />
configuration file to take effect.<br />
More information about nvidia-xconfig can be found in the<br />
nvidia-xconfig manual page by running:<br />
% man nvidia-xconfig<br />
Verifying Linux Installation<br />
1 Run nvidia-settings to displays the Server Settings window.<br />
2 Verify here that the installation is correct and working.<br />
18
REfEREnCES And RESouRCES<br />
05<br />
REfERENCES ANd RESOURCES<br />
Getting Driver Updates<br />
during nVidiA software installation, the installation wizard provides<br />
an option to check for updated software online. You can also<br />
download software updates by visiting: www.nvidia.com/drivers<br />
19
REgiSTRATion, WARRAnTY, And SuPPoRT<br />
06<br />
REGISTRATION, WARRANTy,<br />
ANd SUPPORT<br />
Registering Your Tesla <strong>C2075</strong> Computing Board<br />
Registering your Tesla <strong>C2075</strong> computing board, gives you priority<br />
access to the nVidiA Customer Care support center. once you have<br />
completed registration, you will be given a user id and password<br />
for online customer care. You can also elect to receive automatic<br />
notification of special promotions and software updates through<br />
email to ensure that your Tesla <strong>C2075</strong> computing board continues to<br />
operate optimally.<br />
Warranty and Support<br />
The Tesla <strong>C2075</strong> is covered by a 36 month warranty.<br />
for support, visit the Customer Care Center at<br />
www.nvidia.com/support. The Web site offers access<br />
to a broad range of product information.<br />
20
CoMPLiAnCE And CERTifiCATionS<br />
07<br />
COMPLIANCE<br />
ANd CERTIfICATIONS<br />
The following regulatory compliance statements<br />
apply to the products documented by this manual.<br />
US federal Communications<br />
Commission Compliance<br />
fCC– federal Communications Commission<br />
Title 47 of Code of federal Regulation (CfR) part 15<br />
CAuTion: Changes or modifications to this unit not expressly<br />
approved by the party responsible for compliance could<br />
void the user’s authority to operate the equipment.<br />
noTE: This equipment has been tested and found to comply with<br />
the limits for a Class b digital device, pursuant to Part 15 of the fCC<br />
Rules. These limits are designed to provide reasonable protection<br />
against harmful interference in a residential installation. This<br />
equipment generates, uses and can radiate radio frequency energy<br />
and, if not installed and used in accordance with the instructions,<br />
may cause harmful interference to radio communications. However,<br />
there is no guarantee that interference will not occur in a particular<br />
installation. if this equipment does cause harmful interference to<br />
radio or television reception, which can be determined by turning<br />
the equipment off and on, the user is encouraged to try to correct<br />
the interference by one or more of the following measures:<br />
21
07<br />
CoMPLiAnCE And CERTifiCATionS<br />
> Reorient or relocate the receiving antenna.<br />
> increase the separation between the equipment and receiver.<br />
> Connect the equipment into an outlet on a circuit different from<br />
that to which the receiver is connected.<br />
> Consult the dealer or an experienced radio/TV technician<br />
for help.<br />
CANADA COMPLIANCE<br />
Industry Canada<br />
iCES-003:2004 - digital Apparatus: Spectrum<br />
Management and Telecommunications Policy;<br />
interference-Causing Equipment Standard<br />
This Class b digital apparatus complies with Canadian iCES-003.<br />
Cet appareil numérique de la classe b est<br />
conforme à la norme nMb-003 du Canada.<br />
AUSTRALIA AND NEW ZEALAND COMPLIANCE<br />
C-Tick - The Australian Communications<br />
Authority (ACA) and the Radio Spectrum<br />
Management Group (RSM) of New Zealand<br />
AS/nZS CiSPR 22:2009 standard – information<br />
technology equipment-Radio disturbance characteristicslimit<br />
and methods of measurement<br />
CAuTion: Changes or modifications to this unit not expressly<br />
approved by the party responsible for compliance could<br />
void the user’s authority to operate the equipment.<br />
22
07<br />
CoMPLiAnCE And CERTifiCATionS<br />
JAPAN COMPLIANCE<br />
VCCI - Voluntary Control Council for Interference<br />
by Information Technology Equipment<br />
> V-1/09.04: Agreement of Voluntary Control Council for interference by<br />
information Technology Equipment<br />
> V-2/09.04: Rules for Voluntary Control Measures<br />
> V-3/09.04: normative Annex 1 Technical Requirements<br />
> V-4/09.04: normative Annex 1-1 Supplementary Test Conditions for<br />
Equipment under Test<br />
23
07<br />
CoMPLiAnCE And CERTifiCATionS<br />
KOREA COMPLIANCE<br />
KC – Korea Certification<br />
> kn 22 (CiSPR 22: information technology equipment-Radio<br />
disturbance characteristics - limit and methods of measurement)<br />
> kn 24 (CiSPR 24: information technology equipment - immunity<br />
characteristics-limit and methods of measurement)<br />
b급 기기(가정용 방송통신기기)<br />
이 기기는 가정용(b급)으로 전자파적합등록을 한<br />
기기로서 주로 가정에서 사용하는 것을 목적으로<br />
하며, 모든 지역에서 사용할 수 있습니다.<br />
TAIWAN COMPLIANCE<br />
BSMI - Bureau of Standards, Metrology and Inspection<br />
> CnS 13438:2006 (CiSPR 22: information technology equipment-<br />
Radio disturbance characteristics-limit and methods<br />
of measurement)<br />
24
07<br />
CoMPLiAnCE And CERTifiCATionS<br />
EUROPEAN UNION COMPLIANCE<br />
CE – European Conformity (Conformité Européenne)<br />
Product comply with both the EMC directive (2004/108/<br />
EC) and the Low Voltage directive (2006/95/EC) issued<br />
by the Commission of the European Community.<br />
Compliance with these directives implies conformity<br />
to the following European norms<br />
(The equivalent international standards are in parenthesis)<br />
> En 55022:2006 +A1:2007 (CiSPR 22): information technology<br />
equipment-Radio disturbance characteristics -limit and methods of<br />
measurement<br />
> En 55024:1998+A1:2001+A2:2003 (iEC 61000-4-2, 3, 4, 5, 6, 8, 11):<br />
information technology equipment - immunity characteristics-limit<br />
and methods of measurement<br />
> En 61000-3-2:2006 (iEC 61000-3-2): Electromagnetic compatibility<br />
(EMC)-Part 3-2: Limits-Limits for harmonic current emissions<br />
(equipment input current ≤16 A per phase)<br />
> En 61000-3-3:2008 (iEC 61000-3-3): Electromagnetic compatibility<br />
(EMC)-Part 3-3: Limits-Limitation of voltage changes, voltage<br />
fluctuations and flicker in public low-voltage supply systems, for<br />
equipment with rated current ≤16 A per phase and not subject to<br />
conditional connection)<br />
25
07<br />
CoMPLiAnCE And CERTifiCATionS<br />
UL, CUL COMPLIANCE<br />
> uL60950-1, 2nd edition, 2007-03-27: information technology<br />
equipment - Safety - Part 1: general requirement<br />
> CSA C22.2 no. 60950-1-07, 2nd edition, 2007-03: information<br />
Technology equipment - Safety - Part1: general requirement<br />
26
Notice<br />
ALL nVidiA dESign SPECifiCATionS, REfEREnCE boARdS, fiLES,<br />
dRAWingS, diAgnoSTiCS, LiSTS, And oTHER doCuMEnTS (TogETHER And<br />
SEPARATELY, “MATERiALS”) ARE bEing PRoVidEd “AS iS.” nVidiA MAkES no<br />
WARRAnTiES, EXPRESSEd, iMPLiEd, STATuToRY, oR oTHERWiSE WiTH RESPECT<br />
To THE MATERiALS, And EXPRESSLY diSCLAiMS ALL iMPLiEd WARRAnTiES<br />
of noninfRingEMEnT, MERCHAnTAbiLiTY, And fiTnESS foR A PARTiCuLAR<br />
PuRPoSE.<br />
information furnished is believed to be accurate and reliable. However, nVidiA<br />
Corporation assumes no responsibility for the consequences of use of such<br />
information or for any infringement of patents or other rights of third parties that<br />
may result from its use. no license is granted by implication or otherwise under<br />
any patent or patent rights of nVidiA Corporation. Specifications mentioned in this<br />
publication are subject to change without notice. This publication supersedes and<br />
replaces all information previously supplied. nVidiA Corporation products are not<br />
authorized for use as critical components in life support devices or systems without<br />
express written approval of nVidiA Corporation.<br />
Trademarks<br />
nVidiA and the nVidiA logo are trademarks or registered trademarks of nVidiA<br />
Corporation in the united States and other countries. other company and product<br />
names may be trademarks of the respective companies with which they are<br />
associated.<br />
Copyright<br />
© 2011 nVidiA Corporation. All rights reserved.<br />
27
www.nvidia.com


