Step by step tutorial: how to build a bean for Servoy - Servoy Stuff
Step by step tutorial: how to build a bean for Servoy - Servoy Stuff
Step by step tutorial: how to build a bean for Servoy - Servoy Stuff

Create successful ePaper yourself
Turn your PDF publications into a flip-book with our unique Google optimized e-Paper software.
How <strong>to</strong> <strong>build</strong> a <strong>bean</strong> <strong>for</strong> <strong>Servoy</strong> - A <strong>step</strong> <strong>by</strong> <strong>step</strong> <strong>tu<strong>to</strong>rial</strong> brought <strong>to</strong> you <strong>by</strong> <strong>Servoy</strong> <strong>Stuff</strong><br />
How <strong>to</strong> <strong>build</strong> a <strong>bean</strong> <strong>for</strong> <strong>Servoy</strong><br />
– A <strong>step</strong> <strong>by</strong> <strong>step</strong> <strong>tu<strong>to</strong>rial</strong> brought <strong>to</strong> you <strong>by</strong> <strong>Servoy</strong> <strong>Stuff</strong><br />
PART 5<br />
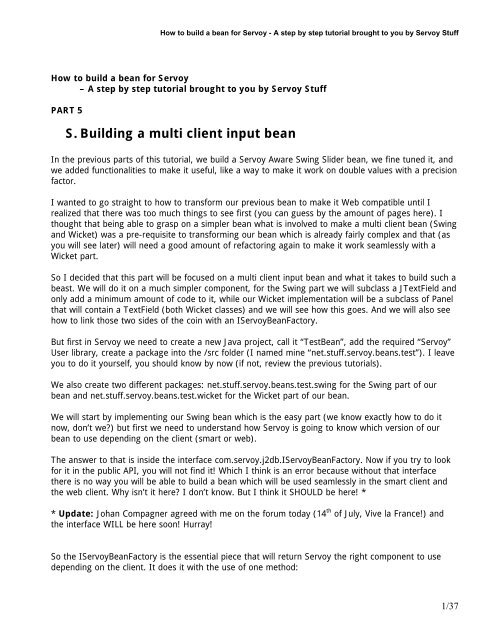
S. Building a multi client input <strong>bean</strong><br />
In the previous parts of this <strong>tu<strong>to</strong>rial</strong>, we <strong>build</strong> a <strong>Servoy</strong> Aware Swing Slider <strong>bean</strong>, we fine tuned it, and<br />
we added functionalities <strong>to</strong> make it useful, like a way <strong>to</strong> make it work on double values with a precision<br />
fac<strong>to</strong>r.<br />
I wanted <strong>to</strong> go straight <strong>to</strong> <strong>how</strong> <strong>to</strong> trans<strong>for</strong>m our previous <strong>bean</strong> <strong>to</strong> make it Web compatible until I<br />
realized that there was <strong>to</strong>o much things <strong>to</strong> see first (you can guess <strong>by</strong> the amount of pages here). I<br />
thought that being able <strong>to</strong> grasp on a simpler <strong>bean</strong> what is involved <strong>to</strong> make a multi client <strong>bean</strong> (Swing<br />
and Wicket) was a pre-requisite <strong>to</strong> trans<strong>for</strong>ming our <strong>bean</strong> which is already fairly complex and that (as<br />
you will see later) will need a good amount of refac<strong>to</strong>ring again <strong>to</strong> make it work seamlessly with a<br />
Wicket part.<br />
So I decided that this part will be focused on a multi client input <strong>bean</strong> and what it takes <strong>to</strong> <strong>build</strong> such a<br />
beast. We will do it on a much simpler component, <strong>for</strong> the Swing part we will subclass a JTextField and<br />
only add a minimum amount of code <strong>to</strong> it, while our Wicket implementation will be a subclass of Panel<br />
that will contain a TextField (both Wicket classes) and we will see <strong>how</strong> this goes. And we will also see<br />
<strong>how</strong> <strong>to</strong> link those two sides of the coin with an I<strong>Servoy</strong>BeanFac<strong>to</strong>ry.<br />
But first in <strong>Servoy</strong> we need <strong>to</strong> create a new Java project, call it “TestBean”, add the required “<strong>Servoy</strong>”<br />
User library, create a package in<strong>to</strong> the /src folder (I named mine “net.stuff.servoy.<strong>bean</strong>s.test”). I leave<br />
you <strong>to</strong> do it yourself, you should know <strong>by</strong> now (if not, review the previous <strong>tu<strong>to</strong>rial</strong>s).<br />
We also create two different packages: net.stuff.servoy.<strong>bean</strong>s.test.swing <strong>for</strong> the Swing part of our<br />
<strong>bean</strong> and net.stuff.servoy.<strong>bean</strong>s.test.wicket <strong>for</strong> the Wicket part of our <strong>bean</strong>.<br />
We will start <strong>by</strong> implementing our Swing <strong>bean</strong> which is the easy part (we know exactly <strong>how</strong> <strong>to</strong> do it<br />
now, don’t we) but first we need <strong>to</strong> understand <strong>how</strong> <strong>Servoy</strong> is going <strong>to</strong> know which version of our<br />
<strong>bean</strong> <strong>to</strong> use depending on the client (smart or web).<br />
The answer <strong>to</strong> that is inside the interface com.servoy.j2db.I<strong>Servoy</strong>BeanFac<strong>to</strong>ry. Now if you try <strong>to</strong> look<br />
<strong>for</strong> it in the public API, you will not find it! Which I think is an error because without that interface<br />
there is no way you will be able <strong>to</strong> <strong>build</strong> a <strong>bean</strong> which will be used seamlessly in the smart client and<br />
the web client. Why isn’t it here I don’t know. But I think it SHOULD be here! *<br />
* Update: Johan Compagner agreed with me on the <strong>for</strong>um <strong>to</strong>day (14 th of July, Vive la France!) and<br />
the interface WILL be here soon! Hurray!<br />
So the I<strong>Servoy</strong>BeanFac<strong>to</strong>ry is the essential piece that will return <strong>Servoy</strong> the right component <strong>to</strong> use<br />
depending on the client. It does it with the use of one method:<br />
1/37
How <strong>to</strong> <strong>build</strong> a <strong>bean</strong> <strong>for</strong> <strong>Servoy</strong> - A <strong>step</strong> <strong>by</strong> <strong>step</strong> <strong>tu<strong>to</strong>rial</strong> brought <strong>to</strong> you <strong>by</strong> <strong>Servoy</strong> <strong>Stuff</strong><br />
public IComponent getBeanInstance(int appMode, IClientPluginAccess<br />
paramIClientPluginAccess, Object[] paramArrayOfObject)<br />
This method is called <strong>by</strong> <strong>Servoy</strong> whenever it needs <strong>to</strong> retrieve an instance of a component <strong>for</strong> the<br />
developer environment as well as the smart client and the web client. It receives 3 parameters:<br />
- an int which is the mode (see IClientPluginAccess constants <strong>to</strong> see that <strong>for</strong> the web it will be<br />
IClientPluginAccess.WEB_CLIENT = 5)<br />
- an IClientPluginAccess object (a pointer <strong>to</strong> the <strong>Servoy</strong> application)<br />
- an array of Object which are the parameters passed <strong>by</strong> <strong>Servoy</strong><br />
This method is called so that you can return an instance of the correct kind of <strong>bean</strong> (Swing or Wicket),<br />
but it is expecting an object that complies with the IComponent interface.<br />
Now we are lucky because this IComponent interface is actually public, so we can have a look at the<br />
javadocs <strong>for</strong> it. It defines 24 methods that we will have <strong>to</strong> implements (most of them are getters and<br />
setters, though).<br />
So the Swing <strong>bean</strong> and the Wicket <strong>bean</strong> <strong>to</strong> return will both have <strong>to</strong> comply with the IComponent<br />
interface. But we also know that <strong>to</strong> be able <strong>to</strong> use these as input <strong>bean</strong> they will need <strong>to</strong> implement the<br />
I<strong>Servoy</strong>AwareBean as well. And we also know that <strong>to</strong> be complete we need <strong>to</strong> deal with at least one<br />
more property: the dataProviderID. So that’s the ID of the interface we are going <strong>to</strong> add straight away<br />
in our main package, let’s see the whole code of it:<br />
public interface ITextComponent extends IComponent, I<strong>Servoy</strong>AwareBean {<br />
}<br />
public void setText(String paramString);<br />
public String getText();<br />
public void setDataProviderID(String dataProviderID);<br />
public String getDataProviderID();<br />
You see that I have <strong>build</strong> an interface, called it ITextComponent (we are <strong>build</strong>ing a text input <strong>bean</strong> this<br />
time), and I have made it an extension of both IComponent and I<strong>Servoy</strong>AwareBean. Then I added<br />
accessor methods <strong>for</strong> the 2 essential properties of our <strong>bean</strong>s: the text itself (a String) and the<br />
dataProviderID (another String which is the “key” of the value in our records).<br />
Note that as usual, you will have <strong>to</strong> type ctrl+space (cmd+space on Mac) so that Eclipse will add the<br />
import in the header of your interface:<br />
import com.servoy.j2db.dataui.I<strong>Servoy</strong>AwareBean;<br />
import com.servoy.j2db.ui.IComponent;<br />
Now that we have our interface ready, let’s <strong>build</strong> our Swing implementation (it won’t take <strong>to</strong>o much<br />
since most of the properties are already part of the JTextField we are going <strong>to</strong> subclass).<br />
2/37
How <strong>to</strong> <strong>build</strong> a <strong>bean</strong> <strong>for</strong> <strong>Servoy</strong> - A <strong>step</strong> <strong>by</strong> <strong>step</strong> <strong>tu<strong>to</strong>rial</strong> brought <strong>to</strong> you <strong>by</strong> <strong>Servoy</strong> <strong>Stuff</strong><br />
T. Implementing the Swing part<br />
Let’s create a class, name it SwingTestBean and put it in the “net.stuff.servoy.<strong>bean</strong>s.test.swing”<br />
package.<br />
Its superclass will be JTextField (javax.swing.JTextField) and its interface will be the one we just<br />
created: ITextComponent, so the signature of our <strong>bean</strong> will be:<br />
public class SwingTestBean extends JTextField implements ITextComponent {<br />
Using quick fix will create all the relevant method stubs that need <strong>to</strong> be implemented, and as you see<br />
there isn’t <strong>to</strong>o much since most of them already exists in JTextField, so we are left with only:<br />
From the IComponent interface we have:<br />
public String getId() {<br />
public void setComponentEnabled(boolean enabled) {<br />
public void setComponentVisible(boolean visible) {<br />
From the I<strong>Servoy</strong>AwareBean interface we have:<br />
public void initialize(IClientPluginAccess paramIClientPluginAccess) {<br />
public boolean isReadOnly() {<br />
public void setValidationEnabled(boolean validationEnabled) {<br />
public boolean s<strong>to</strong>pUIEditing(boolean paramBoolean) {<br />
public void setSelectedRecord(IRecord record) {<br />
From our ITextComponent interface we have:<br />
public String getDataProviderID() {<br />
public void setDataProviderID(String dataProviderID) {<br />
To fulfill our implementation, we already know that we need <strong>to</strong> hold on <strong>to</strong> the current record and that<br />
we need <strong>to</strong> know the dataProviderID, so let’s add these variables:<br />
protected IRecord currentRecord;<br />
private String dataProviderID;<br />
Now on the code! If you look at the javadocs of the IComponent interface, there is actually one useful<br />
comment in it: it’s about the getId() method, the comment says:<br />
wicket id, normally the UUID prefixed with 'sv_'<br />
Meaning that since this one is a Swing <strong>bean</strong> and not a Wicket <strong>bean</strong>, we can safely return null:<br />
public String getId() {<br />
return null;<br />
}<br />
The following ones are pretty easy, they are just alias method names <strong>for</strong> 2 swing component<br />
properties, so let’s implement them accordingly:<br />
public void setComponentEnabled(boolean enabled) {<br />
setEnabled(enabled);<br />
}<br />
public void setComponentVisible(boolean visible) {<br />
setVisible(visible);<br />
}<br />
3/37
How <strong>to</strong> <strong>build</strong> a <strong>bean</strong> <strong>for</strong> <strong>Servoy</strong> - A <strong>step</strong> <strong>by</strong> <strong>step</strong> <strong>tu<strong>to</strong>rial</strong> brought <strong>to</strong> you <strong>by</strong> <strong>Servoy</strong> <strong>Stuff</strong><br />
And we know about the initialize() method, but we don’t really need <strong>to</strong> keep a pointer on the <strong>Servoy</strong><br />
application (there will be no call back <strong>to</strong> JS methods in our simple <strong>bean</strong>), so we can ignore:<br />
public void initialize(IClientPluginAccess paramIClientPluginAccess) {<br />
// ignore<br />
}<br />
For the isReadOnly() method we will also keep it simple and call the JTextField isEnabled() method:<br />
public boolean isReadOnly() {<br />
return !isEnabled();<br />
}<br />
Then we can also ignore the setValidationEnabled() method call, since our <strong>bean</strong> is going <strong>to</strong> allow any<br />
kind of text – there will be no validation anyway:<br />
public void setValidationEnabled(boolean validationEnabled) {<br />
// ignore<br />
}<br />
Finally the s<strong>to</strong>pUIEditing() method is called each time <strong>Servoy</strong> wants <strong>to</strong> retrieve the data, and if it can,<br />
the method must return true (remember), so let’s do it simply like that:<br />
public boolean s<strong>to</strong>pUIEditing(boolean paramBoolean) {<br />
return true;<br />
}<br />
And then we have our dataProviderID getter and setter, so let’s implement them also:<br />
public String getDataProviderID() {<br />
return dataProviderID;<br />
}<br />
public void setDataProviderID(String dataProviderID) {<br />
this.dataProviderID = dataProviderID;<br />
}<br />
Now we are only left with the setSelectedRecord() method. You remember from our <strong>Servoy</strong>SliderBean<br />
that it contained a few tests:<br />
if (currentFoundset != null &&<br />
currentFoundset.getSize() > 0 && currentRecord != null) {<br />
if (hasDataProvider()&& isContainedInFoundset(getDataProviderID())) {<br />
Now we know that we are going <strong>to</strong> need the same kind of code <strong>for</strong> the Wicket <strong>bean</strong>, so it would be a<br />
good idea if we could put these tests in<strong>to</strong> one single method that would be accessible from both class<br />
(the Swing <strong>bean</strong> and the Wicket <strong>bean</strong>).<br />
That’s the idea <strong>for</strong> a new “helper” class. So let’s create a class that will have this method and add it <strong>to</strong><br />
our package. I named mine “<strong>Servoy</strong>Utils” in the “net.stuff.servoy.<strong>bean</strong>s.test” package. Now the best<br />
thing would be if that utility class could be called without the need <strong>to</strong> instantiate it (no “new” object<br />
created <strong>to</strong> access its methods), so we are going <strong>to</strong> put some static methods in it.<br />
But wait! What about concurrency, what about threading The thing is that you can use static methods<br />
safely in a multi-thread environment, but the only condition is that they will only use external objects<br />
(given as parameters) and not modify them! So that’s fine in our case because we want a utility<br />
method which is going <strong>to</strong> read from the objects passed in parameters, lets code the following:<br />
4/37
How <strong>to</strong> <strong>build</strong> a <strong>bean</strong> <strong>for</strong> <strong>Servoy</strong> - A <strong>step</strong> <strong>by</strong> <strong>step</strong> <strong>tu<strong>to</strong>rial</strong> brought <strong>to</strong> you <strong>by</strong> <strong>Servoy</strong> <strong>Stuff</strong><br />
public static boolean isContainedInFoundset(IRecord record, String dataProviderID)<br />
{<br />
if (record != null && isNotEmpty(dataProviderID)) {<br />
IFoundSet foundset = record.getParentFoundSet();<br />
boolean isContained = false;<br />
}<br />
String[] providers = foundset.getDataProviderNames(IFoundSet.COLUMNS);<br />
if (providers != null) {<br />
<strong>for</strong> (int i = 0; i < providers.length; i++) {<br />
if (dataProviderID.equals(providers[i])) {<br />
isContained = true;<br />
break;<br />
}<br />
}<br />
}<br />
if (isContained && foundset.getSelectedIndex() > -1) {<br />
return true;<br />
}<br />
}<br />
return false;<br />
Note that our method is public, and note the use of the static keyword. Our method will be<br />
accessible from anywhere without the need <strong>to</strong> create a new <strong>Servoy</strong>Utils() object at all.<br />
Note that the record and the dataProviderID are passed as parameters; these are the objects that will<br />
be used <strong>for</strong> the tests.<br />
Note that I have used a non existing (yet) method “isNotEmpty” <strong>to</strong> test the dataProviderID. I just<br />
thought that this kind of test can be used in some other contexts <strong>to</strong>o. We can use “quick fix” and ask<br />
Eclipse <strong>to</strong> create a stub <strong>for</strong> us and we will implement it like that:<br />
public static boolean isNotEmpty(String s) {<br />
return (s != null && s.trim().length() > 0);<br />
}<br />
Now that we have our convenience method written in our <strong>Servoy</strong>Utils class, let’s get back <strong>to</strong> our<br />
setSelectedRecord() method that we can now write like this:<br />
public void setSelectedRecord(IRecord record) {<br />
this.currentRecord = record;<br />
if (<strong>Servoy</strong>Utils.isContainedInFoundset(record, getDataProviderID())) {<br />
Object o = currentRe cord.getValue(getDataProviderID());<br />
setText((o==null) null : o.<strong>to</strong>String());<br />
}<br />
}<br />
First, we hold our currentRecord. Then we use our newly created method from the <strong>Servoy</strong>Utils class <strong>to</strong><br />
do all our tests in one go.<br />
Note the direct use of the name of the class, that’s <strong>how</strong> you call static methods in Java. The method is<br />
accessible this way from anywhere in your code and we will use it of course in our Wicket <strong>bean</strong> <strong>to</strong>o.<br />
Then we retrieve the object from our currentRecord with the getValue() method. Since it is an Object,<br />
we test if it is no null first, if it isn’t we simply call its <strong>to</strong>String() method <strong>to</strong> retrieve the String<br />
representation of it.<br />
We now have our <strong>bean</strong> correctly updated <strong>by</strong> <strong>Servoy</strong> each time we change records.<br />
What about the other way round<br />
5/37
How <strong>to</strong> <strong>build</strong> a <strong>bean</strong> <strong>for</strong> <strong>Servoy</strong> - A <strong>step</strong> <strong>by</strong> <strong>step</strong> <strong>tu<strong>to</strong>rial</strong> brought <strong>to</strong> you <strong>by</strong> <strong>Servoy</strong> <strong>Stuff</strong><br />
You probably guessed that we will need <strong>to</strong> implement a listener <strong>to</strong> listen <strong>to</strong> changes of our text value<br />
<strong>to</strong> update the currentRecord.<br />
Now the JTextField class relies on ActionListener <strong>to</strong> propagate changes on the text (you could also<br />
implement a DocumentListener, but it will fire <strong>for</strong> each letter typed in the field, which is not very<br />
efficient), so let’s use our class as an ActionListener <strong>to</strong> itself; we do this <strong>by</strong> changing its signature:<br />
public class SwingTestBean extends JTextField implements ITextComponent,<br />
ActionListener {<br />
Use ctrl+space (cmd+space on Mac) <strong>to</strong> add the import:<br />
import java.awt.event.ActionListener;<br />
Then use “quick fix” <strong>to</strong> add the stub <strong>for</strong> the actionPer<strong>for</strong>med method, and implement it like so:<br />
public void actionPer<strong>for</strong>med(ActionEvent e) {<br />
if (<strong>Servoy</strong>Utils.isContainedInFoundset(currentRecord, getDataProviderID())) {<br />
if (currentRecord.startEditing()) {<br />
currentRecord.setValue(getDataProviderID(), getText());<br />
}<br />
}<br />
}<br />
Note the use of our <strong>Servoy</strong>Utils static method again.<br />
Note that we always need <strong>to</strong> ask <strong>Servoy</strong> the permission <strong>to</strong> update the record, the startEditing() call<br />
will return true if we can.<br />
Then we simply set the value <strong>for</strong> our data provider in the current record <strong>to</strong> the value of the text of our<br />
JTextField.<br />
Is that enough <strong>for</strong> the method <strong>to</strong> be called when the text changes NO!<br />
We need <strong>to</strong> add our class as a listener <strong>to</strong> the JTextField.<br />
We do so <strong>by</strong> subclassing the no parameter construc<strong>to</strong>r (the only one that will be used anyway):<br />
public SwingTestBean() {<br />
super();<br />
addActionListener(this);<br />
}<br />
Note the call <strong>to</strong> the superclass construc<strong>to</strong>r <strong>by</strong> the use of super(); You always need <strong>to</strong> do that if you<br />
want your superclass <strong>to</strong> be properly initialized.<br />
Now the current record will be updated each time the user does an “Action” <strong>to</strong> our field (meaning each<br />
time he hits the return/enter key in it).<br />
But there are still 2 little problems:<br />
1/ the method will not be called if the user type something in our field and then exit using the mouse<br />
or type a tab <strong>to</strong> change focus <strong>for</strong> example.<br />
2/ the current record will be updated when the user hits return/enter in our field EVEN if the value<br />
didn’t change… This can be annoying because the user will see that the record has been edited when<br />
there are no real changes <strong>to</strong> it (there will be a little “e” in the status bar).<br />
1/ To address the first problem, we will rely on the focus system. We will fire the actionPer<strong>for</strong>med<br />
method each time the field loses focus. Now we could add a FocusListener <strong>to</strong> our class signature and<br />
we would have <strong>to</strong> implement 2 methods (focusGained() and focusLost()) when the only one we are<br />
6/37
How <strong>to</strong> <strong>build</strong> a <strong>bean</strong> <strong>for</strong> <strong>Servoy</strong> - A <strong>step</strong> <strong>by</strong> <strong>step</strong> <strong>tu<strong>to</strong>rial</strong> brought <strong>to</strong> you <strong>by</strong> <strong>Servoy</strong> <strong>Stuff</strong><br />
interested in is really the focusLost() method. So instead of implementing the FocusListener, we will<br />
use a FocusAdapter and we will instantiate this FocusAdapter as an anonymous inner class. Let’s see<br />
<strong>how</strong> that goes (it’s easier than it sounds):<br />
public SwingTestBean() {<br />
super();<br />
addActionListener(this);<br />
addFocusListener(new FocusAdapter() {<br />
public void focusLost(FocusEvent e) {<br />
fireActionPer<strong>for</strong>med();<br />
}<br />
}<br />
});<br />
After the addActionListener(), we added a new method “addFocusListener()” which waits a<br />
FocusListener object as parameter.<br />
So we create it on the fly, <strong>by</strong> putting the new object directly inside the parenthesis of our<br />
addFocusListener( ); method…<br />
Our new class will be a FocusAdapter() (look <strong>for</strong> it in the Java API javadocs).<br />
And then inside this new FocusAdapter object, we subclass one of its method, the one we are<br />
interested in: the focusLost() method (you can use “Override/Implements methods…” from the Eclipse<br />
“Source” menu <strong>to</strong> get the stub <strong>for</strong> it).<br />
In the focusLost() method, we call the method from the JTextField superclass which creates the<br />
ActionEvent and calls the actionPer<strong>for</strong>med() method on all the listeners (our class will be one of them).<br />
This way of doing is a powerful shortcut that is possible since Java 1.5.<br />
Look <strong>for</strong> anonymous inner classes on the internet <strong>to</strong> know more about it, they are especially useful<br />
when used with listeners because they allow you <strong>to</strong> code the minimum amount needed <strong>to</strong> implement a<br />
function. You don’t need <strong>to</strong> create subclasses or listeners classes anymore or <strong>to</strong> implement empty<br />
methods <strong>for</strong> your listeners…<br />
OK, so our actionPer<strong>for</strong>med() method will now be called each time a user exits our field or types<br />
return/enter in it. But we still need <strong>to</strong> address our second problem, which might happen even more<br />
now.<br />
2/ We need <strong>to</strong> implement a way <strong>to</strong> test if our value really changed be<strong>for</strong>e updating the record. We can<br />
easily do so <strong>by</strong> keeping the previous value and comparing with the text value of our JTextField. So let’s<br />
add a variable <strong>to</strong> hold the previous value:<br />
protected String previousText;<br />
7/37
How <strong>to</strong> <strong>build</strong> a <strong>bean</strong> <strong>for</strong> <strong>Servoy</strong> - A <strong>step</strong> <strong>by</strong> <strong>step</strong> <strong>tu<strong>to</strong>rial</strong> brought <strong>to</strong> you <strong>by</strong> <strong>Servoy</strong> <strong>Stuff</strong><br />
Then we need <strong>to</strong> update it each time the record changes, in the setSelectedRecord() method, which<br />
will now be:<br />
public void setSelectedRecord(IRecord record) {<br />
this.currentRecord = record;<br />
if (<strong>Servoy</strong>Utils.isContainedInFoundset(record, getDataProviderID())) {<br />
Object o = currentRe cord.getValue(getDataProviderID());<br />
setText((o==null) null : o.<strong>to</strong>String());<br />
previousText = getText();<br />
}<br />
}<br />
And in our actionPer<strong>for</strong>med() method we will add a test be<strong>for</strong>e updating the current record:<br />
public void actionPer<strong>for</strong>med(ActionEvent e) {<br />
if (!Utils.stringSafeEquals(previousText, getText())) {<br />
if (<strong>Servoy</strong>Utils.isContainedInFoundset(currentRecord,<br />
getDataProviderID())) {<br />
if (currentRecord.startEditing()) {<br />
currentRecord.setValue(getDataProviderID(), getText());<br />
}<br />
}<br />
}<br />
}<br />
Note that I used a call <strong>to</strong> Utils.stringSafeEquals(), now why do I need a special method and where<br />
does that Utils class come from<br />
First as the name of the method implies, it is a safe test on equality.<br />
Why safe Because it tests if the String are null be<strong>for</strong>e calling equals on the objects.<br />
As you know calling myString.equals(anotherString) in Java will fire a NullPointerException (the<br />
dreaded NPE that is the plague of every Java programmer) if myString is null.<br />
And the first time we call this test, we know that our previousText will be null, and the text of the slider<br />
might be null as well. This is where the Utils.stringSafeEquals helps.<br />
The Utils class fully qualified name is actually com.servoy.j2db.util.Utils.<br />
That’s right it’s coming from the <strong>Servoy</strong> public API! – And yes, it is public.<br />
You can have a look at it in the public API and you will see that this class is full of convenience<br />
methods like this one that you can use freely inside your plugins and <strong>bean</strong>s and which are meant <strong>to</strong><br />
help you! All the methods in the Utils class are static so you can use them from anywhere in your code.<br />
So, you know that if Eclipse complains that it can’t find Utils, you can use ctrl+space (cmd+space on<br />
Mac) and choose com.servoy.j2db.util.Utils and it will happily add the import in the header of your<br />
class.<br />
Now each time our actionPer<strong>for</strong>med() method is called it will first test if the record really needs <strong>to</strong> be<br />
updated and will do so only if needed.<br />
That’s it <strong>for</strong> our SwingTestBean!<br />
8/37
How <strong>to</strong> <strong>build</strong> a <strong>bean</strong> <strong>for</strong> <strong>Servoy</strong> - A <strong>step</strong> <strong>by</strong> <strong>step</strong> <strong>tu<strong>to</strong>rial</strong> brought <strong>to</strong> you <strong>by</strong> <strong>Servoy</strong> <strong>Stuff</strong><br />
Now we also need <strong>to</strong> add a BeanInfo as you remember from last time <strong>to</strong> get our properties right (and<br />
only the one we want) in the <strong>Servoy</strong> Properties edi<strong>to</strong>r, this is our SwingTestBeanInfo implementation:<br />
public class SwingTestBeanInfo extends SimpleBeanInfo {<br />
@Override<br />
public PropertyDescrip<strong>to</strong>r[] getPropertyDescrip<strong>to</strong>rs()<br />
{<br />
try {<br />
List liste = new ArrayList();<br />
liste.add(new PropertyDescrip<strong>to</strong>r("dataProviderID", <strong>Servoy</strong>TestBean.class));<br />
liste.add(new PropertyDescrip<strong>to</strong>r("name", SwingTestBean.class));<br />
liste.add(new PropertyDescrip<strong>to</strong>r("background", SwingTestBean.class));<br />
liste.add(new PropertyDescrip<strong>to</strong>r("<strong>for</strong>eground", SwingTestBean.class));<br />
liste.add(new PropertyDescrip<strong>to</strong>r("font", SwingTestBean.class));<br />
liste.add(new PropertyDescrip<strong>to</strong>r("<strong>to</strong>olTipText", SwingTestBean.class));<br />
liste.add(new PropertyDescrip<strong>to</strong>r("transparent", SwingTestBean.class));<br />
liste.add(new PropertyDescrip<strong>to</strong>r("border", SwingTestBean.class));<br />
liste.add(new PropertyDescrip<strong>to</strong>r("size", SwingTestBean.class));<br />
liste.add(new PropertyDescrip<strong>to</strong>r("location", SwingTestBean.class));<br />
PropertyDescrip<strong>to</strong>r apropertydescrip<strong>to</strong>r[] =<br />
liste.<strong>to</strong>Array(new PropertyDescrip<strong>to</strong>r[0]);<br />
return apropertydescrip<strong>to</strong>r;<br />
} catch(Exception e) {<br />
Debug.error((new StringBuilder()).append(<br />
"SwingTestBeanInfo: unexpected exception: "<br />
).append(e).<strong>to</strong>String());<br />
}<br />
}<br />
return null;<br />
}<br />
If you don’t remember anything about the BeanInfo interface, the SimpleBeanInfo class and what<br />
the hell they are suppose <strong>to</strong> do, I would suggest going back <strong>to</strong> part 3 of this <strong>tu<strong>to</strong>rial</strong>.<br />
Because now is the time <strong>to</strong> look in<strong>to</strong> our Wicket <strong>bean</strong>…<br />
9/37
How <strong>to</strong> <strong>build</strong> a <strong>bean</strong> <strong>for</strong> <strong>Servoy</strong> - A <strong>step</strong> <strong>by</strong> <strong>step</strong> <strong>tu<strong>to</strong>rial</strong> brought <strong>to</strong> you <strong>by</strong> <strong>Servoy</strong> <strong>Stuff</strong><br />
U. Creating the Wicket part of our <strong>bean</strong><br />
If you have never heard about Wicket, now could be a good time <strong>to</strong> have a serious look at it.<br />
Wicket is a Java web framework, it is an Apache project.<br />
It is Open Source under ASL, the Apache Software License (meaning basically that you can download<br />
the source and use it in any projects including commercial ones, - read the license <strong>for</strong> the legal<br />
aspects), and it is one of the upcoming Java web frameworks.<br />
One of the great advantages of Wicket upon other Java Web frameworks is that it is Component<br />
Oriented, not MVC – read about these 2 different paradigms on the web.<br />
Wicket offers ways of creating your own components <strong>by</strong> subclassing or aggregating existing<br />
components. Another great feature of Wicket is that it is stateful, when the http pro<strong>to</strong>col itself is<br />
stateless, - check <strong>for</strong> the significance of these terms on the internet.<br />
And Wicket makes a great use of Ajax without the need of coding it yourself.<br />
I leave you <strong>to</strong> discover these advantages as well as a few others on the official web site:<br />
http://wicket.apache.org/<br />
Go and see the examples online here:<br />
http://wicket.apache.org/examples.html<br />
And some advanced online examples there:<br />
http://www.wicketstuff.org/wicket13/<br />
One of the core contribu<strong>to</strong>rs of Wicket is Johan Compagner, I’m sure the name rings a bell… That’s<br />
right: he is also one of the core engineers of <strong>Servoy</strong> <strong>to</strong>o! Talk of coincidence<br />
Anyway, <strong>to</strong> better understand what is going <strong>to</strong> follow, I strongly urge you <strong>to</strong> go and have a look at<br />
Wicket, maybe install it, or at least the examples (they are available as a .war file in the distribution, so<br />
easy <strong>to</strong> deploy on any Servlet container/java application server), you will also need <strong>to</strong> refer <strong>to</strong> the API,<br />
which is available online here:<br />
http://wicket.apache.org/docs/wicket-1.3.2/wicket/apidocs/index.html<br />
The version currently used <strong>by</strong> <strong>Servoy</strong> is 1.3.6 (slightly modified and compiled from the SVN sources<br />
according <strong>to</strong> Johan) so the online API version <strong>for</strong> 1.3 should do, you will also find the javadocs in the<br />
distribution available <strong>for</strong> download. I would suppose that the next version of <strong>Servoy</strong> (Tano) will use<br />
Wicket 1.4 but <strong>for</strong> now there is no final version, only release candidates.<br />
OK! Back <strong>to</strong> our <strong>bean</strong>: Inside our net.stuff.servoy.<strong>bean</strong>s.test.wicket package, let’s add a new class, call<br />
it WicketTestBean with a superclass of Panel (org.apache.wicket.markup.html.panel.Panel) – we will<br />
see why a Panel later…<br />
For those who are following, I’m sure you noticed that we don’t implement the ITextComponent<br />
straight away. We will do it differently this time: <strong>to</strong> make things a little bit easier <strong>for</strong> us later, we create<br />
a class that extends Panel but with no interface - we will add the interface later, so <strong>for</strong> now our class<br />
signature just looks like:<br />
public class WicketTestBean extends Panel {<br />
That’s right! We just leave the interface blank. Why Because we will add the properties we need first<br />
and <strong>to</strong> use the Generate Getters/Setters on our properties and then when we will add the interface,<br />
most of the implementation will already be there!<br />
10/37
How <strong>to</strong> <strong>build</strong> a <strong>bean</strong> <strong>for</strong> <strong>Servoy</strong> - A <strong>step</strong> <strong>by</strong> <strong>step</strong> <strong>tu<strong>to</strong>rial</strong> brought <strong>to</strong> you <strong>by</strong> <strong>Servoy</strong> <strong>Stuff</strong><br />
Note that we checked the “Construc<strong>to</strong>rs from superclass” because the Panel class doesn’t have a<br />
default construc<strong>to</strong>r, so we need <strong>to</strong> explicitly define at least one Construc<strong>to</strong>r <strong>for</strong> our subclass.<br />
Once we click OK, the class has been constructed, a little quick fix will add the required<br />
private static final long serialVersionUID = 1L;<br />
And then, we add these properties straight away:<br />
private Dimension size;<br />
private Border border;<br />
private Point location;<br />
private Color background;<br />
private Color <strong>for</strong>eground;<br />
private Font font;<br />
private String <strong>to</strong>olTipText;<br />
private String name;<br />
private boolean opaque;<br />
private String text;<br />
private String dataProviderID;<br />
protected Cursor cursor;<br />
11/37
How <strong>to</strong> <strong>build</strong> a <strong>bean</strong> <strong>for</strong> <strong>Servoy</strong> - A <strong>step</strong> <strong>by</strong> <strong>step</strong> <strong>tu<strong>to</strong>rial</strong> brought <strong>to</strong> you <strong>by</strong> <strong>Servoy</strong> <strong>Stuff</strong><br />
All these have related methods in the ITextComponent interface that we will implement in a minute.<br />
For now, we go <strong>to</strong> the menu “Sources > Generate Getters/Setters”, select all properties (except the<br />
serialVersionUID) and click OK:<br />
That’s 26 methods generated <strong>for</strong> us in one go. That’s what I call fast coding!<br />
And finally we can add our interface in the class signature:<br />
public class WicketTestBean extends Panel implements ITextComponent {<br />
And we can also add the currentRecord IRecord variable that we know we will need later:<br />
protected IRecord currentRecord;<br />
12/37
How <strong>to</strong> <strong>build</strong> a <strong>bean</strong> <strong>for</strong> <strong>Servoy</strong> - A <strong>step</strong> <strong>by</strong> <strong>step</strong> <strong>tu<strong>to</strong>rial</strong> brought <strong>to</strong> you <strong>by</strong> <strong>Servoy</strong> <strong>Stuff</strong><br />
And now when we use the quick fix trick, we can see that there are only 7 methods left <strong>to</strong> implement:<br />
These 7 methods being mainly the one from the I<strong>Servoy</strong>Aware interface.<br />
V. Building a Panel subclass<br />
You can have a look <strong>for</strong> Panel in the Wicket API <strong>to</strong> see what it is about… Unlike the <strong>Servoy</strong> API, the<br />
Wicket API is full of useful comments. Oh yes please, <strong>Servoy</strong> team, let us poor developers have in<br />
<strong>Servoy</strong> the same kind of rich javadocs Wicket has!<br />
Anyway, you will see from the Wicket API, in the header of the javadocs <strong>for</strong> Panel that:<br />
“A panel is a reusable component that holds markup and other components.”<br />
And that:<br />
“a Panel has its own associated markup file and the container content is taken from that file, like:<br />
<br />
My label<br />
....<br />
”<br />
13/37
How <strong>to</strong> <strong>build</strong> a <strong>bean</strong> <strong>for</strong> <strong>Servoy</strong> - A <strong>step</strong> <strong>by</strong> <strong>step</strong> <strong>tu<strong>to</strong>rial</strong> brought <strong>to</strong> you <strong>by</strong> <strong>Servoy</strong> <strong>Stuff</strong><br />
Meaning that it is a container (like a JPanel would be in Swing), that will hold any component we will<br />
put in and that it has an html file associated with it.<br />
But why use a Panel instead of a TextField<br />
Well, I actually tried <strong>to</strong> use a TextField directly, but each time I did, <strong>Servoy</strong> complained that the<br />
markup was wrong, with an angry message and some nasty Exceptions: “input component must use<br />
an input tag but the markup contains ” or something like that (I actually don’t remember the<br />
exact message, but you can try it yourself if you really want <strong>to</strong> see it, I prefer not <strong>to</strong>!).<br />
It seems that <strong>Servoy</strong>, when it instantiates a Wicket <strong>bean</strong>, systematically places it inside a html<br />
tag, but then Wicket complains because he is looking <strong>for</strong> an html tag. So <strong>to</strong> work around this<br />
problem, the trick is <strong>to</strong> use a Panel, and then put our TextField in it, so <strong>Servoy</strong> will use the div <strong>for</strong> our<br />
Panel, and inside we will put our own markup, an tag that will be the place where we will<br />
manage our TextField. Sounds complicated A little bit, but it works fine once you do it right. Basically<br />
all we need is <strong>to</strong> add a new html file next <strong>to</strong> our java file (in the sources, inside the<br />
net.stuff.servoy.<strong>bean</strong>s.test.wicket package).<br />
Just use New File… and type its name, which should be the same as our Wicket class, with an “html”<br />
extension:<br />
14/37
How <strong>to</strong> <strong>build</strong> a <strong>bean</strong> <strong>for</strong> <strong>Servoy</strong> - A <strong>step</strong> <strong>by</strong> <strong>step</strong> <strong>tu<strong>to</strong>rial</strong> brought <strong>to</strong> you <strong>by</strong> <strong>Servoy</strong> <strong>Stuff</strong><br />
When you click “OK” <strong>Servoy</strong> has the bad idea (<strong>by</strong> default) <strong>to</strong> open the html file in the internal browser.<br />
You can close it and right click on the file <strong>to</strong> open it in a text edi<strong>to</strong>r:<br />
Eclipse is clever enough <strong>to</strong> remember what was the last edi<strong>to</strong>r you used on a particular file so next<br />
time you will open this file it will open in the Text Edi<strong>to</strong>r au<strong>to</strong>matically…<br />
Put this html text inside your file:<br />
<br />
<br />
<br />
<br />
<br />
<br />
<br />
<br />
<br />
15/37
How <strong>to</strong> <strong>build</strong> a <strong>bean</strong> <strong>for</strong> <strong>Servoy</strong> - A <strong>step</strong> <strong>by</strong> <strong>step</strong> <strong>tu<strong>to</strong>rial</strong> brought <strong>to</strong> you <strong>by</strong> <strong>Servoy</strong> <strong>Stuff</strong><br />
The spaces here are only <strong>for</strong> readability (in fact it’s better if there is no space at all in all that markup,<br />
the html will be lighter and some browsers sometimes choke on carriage-return), so you can type it all<br />
on one line.<br />
You can see that the html defines a panel inside a special tag and then there is a table<br />
(which is used <strong>for</strong> easier layout – I actually used the exact same html table used <strong>by</strong> the Wicket Panel<br />
used <strong>for</strong> the Calendar DateField), if I don’t encapsulate my input field inside a table with these styles<br />
the layout has all sort of problems. So just trust me on this.<br />
Or don’t ;-) And if you want you can experiment with different styles and no table, but don’t tell me<br />
then that I didn’t warn you if your component s<strong>how</strong>s a bit weird in you preferred browser…<br />
What is really important here in any case (beside the table structure), is the fact that we define a panel<br />
and an input inside it with a wicket id .<br />
Note the id we chose (testField), because we will use it in our class when we add our TextField <strong>to</strong> the<br />
Panel programmatically.<br />
OK Back <strong>to</strong> our <strong>bean</strong>. Let’s start with the construc<strong>to</strong>r; we need <strong>to</strong> add our TextField <strong>to</strong> the Panel, right<br />
So we can do it like that:<br />
public WicketTestBean(String id) {<br />
super(id);<br />
}<br />
TextField field = new TextField("testField", new PropertyModel(this, "text"));<br />
add(field);<br />
TextField is of course a Wicket class, its fully qualified name is really<br />
org.apache.wicket.markup.html.<strong>for</strong>m.TextField (so when you use Quick Fix <strong>to</strong> add the import, choose<br />
this class).<br />
The construc<strong>to</strong>r of the TextField class we use takes 2 parameters: an id and an object of type IModel<br />
(org.apache.wicket.model.IModel), the first one is easy, we just give it the id we put in our html<br />
markup previously. The IModel is really important, this is <strong>how</strong> Wicket will feed the value of the input<br />
field with a real property – this is called “binding”.<br />
Each input component in Wicket needs a Model <strong>to</strong> per<strong>for</strong>m its binding with a POJO class (= Plain Old<br />
Java Object). And a PropertyModel is just one of the many Models you will find in the Wicket API.<br />
You can have a look at the javadocs <strong>for</strong> the IModel and see all the “known implementing classes” <strong>to</strong><br />
get a feel of <strong>how</strong> important this interface is in Wicket.<br />
Alternatively you can find some in<strong>for</strong>mation on the Wicket wiki, with examples (based on API 1.x but<br />
still valid), it will help you understand better than me what this is all about:<br />
http://cwiki.apache.org/WICKET/working-with-wicket-models.html<br />
And if that’s not enough just Google <strong>for</strong> “Wicket model” and I’m sure you will find <strong>to</strong>ns of <strong>tu<strong>to</strong>rial</strong>s,<br />
examples and explanations that will help you.<br />
The PropertyModel we use here is particularly nice: all it needs is an object <strong>to</strong> work with and the name<br />
of one property of this object. Of course in our case the object is this (an instance of our<br />
WicketTestBean class) and the property we are interested about is the “text” property.<br />
16/37
How <strong>to</strong> <strong>build</strong> a <strong>bean</strong> <strong>for</strong> <strong>Servoy</strong> - A <strong>step</strong> <strong>by</strong> <strong>step</strong> <strong>tu<strong>to</strong>rial</strong> brought <strong>to</strong> you <strong>by</strong> <strong>Servoy</strong> <strong>Stuff</strong><br />
So our construc<strong>to</strong>r now has declared our input component inside the Panel. But there are still a few<br />
more things <strong>to</strong> take care about, so we code this:<br />
public WicketTestBean(String id) {<br />
super(id);<br />
setVersioned(false);<br />
setOutputMarkupId(true);<br />
add(StyleAttributeModifierModel.INSTANCE);<br />
add(TooltipAttributeModifier.INSTANCE);<br />
add(new SimpleAttributeModifier("class", getId()+" field"));<br />
}<br />
TextField field = new TextField("testField", new PropertyModel(this, "text"));<br />
add(field);<br />
The line setVersioned(false) just tells Wicket that he doesn’t need <strong>to</strong> trace different version of our<br />
component (Wicket uses a mechanism <strong>to</strong> support the browser’s back but<strong>to</strong>n). You will need <strong>to</strong> dig deep<br />
in<strong>to</strong> Wicket <strong>to</strong> understand <strong>how</strong> it does it, but suffice <strong>to</strong> say here that we don’t need back but<strong>to</strong>n<br />
support <strong>for</strong> our component and that’s basically what we are saying here with this line.<br />
The setOutputMarkupId(true) line that follows tells Wicket that it needs <strong>to</strong> had the id in the final html<br />
produced. This is important because some Ajax callbacks used <strong>by</strong> <strong>Servoy</strong> will use this id in the browser<br />
<strong>to</strong> update the component. – In short the html will have a tag created <strong>by</strong> Wicket<br />
(look at the source html of pages produced <strong>by</strong> <strong>Servoy</strong> and you will see lots of example of that).<br />
Then we add 2 objects <strong>to</strong> our component: an instance of a StyleAttributeModifierModel<br />
(com.servoy.j2db.server.headlessclient.dataui.StyleAttributeModifierModel) and an instance of a<br />
ToolTipAttributeModifier (com.servoy.j2db.server.headlessclient.dataui.TooltipAttributeModifier).<br />
Don’t look in the public API <strong>for</strong> these because they aren’t there! Which I think is a shame because they<br />
are needed <strong>to</strong> <strong>build</strong> a Wicket <strong>bean</strong> <strong>for</strong> <strong>Servoy</strong>.<br />
I just wrote a post on <strong>Servoy</strong>’s <strong>for</strong>um <strong>for</strong> some changes <strong>to</strong> the Public API, requesting that these classes<br />
be included. If you are reading this and like me would like <strong>to</strong> see (or make) more web client compatible<br />
<strong>bean</strong>s <strong>for</strong> <strong>Servoy</strong>, please add your voice and support the request publicly on the <strong>for</strong>um <strong>to</strong>o*:<br />
http://<strong>for</strong>um.servoy.com/view<strong>to</strong>pic.phpf=15&t=12712<br />
* Johan Compagner replied <strong>to</strong>day (July 14 th ) and said that he needed <strong>to</strong> check these 2 classes <strong>to</strong> see if<br />
they could be made public. I hope they will!<br />
These 2 classes are here <strong>to</strong> keep trace of the modifications you do <strong>to</strong> the style and <strong>to</strong>oltip of your<br />
component, and they are especially needed if you use scripting <strong>to</strong> modify style or <strong>to</strong>oltip.<br />
Why aren’t they in the Public API Don’t ask me, ask <strong>Servoy</strong>! We already saw that the<br />
I<strong>Servoy</strong>AwareBean interface which is essential <strong>to</strong> <strong>build</strong>ing input <strong>bean</strong>s is not public “yet” (it is part of<br />
the 4.2.x API, when it is already present in <strong>Servoy</strong> 4.1.x – it should be reinstated soon!) and some<br />
other interfaces and classes that we will soon encounter are not public at all, apparently… But they are<br />
used in some <strong>bean</strong>s, like the TreeViewBean that I had the chance <strong>to</strong> get the source from <strong>Servoy</strong>.<br />
I feel strongly that <strong>Servoy</strong> must commit <strong>to</strong> developers who want <strong>to</strong> <strong>build</strong> professional components, and<br />
<strong>for</strong> me a professional component must take in<strong>to</strong> account the “wicket side” (the web client).<br />
17/37
How <strong>to</strong> <strong>build</strong> a <strong>bean</strong> <strong>for</strong> <strong>Servoy</strong> - A <strong>step</strong> <strong>by</strong> <strong>step</strong> <strong>tu<strong>to</strong>rial</strong> brought <strong>to</strong> you <strong>by</strong> <strong>Servoy</strong> <strong>Stuff</strong><br />
I hope that they will understand that and add a little bit more <strong>to</strong> the public API <strong>for</strong> people who want <strong>to</strong><br />
<strong>build</strong> web client components and are serious about it. Without some of these interfaces and classes, it<br />
is virtually impossible <strong>to</strong> do so, when I was under the impression (drawn from the IComponent<br />
javadocs, <strong>for</strong> example) that the goal of the public API was <strong>to</strong> give developers the ability <strong>to</strong> develop<br />
third party components <strong>for</strong> the plat<strong>for</strong>m. – Apparently Johan Compagner is not <strong>to</strong>tally against the idea,<br />
so that’s good news!<br />
After these two components added, we add a fixed attribute <strong>to</strong> our markup, using<br />
add(new SimpleAttributeModifier("class", getId()+" field"));<br />
This sets a “class” attribute <strong>to</strong> our enclosing tag and set its value <strong>to</strong> the ID of our component +<br />
the key attribute “field” which is given <strong>to</strong> all input fields in <strong>Servoy</strong> (this allow <strong>for</strong> the CSS styling of all<br />
fields).<br />
And then of course we have the code <strong>to</strong> create our TextField and add it <strong>to</strong> our component.<br />
This is it <strong>for</strong> the code of our construc<strong>to</strong>r (we will add one last thing later but <strong>for</strong> now that’s enough).<br />
The second construc<strong>to</strong>r:<br />
public WicketTestBean(String id, IModel model) {<br />
which takes an ID and a Model is not really needed in our case since the model is taken from the “text”<br />
property of our class and not coming from another component, so we can get rid of it.<br />
W. Implementing the Wicket <strong>bean</strong><br />
Now let’s look at our implementation. For all the getters we are fine, because we have a variable that<br />
holds their values and that’s all there is <strong>to</strong> it, but <strong>for</strong> the setters, we actually need <strong>to</strong> update our<br />
component’s markup <strong>to</strong>o!<br />
To do this, we need <strong>to</strong> use yet another “not really public” class, which we will use in great length, this<br />
is the ChangesRecorder class (com.servoy.j2db.server.headlessclient.dataui.ChangesRecorder).<br />
The ChangesRecorder class is supposed <strong>to</strong> be modified in the next version of <strong>Servoy</strong> (“Tano”, now<br />
officially called 5.0 <strong>by</strong> Johan Compagner in its answer <strong>to</strong> my request ☺), and should be public <strong>by</strong> then<br />
so we will likely have <strong>to</strong> adapt our <strong>bean</strong>s but in the meantime, this class works as described here in<br />
4.1+…<br />
And <strong>to</strong> better use this class we will actually add it as a property <strong>to</strong> our class, like this:<br />
public ChangesRecorder jsChangeRecorder =<br />
new ChangesRecorder(new Insets(2,2,2,2), new Insets(0,0,0,0));<br />
Now the ChangesRecorder class is the one that will hold all the style changes <strong>for</strong> our component and<br />
that will tell Wicket <strong>to</strong> update its markup accordingly. We pass it 2 Insets (java.awt.Insets) which<br />
defines the default border and padding <strong>for</strong> our component.<br />
Once we have defined our ChangesRecorder inside a variable jsChangeRecorder, we will now use it in<br />
our setters, like so:<br />
public void setSize(Dimension size) {<br />
this.size = size;<br />
if (this.size != null) {<br />
jsChangeRecorder.setSize(size.width, size.height, this.border, null, 0);<br />
}<br />
}<br />
18/37
How <strong>to</strong> <strong>build</strong> a <strong>bean</strong> <strong>for</strong> <strong>Servoy</strong> - A <strong>step</strong> <strong>by</strong> <strong>step</strong> <strong>tu<strong>to</strong>rial</strong> brought <strong>to</strong> you <strong>by</strong> <strong>Servoy</strong> <strong>Stuff</strong><br />
Note that in the absence of any javadocs and sources, you can still “see” what methods exist <strong>for</strong> a<br />
class <strong>by</strong> typing “.” after the jsChangeRecorder variable name: Eclipse will s<strong>how</strong> you all the available<br />
methods and their parameters.<br />
In our setSize method, we update our local variable first, then we test if it is not null. If it is not, we<br />
call our ChangesRecorder <strong>to</strong> set the new Size, this call will tell Wicket that the component is changed<br />
and will trigger an update of the html markup.<br />
Now the other setters are obvious:<br />
public void setBorder(Border border) {<br />
this.border = border;<br />
if (this.border != null) {<br />
ComponentFac<strong>to</strong>ryHelper.createBorderCSSProperties(ComponentFac<strong>to</strong>ryHelper.create<br />
BorderString(this.border), jsChangeRecorder.getChanges());<br />
}<br />
}<br />
You remember the ComponentFac<strong>to</strong>ryHelper class (we encountered it in part 3 of this <strong>tu<strong>to</strong>rial</strong>, another<br />
one that is not “officially public” yet damn useful <strong>for</strong> Wicket <strong>bean</strong>s!), this class has some useful<br />
methods <strong>to</strong> get a Border from a String and in our case here <strong>to</strong> create the CSS <strong>for</strong> a border from a<br />
java.awt.Border, and it takes as parameter a ChangesRecorder object, surprise, surprise…<br />
Next we have:<br />
public void setLocation(Point location) {<br />
this.location = location;<br />
if (this.location != null) {<br />
jsChangeRecorder.setLocation(location.x, location.y);<br />
}<br />
}<br />
Using setLocation() on our ChangesRecorder.<br />
Then:<br />
public void setBackground(Color c) {<br />
this.background = c;<br />
if (c != null) {<br />
jsChangeRecorder.setBgcolor(PersistHelper.createColorString(c));<br />
}<br />
}<br />
Remember also the PersistHelper class Another one we saw in part 3 of our <strong>tu<strong>to</strong>rial</strong>, and still not<br />
“really public” but still very useful in case of Wicket <strong>bean</strong>s.<br />
The setForeground() method follows the same pattern:<br />
public void setForeground(Color c) {<br />
this.<strong>for</strong>eground = c;<br />
if (c != null) {<br />
jsChangeRecorder.setFgcolor(PersistHelper.createColorString(c));<br />
}<br />
}<br />
As well as the setFont():<br />
public void setFont(Font font) {<br />
this.font = font;<br />
if (font != null) {<br />
jsChangeRecorder.setFont(PersistHelper.createFontString(font));<br />
}<br />
}<br />
19/37
How <strong>to</strong> <strong>build</strong> a <strong>bean</strong> <strong>for</strong> <strong>Servoy</strong> - A <strong>step</strong> <strong>by</strong> <strong>step</strong> <strong>tu<strong>to</strong>rial</strong> brought <strong>to</strong> you <strong>by</strong> <strong>Servoy</strong> <strong>Stuff</strong><br />
The setTooltip doesn’t need more than the default:<br />
public void setToolTipText(String <strong>to</strong>oltip) {<br />
this.<strong>to</strong>olTipText = <strong>to</strong>oltip;<br />
}<br />
This is because we already added a TooltipAttributeModifier instance in our construc<strong>to</strong>r, remember<br />
add(TooltipAttributeModifier.INSTANCE);<br />
The setName() doesn’t need <strong>to</strong> trigger an update since this method will never be changed at runtime<br />
anyway, so leave it like that:<br />
public void setName(String name) {<br />
this.name = name;<br />
}<br />
The setOpaque() method is straight<strong>for</strong>ward (no need <strong>to</strong> test <strong>for</strong> null but the property is called<br />
“transparent” in the ChangesRecorder class – the opposite of opaque), so we do:<br />
public void setOpaque(boolean b) {<br />
opaque = b;<br />
jsChangeRecorder.setTransparent(!b);<br />
}<br />
And the setComponentVisible() is also simple enough:<br />
public void setComponentVisible(boolean visible) {<br />
setVisible(visible);<br />
jsChangeRecorder.setVisible(visible);<br />
}<br />
Now we have our setText() which is the heart of our <strong>bean</strong>, and we do it like that (you will recognize<br />
this code):<br />
public void setText(String text) {<br />
this.text = text;<br />
if (<strong>Servoy</strong>Utils.isContainedInFoundset(currentRecord, getDataProviderID())) {<br />
if (currentRecord.startEditing()) {<br />
currentRecord.setValue(getDataProviderID(), text);<br />
}<br />
}<br />
}<br />
We can see the advantage of having our test method code encapsulated in a static method of a utility<br />
class, we can use it from our Wicket <strong>bean</strong> the same way we used it in our Swing <strong>bean</strong>.<br />
But there is one thing that needs <strong>to</strong> be done: when the text is updated <strong>by</strong> the user (which is when the<br />
setText will be triggered, we need <strong>to</strong> tell Wicket <strong>to</strong> actually update the component. And <strong>to</strong> tell <strong>Servoy</strong><br />
that it needs <strong>to</strong> “listen” <strong>to</strong> changes of our class, we can tell him <strong>to</strong> listen <strong>to</strong> “style” changes <strong>to</strong> our class,<br />
<strong>by</strong> implementing the interface IStylePropertyChanges (com.servoy.j2db.ui.IStylePropertyChanges).<br />
Yes, this is another interface that is not public yet is quite essential <strong>to</strong> <strong>build</strong>ing a Wicket component<br />
that will trigger updates back <strong>to</strong> <strong>Servoy</strong>.<br />
So we add it <strong>to</strong> our class signature which will now be:<br />
public class WicketTestBean extends Panel implements ITextComponent,<br />
IStylePropertyChanges {<br />
20/37
How <strong>to</strong> <strong>build</strong> a <strong>bean</strong> <strong>for</strong> <strong>Servoy</strong> - A <strong>step</strong> <strong>by</strong> <strong>step</strong> <strong>tu<strong>to</strong>rial</strong> brought <strong>to</strong> you <strong>by</strong> <strong>Servoy</strong> <strong>Stuff</strong><br />
Eclipse will complain<br />
1/ that it doesn’t know the interface, so ctrl+space / cmd+space <strong>to</strong> add the import:<br />
import com.servoy.j2db.ui.IStylePropertyChanges;<br />
2/ that the methods are not implemented, so “Quick Fix” <strong>to</strong> add the 5 methods stubs needed.<br />
Fortunately, these 5 new methods are really easy <strong>to</strong> implement, all we need is <strong>to</strong> <strong>for</strong>ward the call <strong>to</strong><br />
our jsChangeRecorder:<br />
public Properties getChanges() {<br />
return jsChangeRecorder.getChanges();<br />
}<br />
public boolean isChanged() {<br />
return jsChangeRecorder.isChanged();<br />
}<br />
public void setChanged() {<br />
jsChangeRecorder.setChanged();<br />
}<br />
public void setChanges(Properties paramProperties) {<br />
jsChangeRecorder.setChanges(paramProperties);<br />
}<br />
public void setRendered() {<br />
jsChangeRecorder.setRendered();<br />
}<br />
OK, back <strong>to</strong> our setText() method, we need now <strong>to</strong> trigger an update in <strong>Servoy</strong> is <strong>to</strong> call our new<br />
method:<br />
public void setText(String text) {<br />
this.text = text;<br />
if (<strong>Servoy</strong>Utils.isContainedInFoundset(currentRecord, getDataProviderID())) {<br />
if (currentRecord.startEditing()) {<br />
currentRecord.setValue(getDataProviderID(), text);<br />
setChanged();<br />
}<br />
}<br />
}<br />
And we will also use this trick <strong>to</strong> trigger updates from the setComponentEnabled() method:<br />
public void setComponentEnabled(boolean enabled) {<br />
setEnabled(enabled);<br />
setChanged();<br />
}<br />
And we still have the methods from the I<strong>Servoy</strong>Aware <strong>bean</strong> <strong>to</strong> implement, but that is easy and we<br />
already know everything we need from previous <strong>tu<strong>to</strong>rial</strong>:<br />
public void initialize(IClientPluginAccess paramIClientPluginAccess) {<br />
// ignore<br />
}<br />
public void setSelectedRecord(IRecord record) {<br />
this.currentRecord = record;<br />
if (<strong>Servoy</strong>Utils.isContainedInFoundset(currentRecord,getDataProviderID())) {<br />
Object o = currentRecord.getValue(getDataProviderID());<br />
21/37
How <strong>to</strong> <strong>build</strong> a <strong>bean</strong> <strong>for</strong> <strong>Servoy</strong> - A <strong>step</strong> <strong>by</strong> <strong>step</strong> <strong>tu<strong>to</strong>rial</strong> brought <strong>to</strong> you <strong>by</strong> <strong>Servoy</strong> <strong>Stuff</strong><br />
this.text = (o==null) null : o.<strong>to</strong>String();<br />
setChanged();<br />
}<br />
}<br />
Note that we trigger a change here <strong>to</strong>o (meaning the component needs updating).<br />
public boolean isReadOnly() {<br />
return !isEnabled();<br />
}<br />
public void setValidationEnabled(boolean validationEnabled) {<br />
// ignore<br />
}<br />
public boolean s<strong>to</strong>pUIEditing(boolean paramBoolean) {<br />
return true;<br />
}<br />
Now look at the task panel in Eclipse, it should be empty! Is our implementation done – Almost…<br />
We still need <strong>to</strong> override 2 more methods from Wicket superclasses <strong>to</strong> be sure that everything work as<br />
planned, so let’s go <strong>to</strong> menu “Source > Override/Implement methods…”, and choose:<br />
22/37
How <strong>to</strong> <strong>build</strong> a <strong>bean</strong> <strong>for</strong> <strong>Servoy</strong> - A <strong>step</strong> <strong>by</strong> <strong>step</strong> <strong>tu<strong>to</strong>rial</strong> brought <strong>to</strong> you <strong>by</strong> <strong>Servoy</strong> <strong>Stuff</strong><br />
Then implement these like so:<br />
public String getMarkupId() {<br />
return getId();<br />
}<br />
This is <strong>to</strong> tell Wicket that the “markupId” that is going <strong>to</strong> be used <strong>for</strong> the tag is going <strong>to</strong> be the<br />
id itself (“sv_xxxxx”, where xxxxx is the UID of the component in <strong>Servoy</strong>)<br />
The other one is:<br />
protected void onRender(MarkupStream markupStream) {<br />
super.onRender(markupStream);<br />
setRendered();<br />
}<br />
This is <strong>to</strong> update our local ChangesRecorder when the component is rendered and set its rendered flag<br />
<strong>to</strong> true when the component has finished rendering…<br />
Look <strong>for</strong> more info about these two methods in the Wicket API and sources.<br />
Yet another thing that is needed <strong>by</strong> <strong>Servoy</strong> <strong>to</strong> compute the correct placement of our <strong>bean</strong> on the html<br />
layout is <strong>for</strong> our component <strong>to</strong> implement the ISupportWebBounds<br />
(com.servoy.j2db.ui.ISupportWebBounds) - yes, I know, this one is not public either, so do like me and<br />
ask <strong>for</strong> it on the <strong>for</strong>um, we really need an updated Public API!<br />
Our final (!) signature <strong>for</strong> our Wicket <strong>bean</strong> is going <strong>to</strong> be:<br />
public class WicketTestBean extends Panel implements ITextComponent,<br />
IStylePropertyChanges, ISupportWebBounds {<br />
You know the drill when adding a new interface: first ask Eclipse <strong>to</strong> add the correct import, then ask<br />
him <strong>to</strong> add the method stubs. There is only one method <strong>for</strong> ISupportWebBounds and we are going <strong>to</strong><br />
code it like that:<br />
public Rectangle getWebBounds() {<br />
Dimension localDimension =<br />
jsChangeRecorder.calculateWebSize(<br />
size.width, size.height, border, null, 0, null<br />
);<br />
}<br />
return new Rectangle(location, localDimension);<br />
Once again we use our faithful ChangesRecorder variable (just imagine what we would do without it,<br />
and remember that it is not public!) <strong>to</strong> calculate the size of our component in the web layout.<br />
Is that it I would like <strong>to</strong> say yes, but hum… we are very close.<br />
You just remind me of these kids in a long journey in a car, asking every 5 minutes: “are we there<br />
yet” ☺<br />
23/37
How <strong>to</strong> <strong>build</strong> a <strong>bean</strong> <strong>for</strong> <strong>Servoy</strong> - A <strong>step</strong> <strong>by</strong> <strong>step</strong> <strong>tu<strong>to</strong>rial</strong> brought <strong>to</strong> you <strong>by</strong> <strong>Servoy</strong> <strong>Stuff</strong><br />
X. Adding some Ajax behavior<br />
One last thing we need <strong>to</strong> take care of in the Wicket <strong>bean</strong> is <strong>to</strong> make sure that our component triggers<br />
Ajax callback <strong>to</strong> <strong>Servoy</strong> whenever our value changes. Remember that we did it with an ActionListener<br />
and a FocusAdapter anonymous inner class in our Swing <strong>bean</strong>.<br />
Well, here we are going <strong>to</strong> code the equivalent in Wicket.<br />
Wicket doesn’t know about java.awt listeners, but it relies heavily on “Behaviors”, basically a Behavior<br />
is some code that will generate some JavaScript on the client side. There are regular behaviors but<br />
there are also AjaxBehaviors, and the one we will use is the well named<br />
“AjaxFormComponentUpdatingBehavior”<br />
(org.apache.wicket.ajax.<strong>for</strong>m.AjaxFormComponentUpdatingBehavior <strong>to</strong> be precise).<br />
We could create an anonymous inner class here, but since this is an important class and we might<br />
need <strong>to</strong> add some code later, we will create a proper java file <strong>for</strong> it. Let’s add a new class<br />
“TextChangesUpdatingBehavior” <strong>to</strong> our “net.stuff.servoy.<strong>bean</strong>s.test.wicket” package:<br />
24/37
How <strong>to</strong> <strong>build</strong> a <strong>bean</strong> <strong>for</strong> <strong>Servoy</strong> - A <strong>step</strong> <strong>by</strong> <strong>step</strong> <strong>tu<strong>to</strong>rial</strong> brought <strong>to</strong> you <strong>by</strong> <strong>Servoy</strong> <strong>Stuff</strong><br />
We checked “Construc<strong>to</strong>rs from superclass” because this class doesn’t have a default construc<strong>to</strong>r so we<br />
will need <strong>to</strong> create one, and we will change it anyway.<br />
It needs <strong>to</strong> be Serializable so we add the required (Quick Fix <strong>to</strong> the rescue!):<br />
private static final long serialVersionUID = 1L;<br />
And we need <strong>to</strong> get access <strong>to</strong> our parent class (the WicketTestBean, so let’s add a variable <strong>to</strong> it):<br />
protected WicketTestBean parent;<br />
Now we can alter the construc<strong>to</strong>r this way <strong>to</strong> s<strong>to</strong>re a reference <strong>to</strong> our parent:<br />
public TextChangesUpdatingBehavior(String event, WicketTestBean parent) {<br />
super(event);<br />
this.parent = parent;<br />
}<br />
Note the call <strong>to</strong> the construc<strong>to</strong>r’s superclass <strong>to</strong> let it initialize correctly.<br />
And then we need <strong>to</strong> define what event we are going <strong>to</strong> use. These are regular browser’s JavaScript<br />
event, so in our case that’s the “onchange” event (equivalent <strong>to</strong> the ActionEvent of our ActionListener<br />
in Swing) and the “onblur” event (equivalent <strong>to</strong> the “onFocusLost()” of our FocusListener in Swing).<br />
To make things a little bit tidier, we can add 2 static values <strong>to</strong> hold our event Strings:<br />
public final static String DATA_CHANGE = "onchange";<br />
public final static String LOST_FOCUS = "onblur";<br />
And now we can implement the only important method of our AjaxFormComponentUpdatingBehavior<br />
subclass the “onUpdate” method. This one will be called <strong>by</strong> Wicket <strong>to</strong> allow us <strong>to</strong> trigger some code on<br />
the event we want <strong>to</strong> “listen” <strong>to</strong>:<br />
protected void onUpdate(AjaxRequestTarget target) {<br />
String evt = getEvent();<br />
if (evt.equalsIgnoreCase(DATA_CHANGE) || evt.equalsIgnoreCase(LOST_FOCUS)) {<br />
parent.testChanged();<br />
}<br />
}<br />
Wicket will pass an AjaxRequestTarget <strong>to</strong> our method (we don’t really need it here anyway – but you<br />
can look <strong>for</strong> it in the Wicket API <strong>to</strong> know more…). What we do need is <strong>to</strong> check the kind of event, so<br />
we retrieve the current event from the superclass, it’s a String, and we check it against our static<br />
Strings.<br />
If the event is one that we are interested in, we ask our parent <strong>to</strong> test if it’s changed…<br />
25/37
How <strong>to</strong> <strong>build</strong> a <strong>bean</strong> <strong>for</strong> <strong>Servoy</strong> - A <strong>step</strong> <strong>by</strong> <strong>step</strong> <strong>tu<strong>to</strong>rial</strong> brought <strong>to</strong> you <strong>by</strong> <strong>Servoy</strong> <strong>Stuff</strong><br />
The testChanged() method doesn’t exist yet in our class, but there is little Eclipse won’t do <strong>for</strong> you if<br />
you ask it nicely with a “Quick Fix” trick:<br />
This will add the method stub directly in our WicketTestBean class (even if the java file is not opened)!<br />
And now, do you remember what we did in our Swing <strong>bean</strong> be<strong>for</strong>e we updated our record That’s<br />
right, we checked if an update was needed <strong>by</strong> comparing the value of the new text <strong>to</strong> the previous<br />
version.<br />
Which means we need <strong>to</strong> add a previousText variable <strong>to</strong> our class:<br />
protected String previousText;<br />
And then update its value when <strong>Servoy</strong> sets a selected record:<br />
public void setSelectedRecord(IRecord record) {<br />
this.currentRecord = record;<br />
if (<strong>Servoy</strong>Utils.isContainedInFoundset(currentRecord,getDataProviderID())) {<br />
Object o = currentRecord.getValue(getDataProviderID());<br />
this.text = (o==null) null : o.<strong>to</strong>String();<br />
this.previousText = getText();<br />
setChanged();<br />
}<br />
}<br />
Now that our previousText value is coherent, we can use it <strong>to</strong> test if the new value is really « new » :<br />
/**<br />
* Will trigger an update if the text has changed:<br />
*/<br />
public void testChanged() {<br />
if (!Utils.stringSafeEquals(previousText, getText())) {<br />
setChanged();<br />
}<br />
}<br />
You remember the Utils.stringSafeEquals we used in our Swing <strong>bean</strong>. Same thing here, and if it is<br />
needed we set our ChangesRecorder <strong>to</strong> “changed”.<br />
26/37
How <strong>to</strong> <strong>build</strong> a <strong>bean</strong> <strong>for</strong> <strong>Servoy</strong> - A <strong>step</strong> <strong>by</strong> <strong>step</strong> <strong>tu<strong>to</strong>rial</strong> brought <strong>to</strong> you <strong>by</strong> <strong>Servoy</strong> <strong>Stuff</strong><br />
Now everything is finally in place <strong>for</strong> our AjaxBehavior, but we need <strong>to</strong> add it <strong>to</strong> our field, so we do it in<br />
our construc<strong>to</strong>r which is (in its final incarnation):<br />
public WicketTestBean(String id) {<br />
super(id);<br />
add(StyleAttributeModifierModel.INSTANCE);<br />
add(TooltipAttributeModifier.INSTANCE);<br />
setVersioned(false);<br />
setOutputMarkupId(true);<br />
TextField field = new TextField("testField", new PropertyModel(this, "text"));<br />
add(field);<br />
field.add(new<br />
TextChangesUpdatingBehavior(TextChangesUpdatingBehavior.DATA_CHANGE, this));<br />
field.add(new<br />
TextChangesUpdatingBehavior(TextChangesUpdatingBehavior.LOST_FOCUS, this));<br />
}<br />
Dora would say it <strong>to</strong>o: we did it! (Sorry <strong>for</strong> the reference, my daughter is a big fan)<br />
We’ve got out Wicket <strong>bean</strong> all set!<br />
So you would think that all you need <strong>to</strong> do now is test this in your solutions…<br />
But not so fast! Right now we have 2 different implementations of the same kind of code, one as a<br />
Swing component <strong>for</strong> the smart client (and the developer environment, actually), and one in Wicket <strong>for</strong><br />
the web client. But yet nothing tells <strong>Servoy</strong> that they are the two sides of the same coin!<br />
And that’s where we will need the last piece of our puzzle, impersonated <strong>by</strong> yet another class, our<br />
<strong>Servoy</strong>TestBean class which will tie everything <strong>to</strong>gether nicely.<br />
27/37
How <strong>to</strong> <strong>build</strong> a <strong>bean</strong> <strong>for</strong> <strong>Servoy</strong> - A <strong>step</strong> <strong>by</strong> <strong>step</strong> <strong>tu<strong>to</strong>rial</strong> brought <strong>to</strong> you <strong>by</strong> <strong>Servoy</strong> <strong>Stuff</strong><br />
Y. Assembling all the pieces of our <strong>bean</strong><br />
The key element is the use of yet another “not so public” interface, and one that you cannot do<br />
without <strong>to</strong> <strong>build</strong> smart/web client <strong>bean</strong>s: that is the I<strong>Servoy</strong>BeanFac<strong>to</strong>ry interface<br />
(com.servoy.j2db.I<strong>Servoy</strong>BeanFac<strong>to</strong>ry).<br />
Once again I urge you <strong>to</strong> petition with me <strong>to</strong> update the Public API javadocs <strong>to</strong> contain this interface.<br />
Without it, there is simply no Wicket <strong>bean</strong>s, no web client <strong>bean</strong>s possible!<br />
So go <strong>to</strong> the <strong>for</strong>um, check this post: http://<strong>for</strong>um.servoy.com/view<strong>to</strong>pic.phpf=15&t=12712<br />
And please add your support <strong>to</strong> my request; I think it is more than reasonable, it is imperative! And an<br />
anonymous case in the support system, easily overlooked will not be enough. * Johan Compagner<br />
agreed <strong>to</strong> add it <strong>to</strong>day (July 14 th )<br />
Back <strong>to</strong> our I<strong>Servoy</strong>BeanInterface, this one only have two methods, so I guess we are lucky, not <strong>to</strong>o<br />
much code <strong>to</strong> add here… We create a new simple class, call it “<strong>Servoy</strong>TestBean” inside our<br />
“net.stuff.servoy.<strong>bean</strong>s.test” package, it must implement the I<strong>Servoy</strong>BeanInterface, like so:<br />
28/37
How <strong>to</strong> <strong>build</strong> a <strong>bean</strong> <strong>for</strong> <strong>Servoy</strong> - A <strong>step</strong> <strong>by</strong> <strong>step</strong> <strong>tu<strong>to</strong>rial</strong> brought <strong>to</strong> you <strong>by</strong> <strong>Servoy</strong> <strong>Stuff</strong><br />
You will see the 2 methods stubs as defined <strong>by</strong> the I<strong>Servoy</strong>BeanFac<strong>to</strong>ry interface and its ances<strong>to</strong>r.<br />
The first method:<br />
public IComponent getBeanInstance(int appMode, IClientPluginAccess<br />
paramIClientPluginAccess, Object[] paramArrayOfObject) {<br />
This is the one that will do all the work, and we will see <strong>how</strong> <strong>to</strong> implement it in a minute…<br />
But first, let’s add all the properties our <strong>bean</strong>s work with:<br />
private Dimension size;<br />
private Point location;<br />
private String name;<br />
private Color background;<br />
private Color <strong>for</strong>eground;<br />
private Border border;<br />
private Font font;<br />
private String <strong>to</strong>olTipText;<br />
private boolean tansparent;<br />
private String dataProviderID;<br />
29/37
How <strong>to</strong> <strong>build</strong> a <strong>bean</strong> <strong>for</strong> <strong>Servoy</strong> - A <strong>step</strong> <strong>by</strong> <strong>step</strong> <strong>tu<strong>to</strong>rial</strong> brought <strong>to</strong> you <strong>by</strong> <strong>Servoy</strong> <strong>Stuff</strong><br />
Then we generate our getters and setters. Menu “Source > Generate Getters and Setters…”, we select<br />
all the properties, and click OK:<br />
Note that of the 10 properties, Eclipse will generate 19 methods, that’s because a getName() method<br />
has already been generated from our interface.<br />
We also know that we are going <strong>to</strong> <strong>for</strong>ward all the setXXX properties <strong>to</strong> the “real” component (the<br />
Swing <strong>bean</strong> or the Wicket <strong>bean</strong>), so <strong>to</strong> do it easily, we add a variable <strong>to</strong> hold it:<br />
protected ITextComponent component = new SwingTestBean();<br />
Note that:<br />
1/ the variable is protected (we will not need <strong>to</strong> had a getter and a setter <strong>for</strong> it)<br />
2/ the type of the variable is actually the interface ITextComponent, because it will then be capable of<br />
holding either a SwingTestBean or a WicketTestBean: again that’s one great advantage of interfaces.<br />
3/ we instantiated the variable with an instance of our SwingTestBean. Now why is that Well, the<br />
thing is that when <strong>Servoy</strong> will first call the <strong>bean</strong>, it will be done from the “Place Bean…” command<br />
30/37
How <strong>to</strong> <strong>build</strong> a <strong>bean</strong> <strong>for</strong> <strong>Servoy</strong> - A <strong>step</strong> <strong>by</strong> <strong>step</strong> <strong>tu<strong>to</strong>rial</strong> brought <strong>to</strong> you <strong>by</strong> <strong>Servoy</strong> <strong>Stuff</strong><br />
(menu or but<strong>to</strong>n), meaning this will be in the developer environment… And as far as we know the<br />
developer environment is not a browser environment, it is a Swing environment (in fact it is a SWT<br />
environment, but I’m going <strong>to</strong>o far here ☺).<br />
So the first time <strong>Servoy</strong> calls the <strong>bean</strong>, it expects <strong>to</strong> find a Swing <strong>bean</strong> <strong>to</strong> place on the <strong>for</strong>m, that’s why<br />
we instantiate the SwingBean when we declare the variable (which is roughly equivalent <strong>to</strong> a call <strong>to</strong> a<br />
Construc<strong>to</strong>r with no parameters).<br />
OK, we will get back <strong>to</strong> our getBeanInstanceMethod(), but we already have everything we need <strong>to</strong><br />
implement our setters.<br />
We leave the getters just as Eclipse has done them; they are perfectly fine as-is.<br />
The only one we need <strong>to</strong> change is the getName() which needs <strong>to</strong> be coded like that:<br />
public String getName() {<br />
return this.name;<br />
}<br />
The setters will look strangely familiar <strong>to</strong> you, let’s see:<br />
public void setSize(Dimension size) {<br />
this.size = size;<br />
if (component != null) {<br />
component.setSize(size);<br />
}<br />
}<br />
public void setLocation(Point location) {<br />
this.location = location;<br />
if (component != null) {<br />
component.setLocation(location);<br />
}<br />
}<br />
public void setBackground(Color background) {<br />
this.background = background;<br />
if (component != null) {<br />
component.setBackground(background);<br />
}<br />
}<br />
public void setForeground(Color <strong>for</strong>eground) {<br />
this.<strong>for</strong>eground = <strong>for</strong>eground;<br />
if (component != null) {<br />
component.setForeground(<strong>for</strong>eground);<br />
}<br />
}<br />
public void setBorder(Border border) {<br />
this.border = border;<br />
if (component != null) {<br />
component.setBorder(border);<br />
}<br />
}<br />
public void setFont(Font font) {<br />
this.font = font;<br />
if (component != null) {<br />
component.setFont(font);<br />
}<br />
}<br />
31/37
How <strong>to</strong> <strong>build</strong> a <strong>bean</strong> <strong>for</strong> <strong>Servoy</strong> - A <strong>step</strong> <strong>by</strong> <strong>step</strong> <strong>tu<strong>to</strong>rial</strong> brought <strong>to</strong> you <strong>by</strong> <strong>Servoy</strong> <strong>Stuff</strong><br />
public void setToolTipText(String <strong>to</strong>olTipText) {<br />
this.<strong>to</strong>olTipText = <strong>to</strong>olTipText;<br />
if (component != null) {<br />
component.setToolTipText(<strong>to</strong>olTipText);<br />
}<br />
}<br />
public void setDataProviderID(String dataProviderID) {<br />
this.dataProviderID = dataProviderID;<br />
if (component != null) {<br />
component.setDataProviderID(dataProviderID);<br />
}<br />
}<br />
public void setTansparent(boolean tansparent) {<br />
this.tansparent = tansparent;<br />
if (component != null) {<br />
component.setOpaque(!tansparent);<br />
}<br />
}<br />
All these methods are <strong>build</strong> on the same principle, we s<strong>to</strong>re the value set <strong>by</strong> the user (from the<br />
Properties View Edi<strong>to</strong>r in <strong>Servoy</strong> Developer), then we check our component <strong>for</strong> null and <strong>for</strong>ward the<br />
value <strong>to</strong> it…<br />
The only one <strong>for</strong> which you actually need <strong>to</strong> think about a little is the setTransparent(), since we really<br />
only have an “opaque” property which is the exact contrary of “transparent” (isn’t it), we invert the<br />
boolean received be<strong>for</strong>e passing it <strong>to</strong> the setOpaque() method. No advanced Java <strong>to</strong>pics here!<br />
So it’s time <strong>to</strong> get back <strong>to</strong> our getBeanInstance() method, this method is called <strong>by</strong> <strong>Servoy</strong> when it<br />
wants <strong>to</strong> retrieve an instance of an object of type IComponent (that’s why it is called this way: it comes<br />
from a well know Object Oriented Pattern called the “Fac<strong>to</strong>ry” pattern, where an object is used <strong>to</strong><br />
produce instances of objects from a set of parameters, see GOF pattern – “Gang Of Four” on the web).<br />
So <strong>Servoy</strong> calls the method, and it sends 3 parameters <strong>to</strong> help us create the right kind of object:<br />
- int: is the type of client actually running, and we only need <strong>to</strong> test if this is the Web client, and<br />
we have a constant <strong>for</strong> that in the IClientAccessPlugin interface: WEB_CLIENT<br />
- IClientPluginAccess: the <strong>Servoy</strong> client (a reduced interface <strong>to</strong> it actually)<br />
- Object[]: and array of objects, which are parameters. As far as I know there is only one object<br />
in this array, it is <strong>Servoy</strong>’s UUID <strong>for</strong> the object as a String.<br />
So we implement our method like this:<br />
public IComponent getBeanInstance(int appMode,<br />
IClientPluginAccess paramIClientPluginAccess,<br />
Object[] paramArrayOfObject) {<br />
}<br />
String id = (String)paramArrayOfObject[0];<br />
if (appMode == IClientPluginAccess.WEB_CLIENT) {<br />
component = new WicketTestBean(id);<br />
initComponent();<br />
}<br />
return component;<br />
32/37
How <strong>to</strong> <strong>build</strong> a <strong>bean</strong> <strong>for</strong> <strong>Servoy</strong> - A <strong>step</strong> <strong>by</strong> <strong>step</strong> <strong>tu<strong>to</strong>rial</strong> brought <strong>to</strong> you <strong>by</strong> <strong>Servoy</strong> <strong>Stuff</strong><br />
1/ We get the ID as a String from the array of Object[] parameter passed<br />
2/ we test if the call is from a web client, if so we<br />
3/ set our component variable <strong>to</strong> be a WicketBean created from the construc<strong>to</strong>r based on an ID<br />
(remember the WicketBean construc<strong>to</strong>r), and call <strong>for</strong> some component initializations (our wicket <strong>bean</strong><br />
needs some default value, we will create the initComponent() in a minute: Quick Fix!).<br />
4/ finally we return our component (a Swing <strong>bean</strong> or a Wicket <strong>bean</strong>, but still an IComponent) <strong>to</strong> <strong>Servoy</strong><br />
Our initComponent method only triggers the setters of our Wicket <strong>bean</strong>, with some default values if<br />
none have been provided (“Default” in the Properties View edi<strong>to</strong>r of <strong>Servoy</strong>).<br />
/**<br />
* Initializes the wicket <strong>bean</strong> (sets all the default values).<br />
*/<br />
private void initComponent() {<br />
setName(name);<br />
setDataProviderID(dataProvide rID) ;<br />
setBackground((background == null) Color.white : background);<br />
setForeground((<strong>for</strong>eground == null) Color.black : <strong>for</strong>eground);<br />
setBorder((border == null) new EtchedBorder(1) : border);<br />
setFont(font);<br />
setToolTipText(<strong>to</strong>olTipText);<br />
setTansparent(tansparent);<br />
}<br />
That’s it <strong>for</strong> our <strong>Servoy</strong>TestBean class, we can wrap it up.<br />
Z. Wrapping it all up<br />
Last but not least, if you have followed until here you will have noticed that right now our BeanInfo<br />
class is based on the SwingTestBean, which is not right because we want <strong>to</strong> use our<br />
I<strong>Servoy</strong>BeanFac<strong>to</strong>ry <strong>Servoy</strong>TestBean.<br />
It’s time <strong>to</strong> change that so that it points <strong>to</strong> our <strong>Servoy</strong>TestBean instead.<br />
A simple find/replace in Eclipse from “SwingTestBean” <strong>to</strong> “<strong>Servoy</strong>TestBean” should do the trick, and<br />
our only method should now look like that:<br />
public PropertyDescrip<strong>to</strong>r[] getPropertyDescrip<strong>to</strong>rs()<br />
{<br />
try {<br />
List liste = new ArrayList();<br />
liste.add(new PropertyDescrip<strong>to</strong>r("dataProviderID", <strong>Servoy</strong>TestBean.class));<br />
liste.add(new PropertyDescrip<strong>to</strong>r("name", <strong>Servoy</strong>TestBean.class));<br />
liste.add(new PropertyDescrip<strong>to</strong>r("background", <strong>Servoy</strong>TestBean.class));<br />
liste.add(new PropertyDescrip<strong>to</strong>r("<strong>for</strong>eground", <strong>Servoy</strong>TestBean.class));<br />
liste.add(new PropertyDescrip<strong>to</strong>r("font", <strong>Servoy</strong>TestBean.class));<br />
liste.add(new PropertyDescrip<strong>to</strong>r("<strong>to</strong>olTipText", <strong>Servoy</strong>TestBean.class));<br />
liste.add(new PropertyDescrip<strong>to</strong>r("transparent", <strong>Servoy</strong>TestBean.class));<br />
liste.add(new PropertyDescrip<strong>to</strong>r("border", <strong>Servoy</strong>TestBean.<br />
class));<br />
liste.add(new PropertyDescrip<strong>to</strong>r("size", <strong>Servoy</strong>TestBean.class));<br />
liste.add(new PropertyDescrip<strong>to</strong>r("location", <strong>Servoy</strong>TestBean.class));<br />
PropertyDescrip<strong>to</strong>r apropertydescrip<strong>to</strong>r[] =<br />
liste.<strong>to</strong>Array(new PropertyDescrip<strong>to</strong>r[0]);<br />
33/37
How <strong>to</strong> <strong>build</strong> a <strong>bean</strong> <strong>for</strong> <strong>Servoy</strong> - A <strong>step</strong> <strong>by</strong> <strong>step</strong> <strong>tu<strong>to</strong>rial</strong> brought <strong>to</strong> you <strong>by</strong> <strong>Servoy</strong> <strong>Stuff</strong><br />
return apropertydescrip<strong>to</strong>r;<br />
} catch(Exception e) {<br />
Debug.error((new StringBuilder()).append(<br />
"SwingTestBeanInfo: unexpected exception: "<br />
).append(e).<strong>to</strong>String());<br />
}<br />
}<br />
return null;<br />
And the name of the class should also be changed, from SwingTestBeanInfo <strong>to</strong> SwingTestBeanInfo.<br />
To do that, you can either select the name of the class in its signature, or select the file in the Package<br />
Explorer, and choose “Refac<strong>to</strong>r > Rename…”:<br />
Either way, it will change the name of the class and the name of the file, and change every reference<br />
<strong>to</strong> it in our sources if any…<br />
Of course, <strong>to</strong> wrap our <strong>bean</strong> we also need <strong>to</strong> create a MANIFEST.MF file with this content:<br />
Manifest-Version: 1.0<br />
Name: net/stuff/servoy/<strong>bean</strong>s/test/<strong>Servoy</strong>TestBean.class<br />
Java-Bean: True<br />
34/37
How <strong>to</strong> <strong>build</strong> a <strong>bean</strong> <strong>for</strong> <strong>Servoy</strong> - A <strong>step</strong> <strong>by</strong> <strong>step</strong> <strong>tu<strong>to</strong>rial</strong> brought <strong>to</strong> you <strong>by</strong> <strong>Servoy</strong> <strong>Stuff</strong><br />
And finally we need <strong>to</strong> create a JAR package, using the “Export…” function on our project, choosing<br />
“Java > JAR File”, and then placing it in our <strong>Servoy</strong>/application_server/<strong>bean</strong>s/ folder:<br />
35/37
How <strong>to</strong> <strong>build</strong> a <strong>bean</strong> <strong>for</strong> <strong>Servoy</strong> - A <strong>step</strong> <strong>by</strong> <strong>step</strong> <strong>tu<strong>to</strong>rial</strong> brought <strong>to</strong> you <strong>by</strong> <strong>Servoy</strong> <strong>Stuff</strong><br />
36/37
How <strong>to</strong> <strong>build</strong> a <strong>bean</strong> <strong>for</strong> <strong>Servoy</strong> - A <strong>step</strong> <strong>by</strong> <strong>step</strong> <strong>tu<strong>to</strong>rial</strong> brought <strong>to</strong> you <strong>by</strong> <strong>Servoy</strong> <strong>Stuff</strong><br />
That’s it! You can restart <strong>Servoy</strong> and place your <strong>bean</strong> on a <strong>for</strong>m, give it a dataProvider, and see that<br />
we just made a text field that works exactly like <strong>Servoy</strong>’s own text field. (Except <strong>for</strong> <strong>for</strong>matting,<br />
callbacks, etc. we did only the basics of an input component).<br />
Try this <strong>bean</strong> in the smart client, and in the web client, and it should work just like a text field does<br />
(data-broadcasting included).<br />
Of course this <strong>bean</strong> is not very useful you would say, but this part of the <strong>tu<strong>to</strong>rial</strong> was not about “useful”<br />
but about addressing a lot of new concepts that you need <strong>to</strong> understand a little bit be<strong>for</strong>e we go back<br />
<strong>to</strong> our <strong>Servoy</strong>Slider <strong>bean</strong>.<br />
I have tried <strong>to</strong> make it as simple as possible so that you get a good grasp of all the main concepts.<br />
Now it’s up <strong>to</strong> your <strong>to</strong> play with it and try <strong>to</strong> add a few more properties <strong>for</strong> example, and go <strong>to</strong> the<br />
Wicket API and examples <strong>to</strong> learn more tips and tricks that are beyond the scope of this little <strong>tu<strong>to</strong>rial</strong><br />
but that might prove useful later when you will want <strong>to</strong> <strong>build</strong> Wicket <strong>bean</strong>s…<br />
Here you should have learned the basics of what Wicket <strong>bean</strong>s are about in <strong>Servoy</strong>.<br />
As always, you will find the complete Eclipse project on the <strong>Servoy</strong> <strong>Stuff</strong> web site, here:<br />
http://www.servoy-stuff.net/<strong>tu<strong>to</strong>rial</strong>s/utils/t02/TestBean_EclipseProject.zip<br />
(Import in any Eclipse distribution)<br />
The compiled <strong>bean</strong> (targeted <strong>for</strong> java 1.5) will be available here:<br />
http://www.servoy-stuff.net/<strong>tu<strong>to</strong>rial</strong>s/utils/t02/testBean.jar<br />
(Put in you /<strong>bean</strong>s folder)<br />
And there is no solution attached because you can use this <strong>bean</strong> just like you would use a simple Text<br />
field, and I’m not going <strong>to</strong> try <strong>to</strong> teach you that ;-)<br />
Hope your liked this <strong>tu<strong>to</strong>rial</strong>, and that you did learn a few things from it, and that it will help you <strong>build</strong><br />
some great <strong>bean</strong>s <strong>for</strong> <strong>Servoy</strong> that will be web compatible.<br />
Feel free <strong>to</strong> comment, question and suggest on the <strong>Servoy</strong> <strong>Stuff</strong> web site, I always like <strong>to</strong> hear from<br />
you!<br />
And get ready <strong>for</strong> the next part where we will go back <strong>to</strong> our <strong>Servoy</strong>SliderBean and prepare the ground<br />
<strong>for</strong> implementing the Wicket side of it. This will involved some refac<strong>to</strong>ring and hopefully will teach you<br />
a few more useful tips and tricks in Java <strong>for</strong> Serclipse!<br />
See you then,<br />
Patrick Talbot<br />
<strong>Servoy</strong> <strong>Stuff</strong><br />
2009-07-14<br />
37/37