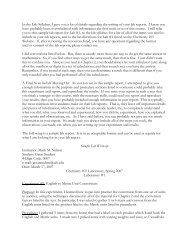
Sample Lab Report #2 - Faculty Web Hosting
Sample Lab Report #2 - Faculty Web Hosting
Sample Lab Report #2 - Faculty Web Hosting

Create successful ePaper yourself
Turn your PDF publications into a flip-book with our unique Google optimized e-Paper software.
Dear Chemistry 103 On-Line Students,<br />
The following is a sample report for the first experiment of the second laboratory experience for this<br />
course. I believe it is a good example of how your lab reports should be written, both in content and<br />
format. I did not include the second experiment, because I felt it would not add anything, as far as<br />
providing you, the student, with a sample. As you look over the following sample report, note at the top<br />
of the first page I include the instructor’s name, the student’s name, their 4-digit code for posting scores,<br />
and the date. Then, you need to include the name and number of the course, term/semester, year of the<br />
course, and the number of the laboratory.<br />
Following this information, you should include sections in your report for the purpose of the<br />
experiment, the materials you used, the procedure you used, your experimental observations, your<br />
explanation of your results and observations, and the web search info. In addition, if there are any<br />
questions posed to you in the lab directions, make sure you answer those questions in your report.<br />
Note: If you wish, you may copy the purpose of the experiment from the lab directions into your report,<br />
or you may change it and place it in your own words. And, this is about the only item you should copy<br />
and paste from the lab directions.<br />
The next section lists the materials you used to do the experiment. I give you a list on the lab directions<br />
of the items you need, but you may always improvise. So, in this section tell me what you actually used<br />
to do your lab experiment.<br />
Your procedure section should be next. In this section, you tell me how you actually did the experiment<br />
and you may list any observations you may during the experiment in this section, if you wish. Again, in<br />
the directions for the lab, I tell you the procedure to use, but how you actually do the experiment and<br />
what you observe can vary some from the lab directions. Remember that I am not there with you doing<br />
the experiment and the only way I will know what you did and what you experienced is by you telling me<br />
about it in your lab report.<br />
In the results section, you should tell me what the results of your experiment were, what observations<br />
you made, and anything else pertinent for the person reading your report to know about what you did,<br />
the results you obtained, and what you observed.<br />
In most cases, I will ask you to search the <strong>Web</strong> and find additional information regarding the experiment<br />
you did. Hopefully, from what I have written in the lab directions, and what you find on-line, you will be<br />
able to write an explanation of your results and observations. In the lab directions, I usually tell you<br />
what to expect and a simple explanation of why. The main reason I do this is because I am not there<br />
with you and assisting you with your lab, and so students feel comfortable with their results and<br />
observations. However, this section should be written by you and it should not be my words copied<br />
from the lab directions, and it should not be whatever you found on-line directly. Your report should be<br />
in your own words. Use the resources available to you in order to better understand your experimental<br />
results and observations, and to explain them to others.<br />
Some students like to combine the explanation of results and the <strong>Web</strong> search into one section and others<br />
write two separate sections. You should do whatever makes sense to you when you are writing your<br />
report. Please look at this sample lab report for <strong>Lab</strong> <strong>#2</strong> and let me know if you have any questions<br />
about content or format. And, the sample of content and format listed below can be used to assist you<br />
in writing the lab reports for <strong>Lab</strong> 2 to <strong>Lab</strong> #10.
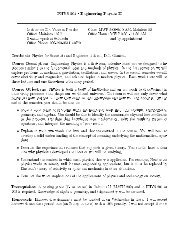
Instructor: Mark M. Nelson<br />
Student: Joe Cool and 4-Digit Code: 1234<br />
e-mail: JoeCool-Snoopy@ulv.edu<br />
Date: March 26, 2007<br />
Chemistry 103 <strong>Lab</strong>oratory, Spring 2007<br />
<strong>Lab</strong>oratory <strong>#2</strong><br />
Purpose: I am doing these experiments to better understand the differences between physical changes<br />
and chemical changes. I remember we went over and discussed physical and chemical changes in<br />
Chapter 3 of the text and the instructor’s corresponding lecture notes, DVD material, and Chapter 3.<br />
Experiment 1 of <strong>Lab</strong> 2: Physical Change<br />
Purpose: In the first experiment, I am going to observe a physical change, the lowering of the freezing<br />
point of water by adding salt to an ice water solution.<br />
Materials: From the photo below, you can see the items I used for this experiment. In the lab<br />
directions, I was asked to use a small metal can, and as you can see I was able to use a Campbell’s Cream<br />
of Mushroom soup can. I used an outdoor thermometer, one that has Fahrenheit and Centigrade scales,<br />
water, crushed ice, and I used a lot of salt. The directions said to use a tablespoon or 2 of salt. I used<br />
about 2 tablespoons for my container.<br />
Temperature without Salt<br />
Temperature with Salt
Procedure:<br />
1) I filled my soup can about three fourths of the way full with the crushed ice.<br />
2) I added cold water to the soup can and made sure to cover all of the crushed ice I had in it. I<br />
stirred the ice and water a quite a few times to make sure that the ice water was at a constant<br />
temperature.<br />
3) I placed my outdoor thermometer in the ice water in the container to measure the temperature of<br />
the ice water mixture.<br />
4) I waited a couple of minutes and kept stirring the ice water mixture to make sure the temperature<br />
was constant. After this time, I measured the temperature of just the ice water mixture, without<br />
the salt added. You can see the temperature of the ice water solution in the photo below.<br />
After about 120 seconds: 34 °F = 1.1 °C (no salt)<br />
5) I removed the thermometer from the ice water solution and added about 2 tablespoons of salt to<br />
the ice water solution. I stirred this really well to dissolve as much of the salt in the ice water.<br />
6) After stirring for a couple of minutes to make sure I had the salt mixed in the ice water and the<br />
solution was at a constant temperature, I placed the thermometer back in the ice water with salt<br />
solution and waited for a minute or so before reading it. I read and recorded the temperature of<br />
the salt-ice water solution.<br />
After about 120 seconds: about 28 °F = -2.2 °C (salt added)
Results: As the lab directions hinted, I saw a significant decrease in temperature. The temperature went<br />
from 34 °F to 28 °F, or a 6 °F change. In centigrade, this went from 1.1 °C to –2.2 °C, or a 3.3 °C<br />
change. I am not sure if I had used a different container or more salt if the results would have been<br />
more dramatic, but I did see a definite and significant decrease in the temperature when I added the two<br />
tablespoons of salt to the ice water solution. When I poured out the ice water solution with the salt in it,<br />
I noticed I still had un-dissolved salt in the solution. I thought I stirred this really well, though when I<br />
saw the salt in the bottom of the container, I am not sure if I did not stir it enough or if I could not get<br />
any more salt dissolved in the ice water.<br />
<strong>Web</strong> Search and Explanation of Results: I was able to find a couple of really cool web sites, which<br />
discussed something called Freezing Point Depression. Basically, these sites discussed this phenomenon<br />
and said that adding another substance to the ice water will interfere with the water molecules getting close<br />
enough together to freeze, which lowers the freezing point of a solution, such as ice water. They talked<br />
about the fact that the salt particles will get in the way of the water coming together to freeze and so it<br />
takes more energy to freeze the water and thus the freezing point is lowered. The really cool part was if<br />
more salt is added, then the freezing point is even lower. The freezing point is directly proportional to the<br />
number of particles added, in this case, salt. So, if I had added even more salt, I would have observed the<br />
freezing point or the temperature of the salt and ice water solution go down even lower. There are some<br />
very common and practical uses of the freezing point depression. They also talked about the fact that this<br />
works for other solutions and other substances. What I mean is that we would observe the same type of<br />
thing occurring with ice water if we used a different substance than salt. We would see the lowering of the<br />
freezing point of ice water if we added a different type of substance to the ice water than salt. And, this<br />
will also happen for other solutions. For example, if we had rubbing alcohol at its freezing point and<br />
added something that could be dissolved in the rubbing alcohol, then we would observe a lowering of the<br />
freezing point of rubbing alcohol.<br />
The addresses to the couple of web sites I visited are listed below. They really helped me better<br />
understand what I observed in this experiment and I was much more confident in my ability to explain<br />
what happened and why it happened after reading the information and examples at these web sites.<br />
http://hyperphysics.phy-astr.gsu.edu/hbase/chemical/meltpt.html<br />
http://antoine.frostburg.edu/chem/senese/101/solutions/faq/thermo-explanation-of-freezingpointdepression.shtml<br />
I grew up in Montana and where I lived it snowed a lot and there were times where there was a significant<br />
amount of snow on the roads and sidewalks, and sometimes they were covered with ice. After a big<br />
snowfall, there were snowplows that went around and scraped all of the snow off the roads and there were<br />
other worked that cleared the snow off the sidewalks. But, it was impossible for them to get all of the<br />
snow off the roads and sidewalks, and in some cases there would be ice under the snow on the roads and<br />
sidewalks. After the plows went through and cleared the roads, they were followed by large trucks, which<br />
poured salt on the roads and spayed it up on the public sidewalks downtown. So, even if there was some<br />
snow and ice left after the initial clearing, they were able to melt the rest of it by the very light covering of<br />
salt.<br />
I also remember another use of ice in salt water from when I was a kid. During the summer, we always<br />
had some great parties at our house. We had our family and most of my parent’s brothers and sisters and<br />
their kids lived in the same town. It seemed like every couple of weeks, we had aunts and uncles and<br />
cousins coming over to our house for a big barbecue. The adults would hang out and play cards or games,
have great food, drink beer, and just have a great time enjoying each other’s company. And, all of the<br />
other kids and me would run around and play. We had so much property on the ranch and there were<br />
always things for us to get into. But, the favorite time of all this was making homemade ice cream. We<br />
had some of the best ice cream, but I remember all the work of cranking the crank on the ice cream<br />
maker. The ice cream maker had a wooden bucket and inside the wooden bucket would sit the metal<br />
container that had all of the fixings for the ice cream. There was space between the metal container and<br />
the wooden bucket. I remember my Dad adding ice, some water, and rock salt to this space and at the<br />
time I didn’t know why he added the rock salt. But, now I know that the rock salt lowered the freezing<br />
point of the ice water to less than the normal freezing point of 32 degrees F and this is why we were able<br />
to make the ice cream. The salt made the temperature of the ice water mix low enough to freeze the<br />
cream and the other items in the metal container as you turned the crank. I remember how you could tell<br />
when you were getting close to having the ice cream ready to eat because it would get so hard to turn the<br />
crank. The cream and other items would get so thick as they froze, as a little kid I would not be able to<br />
turn the crank when this happened.<br />
I really enjoyed this experiment a lot and now I have a better understanding of why adding salt to snowy<br />
and ice covered roads helps to melt it. That is, the freezing point becomes lower with the salt and now the<br />
outside temperature is not cold enough to keep the snow or ice from melting. This is definitely a physical<br />
property of water since we were just observing a change in the freezing point of water and we were not<br />
having a chemical change occur.