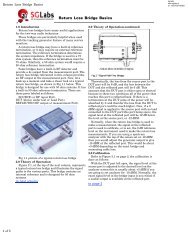
Bird 4304A RF Directional Thruline Wattmeter - SGLabs
Bird 4304A RF Directional Thruline Wattmeter - SGLabs
Bird 4304A RF Directional Thruline Wattmeter - SGLabs

Create successful ePaper yourself
Turn your PDF publications into a flip-book with our unique Google optimized e-Paper software.
INSTRUCTION BOOK<br />
<strong>RF</strong> DIRECTIONAL<br />
THRULINE® WATTMETER<br />
MODEL <strong>4304A</strong><br />
©Copyright 2002 by <strong>Bird</strong> Electronic Corporation<br />
Instruction Book Part Number 920-<strong>4304A</strong> Rev. E<br />
<strong>Thruline</strong>® and Termaline® are registered trademarks<br />
of <strong>Bird</strong> Electronic Corporation
THIS page intentionally left blank
Safety Precautions<br />
The following are general safety precautions that are not necessarily<br />
related to any specific part or procedure, and do not necessarily<br />
appear elsewhere in this publication. These precautions must be<br />
thoroughly understood and applied to all phases of operation and<br />
maintenance.<br />
Keep Away From Live Circuits<br />
Operating personnel must at all times observe normal safety<br />
regulations. Do not replace components or make adjustments inside<br />
the equipment with high voltage turned on. To avoid casualties,<br />
always remove power.<br />
Shock Hazard<br />
Do not attempt to remove the <strong>RF</strong> transmission line while <strong>RF</strong> power is<br />
present.<br />
Do Not Service or Adjust Alone<br />
Under no circumstances should any person reach into an enclosure to<br />
service or adjust equipment except in the presence of someone who is<br />
capable of rendering aid.<br />
Safety Earth Ground<br />
An uninterruptible safety earth ground must be supplied from the<br />
main power source to test instruments. Grounding one conductor of a<br />
two conductor power cable is not sufficient protection. Serious injury<br />
or death can occur if this grounding is not properly installed.<br />
i
<strong>Bird</strong> <strong>4304A</strong> <strong>Thruline</strong> <strong>Wattmeter</strong><br />
Resuscitation<br />
Personnel working with or near high voltages should be familiar with<br />
modern methods of resuscitation.<br />
Safety Symbols<br />
WARNING<br />
Warning notes call attention to a procedure, which if not correctly<br />
performed, could result in personal injury.<br />
CAUTION<br />
Caution notes call attention to a procedure, which if not correctly<br />
performed, could result in damage to the instrument.<br />
The caution symbol appears on the equipment indicating<br />
there is important information in the instruction manual<br />
regarding that particular area.<br />
☞ NOTE: Calls attention to supplemental information<br />
Warning Statements<br />
The following safety warnings appear in the text where there is<br />
danger to operating and maintenance personnel, and are repeated<br />
here for emphasis.<br />
WARNING<br />
Never attempt to connect or disconnect equipment <strong>RF</strong> equipment<br />
from the transmission line while <strong>RF</strong> power is being applied.<br />
Leaking <strong>RF</strong> energy is a potential health hazard.<br />
ii
WARNING<br />
When working with <strong>RF</strong> powers of 200 watts or more, the potential of<br />
the center conductor of the line section will exceed 100 volts.<br />
Do not touch the center conductor while <strong>RF</strong> power is on.<br />
Caution Statements<br />
The following equipment cautions appear in the text whenever the<br />
equipment is in danger of damage, and are repeated here for emphasis.<br />
CAUTION<br />
Do not drop. Calibration could be disturbed or the meter could be<br />
damaged as a result.<br />
CAUTION<br />
Above 800 MHz, do not exceed 150 W <strong>RF</strong> power.<br />
CAUTION<br />
<strong>RF</strong> power must not exceed range switch setting.<br />
CAUTION<br />
Do not attempt to remove the <strong>RF</strong> center conductor. This will<br />
damage the line section.<br />
CAUTION<br />
When handling the circuit board, use caution:<br />
Do not bend the dc contact finger that extends into the line section.<br />
Do not lose the contact finger insulator or the<br />
spacers on the mounting screws.<br />
Do not disturb the potentiometer settings.<br />
iii
<strong>Bird</strong> <strong>4304A</strong> <strong>Thruline</strong> <strong>Wattmeter</strong><br />
Safety Statements<br />
USAGE<br />
ANY USE OF THIS INSTRUMENT IN A MANNER NOT<br />
SPECIFIED BY THE MANUFACTURER MAY IMPAIR<br />
THE INSTRUMENT’S SAFETY PROTECTION.<br />
USO<br />
EL USO DE ESTE INSTRUMENTO DE MANERA NO<br />
ESPECIFICADA POR EL FABRICANTE, PUEDE ANULAR LA<br />
PROTECCIÓN DE SEGURIDAD DEL INSTRUMENTO.<br />
BENUTZUNG<br />
WIRD DAS GERÄT AUF ANDERE WEISE VERWENDET ALS VOM<br />
HERSTELLER BESCHRIEBEN, KANN DIE GERÄTESICHERHEIT<br />
BEEINTRÄCHTIGT WERDEN.<br />
UTILISATION<br />
TOUTE UTILISATION DE CET INSTRUMENT QUI N’EST PAS<br />
EXPLICITEMENT PRÉVUE PAR LE FABRICANT PEUT<br />
ENDOMMAGER LE DISPOSITIF DE PROTECTION DE<br />
L’INSTRUMENT.<br />
IMPIEGO<br />
QUALORA QUESTO STRUMENTO VENISSE UTILIZZATO IN<br />
MODO DIVERSO DA COME SPECIFICATO DAL PRODUTTORE<br />
LA PROZIONE DI SICUREZZA POTREBBE VENIRNE<br />
COMPROMESSA.<br />
SERVICE<br />
SERVICING INSTRUCTIONS ARE FOR USE BY<br />
SERVICE - TRAINED PERSONNEL ONLY. TO AVOID<br />
DANGEROUS ELECTRIC SHOCK, DO NOT PE<strong>RF</strong>ORM<br />
ANY SERVICING UNLESS QUALIFIED TO DO SO.<br />
SERVICIO<br />
iv
LAS INSTRUCCIONES DE SERVICIO SON PARA USO<br />
EXCLUSIVO DEL PERSONAL DE SERVICIO CAPACITADO. PARA<br />
EVITAR EL PELIGRO DE DESCARGAS ELÉCTRICAS, NO<br />
REALICE NINGÚN SERVICIO A MENOS QUE ESTÉ<br />
CAPACITADO PARA HACERIO.<br />
WARTUNG<br />
ANWEISUNGEN FÜR DIE WARTUNG DES GERÄTES GELTEN<br />
NUR FÜR GESCHULTES FACHPERSONAL.<br />
ZUR VERMEIDUNG GEFÄHRLICHE, ELEKTRISCHE SCHOCKS,<br />
SIND WARTUNGSARBEITEN AUSSCHLIEßLICH VON<br />
QUALIFIZIERTEM SERVICEPERSONAL DURCHZUFÜHREN.<br />
ENTRENTIEN<br />
L’EMPLOI DES INSTRUCTIONS D’ENTRETIEN DOIT ÊTRE<br />
RÉSERVÉ AU PERSONNEL FORMÉ AUX OPÉRATIONS<br />
D’ENTRETIEN. POUR PRÉVENIR UN CHOC ÉLECTRIQUE<br />
DANGEREUX, NE PAS EFFECTUER D’ENTRETIEN SI L’ON N’A<br />
PAS ÉTÉ QUALIFIÉ POUR CE FAIRE.<br />
<strong>RF</strong> VOLTAGE MAY BE PRESENT IN <strong>RF</strong> ELEMENT<br />
SOCKET - KEEP ELEMENT IN SOCKET DURING<br />
OPERATION.<br />
DE LA TENSION H.F. PEAT ÊTRE PRÉSENTE DANS LA<br />
PRISE DE L’ÉLÉMENT H.F. - CONSERVER L’ÉLÉMENT DANS LA<br />
PRISE LORS DE L’EMPLOI.<br />
HF-SPANNUNG KANN IN DER HF-ELEMENT-BUCHSE<br />
ANSTEHEN - ELEMENT WÄHREND DES BETRIEBS<br />
EINGESTÖPSELT LASSEN.<br />
PUEDE HABER VOLTAJE <strong>RF</strong> EN EL ENCHUFE DEL ELEMENTO<br />
<strong>RF</strong> - MANTENGA EL ELEMENTO EN EL ENCHUFE DURANTE<br />
LA OPERACION.<br />
IL PORTAELEMENTO <strong>RF</strong> PUÒ PRESENTARE VOLTAGGIO <strong>RF</strong> -<br />
TENERE L’ELEMENTO NELLA PRESA DURANTE IL<br />
FUNZIONAMENTO.<br />
v
<strong>Bird</strong> <strong>4304A</strong> <strong>Thruline</strong> <strong>Wattmeter</strong><br />
About This Manual<br />
This instruction book covers the <strong>Bird</strong> <strong>4304A</strong> <strong>RF</strong> <strong>Thruline</strong> <strong>Wattmeter</strong>.<br />
The manual is arranged so that essential safety information appears<br />
in the front of the book. Reading the Safety Precautions Section before<br />
operating the equipment is strongly advised.<br />
The remainder of this Instruction Book is divided into Chapters and<br />
Sections. At the beginning of each chapter, a general overview<br />
describes the contents of that chapter.<br />
Operation<br />
First time users should read Chapter 1 – Introduction, and Chapter 3<br />
– Installation, to get an overview of equipment capabilities and<br />
installation. An experienced operator can refer to Chapter 4 –<br />
Operating Instructions. All instructions necessary to operate the<br />
equipment appears in this chapter.<br />
Maintenance<br />
All personnel should be familiar with the preventive maintenance<br />
found in Chapter 5 – Maintenance. If a failure should occur, the<br />
troubleshooting section will aid in isolating and correcting the cause.<br />
Specifications and replacement part lists are also in this chapter.<br />
Changes to This Manual<br />
We have made every effort to ensure this manual is accurate. If you<br />
should discover any errors or if you have suggestions for improving<br />
this manual, please send your comment to our factory. This manual<br />
may be periodically updated. When inquiring about updates to this<br />
manual refer to the part number and revision level on the title page.<br />
vi
Table of Contents<br />
Safety Precautions . . . . . . . . . . . . . . . . . . . . . . . . . . . . . . . . . . . . . . . . . i<br />
About This Manual . . . . . . . . . . . . . . . . . . . . . . . . . . . . . . . . . . . . . . . . vi<br />
Introduction. . . . . . . . . . . . . . . . . . . . . . . . . . . . . . . . . . . . . . . . . . . . . . . 1<br />
Theory of Operation . . . . . . . . . . . . . . . . . . . . . . . . . . . . . . . . . . . . . . . . 3<br />
Travelling Wave Viewpoint. . . . . . . . . . . . . . . . . . . . . . . . . . . . . . . . . 3<br />
Coupling Circuit . . . . . . . . . . . . . . . . . . . . . . . . . . . . . . . . . . . . . . . . . 4<br />
Load Power . . . . . . . . . . . . . . . . . . . . . . . . . . . . . . . . . . . . . . . . . . . . 5<br />
Standing Wave vs. Travelling Wave Viewpoint . . . . . . . . . . . . . . . . . 6<br />
ρ vs. φ . . . . . . . . . . . . . . . . . . . . . . . . . . . . . . . . . . . . . . . . . . . . . . . . . . . . . . 6<br />
Component Testing . . . . . . . . . . . . . . . . . . . . . . . . . . . . . . . . . . . . . 10<br />
Impedance Mismatch. . . . . . . . . . . . . . . . . . . . . . . . . . . . . . . . . . . . 11<br />
Installation. . . . . . . . . . . . . . . . . . . . . . . . . . . . . . . . . . . . . . . . . . . . . . . 13<br />
Connections . . . . . . . . . . . . . . . . . . . . . . . . . . . . . . . . . . . . . . . . . . . 13<br />
Load Matching . . . . . . . . . . . . . . . . . . . . . . . . . . . . . . . . . . . . . . . . . 14<br />
Operating Instructions . . . . . . . . . . . . . . . . . . . . . . . . . . . . . . . . . . . . . 17<br />
Normal Operation. . . . . . . . . . . . . . . . . . . . . . . . . . . . . . . . . . . . . . . 17<br />
Low Frequency . . . . . . . . . . . . . . . . . . . . . . . . . . . . . . . . . . . . . . . . 18<br />
VSWR Measurements . . . . . . . . . . . . . . . . . . . . . . . . . . . . . . . . . . . 18<br />
Maintenance . . . . . . . . . . . . . . . . . . . . . . . . . . . . . . . . . . . . . . . . . . . . . 21<br />
Cleaning. . . . . . . . . . . . . . . . . . . . . . . . . . . . . . . . . . . . . . . . . . . . . . 21<br />
Troubleshooting . . . . . . . . . . . . . . . . . . . . . . . . . . . . . . . . . . . . . . . . 22<br />
Zero Adjust. . . . . . . . . . . . . . . . . . . . . . . . . . . . . . . . . . . . . . . . . . . . 24<br />
Connector Replacement . . . . . . . . . . . . . . . . . . . . . . . . . . . . . . . . . 24<br />
Element Removal. . . . . . . . . . . . . . . . . . . . . . . . . . . . . . . . . . . . . . . 24
Back Cover Removal . . . . . . . . . . . . . . . . . . . . . . . . . . . . . . . . . . . . 25<br />
Line Section Replacement . . . . . . . . . . . . . . . . . . . . . . . . . . . . . . . . 25<br />
Meter Replacement . . . . . . . . . . . . . . . . . . . . . . . . . . . . . . . . . . . . . 26<br />
Calibration Checks. . . . . . . . . . . . . . . . . . . . . . . . . . . . . . . . . . . . . . 26<br />
Storage . . . . . . . . . . . . . . . . . . . . . . . . . . . . . . . . . . . . . . . . . . . . . . 28<br />
Customer Service . . . . . . . . . . . . . . . . . . . . . . . . . . . . . . . . . . . . . . 28<br />
Specifications. . . . . . . . . . . . . . . . . . . . . . . . . . . . . . . . . . . . . . . . . . 29<br />
Replacement Parts . . . . . . . . . . . . . . . . . . . . . . . . . . . . . . . . . . . . . 30<br />
Available “QC” Type Connectors . . . . . . . . . . . . . . . . . . . . . . . . . . . 31
Chapter 1<br />
Introduction<br />
The <strong>Bird</strong> <strong>4304A</strong> <strong>Wattmeter</strong> is an in-line sensor that measures <strong>RF</strong><br />
power and load match in 50Ω coaxial transmission lines. It can be<br />
used with CW, AM, FM, and TV modulation, but not pulse<br />
modulation. It is supplied with a special broadband element with a<br />
frequency range of 25 to 1000 MHz. It can measure up to 500 W,<br />
depending on the frequency, and has a maximum VSWR of 1.07 with<br />
the standard “N” connectors. A range switch allows the full scale<br />
power to be reduced for greater accuracy.<br />
The wattmeter is portable, with an included carrying strap. It has an<br />
aluminum housing and an easily removed back cover, with bumpers<br />
on the base and back that allow the meter to stand or lie flat. For<br />
additional protection, the microammeter is specially shock mounted.<br />
A screw on the lower front face of the meter is used to zero the pointer.<br />
Below the meter face, the <strong>RF</strong> line section protrudes slightly from the<br />
wattmeter housing with the element socket in the center.<br />
The <strong>RF</strong> line section is precision machined to provide the best possible<br />
impedance match to the transmission line under test. A formed<br />
phosphor-bronze spring finger protrudes into the element socket to<br />
make contact with the element. At each end of the line section are<br />
<strong>Bird</strong> Quick-Change <strong>RF</strong> connectors that may be interchanged with any<br />
other <strong>Bird</strong> “QC” connector. The wattmeter housing does not interfere<br />
with connector changes.<br />
Combining the <strong>Thruline</strong> <strong>Wattmeter</strong> with a <strong>Bird</strong> Termaline Load<br />
Resistor creates an accurate absorption wattmeter. With this<br />
combination, readings only need to be taken in the forward direction<br />
because the reflected power will be negligible.<br />
1
<strong>Bird</strong> <strong>4304A</strong> <strong>Thruline</strong> <strong>Wattmeter</strong><br />
Figure 1<br />
<strong>Bird</strong> <strong>4304A</strong> <strong>Thruline</strong> <strong>Wattmeter</strong><br />
Outline Drawing<br />
POWER RANGE<br />
SWITCH<br />
5<br />
15<br />
50<br />
150<br />
500<br />
“QC” CONNECTORS<br />
FEMALE N NORMALLY<br />
SUPPLIED<br />
6-7/8”<br />
(175 mm)<br />
1-3/4”<br />
(44 mm)<br />
4”<br />
(100 mm)<br />
ELEMENT<br />
2-3/8”<br />
(59 mm)<br />
4”<br />
(100 mm)<br />
2
Chapter 2<br />
Theory of Operation<br />
Travelling Wave Viewpoint<br />
The easiest way to visualize <strong>Thruline</strong> operation is from a travelling<br />
wave viewpoint. In transmission lines the voltages, currents, standing<br />
waves, etc., on any uniform line section result from the interaction of<br />
two travelling waves:<br />
• The forward wave (and its power) travels from the source to the<br />
load. It has <strong>RF</strong> voltage E f and current I f in phase, with E f / I f = Z o .<br />
• The reflected wave (and its power) originates by reflection at the<br />
load and travels from the load back to the source. It has an <strong>RF</strong><br />
voltage E r and current I r in phase, with E r / I r = Z o .<br />
Each wave is mathematically simple and has a constant power:<br />
W f = Watts Forward = E f 2 / Z o = I f 2 Z o = E f I f<br />
W r = Watts Reflected = E r 2 / Z o = I r 2 Z o = E r I r<br />
Z o is the characteristic impedance of a uniform line section. For useful<br />
lines it is usually a pure resistance of 50Ω. The <strong>RF</strong> circuit of the <strong>Bird</strong><br />
43 is a length of uniform air line with Z o = 50Ω.<br />
3
<strong>Bird</strong> <strong>4304A</strong> <strong>Thruline</strong> <strong>Wattmeter</strong><br />
Coupling Circuit<br />
Figure 2<br />
<strong>Thruline</strong> <strong>Wattmeter</strong> Schematic<br />
<strong>RF</strong> Coaxial Line<br />
XMTR<br />
or<br />
LOAD<br />
LOAD<br />
or<br />
XMTR<br />
<strong>Directional</strong> Coupling<br />
Diode<br />
Meter<br />
Detector Element<br />
DC Contact<br />
Circuit Board<br />
The element, which contains the coupling circuit, and its relationship<br />
to the rest of the <strong>Bird</strong> <strong>4304A</strong> is shown in Figure 2. Current is produced<br />
in the coupling circuit by travelling waves in the line section, through<br />
both inductive and capacitive coupling. The inductive current flows in<br />
the direction of the travelling wave, while the capacitive current is<br />
independent of the direction of the wave. Therefore, the inductive<br />
current produced by one travelling wave will add in phase with the<br />
corresponding capacitive current, while that produced by the wave<br />
travelling in the opposite direction will subtract. The additive or<br />
“arrow” direction is assigned to the forward wave.<br />
4
Theory of Operation<br />
The electrical characteristics of the element are carefully adjusted so<br />
that, for the reverse wave, the inductive current will completely cancel<br />
the capacitive current, giving a directivity greater than 20 dB. Thus,<br />
the element is sensitive at either of its settings, but to only one of the<br />
two travelling waves. <strong>Thruline</strong> <strong>Wattmeter</strong> measurements are also<br />
independent of position along the transmission line.<br />
Like similar diode devices, the <strong>Bird</strong> <strong>4304A</strong> indicates the carrier<br />
component of amplitude modulation, with very little response to side<br />
band components added by modulation.<br />
Load Power<br />
For loads with a VSWR of 1.2 or less, the power dissipated in a load<br />
(W l ) is equivalent (with less than one percent error) to the forward<br />
power (W f ). When appreciable power is reflected, as with an antenna,<br />
it is necessary to use the exact load power which is given by:<br />
W l = Watts into Load = W f – W r<br />
Good load resistors, such as <strong>Bird</strong> Termaline loads, will give negligible<br />
reflected power.<br />
5
<strong>Bird</strong> <strong>4304A</strong> <strong>Thruline</strong> <strong>Wattmeter</strong><br />
Standing Wave vs. Travelling Wave Viewpoint<br />
As mentioned previously, the <strong>Thruline</strong> <strong>Wattmeter</strong> reacts to forward<br />
and reverse travelling waves to measure power in a transmission line.<br />
The standing wave viewpoint, also widely used, is highly developed<br />
both in theory and in practice. This viewpoint can be traced to the<br />
early use of slotted transmission lines.<br />
The slotted line measures the standing wave ratio by mechanically<br />
positioning a voltage detector at peaks and nulls along a length of line<br />
section. Its drawbacks are that it is usually too long, too expensive for<br />
good accuracy, not portable, and too slow. These problems grow rapidly<br />
as the measurement frequency drops below 1000 MHz. The <strong>Thruline</strong><br />
<strong>Wattmeter</strong> by comparison is fast, convenient, and accurate. It provides<br />
the same information as a slotted line with the exception of the phase<br />
angle of the reflection coefficient (distance, load to minimum).<br />
ρ vs. φ<br />
The simple relationships:<br />
ρ<br />
1+ φ<br />
= --------------- and φ<br />
1 – φ<br />
=<br />
ρ – 1<br />
-----------<br />
ρ + 1<br />
2<br />
Where ρ = VSWR<br />
and φ = W r / W f<br />
can be used to convert between the standing wave ratio (ρ) and the<br />
reflected/forward power ratio (φ), which can be directly read from the<br />
<strong>Thruline</strong> <strong>Wattmeter</strong>. The relationship between ρ and φ is graphed in<br />
Figure 3 and Figure 4.<br />
☞ NOTE: Attenuation, measured in dB, can be derived from the<br />
power ratio by the equation N db = 10 log φ.<br />
6
Theory of Operation<br />
VSWR scales and their attendant controls for setting the reference<br />
point have been intentionally omitted from the <strong>Bird</strong> <strong>4304A</strong>.<br />
Experience using the <strong>Thruline</strong> <strong>Wattmeter</strong> for transmitter tune-up,<br />
antenna matching, etc. will show that the power ratio measurement is<br />
as useful in practice as the standing wave ratio.<br />
A trial is suggested – forget about VSWR for a few days and think<br />
in terms of φ = W r / W f . The two meter readings, W r and W f , give<br />
a useful, approximate picture of the results without bothering to<br />
calculate the power ratio exactly. Consider that, for an antenna<br />
matching problem, the main objective usually is to minimize W r .<br />
Anything done experimentally to this end will be seen when the<br />
element is turned to the reflected power position.<br />
7
<strong>Bird</strong> <strong>4304A</strong> <strong>Thruline</strong> <strong>Wattmeter</strong><br />
Figure 3<br />
Percent Reflected Power vs. VSWR (1.0 – 1.3)<br />
8
Theory of Operation<br />
Figure 4<br />
Percent Reflected Power vs. VSWR (1.0 – 8.0)<br />
9
<strong>Bird</strong> <strong>4304A</strong> <strong>Thruline</strong> <strong>Wattmeter</strong><br />
Component Testing<br />
The <strong>Bird</strong> <strong>4304A</strong> is very helpful in component testing, and may be<br />
employed in several ways:<br />
☞ NOTE: Measuring small attenuations requires correction for<br />
normal instrument errors. For two wattmeters, do this by simply<br />
connecting the wattmeters directly, with no line between them,<br />
and adjusting their zero settings. For one, make sure to note exact<br />
readings, or their difference, on the initial equality check, and<br />
correct for this.<br />
1. Insertion VSWR or φ may be measured by placing the component<br />
between the wattmeter and a good load resistor.<br />
2. Attenuation (power lost by heat in a line) as well as insertion<br />
VSWR or φ may be measured by inserting the unknown line<br />
between two <strong>Thruline</strong> wattmeters, or between a <strong>Thruline</strong><br />
wattmeter and a Termaline absorption wattmeter.<br />
3. Line loss using open circuit calibration: The high directivity of<br />
elements can be exploited in line loss measurements by having the<br />
load connector open or short circuited. The forward and reflected<br />
waves then have equal power, so that φ = 100% and ρ = ∞. Open<br />
circuit testing is preferred, because a high quality open is easier to<br />
create than a high quality short. To measure insertion loss, use an<br />
open standard to check forward and reverse power equality, then<br />
connect an open, unknown line to the wattmeter. The measured φ is<br />
the attenuation for two passes along the line (down and back). This<br />
can then be compared with published data for line type and length<br />
(remember to halve N db or double the line length).<br />
10<br />
This measurement should be supplemented with either time<br />
domain reflectometry or dc continuity and leakage checks, since<br />
the attenuation measurement alone cannot detect faults such as<br />
open or short circuits partway down the line.
Theory of Operation<br />
Impedance Mismatch<br />
In some cases it may be necessary to use the <strong>Bird</strong> <strong>4304A</strong> with a<br />
non-50Ω transmission line. If the reflected power is less than 10% and<br />
the frequency is below 200 MHz, the resulting mismatch will not be<br />
too serious. At higher frequencies or reflected power levels, the load<br />
impedance will change when the wattmeter is removed.<br />
When the line and load impedances are known, the system’s VSWR<br />
equals the ratio of the two. Always divide the larger impedance by the<br />
smaller, since VSWR must be greater than 1.<br />
As an example, consider using a <strong>Bird</strong> <strong>4304A</strong> to tune a 70Ω line. If the<br />
load impedance is also 70Ω, the wattmeter will measure a VSWR of<br />
70/50 = 1.4. However, if you remove the wattmeter, the VSWR will<br />
actually be 1.0. Similarly, if the load impedance is 35.7Ω, the VSWR<br />
will be 50/35.7 = 1.4 with the wattmeter and 70/35.7 = 2.0 without it.<br />
Caution must therefore be used, since both good and bad matches can<br />
have the same measured VSWR. In this case, the correct impedance<br />
can be determined by slightly changing the load impedance. When the<br />
load impedance is near 70Ω, the <strong>Bird</strong> 43 will read increasing VSWR as<br />
the load impedance is increased.<br />
☞ NOTE: When working with non-50Ω lines, it is especially<br />
important to calculate the exact load power by subtracting the<br />
reflected power from the forward power.<br />
11
<strong>Bird</strong> <strong>4304A</strong> <strong>Thruline</strong> <strong>Wattmeter</strong><br />
12
Chapter 3<br />
Installation<br />
When transporting the <strong>Bird</strong> <strong>4304A</strong>, turn the element so that the<br />
arrow points down and set the range switch to 5 W. This will shunt<br />
the meter circuit and protect the meter by dampening needle action.<br />
WARNING<br />
Never attempt to connect or disconnect <strong>RF</strong> equipment from the<br />
transmission line while <strong>RF</strong> power is being applied.<br />
Leaking <strong>RF</strong> energy is a potential health hazard.<br />
CAUTION<br />
Do not drop. Calibration could be disturbed or the meter could be<br />
damaged as a result.<br />
Connections<br />
Insert the <strong>Bird</strong> <strong>4304A</strong> in coaxial transmission lines of 50Ω nominal<br />
impedance. The <strong>RF</strong> source can be connected to either side of the<br />
wattmeter without affecting readings.<br />
If non-50Ω cables are used, a mismatch will occur causing<br />
inaccuracies in readings. It is strongly advised that this condition be<br />
avoided. If this is not possible, refer to “Impedance Mismatch” on<br />
page 11 for instructions on how to calculate the actual VSWR.<br />
13
<strong>Bird</strong> <strong>4304A</strong> <strong>Thruline</strong> <strong>Wattmeter</strong><br />
Load Matching<br />
When a <strong>Bird</strong> <strong>4304A</strong> is used to tune a load to a transmitter and a good<br />
match is obtained, removing the wattmeter will not change the match<br />
quality. A 50Ω load can terminate a 50Ω transmission line of any<br />
length without altering conditions at the transmitter. The wattmeter<br />
is just an additional length of 50Ω line.<br />
When the load is not well matched, e.g. an antenna with a VSWR of<br />
2.0, the line length between load and transmitter will transform the<br />
impedance as seen at the transmitter. Removing the wattmeter<br />
shortens the total line length by four inches plus two connectors. This<br />
is still not significant at low frequencies where four to five inches is a<br />
small fraction of a wavelength, but at higher frequencies the<br />
transmitter’s frequency or power output may be affected.<br />
Transmission line theory shows that if the line length changes by<br />
exactly 1 ⁄ 2 wavelength, the impedance at the transmitter will not<br />
change. So, to have identical match with the <strong>Bird</strong> <strong>4304A</strong> in or out of<br />
the circuit, it is necessary to insert or remove 1 ⁄ 2 wavelength of line<br />
(including the wattmeter). Use a length of cable which, when added to<br />
the wattmeter, equals 1 ⁄ 2 wavelength at the frequency of interest. If<br />
more than one frequency is involved, a separate cable length is<br />
required for each. See Figure 5 for sample cable lengths.<br />
☞ NOTE: Cable length is measured from end to end of the outer<br />
conductor of the connectors, except for UHF and mini-UHF plugs<br />
where it is measured from tip to tip of the center pins.<br />
☞ NOTE: Dimensions shown are for solid polyethylene cable such as<br />
RG-58C/U or RG-8/U, which have a velocity of propagation 66% of<br />
that of air. If RG-58 or RG-8 type cables with foam polyethylene<br />
(v.p. of 79%) are used, multiply the dimensions in the graph by the<br />
ratio of the relative velocities; 79% ÷ 66% = 1.2 in this case.<br />
14
Installation<br />
Figure 5<br />
Cable Length / Wavelength Matching<br />
15
<strong>Bird</strong> <strong>4304A</strong> <strong>Thruline</strong> <strong>Wattmeter</strong><br />
16
Chapter 4<br />
Operating Instructions<br />
WARNING<br />
When working with <strong>RF</strong> powers of 200 watts or more, the potential of<br />
the center conductor of the line section will exceed 100 volts.<br />
Do not touch the center conductor while <strong>RF</strong> power is on.<br />
CAUTION<br />
Above 800 MHz, do not exceed 150 W <strong>RF</strong> power.<br />
CAUTION<br />
<strong>RF</strong> power must not exceed range switch setting.<br />
Normal Operation<br />
• Turn the element so that the arrow points towards the load to<br />
measure forward power. Turn it so that the arrow points towards<br />
the source to measure reflected power.<br />
• Set the range switch to 500 W.<br />
• Turn on the <strong>RF</strong> source.<br />
• Read the power using the scale with 500 W full-scale.<br />
☞ NOTE: For greater accuracy, after estimating the power with<br />
500W full-scale, set the range switch so the power is in the upper<br />
third of the scale.<br />
17
<strong>Bird</strong> <strong>4304A</strong> <strong>Thruline</strong> <strong>Wattmeter</strong><br />
Low Frequency<br />
For frequencies below 100 MHz, a correction factor must be applied to<br />
the reading. The correction table is located on the back cover plate of<br />
the unit. Multiply the measured power by the correction factor to<br />
determine the actual power.<br />
VSWR Measurements<br />
For your convenience, a set of VSWR conversion nomographs is<br />
provided on pages 19 and 20. With these charts, VSWR may be<br />
determined from the forward and reflected power readings. Find the<br />
intersection of the forward and reflected power measurements. The<br />
slanted line passing closest to this point indicates the VSWR.<br />
18
Operating Instructions<br />
Figure 6<br />
VSWR Conversion Graph (Reflected Power 0.2 – 20.0)<br />
19
<strong>Bird</strong> <strong>4304A</strong> <strong>Thruline</strong> <strong>Wattmeter</strong><br />
Figure 7<br />
VSWR Conversion Graph (Reflected Power 0.01 – 1.00)<br />
20
Chapter 5<br />
Maintenance<br />
WARNING<br />
Never attempt to connect or disconnect <strong>RF</strong> equipment from the<br />
transmission line while <strong>RF</strong> power is being applied.<br />
Leaking <strong>RF</strong> energy is a potential health hazard.<br />
CAUTION<br />
Do not drop. Calibration could be disturbed or the meter could be<br />
damaged as a result.<br />
The rugged and simple design of the <strong>Bird</strong> <strong>4304A</strong> means that it<br />
requires minimal routine maintenance.<br />
Cleaning<br />
It is important to keep the following surfaces clean:<br />
• Socket bore<br />
• DC contacts on the element<br />
• Teflon insulators<br />
If any of the contacts or line connectors are dirty, clean them with a<br />
cotton swab dipped in commercial contact cleaner or isopropyl alcohol.<br />
CAUTION<br />
Do not attempt to remove the <strong>RF</strong> center conductor.<br />
This will damage the line section.<br />
21
<strong>Bird</strong> <strong>4304A</strong> <strong>Thruline</strong> <strong>Wattmeter</strong><br />
If the <strong>RF</strong> line section seems dirty, do not loosen any connections.<br />
Clean accessible components as described above and use dry, clean air<br />
to blow out the interior.<br />
The outside of the meter housing can be cleaned with a soft cloth<br />
dampened with a mild detergent solution. Do not wipe the meter glass<br />
with a dry cloth, or a static charge could develop that would cause an<br />
erroneous meter indication.<br />
Troubleshooting<br />
The following table contains troubleshooting information for problems<br />
that can occur during normal operation. Find the problem on the<br />
table, review possible causes, and perform the corrective action listed.<br />
This manual does not list all malfunctions that may occur, or all<br />
corrective actions. If a malfunction is not listed or not corrected by the<br />
listed actions, contact the nearest <strong>Bird</strong> Service Center for assistance.<br />
Problem Possible Cause Corrective Action<br />
No meter reading No <strong>RF</strong> power Check <strong>RF</strong> source<br />
“Arrow” on element<br />
pointing wrong way<br />
Rotate element<br />
Intermittent or<br />
inconsistent<br />
meter reading<br />
22<br />
Meter burned out or<br />
damaged<br />
Dirty dc contact<br />
Faulty transmission<br />
line or antenna<br />
Sticky or defective<br />
meter<br />
Replace the meter (refer<br />
to page 26)<br />
Clean contact<br />
Inspect line<br />
Replace the meter (refer<br />
to page 26)
Maintenance<br />
High VSWR or<br />
reflected power<br />
Foreign material in<br />
line section or in <strong>RF</strong><br />
connectors<br />
Open or shorted<br />
transmission line<br />
Bad load or poor<br />
connectors<br />
Clean connectors<br />
Inspect line<br />
Inspect load, antenna,<br />
and connectors<br />
Figure 8<br />
Maintenance Locations<br />
5<br />
15<br />
50<br />
150<br />
500<br />
ZERO<br />
ADJUST<br />
SCREW<br />
LINE<br />
SECTION<br />
SCREWS<br />
METER<br />
SCREW<br />
BACK<br />
COVER<br />
SCREWS<br />
HOLDING<br />
SCREW<br />
ELEMENT<br />
STOP<br />
CONNECTOR<br />
SCREWS<br />
23
<strong>Bird</strong> <strong>4304A</strong> <strong>Thruline</strong> <strong>Wattmeter</strong><br />
Zero Adjust<br />
The meter’s zero setting should be checked when no <strong>RF</strong> power is<br />
present. When no power is applied the pointer should rest exactly on<br />
zero. If adjustment is required, turn the adjustment screw until the<br />
pointer is set at zero (see Figure 8 on page 23).<br />
Connector Replacement<br />
The <strong>Bird</strong> <strong>4304A</strong> has <strong>Bird</strong> “QC” connectors which are designed to be<br />
easily changed. To change the connector, remove the four screws at its<br />
corners and then pull it straight out. Push the new connector in,<br />
making sure that the center pin on the connector aligns with the<br />
socket, and screw into place.<br />
Element Removal<br />
☞ NOTE: If the element is replaced, the unit will need to be returned<br />
to a <strong>Bird</strong> Service Center for recalibration. Changing elements<br />
without recalibrating will result in inaccurate readings.<br />
1. Remove the screw at the lower left corner of the element socket.<br />
2. Move the stop over the hole where the screw had been until it is<br />
free from the element.<br />
3. Pull the element out while turning slightly clockwise.<br />
4. To replace the element, reverse these steps. Make sure that the<br />
stop is on the element before replacing the screw.<br />
24<br />
WARNING<br />
Never attempt to connect or disconnect <strong>RF</strong> equipment from the<br />
transmission line while <strong>RF</strong> power is being applied.<br />
Leaking <strong>RF</strong> energy is a potential health hazard.
Maintenance<br />
Back Cover Removal<br />
Before replacing the line section or meter, the back cover must be<br />
removed as follows (see Figure 8 on page 23):<br />
1. Remove the screws on the rear of either side of the housing.<br />
2. Pull the back cover straight off.<br />
Line Section Replacement<br />
1. Remove the element (See “Element Removal” on page 24).<br />
2. Use a 5 ⁄ 16 " hex wrench to loosen the nuts on the meter terminals.<br />
Remove the wires from the terminals.<br />
3. Use a 5 ⁄ 16 " allen wrench to loosen the set screws on the range<br />
switch knob. Remove the knob.<br />
4. While supporting the line section, remove the screws on the front<br />
of the housing, located on either side of the element socket. Pull<br />
the line section and attached circuit board out the back.<br />
CAUTION<br />
When handling the circuit board, use caution:<br />
Do not bend the dc contact finger that extends into the line section.<br />
Do not lose the contact finger insulator or the<br />
spacers on the mounting screws.<br />
Do not disturb the potentiometer settings.<br />
5. Remove both screws securing the circuit board to the line section<br />
and remove the circuit board.<br />
6. Replace the line section and reassemble by reversing these steps.<br />
☞ NOTE: The circuit board cannot be replaced in the field. If the<br />
circuit board is defective, return the unit to a <strong>Bird</strong> Service Center.<br />
25
<strong>Bird</strong> <strong>4304A</strong> <strong>Thruline</strong> <strong>Wattmeter</strong><br />
Meter Replacement<br />
1. Use a 5 ⁄ 16 " hex wrench to loosen the nuts on the meter terminals.<br />
Remove the wires from the terminals.<br />
2. Remove both screws on the sides of the housing, to either side of<br />
the meter.<br />
3. Remove the meter assembly.<br />
4. Make sure that the shock ring, gasket, and mounting bracket are<br />
in place on the new meter. The shock ring should be on the front<br />
face of the meter, and the mounting ring and mounting bracket on<br />
the back. Align the bracket so that the mounting holes are parallel<br />
to the meter lugs.<br />
5. Place the housing face-down on a flat surface.<br />
6. Insert the meter assembly, pressing until the side holes line up<br />
with the holes in the housing. Screw into place.<br />
Calibration Checks<br />
This test determines if the wattmeter needs recalibration:<br />
1. The following equipment is required, connected in series with the<br />
<strong>Bird</strong> <strong>4304A</strong> (Refer to Figure 9).<br />
• <strong>RF</strong> source<br />
• Low pass filter<br />
• Reference, known accurate, wattmeter<br />
• 50Ω load<br />
• Cables<br />
26
500<br />
5<br />
15<br />
Maintenance<br />
☞ NOTE: Keep all connections as short as possible to minimize<br />
mismatch and insertion losses.<br />
2. For each power range, set the <strong>RF</strong> source to produce a signal with<br />
power in the upper one-third of the scale.<br />
3. Compare the reading on the <strong>Bird</strong> <strong>4304A</strong> with the reference<br />
wattmeter.<br />
4. If the unit is outside the stated accuracy range, return it to a <strong>Bird</strong><br />
Service Center for calibration.<br />
Figure 9<br />
Calibration Check Setup<br />
50<br />
150<br />
<strong>RF</strong> Source Low Pass <strong>4304A</strong> Reference 50 Ω Load<br />
Filter<br />
<strong>Wattmeter</strong><br />
27
<strong>Bird</strong> <strong>4304A</strong> <strong>Thruline</strong> <strong>Wattmeter</strong><br />
Storage<br />
When storing the <strong>Bird</strong> <strong>4304A</strong>, turn the element so that the arrow<br />
points down and set the range switch to 5 W. This will shunt the<br />
meter circuit and protect the meter by dampening needle action.<br />
Customer Service<br />
Any maintenance or service procedure beyond the scope of those in<br />
this chapter should be referred to a qualified service center.<br />
If you need to return the unit for any reason, contact the <strong>Bird</strong> Service<br />
Center for a return authorization. All instruments returned must be<br />
shipped prepaid and to the attention of <strong>Bird</strong> Service Center.<br />
<strong>Bird</strong> Service Center<br />
30303 Aurora Road<br />
Cleveland (Solon), OH 44139-2794<br />
Phone: (440) 519-2298<br />
Fax: (440) 519-2326<br />
E-Mail: bsc@bird-technologies.com<br />
For the location of the Sales Office nearest you, give us a call or visit<br />
our Web site at:<br />
http://www.bird-electronic.com<br />
28
Maintenance<br />
Specifications<br />
Frequency Range<br />
Power Rating<br />
Power Range Settings<br />
25 – 1000 MHz<br />
500 W, 25 – 800 MHz<br />
150 W, 800 – 1000 MHz<br />
5 / 15 / 50 / 150 / 500 W<br />
Insertion VSWR (Max.)<br />
UHF Connnector<br />
N Connector<br />
1.08, 25 – 512 MHz<br />
1.12, 512 – 1000 MHz<br />
1.05, 25 – 512 MHz<br />
1.07, 512 – 1000 MHz<br />
Insertion Loss (Max.)<br />
UHF Connnector<br />
N Connector<br />
0.1 dB, 25 – 512 MHz<br />
0.15 dB, 512 – 1000 MHz<br />
0.1 dB, 25 – 512 MHz<br />
0.13 dB, 512 – 1000 MHz<br />
Accuracy<br />
25 – 100 MHz<br />
100 – 512 MHz<br />
512 – 1000 MHz<br />
Impedance, Nominal<br />
Connectors<br />
± 7% of full scale (with correction<br />
factor)<br />
± 6% of full scale<br />
± 7% of full scale<br />
50Ω<br />
<strong>Bird</strong> “QC”, Female, N or UHF,<br />
normally supplied<br />
29
<strong>Bird</strong> <strong>4304A</strong> <strong>Thruline</strong> <strong>Wattmeter</strong><br />
Operating Position<br />
Dimensions (Nominal)<br />
Weight, Nominal<br />
Finish<br />
Any<br />
3-5/8”L x 4”W x 6-7/8”H<br />
(92 x 102 x 175 mm)<br />
3 lb. (1.4 kg)<br />
Grey Powder Coat<br />
Replacement Parts<br />
Description Qty. Part Number<br />
Housing Assembly 1 4410-003<br />
Cover Assembly 1 4304-069<br />
Line Section Assembly 1 4304-067<br />
Carrying Strap 1 8580A003<br />
Microammeter 1 2120-015<br />
Shock Mount 1 4220-087<br />
Shock Ring 1 4410A261<br />
Gasket 1 5-1066<br />
Range Switch Knob 1 5-1852<br />
Rubber Feet 4 5-1388<br />
30
Maintenance<br />
Available “QC” Type Connectors<br />
Connector Part Number Connector Part Number<br />
BNC-Female 4240-125 LT-Female 4240-018<br />
BNC-Male 4240-132 LT-Male 4240-012<br />
C-Female 4240-100 N-Female 4240-062<br />
C-Male 4240-110 N-Male 4240-063<br />
HN-Female 4240-268 SMA-Female 4240-336<br />
HN-Male 4240-278 SMA-Male 4240-334<br />
LC-Female 4240-031 7/16 Jack, IEC<br />
Type 169-4<br />
LC-Male 4240-025 7/16 Plug, IEC<br />
Type 169-4<br />
4240-344<br />
4240-363<br />
UHF-Female 4240-050 TNC-Female 4240-156<br />
UHF-Male 4240-179 TNC-Male 4240-160<br />
Mini UHF-<br />
Female<br />
4240-346 1-5/8” EIA<br />
Swivel<br />
4240-208<br />
SC-Female 4240-090 1-5/8” EIA Fixed 4240-096<br />
Open Term.<br />
# 10-32 Nut<br />
4240-080 7/8” EIA 4240-002<br />
31
Limited Warranty<br />
All products manufactured by Seller are warranted to be free from defects in<br />
material and workmanship for a period of one (1) year, unless otherwise specified,<br />
from date of shipment and to conform to applicable specifications, drawings,<br />
blueprints and/or samples. Seller’s sole obligation under these<br />
warranties shall be to issue credit, repair or replace any item or part thereof<br />
which is proved to be other than as warranted; no allowance shall be made for<br />
any labor charges of Buyer for replacement of parts, adjustment or repairs, or<br />
any other work, unless such charges are authorized in advance by Seller.<br />
If Seller’s products are claimed to be defective in material or workmanship or<br />
not to conform to specifications, drawings, blueprints and/or samples, Seller<br />
shall, upon prompt notice thereof, either examine the products where they are<br />
located or issue shipping instructions for return to Seller (transportationcharges<br />
prepaid by Buyer). In the event any of our products are proved to be<br />
other than as warranted, transportation costs (cheapest way) to and from<br />
Seller’s plant, will be borne by Seller and reimbursement or credit will be<br />
made for amounts so expended by Buyer. Every such claim for breach of these<br />
warranties shall be deemed to be waived by Buyer unless made in writing<br />
within ten (10) days from the date of discovery of the defect.<br />
The above warranties shall not extend to any products or parts thereof which<br />
have been subjected to any misuse or neglect, damaged by accident, rendered<br />
defective by reason of improper installation or by the performance of repairs<br />
or alterations outside of our plant, and shall not apply to any goods or parts<br />
thereof furnished by Buyer or acquired from others at Buyer’s request and/or<br />
to Buyer’s specifications. Routine (regularly required) calibration is not covered<br />
under this limited warranty. In addition, Seller’s warranties do not<br />
extend to the failure of tubes, transistors, fuses and batteries, or to other<br />
equipment and parts manufactured by others except to the extent of the original<br />
manufacturer’s warranty to Seller.<br />
The obligations under the foregoing warranties are limited to the precise<br />
terms thereof. These warranties provide exclusive remedies, expressly in lieu<br />
of all other remedies including claims for special or consequential damages.<br />
SELLER NEITHER MAKES NOR ASSUMES ANY OTHER WARRANTY<br />
WHATSOEVER, WHETHER EXPRESS, STATUTORY, OR IMPLIED,<br />
INCLUDING WARRANTIES OF MERCHANTABILITY AND FITNESS,<br />
AND NO PERSON IS AUTHORIZED TO ASSUME FOR SELLER ANY<br />
OBLIGATION OR LIABILITY NOT STRICTLY IN ACCORDANCE WITH<br />
THE FOREGOING.