Norene Gilletz's Lunch 'n Learn Low Iodine Diet Recipes
Norene Gilletz's Lunch 'n Learn Low Iodine Diet Recipes
Norene Gilletz's Lunch 'n Learn Low Iodine Diet Recipes

You also want an ePaper? Increase the reach of your titles
YUMPU automatically turns print PDFs into web optimized ePapers that Google loves.
Thyroid Cancer Canada<br />
Wally Patching Memorial Lecture 2010<br />
The following recipes were supplied by <strong>Norene</strong> Gilletz and served as the basis of Thyroid Cancer Canada’s <strong>Low</strong><br />
<strong>Iodine</strong> <strong>Diet</strong> <strong>Lunch</strong> ‘n <strong>Learn</strong> Event on May 29, 2010.<br />
The audience members were not only informed about the <strong>Low</strong> <strong>Iodine</strong> <strong>Diet</strong> at the event, but they also had the<br />
pleasure of participating in the preparation of their own delicious lunch which made use of the recipes that follow<br />
– making the 2010 Wally Patching Memorial Lecture a very unique event!<br />
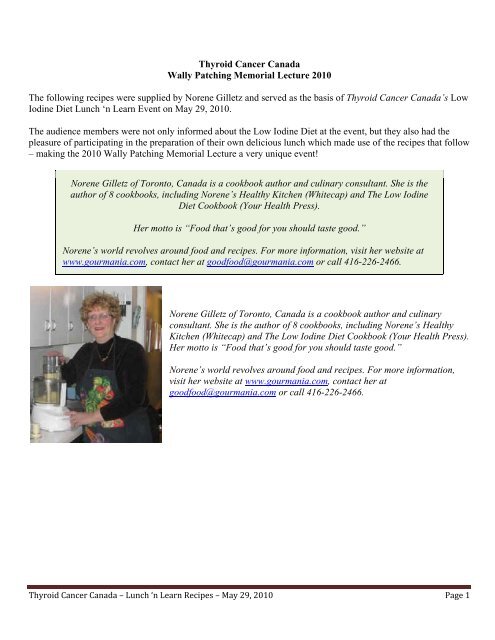
<strong>Norene</strong> Gilletz of Toronto, Canada is a cookbook author and culinary consultant. She is the<br />
author of 8 cookbooks, including <strong>Norene</strong>’s Healthy Kitchen (Whitecap) and The <strong>Low</strong> <strong>Iodine</strong><br />
<strong>Diet</strong> Cookbook (Your Health Press).<br />
Her motto is “Food that’s good for you should taste good.”<br />
<strong>Norene</strong>’s world revolves around food and recipes. For more information, visit her website at<br />
www.gourmania.com, contact her at goodfood@gourmania.com or call 416-226-2466.<br />
<strong>Norene</strong> Gilletz of Toronto, Canada is a cookbook author and culinary<br />
consultant. She is the author of 8 cookbooks, including <strong>Norene</strong>’s Healthy<br />
Kitchen (Whitecap) and The <strong>Low</strong> <strong>Iodine</strong> <strong>Diet</strong> Cookbook (Your Health Press).<br />
Her motto is “Food that’s good for you should taste good.”<br />
<strong>Norene</strong>’s world revolves around food and recipes. For more information,<br />
visit her website at www.gourmania.com, contact her at<br />
goodfood@gourmania.com or call 416-226-2466.<br />
Thyroid Cancer Canada – <strong>Lunch</strong> ‘n <strong>Learn</strong> <strong>Recipes</strong> – May 29, 2010 Page 1
SUPER SALSA<br />
This fresh salsa makes a delicious dip for crudités or Pita or Tortilla Chips or is great with grilled fish, chicken or<br />
burgers.<br />
4–5 large, ripe tomatoes (or 8 Italian plum tomatoes), finely chopped<br />
2 cloves garlic, crushed<br />
1/2 c. coriander/cilantro or parsley, minced<br />
1 jalapeno pepper, seeded & minced<br />
2 tbsp. fresh basil, minced (or 1 tsp. dried)<br />
1/4 cup green onions, chopped<br />
2 tsp. olive oil, to taste<br />
2 tbsp. fresh lemon juice, to taste<br />
Windsor Coarse Salt & pepper, to taste<br />
Dash of cayenne or Tabasco sauce<br />
1 tbsp. salt-free tomato paste, optional<br />
1. Combine all ingredients except tomato paste and mix well. (The processor does a quick job of chopping the<br />
vegetables.) If mixture seems watery, add tomato paste. Season to taste.<br />
Yield: about 3 cups. Salsa keeps for 2 to 3 days in the refrigerator in a tightly closed container. Do not freeze.<br />
• Italian plum tomatoes make a thicker salsa than regular tomatoes because they’re firmer, with less seeds and<br />
juice.<br />
• Don’t rub your eyes after handling hot peppers. It’s a smart idea to wear rubber gloves. Don’t forget to remove<br />
the gloves before touching your eyes . . . or you’ll be yelling “eye, eye, eye!”<br />
• Mediterranean Salsa: Follow recipe for Super Salsa, but add 6 pitted and chopped black olives and 3<br />
tablespoons drained capers. Use 1 tablespoon each of lemon juice and balsamic vinegar.<br />
• Salsa Salad Dressing: Combine leftover salsa with a little salt-free tomato juice in the food processor. Process<br />
with six or eight on/off turns, or until combined.<br />
• Speedy Salsa Gazpacho: Combine 1/2 cup of chopped cucumber, 1/2 cup chopped green pepper, 1 1/2 cups<br />
salt-free tomato juice and 2 cups of salsa. Add crushed garlic, coarse salt and freshly ground pepper. Serve<br />
chilled.<br />
• Salsa Supper in a Snap: Cut several large squares of cooking parchment or aluminum foil. Place a boneless<br />
chicken breast fillet on each square. Top each one with a spoonful of salsa. Seal packets tightly. Arrange on a<br />
baking sheet and place in a preheated 400°F oven. Chicken breasts take 20 to 25 minutes. Easy and good!<br />
Thyroid Cancer Canada – <strong>Lunch</strong> ‘n <strong>Learn</strong> <strong>Recipes</strong> – May 29, 2010 Page 2
COUSCOUS & MUSHROOM CASSEROLE<br />
Many people think that couscous is a grain, but it is actually a pasta made from hard durum wheat. The bran and<br />
germ are stripped from the wheat berry, then the endosperm (semolina) is ground, steamed and dried to form tiny<br />
grains. There is also a delicious whole-wheat couscous available, with its natural bran layers intact.<br />
1 cup couscous<br />
2 cups water, chicken or vegetable broth (salt-free or homemade)<br />
6 green onions, chopped<br />
1 red &/or green pepper, chopped<br />
3 cloves garlic, minced<br />
2 tsp. olive or canola oil<br />
1 cup mushrooms, sliced<br />
1 cup cooked chickpeas or black-eyed peas, drained & well-rinsed<br />
1 medium carrot, grated<br />
Windsor Coarse Salt & pepper, to taste<br />
1/2 tsp. dried basil<br />
2 tbsp. minced fresh dill (or 1 tsp. dried)<br />
• Microwave Method: Combine couscous and water or broth in a 2-quart microsafe casserole and let stand.<br />
(Water will be absorbed by the couscous.) Combine green onions, peppers, garlic and oil in a microsafe bowl.<br />
Microwave uncovered on HIGH 3 to 4 minutes, until softened. Stir in mushrooms and cook 2 minutes longer.<br />
Add to couscous along with chickpeas, carrot and seasonings. Microwave covered on HIGH for 5 minutes, or<br />
until remaining liquid is absorbed. Fluff with a fork to separate the grains. Adjust seasonings to taste.<br />
• Conventional Method: In a large saucepan or skillet, sauté green onions, peppers and garlic in oil until softened.<br />
Add mushrooms and sauté 3 to 4 minutes longer. Add water or broth and bring to a boil. Stir in couscous along<br />
with remaining ingredients. Bring back to a boil, cover and simmer until all the liquid is absorbed, about 5 to 10<br />
minutes. Fluff with a fork to separate the grains. Adjust seasonings to taste. (If mixture seems dry, add a little<br />
extra liquid.)<br />
Yield: 6 servings of approximately 3/4 cup each. Freezes and/or reheats well.<br />
• Couscous Middle-Eastern Style: Omit basil and dill. Replace with 1/2 teaspoon each of ground cumin, ginger<br />
and cinnamon. If desired, cook 1/4 cup currants or raisins along with the couscous. For a delicious, crunchy<br />
texture, stir 1/4 cup toasted pine nuts into couscous just before serving.<br />
• Couscous American-Style: Cook 1/3 cup dried cranberries (craisins) along with couscous. Stir 1/4 cup toasted,<br />
chopped pecans into cooked couscous just before serving.<br />
• Couscous Italian-Style: Add 1 cup diced zucchini and 1 cup canned diced salt-free tomatoes (with juice) to<br />
sautéed vegetables. Cook 5 minutes longer. Stir in couscous along with remaining ingredients. Omit dill and add<br />
2 tablespoons fresh minced basil. (Chickpeas can be omitted, if desired.)<br />
Thyroid Cancer Canada – <strong>Lunch</strong> ‘n <strong>Learn</strong> <strong>Recipes</strong> – May 29, 2010 Page 3
RAINBOW TABBOULEH SALAD<br />
This colorful, vitamin-packed salad is guaranteed to be a winner on any buffet table! This is a wonderful way to<br />
use up fresh mint if you grow it in your garden.<br />
1/3 cup bulgur or couscous<br />
2/3 cup boiling water<br />
2 cups minced flat-leaf or curly parsley<br />
1 cup mint leaves<br />
1 green & 1 red pepper<br />
4 firm, ripe tomatoes<br />
4 green onions (scallions)<br />
1/4 cup red onion<br />
1/4 cup grated carrots<br />
1/2 English cucumber, seeded & diced<br />
1/4–1/3 cup olive oil (to taste)<br />
1/4–1/3 cup fresh lemon juice (to taste)<br />
Windsor Coarse Salt & pepper, to taste<br />
1 tbsp. fresh basil, chopped (or 1 tsp. dried)<br />
Fresh mint or basil leaves, to garnish<br />
1. In a small bowl, combine bulgur or couscous with boiling water. Let stand for 20 minutes to soften. (Couscous<br />
will take only 10 minutes.) Meanwhile, soak parsley and mint in cold salted water for 15 to 20 minutes. Drain<br />
and dry well. Trim off tough parsley stems. Remove mint leaves from stems.<br />
2. Mince parsley and mint leaves. Chop vegetables. (Do this in the processor in batches, using on/off turns to<br />
retain texture.) Combine parsley, mint and vegetables in a large mixing bowl. Add drained bulgur or couscous,<br />
olive oil and lemon juice. Mix well. Add salt, pepper and basil. Allow to stand for at least 1/2 hour for flavors to<br />
blend. Garnish with fresh mint or basil leaves.<br />
Yield: 8 servings. Leftovers will keep for 2 or 3 days in the refrigerator.<br />
• Store bulgur in an airtight container in a cool dark place. It can be stored in the refrigerator for<br />
several months, or in the freezer for up to a year.<br />
• Reserve parsley stems and use them when making chicken or vegetable broth.<br />
• Parsley should be well-dried before chopping. Your processor makes quick work of this task.<br />
Measure parsley after it’s chopped. You need approximately twice as much before chopping to give you the<br />
required amount for this recipe.<br />
• If fresh mint is not available, add 2 teaspoons dried mint. If you don’t have dried mint, just leave it out. The<br />
salad will still have a delicious, garden-fresh flavor.<br />
• Variation: Increase bulgur or couscous to 1 cup for a grain-based Tabbouleh. Soak the grain in double the<br />
amount of water.<br />
• Traditional Tabbouleh: Omit red onion, carrots, cucumber and basil.<br />
Thyroid Cancer Canada – <strong>Lunch</strong> ‘n <strong>Learn</strong> <strong>Recipes</strong> – May 29, 2010 Page 4
LEMON DILL CHICKEN IN A POUCH<br />
This is a perfect dish for one person or for a crowd. For a large quantity, multiply all ingredients. Easy and<br />
versatile! Cold leftovers are delicious thinly sliced and served on a crusty roll or in a salad.<br />
1 boneless, skinless chicken breast, trimmed of fat (1/4 lb/125 g)<br />
Windsor Coarse Salt, if desired<br />
Freshly ground pepper, to taste<br />
Paprika, to taste<br />
1 tsp. fresh dill, minced (or 1/2 tsp. dried)<br />
1/2 tsp. olive or canola oil<br />
1–2 tbsp. fresh lemon juice<br />
1. Place chicken in a bowl and sprinkle it with seasonings. Rub with dill, oil and lemon juice. Let marinate for 30<br />
minutes at room temperature, or cover and refrigerate up to 24 hours.<br />
2. Cut a large square of foil or parchment paper. Place chicken on the foil and drizzle lightly with the marinade.<br />
Seal package by crimping edges closed. (If preparing several portions, make individual packages.) Place on a<br />
baking sheet and bake in a preheated 400°F oven for 20 to 25 minutes. (Use a toaster oven for 1 or 2 portions.)<br />
To serve, place pouch on a serving plate and cut open at the table.<br />
Yield: 1 serving. Best served immediately, but if you make a large quantity, leftovers can be reheated. Cooked<br />
chicken might be too dry if frozen. (Read Time-Saving Secret, below.)<br />
• Perfect with steamed rice and broccoli florets or a garden salad.<br />
• Time-Saving Secret! Combine chicken with seasonings, dill, oil and lemon juice in an airtight container. Freeze<br />
for up to 1 month. Thaw overnight in the fridge, or use the microwave. (One piece of chicken takes 2 to 3<br />
minutes on DEFROST.) Cook immediately as directed in Step 2.<br />
• Forget-about-the-Pouch Version: Place marinated breasts on a lightly greased baking sheet. Bake uncovered at<br />
400°F for 20 minutes.<br />
• Grilled or Broiled Lemon Chicken: Preheat grill or broiler. Prepare chicken as directed in Step 1. Remove<br />
chicken from marinade and pat dry. Grill or broil over medium-high heat, allowing 5 to 6 minutes per side. Baste<br />
often with marinade. Do not overcook or chicken will be dry.<br />
• Microwave Method: In Step 2, wrap marinated chicken breasts in parchment paper. Cook 3 minutes on HIGH<br />
for 1 single breast, 4 to 41/2 minutes for 2 single breasts, and 6 to 7 minutes for 4 single breasts (1 to 11/4<br />
pounds).When done, chicken juices should run clear.<br />
• Chicken & Vegetables in a Pouch: Prepare Lemon Dill Chicken as directed, but before sealing package(s), top<br />
chicken with one of the following veggie combinations: broccoli and/or cauliflower florets; chopped green, red<br />
and/or yellow peppers; julienned zucchini, carrots and/or green onions. Sprinkle with a little marinade or white<br />
wine. Bake or microwave as directed. If microwaving, add an extra minute or two for the veggies.<br />
• Salsa Chicken in a Pouch: Prepare Lemon Dill Chicken as directed, topping each chicken breast with 2 or 3<br />
tablespoons homemade salsa. Wrap in parchment; bake or microwave as directed.<br />
Thyroid Cancer Canada – <strong>Lunch</strong> ‘n <strong>Learn</strong> <strong>Recipes</strong> – May 29, 2010 Page 5
JUMBLEBERRY CRISP<br />
My cousin Nancy Gordon of Toronto gave me the idea for this fast and fabulous crisp based on her yummy<br />
Bumbleberry Pie. I combined various berries, eliminated the crust, and this delectable dessert is the result. If<br />
you’re missing one kind of berry, just use more of another. If using frozen berries, don’t bother defrosting them.<br />
If you don’t have apples, add extra berries!<br />
Filling:<br />
1 1/2 cups strawberries, hulled & sliced<br />
2 cups blueberries<br />
1 1/2 cups cranberries &/or raspberries<br />
2 large apples, peeled, cored & sliced<br />
1/3 cup flour (whole-wheat or all-purpose)<br />
1/3 cup sugar (white or brown)<br />
1 tsp. cinnamon<br />
Topping:<br />
1/3 cup brown sugar, packed<br />
1/2 cup flour (whole-wheat or all-purpose)<br />
3/4 cup quick-cooking oats<br />
1 tsp. cinnamon<br />
1/4 cup canola oil<br />
1. Combine filling ingredients; mix well. Spray a 10-inch glass pie plate or ceramic quiche dish lightly with nonstick<br />
spray. Spread filling ingredients evenly in dish.<br />
2. Combine topping ingredients (can be done quickly in the processor). Carefully spread topping over filling and<br />
press down slightly. Either bake at 375°F for 35 to 45 minutes until golden, or microwave uncovered on HIGH<br />
for 12 to 14 minutes, turning dish at half time. Serve hot or at room temperature.<br />
Yield: 10 servings. Freezes well.<br />
• Topping can be prepared ahead and frozen. No need to thaw before using!<br />
• Prepare crisp as directed, but use 6 to 7 cups of assorted frozen berries and omit apples. Assemble in an<br />
aluminum pie plate, wrap well and freeze it unbaked. When you need a quick dessert, unwrap the frozen crisp<br />
and bake it without defrosting at 375°F about 45 minutes.<br />
• If you are making this dessert in the microwave, place a large microsafe plate or a sheet of waxed paper under<br />
the cooking dish to catch any spills!<br />
• Skinny Version: Reduce oil to 2 tablespoons and add 2 tablespoons water or apple juice to the topping mixture.<br />
• Fruit Crisp: Substitute 6 to 7 cups of assorted sliced fresh (or frozen) fruits &/or berries (peaches, pears,<br />
nectarines, blackberries, etc.).<br />
Thyroid Cancer Canada – <strong>Lunch</strong> ‘n <strong>Learn</strong> <strong>Recipes</strong> – May 29, 2010 Page 6
FAKE ’N BAKE BURGERS<br />
The following recipes were offered as bonus recipes by <strong>Norene</strong> to enjoy!<br />
A wonderful way to use up mashed potatoes! Large patties make a super vegetarian main dish, minis make great<br />
hors d’oeuvres. These are also perfect for Passover. What a rainbow of color and flavor!<br />
4 medium potatoes (or 3 sweet potatoes)<br />
2 medium onions, chopped<br />
1 green & 1 red pepper, chopped<br />
2 cloves garlic, crushed<br />
2 tsp. olive or vegetable oil<br />
3 carrots, peeled & grated (about 1 cup)<br />
2 unpeeled zucchini, grated (about 2 cups)<br />
1/4 cup minced dill &/or parsley<br />
4 egg whites (or 2 eggs for those not on a LID)<br />
1 cup matzo meal (or salt-free bread crumbs)<br />
Windsor Coarse Salt & pepper, to taste<br />
1 tbsp. additional oil (approximately)<br />
1. Peel potatoes and cut into chunks. Boil in salted water until tender, 15 to 20 minutes. Drain well and mash.<br />
You should have about 2 cups.<br />
2. While potatoes are cooking, prepare remaining veggies. (So quick in the processor!) In a large non-stick skillet<br />
(or microwave), cook onions, peppers and garlic in 2 teaspoons oil for 5 minutes, until softened. Add carrots and<br />
zucchini. Cook 3 or 4 minutes longer. Cool slightly. Add remaining ingredients except additional oil. Mix well.<br />
3. Preheat oven to 375°F. Spray a foil-lined baking sheet with non-stick spray. Form mixture into patties. (An ice<br />
cream scoop or 1/4 cup measure works well.) Oil your fingertips, then lightly oil the tops of patties, flattening<br />
them slightly. Bake uncovered at 375°F for 10 to 12 minutes. Turn patties over and bake 10 minutes longer.<br />
Yield: about 18 patties. These reheat and/or freeze well.<br />
• Variations:<br />
Add a 10-ounce package (300 g) chopped cooked spinach, squeezed dry, to cooked vegetables. If desired,<br />
substitute chopped mushrooms for zucchini and add a dash of thyme. Be creative and try various vegetables.<br />
Leftover veggies are great!<br />
• Mini Burgers: Prepare Fake ’n Bake Burger mixture and make small patties. Bake 15 to 20 minutes (or brown<br />
for 3 to 4 minutes per side in a little oil in a non-stick skillet.) You’ll get about 60 minis.<br />
• Grain Burgers: Follow recipe for Fake ’n Bake Burgers, but instead of potatoes, substitute 2 cups leftover<br />
cooked rice, bulgur, millet, couscous or quinoa. Cooked grain should be moist and sticky. Process on Steel Knife<br />
of processor until fine. Combine with remaining ingredients. Bake as directed, or sauté for 4 to 5 minutes per<br />
side in a little oil.<br />
Thyroid Cancer Canada – <strong>Lunch</strong> ‘n <strong>Learn</strong> <strong>Recipes</strong> – May 29, 2010 Page 7
SIMPLE & GOOD RATATOUILLE (Mediterranean Vegetable Stew)<br />
2 medium eggplants (21/2 lb./1.2 kg)<br />
2 medium onions<br />
1 green & 1 red pepper<br />
1 medium zucchini<br />
2 cups mushrooms<br />
4 cloves garlic, minced<br />
1–2 tbsp. olive oil<br />
Windsor Coarse Salt & pepper, to taste<br />
1/2 tsp. each dried basil & oregano<br />
1/4 c. balsamic or red wine vinegar<br />
2 tbsp. brown sugar (to taste)<br />
2 - 51/2 oz. (156 ml) cans tomato paste (salt-free)<br />
1/2 cup water<br />
1. Spray a large, heavy-bottomed pot with nonstick spray. Dice vegetables (do not peel eggplant). Add oil to pot<br />
and heat on medium heat. Add vegetables and sauté for 10 to 15 minutes, stirring often. If necessary, add a little<br />
water to prevent sticking.<br />
2. Add seasonings, vinegar, brown sugar, tomato paste and water. Simmer covered for 25 to 30 min-add a little<br />
water. Adjust seasonings to taste. Serve hot or cold.<br />
Yield: 8 to 10 servings. Mixture keeps up to 10 days in the refrigerator or freezes well.<br />
• Delicious over spaghetti squash, rice, bulgur, couscous, polenta, millet or your favorite grain, or as a vegetarian<br />
pasta sauce over spiral pasta or penne.<br />
• Serve a scoop of chilled Ratatouille on a bed of salad greens as a starter or light main course.<br />
• Serve it cold as an appetizer with salt-free Pita or Tortilla Chips, potato chips, crackers or assorted breads.<br />
• Easy Vegetarian Stew: In Step 2, add any of the following cut-up vegetables: yellow squash, celery, carrots,<br />
potatoes or sweet potatoes, fresh or sun-dried tomatoes, green beans or asparagus. You can also add cooked<br />
chickpeas, black beans and/or kidney beans. Serve over rice, bulgur, pasta, couscous or quinoa.<br />
Thyroid Cancer Canada – <strong>Lunch</strong> ‘n <strong>Learn</strong> <strong>Recipes</strong> – May 29, 2010 Page 8
VEGETARIAN HARVEST OVEN STIR-FRY<br />
So colorful, so healthy!<br />
1 medium eggplant, unpeeled<br />
1 red, 1 yellow & 1 green pepper<br />
1 medium Spanish onion (about 2 cups)<br />
2 medium zucchini, unpeeled<br />
2 cups sliced mushrooms (try shiitake or portobello)<br />
4 cloves garlic, crushed<br />
1 tbsp. olive oil<br />
2 tbsp. balsamic or red wine vinegar<br />
Windsor Coarse Salt and pepper, to taste<br />
2 tbsp. fresh chopped rosemary or basil (or 1 tsp. dried)<br />
1. Preheat oven to 425°F. Cut eggplant, peppers, onion and zucchini into narrow strips. Combine all ingredients<br />
in a large bowl. (May be prepared in advance, covered and refrigerated for 3 or 4 hours.) Spread in a thin layer<br />
on a large foil-lined baking sheet which has been sprayed with nonstick spray.<br />
2. Place baking sheet on top rack of oven. Bake uncovered for 25 to 30 minutes, until tender-crisp and lightly<br />
browned, stirring once or twice.<br />
Yield: 6 servings. This dish reheats well either in the microwave or conventional oven. Veggies will become<br />
soggy if frozen.<br />
Thyroid Cancer Canada – <strong>Lunch</strong> ‘n <strong>Learn</strong> <strong>Recipes</strong> – May 29, 2010 Page 9
ORANGE BALSAMIC VINAIGRETTE<br />
Wonderful on mixed salad greens. It also makes a yummy marinade for boneless chicken breasts.<br />
1/4 cup olive or canola oil<br />
6 tbsp. orange juice<br />
1/4 cup balsamic vinegar<br />
1–2 cloves garlic, crushed<br />
2 tbsp. minced fresh basil (or 1/2 tsp. dried)<br />
1 tbsp. sugar<br />
Windsor Coarse Salt & pepper, to taste<br />
1. Combine all ingredients and mix well. Dressing will keep in the refrigerator about 2 weeks.<br />
Yield: about 3/4 cup.<br />
BROCCOLI & SWEET POTATO SOUP<br />
Carrots, broccoli and sweet potatoes are all great sources of beta carotene.<br />
2 large onions, chopped<br />
2 stalks celery, chopped<br />
1 tbsp. canola oil<br />
3 carrots, chopped<br />
1 bunch broccoli (about 4 cups, cut up)<br />
2 medium potatoes, peeled & cut up<br />
2 medium sweet potatoes, peeled & cut up<br />
7 cups vegetable broth (homemade or salt-free)<br />
1/2 cup chopped parsley<br />
2 tbsp. fresh basil or dill, chopped<br />
1 cup water (or oat milk)<br />
1 tsp. unsalted tub margarine<br />
Windsor Coarse Salt & pepper, to taste<br />
1. In a large soup pot, sauté onions and celery in oil for 5 to 7 minutes, until softened. If necessary, add a little<br />
water to prevent burning. Add carrots. Cook 3 to 4 minutes longer, stirring occasionally.<br />
Add broccoli, potatoes, sweet potatoes and broth. Bring to a boil, reduce heat and simmer for 20 to 25 minutes.<br />
Add parsley and basil. Purée part or all of the soup. Add milk and margarine. Season to taste.<br />
Yield: 10 servings. Reheats and/or freezes well.<br />
Thyroid Cancer Canada – <strong>Lunch</strong> ‘n <strong>Learn</strong> <strong>Recipes</strong> – May 29, 2010 Page 10
DAIRY-FREE SMOOTHIE<br />
Tip: If both the banana and strawberries are frozen, you'll get a thicker smoothie.<br />
1 frozen banana, cut in chunks<br />
1 cup strawberries (fresh or frozen)<br />
1 cup apple or orange juice<br />
1. Combine all ingredients in a blender or food processor and blend until thick and creamy. Serve immediately.<br />
Yield: 1 to 2 servings.<br />
Variations: Instead of strawberries, substitute peeled peaches, nectarines, mango, papaya, or pineapple, cut in<br />
chunks. Use cranberry or pineapple juice as the liquid. For natural sweetness and a flavor boost, add 2 or 3 large<br />
pitted dates.<br />
HOMEMADE POTATO CHIPS<br />
Packaged chips that are salt-free can be hard to find. Also they're full of fat, calories and sodium. These crunchy<br />
munchies are easy and guilt-free! When you're off the lid LID, you may prefer these to regular chips.<br />
1 to 4 medium Idaho potatoes<br />
Windsor Coarse Salt to taste<br />
dried basil, oregano, garlic powder and/or cayenne, if desired<br />
1. Scrub potatoes thoroughly; dry well. Slice paper thin, either in the food processor or by hand. You should get<br />
about 24 slices from each potato.<br />
2. Microwave Method: Place 12 slices at a time on a microsafe rack. Sprinkle lightly with desired seasonings.<br />
Microwave on HIGH for 4 minutes, or until dry and crunchy. Watch carefully because cooking time depends on<br />
moisture content of potatoes. If necessary, microwave 30 seconds longer and check again. Repeat until crispy.<br />
Repeat with remaining potato slices.<br />
3. Conventional Method (for a large batch): Preheat oven to 450 degrees F. Spray a baking sheet lightly with<br />
non-stick spray (LID-safe). Place potato slices in a single layer on pan. Sprinkle lightly with seasonings. Bake at<br />
450 F about 15 to 20 minutes, until crispy and golden.<br />
Yield: calculate 1/2 potato as 1 serving. Do not freeze.<br />
Tip: These are best eaten within a few days. The fresher the better!<br />
Thyroid Cancer Canada – <strong>Lunch</strong> ‘n <strong>Learn</strong> <strong>Recipes</strong> – May 29, 2010 Page 11
CHOCOLATE ALMOND APRICOT CLUSTERS<br />
Source: <strong>Norene</strong>’s Healthy Kitchen by <strong>Norene</strong> Gilletz<br />
Chocolate lifts your spirits when you’re feeling tired and overwhelmed. These no-bake treats are the perfect<br />
“pick-me-upper.” Instead of nuts or apricots, substitute mini marshmallows.<br />
10 oz (300 g) good-quality dark chocolate (bittersweet or semi-sweet dairy-free)<br />
1 Tbsp vegetable oil<br />
2 cups toasted sliced or slivered almonds<br />
11/2 cups (8 oz/250 g) cut-up dried apricots (scissors work best)<br />
1. Break up the chocolate into chunks and place in a large dry microwaveable bowl. Microwave, uncovered, on<br />
medium for 2 minutes, then stir. Continue microwaving on medium for 1 to 2 minutes longer, just until melted;<br />
stir well. Cool slightly before stirring in oil, almonds, and apricots.<br />
2. Drop by teaspoonfuls onto parchment paper-lined baking sheets. Refrigerate for 30 to 45 minutes or until firm.<br />
Transfer to an airtight container, separating the layers with parchment or waxed paper. Yield: 48 pieces. Keeps<br />
for up to 2 to 3 weeks in the refrigerator, if you hide them well! Freezes well for up to 4 months.<br />
<strong>Norene</strong> Gilletz of Toronto, Canada is a cookbook author and culinary consultant. She is the author of 8<br />
cookbooks, including <strong>Norene</strong>’s Healthy Kitchen (Whitecap) and The <strong>Low</strong> <strong>Iodine</strong> <strong>Diet</strong> Cookbook (Your Health<br />
Press). Her motto is “Food that’s good for you should taste good.”<br />
<strong>Norene</strong>’s world revolves around food and recipes. For more information, visit her website at<br />
www.gourmania.com, contact her at goodfood@gourmania.com or call 416-226-2466.<br />
Thyroid Cancer Canada – <strong>Lunch</strong> ‘n <strong>Learn</strong> <strong>Recipes</strong> – May 29, 2010 Page 12