Download FG00210 SC, SCM and SCL Cashbox Cleaning ... - MEI
Download FG00210 SC, SCM and SCL Cashbox Cleaning ... - MEI
Download FG00210 SC, SCM and SCL Cashbox Cleaning ... - MEI

Create successful ePaper yourself
Turn your PDF publications into a flip-book with our unique Google optimized e-Paper software.
Bulletin #:<br />
<strong>FG00210</strong><br />
Bulletin Date: March 15, 2010<br />
Subject:<br />
<strong>Cashbox</strong> <strong>Cleaning</strong> Procedures<br />
Affected Model(s): <strong>SC</strong>, <strong>SC</strong>M, <strong>and</strong> <strong>SC</strong>L cashboxes<br />
Field Bulletin<br />
‣ <strong>FG00210</strong> <strong>Cashbox</strong> <strong>Cleaning</strong> Procedures<br />
‣ <strong>SC</strong>, <strong>SC</strong>M, <strong>and</strong> <strong>SC</strong>L cashboxes<br />
Purpose:<br />
The purpose of this bulletin is to announce options for cleaning the <strong>MEI</strong> CASHFLOW <strong>SC</strong> cashbox.<br />
Details:<br />
The <strong>MEI</strong> CASHFLOW <strong>SC</strong> was launched in 2002 equipped with the industry’s first “fit-for-purpose”<br />
cashbox that was reliable, durable <strong>and</strong> easier to use. <strong>MEI</strong> enhanced the design in 2006 to lengthen<br />
service life even in operating environments susceptible to dust ingress. Enhancements to cashbox<br />
optics, <strong>and</strong> accompanying software changes, were made with a goal of eliminating the need to clean<br />
individual cashbox components.<br />
<strong>MEI</strong>’s 2009 change from screws to rivets – to secure the cashbox pusher assembly – has led to questions<br />
about properly maintaining CASHFLOW <strong>SC</strong> performance. <strong>MEI</strong> believes cashboxes manufactured after<br />
2006 shouldn’t be as susceptible to conditions that would necessitate removing the cashbox pusher<br />
assembly <strong>and</strong> cleaning optics. But, given the durability of the CASHFLOW <strong>SC</strong>, there are a large<br />
number of units produced prior to that change still in the field.<br />
To determine the age of a CASHFLOW <strong>SC</strong> unit please refer to the serial number of the unit. The 1 st <strong>and</strong><br />
2 nd digit of the serial number represents the week the cashbox was manufactured. The 3 rd digit of the<br />
serial number represents the year the cashbox was manufactured.<br />
Clearly, there is a wide variance of environments in which CASHFLOW <strong>SC</strong> operates. Applications that<br />
operate in extreme environments have historically cleaned cashboxes when they can be removed from<br />
service. The need was necessitated by: 1) reduced capacity, 2) dirty optics, <strong>and</strong> 3) “greening”, or<br />
upgrading, in-service equipment. Although the need should be lessened with the 2006 update, operators<br />
that want to continue to clean cashboxes will have several options:<br />
A small ultrasonic cleaner (BT90), which will hold 2-3 <strong>SC</strong>Ls or 4-5 <strong>SC</strong>s.<br />
A larger ultrasonic cleaner (BT130), which will hold 3-4 <strong>SC</strong>Ls or 5-6 <strong>SC</strong>s.<br />
A commercial dishwasher, in which quantities will vary.<br />
<strong>MEI</strong> has tested these solutions internally <strong>and</strong> externally. And, in each case, the cleaned CASHFLOW<br />
<strong>SC</strong> units met all product specifications <strong>and</strong> were fit to go back in the field <strong>and</strong> meet stringent<br />
performance expectations.<br />
Questions should be directed to <strong>MEI</strong> Technical Support at 1-800-345-8172 or our web site: www.meiglobal.com<br />
1 of 3
As always, <strong>MEI</strong> looks forward to working with its customers to develop efficient maintenance processes<br />
that maximize the investment in <strong>MEI</strong> products. There is not a one-size-fits-all solution. Individual<br />
solutions will vary by customer – <strong>and</strong> <strong>MEI</strong> will help each OEM determine the most efficient path<br />
forward (including equipment recommendations) given volume <strong>and</strong> application.<br />
Action:<br />
Option A Ultrasonic Power Corp. Model BT90 or BT130 ultrasonic cleaner<br />
Steps:<br />
1. Remove the lock(s) from the cashbox(es).<br />
2. Open cashbox door(s).<br />
3. Refer to the Model BT90 or BT130 users manual. Set frequency to mid-range with water<br />
temperature 100 – 160 degrees Fahrenheit (37 – 71 Celsius).<br />
4. Set cashbox(es) in the ultrasonic cleaner with h<strong>and</strong>le arrow up.<br />
5. Ensure cashbox(es) are submerged.<br />
6. Turn on ultrasonic cleaner.<br />
7. Let ultrasonic cleaner run for 4 minutes minimum.<br />
8. Remove cashbox(es) from ultrasonic cleaner.<br />
9. Rinse cashbox(es) thoroughly with clean water to remove solution <strong>and</strong> leftover debris.<br />
10. Blow out cashbox(es) with compressed air until all fluid is removed.<br />
11. Allow cashbox(es) to air dry for 24 hours in a well-ventilated area.<br />
12. Reinstall the lock(s).<br />
13. <strong>MEI</strong> suggests a label (with the current date) to track completed cashbox(es).<br />
14. The cashbox(es) are ready for use.<br />
Option B Commercial Dishwasher<br />
Steps:<br />
1. Remove the lock(s) from the cashbox(es).<br />
2. Open cashbox door(s).<br />
3. Remove the spring <strong>and</strong> yellow plate.<br />
4. Pull pusher plate to maximum extension position.<br />
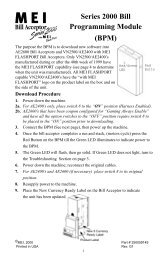
5. Install 8” tie wrap in the guide path (see Figure 1).<br />
6. Ensure water temperature is 100 – 160 degrees Fahrenheit (37 – 71 Celsius).<br />
7. Ensure dishwasher is set to NO HEAT DRY.<br />
8. Use dishwater soap that is non-toxic <strong>and</strong> free of chlorine <strong>and</strong> phosphorus.<br />
9. Set the cashbox(es) on bottom tray with the door open <strong>and</strong> h<strong>and</strong>le arrow pointing up.<br />
10. Turn on dishwasher.<br />
11. Allow the dishwasher to run a complete cycle.<br />
12. Remove tie wrap with diagonal pliers.<br />
13. Blow out cashbox(es) with compressed air until fluid is removed.<br />
14. Allow cashbox to air dry for 24 hours in well-ventilated area.<br />
15. Reinstall the spring <strong>and</strong> yellow plate; ensure the bottom of the spring is re-attached.<br />
16. Reinstall the lock(s).<br />
17. <strong>MEI</strong> suggests a label (with the current date) to track a completed cashbox.<br />
18. The cashbox(es) are ready for use.<br />
Questions should be directed to <strong>MEI</strong> Technical Support at 1-800-345-8172 or our web site: www.meiglobal.com<br />
2 of 3
Figure 1<br />
Optional Tools <strong>and</strong> Accessories:<br />
1. Compressed air source or caned air<br />
2. Lock removal tools<br />
3. 8” tie wraps<br />
4. Non-toxic <strong>and</strong> free of chlorine <strong>and</strong> phosphorous dishwasher soap<br />
5. Label materials<br />
6. Diagonal pliers<br />
Please contact your <strong>MEI</strong> sales associate or technical service contact for additional information about this<br />
issue or any other related to <strong>MEI</strong> products.<br />
Questions should be directed to <strong>MEI</strong> Technical Support at 1-800-345-8172 or our web site: www.meiglobal.com<br />
3 of 3