
Create successful ePaper yourself
Turn your PDF publications into a flip-book with our unique Google optimized e-Paper software.
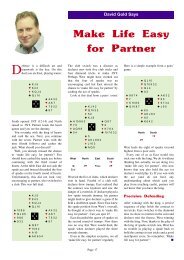
BETTER BIDDING by BERNARD MAGEE<br />
Cue-bidding<br />
Cue-bidding is not easy and if at<br />
all possible I try not to use it!<br />
Blackwood is much easier: it<br />
gives you a specific answer that enables<br />
you to bid slam accurately. However, I<br />
finished last issue’s article by mentioning<br />
the types of hands on which Blackwood<br />
is not suitable. These are the hands<br />
on which I will use cue-bidding – not<br />
because I want to, but because I have to!<br />
The three basic reasons for not using<br />
Blackwood are:<br />
1. Weak side suits – a suit of two or<br />
more cards without the ace or king.<br />
2. The response would take you too<br />
high – usually this happens if a<br />
minor suit has been agreed.<br />
3. Void suits – you won’t know which<br />
aces your partner holds.<br />
What is a cue-bid?<br />
A cue-bid is a bid of a new suit at a<br />
high-level when a suit has been agreed<br />
as trumps; the bid shows a ‘control’ in<br />
the suit, that is, the ability to win a trick<br />
if the suit is led. You can show first- or<br />
second-round controls:<br />
First-round control = an ace or a<br />
void.<br />
Second-round control = a king or a<br />
singleton.<br />
Opener<br />
1♠<br />
4♦<br />
Responder<br />
3♠<br />
In this auction the 4♦ bid is not needed<br />
in a natural sense, as the spade suit has<br />
already been agreed as trumps. Instead,<br />
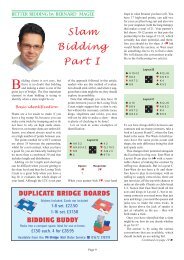
<strong>Slam</strong><br />
<strong>Bidding</strong><br />
(<strong>Part</strong> <strong>II</strong>)<br />
it is used as a slam-try; showing firstround<br />
control of diamonds.<br />
Some experts like to be able to show<br />
immediately first- and second-round controls,<br />
but I believe this is unnecessarily<br />
complicated and can lead to confusion.<br />
I like to start by showing first-round<br />
controls first and then follow with<br />
second-round controls, working my way<br />
up the ladder. The only exception to this,<br />
as we will see later on, is when one hand<br />
is much weaker than the other (for example,<br />
responder after a 2♣ opening).<br />
Note that you cannot cue-bid in<br />
trumps: a bid of the trump suit is a signoff<br />
(negative).<br />
After 1♠ – 3♠ – 4♦, responder might<br />
now bid 4♥, which would suggest firstround<br />
control in hearts (ace or void).<br />
Without a control to show, responder<br />
would bid 4♠.<br />
Weak Side Suits<br />
I try to avoid cue-bidding because it is<br />
so difficult, so when I use it, I use it for<br />
one of the three reasons mentioned<br />
earlier – and I want my partner to work<br />
out which one.<br />
As responder to a cue-bid, always<br />
try to work out why your partner<br />
is cue-bidding (i.e. why didn’t he<br />
just use Blackwood?).<br />
Take a look at the following sequence,<br />
for example:<br />
West East<br />
1♠<br />
3♠<br />
4♣<br />
4♦<br />
5♣ ?<br />
What does it mean?<br />
We are playing in spades – that was<br />
agreed after the first two bids. West has<br />
made a cue-bid to show the ace of clubs<br />
and after East has shown a control in<br />
diamonds with his 4♦ cue-bid, West<br />
has cue-bid in clubs again. Why has he<br />
bothered to do that?<br />
Take a look at the auction shown;<br />
what is missing?<br />
No-one has shown a control in hearts!<br />
West seems to be suggesting that a<br />
slam might be on, but he is worried about<br />
the hearts; he probably has a weakness<br />
there and needs partner to hold a control<br />
(either ace or king, or a singleton or void)<br />
in the suit.<br />
Thus, the solution is that with control<br />
of hearts East can cue-bid it, but without<br />
control of hearts he should sign-off and<br />
bid 5♠<br />
Here is the West hand:<br />
West 1<br />
♠ K Q J 4 3 2<br />
♥ Q 4 2<br />
♦ K Q 3<br />
♣ A<br />
You open 1♠ and hear partner respond<br />
3♠. What next? You have a powerhouse:<br />
17 high-card points, an excellent six-card<br />
suit and a singleton takes you past 20<br />
total points and adding them to partner’s<br />
10-12 you should certainly be hopeful<br />
of slam. If you use Blackwood, what<br />
will you bid over a two-ace response?<br />
The answer is: you would not know!<br />
With East 1 you would want to finish in<br />
5♠ and with East 2 you would want to<br />
finish in 6♠, but both have two aces!<br />
East 1 East 2<br />
♠ A 9 8 5 ♠ A 9 8 5<br />
♥ 7 6 ♥ K 6<br />
♦ A J 9 2 ♦ A 10 9 2<br />
♣ Q J 3 ♣ 9 8 3<br />
The problem is that to make a slam<br />
viable, you need a control in every suit.<br />
West does not have control of the heart<br />
suit and thus Blackwood is no good.<br />
Instead, he starts cue-bidding, setting in<br />
motion the auction shown earlier, as<br />
well as the second one shown on the<br />
next page.<br />
The two auctions would be:<br />
Continued on page 9 ❿<br />
Page 7
BETTER BIDDING continued from page 7<br />
West 1 East 1<br />
♠ K Q J 4 3 2 ♠ A 9 8 5<br />
N<br />
♥ Q 4 2 ♥ 7 6<br />
W E<br />
♦ K Q 3 S ♦ A J 9 2<br />
♣ A ♣ Q J 3<br />
West<br />
1♠<br />
4♣<br />
5♣<br />
End<br />
East<br />
3♠<br />
4♦<br />
5♠<br />
Over 5♣ East 1 has no control in hearts<br />
and thus signs off by bidding 5♠, which<br />
is far enough – making eleven tricks will<br />
be easy.<br />
West 1 East 2<br />
♠ K Q J 4 3 2 ♠ A 9 8 5<br />
♥ Q 4 2 N ♥ K 6<br />
W E<br />
♦ K Q 3 S ♦ A 10 9 2<br />
♣ A ♣ 9 8 3<br />
West<br />
1♠<br />
4♣<br />
5♣<br />
End<br />
East<br />
3♠<br />
4♦<br />
6♠<br />
This time East 2 has a control in hearts,<br />
so slam has a good chance after opener’s<br />
strong bidding. With just second-round<br />
control in hearts, he bids to 6♠; holding<br />
the ace of hearts as well as the ace of<br />
trumps he could try for more!<br />
6♠ is not fail-safe; after all West<br />
might not have the queen of hearts, but<br />
the contract would still be a 50-50 shot,<br />
making when North holds the heart ace.<br />
Cue-bidding, however, does not give<br />
you all the answers, as you can see.<br />
How do you know how good your<br />
trumps are? Good question, and there is<br />
no precise answer. That is why I like to<br />
use Blackwood: the Key-Card version<br />
will tell you all about the trump suit.<br />
However, with various types of hands<br />
cue-bidding is much more accurate.<br />
When a minor has<br />
been agreed<br />
Consider this example:<br />
West 2<br />
♠ 3<br />
♥ K Q 3<br />
♦ AK Q<br />
♣ K Q J 6 5 4<br />
You open 1♣ and your partner responds<br />
3♣. This is a similar start to the auction<br />
with the previous West hand, only this<br />
time you are even stronger; 20 high-card<br />
points, a strong six-card suit and a singleton<br />
– wow! <strong>Slam</strong> is highly likely and<br />
yet it is not so easy to bid. Many of us<br />
would launch into Blackwood immediately,<br />
and after hearing partner’s 5♦ response<br />
would curse our luck: we would<br />
be too high, missing two aces and with<br />
no way back to 5♣.<br />
What you need to do is cue-bid:<br />
West 2 East 3<br />
♠ 3 ♠ AK 6<br />
♥ K Q 3 N ♥ 9 7<br />
W E<br />
♦ AK Q S ♦ 9 8 7 4<br />
♣ K Q J 6 5 4 ♣ A 9 7 2<br />
West<br />
1♣<br />
3♦<br />
4♥<br />
5♣<br />
End<br />
East<br />
3♣<br />
3♠<br />
4♠<br />
6♣<br />
SUPERSCORER<br />
Duplicate <strong>Bridge</strong> Scoring Program for Windows 95 or later<br />
Single or multi section/session ♦ Any movement scored ♦ Enter names using initials<br />
Prints Master-points ♦ Uploads Sim Pairs results ♦ Creates HTML files<br />
From the Mail Order Service 01672 519219<br />
£52 95<br />
inc p&p<br />
This bidding sequence may well be puzzling.<br />
Generally, in auctions where a<br />
minor suit has been agreed, you will be<br />
trying for 3NT, especially at Pairs. So if<br />
the auction starts 1♣ – 3♣ – 3♦, the 3♦<br />
bid should be assumed in the first instance<br />
to be showing strength in diamonds<br />
and suggesting a 3NT contract. How do<br />
you know that it is a cue-bid instead?<br />
From West’s failure to bid 3NT over<br />
East’s 3♠. If 3♦ were not a cue-bid,<br />
West might bid 3NT after East’s 3♠,<br />
which shows strength in the suit for notrump<br />
purposes. The fact that West continues<br />
with 4♥ over 3♠ clarifies that he<br />
has been cue-bidding all along.<br />
What has West shown so far? He has<br />
promised the ace (or a void) in diamonds<br />
and then his 4♥ bid could be<br />
taken to mean that he also has the ace of<br />
hearts – it is, after all, his first opportunity<br />
to show a heart control.<br />
However, that is not what West is trying<br />
to put across: his plan is to cue-bid<br />
every suit, so that his partner understands<br />
that there is no problem, other than the<br />
one he actually has. When West stops in<br />
5♣, East should be asking himself: “We<br />
have control of all the suits, so why on<br />
earth is partner stopping?”<br />
When you have agreed a minor as<br />
your trump suit, you should bear<br />
in mind that partner might not be<br />
able to use Blackwood.<br />
Here, with all the suits cue-bid, there is<br />
no doubt what the problem is. East should<br />
consider that, had his partner needed only<br />
one ace, he would have used Blackwood<br />
but, if he needed two aces, Blackwood<br />
would have taken him too high.<br />
So, having worked out that West is<br />
looking for two aces, East 3 bids on to<br />
6♣, whilst East 4 passes 5♣.<br />
West 2 East 4<br />
♠ 3<br />
♠ AK Q<br />
N<br />
♥ K Q 3 ♥ J 7<br />
W E<br />
♦ AK Q S ♦ J 8 7 4<br />
♣ K Q J 6 5 4 ♣ 10 9 7 2<br />
West<br />
1♣<br />
3♦<br />
4♥<br />
5♣<br />
East<br />
3♣<br />
3♠<br />
4♠<br />
End<br />
Continued on page 10 ❿<br />
Page 9
BETTER BIDDING continued from page 9<br />
Hands with a void<br />
Now let us see a hand with a void:<br />
West 3<br />
♠ Void<br />
♥ A K 9 8 7 4<br />
♦ K Q J 2<br />
♣ K 3 2<br />
Once again the auction starts nice and<br />
neatly: 1♥ – 3♥, and again you have<br />
visions of slam. With partner having fourcard<br />
heart support, you assume there are<br />
likely to be no losers there and it is not<br />
unreasonable to think that if partner has<br />
one of the minor-suit aces. slam might<br />
be on. However, Blackwood will not help<br />
you to find this out: partner’s one ace<br />
could be the ace of spades.<br />
Once again it is time for cue-bidding<br />
and although it takes a little getting used<br />
to, your next bid is 3♠, saying: “<strong>Part</strong>ner,<br />
I have first-round control in spades.”<br />
(You don’t have the ace, but you can win<br />
the first round of spades by ruffing.)<br />
West 3 East 5<br />
♠ Void ♠ K 8 6 3<br />
♥ A K 9 8 7 4 N ♥ Q 6 5 3<br />
W E<br />
♦ K Q J 2<br />
S ♦ A3<br />
♣ K 3 2 ♣ Q 8 7<br />
West<br />
1♥<br />
3♠<br />
6♥<br />
East<br />
3♥<br />
4♦<br />
End<br />
West 3 East 6<br />
♠ Void ♠ AK 8<br />
♥ A K 9 8 7 4 N ♥ Q 6 5 3<br />
W E<br />
♦ K Q J 2 S ♦ 7 6<br />
♣ K 3 2 ♣ Q 8 7 6<br />
West<br />
1♥<br />
3♠<br />
End<br />
East<br />
3♥<br />
4♥<br />
East 5 would cue-bid 4♦ which would<br />
be enough to make West jump to 6♥.<br />
With six hearts and four diamond tricks,<br />
slam is odds-on; West can discard his<br />
partner’s clubs on his diamonds, so the<br />
club queen is surplus to requirements.<br />
East 6, on the other hand, will not be<br />
happy when he hears the 3♠ bid. He<br />
will know there is a clash of values: his<br />
ace-king opposite partner’s void. With<br />
no ace to show outside spades, he would<br />
therefore sign-off in 4♥ and West would<br />
quietly pass.<br />
Cue-bidding before<br />
using Blackwood<br />
As I keep emphasising, the ideal is to use<br />
Blackwood and you can still use it after<br />
you have started cue-bidding in two<br />
situations:<br />
1. When cue-bidding has enabled you<br />
to keep the level low.<br />
2. When your weak suit has been<br />
cue-bid.<br />
This is an example of the first case:<br />
♠ A K 8 7 6 ♠ Q J 10 4<br />
♥ K Q 3 N ♥ J 7 4 2<br />
W E<br />
♦ 3<br />
S ♦ K Q J<br />
♣ A K 7 3 ♣ Q 6<br />
West<br />
1♠<br />
4♣<br />
End<br />
East<br />
3♠<br />
4♠<br />
After 1♠ – 3♠ West could use Key-<br />
Card Blackwood (KCB) – he has control<br />
of all the suits and plenty of strength –<br />
but before doing so he should find out<br />
whether East has a red-suit control by<br />
bidding 4♣. If East cannot cue-bid 4♦<br />
or 4♥, then 4♠ is high enough. A heart<br />
ruff might take 5♠ down.<br />
♠ A K 8 7 6 ♠ Q J 10 4<br />
♥ K Q 3 N ♥ 9 2<br />
W E<br />
♦ 3 S ♦ A J 7 4<br />
♣ A K 7 3 ♣ Q J 2<br />
West<br />
1♠<br />
4♣<br />
4NT<br />
6♠<br />
East<br />
3♠<br />
4♦<br />
5♦<br />
End<br />
However, if partner can cue-bid, here<br />
showing the ace of diamonds, then you<br />
can use KCB and go on to the slam.<br />
Next is an example of using KCB<br />
when your weak suit has been cue-bid:<br />
♠ A K 8 7 6 ♠ Q J 10 4<br />
♥ 2 N ♥ K 8 3<br />
W E<br />
♦ 3 2 S ♦ A 9 7 4<br />
♣ A K Q J 3 ♣ 9 8<br />
West<br />
1♠<br />
4♣<br />
4NT<br />
6♠<br />
East<br />
3♠<br />
4♦<br />
5♦<br />
End<br />
West cannot use Blackwood because of<br />
his weakness in diamonds, so he starts<br />
with a 4♣ cue-bid. However, when he<br />
hears East bid 4♦ he knows his weakness<br />
is covered, so he can use KCB and<br />
then bid on to the excellent slam.<br />
Without the diamond cue-bid, West<br />
would continue cue-bidding to try to<br />
find out whether East had second-round<br />
control of diamonds:<br />
♠ A K 8 7 6 ♠ Q J 10 4<br />
♥ 2 N ♥ AK 8<br />
W E<br />
♦ 3 2 S ♦ 10 9 7 4<br />
♣ A K Q J 3 ♣ 9 8<br />
West<br />
1♠<br />
4♣<br />
5♣<br />
5♠<br />
East<br />
3♠<br />
4♥<br />
5♥<br />
End<br />
When East can only cue-bid hearts (showing<br />
first- and second-round control, and<br />
denying a diamond control) West can be<br />
sure that there are two diamond losers<br />
and that the slam is not on.<br />
Do not mistake<br />
a cue-bid for<br />
a game try<br />
Trial bids in the majors are used after<br />
weak two-level raises, when the idea of<br />
a slam is not even in our thoughts, e,g,<br />
1♥ – 2♥ – 3♣. It can only be a cue-bid<br />
if it is above three of the agreed suit,<br />
e.g. 1♥ – 2♥ – 4♣.<br />
However, there can be a little confusion<br />
Continued on page 11 ❿<br />
Page 10
BETTER BIDDING continued from page 10<br />
when bidding the minors (e.g. 1♣ – 3♣),<br />
as we have seen on page 9. You should<br />
start by assuming that partner is trying<br />
for no-trumps, then if he does not bid<br />
3NT but a suit at the four level, you<br />
know he is cue-bidding and trying for a<br />
slam, and you proceed accordingly.<br />
Other examples<br />
♠ A Q J 7 4 ♠ K 10 3 2<br />
♥ 5 2 N ♥ A9 4<br />
W E<br />
♦ A S ♦ J 5 4 3<br />
♣ A Q J 5 4 ♣ K 2<br />
West<br />
1♠<br />
4♣<br />
4NT<br />
5NT<br />
7♠<br />
East<br />
3♠<br />
4♥<br />
5♥<br />
6♣<br />
End<br />
This hand illustrates how cue-bidding<br />
can be effectively combined with Key-<br />
Card Blackwood (Key-card Blackwood<br />
was discussed at length in the previous<br />
issue and the article is available from<br />
the on-line library at www.mr<br />
bridge.co.uk/library/library.shtm).<br />
West cannot use Blackwood because<br />
of his weak hearts, so he starts to cuebid,<br />
but as soon as he hears his partner<br />
cue-bid hearts (4♥), he can introduce<br />
KCB. His partner shows two key cards<br />
(one ace and the king of trumps). Now<br />
West continues with 5NT, asking for<br />
kings, and East replies by showing the<br />
king of clubs.<br />
That is just the card West needed and<br />
he can confidently bid 7♠.<br />
TABLE<br />
CARD HOLDER<br />
from the<br />
£6 75<br />
CODE CH02<br />
Mail Order Service<br />
01672 519219<br />
♠ A K 5 2 ♠ Q J 6 4<br />
♥ 9 5 N ♥ K Q 2<br />
W E<br />
♦ 10 3 S ♦ A K Q J 4<br />
♣ A J 8 7 6 ♣ 2<br />
West<br />
1♣<br />
1♠<br />
5♠<br />
End<br />
East<br />
1♦<br />
4NT<br />
6♠<br />
Let me repeat it once more: you should<br />
only cue-bid if you have to. East has a<br />
wonderful hand and as soon as he hears<br />
1♠ from West he wants to try for slam<br />
in spades. He does not need cue-bidding,<br />
he simply needs to know about key cards:<br />
the ace and king of spades, the ace of<br />
hearts and the ace of clubs – all of which<br />
he can find out about by bidding 4NT.<br />
When West shows three key-cards, East<br />
can bid 6♠.<br />
♠ K Q 9 8 7 6 ♠ A J 10 4<br />
♥ 7 6 N ♥ Q 3 2<br />
W E<br />
♦ AK Q S ♦ 7 6<br />
♣ K Q ♣ A J 5 3<br />
West<br />
1♠<br />
4♦<br />
5♦<br />
End<br />
East<br />
3♠<br />
5♣<br />
5♠<br />
On this last deal West has weak hearts<br />
and so avoids Blackwood; instead he<br />
cue-bids 4♦ to find out if East has a heart<br />
control. It’s a neat auction, because after<br />
West’s 5♦ bid East can work out what<br />
West needs: with all the suits bid except<br />
for hearts, it is clear that a heart control is<br />
required. East’s queen is not good enough<br />
for that, so he signs off in 5♠.<br />
Conclusion<br />
Cue-bidding is difficult, but it is a very<br />
useful aid – without it, a lot of slam<br />
bidding is guesswork. However, try to<br />
heed my advice and use it only when<br />
necessary. Mind you, when you do get a<br />
cue-bidding auction right and bid to a<br />
good slam, there are few better feelings<br />
in bridge – other than making the slam<br />
afterwards!<br />
■<br />
MORE ACOL<br />
BIDDING<br />
The follow-up<br />
Interactive CD by<br />
BERNARD MAGEE<br />
200 More Hands<br />
in 10 Chapters<br />
Basics<br />
Advanced Basics<br />
Weak Twos<br />
Strong Hands<br />
Defence to Weak Twos<br />
Defence to 1NT<br />
Doubles<br />
Two-suited Overcalls<br />
Defences to Other Systems<br />
Misfits and<br />
Distributional Hands<br />
Includes<br />
Analysis and Commentary on<br />
the Play of the 200 hands, which<br />
vary from the straightforward<br />
to the very difficult.<br />
System Requirements<br />
Windows 98 or later CD-ROM<br />
£89 95<br />
A<br />
Product<br />
Available exclusively from the<br />
Mail Order Service<br />
01672 519219<br />
Page 11