Installation Guidelines for Glass Mosaic and Tile - New Ravenna
Installation Guidelines for Glass Mosaic and Tile - New Ravenna
Installation Guidelines for Glass Mosaic and Tile - New Ravenna

Create successful ePaper yourself
Turn your PDF publications into a flip-book with our unique Google optimized e-Paper software.
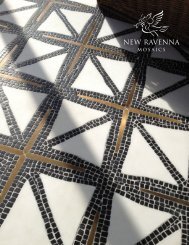
<strong>New</strong> <strong>Ravenna</strong><br />
installation guidelines<br />
jewel glass mosaic <strong>and</strong> smaller tiles onto wall surfaces<br />
september 2009<br />
Please take a few minutes to read this document. Because jewel glass tiles <strong>and</strong> mosaics are custom made to order, they<br />
differ from other projects <strong>and</strong> require special h<strong>and</strong>ling.<br />
Every ef<strong>for</strong>t has been made at the factory to make the installation as easy as possible. These instructions are very<br />
important to read, even if you have installed similar products in the past. Refunds are not possible after the product has<br />
been installed. If you are installing larger glass tiles that are loose (not tape-faced), consult “<strong>Installation</strong> <strong>Guidelines</strong> <strong>for</strong> Larger<br />
Jewel <strong>Glass</strong> <strong>Tile</strong>s onto Wall Surfaces.” <strong>Glass</strong> is not approved <strong>for</strong> most floor applications; in pools, glass is sometimes used<br />
<strong>for</strong> pool waterline borders, but it should only be used in tropical <strong>and</strong> subtropical climates, not temperate climates.<br />
A. Preparing the Space to Install <strong>Glass</strong> <strong>Mosaic</strong> <strong>and</strong> <strong>Tile</strong> Projects<br />
1. You should mount glass tile <strong>and</strong> mosaic only on substrate that is rated to hold it, such as drywall, sheet<br />
rock, blue board, as well as cementitious board units (CBUs) such as WonderBoard, Durock, <strong>and</strong><br />
HardieBacker. The area on which the tile or mosaic is to be mounted must be clean <strong>and</strong> dry <strong>and</strong> remain<br />
dry—that is, not subjected to moisture. Concrete areas must be allowed to cure <strong>for</strong> 28 days in warm, dry<br />
conditions; in colder or more humid areas, 60 days is the minimum. Wire-rein<strong>for</strong>ced mortar beds should<br />
cure <strong>for</strong> at least seven days prior to installation. Do not mount glass tile or mosaic onto any flexible<br />
surfaces, such as uninstalled Sintra or other plastic products, as the drying of the cement <strong>and</strong> grout will<br />
cause contraction, which will crack the glass in places as well as altering the grout spacing.<br />
2. If the substrate has joints, these should be filled using the same type of mortar used to set the glass, <strong>and</strong><br />
fiberglass CBU tape is also highly recommended. Make sure the surface is perfectly level <strong>and</strong> dry be<strong>for</strong>e<br />
installation. Any unevenness in the surface will be visible in the final result.<br />
3. All manufacturers now advise the addition of an anti-fracture membrane (also called a “crack-isolation<br />
membrane”), which is available in liquid, paste, or sheet <strong>for</strong>m. Because glass exp<strong>and</strong>s <strong>and</strong> contracts at a<br />
rate much higher than stone or ceramic, a crack in the substrate will typically be transmitted to the glass,<br />
causing it to crack. Anti-fracture membranes reduce the likelihood of this occurring <strong>and</strong> also provide an<br />
important moisture barrier.<br />
B. Dry-laying the Project<br />
1. Almost all glass tiles <strong>and</strong> mosaics will be used on walls <strong>and</strong> other vertical spaces, so dry-laying (fitting) the<br />
material to the installation space is more difficult than with horizontal spaces like floors. We strongly<br />
recommend creating an exact template of the installation space, using luan, strong cardboard or similar<br />
material, or very thick paper. Then, make sure the glass mosaic fits precisely on the template. If the<br />
project needs to fit together in a specific way, the manufacturer provides “maps” of the project, to show
how pieces fit together. It is much easier to adjust the size of the project to the space be<strong>for</strong>e installation<br />
than after installation. H<strong>and</strong>le the sheets of the project with extreme care, as glass is very fragile.<br />
2. If the dimensions of the project <strong>and</strong> the installation space differ, you will need to modify the space or the<br />
project. If the project needs to be larger, look <strong>for</strong> a “piece bag” of extra material that shipped with the<br />
project. If the project needs to be smaller, it can be cut down, using a high-quality wet tile saw fitted with<br />
a glass-cutting blade.<br />
3. Experienced installers will tell you: It is best to have the client’s approval of the dry-laid project be<strong>for</strong>e<br />
installation.<br />
C. Setting the Project<br />
1. Mix <strong>and</strong> prepare the mortar (use a polymer-modified thinset cement) according to the package<br />
instructions.<br />
2. Using a fine v-notched trowel (3/16”), apply a first coat (called a “bond coat”) to the installation surface<br />
with the flat side of the trowel.<br />
3. Using the notched side of the trowel, apply additional setting material, combing horizontal rows into the<br />
surface. This will make the setting bed the proper depth. (Be careful not to apply too much, as cement<br />
will come out between the glass pieces in the grout joints: with glass projects, it is exceedingly difficult to<br />
“pick” this extruded cement from between the joints without damaging the glass in some way.)<br />
4. For glass that is partly or entirely transparent, use the flat side of the trowel to flatten the grooves in the<br />
material to make the surface of the setting bed smooth. Because jewel glass is very thin (1/16”), the<br />
setting bed should be relatively shallow. Caution: trowel marks or other irregularities in the setting bed<br />
may be visible through the installed product if it has areas of transparency.<br />
5. Thinset dries quickly, so it is necessary to work quickly, be<strong>for</strong>e the material dries. Do not allow the<br />
thinset to “skin” (partially dry at the surface). If it does, remove it <strong>and</strong> begin again. Because the rate of<br />
drying is variable, it is important to install the mosaic or tiles after you have applied a few square feet of<br />
thinset, rather than covering the entire installation area with thinset <strong>and</strong> then trying to install the project<br />
be<strong>for</strong>e it sets up a skin.<br />
6. Apply the sections of the taped project from the top left to bottom right (the usual ordering of pieces; see<br />
the project map, if there is one). Using light pressure, apply the sheets (tape side to you) in the correct<br />
portion of the wall that corresponds to the template.<br />
7. <strong>Glass</strong> is fragile, but the project has to be set into the thinset at a consistent depth. We recommend using<br />
a block of wood (a short piece of 2x4 is fine) <strong>and</strong> a rubber mallet to tap—very lightly—the project into<br />
the thinset. Do this <strong>for</strong> each sheet, making sure that all are level <strong>and</strong> even with one another.<br />
8. Make sure that each sheet of the project aligns just right with the ones around it—because the tape is<br />
clear, you will be able see what you are doing <strong>and</strong> to maintain spacing perfectly among the different<br />
pieces, whether a mosaic or tiles. The sheets should not be distinct in the project: that is, there should be<br />
no gaps, seams, or tight areas. The setting of each sheet relative to the other sheets is one of the most<br />
important parts of the installation. The project should look like a whole, continuous work of art. If you<br />
feel concerned about certain sheets interlocking just right, it is fine to use 2-3” clear plastic tape to join
those sheets together while they are still on the template. If you need to make adjustments to the sheets or<br />
parts of the sheets, it is possible to slit the tape with a utility knife or X-acto blade to move the sheets.<br />
9. After the entire project has been installed, wait at least 24 hours to remove the face tape from each piece.<br />
Pulling the Face Tape<br />
10. Once the thinset has dried, the tape must be removed be<strong>for</strong>e the project is grouted. Most installers<br />
remove tape by peeling slowly but firmly from upper left to lower right corner.<br />
11. It is normal <strong>for</strong> some pieces of the project to come off with the tape, perhaps a few per sheet at most. Set<br />
these aside, noting where they go in the project. However, if you find many pieces are coming off with<br />
the tape, then too little thinset was applied—or the material was not given enough time to dry.<br />
12. It is helpful to use an X-acto or similar blade to get a corner of the tape started, be<strong>for</strong>e pulling.<br />
13. If there are loose pieces that have come off with the tape, these should be “back-buttered” (thinset applied<br />
to the back) <strong>and</strong> placed into the proper places in the project. Make sure the pieces are level in the project<br />
<strong>and</strong> have the correct grout spacing around them.<br />
14. Allow the project to cure <strong>for</strong> a minimum of 48 hours be<strong>for</strong>e cleaning <strong>and</strong> grouting.<br />
15. If some of the cement was unevenly applied, it may come out through the grout joints. This extruded<br />
material has to be picked out, using a small pick or chisel. Be careful not to scratch or otherwise damage<br />
the glass in the process.<br />
D. Sealing the Project prior to Grouting<br />
1. Because most glass naturally has “crazing” (fine fissures) <strong>and</strong> fine pits in the surface, it is important to use<br />
a glass sealer prior to—not just after—grouting. Grout is extremely difficult to remove from these fissures<br />
unless the protective sealer has been applied. Most products require 24 hours after sealing be<strong>for</strong>e the<br />
project can be cleaned <strong>and</strong> prepared <strong>for</strong> grouting.<br />
E. Grouting, Sealing, <strong>and</strong> Cleaning the Project<br />
1. Make sure the project is clean <strong>and</strong> free of tape residue be<strong>for</strong>e grouting.<br />
2. Use water <strong>and</strong> a nylon brush to clean the project; if residue persists, use a little warm water <strong>and</strong> liquid<br />
dishwashing soap.<br />
3. Wipe down the project with a dry sponge or soft cloth <strong>and</strong> allow the project to dry completely.<br />
4. Mix uns<strong>and</strong>ed grout according to the manufacturer’s instructions; <strong>for</strong> light/pale glass, paler grout colors<br />
are recommended, while darker grout is more appropriate <strong>for</strong> darker colored glass. See the manufacturer’s<br />
more specific color instructions if a single color of glass in being used.<br />
5. Apply the grout using a rubber float, pressing firmly to fill the joints, using mostly vertical <strong>and</strong> horizontal<br />
strokes at first, then finishing with diagonal strokes to remove excess grout.<br />
6. Grout takes longer to set with glass than with stone, so allow sufficient time <strong>for</strong> the grout to start to turn<br />
duller <strong>and</strong> paler in color, an indication that it has begun to set.<br />
7. Wipe away excess grout with dry cheesecloth, taking care not to scratch the glass (grit or other material<br />
can scratch the glass, especially darker types of glass). Other materials or methods can often wash out the<br />
grout joints, which will require re-grouting.
8. Allow the grout to set up again (turn dull <strong>and</strong> paler) <strong>and</strong> then wipe down to a clean appearance with a<br />
lightly damp sponge (the sponge should not throw water when it is shaken). Do not allow the grout to<br />
dry completely be<strong>for</strong>e trying to clean; dried grout is difficult to remove.<br />
9. To remove final grout haze, wipe the project down with a clean, soft cloth. Grout haze remover is also<br />
available at most hardware stores.<br />
10. After the grouted project has cured <strong>for</strong> 48 hours, use warm water <strong>and</strong> liquid dishwashing soap to clean it.<br />
If any residue persists, a soft (#0000) steel wool pad or stone/tile stripper can be used (phosphoric acids do<br />
not discolor glass or change grout colors). If grout has accumulated in pits or in fissures, it is possible to<br />
use a sealer/ager such as that made by Tenax to reduce the appearance of grout, particularly in darker<br />
shades of glass. For paler shades of glass, it is possible to pick tiny bits of grout out with a sewing needle.<br />
11. Finally, the project should be sealed again, to protect both the glass <strong>and</strong> the grouted joints.<br />
12. After 24 hours, the project can be cleaned with a moderately damp clean cloth or rag.<br />
13. Sealer should be applied from time to time (at least annually) to maintain protection, in accordance with<br />
the manufacturers’ guidelines.<br />
14. Regular cleaning with a mild, non-abrasive pH-neutral cleanser is highly recommended. Several<br />
commercially available products promise to remove spots, scratches, <strong>and</strong> haziness from glass; polishing<br />
systems that incorporate harsh chemicals—particularly ammonia, hydrochloric acid, metal silicates, or<br />
acetic acid—may change the appearance of some stained glass, so it is important to test a spare piece of<br />
glass be<strong>for</strong>e applying any such product to the project itself.