sentry installation & operation instructions - BLACOH Fluid Control
sentry installation & operation instructions - BLACOH Fluid Control
sentry installation & operation instructions - BLACOH Fluid Control

You also want an ePaper? Increase the reach of your titles
YUMPU automatically turns print PDFs into web optimized ePapers that Google loves.
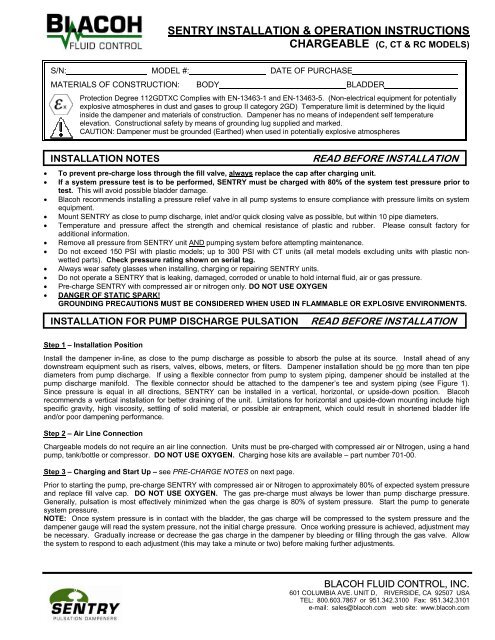
SENTRY INSTALLATION & OPERATION INSTRUCTIONS<br />
CHARGEABLE (C, CT & RC MODELS)<br />
S/N: MODEL #: DATE OF PURCHASE<br />
MATERIALS OF CONSTRUCTION: BODY BLADDER<br />
Protection Degree 112GDTXC Complies with EN-13463-1 and EN-13463-5. (Non-electrical equipment for potentially<br />
explosive atmospheres in dust and gases to group II category 2GD) Temperature limit is determined by the liquid<br />
inside the dampener and materials of construction. Dampener has no means of independent self temperature<br />
elevation. Constructional safety by means of grounding lug supplied and marked.<br />
CAUTION: Dampener must be grounded (Earthed) when used in potentially explosive atmospheres<br />
INSTALLATION NOTES<br />
READ BEFORE INSTALLATION<br />
• To prevent pre-charge loss through the fill valve, always replace the cap after charging unit.<br />
• If a system pressure test is to be performed, SENTRY must be charged with 80% of the system test pressure prior to<br />
test. This will avoid possible bladder damage.<br />
• Blacoh recommends installing a pressure relief valve in all pump systems to ensure compliance with pressure limits on system<br />
equipment.<br />
• Mount SENTRY as close to pump discharge, inlet and/or quick closing valve as possible, but within 10 pipe diameters.<br />
• Temperature and pressure affect the strength and chemical resistance of plastic and rubber. Please consult factory for<br />
additional information.<br />
• Remove all pressure from SENTRY unit AND pumping system before attempting maintenance.<br />
• Do not exceed 150 PSI with plastic models; up to 300 PSI with CT units (all metal models excluding units with plastic nonwetted<br />
parts). Check pressure rating shown on serial tag.<br />
• Always wear safety glasses when installing, charging or repairing SENTRY units.<br />
• Do not operate a SENTRY that is leaking, damaged, corroded or unable to hold internal fluid, air or gas pressure.<br />
• Pre-charge SENTRY with compressed air or nitrogen only. DO NOT USE OXYGEN<br />
• DANGER OF STATIC SPARK!<br />
GROUNDING PRECAUTIONS MUST BE CONSIDERED WHEN USED IN FLAMMABLE OR EXPLOSIVE ENVIRONMENTS.<br />
INSTALLATION FOR PUMP DISCHARGE PULSATION<br />
READ BEFORE INSTALLATION<br />
Step 1 – Installation Position<br />
Install the dampener in-line, as close to the pump discharge as possible to absorb the pulse at its source. Install ahead of any<br />
downstream equipment such as risers, valves, elbows, meters, or filters. Dampener <strong>installation</strong> should be no more than ten pipe<br />
diameters from pump discharge. If using a flexible connector from pump to system piping, dampener should be installed at the<br />
pump discharge manifold. The flexible connector should be attached to the dampener’s tee and system piping (see Figure 1).<br />
Since pressure is equal in all directions, SENTRY can be installed in a vertical, horizontal, or upside-down position. Blacoh<br />
recommends a vertical <strong>installation</strong> for better draining of the unit. Limitations for horizontal and upside-down mounting include high<br />
specific gravity, high viscosity, settling of solid material, or possible air entrapment, which could result in shortened bladder life<br />
and/or poor dampening performance.<br />
Step 2 – Air Line Connection<br />
Chargeable models do not require an air line connection. Units must be pre-charged with compressed air or Nitrogen, using a hand<br />
pump, tank/bottle or compressor. DO NOT USE OXYGEN. Charging hose kits are available – part number 701-00.<br />
Step 3 – Charging and Start Up – see PRE-CHARGE NOTES on next page.<br />
Prior to starting the pump, pre-charge SENTRY with compressed air or Nitrogen to approximately 80% of expected system pressure<br />
and replace fill valve cap. DO NOT USE OXYGEN. The gas pre-charge must always be lower than pump discharge pressure.<br />
Generally, pulsation is most effectively minimized when the gas charge is 80% of system pressure. Start the pump to generate<br />
system pressure.<br />
NOTE: Once system pressure is in contact with the bladder, the gas charge will be compressed to the system pressure and the<br />
dampener gauge will read the system pressure, not the initial charge pressure. Once working pressure is achieved, adjustment may<br />
be necessary. Gradually increase or decrease the gas charge in the dampener by bleeding or filling through the gas valve. Allow<br />
the system to respond to each adjustment (this may take a minute or two) before making further adjustments.<br />
<strong>BLACOH</strong> FLUID CONTROL, INC.<br />
601 COLUMBIA AVE. UNIT D, RIVERSIDE, CA 92507 USA<br />
TEL: 800.603.7867 or 951.342.3100 Fax: 951.342.3101<br />
e-mail: sales@blacoh.com web site: www.blacoh.com
INSTALLATION FOR PUMP INLET<br />
READ BEFORE INSTALLATION<br />
Step 1 – Installation Position<br />
Install SENTRY as close to the pump inlet as possible. Install after any upstream equipment such as risers, valves, elbows, meters,<br />
or filters. If using a flexible connector from system piping to pump, SENTRY should be installed to the pump inlet manifold. The<br />
flexible connector should be attached to the SENTRY tee and system piping (see Figure 1).<br />
Step 2 – Air Line Connection<br />
Chargeable models do not require an air line connection. Units must be pre-charged with compressed air or Nitrogen, using a hand<br />
pump, tank/bottle or compressor. DO NOT USE OXYGEN. Charging hose kits are available – part number 701-00.<br />
Step 3 – Charging and Start Up – see PRE-CHARGE NOTES.<br />
A. Suctions Lift/Accumulator: No pre-charge is required in a lift/accumulator <strong>installation</strong>. Start the pump to generate working<br />
pressure. As system pressure and vacuum is created, the acceleration head created with each suction stroke will compress the air<br />
trapped in the bladder.<br />
B. Positive Inlet Pressure: Pre-charge SENTRY with 50% of the static pressure realized at the pump inlet. Start<br />
the pump to generate working pressure. Minor pressure adjustments may be required. Allow the system to respond to each<br />
adjustment (this may take a minute or two) before making further adjustments.<br />
FIGURE 2<br />
INSTALLATION FOR WATER HAMMER / SURGE<br />
Step 1 – Installation Position<br />
Install SENTRY up stream from valve, as close as possible but no more than ten pipe diameters from the valve. (See Figure 2)<br />
Step 2 – Air Line Connection<br />
Chargeable models do not require an air line connection. Units must be pre-charged with compressed air or Nitrogen, using a hand<br />
pump, tank/bottle or compressor. DO NOT USE OXYGEN. Charging hose kits are available – part number 701-00.<br />
Step 3 – Charging and Start Up – see PRE-CHARGE NOTES<br />
Prior to operating system, pre-charge SENTRY to 90% of system pressure and replace fill valve cap. Start the system.<br />
PRE-CHARGE NOTES<br />
READ BEFORE INSTALLATION<br />
READ BEFORE INSTALLATION<br />
Gas molecules will diffuse through elastomer membranes, the speed of which depends on elastomer material, temperature and<br />
pressure. As a rule of thumb, the pre-charge pressure should be checked every month. Checks must occur when no system<br />
pressure is present or inaccurate readings will be recorded. If temperature is above ambient and/or pressure is over 300 PSI,<br />
checks should be performed more frequently. Also, to prevent pre-charge loss through the fill valve, always replace the cap<br />
after charging. A proper gas charge is the key to dampener effectiveness and bladder life.<br />
IMPORTANT!<br />
AFTER MAINTENANCE OR RE-ASSEMBLY, TORQUE FASTENERS ACCORDING TO SPECIFICATION ON THE UNIT TAG.<br />
Standard Product Warranty: Blacoh <strong>Fluid</strong> <strong>Control</strong> warrants its products to be free of defective material and workmanship under normal use and service for two years<br />
from date of shipment. The remedy for any product defect covered under this warranty shall be limited to the replacement or repair of the defective part or parts and<br />
Blacoh will not be responsible for damages or injury caused to other products, machinery, buildings, property or person. This warranty shall be null and void if the<br />
product has been altered, misapplied, misused, or neglected of maintenance. Damage or loss resulting from over-pressurization of a product, whether from gas or<br />
fluid does not constitute a defect covered under this warranty nor will Blacoh be responsible in any way for any such damage or loss. Because Blacoh cannot<br />
anticipate or control the many different conditions under which its products may be used, Blacoh does not guarantee the applicability or suitability of its products for<br />
any particular use or purpose. Each user of Blacoh products should conduct its own tests to determine the suitability of each product for its intended uses or purposes.<br />
Blacoh products are sold with this limited warranty and each buyer assumes all responsibility for loss or damage, including consequential damage, arising from the<br />
handling and use of Blacoh products whether used in accordance with Blacoh’s directions or otherwise. Statements concerning the possible use of Blacoh products<br />
are not intended as recommendations for any specific use of such products. This Standard Product Warranty shall be governed by and construed in accordance with<br />
the laws of the State of California.<br />
<strong>BLACOH</strong> FLUID CONTROL, INC.<br />
601 COLUMBIA AVE. UNIT D, RIVERSIDE, CA 92507 USA<br />
TEL: 800.603.7867 or 951.342.3100 Fax: 951.342.3101<br />
e-mail: sales@blacoh.com web site: www.blacoh.com<br />
AT-L-180 REV 8/9/04