

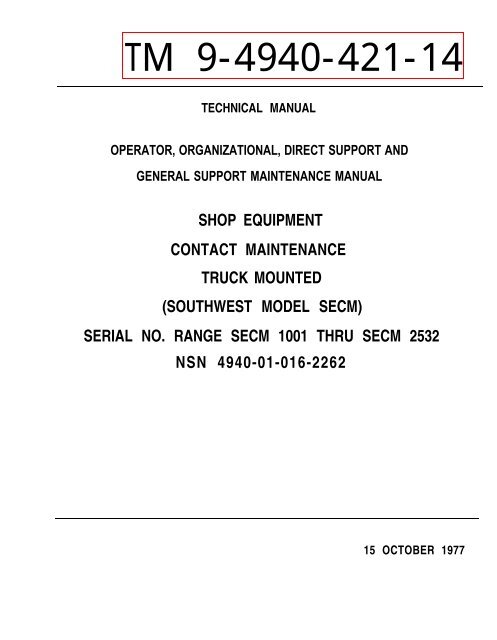
TM 9-4940-421-14
TM 9-4940-421-14
TM 9-4940-421-14

Create successful ePaper yourself
Turn your PDF publications into a flip-book with our unique Google optimized e-Paper software.
<strong>TM</strong> 9-<strong>4940</strong>-<strong>421</strong>-<strong>14</strong><br />
TECHNICAL MANUAL<br />
OPERATOR, ORGANIZATIONAL, DIRECT SUPPORT AND<br />
GENERAL SUPPORT MAINTENANCE MANUAL<br />
SHOP EQUIPMENT<br />
CONTACT MAINTENANCE<br />
TRUCK MOUNTED<br />
(SOUTHWEST MODEL SECM)<br />
SERIAL NO. RANGE SECM 1001 THRU SECM 2532<br />
NSN <strong>4940</strong>-01-016-2262<br />
15 OCTOBER 1977
WARNING<br />
To prevent eye burn, it is necessary that the eyes of the<br />
arc welder operator, as well as the eyes of personnel<br />
nearby, be shielded from the intense light of the electric<br />
arc. Ordinary sunglasses or gas welding goggles do NOT<br />
provide sufficient protection.<br />
Do not operate generator-welder within 100 feet of<br />
electronic communication equipment.<br />
Do not permit an energized electrode to touch the skin or<br />
damp clothing of operator or nearby personnel.<br />
When operating in an enclosed area, the exhaust gases<br />
must be piped to the outside. The exhaust gases contain<br />
carbon monoxide, which is a colorless, odorless, and<br />
poisonous gas.<br />
When handling gasoline, always provide a metal-tometal<br />
contact between container and tank. This will prevent<br />
a spark from being generated as gasoline flows over<br />
the metallic surface.<br />
Injury or death can result if shop set is not properly<br />
grounded.
<strong>TM</strong> 9-<strong>4940</strong>-<strong>421</strong>-<strong>14</strong><br />
C1<br />
CHANGE<br />
HEADQUARTERS<br />
DEPAR<strong>TM</strong>ENT OF THE ARMY<br />
NO. 1 WASHINGTON , DC 18 SEPTEMBER 1992<br />
Operator, Organizational, Direct Support and General<br />
Support Maintenance Manual<br />
SHOP EQUIPMENT, CONTACT MAINTENANCE<br />
TRUCK MOUNTED<br />
(SOUTHWEST MODEL SECM)<br />
SERIAL NO. RANGE SECM 1001 THRU SECM 2532<br />
NSN <strong>4940</strong>-01-016-2262<br />
<strong>TM</strong> 9-<strong>4940</strong>-<strong>421</strong>-<strong>14</strong>, 15 October 1977, is changed as indicated below:<br />
NOTE<br />
New or changed text is indicated by a change bar at the outer margin of the page and<br />
the designation “Change 1” next to the page number. On pages with this designation<br />
but without the change bar, the entire page is new or changed.<br />
1. Remove old pages and insert new pages as follows:<br />
Remove Pages<br />
Insert Pages<br />
3-1 and 3-2 3-1 thru 3-2.8<br />
4-1 and 4-2 4-1 thru 4-2.6<br />
B-1 B–1/(B–2 blank)<br />
D-1 D-1/(D2 blank)<br />
2. File this change sheet in back of the publication for reference purposes.
By Order of the Secretary of the Army:<br />
GORDON R. SULLIVAN<br />
General, United States Army<br />
Chief of Staff<br />
MILTON H. HAMILTON<br />
Administrative Assistant to the<br />
Secretary of the Army<br />
02380<br />
DISTRIBUTION:<br />
TO BE DISTRIBUTED IN ACCORDANCE WITH DA FORM 12-25-E, (BLOCK 2602),<br />
REQUIREMENTS FOR <strong>TM</strong> 9-<strong>4940</strong>-<strong>421</strong>-<strong>14</strong>.
<strong>TM</strong> 9-<strong>4940</strong>-<strong>421</strong>-<strong>14</strong><br />
TECHNICAL MANUAL<br />
HEADQUARTERS,<br />
DEPAR<strong>TM</strong>ENT OF THE ARMY<br />
NO. 9-<strong>4940</strong>-<strong>421</strong>-<strong>14</strong> WASHINGTON, D. C., 15 October 1977<br />
Operator, Organizational, Direct Support and General<br />
Support Maintenance Manual<br />
SHOP EQUIPMENT, CONTACT MAINTENANCE<br />
TRUCK MOUNTED<br />
(SOUTHWEST MODEL SECM)<br />
SERIAL NO. RANGE SECM 1001 THRU SECM 2532<br />
NSN <strong>4940</strong>-01-016-2262<br />
Reporting Errors and Recommending Improvements. You can help improve this manual. If you find any mistake or<br />
if you know of a way to improve the procedures, please let us know. Mail your letter, DA Form 2028 (Recommended<br />
Changes to Publication and Blank Form), or DA Form 2028-2 located in the back of this manual direct to Commander,<br />
US Army Armament Materiel Readiness Command. ATTN DRSAR-MAS, Rock Island, Illinois 61201. A<br />
reply will be furnished to you.<br />
CHAPTER 1.<br />
Section I.<br />
II.<br />
CHAPTER 2.<br />
Section I.<br />
II.<br />
III.<br />
CHAPTER 3.<br />
Section I.<br />
II.<br />
III.<br />
IV.<br />
CHAPTER 4.<br />
Section I.<br />
II.<br />
III.<br />
IV.<br />
V.<br />
VI.<br />
VII.<br />
VIII.<br />
IX.<br />
X.<br />
XI.<br />
XII.<br />
XIII.<br />
XIV.<br />
XV.<br />
XVI.<br />
XVII.<br />
XVIII.<br />
CHAPTER 5.<br />
Section I.<br />
II.<br />
III.<br />
CHAPTER 6.<br />
Section I.<br />
II.<br />
III.<br />
PARAGRAPH<br />
INTRODUCTION<br />
General . . . . . . . . . . . . . . . . . . . . . . . . . . . . . . . . . . . . . . . . . . . . . . . . . . . . . . . . . . . . . . . . . . . . . . . . . . . . . . ... ..............1-1,1-6<br />
Description and Data . . . . . . . . . . . . . . . . . . . . . . . . . . . . . . . . . . . . . . . . . . . . . . . . . . . . . . . . . . . . . . . . 1-7,1-8<br />
OPERATING INSTRUCTIONS<br />
Oerating procedures . . . . . . . . . . . . . . . . . . . . . . . . . . . . . . . . . . . . . . . . . . . . . . . . . . . . . . . . . . . . . . . . . .2-l, 2-6<br />
Operating Under Unusual Condtions . . . . . . . . . . . . . . . . . . . . . . . . . . . . . . . . . . . . . . . . . . . . . . . . . ............2-7, 2-10<br />
Engine Protection Between Short Period Operating Intervals. . . . . . . . . . . . . . . . . . . . . . . ..... . . . ...2-11<br />
OPERATOR/CREW MAINTENANCE INSTRUCTIONS<br />
Lubrication Instructions . . . . . . . . . . . . . . . . . . . . . . . . . . . . . . . . . . . . . . . . . . . . . . . . . . . . . . . . . . . . . ...3-1,3-2<br />
Preventive Maintenance Check and Services . . . . . . . . . . . . . . . . . . . . . . . . . . . . . . . . . . . . . . . . ...3-3,3-4<br />
Troubleshooting . . . . . . . . . . . . . . . . . . . . . . . . . . . . . . . . . . . . . . . . . . . . . . . . . . . . . . . . . . . . . . . . . . . ...3-5,3-6<br />
Operator/Crew Maintenance Procedures . . . . . . . . . . . . . . . . . . . . . . . . . . . . . . . . . . . . . . . . . . . . . . . ...3-7, 3-11<br />
ORGANIZATIONAL MAINTENANCE INSTRUCTIONS<br />
Service Upon Receipt of Material . . . . . . . . . . . . . . . . . . . . . . . . . . . . . . . . . . . . . . . . . . . . . . . . . . . . . ...4-1,4-2<br />
Movement To A New Worksite . . . . . . . . . . . . . . . . . . . . . . . . . . . . . . . . . . . . . . . . . . . . . . . . . . . . . . . ...4-3,4-4<br />
Repair Parts, Special Tools and Equipment. . . . . . . . . . . . . . . . . . . . . . . . . . . . . . . . . . . . . . . . . . . . ...4-5,4-6<br />
Lubrication Instructions . . . . . . . . . . . . . . . . . . . . . . . . . . . . . . . . . . . . . . . . . . . . . . . . . . . . . . . . . . . . ... ...4-7<br />
Preventive Maintenance Checks and Services . . . . . . . . . . . . . . . . . . . . . . . . . . . . . . . . . . . . . .4-8,4-9<br />
Troubleshooting . . . . . . . . . . . . . . . . . . . . . . . . . . . . . . . . . . . . . . . . . . . . . . . . . . . . . . . . . . . . . . . . . . . . ...4-10, 4-11<br />
Radio Interference Suppression . . . . . . . . . . . . . . . . . . . . . . . . . . . . . . . . . . . . . . . . . . . . . . . . . . . . . . . ...4-12<br />
Maintenance of Engine Fuel System.. . . . . . . . . . . . . . . . . . . . . . . . . . . . . . . . . . . . . . . . . . . . . . . . . . . .4-13 ,4-15<br />
Maintenance of Ignition Components. . . . . . . . . . . . . . . . . . . . . . . . . . . . . . . . . . . . . . . . . . . . . . . . . . ..4-16 ,4-18<br />
Maintenance of Electrical System.. . . . . . . . . . . . . . . . . . . . . . . . . . . . . . . . . . . . . . . . . . . . . . . . . . . . . .4-19 ,4-20<br />
Maintenance of Engine Lubrication System . . . . . . . . . . . . . . . . . . . . . . . . . . . . . . . . . . . . . . . . . . . . ..4-21 ,4-22<br />
Maintenance of Engine Governor,.. . . . . . . . . . . . . . . . . . . . . . . . . . . . . . . . . . . . . . . . . . . . . . . . . . . ...4-23<br />
Maintenance of Engine Air Cooling System . . . . . . . . . . . . . . . . . . . . . . . . . . . . . . . . . . . . . . . . . . . ..4-24 ,4-25<br />
Maintenance of Control Panel and Cubicle . . . . . . . . . . . . . . . . . . . . . . . . . . . . . . . . . . . . . . . . . . . . . ..4-26 ,4-34<br />
Maintenance of Pneumatic Equipment. . . . . . . . . . . . . . . . . . . . . . . . . . . . . . . . . . . . . . . . . . . . . . . . . .. 4-35, 4-40<br />
Maintenance of Engine Exhaust System. . . . . . . . . . . . . . . . . . . . . . . . . . . . . . . . . . . . . . . . . . . . . . . . ..4-41,4-42<br />
Maintenance of Generator-Welder.. . . . . . . . . . . . . . . . . . . . . . . . . . . . . . . . . . . . . . . . . . . . . . . . . . . . . .4-43 ,4-47<br />
Maintenance of Shop Body Components. . . . . . . . . . . . . . . . . . . . . . . . . . . . . . . . . . . . . . . . . . . . . . . . ..4-48 ,4-56<br />
DIRECT SUPPORT AND GENERAL SUPPORT MAINTENANCE INSTRUCTIONS<br />
Repair Parts, Special Tools and Equipment.. . . . . . . . . . . . . . . . . . . . . . . . . . . . . . . . . . . . . . . . . . . ...5-1,5-2<br />
Troubleshooting . . . . . . . . . . . . . . . . . . . . . . . . . . . . . . . . . . . . . . . . . . . . . . . . . . . . . . . . . . . . . . . . . . . . . ...5-3,5-4<br />
Removal and Installation of Major Components and Assemblies . . . . . . . . . . . . . . . . . . . . . . . . . ...5-5, 5-6<br />
REPAIR OF ENGINE<br />
Introduction . . . . . . . . . . . . . . . . . . . . . . . . . . . . . . . . . . . . . . . . . . . . . . . . . . . . . . . . . . . . . . . . . . . . . . . . . ...6-1<br />
Engine . . . . . . . . . . . . . . . . . . . . . . . . . . . . . . . . . . . . . . . . . . . . . . . . . . . . . . . . . . . . . . . . . . . . . . . . . . . . . . ...6-2,6-7<br />
Engine Disassembly . . . . . . . . . . . . . . . . . . . . . . . . . . . . . . . . . . . . . . . . . . . . . . . . . . . . . . . . . . . . . . . . . . ..6-8, 6-19<br />
PAGE<br />
1-1<br />
1-1, 1-2<br />
2-1, 2-4<br />
2-5<br />
2-5<br />
3-1<br />
3-1<br />
3-1, 3-2<br />
3-2, 3-6<br />
4-1<br />
4-1<br />
4-1<br />
4-1<br />
4-1<br />
4-2<br />
4-2<br />
4-3,4-4<br />
4-4, 4-6<br />
4-7,4-8<br />
4-9,4-10<br />
4-11<br />
4-12<br />
4-12,4-<strong>14</strong><br />
4-15, 4-17<br />
4-18<br />
4-19,4-22<br />
4-23,4-28<br />
5-1<br />
5-1<br />
5-2, 5-3<br />
6-1<br />
6-1, 6-2<br />
6-3,6-18<br />
i
<strong>TM</strong> 9-<strong>4940</strong>-<strong>421</strong>-<strong>14</strong><br />
PARAGRAPH<br />
PAGE<br />
CHAPTER 7. REPAIR OF ENGINE STARTER<br />
Section I. Introduction . . . . . . . . . . . . . . . . . . . . . . . . . . . . . . . . . . . . . . . . . . . . . . . . . . . . . . . . . . . . . . . . . . . . . ...7-1 7-1<br />
II. Maintenance Instruction . . . . . . . . . . . . . . . . . . . . . . . . . . . . . . . . . . . . . . . . . . . . . . . . . . . . . . . . . . . . . ...7-2 7-1<br />
CHAPTER 8. REPAIR OF GENERATOR-WELDER<br />
Section I. Introduction . . . . . . . . . . . . . . . . . . . . . . . . . . . . . . . . . . . . . . . . . . . . . . . . . . . . . . . . . . . . . . . . . . . . ...8-1 8-1<br />
II. Generator-Welder Maintenance . . . . . . . . . . . . . . . . . . . . . . . . . . . . . . . . . . . . . . . . . . . . . . . . . ...8-2.8-4 8-1<br />
CHAPTER 9. REPAIR OF PNEUMATIC EQUIPMENT<br />
Section I. Introduction . . . . . . . . . . . . . . . . . . . . . . . . . . . . . . . . . . . . . . . . . . . . . . . . . . . . . . . . . . . . . . . . . . . . . . . . ...9-1 9-1<br />
II. Air Compressor and Related Parts . . . . . . . . . . . . . . . . . . . . . . . . . . . . . . . . . . . . . . . . . . . . . . . . . . ...9-2,9-3 9-1, 9-2<br />
APPENDIX A. REFERENCES . . . . . . . . . . . . . . . . . . . . . . . . . . . . . . . . . . . . . . . . . . . . . . . . . . . . . . . . A-1<br />
B. BASIC ISSUE ITEMS . . . . . . . . . . . . . . . . . . . . . . . . . . . . . . . . . . . . . . . . . . . . . . . . . . . . . . . . . . . . . . . . . . . . . . . . . . B-1<br />
C. MAINTENANCE ALLOCATION CHART . . . . . . . . . . . . . . . . . . . . . . . . . . . . . . . . . . . . . . . . . . . . . . . . . . . . . . . . . . . . . . . . . C-1<br />
D. EXPENDABLE CONSUMABLE MAINTENANCE SUPPLIES AND MATERIALS . . . . . . . . . . . . . . . . . . . . . . . . D-1<br />
E. CONTENTS OF SHOP SET . . . . . . . . . . . . . . . . . . . . . . . . . . . . . . . . . . . . . . . . . . . . . . . . . . . . . . . . . . . . . . . . . . . . . . . . . . . E-1<br />
INDEX . . . . . . . . . . . . . . . . . . . . . . . . . . . . . . . . . . . . . . . . Index-1<br />
.<br />
ii
<strong>TM</strong> 9-<strong>4940</strong>-<strong>421</strong>-<strong>14</strong><br />
FIGURE.<br />
1-1<br />
1-2<br />
2-1.<br />
2-2.<br />
2-3.<br />
2-4.<br />
3-1.<br />
3-2.<br />
3-3.<br />
4-1.<br />
4-2.<br />
4-3.<br />
4-4.<br />
4-5.<br />
4-6.<br />
4-7.<br />
4-8.<br />
4-9.<br />
4-10.<br />
4-11.<br />
4-12.<br />
4-13.<br />
4-<strong>14</strong>.<br />
4-15.<br />
4-16.<br />
4-17.<br />
4-18.<br />
4-19.<br />
4-20.<br />
4-21.<br />
4-22.<br />
4-23.<br />
4-24.<br />
4-25.<br />
4-26.<br />
4-27.<br />
4-28.<br />
5-1.<br />
5-2.<br />
6-1.<br />
6-2.<br />
6-3.<br />
6-4.<br />
6-5.<br />
6-6.<br />
6-7.<br />
6-8.<br />
6-9.<br />
6-10.<br />
6-11.<br />
6-12.<br />
6-13.<br />
6-<strong>14</strong>.<br />
6-15.<br />
6-16.<br />
7-1.<br />
9-1.<br />
9-2.<br />
LIST OF ILLUSTRATIONS<br />
Title<br />
Page<br />
Shop set, right rear 3/4 view . . . . . . . . . . . . . . . . . . . . . . . . . . . . . . . . . . . . . . . . . . . . . . . . . . . . . . . . . . . . . . . . . . . . . . . . . . . . . . . . . . . . . . . . . . . . . 1-1<br />
Shop set, left front 3/4 view . . . . . . . . . . . . . . . . . . . . . . . . . . . . . . . . . . . . . . . . . . . . . . . . . . . . . . . . . . . . . . . . . . . . . . . . . . . . . . . . . . . . . . . . . . . . . . 1-2<br />
Controls and instruments.. . . . . . . . . . . . . . . . . . . . . . . . . . . . . . . . . . . . . . . . . . . . . . . . . . . . . . . . . . . . . . . . . . . . . . . . . . . . . . . . . . . . . . . . . . . . . . 2-2<br />
Air compressor drive motor controls, air receiver tank, pressure gage and pressure switch . . . . . . . . . . . . . . . . . . . . . . . . . . . . . . . . . . . 2-3<br />
External power receptacle . . . . . . . . . . . . . . . . . . . . . . . . . . . . . . . . . . . . . . . . . . . . . . . . . . . . . . . . . . . . . . . . . . . . . . . . . . . . . . . . . . . . . . . . . . . 2-4<br />
Overspeed safety switch . . . . . . . . . . . . . . . . . . . . . . . . . . . . . . . . . . . . . . . . . . . . . . . . . . . . . . . . . . . . . . . . . . . . . . . . . . . . . . . . . . . . . . . . . . . . . . . . 2-4<br />
Air compressor inlet filter, removal and installation . . . . . . . . . . . . . . . . . . . . . . . . . . . . . . . . . . . . . . . . . . . . . . . . . . . . . . . . . . . . . . . . . . . . . . 3-3<br />
Engine air cleaner, removal and installation. . . . . . . . . . . . . . . . . . . . . . . . . . . . . . . . . . . . . . . . . . . . . . . . . . . . . . . . . . . . . . . . . . . . . . . . . . . . . 3-5<br />
Engine fuel strainer, removal and installation... . . . . . . . . . . . . . . . . . . . . . . . . . . . . . . . . . . . . . . . . . . . . . . . . . . . . . . . . . . . . . . . . . . . . . . . . . 3-6<br />
Fuel pump, removal and installation . . . . . . . . . . . . . . . . . . . . . . . . . . . . . . . . . . . . . . . . . . . . . . . . . . . . . . . . . . . . . . . . . . . . . . . . . . . . . . . . . . . . . 4-4<br />
Carburetor, removal and installation... . . . . . . . . . . . . . . . . . . . . . . . . . . . . . . . . . . . . . . . . . . . . . . . . . . . . . . . . . . . . . . . . . . . . . . . . . . . . . . . . . . 4-4<br />
Distributor, removal and installation. . . . . . . . . . . . . . . . . . . . . . . . . . . . . . . . . . . . . . . . . . . . . . . . . . . . . . . . . . . . . . . . . . . . . . . . . . . . . . . . . . . . 4-6<br />
Flywheel timing marks . . . . . . . . . . . . . . . . . . . . . . . . . . . . . . . . . . . . . . . . . . . . . . . . . . . . . . . . . . . . . . . . . . . . . . . . . . . . . . . . . . . . . . . . . . . . . . . . . 4-6<br />
Ignition coil, removal and installation. . . . . . . . . . . . . . . . . . . . . . . . . . . . . . . . . . . . . . . . . . . . . . . . . . . . . . . . . . . . . . . . . . . . . . . . . . . . . . . . . . . 4-7<br />
Battery, removal and installation . . . . . . . . . . . . . . . . . . . . . . . . . . . . . . . . . . . . . . . . . . . . . . . . . . . . . . . . . . . . . . . . . . . . . . . . . . . . . . . . . . . . . . . . 4-8<br />
Starter, removal and installation . . . . . . . . . . . . . . . . . . . . . . . . . . . . . . . . . . . . . . . . . . . . . . . . . . . . . . . . . . . . . . . . . . . . . . . . . . . . . . . . . . . . . . . . 4-9<br />
Oil filter assembly, removal and installation . . . . . . . . . . . . . . . . . . . . . . . . . . . . . . . . . . . . . . . . . . . . . . . . . . . . . . . . . . . . . . . . . . . . . . . . . . . ...4-l0<br />
PCV valve and filter, removal and installation. . . . . . . . . . . . . . . . . . . . . . . . . . . . . . . . . . . . . . . . . . . . . . . . . . . . . . . . . . . . . . . . . . . . . . . . . . . 4-11<br />
Governor, removal and installation . . . . . . . . . . . . . . . . . . . . . . . . . . . . . . . . . . . . . . . . . . . . . . . . . . . . . . . . . . . . . . . . . . . . . . . . . . . . . . . . . . . ...4-12<br />
Controls andinstruments, removal and installation . . . . . . . . . . . . . . . . . . . . . . . . . . . . . . . . . . . . . . . . . . . . . . . . . . . . . . . . . . . . . . . . . . . . . .. 4-<strong>14</strong><br />
Overspend safety switch, removal and installation . . . . . . . . . . . . . . . . . . . . . . . . . . . . . . . . . . . . . . . . . . . . . . . . . . . . . . . . . . . . . . . . . . . . ...4-15<br />
Air compreesor and drive motor assembly, removal and installation . . . . . . . . . . . . . . . . . . . . . . . . . . . . . . . . . . . . . . . . . . . . . . . . . . . . . . . .4-16<br />
Air compressor pressure switch adjustment. . . . . . . . . . . . . . . . . . . . . . . . . . . . . . . . . . . . . . . . . . . . . . . . . . . . . . . . . . . . . . . . . . . . . . . . . . . ...4-17<br />
Air receiver tank pressure gage, and pressure switch, removal and installation . . . . . . . . . . . . . . . . . . . . . . . . . . . . . . . . . . . . . . . . . . . . .4-18<br />
Muffler, removal and installation . . . . . . . . . . . . . . . . . . . . . . . . . . . . . . . . . . . . . . . . . . . . . . . . . . . . . . . . . . . . . . . . . . . . . . . . . . . . . . . . . . . . . ...4-19<br />
Fan cover andgenerator housing cover, removal and installation . . . . . . . . . . . . . . . . . . . . . . . . . . . . . . . . . . . . . . . . . . . . . . . . . . . . . . . ...4-19<br />
Generator-welder brushes, removal and installation . . . . . . . . . . . . . . . . . . . . . . . . . . . . . . . . . . . . . . . . . . . . . . . . . . . . . . . . . . . . . . . . . . . . ...4-21<br />
End cover housing, removal and installation.. . . . . . . . . . . . . . . . . . . . . . . . . . . . . . . . . . . . . . . . . . . . . . . . . . . . . . . . . . . . . . . . . . . . . . . . . . . . . 4-22<br />
Auxiliary generator brushes, removal and installation . . . . . . . . . . . . . . . . . . . . . . . . . . . . . . . . . . . . . . . . . . . . . . . . . . . . . . . . . . . . . . . . . ...4-22<br />
Compartment doors and compartment door braces, removal and installation. . . . . . . . . . . . . . . . . . . . . . . . . . . . . . . . . . . . . . . . . . . . . ...4-23<br />
Tailgate and tailgat e latch, removal and installation . . . . . . . . . . . . . . . . . . . . . . . . . . . . . . . . . . . . . . . . . . . . . . . . . . . . . . . . . . . . . . . . . . . ...4-24<br />
Fuel tank filler tube, removal and installation . . . . . . . . . . . . . . . . . . . . . . . . . . . . . . . . . . . . . . . . . . . . . . . . . . . . . . . . . . . . . . . . . . . . . . . . ...4-25<br />
Taillight and stoplight, removal and installation... . . . . . . . . . . . . . . . . . . . . . . . . . . . . . . . . . . . . . . . . . . . . . . . . . . . . . . . . . . . . . . . . . . . . ...4-26<br />
Clearance lig ts, removal and installation . . . . . . . . . . . . . . . . . . . . . . . . . . . . . . . . . . . . . . . . . . . . . . . . . . . . . . . . . . . . . . . . . . . . . . . . . . . . . ...4-26<br />
External power receptacle, removaland installation . . . . . . . . . . . . . . . . . . . . . . . . . . . . . . . . . . . . . . . . . . . . . . . . . . . . . . . . . . . . . . . . . . . ...4-27<br />
Intervehicle receptacle, removal and installation . . . . . . . . . . . . . . . . . . . . . . . . . . . . . . . . . . . . . . . . . . . . . . . . . . . . . . . . . . . . . . . . . . . . . . . .4-28<br />
Rear bumper, removal and installation . . . . . . . . . . . . . . . . . . . . . . . . . . . . . . . . . . . . . . . . . . . . . . . . . . . . . . . . . . . . . . . . . . . . . . . . . . . . . . ....4-28<br />
Engine, control panel, and generator-welder, removal and instllation . . . . . . . . . . . . . . . . . . . . . . . . . . . . . . . . . . . . . . . . . . . . . .. . . . . 5-3<br />
Shop set body, removal and installation.. . . . . . . . . . . . . . . . . . . . . . . . . . . . . . . . . . . . . . . . . . . . . . . . . . . . . . . . . . . . . . . . . . . . . . . . . . . . . . . . . 5-4<br />
Engine andgenerator-welder, removal and installation . . . . . . . . . . . . . . . . . . . . . . . . . . . . . . . . . . . . . . . . . . . . . . . . . . . . . . . . . . . . . . . . . . . . 6-2<br />
Distributor assembly, exploded view . . . . . . . . . . . . . . . . . . . . . . . . . . . . . . . . . . . . . . . . . . . . . . . . . . . . . . . . . . . . . . . . . . . . . . . . . . . . . . . . . . . . . 6-3<br />
Flywheel, removal and installation . . . . . . . . . . . . . . . . . . . . . . . . . . . . . . . . . . . . . . . . . . . . . . . . . . . . . . . . . . . . . . . . . . . . . . . . . . . . . . . . . . . . . . 6-4<br />
Flywheel alternator stator, removal and installation . . . . . . . . . . . . . . . . . . . . . . . . . . . . . . . . . . . . . . . . . . . . . . . . . . . . . . . . . . . . . . . . . . . . . . 6-5<br />
Manifold assembly, removal and installation. . . . . . . . . . . . . . . . . . . . . . . . . . . . . . . . . . . . . . . . . . . . . . . . . . . . . . . . . . . . . . . . . . . . . . . . . . . . . 6-5<br />
Cylinder block, exploded view . . . . . . . . . . . . . . . . . . . . . . . . . . . . . . . . . . . . . . . . . . . . . . . . . . . . . . . . . . . . . . . . . . . . . . . . . . . . . . . . . . . . . . . . . . . 6-6<br />
Adjusting valve tappets . . . . . . . . . . . . . . . . . . . . . . . . . . . . . . . . . . . . . . . . . . . . . . . . . . . . . . . . . . . . . . . . . . . . . . . . . . . . . . . . . . . . . . . . . . . . . . . . . 6-8<br />
Oil pan, removal and installation . . . . . . . . . . . . . . . . . . . . . . . . . . . . . . . . . . . . . . . . . . . . . . . . . . . . . . . . . . . . . . . . . . . . . . . . . .. . 6-9<br />
Gear Cover, removal and installation . . . . . . . . . . . . . . . . . . . . . . . . . . . . . . . . . . . . . . . . . . . . . . . . . . . . . . . . . . . . . . . . . . . . . . . . . . . ...... .6-10<br />
OiI pump, removal and installation . . . . . . . . . . . . . . . . . . . . . . . . . . . . . . . . . . . . . . . . . . . . . . . . . . . . . . . . . . . . . . . . . . . . . . . . . . . . . . . . . . . . ..6-10<br />
Oil pump, exploded view. . . . . . . . . . . . . . . . . . . . . . . . . . . . . . . . . . . . . . . . . . . . . . . . . . . . . . . . . . . . . . . . . . . . . . . . . . . . . . . . . . . . . . . . . . . . . . . 6-11<br />
Timing-gear train. . . . . . . . . . . . . . . . . . . . . . . . . . . . . . . . . . . . . . . . . . . . . . . . . . . . . . . . . . . . . . . . . . . . . . . . . . . . . . . . . . . . . . . . . . . . .. . . . . . . . 6-12<br />
Camshaft, exploded view . . . . . . . . . . . . . . . . . . . . . . . . . . . . . . . . . . . . . . . . . . . . . . . . . . . . . . . . . . . . . . . . . . . . . . . . . . . . . . . . . . . . . . . . . . . . . . . . 6-13<br />
Crankshaft, piston and connecting rod, exploded vi ew . . . . . . . . . . . . . . . . . . . . . . . . . . . . . . . . . . . . . . . . . . . . . . . . . . . . . . . . . . . . . . . . . . . . .6-<strong>14</strong><br />
Crankshaft, removal and installation . . . . . . . . . . . . . . . . . . . . . . . . . . . . . . . . . . . . . . . . . . . . . . . . . . . . . . . . . . . . . . . . . . . . . . . . . . . . . . . . . . . . 6-16<br />
Camshaft, removal and installation . . . . . . . . . . . . . . . . . . . . . . . . . . . . . . . . . . . . . . . . . . . . . . . . . . . . . . . . . . . . . . . . . . . . . . . . . . . . . . . . . . . . . .6-17<br />
Starter, exploded view. . . . . . . . . . . . . . . . . . . . . . . . . . . . . . . . . . . . . . . . . . . . . . . . . . . . . . . . . . . . . . . . . . . . . . . . . . . . . . . . . . . . . . . . . . . . . . . . . .<br />
7 - 1<br />
Air compressor, exploded view. . . . . . . . . . . . . . . . . . . . . . . . . . . . ....... . . . . . . . . . . . . . . . . . . . . . . . . . . . . . . . . . . . . . . . . . . . . . . . . . . . .... 9 -1<br />
Air compressor drive motor, exploded view. . . . . . . . . . . . . . . . . . . . . . . . . . . . . . . . . . . . . . . . . . . . . . . . . . . . . . . . . . . . . . . . . . . . . . . . . . . . . . . 9-2<br />
E-1. Shop set tool location . . . . . . . . . . . . . . . . . . . . . . . . . . . . . . . . . . . . . . . . . . . . . . . . . . . . . . . . . . . . . . . . . . . . . . . . . . . . . . . . . . . . . . . . . . . . . . . . E-1<br />
FO-l. Generator-welder wiring diagram. . . . . . . . . . . . . . . . . . . . . . . . . . . . . . . . . . . . . . . . . . . . . . . . . . . . . . . . . . . . . . . . . . . . . . . . . . . . . . . . . . . . . . . .FO-l<br />
iii
<strong>TM</strong> 9-<strong>4940</strong>-<strong>421</strong>-<strong>14</strong><br />
CHAPTER 1<br />
INTRODUCTION<br />
Section I. GENERAL<br />
1-1. SCOPE. This manual is published for the use of<br />
the personnel to whom the Shop Set Model SECM,<br />
Serial No. Range SECM 1001 thru SECM 2532 is<br />
issued.<br />
1-2. MAINTENANCE FORMS AND RECORDS.<br />
Equipment maintenance forms and procedures for<br />
their use are contained in <strong>TM</strong> 38-750, The Army Maintenance<br />
Management System (TAMMS).<br />
1-3. ADMINISTRATIVE STORAGE. Refer to <strong>TM</strong><br />
740-90-1 for administrative storage of this equipment.<br />
1-4. EQUIPMENT SERVICEABILITY CRI-<br />
TERIA (ESC). This equipment is not covered by an<br />
ESC.<br />
1-5. DESTRUCTION OF ARMY MATERIAL TO<br />
PREVENT ENEMY USE. Refer to <strong>TM</strong> 750-244-3,<br />
Procedures for Destruction of Equipment to Prevent<br />
Enemy Use for destruction of the equipment.<br />
1-6. REPORTING OF EQUIPMENT IMPROVE-<br />
MENT RECOMMENDATIONS (EIR) EIR’s will be<br />
prepared on DA Form 2407, Maintenance Request Instructions<br />
for preparing EIR’s are provided in <strong>TM</strong><br />
38-750, The Army Maintenance Management System<br />
(TAMMS). EIR's should be mailed directly to Commander,<br />
U. S. Army Armament Materiel Readiness<br />
Command, ATTN DRSAR-MAO, Rock Island, Il.<br />
61201. A reply will be furnished directly to you.<br />
Section II. DESCRIPTION AND DATA<br />
1-7. DESCRIPTION. The Shop set, Model SECM tor-welder is driven by a 154 cu., in., 4 cycle, gas<br />
Serial No. SECM 1001 thru SECM 2532 (fig 1-1 and engine.<br />
1-2), consists of 8 compartments The compartments NOTE<br />
provide storage space for all tools and equipment. The This shop set has been designed to operate at temperatures<br />
shop set is mounted on a 4x4 Cab/Truck chassis Model of -25° F to + 105° F. It can be safely stored at -50° F to<br />
XM887. The shop is equipped with a generator-welder + 150° F. A suitable arctic kit(s) is under construction for<br />
shop sets to be used in temperatures colder than those cited<br />
which provides 115 volt single phase alternating current<br />
for operation of the air compressor and other Army Armament Materiel Readiness Command, ATTN:<br />
above. If these kits are required, contact Commander, U. S.<br />
equipment, and 200 amperes, 28 volt direct current for<br />
DRSAR-MA, Rock Island, Il. 61201.<br />
welding (see fig FO-1 for wiring diagram). The genera-<br />
AR 701532<br />
Figure 1-1. Shop set right rear 3/4 view.<br />
1-1
<strong>TM</strong> 9-<strong>4940</strong>-<strong>421</strong>-<strong>14</strong><br />
AR 701533<br />
Figure 1-2. Shop set, left front 3/4 view.<br />
1-8. TABULATED DATA.<br />
a. The U. S. Army Identification Plate. Located upper<br />
left front of the shop set body.<br />
Nomenclature Shop Equipment, Contact Maintenance,<br />
Truck Mounted<br />
Model<br />
SECM<br />
NSN <strong>4940</strong>-01-016-2262<br />
Manufacturer Southwest Truck Body Co.<br />
Length<br />
213 in.<br />
Width<br />
84 in.<br />
Height<br />
82 in.<br />
Shipping weight 7300 lbs.<br />
Cube<br />
849 ft.<br />
b. Transportation Data. Located upper left front of<br />
the shop set body.<br />
Shop Equipment, Contact Maintenance, Truck<br />
Mounted<br />
Overall Length 213 in.<br />
Overall Height 82 in.<br />
Overall Width 84 in.<br />
Gvw<br />
8000 lbs.<br />
Shipping Tonnage 21.2 ton<br />
Shipping Cubage 849 ft.<br />
c. Welder and Engine. Located lower left corner of<br />
control panel.<br />
(1) Welder<br />
Amps 200<br />
Max. ovc 90<br />
Volts 28<br />
Duty Cycle 60%<br />
Aux Power<br />
Volts 120<br />
Phase 1<br />
Hertz 60<br />
KW 4<br />
Power factor 1.0<br />
(2) Engine<br />
Manufacture Wisconsin<br />
Spec 5854-1<br />
Rpm 1800<br />
Model G-204<br />
d. Air Compressor and Drive Motor.<br />
(1) Air Compressor.<br />
Model<br />
B-201-SC<br />
Manufacture Kellogg-American<br />
Stage<br />
Single<br />
Cylinder<br />
Two<br />
Bore<br />
2-1/4 in.<br />
Stroke<br />
2-1/4 in.<br />
(2) Drive Motor.<br />
Manufacture Baldor Electric Co.<br />
Spec 35001-3069<br />
H.P. 1-1/2<br />
Volts 115/230<br />
Frame<br />
<strong>14</strong>5T 528L<br />
Hertz 60<br />
Phase 1<br />
Amps 20/10<br />
e. Bridge Weight Classification.<br />
Empty<br />
1-2
<strong>TM</strong> 9-<strong>4940</strong>-<strong>421</strong>-<strong>14</strong><br />
Class Air compressor 3/4 pint<br />
Cross-country 4 Fuel tank (truck chassis) 20 gal.<br />
Highway loaded 4 g. Tire Pressure. Dry Mud and Snow<br />
f. Component Capacities (approx). Front 35 psi 30 psi<br />
Engine lubricating system (shop set) 5-1/2 qts. Rear 50 psi 45 psi<br />
1-3
<strong>TM</strong> 9-<strong>4940</strong>-<strong>421</strong>-<strong>14</strong><br />
2-1. GENERAL. This section describes the various<br />
controls and instruments and provides the operator or<br />
crew sufficient information to operate the shop set.<br />
2-2. CONTROLS AND INSTRUMENTS.<br />
a Frequency Meter. The frequency meter (fig 2-1)<br />
indicates the output power of the welder when driven<br />
by the gas engine. Normal reading is 60 hertz when the<br />
engine is driving the welder at 1800 rpm.<br />
b. Running Time Meter. The running time meter<br />
(fig 2-1) denotes hours of operation.<br />
c. Oil Pressure Gage. The oil pressure gage (fig 2-1)<br />
indicates the engine oil pressure. Abnormal oil pressure,<br />
the needle should point to the green. If the needle<br />
points to the red, stop the engine and determine the<br />
cause for low oil pressure.<br />
d. Buttery Ammeter. The battery ammeter (fig 2-1)<br />
measures the dc current flow to and from the battery.<br />
It is calibrated in 10 ampere increments from -30 to<br />
+30. Normal indication of the meter is dependent upon<br />
the charge of the battery. A low charge, such as exists<br />
immediately after engine starting, will result in a high<br />
reading. When the charge has been restored to the battery<br />
the indicator should read near 0.<br />
e. Choke Control The choke control (fig 2-1) is used<br />
to increase fuel intake for initial starting and warm up<br />
of a cold engine. Pull out to start engine and push<br />
slowly as the engine warms up. Push choke in during<br />
normal operation,<br />
CHAPTER 2<br />
OPERATING INSTRUCTIONS<br />
Section I. OPERATING PROCEDURES<br />
f. Throttle Control The throttle control (fig 2-1) is<br />
used to adjust engine speed to the desired rpm. Turn<br />
the handle counterclockwise and pull out to decrease<br />
rpm and push in to increase rpm. Pull out to idle and<br />
push in to run.<br />
g. Ignition Switch. The ignition switch (fig 2-1) is a 3<br />
position switch, used to start and stop the shop set<br />
engine.<br />
h. Circuit Breakers. There are five circuit breakers<br />
(fig 2-l). Three 15A circuit breakers protect the receptacles<br />
and body wiring circuits. The 30A circuit<br />
breaker protects the air compressor circuit. The 40A<br />
circuit breaker protects the main power circuit.<br />
i. Receptacles. The receptacles (fig 2-1 ) are 115 volt<br />
single-phase. Receptacles J1 and J2 are the twist-lock<br />
type and J3 and J4 are the three-prong type.<br />
j. D. C. Ampere Selector Switch. The switch (fig 2-1)<br />
is used to select the welding ampere range required for<br />
all welding to be accomplished. Each welding ampere<br />
range shown on the switch shows a minimum and maximum<br />
for the range selected, and should be further adjusted<br />
with the dc ampere adjusting rheostat.<br />
k. D. C. Ampere Adjusting Rheostat. This rheostat<br />
(fig 2-1) regulates the dc welding amperage within the<br />
ampere range selected at the dc ampere selector<br />
switch. Turn the adjusting rheostat clockwise to increase<br />
the welding amperage and counterclockwise to<br />
decrease the amperage.<br />
2-1
<strong>TM</strong> 9-<strong>4940</strong>-<strong>421</strong>-<strong>14</strong><br />
Figure 2-1.<br />
2-2
<strong>TM</strong> 9-<strong>4940</strong>-<strong>421</strong>-<strong>14</strong><br />
AR 701536<br />
Figure 2-2. Air compressor drive motor controls, air receiver tank pressure gage and pressure switch<br />
l. Service Light Switch. The service light switch (fig<br />
2-1) controls the light on the upper rear of the control<br />
panel.<br />
m. Air Pressure Gage. The gage (fig 2-2) shows the<br />
amount of air pressure in the air receiver tank. During<br />
normal operation it should read between 80 psi and 100<br />
psi.<br />
n. Pressure Switch The switch (fig 2-2) is a pressure<br />
operated electric switch that automatically starts and<br />
stops the air compressor to maintain a minimum of 80<br />
psi and a maximum of 100 psi.<br />
o. Pop-off Value. The pop-off valve (fig 2-2) is a<br />
safety device to protect the air system and personnel if<br />
a malfunction occurs that would cause the pressure in<br />
the system to exceed a safe working pressure. The popoff<br />
valve will open to let the air pressure escape from<br />
the system when the air pressure of 135 psi is reached.<br />
p. Start, Stop and Reset Switch. The switch (fig 2-2)<br />
is used to start and stop the air compressor system. The<br />
reset switch will automatically disengage when a<br />
mechanical or electrical malfunction occurs in the air<br />
system that causes the electrical circuit to be overloaded.<br />
q. External Power Receptacle. The external power<br />
receptacle (fig 2-3) provides 115 volts ac single-phase<br />
power to operate equipment.<br />
r. Overspeed Safety Switch. The overspeed safety<br />
switch (fig 2-4) will break the ignition circuit at 2<strong>14</strong>0<br />
rpm or 68 hertz. To reset the overspeed safety switch,<br />
shut ignition switch off and restart engine.<br />
s. High Temperature Safety Switch. As a safety precaution<br />
against overheating, a high temperature safety<br />
switch has been mounted to the cylinder head at no. 2<br />
spark plug. The safety switch will automatically stop<br />
the engine by shorting out the ignition system. A waiting<br />
period of about 15 minutes will be required before<br />
the switch has cooled off sufficiently to restart the<br />
engine.<br />
2-3
<strong>TM</strong> 9-<strong>4940</strong>-<strong>421</strong>-<strong>14</strong><br />
2-3. STARTING THE ENGINE.<br />
WARNING<br />
Do not operate generator-welder within<br />
100 ft. of electronic communication<br />
equipment.<br />
CAUTION<br />
Open overhead door before operating<br />
engine.<br />
a. Preparation for Starting.<br />
(I) Perform the necessary daily preventive maintenance<br />
checks and services (para 3-3).<br />
(2) Open vent above engine.<br />
b. Starting the Engine.<br />
(1) Unlock throttle and pull out to the idle position.<br />
(2) Pull choke control out.<br />
(3) Move ignition switch to the start position and<br />
hold. When engine starts release the switch and it will<br />
return to the run position.<br />
NOTE<br />
If engine fails to start within 30 seconds release starter<br />
and allow to cool before trying to rc-start,<br />
(4) After the engine starts gradually push choke<br />
control in and adjust throttle control to the desired<br />
rpm.<br />
AR 701537<br />
Figure 2-3. External power receptacle.<br />
SAFETY<br />
SWITCH<br />
AR 701538<br />
Figure 2-4. Overspeed safety switch.<br />
2-4. STOPPING THE ENGINE.<br />
NOTE<br />
If the engine has been running hard and is hot, do not stop<br />
it abruptly from full load, but remove and allow<br />
engine to run at idle for three to five minutes.<br />
a. Unlock throttle control and pull out to idle.<br />
b. Place all circuit breakers in the OFF position.<br />
c. Place ignition switch in the OFF position.<br />
2-5. OPERATION OF THE AIR COMPRESSOR.<br />
a. Energize the electrical system (para 2-3).<br />
b. Switch the main power and air compressor circuit<br />
breakers ON.<br />
c. Open air receiver tank draincock and drain condensation<br />
from tank.<br />
d. Press start switch (fig 2-2) to start.<br />
e. To stop compressor push the stop reset button and<br />
place the main power and air compressor circuit<br />
breaker OFF.<br />
f The air compressor pressure switch (fig 2-2) will<br />
automatically shutdown the compressor when pressure<br />
reaches 100 psi and will restart the compressor as soon<br />
as pressure fails below 80 psi.<br />
2-6. OPERATION OF THE GENERATOR-<br />
WELDER.<br />
a. Refer to <strong>TM</strong> 9-237 for welding techniques.<br />
WARNING<br />
Injury or death can result if shop set is<br />
not grounded properly.<br />
b. Drive a metal ground rod into the ground adjacent<br />
to the shop set. Attach a no. 6 hare copper wire to the<br />
2-4
<strong>TM</strong> 9-<strong>4940</strong>-<strong>421</strong>-<strong>14</strong><br />
safety ground terminal on the control panel and the dc ampere fine adjustment rheostat located in the<br />
ground rod.<br />
center of the selector switch can now be adjusted to the<br />
c. Connect electrode and ground cable to the output desired amperes within the range shown at the top of<br />
terminals.<br />
the range selector switch.<br />
CAUTION<br />
d. Refer to paragraph 2-3 for starting the engine.<br />
Do not change the setting of the dc ammeter<br />
reads 60 hz the welder is ready for operation.<br />
Move the throttle to the run position. When frequency<br />
pere range selector switch, or the fine<br />
adjustment while welding is being pere.<br />
Turn the dc ampere selector switch (fig 2-1) so formed.<br />
that the desired amperes (welding) range is directly<br />
NOTE<br />
under the arrow at the top of the selector switch. The For best results unwind cables before welding.<br />
Section II. OPERATING UNDER UNUSUAL CONDITIONS<br />
2-7. OPERATION IN EXTREME COLD.<br />
. a. Engine and Air Compressor. Use the proper<br />
lubrication for cold weather operation.<br />
b. Welder. Allow a warm-up period to allow the<br />
engine to reach normal operating temperature before<br />
operating the welder.<br />
c. Wiring Do not attempt to service or move the wiring<br />
during extremely cold temperatures. Bending a<br />
wire under these conditions may cause cracks and<br />
breaks in the insulation and the wiring.<br />
d. Fuel System. Fuel tank should be kept as full as<br />
possible at all times to reduce the possibility of<br />
moisture forming in the tank.<br />
2-8. OPERATION IN EXTREME HEAT.<br />
a. Engine and Air Compressor. Use the proper<br />
lubrication for extreme heat.<br />
b. Generator-Welder. Maintain maximum ventilation<br />
through the generator-welder at all times.<br />
2-9. OPERATION IN DUSTY OR SANDY<br />
AREAS.<br />
a Protection. Locate the shop set in a well-protected<br />
area whenever possible. Make sure that all weather<br />
seals are in good condition and properly seated. Clean<br />
Section Ill. ENGINE PROTECTION BETWEEN<br />
2-11. GENERAL INSTRUCTIONS. When the work<br />
interval is completed, the following instructions should<br />
be carried out very carefully to protect the engine. To<br />
protect the cylinders, pistons, rings and valves and<br />
keep them from rusting and sticking, rust preventive<br />
oil, as specified under Military Specification MIL-<br />
0-6082, (type 1, ready mixed, or equivalent), should be<br />
injected into the pipe tap opening on the intake<br />
all equipment carefully and frequently. Cover all exposed<br />
or partially exposed components when not in use.<br />
b. Lubrication. Observe all lubrication instructions.<br />
c. Fuel System. Take all precaution to keep the fuel<br />
and fuel system free from dust and foreign particles.<br />
Inspect the fuel strainer bowl more frequently than<br />
under normal circumstances.<br />
2-10. OPERATION IN RAIN OR HUMID CONDI-<br />
TIONS.<br />
a. General. Provide adequate ventilation and shelter<br />
to protect the shop set from rain and humidity. Remove<br />
any covering during dry periods to aid in drying out of<br />
the shop set and components.<br />
b. Fuel System. Keep fuel tank full to avoid condensation<br />
in the tank.<br />
c. Welder. Do not attempt to weld in the direct<br />
presence of rain or when condensate is forming on<br />
metal parts in an extremely humid atmosphere.<br />
d. Generator. All connections must be dry and<br />
maintained dry and all interconnecting cables must be<br />
waterproof, properly connected and maintained to<br />
avoid any shock hazard.<br />
SHORT PERIOD OPERATING INTERVALS<br />
manifold while the engine is warm and running at<br />
moderate speed. About a quarter of a pint is necessary,<br />
or enough so that a heavy bluish smoke will appear at<br />
the exhaust. The ignition switch should then be shut off<br />
and the engine stopped. This fogging operation will<br />
give a coating of oil on the above-mentioned parts protecting<br />
them from the atmosphere.<br />
2-5
<strong>TM</strong> 9-<strong>4940</strong>-<strong>421</strong>-<strong>14</strong><br />
OPERATOR/CREW<br />
CHAPTER 3<br />
MAINTENANCE INSTRUCTIONS<br />
Section I. LUBRICATION INSTRUCTIONS<br />
3-1. GENERAL. This section contains lubrication b. Clean fittings before lubrication.<br />
instructions for the shop set. No lubrication order has c. After washing or fording relubricate affected<br />
been published. Refer to table 3-1 for lubrication infor- parts<br />
.<br />
mation. - d. Care of lubricants and lubrication equipment.<br />
3-2. LUBRICATION INFORMATION.<br />
Keep all lubricants in closed containers and store in a<br />
a. Intervals are based on normal operation. Reduce clean, dry area away from heat. Do not allow dirt, dust,<br />
intervals to compensate for abnormal operations and water, or other foreign material to come in contact with<br />
severe conditions. During inactive periods sufficient the lubricants. Keep all lubrication equipment clean and<br />
lubrications must be performed for adequate preserva- ready for use.<br />
tion.<br />
TABLE 3–1. LUBRICATION<br />
Lubricants Capacity Temperature Intervals<br />
above +40°F +40° to +l0°F +10° to -10°F<br />
0E-OIL, Engine, Heavy Duty OE 30 OE 10 OES<br />
5 qts 50 hrs.<br />
Filter<br />
1/2 qt.<br />
Air compressor 3/4 pt. 3 months<br />
Oil can points see note 1<br />
OES-OIL, Engine Subzero<br />
50 hrs.<br />
GAA-GREASE, Automobile and<br />
all temperatures<br />
artillery<br />
Air compressor motor (as required)<br />
Generator-welder<br />
bearings<br />
1 oz. see note 2 6-8 months<br />
NOTES<br />
1. Oil Can Points. Every 50 hrs. lubricate the hinges, latches linkage and exposed adjusting threads with OE.<br />
2. To be lubricated by Direct Support. Welder generator bearings.<br />
Section II. OPERATOR/CREW PREVENTATIVE MAINTENANCE CHECKS AND SERVICES<br />
3-3. GENERAL. c. If Your Equipment Fails to Operate. Troubleshoot<br />
with proper equipment. Report any deficiencies using<br />
a. Before You Operate. Always keep in mind the<br />
the proper forms. See DA PAM 738-705.<br />
CAUTIONS and WARNINGS. Perform your<br />
“BEFORE” PMCS prior to the equipment leaving its 3-4. PMCS PROCEDURES.<br />
containment area or performing its intended mission.<br />
a. Your Operator/Crew Preventive Maintenance<br />
Checks and Services table (table 3-2) lists the inspecb.<br />
While You Operate. Always keep in mind the<br />
tions and care of your equipment required to keep it in<br />
CAUTIONS and WARNINGS. Perform your<br />
good operating condition.<br />
“DURING" PMCS when the equipment is being used in<br />
its intended mission.<br />
Change 1 3-1
<strong>TM</strong> 9-<strong>4940</strong>-<strong>421</strong>-<strong>14</strong><br />
3-4. PMCS PROCEDURES (cont).<br />
b. The interval column of your PMCS table tells you<br />
when to do a certain check or service.<br />
c. Leakage definitions for operator/crew PMCS shall<br />
be classified as follows:<br />
Class I See page of fluid (as indicated by wetness or<br />
discoloration) not great enough to form<br />
drops.<br />
Class II Leakage of fluid great enough to form drops<br />
but not enough to cause drops to drip from<br />
item being checked/inspected.<br />
Class III Leakage of fluid great enough to form drops<br />
that fall from the item being checked/inspected.<br />
NOTE<br />
Equipment operation is allowable with<br />
minor leakages (Class I or II). Of<br />
course, you must consider the fluid capacity<br />
in the item/system being checked/inspected.<br />
When in doubt, notify<br />
your supervisor,<br />
When operating with Class I or Class II<br />
leaks, continue to check fluid levels as<br />
required in your PMCS.<br />
Class III leaks should be reported to<br />
your supervisor or organizational<br />
maintenance.<br />
d. The procedure column of your PMCS table tells<br />
you how to do the required checks and services. Carefully<br />
follow these instructions. If you do not have the tools,<br />
or if the proeedure tells you to, have organizational<br />
maintenance do the work.<br />
e. If your equipment does not perform as required,<br />
refer to Section III, Troubleshooting, for possible problems.<br />
Report any malfunctions or failures on<br />
DA Form 2404, or refer to DA Pam 738-750.<br />
f. Notify organizational maintenance for any removal<br />
of assemblies or equipment required in order to perform<br />
PMCS.<br />
g. Not Fully Mission Capable If: column tells you<br />
when and why your equipment cannot be used.<br />
NOTE<br />
The term mission capable means that<br />
equipment is on hand and is able to perform<br />
its combat missions (see AR<br />
700--138).<br />
h. The item number column shall be used as a source<br />
of item numbers for the <strong>TM</strong> Number column on DA<br />
Form 2404, Equipment Inspection and Maintenance<br />
Worksheet, in recording results of PMCS.<br />
Table 3-2. Operator/Crew Preventive Maintenance Checks and Services<br />
ITEM<br />
NO.<br />
INTERVAL<br />
LOCATION<br />
ITEM TO<br />
CHECK/SERVICE<br />
PROCEDURE<br />
NOT FULLY MISSION<br />
CAPABLE IF:<br />
TRUCK-MOUNTED CONTACT<br />
MAINTENANCE SHOP EQUIP-<br />
MENT<br />
1<br />
Before<br />
Operation<br />
M887 Truck<br />
Chassis<br />
See <strong>TM</strong> 9–2320-286-10 for PMCS<br />
procedures<br />
Stated PMCS requirements<br />
are not met.<br />
2<br />
Monthly<br />
Fire Extinguisher<br />
Check for broken seal and for full<br />
charge on pressure gage. If seal is<br />
broken or gage reads below normal<br />
zone, notify organizational maintenance.<br />
Seal is broken or if gage<br />
does not show full<br />
charge.<br />
3<br />
Before<br />
Operation<br />
ABC–M11 Decon<br />
Apparatus<br />
See <strong>TM</strong> 3-4230-204-12&P for<br />
PMCS procedures<br />
Stated PMCS requirements<br />
are not met.<br />
3-2<br />
Change 1
<strong>TM</strong> 9-<strong>4940</strong>-<strong>421</strong>-<strong>14</strong><br />
Table 3-2. Operator/Crew Preventive Maintenance Checks and Services (cont)<br />
INTERVAL<br />
LOCATION<br />
ITEM TO<br />
CHECK/SERVICE<br />
PROCEDURE<br />
NOT FULLY MISSION<br />
CAPABLE IF:<br />
Quarterly,<br />
except more<br />
frequently<br />
when operating<br />
under<br />
dirty/dusty<br />
conditions<br />
Air Cleaner Filter<br />
ARC WELDING MACHINE<br />
ENGINE<br />
Inspect for dirt and dust. Clean as<br />
necessary (p. 3-3). If air cleaner filter<br />
is clogged with dirt/dust, notify organizational<br />
maintenance to replace it.<br />
Filter is clogged with<br />
dirt/dust.<br />
weekly<br />
Engine Oil and<br />
Leaks<br />
With shop parked on level ground,<br />
check dipstick (1) for level of engine<br />
oil. Add oil thru filter (2) if oil is 1<br />
quart or more low. Report any class<br />
III oil leaks to organizational maintenance.<br />
Oil is 1 quart or more<br />
low or if class III oil<br />
leaks are present.<br />
Monthly<br />
weekly<br />
Fuel Strainer<br />
Air Cooling System<br />
Shrouds<br />
I<br />
Check fuel strainer (3) for debris and<br />
clean as necessary (p. 3-5).<br />
Inspect shrouds for looseness, missing<br />
components, and cracks. Tighten any<br />
loose fasteners. Notify organization~<br />
maintenance of missing or cracked<br />
shrouds or missing fasteners.<br />
Fuel strainer is dirty.<br />
Air cooling system<br />
shrouds are loose,<br />
cracked, or missing, or<br />
if fasteners are missing.<br />
Change 1 3-2.1
<strong>TM</strong> 9-<strong>4940</strong>-<strong>421</strong>-<strong>14</strong><br />
Table 3-2. Operator/Crew preventive Maintenance Checks and Services (cont)<br />
ITEM<br />
NO.<br />
INTERVAL<br />
LOCATION<br />
ITEM TO<br />
CHECK/SERVICE<br />
PROCEDURE<br />
NOT FULLY MISSION<br />
CAPABLE IF:<br />
8<br />
Monthly<br />
Battery<br />
ARC WELDING MACHINE<br />
ENGINE (CONT)<br />
Check battery charge indicator (4) as<br />
follows:<br />
Battery cannot be<br />
charged or will not hold<br />
a charge, or if connectors<br />
are loose, or if connectors<br />
and/or posts are<br />
corroded, or if case is<br />
cracked or leaking.<br />
Inspect battery terminals and cable<br />
connectors (5) for looseness and corrosion.<br />
Tighten loose cable connectors.<br />
Inspect case (6) for cracks and<br />
leaks. Notify organizational maintenance<br />
for battery servicing or replacement.<br />
ARC WELDING MACHINE<br />
POWER UNIT<br />
9<br />
Weekly<br />
Arc Welding Machine<br />
Power Unit<br />
Inspect both sides of unit for darnaged<br />
or loose mountings (7). Tighten loose<br />
mountings. Check for dirt or debris<br />
obstructing vents (8). Clean off any<br />
debris with a soft-bristle brush.<br />
Check that protective cage (9) is securely<br />
in place. Tighten screws if necessary.<br />
Report any missing components<br />
or damage to organizational<br />
maintenance.<br />
Mountings are loose or<br />
damaged, or if protective<br />
cage is not securely<br />
in place (3 or more<br />
screws stripped or missing).<br />
3-2.2<br />
Change 1
<strong>TM</strong> 9-<strong>4940</strong>-<strong>421</strong>-<strong>14</strong><br />
Table 3-2. Operator/Crew Preventive Maintenance Checks and Services (cont)<br />
INTERVAL<br />
LOCATION<br />
ITEM TO<br />
CHECK/SERVICE<br />
PROCEDURE<br />
NOT FULLY MISSION<br />
CAPABLE IF:<br />
AIR COMPRESSOR ASSEMBLY<br />
WARNING<br />
Remove electrical power<br />
from air compressor assembly<br />
(p. 2-2) before<br />
checking or servicing.<br />
Failure to do so could result<br />
in death or injury to<br />
personnel.<br />
weekly<br />
Air Compressor<br />
Assembly<br />
Check oil level in compressor base<br />
(10); add oil as required (p. 3-l).<br />
Oil is not up to proper<br />
level, or if any class III<br />
oil leaks are present.<br />
Report any class III oil leaks to organization<br />
maintenance.<br />
Semiannually<br />
or every<br />
200 hours of<br />
operation,<br />
whichever<br />
comes first<br />
Air Compressor Oil<br />
Change oil (p. 3-1).<br />
Oil change schedule is<br />
not followed.<br />
Change 1 3-2.3
<strong>TM</strong> 9-<strong>4940</strong>-<strong>421</strong>-<strong>14</strong><br />
Table 3-2. Operator/Crew Preventive Maintenancc Checks and Services (cont)<br />
ITEM<br />
NO.<br />
INTERVAL<br />
LOCATION<br />
ITEM TO<br />
CHECK/SERVICE<br />
NOT FULLY MISSION<br />
CAPABLE IF:<br />
WARNING<br />
Remove electrical power<br />
from air compressor<br />
(p. 2-2) before checking<br />
or servicing. Failure to do<br />
so could result in death or<br />
injury to personnel.<br />
12<br />
Monthly<br />
v–belt<br />
Inspect V–belt (11) for cracks, frays,<br />
and tears. Check tension for l/2-inch<br />
(1.27 centimeter) deflection. If belt is<br />
loose, broken, or defective, notify organizational<br />
maintenance.<br />
V–belt is loose, broken,<br />
or defective.<br />
13<br />
Monthly, or<br />
more frequently<br />
if operating<br />
in<br />
sandy/dusty<br />
environment<br />
Air Compressor<br />
Inlet Filter<br />
Inspect air compressor inlet filter (12)<br />
for dust/dirt. Clean if dirty (p. 3-3).<br />
Report any tears, perforation, or clogging<br />
of the filter to organizational<br />
maintenance.<br />
Filter is torn, perforated,<br />
or clogged.<br />
<strong>14</strong><br />
Monthly<br />
Motor<br />
Check motor (13) for loose or missing<br />
mounting hardware. Tighten any<br />
loose hardware. Notify organizational<br />
maintenance if any items of mounting<br />
hardware are missing.<br />
Motor is not securely<br />
mounted or any mounting<br />
hardware is missing.<br />
OVERALL SYSTEM CHECKOUT<br />
WARNING<br />
Injury or death can result if<br />
shop set is not properly<br />
grounded before operation.<br />
15<br />
Before<br />
Operation<br />
Safety Ground<br />
Before starting engine check corrections<br />
between metal ground rod and<br />
wire lead to control panel assembly<br />
(p. 2-2 and 2-4).<br />
Shop set is not properly<br />
grounded when the welder–generator<br />
is placed<br />
in operation.<br />
3-2.4<br />
Change 1
<strong>TM</strong> 9-<strong>4940</strong>-<strong>421</strong>-<strong>14</strong><br />
Table 3-2. Operator/Crew Preventive Maintenance Checks and Services (cent)<br />
INTERVAL<br />
LOCATION<br />
ITEM TO<br />
CHECK/SERVICE<br />
PROCEDURE<br />
NOT FULLY MISSION<br />
CAPABLE IF:<br />
Before operation,<br />
but not<br />
less frequently<br />
than weekly.<br />
Air Receiver Tank<br />
Momentarily open drain cock at air<br />
receiver tank (p. 2–3) to drain any accumulated<br />
moisture. Notify organizational<br />
maintenance if drain cock is inoperative.<br />
Drain cock is inoperative.<br />
Before operation,<br />
but not<br />
less frequently<br />
than weekly<br />
Pop-off valve<br />
Actuate pop-off valve to check that it<br />
is operating properly. Notify organizational<br />
maintenance of improper<br />
Pop-off valve is inoperative.<br />
NOTE<br />
While START is engaged<br />
observe BATTERY AMME-<br />
TER (<strong>14</strong>).<br />
During operation<br />
but not<br />
less frequently<br />
than weekly<br />
Arc Welding<br />
Machine Engine<br />
STARTING ENGINE. Strut and<br />
warm up engine (p. 2-4). Observe exhaust.<br />
Listen for unusual noises.<br />
Notify organizational maintenance of<br />
hard starting, exhaust smoke after<br />
startup, unusual noises, or engine cutout<br />
due to overheating.<br />
Engine will not start or<br />
requires long and/or repeated<br />
starting, or if<br />
there is visible exhaust<br />
smoke after warm-up,<br />
or if BATTERY AM-<br />
METER does not indicate<br />
discharging when<br />
START is engaged, or if<br />
there are unusual noises<br />
coming from the engine,<br />
or if engine is overheating.<br />
Change 1 3-2.5
<strong>TM</strong> 9-<strong>4940</strong>-<strong>421</strong>-<strong>14</strong><br />
Table 3-2. Operator/Crew Preventive Maintenance Checks and Services (cont)<br />
ITEM<br />
NO.<br />
INTERVAL<br />
LOCATION<br />
ITEM TO<br />
CHECK/SERVICE<br />
PROCEDURE<br />
NOT FULLY MISSION<br />
CAPABLE IF:<br />
OVERALL SYSTEM CHECKOUT<br />
(CONT)<br />
19<br />
During operation<br />
but not<br />
less frequently<br />
than weekly<br />
Control Panel<br />
BATTERY AMMETER (<strong>14</strong>). Check<br />
for normal indication in 0 to +30<br />
zone. Negative readings are abnormal.<br />
If normal indication cannot be<br />
obtained stop engine and notify organizational<br />
maintenance.<br />
Ammeter reads in negative<br />
zone during engine<br />
operation.<br />
OIL PRESSURE GAGE (15). Check<br />
for normal indication in green zone;<br />
red zone indicates abnormal. If oil<br />
pressure is low, stop engine and add<br />
oil as required (p. 3-l). If normal indication<br />
cannot be obtained, notify<br />
organizational maintenance.<br />
Oil pressure<br />
zone.<br />
is in red<br />
FREQUENCY METER (16). Check<br />
for normal indication of 58-62 Hz.<br />
Adjust throttle as necessary to bring<br />
frequency within proper range. Turn<br />
on air compressor or otherwise connect<br />
10 amp or greater load to generator.<br />
Readjust throttle as necessary to<br />
restore frequency within proper<br />
range. If generator cannot be maintained<br />
at correct frequency range,<br />
notify organizational maintenance.<br />
Turn off air compressor or remove<br />
electrical load.<br />
Meter fails to read<br />
58-62 Hz both with and<br />
without load, and/or this<br />
frequency range cannot<br />
be set and held using<br />
the throttle.<br />
RUNNING TIME METER (17).<br />
Check to see if running time meter is<br />
turning over while engine is running.<br />
Notify organizational maintenance if<br />
running time meter is not working.<br />
Running time<br />
not working.<br />
meter is<br />
3-2.6<br />
Change 1
<strong>TM</strong> 9-<strong>4940</strong>-<strong>421</strong>-<strong>14</strong><br />
INTERVAL<br />
LOCATION<br />
ITEM TO<br />
CHECK/SERVICE<br />
PROCEDURE<br />
NOT FULLY MISSION<br />
CAPABLE IF:<br />
During operation,<br />
but not<br />
less frequently<br />
than<br />
monthly<br />
CIRCUIT BREAKERS AND RE-<br />
CEPTACLES. Check that electrical<br />
current is delivered to the four receptacles<br />
on the control panel (p. 2–2),<br />
the receptacle next to the air compressor<br />
starter box (p. 2–3), and the external<br />
power receptacle (p. 2-4). Check<br />
that circuit brokers operate easily<br />
and do not cutoff for no reason.<br />
Notify organizational maintenance if<br />
circuit breakers and/or receptacles are<br />
not working properly.<br />
Any of the outlets are<br />
dead, or if circuit breakers<br />
cut off for no reason,<br />
or if circuit breakers are<br />
difficult to turn on and<br />
off.<br />
SERVICE LIGHT. Turn on, then turn<br />
off service light. Notify organizational<br />
maintenance if service light is not<br />
working.<br />
During operation,<br />
but not<br />
less frequently<br />
than<br />
monthly<br />
Welder<br />
Perform straight stick welding<br />
(p. 2-4) or otherwise apply a load at<br />
all settings of DC ampere selector<br />
switch and DC ampere adjusting<br />
rheostat. Notify organizational maintenance<br />
if welder is not functioning at<br />
all settings.<br />
Welder will not perform<br />
its function at all switch<br />
settings.<br />
During operation,<br />
but not<br />
less frequently<br />
than weekly<br />
Pressure Gage<br />
Reading<br />
Turn on air compressor (p. 2-4) and<br />
observe reading on pressure gage<br />
(p. 2-3) while checking that the compressed<br />
air system delivers a steady<br />
flow of air. If correct pressure range<br />
cannot be reached, adjust the pressure<br />
switch (p. 2–3) as follows:<br />
a. Low cut–in pressure: 75 – 85<br />
psi (517.13 – 586.08 kpa).<br />
b. High cut-out pressure: 95 –<br />
105 psi (655.03 – 689.50 kpa).<br />
Air compessor will not<br />
come on and buildup<br />
normal pressure of 80-<br />
100 psi (551.60 –<br />
689.50 kpa), or if compressed<br />
air delivery cannot<br />
be maintained at this<br />
pressure, or if presure<br />
switch cannot be properly<br />
adjusted, or if pressure<br />
gage is inoperative.<br />
If switch cannot be set to correct pressure,<br />
notify organizational maintenance.<br />
Change 1 3-2.7
<strong>TM</strong> 9-<strong>4940</strong>-<strong>421</strong>-<strong>14</strong><br />
Table 3-2. Operator/Crew Preventive Maintenance Checks and Services (cont)<br />
ITEM<br />
NO.<br />
INTERVAL<br />
LOCATION<br />
ITEM TO<br />
CHECK/SERVICE<br />
PROCEDURE<br />
NOT FULLY MISSION<br />
CAPABLE IF:<br />
OVERALL SYSTEM CHECKOUT<br />
(CONT)<br />
23<br />
During operation,<br />
but not<br />
less frequently<br />
than weekly<br />
Air System Leakage<br />
Observe if air compressor is frequently<br />
cycling on and off when air is not<br />
being used. Turn off air compressor<br />
(p. 2-4) and observe pressure gage<br />
reading. Wait several minutes and<br />
check gage again. If there is any evidence<br />
of a fall off in pressure which<br />
would indicate the presence of leaks,<br />
notify organizational maintenance.<br />
There is evidence of<br />
leakage in air system.<br />
OPERATIONAL TEST COM-<br />
PLETED<br />
3-5. GENERAL.<br />
a. This section contains troubleshooting information<br />
for locating and correcting most of the operating<br />
troubles which may develop in the shop set. Each malfunction<br />
for an individual component, unit, or system is<br />
followed by a list of tests or inspections which will help<br />
you determine corrective actions to take. You should<br />
perform the tests/inspections and corrective actions in<br />
the order listed.<br />
b. This manual cannot list all malfunctions that may<br />
occur, nor all tests or inspections and corrective actions.<br />
Section III. TROUBLESHOOTING<br />
If a malfunction is not listed or is not corrected by listed<br />
corrective actions notify your supervisor.<br />
c. The table lists the common malfunctions which<br />
you may find during the operation or maintenance of the<br />
shop set or its components. You should perform the<br />
tests/inspections and corrective actions in the order<br />
listed.<br />
3-6. TROUBLESHOOTING. Refer to table 3-3 for<br />
Operation/Crew Troubleshooting information.<br />
Section IV. OPERATOR/CREW<br />
MAINTENANCE PROCEDURES<br />
3-7. AIR COMPRESSOR INLET FILTER.<br />
a. General. The inlet filter should be serviced weekly<br />
when in use.<br />
b. Inlet Filter Element Removal. Refer to figure 3–1<br />
to remove filter element.<br />
c. Cleaning and Inspection.<br />
(1) Clean filter element and filter screen in solvent<br />
and dry (app D).<br />
(2) Inspect screen for rust corrossion and that air<br />
flows freely through the filter.<br />
(3) Dip the filter element in OE 10 oil and drain.<br />
d. Installation. Refer to figure 3-1 and install in reverse<br />
order of removal.<br />
3-2.8 Change 1
<strong>TM</strong> 9-<strong>4940</strong>-<strong>421</strong>-<strong>14</strong><br />
3-8. ENGINE AIR CLEANER.<br />
a. General. The air cleaner filter is a paper element.<br />
Figure 3-1. Air compressor inlet filter, removal and installation.<br />
MALFUNCTION<br />
TEST OR INSPECTION<br />
CORRECTIVE ACTION<br />
Table 3-3. TROUBLESHOOTING<br />
—.<br />
ENGINE<br />
1. ENGINE FAILS TO START OR HARD TO START.<br />
Step 1. Battery weak.<br />
Chargw or replace battery, inspect for lmse or corroded terminals.<br />
Step 2. Air cleaner element clogged.<br />
Service or replace air cleaner element (para 3-8).<br />
Step 3. Fuel strainer clogged.<br />
Service fuel strainer (para 3-9).<br />
Step 4. Starter inoperative.<br />
Notify organizational maintenance.<br />
Step 5. Carburetor not choked sufficient y (cold engine).<br />
Pull choke control out.<br />
St@P 6. Poor grade or stale gasoline in fuel tank.<br />
Drain and refill with proper grade gaso~ine.<br />
Step 7. Water or dirt in fuel tank.<br />
Drain and refill with proper grade gasoline.<br />
Step 8. Eacessive carburetor flooding.<br />
Notify organizational maintenance.<br />
2. ENGINE MISS~- OR RUNS ERRATICALLY<br />
step 1. Fuel contaminated.<br />
Drain fuel tank and refill with proper grade gasoline.<br />
step 2. Air cleaner element clogged.<br />
Service or replace air cleaner element.<br />
step 3. Worn or cracked spark plug wires.<br />
Notify organizational maintenance.<br />
step 4. Loose connections at ignition wires.<br />
Tighten Irxme connections. If trouble continues notify organizational maintenance.<br />
3-3
<strong>TM</strong> 9-<strong>4940</strong>-<strong>421</strong>-<strong>14</strong><br />
MALFUNC’I’1ON<br />
TliST OR INSPECTION<br />
CORRECTIVE ACTION<br />
Table 3-3. TROUBLESHOOTING-Continued<br />
Step 5. Weak spark.<br />
Notify organizational maintenance.<br />
3. ENGINE STOPS SUDDENLY<br />
Step 1. Fuel tank empty.<br />
Service fuel tank.<br />
,Wep 2. Fuel pump defective.<br />
Notify organizational maintenance.<br />
Step 3. Vapor lock.<br />
Wait until engine has cooled off sufficiently to overcome the vapor lock.<br />
Step 4. Ignition trouble.<br />
Notify organizational maintenance.<br />
Step 5. Overspeed safety relay trips,<br />
Reset switch. (para 2-2r)<br />
4. ENGINE OVERHEATS<br />
Step 1, Crankcase oil supply low.<br />
Add oil to proper level.<br />
Step 2. Restricted exhaust.<br />
Remove restriction from exhaust.<br />
Step 3. Restricted cooling air circulation.<br />
Remove cooling air restriction.<br />
Step 4. Dirt between cooling fins on cylinder or head.<br />
Clean dirt from cooling fins.<br />
5. ENGINE BACKFIRES THRU CARBURETOR<br />
Step 1. Water or dirt in gasoline.<br />
Drain fuel tank and service with proper grade of gasoline<br />
Step 2. Engine cold.<br />
Let engine warm up before applying load.<br />
6. ENGINE KNOCKS OR DEVELOPS OTHER NOISE<br />
Step 1. Crankcase oil supply low.<br />
Add oil to proper level.<br />
step 2. Engine overheated.<br />
See malfunction 4 above.<br />
Step 3. Accessories mounting loose.<br />
Tighten all loose mounting hardware and connections.<br />
GENERATOR-WELDER<br />
1. GENERATOR-WELDER NOISY<br />
Loose mounting hardware,<br />
Tighten or replace loose hardware.<br />
2. GENERATOR-WELDER OVERHEATS<br />
Step 1, Fan cover openin~ obstructed.<br />
Remove obstruction from fan cover.<br />
Step 2. Other causes.<br />
Notify general support maintenance.<br />
AIR COMPRESSOR<br />
1. AIR COMPRESSOR FAILS TO BUILD UP PRESSURE IN RECEIVER TANK<br />
Step 1. Air hoses, lines or fittings leaking.<br />
Tighten or replace hoses, couplings or fittings.<br />
Step 2. Receiver draincock open.<br />
Close draincwk.<br />
Step 3. Receiver tank pop-off valve dirty or defective.<br />
Notify organizational maintenance.<br />
2. AIR COMPRESSOR FAILS TO OPERATE<br />
Step 1. Circuit breaker tripped.<br />
Reset circuit breaker (fig 2-l).<br />
Step 2. Overload circuit in starter control box tripped.<br />
Push reset button (fig 2-2).<br />
Step 3. Air compressor drive motor defective,<br />
Notify organizational maintenance.<br />
3. AIR PRESSURE LOW<br />
Step 1. Inlet air fiiter clogged.<br />
Clean inlet air filter.<br />
Step 2. Electrical pressure switch out of adjustment.<br />
Notify organizational maintenance.<br />
3-4
<strong>TM</strong> 9-<strong>4940</strong>-<strong>421</strong>-<strong>14</strong><br />
MALFUNCTION<br />
TEST OR INSPECTION<br />
CORRECTIVE ACTION<br />
4. AIR PRESSURE TOO HIGH<br />
Electrical pressure switch out of adjustment.<br />
Notify organizational maintenance.<br />
5. AIR COMPRESSOR OVERHEATS<br />
Oil level in compressor crankcase low.<br />
Add oil as rewired (table 3-l).<br />
Table 3-3. TROUBLESHOOTING-Continued<br />
b. Removal. damaged replace element.<br />
(1) Remove four twistlock fasteners securing (2) Emergency cleaning. Loosen and remove dirt<br />
cover to the false panel located in compartment 1. by blowing with low pressure air. Tapping end of filter<br />
(2) Remove wing nut and plate (fig 3-2) securing on a solid surface is an acceptable method if air is not<br />
air cleaner element and remove air cleaner element. available. Do not strike sides of filter.<br />
c. Cleaning and Inspection d. Installation. Install in reverse order of removal.<br />
(1) Inspect element for dirt or damage. If<br />
Figure 3-2. Engine air cleaner, removal and installation<br />
3-9. ENGINE FUEL STRAINER (fig 3-3). D).<br />
a Remoual Remove fuel line quick disconnect from (2) Inspect bowl for cracks. Replace a defective<br />
inlet side of strainer. Loosen knurled nut below bowl bowl.<br />
and swing wire bail to one side. Remove bowl, gasket (3) Inspect screen for damage. Replace a defective<br />
and screen.<br />
screen.<br />
b. Cleaning and Inspection. c. Installation. Install in reverse order of removal,<br />
(1) Wash bowl and screen in solvent and dry (app being sure gasket is in good condition.<br />
. .<br />
3-5
<strong>TM</strong> 9-<strong>4940</strong>-<strong>421</strong>-<strong>14</strong><br />
AR 701541<br />
Figure 3-3. Engine fuel strainer, removal and installation.<br />
3-10. CRANKCASE BREATHER FILTER (fig (2) Inspect cover and body for cracks or damage.<br />
3-3). (3) Inspect filter for dirt or damage. Replace an<br />
a. Removal Remove cover and filter. unserviceable filter.<br />
b. Cleaning and Inspection. c. Installation. Install in reverse order of removal.<br />
(1) Clean cover and filter in solvent and dry (app 3-11. BATTERY. The battery does not require servic-<br />
D).<br />
ing. Check for loose or corroded terminals.<br />
3-6
<strong>TM</strong> 9-<strong>4940</strong>-<strong>421</strong>-<strong>14</strong><br />
CHAPTER 4<br />
ORGANIZATIONAL MAINTENANCE INSTRUCTIONS<br />
Section I. SERVICE UPON RECEIPT OF MATERIAL<br />
4-1. INSPECTING AND SERVICING THE<br />
EQUIPMENT.<br />
a. Perform daily preventive maintenance services<br />
(table 3-2).<br />
b. Refer to truck manual for servicing chassis.<br />
c. Make a complete inspection of the shop set and the<br />
equipment, visually inspecting for loss or damage which<br />
may have occurred during shipment.<br />
d. Inspect the doom, tailgate and other body membersfordents,breaks,<br />
cracks, and loose or missing parts.<br />
e. Inspect the generator-welder for breaks, dents,<br />
cracks and loose or missing parts.<br />
f. Inspect the air compressor for defects and for loose<br />
or missing parts.<br />
g. Inspect the engine for dents, defects and for loose<br />
or missing parts.<br />
h. Correct any deficiencies or refer them to Direct<br />
Support Maintenance.<br />
CAUTION<br />
Do not change loading plan of set contents<br />
(app E). Relocation may result In<br />
damage to Test, Measurement, and<br />
Diagnostic Equipment (<strong>TM</strong>DE) Items<br />
due to vibration.<br />
i. Visually inspect that all shop set contents in<br />
their respective locations and secured with hold down<br />
straps and clamps. Refer to Appendix E for proper location<br />
of equipment.<br />
4-2. INSTALLATION.<br />
WARNING<br />
Injury or death can result if shop set is<br />
not properiy grounded.<br />
For installation instructions, see paragraph 2-6b and c.<br />
Section II. MOVEMENT TO A NEW WORKSITE<br />
4-3. DISMANTLING FOR MOVEMENT. c. Make certain that the generator-welder, engine<br />
a. Disconnect all welding cables and stow securely<br />
and air compressor are secure.<br />
in the proper compartment.<br />
d. Make certain all compartments are securely<br />
b. Secure all portable accessories in the proper localatched<br />
and locked.<br />
tion withhold down straps.<br />
4-4. REINSTALLATION AFTER MOVEMENT.<br />
Refer to paragraph 4-2.<br />
Section III. REPAIR PARTS, SPECIAL TOOLS AND EQUIPMENT<br />
4-5. SPECIAL TOOLS AND EQUIPMENT. 4-6. REPAIR PARTS.<br />
No special tools or equipment are required by organiza- Repair parts are listed and illustrated in the repair parts<br />
tional maintenance personnel for the maintenance of and special tools list covering organizational maintethis<br />
shop set.<br />
-<br />
nance for this equipment <strong>TM</strong> 9-<strong>4940</strong>-<strong>421</strong>-24P.<br />
Section IV.<br />
4-7. GENERAL. Refer to paragraph 3-2<br />
3-1 for lubrication information.<br />
LUBRICATION INSTRUCTIONS<br />
and table<br />
4-1
<strong>TM</strong> 9-<strong>4940</strong>-<strong>421</strong>-<strong>14</strong><br />
Section V. ORGANIZATIONAL PREVENTIVE MAINTENANCE CHECKS AND SERVICES<br />
4-8. GENERAL. To ensure that the shop set is ready<br />
for operation at all times, it must be inspected systematically<br />
so that defects may be discovered and corrected<br />
before they result in serious damage or failure.<br />
4-9. PMCS PROCEDURES.<br />
a. Your Organizational Preventive Maintenance<br />
Checks and Services Table (table 4-1) lists the inspections<br />
and care of your equipment required to keep it in<br />
good operating condition.<br />
b. The interval column of your PMCS table tells you<br />
when to do a certain check or service.<br />
c. The procedure column of your PMCS table tells<br />
you how to do the required checks and services. Careful-<br />
1 y follow these instructions. If you do not have the tools,<br />
or if the procedure tells you to, have direct support maintenance<br />
do the work.<br />
d. If your equipment does not perform as required,<br />
refer to Section VI, Troubleshooting, for possible problems.<br />
Report any malfunctions or failures on<br />
DA Form 2404, or refer to DA Pam 738–750.<br />
e. Notify direct support maintenance for any removal<br />
of assemblies or equipment required in order to perform<br />
PMCS.<br />
f. Not Fully Mission Capable If column tells you<br />
when and why you or equipment cannot be used. The<br />
term mission capable means that equipment is on hand<br />
and is able to perform its combat missions (see<br />
AR 700-138).<br />
g. The item number column shall be used as a source<br />
of item numbers for the <strong>TM</strong> Number column on DA<br />
Form 2404, Equipment Inspection and Maintenance<br />
Worksheet, in recording results of PMCS.<br />
Table 4-1. Organizational Preventive Maintenance Checks and Services<br />
ITEM<br />
NO.<br />
INTERVAL<br />
LOCATION<br />
ITEM TO<br />
CHECK/SERVICE<br />
PROCEDURE<br />
NOT FULLY MISSION<br />
CAPABLE IF:<br />
TRUCK-MOUNTED CONTACT<br />
MAINTENANCE SHOP EQUIP-<br />
MENT<br />
1<br />
Semiannually<br />
Fire Extinguisher<br />
Recharge, reset, and reseal as required.<br />
2<br />
Semiannually<br />
Ml1 Decon Apparatus<br />
See <strong>TM</strong> 3-4230-204-12&P for<br />
PMCS procedures<br />
ARC WELDING MACHINE<br />
ENGINE<br />
4-2<br />
Change 1
<strong>TM</strong> 9-<strong>4940</strong>-<strong>421</strong>-<strong>14</strong><br />
Table 4-1. Organizational Preventive Maintenance Checks and Services (cont)<br />
INTERVAL<br />
LOCATION<br />
ITEM TO<br />
CHECK/SERVICE<br />
PROCEDURE<br />
NOT FULLY MISSION<br />
CAPABLE IF<br />
Every 100<br />
hours of operation<br />
or<br />
every 3<br />
months,<br />
whichever<br />
comes first<br />
Oil and Filter<br />
Change oil and filter (1) every 100<br />
hours of operation or every 3 months,<br />
whichever comes first. Change more<br />
frequently if operating in dusty conditions.<br />
Oil and falter change<br />
schedule is not followed.<br />
Semiannually<br />
Crankcase Breather<br />
and PCV Vent<br />
valve<br />
a. Clean breather hose (p. 4-10)<br />
with wiping rag (item 4, app D). Replace<br />
breather hose if cut, cracked, or<br />
hardened.<br />
Breather hose is cut,<br />
cracked, or hardened.<br />
b. Clean PCV vent valve in solvent<br />
(item 3, appx D) and inspect for normal<br />
operation (p. 4-10). Replace if<br />
unserviceable.<br />
PCV vent valve is<br />
clogged and/or inoperative.<br />
Semiannually;<br />
more frequently<br />
under<br />
dusty<br />
conditions<br />
Carburetor<br />
Inspect for gum, varnish, or other deposits<br />
in carburetor, especially throat<br />
area. Check that linkage moves freely.<br />
If necessary, remove and clean carburetor’s<br />
metal parts in cleaning solvent<br />
(item 3, appx D) and air dry each part.<br />
Check and adjust idle speed (p. 4-4).<br />
If engine will not maintain smooth<br />
idle or if there are symptoms of too<br />
rich or too lean fuel mixture, repair<br />
carburetor as required (p. 4-4).<br />
Engine cannot be adjusted<br />
to have a smooth<br />
idle and/or if there are<br />
symptoms of too rich or<br />
too lean fuel mixture at<br />
any operating speed.<br />
Semiannually<br />
or any<br />
time there is<br />
an odor of<br />
gasoline<br />
Fuel System<br />
Inspect fuel pump, strainer, lines, and<br />
fittings for cracks, leaks, or any other<br />
damage. Repair fuel strainer as necessary<br />
(p. 4-3). Forward defective fuel<br />
pump to direct support maintenance<br />
for repair.<br />
Fuel is leaking from<br />
fuel system or if the engine<br />
shows symptoms<br />
of fuel starvation.<br />
WARNING<br />
A short between battery<br />
positive terminal and<br />
chassis metal components<br />
could cause injury<br />
to personnel. To avoid<br />
this, disconnect battery<br />
negative cable first.<br />
Change 1 4-2.1
<strong>TM</strong> 9-<strong>4940</strong>-<strong>421</strong>-<strong>14</strong><br />
Table 4-1. Organizational Preventive Maintenance Checks and Services (cont)<br />
ITEM<br />
NO.<br />
INTERVAL<br />
LOCATION<br />
ITEM TO<br />
CHECK/SERVICE<br />
PROCEDURE<br />
NOT FULLY MISSION<br />
CAPABLE IF:<br />
ARC WELDING MACHINE<br />
ENGINE (CONT)<br />
7<br />
Semiannually<br />
Battery<br />
a. Disconnect battery cables (2)<br />
from battery posts (3). Clean posts<br />
and cable terminals with stiff-bristle<br />
brush. Reattach cable (2) terminals to<br />
posts (3) and coat exposed areas of<br />
terminals and posts with a thin coat of<br />
grease (item 2, appx D) to stop future<br />
corrosion. Wipe off battery case (4)<br />
with a wiping rag (item 4, appx D).<br />
Battery cable connections<br />
are loose or corroded.<br />
b. Recharge battery as needed. If<br />
battery case is leaking or battery will<br />
not hold a charge, replace.<br />
Battery case is leaking<br />
or if battery will not<br />
stay charged.<br />
8<br />
Semiannually<br />
Overspeed Safety<br />
Switch<br />
Clean off overspeed safety switch (5)<br />
with wiping rag (item 4, appx D) and<br />
inspect for loose or corroded terminals<br />
(6). Remove any corrosion using<br />
extra–fine sandpaper. Tighten loose<br />
connections.<br />
Overspeed safety switch<br />
terminals are loose or<br />
corroded.<br />
9<br />
Semiannually<br />
or every<br />
500 hours of<br />
operation,<br />
whichever<br />
comes first<br />
Spark Plugs<br />
Remove and inspect spark plugs<br />
(p. 4-4) and service as necessary. Replace<br />
spark plug if insulators are<br />
cracked or broken, if plug is misfiring,<br />
or if electrodes are burned back<br />
so that plug cannot be properly<br />
gapped.<br />
One or more spark<br />
plugs are unserviceable<br />
or if one or more cylinders<br />
are misfiring due to<br />
the spark plugs.<br />
4-2.2 Change 1
<strong>TM</strong> 9-<strong>4940</strong>-<strong>421</strong>-<strong>14</strong><br />
Table 4-1. Organizational Preventive Maintenance Checks and Services (cont)<br />
INTERVAL<br />
LOCATION<br />
ITEM TO<br />
CHECK/SERVICE<br />
PROCEDURE<br />
NOT FULILY MISSION<br />
CAPABLE IF:<br />
Semiannually<br />
or every<br />
500 hours of<br />
operation,<br />
whichever<br />
comes first<br />
Spark Plug and Coil<br />
Wires<br />
Note engine firing order and disconnect<br />
spark plug and coil wires (7).<br />
Clean wires with wiping rag (item 4,<br />
appx D). Inspect wires and boots for<br />
deep cracks or cuts in insulation or<br />
for lack of continuity in wire and replace<br />
as necessary.<br />
Spark plug wires are<br />
faulty or engine is misfiring<br />
due to the spark<br />
plug or coil wires.<br />
Semiannually<br />
or every<br />
500 hours of<br />
operation,<br />
whichever<br />
comes first<br />
Distributor Cap and<br />
Rotor<br />
Remove and inspect distributor cap<br />
(8) and rotor (9) for carbon tracks.<br />
Clean with wiping rag (item 4,<br />
appx D). Check for cracks and breaks<br />
in plastic and for burned or corroded<br />
terminals and contacts. Remove<br />
burned spots or corrosion with extra–<br />
fine sandpaper. Replace distributor<br />
cap and/or rotor if cracked or broken<br />
or if terminals or contacts are burned<br />
back too far.<br />
Cap or rotor are<br />
cracked, if terminals or<br />
contacts are burned<br />
back too far, or if engine<br />
is misfiring due to<br />
faulty cap or rotor.<br />
Quarterly or<br />
every 250<br />
hours of operation,<br />
whichever<br />
comes<br />
first<br />
Breaker Points and<br />
Condenser<br />
Remove distributor cap (8), rotor (9)<br />
and advance arm clamp screw (10)<br />
and check breaker points (11) for<br />
burned or pitted contacts and worn<br />
cam follower. File faces of points to<br />
remove burned spots and pitting. If<br />
point faces are excessively burned/<br />
pitted or cam follower is worn down<br />
too far, replace points (condenser (12)<br />
should be-replaced at the same time as<br />
the breaker points).<br />
Breaker points are<br />
burned back so that correct<br />
point gap cannot. be<br />
set, if cam follower is<br />
worn down too far, or if<br />
engine is misfiring due<br />
to faulty breaker points<br />
or condenser.<br />
Change 1 4-2.3
<strong>TM</strong> 9-<strong>4940</strong>-<strong>421</strong>-<strong>14</strong><br />
Table 3-2. Operator/Crew Preventive Maintenance Checks and Services (cont)<br />
ITEM<br />
NO.<br />
INTERVAL<br />
–<br />
LOCATION<br />
ITEM TO<br />
CHECK/SERVICE<br />
PROCEDURE<br />
NOT FULLY MISSION<br />
CAPABLE IF:<br />
ARC WELDING MACHINE<br />
ENGINE (cent)<br />
13<br />
Quarterly or<br />
every 250<br />
hours,<br />
whichever<br />
comes first<br />
Cam Sleeve<br />
Apply 2 drops of oil (item 1, appx D)<br />
to the felt (13) in the top of the cam<br />
sleeve.<br />
Lubrication schedule is<br />
not followed.<br />
<strong>14</strong><br />
Quarterly or<br />
every 250<br />
hours,<br />
whichever<br />
comes first<br />
Distributor Base<br />
Apply 2 drops of oil (item 1, appx D)<br />
to the oiler ( <strong>14</strong>) at the side of the distributor<br />
base.<br />
Lubrication schedule is<br />
not followed.<br />
15<br />
Semiannually,<br />
more frequently<br />
under<br />
dusty conditions<br />
Air Cooling System<br />
Shrouds<br />
Remove air cooling system shrouds<br />
(p. 4-12). Inspect air shrouds for<br />
dents, cracks, or missing hardware.<br />
Clean out any dirt and debris from<br />
shrouds and cylinder head fins. Replace<br />
any missing hardware Notify<br />
direct support maintenance to pound<br />
out any large dents.<br />
Air cooling system<br />
shrouds are cracked,<br />
have large enough dents<br />
or contain debris that<br />
would impede air circulation,<br />
or if any attaching<br />
hardware is stripped<br />
or missing.<br />
16<br />
Semiannually<br />
High Temperature<br />
Safety Switch<br />
Check high temperature safety switch<br />
(p. 2–3) and wiring for shorts, frayed<br />
insulation, and loose or corroded connections.<br />
Remove corrosion with extra<br />
fine sandpaper and tighten any<br />
loose connections. Notify direct support<br />
maintenance if high temperature<br />
safety switch is inoperative.<br />
High temperature safety<br />
switch is inoperative.<br />
ARC WELDING MACHINE<br />
POWER UNIT<br />
1<br />
1<br />
4-2.4<br />
Change 1
<strong>TM</strong> 9-<strong>4940</strong>-<strong>421</strong>-<strong>14</strong><br />
Table 4-1. Organizational Preventive Maintenance Checks and Services (cont)<br />
INTERVAL<br />
LOCATION<br />
ITEM TO<br />
CHECK/SERVICE<br />
PROCEDURE<br />
NOT FULLY MISSION<br />
CAPABLE III.<br />
Annually<br />
Annually<br />
Electrical Brushes<br />
Interior Components<br />
and End<br />
Bearing<br />
Remove and inspect generator–<br />
welder brushes (15) (p. 4-20) and<br />
auxiliary generator brushes (16)<br />
(p. 4-22) for wear and damage. If<br />
they are damaged or are worn unevenly,<br />
or if generator-welder<br />
brushes are shorter than 7/8 in. (2.22<br />
cm), or if auxiliary generator brushes<br />
are shorter than 7/16 in. (1.11 cm),<br />
they should be repaired or replaced as<br />
required (pp. 4-20 and 4-22).<br />
Remove end cover housing (p. 4-21)<br />
and inspect for internal accumulation<br />
of moisture in generator housing (17).<br />
Blow out generator windings with not<br />
over 125 psi (172.38 kPa) of dry<br />
compressed air. Inspect generator<br />
housing for worn end bearing (18)<br />
and loose mountings (p. 4-21). Tighten<br />
any loose mountings and notify direct<br />
support maintenance to repair as<br />
required.<br />
Brushes and damaged or<br />
worn beyond limits<br />
Mountings are loose or<br />
end bearing is worn.<br />
CONTROL PANEL ASSEMBLY<br />
Semiannually<br />
Gages<br />
Check that all gages (p. 4-12) are securely<br />
mounted. Tighten any loose<br />
mounting hardware and replace any<br />
missing mounting hardware. Check<br />
for loose or corroded connections.<br />
Clean any corroded connections with<br />
extra-free sandpaper and tighten any<br />
loose connections.<br />
Gages are loose or<br />
mounting hardware is<br />
missing, or if connections<br />
are loose or corroded.<br />
AIR COMPRESSOR ASSEMBLY<br />
Change 1 4-2.5
<strong>TM</strong> 9-<strong>4940</strong>-<strong>421</strong>-<strong>14</strong><br />
Table 4-1. Organizational ‘Preventive Maintenance Checks and Services (cont)<br />
INTERVAL<br />
—<br />
Semiannually<br />
—<br />
LOCATION<br />
ITEM TO<br />
CHECK/SERVICE<br />
Pop-off Valve<br />
Air Receiver Tank<br />
PROCEDURE<br />
WARNING<br />
Bleed air system of pressure<br />
before servicing.<br />
Clean pop-off valve (19) with a clean<br />
wiping rag (item 4, appx D) dampened<br />
with solvent (item 3, appx D).<br />
Replace pop-off valve if defective.<br />
Clear air receiver tank (20) with wiping<br />
rag (item 4, appx D) dampened<br />
with solvent (item 3, appx D). Replace<br />
drain cock (21) if defective.<br />
I<br />
NOT FULLY MISSION<br />
CAPABLE IF:<br />
Pop-off valve is inoperative<br />
Drain cock is defective,<br />
Section VI. TROUBLESHOOTING<br />
4-10. GENERAL. If a malfunction is not listed or is not corrected by listed<br />
a. This section contains troubleshooting information<br />
corrective actions, notify your supervisor.<br />
for locating and correcting most of the operating c. This table lists common malfuctions which you<br />
troubles which may develop in the shop set. Each mal- may find during the operation or maintenance of the<br />
function for an individual component, unit or system is shop set or its components. You should perform the<br />
followed by a list of tests or inspections which will help tests/inspections and corrective actions in the order<br />
you to determine corrective actions to take. You should listed.<br />
perform the tests/inspections and corrective actions in<br />
4-11. TROUBLESHOOTING. Refer to table 4-2 for<br />
the order listed.<br />
organizational maintenance troubleshooting.<br />
b. This manual cannot list all malfunctions that may<br />
occur, nor all tests or inspections and corrective actions.<br />
Section VII. RADIO INTERFERENCE SUPPRESSION<br />
4-12. GENERAL. This section is not applicable to<br />
this equipment.<br />
4-2.6 Change 1
<strong>TM</strong> 9-<strong>4940</strong>-<strong>421</strong>-<strong>14</strong><br />
.<br />
Section VIII. MAINTENANCE OF ENGINE FUEL SYSTEM<br />
4-13. FUEL STRAINER (fig 4-l).<br />
a General. The fuel strainer is located on the right<br />
side of the engine above the oil filler tube. Fuel from<br />
the tank is delivered to the fuel strainer, then passes<br />
through the sediment bowl and up through the screen,<br />
which removes dirt from the fuel.<br />
b. Removal.<br />
(1) Remove fuel line quick disconnect from fitting<br />
on the fuel strainer.<br />
(2) Remove the fuel strainer sediment bowl.<br />
(3) Unscrew the strainer body from the connection<br />
to the fuel pump.<br />
c. Cleaning and Inspection.<br />
(1) Wash the removed parts with cleaning solvent<br />
and dry thoroughly (app D).<br />
(2) Inspect sediment bowl for cracks. Replace a<br />
defective sediment bowl.<br />
(3) Check the strainer body for cracks, breaks and<br />
bad threads. Replace the strainer body if it is defective<br />
or damaged.<br />
(4) Inspect the filter screen for tears or clogged<br />
mesh. Clean the screen or replace if necessary.<br />
d. Installation. Install in reverse order of removal.<br />
Table 4-2. TROUBLESHOOTING<br />
MALFUNCTION<br />
TEST OR INSPECTION<br />
CORRECTIVE ACTION<br />
ENGINE<br />
1. ENGINE FAILS TO START<br />
Step 1. Spark plug insulator wet or dirty.<br />
Wipe clean and dry.<br />
i%q 2. Spark plug cracked.<br />
Replace spark plug (para 4-16).<br />
Step 3. Improper ignition timing.<br />
Retime the engine (para 4-17).<br />
Step 4. Starter will not crank the engine. Check electrical connections and wirea. If alright, replace starter (para 4-20).<br />
2. ENGINE MISSES<br />
Step 1. Ignition wire loose.<br />
Tighten all electrical connections.<br />
t%.eP 2. Foubd spark plug.<br />
Clean spark plugs and adjust gap (para 4-16).<br />
Step 3. Distributor breaker painta pitted or worn.<br />
Replace distributor breaker points (para 4-17).<br />
3. ENGINE LACKS POWER<br />
Step 1. Improper ignition timing.<br />
Retime the engine.<br />
Step 2. Carburetor out of adjustment.<br />
Adjust carburetor (para 4-15).<br />
Step 3. Carburetor choke not opening.<br />
check and adjust choke control (para 4-15e).<br />
Step 4. Carburetor clogged.<br />
Clean carburetor (4-15b and c).<br />
4. ENGINE BACKFIRIE3<br />
Step 1. Water or dirt in gasoline.<br />
Clean fuel tank Iinea, and fuel strainer.<br />
Step 2. Engine cold.<br />
Choke engine for cold weather starting.<br />
Step 3. Spark plugs ba hot.<br />
RCphllX spark Phlgs (.FW’S 4-16).<br />
AIR COMPRESSOR<br />
1. AIR COMPRESSOR AIR PRESSURE LOW<br />
Electric pressure switch defective or out of adjustment.<br />
Adjust or replace switch (para 4-39).<br />
2. AIR COMPRESSOR AIR PRESSURE TOO HIGH<br />
Electric pressure switch defective or out of adjustment.<br />
Adjust or replace switch (para 4-39).<br />
4-<strong>14</strong>. FUEL PUMP (fig 4-l). (1) Remove the fuel strainer (para 4-13 b).<br />
a General The fuel pump is a diaphragm type and (2) Disconnect the fuel line to the carburetor.<br />
is actuated by an eccentric on the camshaft.<br />
(3) Remove the two bolts and two lockwashers<br />
b. Removal that secure the fuel pump to the adapter and remove<br />
4-3
<strong>TM</strong> 9-<strong>4940</strong>-<strong>421</strong>-<strong>14</strong><br />
the fuel pump and gasket.<br />
(4) Remove the two bolts and two lockwashers<br />
that secure the adapter to the crankcase.<br />
c. Cleaning and Installation.<br />
(1) Clean all parts in cleaning solvent and dry<br />
thoroughly (app D).<br />
(2) Inspect each part for evidence of cracks,<br />
breaks, or other visible damage.<br />
(3) Inspect the fittings and be sure that the fuel<br />
lines are not damaged.<br />
d. Installation. Install in reverse order of removal.<br />
(5) Remove PCV valve.<br />
(6) Remove two bolts and two lockwashers that<br />
secure carburetor and gasket to the engine intake<br />
manifold. Remove carburetor and gasket.<br />
c. Cleaning aid Inspection.<br />
(1) Clean all metal parts in cleaning solvent and<br />
dry each part thoroughly (app D).<br />
(2) Blow out all passages in the throttle body and<br />
fuel bowl with clean dry compressed air. Reverse the<br />
flow of air in the passages to insure that all dirt has<br />
been removed. Make sure that all carbon deposits and<br />
foreign matter have been removed from the throttle<br />
bore and idle port.<br />
d. Installaion. Install in reverse order of removal.<br />
e. Carburetor Adjustments. Start the engine and let<br />
it run until it reaches operating temperature. Turn idle<br />
adjusting screw out until engine falters; slowly turn in<br />
the screw until the engine runs smoothly. Stop the<br />
engine. The idle adjusting screw should be in proper<br />
adjustment at about 3/4 to a full turn open.<br />
NOTE<br />
Hook governor spring in hole no. 7 of governor lever.<br />
AR 701542<br />
Figure 4-1. Fuel pump, removal and installation.<br />
4-15. CARBURETOR (fig. 4-2).<br />
a. General. The carburetor is a float type with idle<br />
fuel adjustment. The carburetor is designed with 2 major<br />
units — a die cast aluminum throttle body and a<br />
stamped steel fuel bowl.<br />
b. Removal.<br />
(1) Disconnect choke control wire.<br />
(2) Disconnect governor spring.<br />
(3) Remove air cleaner hose.<br />
(4) Disconnect fuel line at fuel pump.<br />
AR 701543<br />
Figure 4-2. Carburetor, removal and installation.<br />
f Choke Adjustment.<br />
(1) Loosen adjusting screw on butterfly arm.<br />
(2) Be sure choke control is pushed all the way in. -<br />
(3) Hold butterfly in the full open position and<br />
tighten adjusting screw on butterfly arm.<br />
Section IX. MAINTENANCE OF IGNITION COMPONENTS<br />
4-16. SPARK PLUGSS. b. Cleaning and Inspection.<br />
a. Rernoval. Disconnect the cable assembly from the (1) Wipe the exterior of the spark plugs clean with<br />
spark plugs. Clean out the spark plug wells in the a cloth dampened with cleaning solvent.<br />
cylinder heads and remove the spark plugs with the (2) Examine the firing ends of the plugs noting<br />
spark plug wrench.<br />
the type of deposit. Wet, sludgy deposits indicate ex-<br />
4-4
<strong>TM</strong> 9-<strong>4940</strong>-<strong>421</strong>-<strong>14</strong><br />
cessive clearance between the valve guides and stems,<br />
or that excessive amounts of oil are entering the combustion;<br />
check the distributor and spark plug cables for<br />
defects that could result in too inadequate a spark.<br />
Burned or overheated plugs are indicated by a burnt or<br />
badly eroded electrode. Check the air shrouds and cooling<br />
fins for causes of engine overheating. A rusty<br />
brown or grayish white powdery deposit when<br />
unleaded or regular gasolines have been used is normal.<br />
Clean deposits from the electrodes. Use a wire brush to<br />
clean the threads.<br />
(3) Examine the spark plug electrode for pitting.<br />
Replace a badly pitted spark plug.<br />
(4) Set the gap of spark plugs to 0.030 inch.<br />
c. hstallation. Install spark plug and gasket in the<br />
spark plug hole and tighten. Torque the spark plugs<br />
25-30 lbs. ft. Connect the spark plug cables.<br />
4-17. DISTRIBUTOR ASSEMBLY (fig 4-3).<br />
a. Removal.<br />
(1) Remove eight bolts and eight nuts and remove<br />
false panel (compartment 1).<br />
(2) Loosen hose clamp on carburetor air intake.<br />
(3) Remove eight bolts and eight lockwashers<br />
securing screen and air intake duct. Remove flywheel<br />
shroud screen, air intake duct and carburetor air inlet<br />
hose.<br />
(4) Disconnect spark plug and ignition coil wires.<br />
(5) Disconnect coil and high temperatures safety<br />
switch wires from the primary terminal.<br />
(6) Loosen screw on advance arm lock and remove<br />
distributor assembly.<br />
b. Cleaning and Inspection.<br />
(1) Clean the exterior of the distributor assembly<br />
with a cloth dampened in cleaning solvent (app D).<br />
(2) Inspect distributor for cracks or other defects<br />
and replace defective parts.<br />
(3) Remove distributor cap and inspect rotor for<br />
cracks or other defects. Inspect for burned or pitted<br />
points.<br />
c. Installation. Install in reverse order of removal.<br />
d. Distributor Timing.<br />
(1) Remove screen over the flywheel air intake<br />
opening. This will expose the timing marks on flywheel<br />
shroud and the vane on the flywheel, marked by an<br />
"X" and the letters "DC" (fig 4-4).<br />
WARNING<br />
Operation of the engine without the<br />
screen in place, exposes the operator to<br />
moving flywheel vanes which can, if contacted,<br />
cause serious injury or death.<br />
(2) Remove the spark plug from no. 1 cylinder and<br />
turn engine over slowly, at the same time hold finger<br />
over the spark plug hole to determine the compression<br />
stroke (para 6-12 a).<br />
(3) Upon reaching the compression stroke, continue<br />
turning until the leading edge of the marked vane<br />
on the flywheel is in line with the centerline mark on<br />
the flywheel shroud of the no. 1 cylinder (fig 4-4). The<br />
no. 1 piston is on top dead center in this position.<br />
Replace distributor.<br />
(4) Remove the distributor cap. The centerline of<br />
the distributor rotor should be in line with the center of<br />
the notch in the distributor housing. The no. 1 cylinder<br />
is ready to fire in the retarded timing position, when<br />
the distributor rotor is in this position.<br />
(5) With the advance arm clamp screw loose, turn<br />
the distributor body slightly in a counterclockwise<br />
rotation so that the breaker points are firmly closed.<br />
Then turn the distributor body in a clockwise rotation<br />
until the breaker points are just beginning to open. At<br />
this point a slight resistance can be felt. Tighten advance<br />
arm clamp screw.<br />
(6) The breaker point gap should be 0.018 to 0.022<br />
inch. This should be checked before the distributor body<br />
is set, otherwise any adjustment made to the breaker<br />
point opening will change the ignition advance.<br />
Replace the distributor cap. If care is exercised in the<br />
above operations, the spark timing should be accurate<br />
enough for satisfactory operation, checking spark advance<br />
with a neon lamp is recommended.<br />
e. Neon Lamp Timing.<br />
CAUTION<br />
Do not exceed 2200 rpm when generatorwelder<br />
is hooked to the engine.<br />
NOTE<br />
The engine should be timed to the 23° advanced position at<br />
not less than 2000 rpm.<br />
(1) Connect neon timing light in series with the<br />
no. 1 spark plug.<br />
(2) Chalk or point the end of the " X" marked vane<br />
on the flywheel.<br />
(3) With the engine operating at 2000 rpm or over,<br />
allow the flash from the neon lamp to illuminate the<br />
marked vane. At the time of the flash, the leading edge<br />
of the vane should line up with the running spark advance<br />
timing hole on the flywheel shroud (fig 4-4). If it<br />
does not line up, loosen the advance arm clamp screw,<br />
turn the distributor body slightly clockwise or counterclockwise,<br />
as required, until the marked flywheel<br />
vane matches up with the advance timing hole.<br />
(4) Tighten the advance arm clamp.<br />
(5) Stop engine.<br />
(6) Install flywheel screen.<br />
NOTE<br />
A 3/8 inch diameter hole is locatcd in the screen rim to<br />
check timing without removing screen.<br />
f Distributor Point Gap Adjustment.<br />
(1) Turn engine over until the distributor breaker<br />
arm rubbing block is on a high point of the cam.<br />
(2) Loosen the stationary contact screw.<br />
(3) Turn fixed contact screw in or out, until the<br />
4-5
<strong>TM</strong> 9-<strong>4940</strong>-<strong>421</strong>-<strong>14</strong><br />
correct gap is obtained. The distributor breaker point<br />
gap should be 0.018 to 0.022 inch.<br />
(4) Tighten the stationary contact screw.<br />
Figure 4-3. Distributor, removal and installation.<br />
Figure 4-4. Flywheel timing marks.<br />
4-18. IGNITION COIL (fig 4-5). (4) Remove ignition coil.<br />
a. Removal. b. Cleaning and Inspection.<br />
(1) Disconnect coil wire from distributor. (1) Clean the exterior of the ignition coil with a<br />
(2) Disconnect and tag wires from the two ter- cloth dampened in cleaning solvent (app D).<br />
minals.<br />
(2) Inspect the coil for cracks and hose connec-<br />
(3) Remove capscrew and washers securing clamp tions . Replace if defective.<br />
assembly to the cylinder head cover shroud.<br />
c. Installation. Install in reverse order of removal.<br />
4-6
<strong>TM</strong> 9-<strong>4940</strong>-<strong>421</strong>-<strong>14</strong><br />
.<br />
. AR 701546<br />
Figure 4-5. Ignition coil removal and installation.<br />
Section X. MAINTENANCE OF ENGINE ELECTRICAL SYSTEM<br />
4-19. BATTERY (fig 4-6).<br />
a. Removal.<br />
(1) Remove protective guard from rear of control<br />
panel (para 4-26).<br />
CAUTION<br />
To avoid short, disconnect negative cable<br />
first.<br />
(2) Disconnect the battery cables.<br />
(3) Remove two nuts and two lockwashers from<br />
hold down bracket bolts. Remove hold down bracket.<br />
CAUTION<br />
Remove the relay from the top of overspeed<br />
safety switch before removing the<br />
battery (fig 4-12).<br />
(4) Remove the battery.<br />
b. Cleaning and Inspection.<br />
(1) Clean all corrosion from the battery terminals<br />
and case, with a wire brush.<br />
(2) Inspect the battery case for cracks and the terminals<br />
for loose mounting.<br />
(3) When battery cables are installed, coat exposed<br />
areas of the terminals with a thin coat of grease<br />
to prevent corrosion (app D).<br />
c. Installation. Install in reverse order of removal.<br />
4-7
<strong>TM</strong> 9-<strong>4940</strong>-<strong>421</strong>-<strong>14</strong><br />
Figure 4-6. Battery removal and installation.<br />
4-20. STARTER (fig 4-7).<br />
CAUTION<br />
Disconnect battery cables before removing<br />
starter.<br />
a. General. Before removing restarter, the engine<br />
must be removed. Slide the engine out compartment door<br />
one (Ref.. fig E-1) by using the following procedure.<br />
(1) Loosen nine bolts and remove guard from rear<br />
of control panel.<br />
(2) Disconnect tag and electrical leads.<br />
(3). Remove conduit brackets from control panel<br />
base’.<br />
(4) Remove three capscrews and three lockwashers<br />
securing the hose rack and remove (curbside<br />
door).<br />
(5). Remove acetylene tank and bracket.<br />
(6) Remove eight bolts and eight nuts and remove<br />
false panel.<br />
(7). Remove three bolts and three nuts from upper<br />
and lower flange. Remove exhaust pipe.<br />
(8) Disconnect fuel line quick disconnect at fuel<br />
strainer.<br />
(9) Remove two bolts and two tapered washers<br />
from rail below control panel.<br />
(10) Remove two bolts and two tapered washers<br />
from rail below front of engine.<br />
(11) Remove safety block from rear rail below control<br />
panel.<br />
(12) Remove two safety blocks from rail below<br />
front of engine.<br />
(13) Slide generator-welder engine out of compartment<br />
until assembly reaches stop.<br />
b. Removal.<br />
(1) Disconnect and tag starter electrical leads.<br />
(2) Remove two nuts and two lockwashers from<br />
the starter support bracket and remove bracket.<br />
(3) Remove three bolts and three lockwashers<br />
securing starter to the flywheel shroud.<br />
(4) Remove the starter.<br />
c. Cleaning and Inspection.<br />
(1) Clean the outside of the starter housing with a<br />
cloth dampened with cleaning solvent (app D).<br />
(2) Inspect housing for cracks and other damage.<br />
d. Installation.<br />
(1) Install starter in reverse order of removal.<br />
(2) Install generator-welder engine assembly in<br />
reverse order of removal.<br />
(3) Reconnect battery terminals.<br />
4-8
<strong>TM</strong> 9-<strong>4940</strong>-<strong>421</strong>-<strong>14</strong><br />
NOTE :<br />
TAG AND DISCONNECT ELECTRICAL WIRING<br />
AR 701548<br />
Figure 4-7. Starter, removal and installation.<br />
Section Xl. MAINTENANCE OF ENGINE LUBRICATION SYSTEM<br />
4-21. OIL FILTER ASSEMBLY (fig 4-8). b. Cleaning and Inspection.<br />
a. Removal. (1) Clean base with solvent and dry thoroughly<br />
(1) Remove oil filter cartridge. (app D).<br />
(2) Remove two nuts and two lockwashers secur- (2) Inspect base for cracks and other damage.<br />
ing oil filter base to the crankcase.<br />
c. Installation. Install in reverse order of removal.<br />
(3) Remove oil filter base and gasket. Use a new gasket.<br />
4-9
<strong>TM</strong> 9-<strong>4940</strong>-<strong>421</strong>-<strong>14</strong><br />
Figure 4-8. Oil filter assembly, removal and installation.<br />
4-22. PCV SYSTEM.<br />
a. General. The system is a semi-closed system consisting<br />
of a valve and filter. Under full load conditions<br />
the system admits engine by-pass gases to the atmosphere<br />
through the air inlet filter housing.<br />
b. Removal (fig 4-9).<br />
(1) Remove two hose clamps from the breather<br />
hose and remove the breather hose from the valve and<br />
cover assembly.<br />
(2) Remove the PCV valve from the intake<br />
ma ni f o1 d.<br />
(3) Remove cover and filter element from the<br />
breather assemb]y.<br />
(4) Remove two screws and lockwasher securing<br />
the breather housing to the cover assembly and remove<br />
the breather housing.<br />
(5) Removc capscrew and washer securing the<br />
cover assembly to no. 3 cylinder. Remove the cover and<br />
gasket.<br />
(6) Remove capscrew and washer securing the<br />
cover assembly to no. 4 cylinder. Remove the cover and<br />
gasket.<br />
c. Cleaning and Inspection.<br />
(1) Clean the breather hose and inspect for cracks<br />
or deterioration.<br />
(2) Clean cover assemblies with cleaning solvent<br />
and dry thoroughly. Inspect for cracks and other<br />
damage (app D).<br />
(3) Clean the breather housing with cleaning solvent<br />
and dry thoroughly. Inspect the breather housing<br />
for cracks and other damage (app D).<br />
(4) Clean the filter element in solvent and dry<br />
thoroughly. Inspect element for holes, damage and<br />
other defects (app D).<br />
(5) Clean PCV valve in cleaning solvent and dry<br />
thoroughly. Inspect for clogging, varnish buildup and<br />
other damage (app D).<br />
d. Installation. Install in reverse order of removal.<br />
4-10
<strong>TM</strong> 9-<strong>4940</strong>-<strong>421</strong>-<strong>14</strong><br />
Figure 4-9. PCV valve and filter, removal and installation.<br />
Section XII. MAINTENANCE OF ENGINE GOVERNOR<br />
4-23. GOVERNOR ASSEMBLY (fig 4-10). (3) Inspect the governor housing for cracks,<br />
a Removal.<br />
damage or other defects.<br />
(1) Remove distributor assembly (para 4-17). c. Installaion. Install in reverse order of removal.<br />
(2) Disconnect governor oil line. NOTE<br />
(3) Disconnect governor linkage. Hook governor spring in hole no. 7 of governor lever.<br />
(4) Remove carburetor (para 4-15). d. Adjustment.<br />
(5) Remove four bolts and four lockwashers secur- (1) Start engine, let engine run until it reaches<br />
ing governor to the gear housing.<br />
normal operating temperature.<br />
(6) Remove the governor and gasket from the gear (2) Push throttle to full IN position.<br />
housing.<br />
(3) Using mechanical tachometer set rpm by turnb.<br />
Cleaning and Inspection. ing adjusting nut on the governor control rod until a<br />
(1) Clean exterior of the governor with solvent and reading of 1800 to 1860 rpm is obtained.<br />
dry thoroughly (app D). (4) Frequency meter reading should read 60 to 62<br />
(2) Inspect the governor gear for cracked or chip- hertz.<br />
ped teeth. Replace a defective gear.<br />
4-11
<strong>TM</strong> 9-<strong>4940</strong>-<strong>421</strong>-<strong>14</strong><br />
AR 701551<br />
Figure 4-10. Governor, removal and installation,<br />
Section XIII. MAINTENANCE OF ENGINE AIR COOLING SYSTEM<br />
4-24. DESCRIPTION. A combination fan and<br />
Flywheel forces air through the flywheel shroud to circulate<br />
around the cylinders and cylinder heads. Air<br />
shrouds are provided to direct the flow of air.<br />
CAUTION<br />
Do not operate the engine with any part<br />
of the shrouding removed. To do so may<br />
cause engine to overheat and be<br />
damaged.<br />
4-25. ENGINE AIR SHROUDS.<br />
a. Removal<br />
(1) Cylinder head shrouds.<br />
(a) Disconnect the spark plug cables from the<br />
spark plugs.<br />
(1) Remove the screws and lockwashers that<br />
secure the spark plug cable clips, the throttle control<br />
cable chips, and the screw and lockwashers securing the<br />
ignition coil clamp. Remove the remaining screws and<br />
lockwashers, securing the cylinder head shrouds to the<br />
flywheel shroud, lower cylinder shrouds, rear shroud<br />
covers, cylinder heat deflectors and remove the<br />
cylinder head shrouds.<br />
(2) Rear shroud covers.<br />
(a) Remove the screws and lockwashers that<br />
secure the rear shroud covers to the cylinder heat<br />
deflectors.<br />
(b) Remove the screws and lockwashers that<br />
secure the lower cylinder shrouds to the rear shroud<br />
covers. Remove the rear shroud covers.<br />
(3) Lower cylinder shrouds.<br />
(a) Remove the starter solenoid.<br />
(b) Remove the rectifier and regulator modules.<br />
(c) Remove the screws and lockwashers that<br />
secure each of the lower cylinder shrouds to the<br />
flywheel shroud. Remove the lower cylinder shroud.<br />
b. Installation. Install in reverse order of removal.<br />
Section XIV. MAINTENANCE OF CONTROL PANEL AND CUBICLE<br />
4-26. CONTROL PANEL GUARD. (1) Clean control panel guard with solvent and dry<br />
a. Removal Loosen nine bolts and remove the con- thoroughly (app D).<br />
t.rol panel gaurd.<br />
(2) Inspect control panel guard for holes, dents<br />
b. Cleaning and Inspection. and cracks. Replace a damaged control panel guard.<br />
4-12
<strong>TM</strong> 9-<strong>4940</strong>-<strong>421</strong>-<strong>14</strong><br />
c. Installation. Install in reverse order of removal.<br />
4-27. FREQUENCY METER (fig 2-1 and 4-11).<br />
a. Removal.<br />
(1) Disconnect and tag electrical leads.<br />
(2) Remove three screws and remove frequency<br />
meter.<br />
b. Cleaning and Inspection.<br />
(1) Clean the frequency meter with a clean, lintfree<br />
cloth.<br />
(2) Inspect for damage and for loose terminals.<br />
Replace a defective frequency meter.<br />
c. Installation. Install frequency meter in reverse<br />
order of removal.<br />
4-28. RUNNING TIME METER (fig 2-1 and 4-11).<br />
a. Removal.<br />
(1) Disconnect. and tag electrical leads.<br />
(2) Remove three screws and remove running time<br />
meter.<br />
b. Cleaning and Inspection.<br />
(1) Clean the running time meter with a clean,<br />
lint-free cloth.<br />
(2) Inspect for damage and loose terminals.<br />
Replace a defective running time meter.<br />
c. Installation. Install running time meter in reverse<br />
order of removal.<br />
4-29. OIL PRESSURE GAGE (fig 2-1 and 4-11).<br />
a. Removal.<br />
(1) Disconnect oil pressure line from the oil pressure<br />
gage.<br />
(2) Remove two nuts and two lockwashers from<br />
rear of oil pressure gage.<br />
b. Cleaning and Inspection.<br />
(1) Clean the oil pressure gage with a clean, lintfree<br />
cloth.<br />
(2) Inspect for loose fitting and other damage and<br />
replace a defective oil pressure gage.<br />
c. Installation. Install oil pressure gage in reverse<br />
order of removal.<br />
4-30. BATTERY CHARGING INDICATOR (Ammeter<br />
fig 2-1 and 4-11).<br />
a. Removal.<br />
(1) Disconnect and tag electrical leads.<br />
(2) Remove two nuts and two lockwashers and<br />
remove battery charging indicator.<br />
b. Cleaning and Inspection.<br />
(1) Clean the battery charging indicator with a<br />
clean, lint-free cloth.<br />
(2) Inspect for damage and for loose terminals.<br />
Replace a defective battery charging indicator.<br />
c. Installation. Install battery charging indicator in<br />
reverse order of removal.<br />
4-31. RECEPTACLES, 115V (fig 2-1 and 4-11).<br />
a. Removal.<br />
(1) Disconnect and tag electrical leads.<br />
(2) Remove receptacle covers.<br />
(3) Remove receptacles.<br />
b. Cleaning and Inspection.<br />
(1) Clean receptacles with a clean, lint-free cloth.<br />
(2) Inspect for loose terminals or damage.<br />
(3) Replace a defective receptacle<br />
c. Installaion. Install receptacles in reverse order of<br />
removal.<br />
4-32. CIRCUIT BREAKERS, 115V (fig 2-1 and<br />
4-11).<br />
a. Removal.<br />
(1) Disconnect and tag electrical leads.<br />
(2) Remove screws and remove circuit breakers.<br />
b. Cleaning and Inspection.<br />
(1) Clean circuit breaker with a clean, lint-free<br />
cloth.<br />
(2) Inspect circuit breakers for cracks, loose terminals<br />
and test for continuity across the terminals.<br />
Continuity should be indicated with the breaker ON<br />
and not indicated with the breaker OFF.<br />
c. Installaion. Install circuit breakers in reverse<br />
order of removal.<br />
4-33. D.C. AMPERE SELECTOR SWITCH (fig 2-1<br />
and 4-11).<br />
a. Removal.<br />
(1) Disconnect and tag electrical leads.<br />
(2) Remove three screws and remove dc ampere<br />
selector switch.<br />
b. Cleaning and Inspection.<br />
(1) Clean with a clean, lint-free cloth.<br />
(2) Inspect for broken insulation, burnt insulation,<br />
loose terminals and other defects. Replace a<br />
defective switch.<br />
c. Installation. Install dc ampere selector switch in<br />
reverse order of removal.<br />
4-13
<strong>TM</strong> 9-<strong>4940</strong>-<strong>421</strong>-<strong>14</strong><br />
AR 701552<br />
Figure 4-11. Controls and instruments, removal and installation.<br />
4-34. OVERSPEED SAFETY SWITCH (fig 4-6 b. Cleaning and Inspection.<br />
and 4-12).<br />
(1) Clean with a clean, lint-free cloth.<br />
a. Removal. (2) Inspect for loose terminals and other defects.<br />
(1) Disconnect and tag electrical leads. c. Installation. Install overspeed relay in reverse<br />
(2) Remove two bolts securing overspeed relay order of removal.<br />
switch and remove switch.<br />
4-<strong>14</strong>
<strong>TM</strong> 9-<strong>4940</strong>-<strong>421</strong>-<strong>14</strong><br />
Figure 4-12<br />
Section XV. MAINTENANCE OF PNEUMATIC EQUIPMENT<br />
4-35. GENERAL. The single stage air compressor is<br />
driven by a 1.5 horsepower motor. The unit delivers an<br />
adequate volume of air to the air receiver tank to maintain<br />
an air pressure differential of 80 to 100 psi. The<br />
air receiver tank pressure gage indicates, at all times,<br />
the output of the system and the pressure in the tank.<br />
A pop-off valve set at 135 psi prevents the system from<br />
being overloaded. A draincock beneath the tank provides<br />
a means of draining the condensation out of the<br />
system after the air compressor has been used.<br />
4-36. AIR COMPRESSOR (fig 4-13).<br />
a. Removal. Open draincock and relieve any pressure<br />
in system. Remove four bolts and four washers,<br />
disconnect air line, tag and disconnect electrical leads.<br />
b. Installation. Install in reverse order of removal.<br />
Close the draincock.<br />
4-15
<strong>TM</strong> 9-<strong>4940</strong>-<strong>421</strong>-<strong>14</strong><br />
Figure 4-13. Air commpressor and drive motor assembly, remove and installation<br />
4-37. V-BELT.<br />
Adjustment.<br />
a. Remove ten screws and remove fan guard.<br />
b. Loosen four hold down bolts and nuts and slidc<br />
the motor on the base to allow the belt a 1/2 inch deflection<br />
between pulleys. Tighten the four hold down bolts<br />
and nuts.<br />
4-38. AIR COMPRESSOR DRIVE MOTOR.<br />
a. Removal<br />
(1) Disconnect and tag electrical lead.<br />
(2) Remove fan guard and V-belt.<br />
(3) Remove four bolts and nuts and remove drive<br />
motor.<br />
b. Installation. Install drive motor in reverse order<br />
of removal.<br />
4-39. AIR COMPRESSOR PRESSURE SWITCH.<br />
a. To increase both CUT-IN and CUT-OUT turn<br />
pressure adjusting screw clockwise (fig 4-<strong>14</strong>).<br />
b. To increase DIFFERENTIAL and maintain same<br />
CUT-IN pressure, turn differential screw at edge<br />
clockwise (fig 4-<strong>14</strong>).<br />
WARNING<br />
Do not block POP- OFF valve,<br />
NOTE<br />
CUT-IN pressure should be set at 80 psi and differential<br />
should be set to CUT-OUT at 100 psi.<br />
4-16
<strong>TM</strong> 9-<strong>4940</strong>-<strong>421</strong>-<strong>14</strong><br />
Figure 4-<strong>14</strong>. Air compressor pressure switch adjustment.<br />
4-40. AIR RECEIVER TANK (fig 4-15). line to clear clamp and slide air receiver tank out.<br />
a. Removal b. Cleaning and Inspection.<br />
(1) Bleed air from tank. (1) Clean air receiver with a cloth dampened with<br />
(2) Disconnect and tag electrical leads from pres- leaning solvent (app D).<br />
sure switch.<br />
(2) Inspect air tank for cracks, dents, damaged<br />
(3) Disconnect air line from air compressor. fittings and other defects. Replace a defective tank.<br />
(4) Remove two bolts, nuts and washers from c. Installation. Install air receiver tank in reverse<br />
clamps securing air receiver tank.<br />
order of removal.<br />
(5) Turn air receiver to clear pressure gage and air<br />
4-17
<strong>TM</strong> 9-<strong>4940</strong>-<strong>421</strong>-<strong>14</strong><br />
Figure 4-15. Air receiver tank, pressure gage, and pressure switch, removal and installation.<br />
Section XVI. MAINTENANCE OF ENGINE EXHAUST SYSTEM<br />
4-41. EXHAUST PIPE (fig 4-16). 4-42. MUFFLER (fig 4-16).<br />
a. Removal.<br />
a. Removal.<br />
(1) Remove three bolts and three nuts from upper (1) Remove insulated wrapping from muffler.<br />
and lower flange connections.<br />
(2) Remove three bolts and nuts from flange<br />
(2) Remove insulated wrapping from exhaust securing muffler to exhaust pipe.<br />
pipe.<br />
(3) Loosen clamp securing muffler to pipe nipple.<br />
Remove muffler.<br />
b. cleaning and Inspection.<br />
b. Cleaning and Inspection.<br />
(1) Clean exhaust pipe in solvent and dry<br />
(1) Inspect for soft spots by pressing the shell, and<br />
thoroughly (app D).<br />
for internal deposits of loose rust by shaking the<br />
(2) Inspect exhaust pipe for rust, holes and soft muffler.<br />
spots. Replace if defective.<br />
(2) Replace if defective.<br />
c. Installation. Install exhaust pipe in reverse order c. Installation. Install muffler in reverse order of removal.<br />
of removal.<br />
4-18
<strong>TM</strong> 9-<strong>4940</strong>-<strong>421</strong>-<strong>14</strong><br />
Figure 4-16. Muffler, removal and installation.<br />
Section XVII. MAINTENANCE OF GENERATOR-WELDER<br />
4-43. VENTILATING FAN COVER.<br />
a. Removal. Refer to fig 4-17 and remove the fan<br />
cover.<br />
b. Cleaning and Inspection.<br />
(1) Clean ventilating fan cover with cleaning solvent<br />
and dry thoroughly (app D).<br />
(2) Inspect fan cover for cracks, breaks, bends and<br />
broken welda. Repair or replace damaged fan cover.<br />
c. Installation. Refer to fig 4-17 and install in<br />
reverse order of removal.<br />
.<br />
AR 701558<br />
Figure 4-17. Fan cover and generator housing cover, removal<br />
and installation<br />
4-19
<strong>TM</strong> 9-<strong>4940</strong>-<strong>421</strong>-<strong>14</strong><br />
4-44. GENERATOR HOUSING COVER.<br />
a. Removal. Refer to figure 4-17.<br />
b. Cleaning and Inspection.<br />
(1) Clean cover with solvent and dry thoroughly<br />
(app D).<br />
(2) Inspect cover for cracks, bends and dents.<br />
Replace a defective cover.<br />
c. Installation. Install in reverse order of removal.<br />
4-45. GENERATOR-WELDER BRUSHES (fig<br />
4-18).<br />
a. General. Before removing the generator-welder<br />
brushes the engine must be moved. Slide the engine out<br />
compartment door five (app E) by using the following<br />
procedure.<br />
(1) Loosen nine bolts and remove guard from rear<br />
of control panel.<br />
(2) Disconnect and tag electrical leads.<br />
(3) Remove conduit brackets from control panel<br />
base.<br />
(4) Remove acetylene tank and bracket.<br />
(5) Remove eight bolts and eight nuts and remove<br />
false panel.<br />
(6) Remove three bolts and three nuts from lower<br />
flange in exhaust pipe.<br />
(7) Disconnect fuel line quick disconnect at fuel<br />
strainer.<br />
(8) Remove two bolts and two tapered washers<br />
from rail below control panel.<br />
(9) Remove two bolts and two tapered washers<br />
from rail below front of engine.<br />
(10) Remove safety block from rear rail below<br />
engine.<br />
(11) Remove two stop blocks from frame below<br />
control panel.<br />
(12) Using pry bar break assembly frame free and<br />
slide out compartment door five (app E) until assembly<br />
reaches stop.<br />
b. Removal.<br />
(1) Refer to paragraph 4-44 to remove generator<br />
housing cover.<br />
(2) Disconnect brush pigtail. Raise brush spring<br />
and remove brush. Remove remaining brushes in a<br />
similar manner.<br />
c. Cleaning and Inspection.<br />
(1) Remove dirt and dust from brushes and brush<br />
holders with low pressure compressed air.<br />
(2) Inspect the brushes for breaks, nicks or<br />
damage to the commutator wearing surfaces. Replace<br />
worn or damaged brushes.<br />
d. Installation. Install in reverse order of removal.<br />
Install housing cover (para 4-44).<br />
CAUTION<br />
Do not use emery cloth for seating<br />
brushes. Emery particles will cause<br />
short circuits in commutator.<br />
e. Seating Brushes. Seat brushes to contour of the<br />
commutator by placing a strip of no. 00 sandpaper between<br />
the brushes and commutator with grit side of<br />
sandpaper against brushes, Draw sandpaper back and<br />
forth until brushes conform to contour of commutator.<br />
Remove all loose carbon particles from the commutator<br />
with clean, dry, compressed air.<br />
4-20
<strong>TM</strong> 9-<strong>4940</strong>-<strong>421</strong>-<strong>14</strong><br />
AR 701559<br />
Figure 4-18. Generator-welder brushes, removal and installation.<br />
4-46. END COVER HOUSING.<br />
a. Removal Refer to figure 4-19 and remove end<br />
cover housing.<br />
b. Cleaning and Inspection.<br />
(1) Clean housing with solvent and dry thoroughly<br />
(app D).<br />
(2) Inspect housing for blockage, dents, cracks and<br />
damaged louvers.<br />
c. Installation. Install in reverse order of removal.<br />
4-21
<strong>TM</strong> 9-<strong>4940</strong>-<strong>421</strong>-<strong>14</strong><br />
4-47. AUXILIARY GENERATOR BRUSHES (fig<br />
4-20).<br />
a. Removal.<br />
(1) Disconnect and tag electrical wires.<br />
(2) Remove end caps and springs and remove<br />
brushes.<br />
b. Cleaning and Inspection.<br />
(1) Remove dirt and dust from brushes and brush<br />
holders with low pressure compressed air.<br />
(2) Inspect the brushes for breaks, nicks or<br />
damage to the commutator wearing surface. Replace<br />
worn or damaged brushes.<br />
c. Installation. Install in reverse order of removal.<br />
d. Seating Brushes. Refer to paragraph 4-45e.<br />
Figure 4-19. End cover housing, removal and installation.<br />
AR 701561<br />
Figure 4-20. Auxiliary generator brushes, removal<br />
and installation.<br />
4-22
Section XVIII. MAINTENANCE OF SHOP BODY COMPONENTS<br />
<strong>TM</strong> 9-<strong>4940</strong>-<strong>421</strong>-<strong>14</strong><br />
4-48. GENERAL. The shop set body is a welded and<br />
riveted unit having eight side compartments for tool<br />
and equipment storage and a centrally located cargo<br />
area to the rear of the generator-welder engine. Hinged<br />
doors, fitted with locks, are provided for compartment<br />
closure. A hinged door, located in the roof, is provided<br />
for air ventilation when operating the engine. A tailgate,<br />
hinged double doors, and roof enclose the generator-welder<br />
engine and air compressor. Various doors<br />
and compartment fixtures are riveted in place. Any<br />
. maintenance to be performed to these components will<br />
necessitate rivet removal. Be sure to use the correct size<br />
and type of rivet when replacing riveted components of<br />
the shop set body.<br />
4-49. COMPAR<strong>TM</strong>ENT DOORS, ROOF VENT<br />
DOOR, AND REAR DOORS.<br />
NOTE<br />
Left and right side compartment doors are interchangeable.<br />
a Removal. Refer to figure 4-21 for removal of the<br />
compartment doors, roof vent door, and rear doors from<br />
the shop set body.<br />
b. Cleaning and Inspection.<br />
(1) Clean all parts with cleaning solvent and dry<br />
thoroughly (app D).<br />
(2) Inspect the compartment door brace for<br />
cracks, breaks or other damage. Replace a damaged<br />
brace.<br />
(3) Inspect all hardware for damage. Replace as<br />
required.<br />
c. Installation. Install in reverse order of removal.<br />
NOTE :<br />
REMOVE THE REMAINING COMPAR<strong>TM</strong>ENT DOORS,<br />
COMPAR<strong>TM</strong>ENT DOOR BRACES AND REAR DOORS<br />
IN SIMILAR MANNER.<br />
AR 701562<br />
Figure 4-21. Compartment doors and compartment door braces, removal and installation.<br />
4-23
<strong>TM</strong> 9-<strong>4940</strong>-<strong>421</strong>-<strong>14</strong><br />
4-50. TAILGATE AND TAILGATE LATCH. thoroughly (app D).<br />
a. Removal. Refer to figure 4-22 and remove the (2) Inspect all parts for dents, cracks, breaks, distailgate<br />
and the tailgate latch from the shop set body. tortion and deterioration, straighten or replace if<br />
b. Cleaning and Inspection. defective.<br />
(1) Clean all parts with cleaning solvent and dry c. Installation. Install in reverse order of removal.<br />
AR 701563<br />
Figare 4-22. Tailgate and tailgate latch removal and installation.<br />
4-51. FUEL TANK FILLER TUBE. thoroughly.<br />
a. Removal. Refer to figure 4-23 to remove fuel tank (3) Inspect the fuel tank filler tube for cracks,<br />
filler tube.<br />
holes and dents. Replace a defective filler tube.<br />
b. Cleaning and Inspection. (4) Inspect hoses for cracks, holes and deteriora-<br />
(1) Clean parts in cleaning solvent and dry tion. Replace a defective hose.<br />
thoroughly (app D).<br />
c. Installation. Install in reverse order of removal.<br />
(2) Clean hose with soap and water and dry<br />
4-24
<strong>TM</strong> 9-<strong>4940</strong>-<strong>421</strong>-<strong>14</strong><br />
AR 701564<br />
Figure 4-23. Fuel tank filler tube, removal and installation.<br />
4-52. TAILLIGHT AND STOPLIGHT.<br />
a. Removal (fig 4-24).<br />
(1) Open compartment door (4 or 8) (app E).<br />
(2) Push upper part of light out of rubber seal.<br />
(3) Disconnect electrical plug.<br />
(4) Remove light.<br />
(5) Remove rubber seal.<br />
b. Cleaning and Inspection.<br />
(1) Clean rubber seal with soap and water and dry<br />
thoroughly.<br />
(2) Clean light with a clean, lint-free cloth.<br />
(3) Inspect rubber seal for tears and deterioration.<br />
Replace a damaged rubber seal.<br />
(4) Inspect light for damage. Replace a defective<br />
light.<br />
c. Installation<br />
(1) Install rubber seal.<br />
(2) Connect electrical plug.<br />
(3) Place lower part of light in the rubber seal,<br />
work lip of seal around light and push top of light into<br />
rubber seal.<br />
(4) Close compartment door.<br />
4-25
<strong>TM</strong> 9-<strong>4940</strong>-<strong>421</strong>-<strong>14</strong><br />
AR 701565<br />
Figure 4-24. Taillight and stoplight, removal and installation,<br />
4-53. CLEARANCE LIGHTS. (2) Inspect all parts for damaged threads, bends,<br />
a. Removal. Refer to figure 4-25 to remove cracks, breaks, and other damage. Inspect for a defecclearance<br />
light.<br />
tive lamp and any corrosion. Replace any defective<br />
b. Cleaning and Inspection. parts.<br />
(1) Clean lens with a clean, lint-free cloth. c. Installation. Install inreverse order of removal.<br />
CLEARANCE LIGHTS<br />
REMOVE COVER<br />
NOTE :<br />
TAG AND DISCONNECT ELECTRICAL LEADS<br />
AR 701566<br />
Figure 4-25. Clearance lights, removal and installation.<br />
4-54. EXTERNAL POWER RECEPTACLE. (2) Inspect fordefective ormissing hardware and<br />
a. Removal. Refer to figure 4-26 to remove the ex- loose electrical connections. Replace loose or missing<br />
ternal power receptacle.<br />
parts and be sure electrical connections are secure.<br />
b. Cleaning and Inspection. (3) Inspect wiring for breaks or damaged insula-<br />
(1) Clean parts with a cloth dampened in cleaning tion. If wiring is defective, notify direct support.<br />
solvent (app D).<br />
c. Installation. Install in reverse order of removal.<br />
4-26
<strong>TM</strong> 9-<strong>4940</strong>-<strong>421</strong>-<strong>14</strong><br />
NOTE :<br />
TAG AND DISCONNECT ELECTRICAL LEADS.<br />
Figure 4-26. External power receptacle, removal and installation.<br />
AR 701567<br />
4-55. INTERVEHICLE RECEPTACLE. dry thoroughly (app D).<br />
a. Removal Refer to figure 4-27 to remove inter- (2) Inspect the receptacle for bends, cracks or<br />
vehicle receptacle.<br />
other damage and replace damaged receptacle.<br />
b. Cleaning and Inspection. c. Installation. Install in reverse order of removal.<br />
(1) Clean metal parts with c!eaning solvent and<br />
4-27
<strong>TM</strong> 9-<strong>4940</strong>-<strong>421</strong>-<strong>14</strong><br />
4-56. REAR BUMPER.<br />
a. Removal Refer to figure 4-28 to remove rear<br />
bumper.<br />
b. Cleaning and Inspection.<br />
(1) Clean metal parts with cleaning solvent and<br />
dry thoroughly (app D).<br />
(2) Inspect bumper and brackets for cracks, bends<br />
or other defects.<br />
c. lnstallation. Install in reverse order of removal.<br />
AR 701568<br />
Figare 4-27. Intervehicle receptacle, removal and installation<br />
NOTE :<br />
TAG AND DISCONNECT ELECTRICAL<br />
WIRING<br />
AR701569<br />
Figure 4-28. Rear bumper, removal and installation.<br />
4-28
<strong>TM</strong> 9-<strong>4940</strong>-<strong>421</strong>-<strong>14</strong><br />
CHAPTER 5<br />
DIRECT SUPPORT AND GENERAL SUPPORT MAINTENANCE INSTRUCTIONS<br />
Section I. REPAIR PARTS, SPECIAL TOOLS AND EQUIPMENT<br />
5-1. SPECIAL TOOLS AND EQUIPMENT. No 5-2. REPAIR PARTS. Direct support and general<br />
special tools or equipment are required by direct sup- support maintenance repair parts are listed in <strong>TM</strong><br />
port and general support maintenance personnel for 9-<strong>4940</strong>-<strong>421</strong>-24P.<br />
the maintenance of the shop set.<br />
Section II. TROUBLESHOOTING<br />
5-3. GENERAL. may occur, nor all tests or inspections and corrective<br />
a. This section contains troubleshooting information actions. If a malfunction is not listed or is not corrected<br />
for locating and correcting most of the operating trou- by listed corrective actions, notify your supervisor.<br />
blea which may develop in the shop set, Each malfunc- c. The table lists the common malfunctions which<br />
tion for an individual component, unit, or system is you may find during the operation or maintenance of<br />
followed by a list of tests or inspections which will help the shop set or its components. You should perform the<br />
you to determine corrective actions to take. You should tests/inspections and corrective actions in the order<br />
perform the tests/inspections and corrective actions in listed.<br />
the order listed.<br />
5-4. TROUBLESHOOTING. Refer to table 5-1 for<br />
b. This manual cannot list all malfunctions that direct support and general support troubleshooting.<br />
Table 5-1. TROUBLESHOOTING<br />
MALFUNCTION<br />
TEST OR INSPECTION<br />
CORRECTIVE ACTION<br />
ENGINE<br />
1. ENGINE BACKFIRES<br />
Overheated or sticky valves.<br />
Repair or replace valves (para 6-12).<br />
2. ENGINE KNOCKS<br />
Step 1. Worn or loose piston pin.<br />
Replace piston pin (para 6-17).<br />
Step 2. Connecting rod bearing loose or burned out.<br />
Replace any worn or damaged parts (para 6-17).<br />
Step 3. Loose connecting rod bearings.<br />
Install new bearings (para 6-17).<br />
Step 4. Weak or broken valve springs.<br />
Check valve springs and replace if necessary (para 6-12).<br />
Step 5. Excessive carbon.<br />
Remove cylinder heads and scrape carbon from head and from top of piston (para 6-11).<br />
3. OIL CONSUMPTION HIGH<br />
Step 1. Worn valve guides, oil rings, cylinder walls and pistons.<br />
Replace worn guides, oil rings, and pistons (para 6-12, 6-17).<br />
Step 2. Worn main or connecting rod bearings.<br />
Replace worn main or connecting rod bearings (para 6-17).<br />
FLYWHEEL ALTERNATOR<br />
1. BATTERY OVERCHARGE<br />
With engine running full governed rpm, check battery voltage with dc voltmeter.<br />
If voltage is over 15.0.<br />
Replace regulator module.<br />
If voltage is under 15.0.<br />
Check battery condition.<br />
2. LOW/NO CHARGE<br />
Step 1. With engine running at full governed rpm, check battery voltage with dc voltmeter. If voltage is greater than <strong>14</strong> volts, place load<br />
on battery to reduce voltage below <strong>14</strong> volts.<br />
If the change rate increases.<br />
Replace regulator module.<br />
If charge rats does not increase with new regulator module.<br />
Replace rectifier module.<br />
Step 2. With engine stopped unplug all connectors between modules and stator. Start engine and run at full governed rpm. With ac<br />
voltmeter check voltage between each of the black stator leads and ground. If one of the two voltages is zero or they are over 10%<br />
apart.<br />
Replace the stator.<br />
5-1
<strong>TM</strong> 9-<strong>4940</strong>-<strong>421</strong>-<strong>14</strong><br />
MALFuJNCT1ON<br />
TEST OR INSPECTION<br />
(X) RREC’IIVE ,4 CTiON<br />
1, COMPRESSOR OVERHEATS<br />
Low oil level.<br />
Add oil as required.<br />
2. COMPRESSOR KNOCKS<br />
Low oil level,<br />
Add oil as required.<br />
Table 5-1. TROUBLESHOOTING-Continued<br />
AIR COMPRESSOR<br />
GENERATOR-WELEER<br />
1. GENERATOR-WELDER NOISY<br />
Bearing defective.<br />
Replace bearing.<br />
2. GENERATOR-WELDER FAILS TO GENERATE REQUIRED VOLTAGE<br />
Step 1. Brushes burned or badly worn.<br />
Replace brushes (para 4-45).<br />
Step 2. Commutator dirty.<br />
Clean commutator,<br />
Section Ill. REMOVAL AND INSTALLATION OF MAJOR<br />
5-5. ENGINE, GENERATOR-WELDER AND<br />
CONTROL CUBICLE.<br />
a. Removal.<br />
(1) Remove guard from rear of control panel (para<br />
4-26).<br />
(2) Disconnect and tag electrical leads.<br />
(3) Remove conduit brackets from control panel<br />
base.<br />
(4) Remove three capscrews and lockwashers<br />
securing the hose rack and remove (curbside door).<br />
(5) Remove acetylene tank and bracket.<br />
(6) Remove eight bolts and nuts and remove false<br />
panel.<br />
(7) Remove exhaust pipe (para 4-41).<br />
(8) Disconnect fuel line quick disconnect at fuel<br />
strainer.<br />
(9) Remove two bolts and two tapered washers<br />
COMPONENTS AND ASSEMBLIES<br />
from rail below control panel.<br />
(10) Remove two bolts and two tapered washers<br />
from rail below front of engine.<br />
(11) Remove two bolts and two safety blocks from<br />
inside of rear rail.<br />
(12) Use the oxygen or acetylene bottle tie-down<br />
strap. Place the strap around the welder between the<br />
lugs.<br />
(13) Position forklift so that the forks will be<br />
above the centerline of the engine and generatorwelder.<br />
Secure the strap to the forks. Raise the forks to<br />
relieve the pressure from the rails and back the forklift<br />
slowly as not to damage the shop set.<br />
(<strong>14</strong>) Place the engine and welder assembly on a<br />
suitable stand.<br />
5-2
<strong>TM</strong> 9-<strong>4940</strong>-<strong>421</strong>-<strong>14</strong><br />
Figure 5-1. Engine, control panel, and generator-welder, removal and installation.<br />
b. Installation. Install engine and generator-welder engine.<br />
assembly in reverse order of removal.<br />
(4) Remove eight bolts, eight nuts, sixteen<br />
washers and eight body shims.<br />
5-6. SHOP BODY.<br />
a. Removal (fig 5-2).<br />
(5) Remove the shop set body from the truck<br />
(1) Tag and disconnect electrical leads at rear of<br />
frame.<br />
truck frame.<br />
b. Installation. Install shop set body in reverse order<br />
(2) Disconnect fuel filler tube.<br />
of removal. Torque nuts 40-45 ft. lbs.<br />
(3) Disconnect fuel line for generator-welder<br />
5-3
<strong>TM</strong> 9-<strong>4940</strong>-<strong>421</strong>-<strong>14</strong><br />
Figure 5-2. Shop set body, removal and installation.<br />
5-4
<strong>TM</strong> 9-<strong>4940</strong>-<strong>421</strong>-<strong>14</strong><br />
CHAPTER 6<br />
REPAIR OF ENGINE<br />
Section I. INTRODUCTION<br />
6-1. GENERAL. Instructions in this section and in the use of direct support and general support personnel<br />
succeeding sections of this chapter are published for responsible for maintenance of the engine.<br />
Section II. ENGINE<br />
6-2. GENERAL. The four-cycle engine is so termed<br />
because of the four distinct and separate strokes of the<br />
piston during one complete power cycle. The engine<br />
develops power by rapidly burning a highly compressed<br />
mixture of fuel and air in a closed combustion chamber.<br />
The ignited force of the burned fuel-air mixture is<br />
directed against the piston that compressed the gas,<br />
driving the piston away from the ignition. The piston is<br />
attached to a crankshaft, which changes the reciprocating<br />
motion of the piston to a rotary, driving<br />
motion. The four operations intake, compression,<br />
power, and exhaust, each require a complete stroke.<br />
This gives one power stroke per cylinder for each two<br />
revolutions of the crankshaft.<br />
6-3. ENGINE AND GENERATOR-WELDER DIS-<br />
ASSEMBLY.<br />
a General. Whenever it becomes necessary to<br />
remove the engine and generator-welder assembly<br />
from its mounting in the shop set for repair purposes,<br />
the engine and generator-welder assembly is removed<br />
as a unit. Refer to paragraph 5-5.<br />
b. .Removal.<br />
(1) Remove generator housing cover (fig 4-17).<br />
(2) Remove fan housing cover (fig 4-17).<br />
(3) Turn engine until two setscrews securing armature<br />
to fan assembly are visible. Loosen the two<br />
setscrews. Remove four capscrews attaching the<br />
generator housing to the fan housing (fig 6-1). Separate<br />
the fan housing and generator housing.<br />
(4) Turn engine until two setscrews are visible<br />
through the hole in the left side of the fan housing.<br />
Loosen the two setscrews and remove the fan assembly<br />
from the engine crankshaft.<br />
(5) Remove four capscrews and washers attaching<br />
fan housing to the engine and remove fan housing.<br />
(6) Remove four bolts, nuts, washers, rubber shock<br />
mounts and cup washers attaching engine support bars<br />
to the rail. Remove engine.<br />
c. Cleaning and Inspection.<br />
(1) Clean the engine with an approved cleaning<br />
solvent and dry thoroughly. Be sure all dirt, grease, grit<br />
and other foreign matter are removed (app D).<br />
(2) Clean all mounting hardware with an approved<br />
cleaning solvent. Inspect each threaded surface<br />
for corrosion or damage. Replace all mounting hardware<br />
that is corroded or damaged.<br />
d. Installation. Install the assembly in reverse order<br />
of removal.<br />
6-1
<strong>TM</strong> 9-<strong>4940</strong>-<strong>421</strong>-<strong>14</strong><br />
AR 701572<br />
6-4. FUEL PUMP.<br />
a. Removal. Refer to paragraph 4-<strong>14</strong> for fuel pump<br />
removal,<br />
b. Cleaning and Inspection.<br />
(1) Clean all metal parts in an approved cleaning<br />
solvent and dry thoroughly (app D).<br />
(2) Inspect the bracket and fuel head for cracks or<br />
breaks. Replace if necessary.<br />
(3) Inspect all parts for wear or other damage.<br />
Replace if necssary.<br />
c. Installation. Install in reverse order of removal.<br />
6-5. CARBURETOR.<br />
a. Removal. Refer to paragraph 4-15 and remove<br />
the carburetor.<br />
b. Cleaning and Inspection.<br />
(1) Clean all metal parts in cleaning solvent and<br />
dry cach part thoroughly (app D).<br />
(2) Blow out all passages in the throttle body and<br />
fuel bowl with clean dry compressed air. Reverse the<br />
flow of air in the passages to insure that all dirt has<br />
been removed. Make sure that all carbon deposits and<br />
other foreign matter have been removed from the<br />
throttle bore and idle port.<br />
c. Installation. Install in reverse order of removal.<br />
d. Adjustment. Refer to paragraph 4-15e.<br />
Figure 6-1. Engine and generator-welder, rernoval and installation.<br />
6-6. GOVERNOR.<br />
a. Removal. Refer to paragraph 4-23 for removal of<br />
the governor.<br />
b. Cleaning and Inspection.<br />
(1) Wash the parts in solvent and dry thoroughly<br />
(app D).<br />
(2) Replace a defective governor.<br />
c. Installation. Install in reverse order of removal.<br />
d. Adjustment. Refer to paragraph 4-23d.<br />
6-7. DISTRIBUTOR.<br />
a. Removal. Refer to paragraph 4-17 and remove<br />
the distributor.<br />
b. Disassembly. Refer to figure 6-2 and disassemble<br />
the distributor.<br />
c. Cleaning and Inspection.<br />
(1) Before cleaning distributor cap, check for carbon<br />
tracks.<br />
(2) Clean parts thoroughly with a clean, lint-free<br />
cloth.<br />
(3) Inspect distributor cap for cracks, broken<br />
towers, burned or corroded terminals and worn center<br />
contacts. Replace unserviceable cap.<br />
(4) Inspect rotor for cracks, carbon tracks, breaks<br />
and a burned, corroded or broken metal terminal.<br />
Replace a damaged rotor.<br />
6-2
<strong>TM</strong> 9-<strong>4940</strong>-<strong>421</strong>-<strong>14</strong><br />
(5) Inspect breaker points for roughness, burning the distributor in reverse order of disassembly.<br />
and pitting. Replace damaged points.<br />
e. Installation. Refer to paragraph 4-17 and install<br />
(6) Inspect the coil to distributor primary wire for the distributor. Be sure to lubricate the cam and wick.<br />
broken, bare, or frayed wire. Replace a damaged wire. f. Adjustment. Refer to paragraph 4-17f.<br />
d. Reassembly. Refer to figure 6-2 and reassemble<br />
Legend for fig 6-2:<br />
1. Distributor cap<br />
2. Rotor<br />
3. Dust cover<br />
4, Condensor<br />
5. Points Set<br />
6. Base Assembly<br />
Figure 6-2. Distributor assembly, exploded view.<br />
. Section III. ENGINE DISASSEMBLY<br />
.<br />
6-8. FYLWHEEL. (1) Wash all parts in cleaning solvent and dry<br />
a. Removal (fig 6-3). thoroughly (app D). Use a wire brush to clean rust and<br />
(1) Drive the crank pin out of the crankshaft. scale from the flywheel. Be careful and not damage the<br />
Remove the nut and lockwasher.<br />
flywheel alternator rotor.<br />
(2) Hit the end of the crankshaft with a soft ham- (2) Inspect the flywheel for cracks or broken<br />
mer to loosen the flywheel. If the flywheel is not vanes. Inspect the flywheel ring gear for broken or<br />
loosened after two or three blows, use a puller to cracked teeth. Replace a damaged flywheel.<br />
remove it.<br />
c. Installation. Install flywheel in reverse order of<br />
(3) Remove the key from the crankshaft. removal.<br />
b. Cleaning and Inspection.<br />
6-3
6-9. FLYWHEEL ALTERNATOR STATOR.<br />
a. Testing. Refer to table 6-1 and check stator using<br />
Table 6-1. ALTERNATOR STA TOR CHECKS<br />
AC AC REG.<br />
AC AC REG.<br />
Black #2<br />
Red<br />
NOTE<br />
Wire numbers indicated for probe connections are<br />
for convenience only and are not indicated on the<br />
connectors.<br />
Figure 6-3. Flywheel, removal and installation,<br />
METER PROBE METER REPLACE<br />
CONNECTIONS VALUE STATOR<br />
Black # 1 to Black #- 2<br />
0.40 ohm<br />
Black # 1 to Engine grid. 0.20 ohm Indicates open Circuit<br />
Black # 2 to Engine gnd<br />
0.20 ohm<br />
Black # 1 to Red<br />
3.20 ohms<br />
Black # 2 to Red<br />
2.80 ohms<br />
b. Removal (fig 6-4). Remove four allen head screws (1) Wipe stator clean with a clean, lint-free cloth.<br />
and washers attaching stator to gear housing cover. (2) Inspect stator for cracks, broken or loose wire<br />
Remove stator from gear housing.<br />
connections.<br />
c. Cleaning and Inspection. d. Installation. Install in reverse order of removal.<br />
6-4
<strong>TM</strong> 9-<strong>4940</strong>-<strong>421</strong>-<strong>14</strong><br />
6-10. MANIFOLD ASSEMBLY.<br />
a. Removal (fig 6-5).<br />
(1) Remove carburetor (para 4-15).<br />
(2) Remove four nuts and lockwashers securing<br />
the manifold to the cylinder block.<br />
(3) Lift off the manifold assembly from the<br />
cylinder block. Remove gaskets and inserts.<br />
b. Cleaning and Inspection.<br />
(1) Clean the manifold with a wire brush to<br />
remove any rust or foreign material.<br />
(2) Examine the manifold for cracks or breaks.<br />
Replace a defective manifold.<br />
(3) Check the manifold cylinder block gaskets and<br />
inserts. Replace if damaged.<br />
c. Installation. Install manifold assembly in reverse<br />
order of removal. Torque nuts 35 lbs. ft.<br />
AR 7101575<br />
Figure 6-4<br />
AR 701576<br />
Figure 6-5. Manifold assembly, removal and installation.<br />
6-5
<strong>TM</strong> 9-<strong>4940</strong>-<strong>421</strong>-<strong>14</strong><br />
6-11. CYLINDER HEAD.<br />
a. Removal (fig 6-6).<br />
(1) Remove the cylinder head shrouds and rear<br />
shroud covers.<br />
(2) Remove the manifold assembly (para 6-10).<br />
(3) Remove the spark plugs.<br />
(4) Remove the seventeen capscrews (19) and<br />
washers (18) that secure the cylinder head (17) to the<br />
cylinder block (12). Remove the cylinder head and<br />
gasket (16).<br />
b. Cleasning and Inspection.<br />
(1) Carefully scrape and wire brush all carbon<br />
deposits from the cylinder blocks. Clean the carbon<br />
from the tops of the pistons and blow away the carbon<br />
with compressed air.<br />
(2) Wire brush and scrape the carbon out of the<br />
cylinder heads.<br />
(3) Wipe the cylinder heads and blocks with a<br />
cloth dampened with cleaning solvent. Dry thoroughly<br />
(app D).<br />
(4) Inspect the cylinder heads for cracks, breaks or<br />
warping. Replace a defective cylinder head.<br />
(5) Inspect the top of the cylinder block for cracks<br />
or breaks. Inspect the cylinder walls for scoring and<br />
pitting.<br />
(6) Inspect the top of the valves and valve seats.<br />
Repair or replace any defective valves or valve seats.<br />
c. Installation.<br />
(1) Install cylinder head in reverse order of removal.<br />
(2) Apply a mixture of graphite and oil on the<br />
capscrews and tighten to 25-32 lb. ft. torque.<br />
Legend for fig 6-6:<br />
1. Gasket<br />
2. Cap<br />
3. Lock<br />
4. Seat<br />
5. Spring<br />
6. Gasket<br />
7. Plate<br />
8. Bolt<br />
9. Washer<br />
10. Retaincr<br />
11. Stud<br />
12. Cylinder block<br />
13. Insert<br />
<strong>14</strong>. Guide<br />
15. Valves<br />
16. Gasket<br />
17. Cylinder head<br />
18. Washer<br />
19. Screw<br />
20. Spark plug<br />
21. Nut<br />
22. Washer<br />
Figure 6-6. Cylinder block, exploded view.<br />
6-6
<strong>TM</strong> 9-<strong>4940</strong>-<strong>421</strong>-<strong>14</strong><br />
6-12. VALVES.<br />
a General. The valves are lifted by tappets located<br />
in the crankcase. The tappets are raised by the lobes on<br />
the camshaft. The firing order of the cylinders is<br />
1-3-4-2. Number 1 cylinder is the nearest one to the<br />
flywheel in the left bank of cylinders; number 3<br />
cylinder is the other one in this bank. Number 2<br />
cylinder is the nearest one to the flywheel in the right<br />
bank of cylinders and number 4 is the other (fig 4-4).<br />
b. Removal<br />
(1) Remove the governor (para 4-23).<br />
(2) Remove the cylinder heads (para 6-11).<br />
(3) Remove the valve covers (fig 6-6).<br />
NOTE<br />
Tag or otherwise identify each valve and its parts so they<br />
will be reinstalled in the same guide and valve chamber<br />
from which they were removed.<br />
(4) Use a valve spring compressor and compress<br />
the valve spring. Remove the pair of valve spring seat<br />
locks, the valve stem rotator, and valve spring seat.<br />
Remove the spring compressor, lift out the valve, and<br />
remove the valve spring.<br />
c. Cleaning and Inspection.<br />
(1) Clean the valves on a wire wheel brush to<br />
remove carbon from the valve face and gum deposits<br />
from the stems. Wash the springs with cleaning solvent<br />
and dry thoroughly (app D).<br />
(2) Clean out the valve guides in the cylinder block<br />
and blow out with compressed air.<br />
(3) Clean the valve seat inserts and top of the<br />
cylinder block.<br />
(4) Inspect the valves for burned, pitted or cracked<br />
faces. Replace a burned, cracked or deeply pitted valve.<br />
(5) Inspect the valve springs for breaks and wear.<br />
Replace if weak or damaged.<br />
(6) Inspect the valve seat insert for looseness and<br />
excessive wear.<br />
(7) Inspect and replace all unserviceable parts.<br />
d. Valve and Valve Seat Refacing.<br />
(1) Reface valves and valve seats only when there<br />
is evidence of warping or deep pits. A good method of<br />
detecting warping is to check each valve stem in a<br />
valve face grinder, and slowly rotate the valve while<br />
the grinding wheel is brought near the rotating valve<br />
face.<br />
(2) Using a valve face grinder, reface the valves to<br />
an angle of 45 degrees. Replace any valve that<br />
measures less than 0.0625 inch from the top of head to<br />
the edge of the refaced outer circle.<br />
(3) Install a pilot in the valve stem bore of the<br />
cylinder block. Set the stone on the valve reseating outfit<br />
to the angle of 45 degrees and dress the stone with<br />
the dresser. Place the grinder and stone assembly over<br />
the pilot in the valve stem bore, and grind just enough<br />
to make a smooth seat.<br />
e. Valve Grinding Procedure.<br />
(1) Remove all traces of carbon from the face of<br />
the cylinder block.<br />
(2) Lightly coat the entire valve seat with a good<br />
quality water-soluble, valve-grinding compound. Slip a<br />
light lifting spring over the valve stem, and lubricate<br />
the stem. Drop the valve into its original place in the<br />
cylinder block. The lifting spring should barely hold the<br />
valve face off its seat. Set the grinding tool on the valve<br />
head, and press down until the valve is seated. Turn the<br />
valve one-quarter turn, first in one direction, then the<br />
other. Do this three or four times. Release pressure on<br />
the valve so that the lifting spring will lift it from its<br />
seat, and turn the valve 10 degrees thru 15 degrees to<br />
another position. Repeat the grinding. Do this until all<br />
of the compound is rubbed off the valve seat. Take out<br />
the valve, apply fresh compound, and repeat the grinding<br />
operation as necessary.<br />
(3) Do not overgrind the valves. Occasionally clean<br />
the valve and its seat to see how the grinding is<br />
progressing. When all of the pits and grooves have disappeared<br />
wipe the valve and its seat clean and place 3<br />
to 10 soft pencil marks on the valve seat. Drop the valve<br />
in place. Turn it one-quarter turn, and remove. A perfect<br />
seat will be identified if every pencil mark shows<br />
where the valve has rubbed it. If any pencil marks remain<br />
untouched, continue the grinding.<br />
(4) When the grinding is completed, clean off all<br />
traces of the cleaning compound. Check the valve seat<br />
for concentricity with a dial indicator.<br />
f. Valve Assembly Installation.<br />
(1) Place the valve springs (5, fig 6-6) in their<br />
respective valve chambers.<br />
(2) Insert the valves (15) into the same bores from<br />
which they were removed. Assemble the valve spring<br />
seats (4) on the valve stems. Compress the valve springs<br />
and install the valve spring seat locks (3).<br />
(3) Install the cylinder heads.<br />
g. Tappet Clearance Adjustment.<br />
(1) Make sure the engine is cold.<br />
(2) Crank the engine slowly until the no. 1 piston<br />
is rising in the compression stroke. Continue cranking<br />
until the marked vane on the flywheel alines with the<br />
no. 1 centerline mark on the flywheel shroud which is<br />
45 degrees counterclockwise from the vertical (fig 4-4).<br />
(3) Adjust the valve tappet clearance as shown in<br />
figure 6-7. Adjust exhaust valve tappet clearance to<br />
0.016 inch. Adjust the inlet valve tappet clearance to<br />
0.008 inch.<br />
NOTE<br />
Chalk mark the vane directly opposite the marked vanes on<br />
the flywheel. To determine the 180 degree turn mentioned,<br />
turn the crankshaft until the chalk-marked vane is alined<br />
with the no. 1 cylinder centerline.<br />
(4) Turn the engine crankshaft 180 degrees clockwise<br />
and adjust tappet clearance on the no. 3 cylinder.<br />
(5) Turn the crankshaft clockwise until the<br />
marked vane is alined with the no. 2 cylinder centerline<br />
which is 45 degrees clockwise from the vertical. This<br />
6-7
<strong>TM</strong> 9-<strong>4940</strong>-<strong>421</strong>-<strong>14</strong><br />
position is 270 degrees past the position of (4) above. (7) Install the gaskets and valve covers. Tighten<br />
Adjust the tappet clearance of no. 4 cylinder.<br />
the capscrews securely.<br />
(6) Turn the crankshaft clockwise until the chalk- (8) Install cylinder heads (para 6-llc).<br />
marked vane is alined with the no. 2 cylinder cen- (9) Install governor (para 4-23).<br />
terline. This position is 180 degrees past the position (10) Install the flywheel screen.<br />
(5) above. Adjust the tappet clearance of no. 2 cylinder. (11) install the spark plugs (para 4-16c).<br />
6-13. VALVE-SEAT INSERT.<br />
a. General. The valve seats are replaceable, hardened<br />
inserts which are pressed into the cylinder<br />
blocks. The inserts should be replaced if they are pitted<br />
or burnt to the point where ordinary grinding<br />
procedureswill not make them serviceable.<br />
b. Valve-Sea t Insert Replacement.<br />
(1) Remove as instructed in paragraph 6-12b.<br />
(2) Clean andinspect asinstructed in paragraph<br />
6-12c.<br />
(3) Using a suitable puller, remove the exhaust<br />
valve-seat inserts. Take care not to damage the insert<br />
counterbore.<br />
(4) (lean all the carbon from the insert counterbore,<br />
and from the valve port.<br />
CAUTION<br />
Do not attempt to drive in an oversized<br />
insert before machining the counterbore.<br />
(5) Finish the counterbores in the cylinder blocks<br />
so that bore-to-insert interference is between 0.002<br />
and 0.004 inch. Chill the inserts with dry ice; then,<br />
using a pilot driver, tap the insert in place with light<br />
blows. Peen the insert to anchor it in place.<br />
(6) Reface each insert if necessary to make their<br />
valve seats concentric with the valve stem bore. Use a<br />
dial indicator and make sure that the valve seats are<br />
concentric. Regrind the valve seats if necessary.<br />
(7) Install the valves, and adjust the tappet<br />
clearance as instructed in paragraph 6-12.<br />
6-8<br />
Figure 6-7. Adjusting valve tappets<br />
6-<strong>14</strong>. OIL PAN (fig 6-8).<br />
a. General. The bottom cover plate is also the oil pan<br />
of the engine which serves as an oil reservoir. The oil<br />
pan is provided with a pipe plug to drain the oil.<br />
b. Removal.<br />
(1) Drain all the crankcase oil from the engine.<br />
(2) Lay the engine on its side supporting it in such<br />
a manner which will prevent damage to the cylinder<br />
air shrouds.<br />
(3) Remove the four capscrews and lockwashers<br />
that secure the front and rear engine supports to the<br />
bottom of the crankcase. Remove the engine supports.<br />
(4) Remove the fourteen capscrews and lockwashers<br />
that secure the crankcase bottom cover plate<br />
to the crankcase. Remove the cover plate and gasket.<br />
c. Cleaning and Inspection.<br />
(1) Scrape out all sludge and foreign particles accumulated<br />
on the bottom of the oil pan, and wash all<br />
parts removed in cleaning solvent (app D).<br />
(2) Brush the screen with a stiff brush and remove<br />
all sludge and foreign matter from between the wires<br />
of the screen. Dry with clean, dry compressed air.<br />
(3) Inspect the oil pan for dents. If minor, smooth<br />
out with hammer and wood block. Replace the oil pan if<br />
it is damaged beyond serviceable limits.<br />
d. Installation. Install new oil pan gasket and the oil<br />
pan with the deep end of oil pan toward oil pump.<br />
Secure with fourteen capscrews and washers. Tighten<br />
capscrews 6 to 9 lbs. ft.
<strong>TM</strong> 9-<strong>4940</strong>-<strong>421</strong>-<strong>14</strong><br />
Figure 6-8. Oil pan, removal and installation.<br />
AR 701579<br />
6-15. OIL PUMP. ten capscrews and lockwashers that secure the gear<br />
a. Removal. cover to the crankcase. Using a suitable drift pin,<br />
(1) Remove the oil pan (para 6-<strong>14</strong>). carefully drive the two dowel pins out from the gear<br />
(2) Remove the front gear cover (fig 6-9). Remove cover. Remove the gear cover and gasket.<br />
6-9
<strong>TM</strong> 9-<strong>4940</strong>-<strong>421</strong>-<strong>14</strong><br />
AR 701580<br />
Figure 6-9. Gear cover, removal and installation.<br />
(3) Remove the pipe plug and allen head lockscrew brass rod or similar punch against the drive shaft, and<br />
(fig 6-10).<br />
carefully drive the shaft through the gear. The oil<br />
(4) Remove the nut (l, fig 6-11) that secures the pump assembly can then be removed by withdrawing it<br />
gear (2) to the oil pump drive shaft. Place a suitable toward the center of the crankcase.<br />
Figure 6-10. Oil pump, removal and installation.<br />
AR 701581<br />
6-10
<strong>TM</strong> 9-<strong>4940</strong>-<strong>421</strong>-<strong>14</strong><br />
b. Cleaning and Inspection. (app D).<br />
(1) Wash all of the parts in cleaning solvent and (2) Examine the pump body and gear for cracks or<br />
dry thoroughly. Use a fiber brush to clean the screen breaks and replace a defective oil pump.<br />
Legend for fig 6-11:<br />
1. Nut<br />
2. Gear<br />
3. Body<br />
Figure 6-11. Oil pump, exploded view.<br />
AR 701582<br />
c. Installation.<br />
(1) Install the oil pump in the crankcase with the<br />
screen facing toward the bottom of the engine. Secure<br />
with the setscrew and pipe plug.<br />
(2) Install the woodruff key in the oil pump shaft.<br />
(3) Install the gear (2) and secure with the nut (l).<br />
(4) Apply a thin coat of grease to a new cover<br />
plate gasket and position the gear cover on the<br />
crankcase and secure with capscrews and lockwashers.<br />
Tighten to 6-9 lbs. ft.<br />
6-16. TIMING-GEAR TRAIN (fig 6-12).<br />
a. General. The timing-gear train is located at the<br />
same end of the engine as the flywheel, and is enclosed<br />
in a gear cover. It comprises the governor gear,<br />
camshaft gear, crankshaft gear, idler gear and oil<br />
pump gear. The governor gear can be removed from the<br />
gear train without removing the gear cover. The remaining<br />
gears, with the exception of the crankshaft<br />
gear, can be removed after the gear cover is removed.<br />
b. Removal.<br />
(1) Remove the gear cover (fig 6-9).<br />
(2) Remove the setscrew from the left-hand side of<br />
the crankcase which locks the idler shaft in position.<br />
(3) Using a gear puller remove the idler shaft and<br />
idler gear assembly.<br />
(4) Remove the three capscrews (1, fig 6-13) and<br />
lockwashers (2) that secure the camshaft gear (3) to the<br />
camshaft. Pull the camshaft thrust plunger (7) from<br />
the end of the camshaft. Remove the plunger spring (6).<br />
c. Cleaning and Inspection.<br />
(1) Wash the removed gears with cleaning solvent<br />
and dry thoroughly (app D).<br />
(2) Examine the gears for broken, cracked or chipped<br />
teeth. Replace any damaged or excessively worn<br />
gears.<br />
(3) Inspect the idler gear shaft for scoring or pitting.<br />
Remove any roughness with a fine grade of emery<br />
cloth.<br />
6-11
<strong>TM</strong> 9-<strong>4940</strong>-<strong>421</strong>-<strong>14</strong><br />
(4) Examine the camshaft thrust-plunger spring<br />
for pits or breaks. Replace a defective spring.<br />
(5) Check the hardware for rust or bad threads.<br />
Replace any defective hardware.<br />
d. Installation.<br />
(1) Position the camshaft gear (3, fig 6-13) on the<br />
end of the camshaft. The three holes in the camshaft<br />
and the gear are staggered in such a manner that they<br />
are lined up in only one position, which will automatically<br />
time the gear to the shaft. Secure the camshaft<br />
gear in place with three lockwashers (2) and three<br />
capscrews (1). Tighten to <strong>14</strong>-18 lbs. ft.<br />
NOTE<br />
Be sure the timing marks on the camshaft gear and<br />
crankshaft gear are lined up.<br />
Figure 6-12. Timing-gear train..<br />
(2) lnstall the thrust-plunger spring (6) and the<br />
thrust-plunger (7) in the hollow end of the camshaft.<br />
(3) Slide the idler gear over the idler gear stud<br />
with the timing marks toward the shoulder of the idler<br />
gear shaft. Using a suitable fiber hammer, carefully<br />
drive the idler gear shaft into the case. Be sure that the<br />
oil groove is facing upward. Take care to allow 0.003 to<br />
0.004 inch clearance between the idler gear and stud<br />
collar. Install the setscrew in the crankcase to secure<br />
the idler gear shaft.<br />
(4) Check the position of all the gears and install<br />
the gear cover (para 6- 15c.(A)).<br />
6-12
<strong>TM</strong> 9-<strong>4940</strong>-<strong>421</strong>-<strong>14</strong><br />
AR 701584<br />
6-17. CONNECTING RODS AND PISTONS.<br />
a. General The pistons are made of heavy duty alloy<br />
casting, and are equipped with two compression rings,<br />
one scraper ring and one oil ring. The upper end of the<br />
connecting rod is fitted with bronze bushing. The connecting<br />
rod has a shell bearing.<br />
b. Removal.<br />
(1) Remove cylinder head (para 6-11).<br />
(2) Remove the oil pump (para 6-15).<br />
(3) Remove the carbon and ridge at the top of the<br />
cylinder bore with a ridge reamer,<br />
(4) Turn the crankshaft until the lower end of the<br />
desired connecting rod is accessible.<br />
(5) Remove the nuts (18, fig 6-<strong>14</strong>) from the connecting<br />
rod bolts (8). Loosen the cap from the bolts by<br />
tapping it with a soft-faced hammer. Remove the cap<br />
Legend for fig 6-13:<br />
1. Capscrew<br />
2. Lockwasher<br />
3. Gear<br />
4. Camshaft<br />
5. Valve tappet assembly<br />
6. Spring<br />
7. Plunger<br />
Figure 6-13. Camshaft exploded view.<br />
of the connecting rod (7).<br />
(6) Push the piston and connecting rod out<br />
through the top of the cylinder bore, Be careful not to<br />
scratch or mar the bore. Reassemble the connecting rod<br />
cap.<br />
NOTE<br />
The connecting rods and caps are matched and must be<br />
paired together to insure correct installation. The caps and<br />
rods are marked with their respective cylinder numbers.<br />
c. Disassembly.<br />
(1) Remove the piston rings from the pistons.<br />
(2) Remove the retaining rings (6) and push the<br />
piston pin (5) out from the piston (4) and connecting<br />
rod (7).<br />
(3) Remove the piston pin bushing (27). Place the<br />
connecting rod in a press, and press out the bushing.<br />
6-13
<strong>TM</strong> 9-<strong>4940</strong>-<strong>421</strong>-<strong>14</strong><br />
Figure 6-<strong>14</strong>. Crankshaft, piston and connecting rod, exploded view.<br />
d. Cleaning and Inspection. thoroughly (app D).<br />
(1) Using a wire brush, remove all carbon from the (3) Measure the cylinder bores with an inside<br />
ring grooves in the pistons and from the top of the micrometer. Measure the bore lengthwise and<br />
pistons, making sure that the oil holes in the lower crosswise above the ring travel; repeat the measurering<br />
grooves are open.<br />
ment at the top of the ring travel. The difference in<br />
(2) Wash all parts in cleaning solvent and dry these measurements will determine the amount of<br />
6-<strong>14</strong>
<strong>TM</strong> 9-<strong>4940</strong>-<strong>421</strong>-<strong>14</strong><br />
wear in the cylinder bore, the taper and out-of-round<br />
condition.<br />
(4) Clean the carbon from the top of the piston.<br />
Clean the ring gooves with a ring groove tool or a piece<br />
of an old ring.<br />
(5) Wash all of the parts in cleaning solvent and<br />
blow dry with compressed air (app D).<br />
(6) To measure the piston ring gap, place the ring<br />
into the cylinder bore in the approximate operating<br />
position, and measure the gap with a feeler gage. The<br />
gap clearance should be between 0.010 to 0.020 inch.<br />
(7) Invert the piston and slide it into the cylinder<br />
bore. Check the piston-to-cylinder clearance at the<br />
piston skirt. The clearance should be 0.0037 to 0.0042<br />
inch. The clearance must be measured at the center of<br />
the thrust face, at the bottom of the piston skirt.<br />
(8) Measure the piston ring side clearance.<br />
Replace the piston if the side clearance is not within<br />
the following tolerances.<br />
Topring . . . . . . . . . . . . . . . ..0.0015 to 0.0035 inch<br />
2nd and 3rd ring . . . . . . . . . 0.0015 to 0.0035 inch<br />
Oilring . . . . . . . . . . . . . . . . ..0.002 to 0.004 inch<br />
(9) Measure the fit of the piston pin in the piston.<br />
The clearance should measure 0.0000 to 0.0008 inch.<br />
(10) Check the piston pin bushing in the connecting<br />
rod for wear, scoring, or out-of-round condition.<br />
The clearance between the piston pin and bushing<br />
should be 0.0005 to 0.0011 inch. Replace bushing as<br />
necessary.<br />
NOTE<br />
When pressing in new bushings, be careful to aline the oil<br />
hole in the bushing with the oil hole in the connecting rod.<br />
(11) Inspect the connecting rod bearing halves for<br />
wear or scoring. Check the bearing to crank pin<br />
clearance; it should be between 0.0013 and 0.0035 inch.<br />
Replace if worn beyond the limits.<br />
e. Reassembly of Connecting Rod and Piston.<br />
(1) Using a fiber hammer, tap the piston pin (5,<br />
fig 6-<strong>14</strong>) into the piston (4) about one inch.<br />
NOTE<br />
Each piston and connecting rod is marked for its cylinder;<br />
make sure that the parts are assembled in the proper position.<br />
(2) Place the proper connecting rod (7) in the<br />
matched piston so that the oil hole in the connecting<br />
rod cap is correct. Tap the piston pin into the other bore<br />
of the piston, and install the two retaining rings (6).<br />
(3) Expand the oil ring (3) and install it in the bottom<br />
groove of the piston skirt. Next, install the scraper<br />
ring (2). Mount the scraper ring with scraper edge<br />
down. Install the compression rings (l). Stagger the<br />
piston ring gaps 90 degrees apart around the piston.<br />
(4) Fit the connecting rod bolts (8) in the rod, and<br />
fit the upper bearing half so that the oil hole in the<br />
bearing alines with the oil hole in the rod. Lightly oil<br />
the piston, piston rings and cylinder walls. Turn the<br />
crankshaft journal, to which the rod is to be attached,<br />
to top dead-center. Use a ring compressor to compress<br />
the piston rings.<br />
f. Installation of Connecting Rod and piston.<br />
(1) Lower the piston into the cylinder. Using the<br />
butt end of a hammer handle, carefully push the piston<br />
and connecting rod into the cylinder until connecting<br />
rod rests on the crankshaft. This action will release the<br />
piston ring compressor.<br />
(2) Assemble the lower rod cap. A number is<br />
stamped on each rod and cap to insure matching of the<br />
parts. Make sure the numbers agree for each rod and<br />
cap. Push the piston down while rotating the<br />
crankshaft to bottom dead-center. Position the cap on<br />
the rod so that its oil hole faces the oil spray nozzle.<br />
Secure the assembly with nuts (7) and tighten each nut<br />
to 26-32 ft. lbs. torque.<br />
(3) Using a suitable feeler gage, measure the side<br />
clearance between the bearing and crankshaft. The<br />
clearance should measure at least 0.009 inch and not<br />
more than 0.016 inch.<br />
(4) Install the oil pump. Refer to paragraph 6-15.<br />
(5) Install the cylinder heads. Refer to paragraph<br />
6-11.<br />
6-18. CRANKSHAFT AND CAMSHAFT.<br />
a. General. The crankshaft is supported at both ends<br />
by roller bearings. The outer race or cup of the bearing<br />
at the drive end of the engine is carried in the main<br />
bearing plate, which is secured to the crankcase with<br />
capscrews and lockwashers. Shims are installed between<br />
the bearing plate and crankcase to provide the<br />
proper crankshaft end play. The camshaft operates the<br />
valve tappets and fuel pump adapter. The cams and<br />
fuel pump eccentric are integral with the shaft. The<br />
two camshaft journals ride in honed bores in the<br />
crankcase.<br />
b. Removal of the Crankshaft.<br />
(1) Remove the cylinder heads and valves (para<br />
6-11 and 6-12).<br />
(2) Remove the fuel pump adapter (para 6-4).<br />
(3) Remove the gear cover (para 6-15a(2)).<br />
NOTE<br />
When removing camshaft and idler gear, tag each gear to<br />
facilitate installation.<br />
(4) Remove the idler and camshaft gears (para<br />
6-17).<br />
(5) Remove the connecting rods and pistons (para<br />
6-17).<br />
NOTE<br />
Keep the shims together so that the same shims will be<br />
reinstalled. If any are damaged, replace them with shims of<br />
the same thickness.<br />
(6) Remove the six capscrews and lockwashers<br />
that secure the main bearing plate to the crankcase.<br />
Pry off the bearing plate, gaskets and any installed<br />
shims.<br />
(7) Slide the oil slinger (12, fig 6-<strong>14</strong>) from the<br />
6-15
<strong>TM</strong> 9-<strong>4940</strong>-<strong>421</strong>-<strong>14</strong><br />
flywheel end of the crankshaft (25) and carefully opening of the crankcase (fig 6-15).<br />
remove the assembled crankshaft through the rear<br />
AR 701586<br />
Figure 6-15. Crankshaft, removal and installation.<br />
(8) Remove the crankshaft gear (20) with a press c. Removal of the Camshaft.<br />
plate by pressing the crankshaft through the gear with (1) Remove the tappets (5, fig 6-13) from the<br />
an arbor press. Remove the woodruff key (17) from the cylinder block.<br />
crankshaft.<br />
(2) Carefully remove the camshaft from the<br />
(9) Remove both bearings (6) from the crankshaft. flywheel end of the engine (fig 6-16).<br />
6-16
<strong>TM</strong> 9-<strong>4940</strong>-<strong>421</strong>-<strong>14</strong><br />
Figure 6-16. Camshaft removal and installation.<br />
(3) With a sharp chisel, punch a hole in the expansion<br />
plug installed in the rear camshaft bore in the<br />
crankcase. Pry the expansion plug out with a<br />
screwdriver.<br />
d. Cleaning, Inspection and Repair.<br />
(1) Crankshaft.<br />
(a) Wash the removed crankshaft parts in<br />
cleaning solvent and dry thoroughly (app D).<br />
(b) Inspect the connecting rod journals on the<br />
crankshaft for scoring. Hone the journals to remove<br />
any slight scoring, or replace a defective crankshaft.<br />
(c) Measure the journals. Replace a crankshaft<br />
that is worn more than 0.002 inch. The diameter of the<br />
crankshaft should be between 2.125 and 2.126 inches.<br />
(d) Check the main bearing plate and bearing<br />
retainer plate for cracks, breaks, or burrs on the mating<br />
surface. File away any burrs. Replace a cracked or<br />
broken plate.<br />
(e) Check the rear oil seal for damage or indication<br />
of wear. Replace a defective oil seal.<br />
(f) Inspect the bearing cones and cups. Ordinarily<br />
they should be in good condition. Replace<br />
defective oil seals.<br />
(g) Inspect the hardware for bad threads, rust,<br />
or damage incurred during removal. If the screws have<br />
bad threads, replace the screws. Repair the mounting<br />
holes by running a tap into them. Replace any other<br />
defective hardware.<br />
(h) Replace the main bearing plate gaskets.<br />
(2) Camshaft<br />
(a) Wash the camshaft and tappets with cleaning<br />
solvent and dry thoroughly (app D).<br />
(b) Inspect the camshaft for alinement, scoring,<br />
and roughness on the cams and journals. Repair any<br />
slight roughness, or replace a badly scored camshaft.<br />
(c) Measure the camshaft journals and cams.<br />
Replace the camshaft if either the journals or cams are<br />
worn beyond the limits of allowable wear. The no. 1<br />
camshaft journal should be between 1.8725 and 1.8730<br />
inches. The smaller no. 2 journal should be between<br />
1.2475 and 1.2480 inches.<br />
(d) Measure the camshaft journals and the<br />
camshaft bores in the crankcase. If the difference in<br />
diameters exceeds 0.0035 inch, and the camshaft is<br />
within the wear tolerances, replace the crankcase. If<br />
the difference in diameter is less than 0.002 inch, ream<br />
and hone the crankshaft bores.<br />
e. Reassembly and Installation.<br />
(1) Camshaft.<br />
(a) Apply a thin coat of oil to the tappets (5, fig<br />
6-13), and install them in the proper bores in the<br />
crankcase. Place a prop under the tappets so as to clear<br />
the camshaft when it is installed.<br />
(b) Apply a thin coat of oil to the camshaft (4),<br />
and install it in the crankcase. Install a new expansion<br />
plug. Remove the props from under the tappets.<br />
(2) Crankshaft.<br />
(a) Press the bearings (6, fig 6-<strong>14</strong>) on the<br />
crankshaft.<br />
(b) Install the key (17) in the crankshaft keyway.<br />
Aline the keyway in the crankshaft gear (20) with<br />
the installed key, and press the gear on the shaft.<br />
(c) Assemble the oil seal in its retainer and<br />
press the assembly into the main bearing plate with<br />
the retainer facing toward the exterior face of the<br />
plate.<br />
(d) Press the bearing into the main bearing<br />
plate.<br />
(e) Apply a coat of bearing grease to the roller<br />
bearings.<br />
(f) Carefully install the crankshaft into the<br />
crankcase through the rear opening of the crankcase.<br />
Engage the crankshaft gear in the gear train so that<br />
the timing mark on the camshaft gear alines with the<br />
timing mark of the crankshaft gear.<br />
6-17
<strong>TM</strong> 9-<strong>4940</strong>-<strong>421</strong>-<strong>14</strong><br />
(g) Apply a thin coat of grease to the two<br />
gaskets (28). Position the thicker gaskets (27) around<br />
the rear opening of the crankcase and the gasket on the<br />
main bearing plate.<br />
(h) Install the bearing plate and shims on the<br />
crankcase. Secure them with the six capscrews and<br />
lockwashers. Tighten capscrews to 25-30 lbs. ft. torque.<br />
(i) Use a dial indicator and set its contact point<br />
against the end of the crankshaft. With a screwdriver<br />
pry the crankshaft back and forth, being careful not to<br />
damage the connecting rod journals. If the end play of<br />
the crankshaft exceeds 0.005 inch, remove shims to adjust.<br />
Add shims if there is not at least 0.002 inch end<br />
play.<br />
(j) Install the connecting rods and pistons (para<br />
6-17).<br />
(k) Install the idler and camshaft gears (para<br />
6-16).<br />
(1) Install the gear cover (para 6-15a (2)).<br />
(m) Install the fuel pump (para 6-4).<br />
(n) Install the cylinder heads and valves (para<br />
6-11 and 6-12).<br />
6-19. CYLINDER BLOCKS AND CRANKCASE.<br />
a. General.<br />
(1) Crankcase. The crankcase is a one-piece casting<br />
machined at the top and fitted with studs to mount<br />
the two cylinder blocks. The camshaft bores are honed,<br />
and serve as bearing surfaces for the camshaft.<br />
(2) Cylinder Blocks. The cylinder blinks are cast<br />
in pairs and are provided with cooling fins. The valve<br />
stem bores are machined in each of the blocks.<br />
b. Removal of Cylinder Block.<br />
(1) Remove the valves (para 6-12).<br />
(2) Remove the connecting rod and pistons (para<br />
6-17).<br />
(3) Remove the six nuts (21, fig 6-6) and lockwashers<br />
(22) that secure each cylinder block (12) to the<br />
crankcase. Remove the cylinder blocks and gaskets (1).<br />
Tag them so that they will be reinstalled on the same<br />
side of the crankcase from which they are removed.<br />
c. Cleaning and Inspection of Cylinder Block.<br />
(1) Clean, inspect and repair the cylinder bores as<br />
necessary.<br />
(2) Clean, inspect and repair the valve seats and<br />
bores as necessary.<br />
(3) Use a wire brush, compressed air, and cleaning<br />
solvent to clean the cooling fins of the cylinder blocks.<br />
Inspect the cylinder blocks for cracks, breaks, or<br />
damaged cooling fins. Replace defective cylinder block.<br />
(4) Inspect the manifold mounting studs, cylinder<br />
block mounting studs, mounting hardware. Tighten<br />
any loose mounting studs. Replace any defective hardware.<br />
(5) Examine the threaded cylinder head mounting<br />
holes. Repair any holes that have bad threads.<br />
(6) Replace the cylinder block gaskets.<br />
d. Installation of the Cylinder Block.<br />
(1) Position a new gasket (1, fig 6-6) over the studs<br />
of the crankcase. Install the appropriate cylinder block<br />
(12) and secure it with the six lockwashers (22) and<br />
nuts (21). Tighten the nuts to 62-78 lbs. ft. torque.<br />
(2) Install the pistons and connecting rods (para<br />
6-17).<br />
(3) Install the valves (para 6-12).<br />
e. Disassembly of the Crankcase.<br />
(1) Remove the timing gears (para 6-16).<br />
(2) Remove the crankshaft (para 6-18).<br />
(3) Remove the camshaft (para 6-18).<br />
(4) Remove the cylinder blocks (para 6-19).<br />
(5) Remove the oil filler tube.<br />
f. Cleaning and Inspection of the Crankcase.<br />
(1) Clean the crankcase with a wire brush and<br />
cleaning solvent and dry thoroughly (app D).<br />
(2) Examine the oil filler tube for corrosion, bends,<br />
or dents. Repair or replace the oil filler tube as necessary.<br />
(3) Examine the crankshaft bores. Replace a<br />
defective crankcase.<br />
(4) Examine the crankcase for cracks or breaks.<br />
Replace a defective crankcase.<br />
g. Reassembly of the Crankcase.<br />
(1) Chill the oil filler tube with dry ice and install<br />
in the crankcase.<br />
(2) Install the camshaft (para 6-18).<br />
(3) Install the crankshaft (para 6-18).<br />
(4) Install the timing gears (para 6-16).<br />
(5) Install the cylinder blocks (para 6-19).<br />
6-18
<strong>TM</strong> 9-<strong>4940</strong>-<strong>421</strong>-<strong>14</strong><br />
CHAPTER 7<br />
REPAIR OF ENGINE STARTER<br />
Section I. INTRODUCTION<br />
7-1. GENERAL. This provides procedures for remov- and installation of the engine starter.<br />
al, disassembly, cleaning, inspection, repair, assembly,<br />
Section II. MAINTENANCE INSTRUCTIONS<br />
7-2. ENGINE STARTER.<br />
a. Removal. Refer to paragraph 4-20 and remove<br />
the engine starter.<br />
b. Disassembly. Refer to figure 7-1 and disassemble<br />
the starter.<br />
c. Cleaning Inspection and Repair.<br />
(1) Clean all metal parts in cleaning solvent and<br />
dry thoroughly (app D).<br />
(2) Clean frame with a clean cloth dampened with<br />
cleaning solvent and dry thoroughly with compressed<br />
air (app D).<br />
(3) Clean brush holder and springs with a brush<br />
and cleaning solvent. Dry thoroughly with compressed<br />
air (app D).<br />
(4) Clean brushes with a clean, dry cloth only. Do<br />
not permit cleaning solvent to come in contact with<br />
brushes.<br />
(5) Replace brushes if less than 1/2 inch long.<br />
d. Reassembly and Installation.<br />
(1) Reassemble starter in reverse order of disassembly.<br />
(2) Install the starter in reverse order of removal.<br />
Legend for fig 7-1:<br />
1. Cover hand<br />
2. Commutator end housing<br />
3. Brushes<br />
4. Brush spring<br />
5. Housing<br />
Figure 7-1. Starter, exploded view.<br />
7-1
<strong>TM</strong> 9-<strong>4940</strong>-<strong>421</strong>-<strong>14</strong><br />
CHAPTER 8<br />
REPAIR OF GENERATOR-WELDER<br />
Section I. INTRODUCTION<br />
8-1. GENERAL. The generator-welder is a multi-pur- ate electrical equipment. The 4 cycle gasoline engine is<br />
pose machine capable of generating direct current for the only source of power to operate the generatorwelding<br />
and 120 volts, single phase, 60 hertz, to oper- welder.<br />
Section II. GENERATOR-WELDER<br />
8-2. ON-EQUIPMENT TESTING.<br />
a. Generator-Welder Armature. Refer to <strong>TM</strong> 5-764<br />
for armature testing procedures.<br />
b. Shunt Field. Refer <strong>TM</strong> 5-764 for shunt field testing<br />
procedures.<br />
c. Welding Generator Series Field Group. Refer to<br />
<strong>TM</strong> 5-764 for series field group testing procedures.<br />
d. Welding Generator Interpole Group. Refer to <strong>TM</strong><br />
5-764 for interpole group testing procedures.<br />
8-3. GENERATOR-WELDER.<br />
a. Removal and Disassembly.<br />
(1) Refer to paragraph 6-3 to remove generatorwelder<br />
from the engine.<br />
(2) Refer to paragraph 4-45 to remove welder<br />
brushes.<br />
(3) Refer to paragraph 4-46 to remove end cover<br />
housing.<br />
(4) Refer to paragraph 4-47 to remove auxiliarygenerator<br />
brushes.<br />
(5) Refer to figure 6-1 and remove four capscrews<br />
securing auxiliary-generator housing to generator<br />
housing.<br />
(6) Remove the armature from the generator<br />
housing and place in a suitable stand.<br />
(7) Remove two bolts and nuts securing brush<br />
holder to generator housing and remove brush holder.<br />
b. Testing During or After Disassembly. Refer to<br />
<strong>TM</strong> 5-764 and test each component of the generatorwelder<br />
at the appropriate time during disassembly.<br />
c. Cleaning and Inspection.<br />
(1) Clean all metal parts with cleaning solvent<br />
. and dry thoroughly (app D).<br />
(2) Inspect holder assembly for breaks, cracks, or<br />
other damage. Replace all parts found to be defective.<br />
CAUTION<br />
Do not use emery paper or emery cloth<br />
on any commutator.<br />
(3) Clean a slightly dirty or discolored commutator<br />
with no. 00 sandpaper. Blow sand, dust and dirt<br />
from the armature with clean, dry, compressed air.<br />
(4) Inspect the armature shaft bearing surface for<br />
wear, galling roughness or other damage. Replace a<br />
damaged bearing.<br />
(5) Inspect the welder commutator and auxiliary<br />
MAINTENANCE<br />
generator commutator for roughness, wear, or eccentricity.<br />
Measure the commutator runout with a dial<br />
indicator. Place the armature assembly in a lathe and<br />
turn a commutator that is 0.003 inch or more out-ofround.<br />
Make light cuts until the commutator is clean,<br />
(6) Undercut the mica separators in the commutator<br />
to a depth of one-thirty-second inch below the commutator<br />
bars, either by hand or by machine.<br />
(7) Inspect all stator assemblies and field coils for<br />
defective insulation broken leads, or other defects,<br />
Replace defective windings, leads or insulation.<br />
(8) Inspect generator housing and auxiliary<br />
generator for cracks or breaks. Weld minor cracks and<br />
replace a damaged housing.<br />
(9) Inspect the generator-welder base for cracks,<br />
breaks, and damaged mounting hardware. Weld cracks<br />
and minor breaks. Replace damaged mounting hardware.<br />
d. Reassembly. Reassemble in reverse order of disassembly.<br />
e. Installation. Install generator-welder in reverse<br />
order of removal.<br />
8-4. GENERATOR BEARING SERVICE.<br />
a. General. The generator end bearing is the only<br />
thing requiring lubrication. Greasing twice yearly is<br />
sufficient for the bearing under normal use. Pressure<br />
fittings are not recommended, because grease, under<br />
pressure, may go through the bearing grease seal and<br />
into the commutator.<br />
b. Removal. Use a puller and remove bearing from<br />
armature shaft.<br />
c. Cleaning and Inspection.<br />
(1) Clean the bearings in solvent and place on<br />
clean absorbent paper and allow to drain dry. Do not<br />
spin the bearing dry with compressed air.<br />
(2) Inspect the bearing for cracked balls or race,<br />
burned or galled spots, or excessive play due to normal<br />
wear. Replace a damaged or worn bearing.<br />
d. Installation<br />
(1) Repack the bearing with approximately one<br />
ounce of grease, automotive and artillery, before installation.<br />
Pack the space to be covered by the cover<br />
plate.<br />
(2) Install bearing on the armature shaft.<br />
8-1
<strong>TM</strong> 9-<strong>4940</strong>-<strong>421</strong>-<strong>14</strong><br />
CHAPTER 9<br />
REPAIR OF PNEUMATIC EQUIPMENT<br />
Section I. INTRODUCTION<br />
9-1. GENERAL. This section covers repair instruc- phase alternating current. The air compressor is a two<br />
tions for the air compressor and drive motor. The motor cylinder, single stage and rated at 5 cfm.<br />
is rated at 1-1/2 horsepower, 115 volt, 60 hertz single<br />
Section Il. AIR COMPRESSOR AND RELATED PARTS<br />
9-2. AIR COMPRESSOR. (4) Inspect the crankcase for cracks, breaks,<br />
a. Removal Refer to paragraph 4-36 for removal of damaged threads, scoring, wearing, warpage and other<br />
the air compressor.<br />
defects.<br />
b. Disassembly. Disassemble air compressor as il- d. Reassembly.<br />
lustrated in figure 9-1.<br />
(1) Reassemble the air compressor in reverse order<br />
c. Cleaning Inspection and Repair. of removal.<br />
(1) Clean all parts with cleaning solvent and dry (2) Use the following torque values in reassemthoroughly<br />
(app D).<br />
bling the air compressor:<br />
(2) Inspect the cylinder head for cracks, breaks, End cover bolts 5 lbs. ft.<br />
warpage, and other damage.<br />
Pulley screw<br />
10 lbs. ft.<br />
(3) Inspect the baseplate<br />
other defects.<br />
for cracks, burrs and e. Installation. Install the air compressor in reverse<br />
order of removal,<br />
AR 701589<br />
Legend for fig 9-1:<br />
1. Air compressor<br />
2. End cover gasket<br />
3. End cover<br />
Figure 9-1. Air compressor, exploded view.<br />
4. Oil seal<br />
5. Pulley assembly<br />
6. Bolt<br />
9-1
<strong>TM</strong> 9-<strong>4940</strong>-<strong>421</strong>-<strong>14</strong><br />
9-3. AIR COMPRESSOR DRIVE MOTOR.<br />
a. Removal. Refer to paragraph 4-38 and remove<br />
drive motor.<br />
b. Disassembly. Refer to figure 9-2 and disassemble<br />
the drive motor.<br />
c. Cleaning and Inspection.<br />
(1) Clean parts in cleaning solvent and dry<br />
thoroughly (app D).<br />
(2) Inspect for cracks, pitting, burning, excessive<br />
wear and other damage.<br />
(3) Replace defective parts or a defective motor<br />
that is damaged beyond repair.<br />
d. Testing After Disassembly. Test the motor for<br />
open or shorted circuits and for insulation resistance<br />
(<strong>TM</strong> 5-764).<br />
e. Reassembly. Refer to figure 9-2 and reassemble<br />
the drive motor in reverse order of disassembly.<br />
f. installation, Refer to paragraph 4-38 and install<br />
the drive motor in reverse order of removal.<br />
AR 701590<br />
Figure 9-2. Air compressor drive motor, exploded view.<br />
9-2
<strong>TM</strong> 9-<strong>4940</strong>-<strong>421</strong>-<strong>14</strong><br />
A-1 Maintenance<br />
<strong>TM</strong> 38-750<br />
<strong>TM</strong> 5-764<br />
<strong>TM</strong> 9-<strong>4940</strong>-<strong>421</strong>-24P<br />
APPENDIX A<br />
REFERENCES<br />
The Army Maintenance Management System<br />
Electrical Motor and Generator Repair<br />
organizational, Direct Support And General Support Maintenance Repair Parts And<br />
Special Tools List (Including Depot Maintenance Repair Parts And Special Tools) For<br />
Shop Equipment Contact Maintenance Truck Mounted.<br />
A-2. Shipment and Storage<br />
<strong>TM</strong> 740-90-1 Administrative Storage of Equipment<br />
A-3. Destruction<br />
<strong>TM</strong> 750-244-3<br />
of Equipment<br />
Procedures For Destruction of Equipment To Prevent Enemy Use,<br />
A-1
<strong>TM</strong> 9-<strong>4940</strong>-<strong>421</strong>-<strong>14</strong><br />
APPENDIX B<br />
BASIC ISSUE ITEMS<br />
B-1. SCOPE. This appendix lists basic issue items;<br />
items troop installed or authorized for operation or operator’s<br />
maintenance of the shop set.<br />
B-2. GENERAL. This basic issue items; items troop<br />
installed or authorized is divided into the following sections:<br />
a. Section II. Basic Issue Items List. A list of items<br />
which are furnished with and which must be turned in<br />
with the end item.<br />
b. Section III. Items Troop Installed or Authorized<br />
List. A list of items which at the discretion of the unit<br />
commander, may accompany the end item, but should<br />
not be turned in with the end item.<br />
b-3. EXPLANATION OF COLUMNS.<br />
a. Illustraion. This column is divided as follows:<br />
(1) Figure Number. Indicates the figure number<br />
of the illustration in which the item is shown.<br />
(2) Item Number. The number used to identify<br />
each item called out in the illustration.<br />
b. National Stock Number Indicates the National<br />
Stock Number assigned to the item and will be used for<br />
requisitioning purposes.<br />
c. Part Number Indicates the primary number used<br />
by the manufacturer (individual, company, firm, corporation<br />
or government activity), which controls the design<br />
and characteristics of the item by means of its engineering<br />
drawings, specification standards, and<br />
inspection requimments, to identify end item or range of<br />
items.<br />
Section I. INTRODUCTION<br />
Section II. BASIC ISSUE ITEMS LIST<br />
NOTE<br />
When a stock numbered item is requisitioned,<br />
the repair part received may<br />
have a different part number than the<br />
part being replaced.<br />
d. Federal Supply Code for Manufacturer<br />
(FSCM). The FSCM is a 5-digit numeric code listed in<br />
SB 708-42 which is used to identify the manufacturer,<br />
distributor, or government agency, etc.<br />
e. Description. Indicates the federal item name and,<br />
if required, a minimum description to identify the item.<br />
The last line for each item in the BIIL and ITIAL indicates<br />
the part number with the FSCM in parentheses.<br />
f. Unit of Measure (U/M). Indicates the standard of<br />
the basic quantity of the listed item as used in performing<br />
the actual maintenance function. This measure is expressed<br />
by a two-character alphabetical abbreviation<br />
(eg., ea, in., pr, etc). When the unit of measure differs<br />
from the unit of issue, the lowest unit of issue that will<br />
satisfy the required units of measure will be requisitioned.<br />
g. Quantiy Furnished with Equipment (Basic Issue<br />
Items Only). Indicates the quantity of the item authorized<br />
to be used with the equipment.<br />
h. Quantity Authorized (Items Troop Installed or Authorized<br />
Only). Indicates the quantity of the item authorized<br />
to be used with the equipment.<br />
I<br />
Change 1<br />
B-1/( B-2 blank)
<strong>TM</strong> 9-<strong>4940</strong>-<strong>421</strong>-<strong>14</strong><br />
APPENDIX C<br />
MAINTENANCE ALLOCATION CHART<br />
Section I. INTRODUCTION<br />
C-1 GENERAL.<br />
a. This section provides a general explanation of all<br />
maintenance and repair functions authorized at<br />
various maintenance levels.<br />
b. The Maintenance Allocation Chart (MAC) in Section<br />
II, designates overall responsibility for the performance<br />
of maintenance functions on the identified<br />
end item or component. The implementation of the<br />
maintenance functions upon the end item or component,<br />
will be consistent with the assigned maintenance<br />
functions.<br />
c. Section HI lists the special tools and test equipment<br />
required for each maintenance function as referenced<br />
from Section II.<br />
d. Section IV contains supplemental instructions on<br />
explanatory notes for a particular maintenance function.<br />
C-2. MAINTENANCE FUNCTIONS.<br />
a. Inspect. To determine the serviceability of an<br />
item by comparing its physical, mechanical and/or<br />
electrical characteristics with established standards<br />
through examination.<br />
b. Test. To verify serviceability and detect incipient<br />
failure by measuring the mechanical or electrical<br />
characteristics of an item and comparing those characteristics<br />
with prescribed standards.<br />
c. Service. Operations required periodically to keep<br />
an item in proper operating condition, i.e., to clean (decontaminate),<br />
to preserve, to drain, to paint, or to<br />
replenish fuel, lubricants, hydraulic fluids, or compressed<br />
air supplies.<br />
d. Adjust To maintain, within prescribed limits, by<br />
bringing into proper or exact position, or by setting the<br />
operating characteristics to specified parameters.<br />
e. Align. Adjust specified variable elements of an<br />
item to bring about optimum or desired performance.<br />
f. Calibrate. To determine and cause corrections to<br />
. be made or to be adjusted on instruments or test<br />
measuring and diagnostic equipments used in precision<br />
measurements. Consists of comparisons of two instru-<br />
. ments, one of which is a certified standard of known<br />
accuracy, to detect and adjust any discrepancy in the<br />
accuracy of the instrument being compared.<br />
g. Install The act of emplacing, seating or fixing<br />
into position an item, part, or module (component or assembly)<br />
in a manner to allow the proper functioning of<br />
an equipment or system.<br />
h Replace. The-act of substituting a serviceable like<br />
type part, subassembly, or module (component or assembly)<br />
for an unserviceable counterpart.<br />
i. Repair. The application of maintenance services<br />
or other maintenance actions to restore serviceability<br />
to an item by correcting specific damage, fault, malfunction,<br />
or failure in a part, subassembly, module<br />
(component or assembly), end item, or system.<br />
i. Overhaul. That maintenance effort (services/actions)<br />
necessary to restore an item to a completely<br />
serviceable/operational condition as prescribed<br />
by maintenance standards (i.e., DMWR) in appropriate<br />
technical publications. Overhaul is normally the highest<br />
degree of maintenance performed by the Army.<br />
Overhaul does not normally return an item to like new<br />
condition.<br />
k. Rebuild. Consists of those services/actions necessary<br />
for the restoration of unserviceable equipment to<br />
a like new condition in accordance with original<br />
manufacturing standards. Rebuild is the highest<br />
degree of materiel maintenance applied to Army<br />
equipment. The rebuild operation includes the act of<br />
returning to zero those age measurements (hours/miles,<br />
etc. ) considered in classifying Army equipment/components.<br />
C-3. COLUMN ENTRIES USED IN THE MAC.<br />
a. Column 1, Group Number. Column 1 lists group<br />
numbers, the purpose of which is to identify components,<br />
assemblies, subassemblies and modules with the<br />
next higher assembly.<br />
b. Column 2, Component/Assembly. Column 2 contains<br />
the names of components, assemblies, subassemblies,<br />
and modules for which maintenance is<br />
authorized.<br />
c. Column 3, Maintenance Functions. Column 3 lists<br />
the functions to be performed on the item listed in column<br />
2. (For detailed explanation of these functions, see<br />
para C-2).<br />
d. Column 4, Maintenance Level. Column 4<br />
specifies by listing of a "work time" figure in the appropriate<br />
subcolumn(s) the lowest level of maintenance<br />
authorized to perform the function listed in Column 3.<br />
This figure represents the active time required to perform<br />
the maintenance function at the indicated level of<br />
maintenance. If the number or complexity of the tasks<br />
within the listed maintenance function vary at<br />
different maintenance levels, appropriate "work time"<br />
figures will be shown for each level. The number of<br />
manhours specified by the "work time" figure represents<br />
the average time required to restore an item (assembly,<br />
subassembly, component, module, end item, or<br />
system) to a serviceable condition under typical field<br />
operating conditions. This time includes preparation<br />
C-1
<strong>TM</strong> 9-<strong>4940</strong>-<strong>421</strong>-<strong>14</strong><br />
time, troubleshooting time, and quality<br />
assurance/quality control time in addition to the time<br />
required to perform the specific tasks identified for the<br />
maintenance functions authorized in the maintenance<br />
allocation chart. The symbol designations for the<br />
various maintenance levels are as follows:<br />
C operator or crew<br />
O Organization maintenance<br />
F Direct support maintenance<br />
H General support maintenance<br />
D Depot maintenance<br />
e. Column 5, Tools and Equipment. Column 5<br />
specifies, by code, those common tool sets (not individual<br />
tools) and special tools, test, and support<br />
equipment required to perform the designated function.<br />
f. Column 6, Remarks. This column shall contain a<br />
letter code in alphabetic order which shall be keyed to<br />
the remarks contained in Section IV.<br />
C-4. COLUMN ENTRIES USED IN TOOLS AND<br />
TEST EQUIPMENT REQUIREMENTS.<br />
a. Column 1, Tool or Test Equipment Reference<br />
Cose. The tool and test equipment reference code correlates<br />
with a maintenance function on the identified<br />
end item or component.<br />
b. Column 2, Maintenance Level. The lowest level of<br />
maintenance authorized to use the tool or test equipment.<br />
c. Column 3, Nomenclature. Name or identification<br />
of the tool or test equipment.<br />
d. Column 4, National/NATO Stock Number. The<br />
National or NATO stock number of the tool or test<br />
equipment.<br />
e. Column 5, Tool Number. The manufacturer’s<br />
part number.<br />
C-5. EXPLANATION OF COLUMNS IN SEC-<br />
TION IV.<br />
a. Reference Code. The code scheme recorded in Column<br />
1, Section III.<br />
b. Remarks. This column lists information pertinent<br />
to the maintenance function being performed as indicated<br />
on the MAC Section II.<br />
Section II. MAINTENANCE ALLOCATION CHART<br />
(1)<br />
Group<br />
Number<br />
01<br />
0100<br />
0101<br />
0102<br />
0103<br />
ENGINE<br />
ENGINE ASSEMBLY<br />
(2)<br />
Component/Assembly<br />
CRANKCASE, CYLINDER BLOCK<br />
Cylinder Head<br />
Cylinder Block<br />
Manifold<br />
CRANKSHAFT<br />
CRANKSHAFT ASSEMBLY<br />
Pistons and Rods<br />
Flywheel Assembly<br />
Camshaft<br />
Valves and<br />
Timing Gear<br />
Train<br />
ENGINE LUBRICATION SYSTEM<br />
Filter, Oil<br />
Pan, Oil<br />
Pump, Oil<br />
(3)<br />
Maintenance<br />
function<br />
Inspect<br />
Test<br />
Service<br />
Replace<br />
Repair<br />
Overhaul<br />
Inspect<br />
Replace<br />
Inspect<br />
Replace<br />
Inspect<br />
Replace<br />
Replace<br />
Repair<br />
Inspect<br />
Replace<br />
Inspect<br />
Replace<br />
Repair<br />
Inspect<br />
Replace<br />
Repair<br />
Inspect<br />
Adjust<br />
Replace<br />
Service<br />
Replace<br />
Inspect<br />
Replace<br />
Inspect<br />
Replace<br />
C<br />
0.1<br />
0.3<br />
0.1<br />
(4)<br />
Maintenance level<br />
O<br />
0.1<br />
0.2<br />
F<br />
2.2<br />
0.2<br />
0.5<br />
0.2<br />
0.5<br />
0.2<br />
1.0<br />
0.6<br />
1.2<br />
0.8<br />
0.1<br />
1.5<br />
0.2<br />
1.0<br />
H<br />
1.3<br />
0.2<br />
0.7<br />
1.9<br />
0.4<br />
0.8<br />
0.9<br />
0.6<br />
1.2<br />
0.8<br />
D<br />
12.0<br />
0.5<br />
(5)<br />
Tools and<br />
equipment<br />
(6)<br />
Remarks<br />
C-2
<strong>TM</strong> 9-<strong>4940</strong>-<strong>421</strong>-<strong>14</strong><br />
(1)<br />
Group<br />
Number<br />
0104<br />
0105<br />
0106<br />
0107<br />
0108<br />
0109<br />
0110<br />
0111<br />
0112<br />
02<br />
0201<br />
03<br />
0301<br />
0302<br />
0303<br />
(2)<br />
Component/Assembly<br />
Valve, PCV and Crankcase Breather<br />
FUEL SYSTEM<br />
Carburetor<br />
Pump, Fuel<br />
AIR CLEANER<br />
Air Cleaner<br />
Assembly<br />
ENGINE SPEED GOVERNOR AND CONTROLS<br />
Governor Assembly<br />
FUEL FILTER<br />
Strainer Assembly<br />
COOLING SYSTEM<br />
Cowling, Air Ducts<br />
Shrouds, Air Baffle<br />
ELECTRICAL SYSTEM<br />
Stator Assy, Alternator<br />
Battery<br />
STARTING MOTOR<br />
Starter, Engine<br />
Brushes<br />
IGNITION COMPONENTS<br />
Distributor Assembly<br />
Spark Plugs<br />
Ignition Coil<br />
EXHAUST SYSTEM<br />
Muffler<br />
Exhaust Pipe<br />
FUEL SYSTEM<br />
LINES AND FITTINGS<br />
Filler Tube<br />
ELECTRICAL SYSTEM<br />
LIGHTS<br />
Taillight<br />
Clearance<br />
POWER RECEPTACLE<br />
WIRING HARNESS<br />
(3)<br />
Maintenance<br />
function<br />
Inspect<br />
Service<br />
Replace<br />
Inspect<br />
Adjust<br />
Replace<br />
Inspect<br />
Inspect<br />
Service<br />
Replace<br />
Inspect<br />
Replace<br />
Adjust<br />
Inspect<br />
Service<br />
Replace<br />
Inspect<br />
Replace<br />
Inspect<br />
Test<br />
Replace<br />
Inspect<br />
Replace<br />
Inspect<br />
Replace<br />
Inspect<br />
Inspect<br />
Adjust<br />
Replace<br />
Repair<br />
Inspect<br />
Adjust<br />
Replace<br />
Inspect<br />
Replace<br />
Inspect<br />
Replace<br />
Inspect<br />
Replace<br />
Inspect<br />
Replace<br />
Inspect<br />
Replace<br />
Inspect<br />
Replace<br />
Inspect<br />
Replace<br />
Inspect<br />
Replace<br />
C<br />
0.1<br />
0.2<br />
0.3<br />
0.2<br />
0.1<br />
0.4<br />
0.1<br />
0.3<br />
0.4<br />
0.1<br />
0.1<br />
0.1<br />
0.1<br />
0.1<br />
0.1<br />
(4)<br />
Maintenance<br />
O<br />
0.7<br />
0.4<br />
0.5<br />
0.1<br />
0.5<br />
0.1<br />
0.9<br />
0.1<br />
0.6<br />
0.2<br />
0.1<br />
0.5<br />
0.2<br />
0.3<br />
0.1<br />
0.3<br />
0.5<br />
0.1<br />
0.1<br />
0.2<br />
0.1<br />
0.2<br />
0.1<br />
0.5<br />
0.1<br />
0.4<br />
0.6<br />
0.2<br />
0.2<br />
0.3<br />
0.1<br />
F<br />
0.2<br />
0.4<br />
0.3<br />
0.5<br />
0.4<br />
level<br />
H<br />
D<br />
(5)<br />
Tools and<br />
equipment<br />
(6)<br />
Remarks<br />
C-3
<strong>TM</strong> 9-<strong>4940</strong>-<strong>421</strong>-<strong>14</strong><br />
(1)<br />
Group<br />
Number<br />
04<br />
0401<br />
05<br />
0501<br />
0502<br />
06<br />
0601<br />
0602<br />
07<br />
0701<br />
0702<br />
0703<br />
0704<br />
0705<br />
0706<br />
0707<br />
0708<br />
(2)<br />
Component/Assembly<br />
FRAME<br />
BASE, GENERATOR-WELDER AND ENGINE MOUNTING<br />
BODY<br />
STOWAGE STRAPS<br />
SPECIAL PURPOSE BODIES<br />
Body Assy.<br />
Compartment<br />
Doors and Roof<br />
Vent Door<br />
Rear Door Assy.<br />
and Tailgate<br />
BODY CHASSIS ACCESSORY ITEMS<br />
ACCESSORY ITEMS<br />
Reflectors<br />
Bumper<br />
DATA PLATES<br />
Plate, Instruction<br />
WELDING EQUIPMENT<br />
ARC WELDER<br />
Generator Assembly<br />
ROTOR ASSEMBLY<br />
Armature Assy.<br />
STATOR ASSEMBLY<br />
BRUSH HOLDER ASSEMBLY.<br />
Brushes<br />
GENERATOR HOUSING COVER<br />
FRAME SUPPORT<br />
HOUSING CARRIER<br />
VENTILATING SYSTEM<br />
Fan Cover<br />
End Cover Housing<br />
CONTROL PANEL HOUSING CUBICLE<br />
Guard Assembly<br />
Panel Assembly<br />
Meters<br />
Frequency<br />
Running Time<br />
Ammeter<br />
Wiring Assy.<br />
(3)<br />
Maintenance<br />
function<br />
Inspect<br />
Replace<br />
Inspect<br />
Replace<br />
Inspect<br />
Replace<br />
Inspect<br />
Replace<br />
Inspect<br />
Replace<br />
Inspect<br />
Replace<br />
Inspect<br />
Replace<br />
Inspect<br />
Replace<br />
Inspect<br />
Test<br />
Service<br />
Replace<br />
Repair<br />
Overhaul<br />
Test<br />
Replace<br />
Repair<br />
Overhaul<br />
Test<br />
Replace<br />
Repair<br />
Overhaul<br />
Inspect<br />
Replace<br />
Inspect<br />
Replace<br />
Inspect<br />
Replace<br />
Inspect<br />
Replace<br />
Inspect<br />
Replace<br />
Inspect<br />
Replace<br />
Inspect<br />
Replace<br />
Inspect<br />
Replace<br />
Inspect<br />
Replace<br />
Inspect<br />
C O<br />
0.1<br />
0.2<br />
0.1<br />
0.1<br />
0.1<br />
0.1<br />
0.1<br />
0.1<br />
0.4<br />
0.5<br />
0.5<br />
0.3<br />
0.5<br />
0.2<br />
0.1<br />
0.2<br />
0.1<br />
0.1<br />
0.2<br />
0.1<br />
0.1<br />
0.1<br />
0.1<br />
0.2<br />
0.1<br />
0.2<br />
0.1<br />
0.2<br />
0.1<br />
0.1<br />
0.2<br />
0.3<br />
(4)<br />
Maintenance level<br />
F<br />
0.5<br />
2.0<br />
0.2<br />
0.5<br />
0.3<br />
0.3<br />
H<br />
0.7<br />
0.2<br />
0.3<br />
0.4<br />
0.2<br />
0.3<br />
0.4<br />
0.4<br />
D<br />
1.2<br />
0.5<br />
0.7<br />
(5)<br />
Tools and<br />
equipment<br />
(6)<br />
Remarks<br />
C-4
<strong>TM</strong> 9-<strong>4940</strong>-<strong>421</strong>-<strong>14</strong><br />
(1)<br />
Group<br />
Number<br />
0709<br />
0710<br />
0711<br />
08<br />
0801<br />
0802<br />
09<br />
0901<br />
0902<br />
0903<br />
0904<br />
0905<br />
0906<br />
10<br />
Circuit Breaker<br />
Receptacles<br />
Choke Assembly<br />
Throttle Assembly<br />
CONNECTING DEVICES<br />
Terminal Board<br />
SWITCHES AND CONTROLS<br />
D.C. Selector Switch<br />
Replay, Overspeed<br />
VOLTAGE REGULATOR<br />
Fuse<br />
GAGES (NONELECTRICAL)<br />
OIL PRESSURE<br />
LINES AND FITTINGS<br />
(2)<br />
Component/Assmbly<br />
PNEUMATIC EQUIPMENT<br />
AIR COMPRESSOR ASSEMBLY<br />
Head Cylinder<br />
Inlet Filter<br />
UNLOADER SYSTEM COMPONENTS<br />
Pressure Switch<br />
Pop-off Valve<br />
AIR RECEIVER<br />
Tank Assembly<br />
AIR DISCHARGE SYSTEM<br />
Lines<br />
V-BELT<br />
DRIVE MOTOR<br />
FIRE FIGHTING EQUIPMENT COMPONENTS<br />
FIRE EXTINGUISHER<br />
(3)<br />
Maintenance<br />
function<br />
Replace<br />
Inspect<br />
Replace<br />
Inspect<br />
Replace<br />
Adjust<br />
Replace<br />
Adjust<br />
Replace<br />
Inspect<br />
Replace<br />
Inspect<br />
Replace<br />
Inspect<br />
Replace<br />
Replace<br />
Replace<br />
Inspect<br />
Replace<br />
Inspect<br />
Replace<br />
Inspect<br />
Service<br />
Adjust<br />
Replace<br />
Inspect<br />
Service<br />
Replace<br />
Inspect<br />
Adjust<br />
Replace<br />
Inspect<br />
Adjust<br />
Replace<br />
Inspect<br />
Service<br />
Replace<br />
Inspect<br />
Replace<br />
Inspect<br />
Adjust<br />
Replace<br />
Inspect<br />
Service<br />
Replace<br />
Inspect<br />
Test<br />
Service<br />
Replace<br />
C<br />
0.2<br />
0.4<br />
0.1<br />
0.3<br />
0.1<br />
0.1<br />
0.1<br />
0.1<br />
0.1<br />
0.1<br />
0.1<br />
0.1<br />
0.1<br />
0.1<br />
0.2<br />
0.1<br />
(4)<br />
Maintenance<br />
O<br />
0.1<br />
0.2<br />
0.1<br />
0.2<br />
0.1<br />
0.5<br />
0.1<br />
0.5<br />
0.1<br />
0.5<br />
0.1<br />
0.3<br />
0.1<br />
0.2<br />
0.1<br />
0.1<br />
0.2<br />
0.1<br />
0.2<br />
0.3<br />
2.1<br />
0.2<br />
0.2<br />
0.3<br />
0.2<br />
0.3<br />
0.4<br />
0.3<br />
0.1<br />
0.2<br />
0.3<br />
F<br />
1.2<br />
0.1<br />
0.6<br />
level<br />
H<br />
D<br />
(5)<br />
Tools and<br />
equipment<br />
(6)<br />
Remarks<br />
C-5
<strong>TM</strong> 9-<strong>4940</strong>-<strong>421</strong>-<strong>14</strong><br />
Section Ill. TOOL AND TEST EQUIPMENT REQUIREMENTS<br />
Not applicable<br />
Section IV. REMARKS<br />
Not applicable<br />
C-6
<strong>TM</strong> 9-<strong>4940</strong>-<strong>421</strong>-<strong>14</strong><br />
APPENDIX D<br />
EXPENDABLE CONSUMABLE MAINTENANCE<br />
SUPPLIES AND MATERIALS<br />
Description<br />
Ref No.<br />
FSCM<br />
NSN<br />
LUBRICATING OIL<br />
OE/HDO 30<br />
OE/HDO 10<br />
OES<br />
GREASE AUTOMOTIVE:<br />
GAA<br />
CLEANING SOLVENT<br />
RAG, WIPING<br />
I<br />
I<br />
MIL-L-2104<br />
MIL-L-2104<br />
MIL-L-0295<br />
MIL-L-10924<br />
MIL-PD-680<br />
DDD-R-30<br />
9150-00-265-9435<br />
9150-00-269-9428<br />
9150-00-402-2372<br />
9150-00-190-0904<br />
6810-00-664-0387<br />
7920-00-205-1711<br />
* U.S. GOVERNMENT PRINTING OFFICE: 1992 643-046/70043<br />
Change 1<br />
D-1/(D-2 blank)
<strong>TM</strong> 9-<strong>4940</strong>-<strong>421</strong>-<strong>14</strong><br />
APPENDIX E<br />
CONTENTS OF SHOP SET<br />
Figure E-1. Shop set tool location.<br />
AR 701591<br />
E-1
<strong>TM</strong> 9-<strong>4940</strong>-<strong>421</strong>-<strong>14</strong><br />
This appendix contains a list of tools and equipment of<br />
the shop set. The first column lists the National Stock<br />
Number, the second column lists the description, the<br />
NSN<br />
8120-00-264-5531<br />
8120-00-264-5530<br />
8120.00-695-5867<br />
8120-00-695-6001<br />
8120-00-695-6044<br />
8120-00-695-5983<br />
5935-00-081-8025<br />
5130-00-293-2330<br />
4730-00-273-0905<br />
4730-00-273-0668<br />
4910-00-348-7600<br />
8415-00-250-2531<br />
5330-00-233-5840<br />
5330-00-641-1192”<br />
5110-00-24:3-0901<br />
6150-00-809-9029<br />
6150-00-866-2358<br />
51~@oo.1~().()9()9<br />
5120-00-222-1613<br />
5975-00-913-0883<br />
5940 -00-679 -9!547<br />
4730-00-116-5121<br />
4730-00-554-8698<br />
4730-00 -90s-3193”<br />
4730-00-927-3838<br />
4730-00-90%6292<br />
5120-00-494-1895<br />
3439-00-262-7556<br />
3439-00-383-3634<br />
5350-00-192-5047<br />
5350-00-192-5050<br />
5330-00-291-1685<br />
4730-00-595-1813<br />
4730-00-595-1813<br />
4730-00-<strong>14</strong>2-1958<br />
4730-00-176-4292<br />
7510-00-223-6708<br />
5120-00-240-6040<br />
5120-00-184-8400<br />
5110-00-224-7057<br />
5180-00-596-1038<br />
5130-00-203-6542<br />
5130-00-293-0955<br />
5133-00-189-9318<br />
5133-00-189-9326<br />
5133-00-228-1335<br />
5133-00-228-1331<br />
5133-00-293-0983<br />
4720-00-223-7381<br />
3439-00-262-2671<br />
<strong>421</strong>0-00-889-2221<br />
5120-00-595-8279<br />
5120-00-293-2997<br />
5110-00-373-1691<br />
6545 -00-922 -i200<br />
4730-00-470-6625<br />
5120-00-965-0603<br />
6230-00-815-5022<br />
3439-00-255-4566<br />
CONTENTS OF SHOP SET<br />
Ikcription<br />
ADAPTER, COMP GAS CYL<br />
ADAPTER, COMP GAS CYL<br />
ADAPTER, COMP GAS CYL<br />
ADAPTER, COMP GAS CYL<br />
ADAPTER, COMP GAS CYL<br />
ADAPTER, COMP GAS CYL<br />
ADAPTER, CONNECTOR<br />
ADAPTER,SPINDLE<br />
ADAPTER,TUBE TOHOSELH<br />
ADAPTER,TUBE TOHOSERH<br />
ADAPTER SET---ELECTRIC TEST<br />
APRON,WELDERS<br />
ASBESTOSSHT,COMP RUBBER<br />
ASBESTOSSHT, COMPGRAPHITE<br />
BLADE, HAND HACKSAW, 10PER BUNDLE<br />
CABLEASSY, POWER, ELEC<br />
CABLEASSY, POWER, ELEC<br />
CLAMP,CLIGHT<br />
CLAMP, CMEDIUM, CAST<br />
CLAMP,ELECTRICAL BRONZE<br />
CLAMP,GROUND<br />
CLAMP, HOSE<br />
CLAMP,HOSE<br />
CLAMP,HOSE<br />
CLAMP, HC)SE<br />
CLAMP,HOSE<br />
CLAMP, PLIER<br />
CLEANER SET,WELDING<br />
CLEANER SET,WELDING<br />
CLOTH,ABRASIVE GRADEl/050sheets<br />
CLOTH,ABRASIVE GRADE4/050sheets<br />
CORK SHEET<br />
COUPLE HALF<br />
COUPLE HALF<br />
COUPLE HALF<br />
COUPLE HALF<br />
COUPLE HALF<br />
CRAYON,MARKING<br />
CROWBAR<br />
CROWFOOTATTACH ,SOCKETWRENCH<br />
CUTTER, BOLT<br />
CUTTERANDFLARING TOOLKIT<br />
DRILL, ELECTRIC, PORTABLE,%in.<br />
DRILL, ELECTRIC, PORTABLE,%in,<br />
DRILL, TWIST 7/]6 in. dia.<br />
DRILL, TWIST ‘/16 in. dia.<br />
DRILL, TWIST 11/16 in. dia.<br />
DRILL, TWIST % in. dia.<br />
DRILL, SET, TWIST 1/16 thru 1/2 in.<br />
DUPLEX HOSE<br />
ELECTRODE, WELDING<br />
EXTINGUISHER, FIRE<br />
EXTRACTOR SET, SCREW<br />
FACE, HAMMER, INSERTED<br />
FILE, THREAD RESTORER<br />
FIRST AID KIT<br />
FITTING KIT, TUBE-PIPE 430<br />
FLINT TIP, IGNITER 6 to box<br />
FLOODLIGHT, ELECTRIC<br />
FLUX, SOLDERING % lb can<br />
third column lists the location reference, and the fourth<br />
column lists the quantity.<br />
Lwation<br />
9B<br />
9B<br />
9B<br />
9B<br />
9B<br />
9B<br />
9B<br />
3A<br />
9B<br />
9B<br />
6A<br />
5<br />
3A<br />
1<br />
9B<br />
2A<br />
2A<br />
3D<br />
3D<br />
9B<br />
5<br />
9B<br />
9B<br />
9B<br />
9B<br />
9B<br />
9B<br />
9B<br />
9B<br />
3C<br />
3C<br />
3A<br />
9C<br />
9B<br />
9B<br />
9B<br />
9B<br />
3D<br />
9B<br />
9B<br />
9A<br />
7B<br />
9C<br />
7A<br />
9B<br />
9B<br />
9B<br />
9B<br />
7D<br />
1<br />
5<br />
9C<br />
9B<br />
9B<br />
9B<br />
3B<br />
7C<br />
9B<br />
9C<br />
9B<br />
@Y<br />
1<br />
1<br />
1<br />
1<br />
1<br />
1<br />
2<br />
1<br />
2<br />
2<br />
1<br />
1<br />
1<br />
1<br />
2<br />
2<br />
2<br />
2<br />
2<br />
1<br />
1<br />
5<br />
5<br />
4<br />
3<br />
3<br />
2<br />
1<br />
1<br />
1<br />
1<br />
2<br />
1<br />
1<br />
2<br />
3<br />
3<br />
1<br />
1<br />
1<br />
1<br />
1<br />
1<br />
1<br />
1<br />
1<br />
1<br />
1<br />
1<br />
1<br />
20<br />
1<br />
1<br />
4<br />
1<br />
1<br />
1<br />
1<br />
2<br />
1<br />
E-2
<strong>TM</strong> 9-<strong>4940</strong>-<strong>421</strong>-<strong>14</strong><br />
NW<br />
3439-00-255-4577<br />
4910-00-204-3170<br />
4240-00-203-3810<br />
4240-00-203-3804<br />
<strong>4940</strong>-00-255-8677<br />
4930-00-265-7082<br />
5120-00-900-6098<br />
5120-00-900-6111<br />
5120-00-240-3096<br />
5110-00-228-3161<br />
4240-00-540-0623<br />
3950-W-292-9879<br />
3439-00-238-1638<br />
4720-00-278-4887<br />
5120-00-965-0326<br />
4910-00-204-2644<br />
5120-00-224-7330<br />
6240-00-155-8634<br />
6240-W-553-1881<br />
6150-00-665-9799<br />
4240-00-262-7092<br />
4240-00-262-7099<br />
4240-00-262-7106<br />
4240-00-203-7764<br />
4240-00-276-8940<br />
6230-00-240-3759<br />
4910-00-937-5724<br />
4930-00-253-2478<br />
6625-00-553-0<strong>14</strong>2<br />
<strong>TM</strong> 9-<strong>4940</strong>-<strong>421</strong>-<strong>14</strong><br />
NSN<br />
4910-00-250-2423<br />
4910-00-255-8673<br />
4910-00-092-9136<br />
5180-00-194-2600<br />
5180-00-448-2362<br />
5180-00-122-4975<br />
5180-00-699-5273<br />
3433-00-294-6743<br />
6685-00-281-8190<br />
6685-00-641-3519<br />
5120-00-223-1951<br />
4910-00-243-3130<br />
5130-00-049-7912<br />
6<strong>14</strong>5-00-643-0956<br />
5120-00-240-5328<br />
5120-00264-3796<br />
5120-00-277-<strong>14</strong>77<br />
5120-00-277-4479<br />
5120-00-277-text<br />
5120-00-277-text<br />
5120-00-611-text<br />
CONTENTS OF SHOP SET — Continued<br />
Description<br />
TESTER, CYLINDER, COMPRESSION<br />
TESTER, INTERNAL COMBUSTION ENGINE<br />
TEST SET, LOW VOLTAGE CIRCUIT<br />
THREAD REPAIR KIT<br />
THREADING SET, SCREW UNC<br />
THREADING SET, SCREW UNF<br />
TOOL KIT --- MASTER MECH<br />
TORCH SET, CUTTING AND WELDING<br />
VALVE, REG, FLUID PRES, ACETYLENE<br />
VALVE, REG, FLUID PRES, OXYGEN<br />
VISE, BENCH AND PIPE<br />
VULCANIZER, HOT PATCH<br />
WHEEL, ABRASIVE<br />
WIRE, ELECTRICAL<br />
WRENCH, OPEN END, adjust 8 in.<br />
WRENCH, OPEN END, adjust 12 in.<br />
WRENCH, PIPE ¼ to 1 in.<br />
WRENCH, PIPE 1 to 2 in.<br />
WRENCH, PIPE<br />
WRENCH, TORQUE<br />
WRENCH SET, SOCKET<br />
Location<br />
Qty<br />
6B 1<br />
7E 1<br />
6C<br />
1<br />
3E<br />
1<br />
9A<br />
1<br />
9A<br />
1<br />
2B<br />
1<br />
7A<br />
1<br />
1<br />
1<br />
1<br />
1<br />
9B<br />
1<br />
4B<br />
1<br />
3G 6<br />
8B 2<br />
9B 2<br />
9B<br />
1<br />
9B<br />
1<br />
9B<br />
1<br />
9A<br />
1<br />
2B<br />
1<br />
3F<br />
1<br />
E-4
<strong>TM</strong> 9-<strong>4940</strong>-<strong>421</strong>-<strong>14</strong><br />
INDEX<br />
A<br />
Administrative storage<br />
Air cleaner, engine<br />
Air compressor<br />
Drive motor<br />
Pressure switch<br />
Receiver tank<br />
Repair<br />
V-belt adjustment<br />
Air compressor inlet filter<br />
Air pressure gage<br />
Air shrouds, engine<br />
Alternator flywheel stator<br />
Auxiliary generator brushes<br />
Battery ammeter<br />
Battery<br />
Battery servicing<br />
Belt adjustment, air compressor<br />
Brushes<br />
Generator-welder<br />
Auxiliary generator<br />
Bumper, rear<br />
C<br />
Camshaft<br />
Carburetor<br />
Adjustment<br />
Removal<br />
Circuit breakers<br />
Clearance lights<br />
Coil, ignition<br />
Compartment doors<br />
Compressor, air<br />
Connecting rods and pistons<br />
Controls and instruments<br />
Control panel guard<br />
Crankcase<br />
Crankshaft<br />
Crankcase breather filter<br />
Cylinder block<br />
Cylinder head<br />
D.C. ampere adjusting rheostat<br />
D.C. ampere selector switch<br />
Description<br />
Destruction of Army Material to prevent enemy<br />
use<br />
Dismantling for movement<br />
Distributor<br />
Adjustment<br />
Timing<br />
Doors, compartment<br />
E<br />
End cover housing<br />
Engine air shroud<br />
Engine, generator-welder control cubicle<br />
Engine, generator-welder disassembly<br />
Engine starter<br />
Equipment serviceability criteria<br />
External power receptacle<br />
Exhaust pipe<br />
B<br />
D<br />
paragraph<br />
1-3<br />
3-8<br />
4-36<br />
4-38<br />
4-39<br />
4-40<br />
9-2<br />
4-37<br />
3-7<br />
2-2m<br />
4-25<br />
6-9<br />
4-47<br />
4-30<br />
4-19<br />
3-11<br />
4-37<br />
4-45<br />
4-47<br />
4-56<br />
6-18<br />
6-5<br />
4-15e<br />
4-15b<br />
4-32<br />
4-53<br />
4-18<br />
4-49<br />
9-2<br />
6-17<br />
2-2<br />
4-26<br />
6-19<br />
6-18<br />
3-10<br />
6-19<br />
6-11<br />
2-2k<br />
4-33<br />
1-’7<br />
1-5<br />
4-3<br />
4-17<br />
4-17f<br />
4-17d<br />
4-49<br />
4-46<br />
4-25<br />
5-5<br />
6-3<br />
7-2<br />
1-4<br />
4-54<br />
4-41<br />
page<br />
1-1<br />
3-3<br />
4-15<br />
4-16<br />
4-16<br />
4-17<br />
9-1<br />
4-16<br />
3-2<br />
2-3<br />
4-12<br />
6-4<br />
4-22<br />
4-13<br />
4-7<br />
3-6<br />
4-16<br />
4-20<br />
4-22<br />
4-28<br />
6-15<br />
6-2<br />
4-4<br />
4-4<br />
4-13<br />
4-26<br />
4-6<br />
4-23<br />
9-1<br />
6-13<br />
2-1<br />
4-12<br />
6-18<br />
6-15<br />
3-6<br />
6-18<br />
6-6<br />
2-1<br />
4-13<br />
1-1<br />
1-1<br />
4-1<br />
4-5<br />
4-5<br />
4-5<br />
4-23<br />
4-21<br />
4-12<br />
5-2<br />
6-1<br />
7-1<br />
1-1<br />
4-26<br />
4-18<br />
F<br />
Flywheel<br />
Flywheel alternator stator<br />
Frequency metcr<br />
Fuel pump<br />
Fuel strainer<br />
Fuel tank filler tube<br />
G<br />
Generator bearing<br />
Generator housing cover<br />
Generator-wcldcv<br />
Generator-weldvr brushes<br />
Governor<br />
Guard, control panel<br />
H<br />
Head, cylinder<br />
High temperature safety switch<br />
Housing, end cover<br />
I<br />
Ignition coil<br />
Ignition switch<br />
Inspecting and servicing equipment<br />
Instruments, controls and<br />
Intervehicle receptacle<br />
L<br />
Latch, tailgate<br />
Lubrication information<br />
M<br />
Maintenance forms and records<br />
Manifold asscmbly<br />
Motor, compressor drive<br />
Muffler<br />
O<br />
Oil filter<br />
Oil pan<br />
Oil pressure gage<br />
Oil pump<br />
on-equipment testing, welder<br />
Operation of the air compressor<br />
Operation in dusty or sandy areas<br />
Operation in extreme cold<br />
Operation in extreme heat<br />
operation of the generator-wc!der<br />
Operation in rain or humid conditions<br />
Overspeed safety switch<br />
P<br />
Pan, oil<br />
PCV system<br />
Pistons, connecting rods and<br />
Pop-off valve<br />
Pressure switch<br />
Preventive maintenance checks and services<br />
Operator/crew<br />
Organizational<br />
Pump, fuel<br />
Pump, oil<br />
R<br />
Receptacles<br />
Receptacle, external power<br />
Receptacle, intervehicle<br />
paragraph<br />
page<br />
6-8 6-3<br />
6-9 6-4<br />
4-27 4-13<br />
4-<strong>14</strong> 4-3<br />
4-13 4-3<br />
4-51 4-24<br />
8-4 8-1<br />
4-44 4-20<br />
8-3 8-1<br />
4-45 4-20<br />
4-23 4-11<br />
4-26 4-12<br />
6-11 6-6<br />
2-2s 2-3<br />
4-46 4-21<br />
4-18 4-6<br />
2-2g 2-1<br />
4-1 4-1<br />
2-2 2-1<br />
4-55 4-27<br />
4-50 4-24<br />
3-2 3-1<br />
1-2 1-1<br />
6-10 6-5<br />
9-3 9-2<br />
4-42 4-18<br />
4-21 4-9<br />
6-<strong>14</strong> 6-8<br />
4-29 4-13<br />
6-15 6-9<br />
8-2 8-1<br />
2-5 2-4<br />
2-9 2-5<br />
2-7 2-5<br />
2-8 2-5<br />
2-6 2-4<br />
2-10 2-5<br />
4-34 4-<strong>14</strong><br />
6-<strong>14</strong> 6-8<br />
4-22 4-10<br />
6-17 6-13<br />
2-20 2-3<br />
2-2n 2-3<br />
3-4 3-1<br />
4-9 4-1<br />
4-<strong>14</strong> 4-3<br />
6-15 6-9<br />
4-31 4-13<br />
4-54 4-26<br />
4-55 4-27<br />
Index 1
<strong>TM</strong> 9-<strong>4940</strong>-<strong>421</strong>-<strong>14</strong><br />
paragraph page<br />
paragraph page<br />
Reinstallation after movement<br />
Repair parts<br />
Organizational<br />
Direct support and general support<br />
Reporting of Equipment Improvement<br />
Recommendations<br />
Rods, connecting<br />
Running time meter<br />
Scope<br />
Shop body<br />
Spark plugs<br />
Special tools and equipment<br />
Organizational<br />
Direct support and general support<br />
Starter<br />
Removal<br />
Repair<br />
Start stop and reset switch<br />
Starting the engine<br />
Stoplight, taillight and<br />
Stopping the engine<br />
S<br />
4-4 4-1<br />
4-6 4-1<br />
5-2 5-1<br />
1-6 1-1<br />
6-17 6-13<br />
4-28 4-13<br />
1-1 1-1<br />
5-6 5-3<br />
4-16 4-4<br />
4-5 4-1<br />
5-1 5-1<br />
4-20 4-8<br />
7-2 7-1<br />
2-2p 2-3<br />
2-3 2-4<br />
4-52 4-25<br />
2-4 2-4<br />
Strainer, fuel<br />
Tabulated data<br />
Taillight and stoplight<br />
Tailgate and tailgate latch<br />
Tank, air receiver<br />
Throttle control<br />
Timing gear train<br />
Troubleshooting<br />
Operator/crew<br />
Organizational<br />
Direct support and general support<br />
Valves<br />
Valve seat insert<br />
V-belt adjustment, air compressor<br />
Ventilating fan cover<br />
Welder, generator<br />
Welder, operation of the<br />
T<br />
V<br />
W<br />
3-9 3-5<br />
1-8 1-2<br />
4-52 4-25<br />
4-50 4-24<br />
4-40 4-17<br />
2-2f 2-1<br />
6-16 6-11<br />
3-6 3-2<br />
4-11 4-2<br />
5-4 5-1<br />
6-12 6-7<br />
6-13 6-8<br />
4-37 4-16<br />
4-43 4-19<br />
8-3 8-1<br />
2-6 2-4<br />
Index 2
<strong>TM</strong> 9-<strong>4940</strong>-<strong>421</strong>-<strong>14</strong><br />
F0-1<br />
AR 701534
By Order of the Secretary of the Army:<br />
Official:<br />
J. C. PENNINGTON<br />
Brigadier General United States Army<br />
The Adjutant General<br />
BERNARD W. ROGERS<br />
General, United States Army<br />
Chief of Staff<br />
DISTRIBUTION<br />
To be distributed in accordance with DA Form 12-25A, Operator maintenance requirements for Set No. 3, Contact<br />
Maintenance.
PIN: 033388-001


