SV5000C Manual 2012 (111 pages 5mb) (PDF) - Polychem
SV5000C Manual 2012 (111 pages 5mb) (PDF) - Polychem
SV5000C Manual 2012 (111 pages 5mb) (PDF) - Polychem

You also want an ePaper? Increase the reach of your titles
YUMPU automatically turns print PDFs into web optimized ePapers that Google loves.
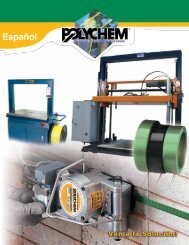
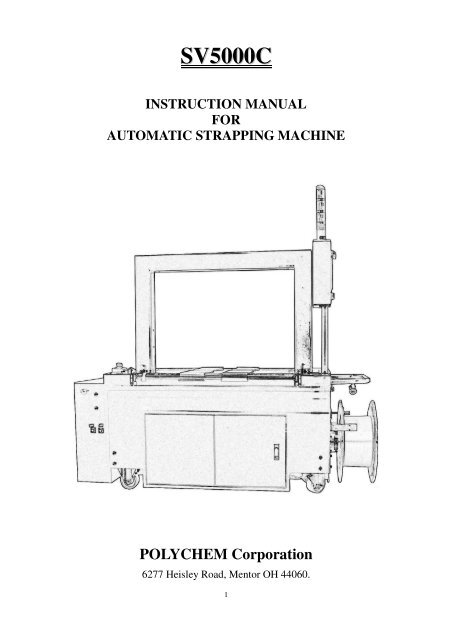
<strong>SV5000C</strong><br />
INSTRUCTION MANUAL<br />
FOR<br />
AUTOMATIC STRAPPING MACHINE<br />
POLYCHEM Corporation<br />
6277 Heisley Road, Mentor OH 44060.<br />
1
Model: <strong>SV5000C</strong><br />
TEL : 440-358-7060 FAX : 440-358-7061<br />
<strong>2012</strong>.03 2
Model: <strong>SV5000C</strong><br />
Table Of Contents<br />
<strong>SV5000C</strong><br />
Operation <strong>Manual</strong><br />
Chapter 1:Safety Precautions<br />
1.1 Safety Warnings 4<br />
1.2 Personal Safety Provisions 4<br />
1.3 Mechanical Safety 5<br />
1.4 Electrical Safety 6<br />
1.5 Pneumatic Safety 6<br />
1.6 Environment Safety 6<br />
Chapter 2:Introduction<br />
2.1 Purpose Of The Strapping Machine 7<br />
2.2 Purpose of This <strong>Manual</strong> 7<br />
2.3 Technical Specifications 7<br />
Chapter 3:Operating Instructions<br />
3.1 Introduction 9<br />
3.2 Operator Controls And Indicators 10<br />
3.3 HMI system 13<br />
3.4 Starting The Strapping Machine 17<br />
3.5 Loading The Strap 17<br />
3.6 <strong>Manual</strong> Operation 18<br />
3.7 Automatic Operation 18<br />
3.8 Unloading The Strap 18<br />
3.9 Shutdown 18<br />
Maintenance <strong>Manual</strong><br />
Chapter 4:Adjustments<br />
4.1 General Safety Precautions 19<br />
4.1.1 Safety Warnings 19<br />
4.1.2 Personal Safety Provisions 19<br />
4.2 Home Position Switch Adjustment 20<br />
4.3 Feed Stop Switch Adjustment 20<br />
4.4 Feed Re-tracking Pinch Force Adjustment 20<br />
4.5 Second Tension Pinch Wheel Adjustment 21<br />
4.6 Accumulator Feeding Roller Proximity Switch 21<br />
4.7 Accumulator Fill Proximity Switch Adjustment 21<br />
4.8 Accumulator Fill Volume Adjustment 22<br />
4.9 Accumulator Fill Force Adjustment 22<br />
4.10 Strapping Height Adjustment 22<br />
4.11 Strap Width Adjustment 23<br />
4.12 Feed Roller Gap Adjustment 23<br />
4.13 Heater Temperature Adjustment 23<br />
4.14 Track Opener Wiring Adjustment 24<br />
4.15 Cutter Block Cleaning And Adjustment 24<br />
4.16 Strap Sealing Alignment Adjustment 24<br />
4.17 Table Belt Adjustment 25<br />
Chapter 5:Preventive Maintenance<br />
5.1 General Safety Instructions 26<br />
5.1.1 Safety Warnings 26<br />
5.2 Lockout Tag out Procedure 26<br />
5.3 Pneumatic Safety (if equipped) 27<br />
5.4 Maintenance Required After Each 15,000 cycles 27<br />
5.5 Maintenance Required After Each 150,000 28<br />
5.6 Maintenance Required After Each 300,000 28<br />
5.7 Maintenance Required After Each 500,000 29<br />
5.8 Maintenance for Applying Bearing Grease 29<br />
Chapter 6:Trouble Shooting<br />
6 Trouble Shooting 30<br />
Chapter 7:Safety During Installation<br />
7.1 Introduction 34<br />
7.2 Safety Warning 34<br />
7.3 Personal Safety Provision 35<br />
7.4 Mechanical Safety 35<br />
7.5 Electrical Safety 35<br />
7.6 Pneumatic Safety (If So Equipped) 36<br />
7.7 General Product Information 36<br />
7.8 Installing The Strapping Machine 36<br />
Chapter 8:Safety During De-Installation<br />
8.1 Introduction 37<br />
8.2 General Product Information 37<br />
8.3 Cleaning The Strapping Machine 37<br />
8.4 Electrical shutdown of the strapping machine 37<br />
<strong>2012</strong>.03 3
Model: <strong>SV5000C</strong><br />
Table Of Contents<br />
<strong>SV5000C</strong><br />
Chapter 9:Part List And Drawings<br />
9.1 Control Unit 38<br />
Fig-1A: Cam Unit 38<br />
Fig-1B-AB: Slide Table Unit 41<br />
Fig-2B-AB: Slide Table Unit 44<br />
Fig-3B: Slide Table Unit 47<br />
Fig-4B: Slide Table Unit 49<br />
9.2 Cam Unit 52<br />
Fig-1C: Roller Block Unit 52<br />
Fig-3C-AB: Roller Block Unit 54<br />
Fig-4C-AB: Roller Block Unit 57<br />
Fig-1D-AB: Roller Block Unit 59<br />
Fig-2D: Roller Block Unit 62<br />
9.7 Belt Driving Table Top Assembly 98<br />
Fig-1K-AB: Belt Driving Table Top 98<br />
Fig-2K-AB: Belt Driving Table Top 100<br />
9.8 Pneumatic Assembly 103<br />
Fig-1L-AB: Pneumatic Assembly 103<br />
9.9 Screw Specification List 106<br />
9.10 Appendix A: motor application phase 108<br />
Chapter 10:Electrical Schematics<br />
10.1 Wiring Schematic 110<br />
9.3 Accumulator Unit 64<br />
Fig-2E: Pool Unit 64<br />
Fig-3E: Accumulator 66<br />
Fig-4E: Accumulator Box 69<br />
Fig-5E-AB: Accumulator Box 71<br />
9.4 Arch Unit 74<br />
Fig-1F-AB: Arch Unit 74<br />
Fig-2F: Arch Unit 76<br />
Fig-1G: Arch Unit 79<br />
Fig-2G-AB: Arch Unit 82<br />
9.5 Body Unit 86<br />
Fig-6H-AB: Body Unit 86<br />
Fig-7H-AB: Body Unit 89<br />
Fig-8H-AB: Body Unit 91<br />
Fig-9H-AB: Body Unit 93<br />
9.6 Control Box Unit 95<br />
Fig-2J-AB: Control Box Unit 95<br />
<strong>2012</strong>.03 4
Model: <strong>SV5000C</strong><br />
1<br />
Safety Precautions<br />
1.1 Safety Warnings<br />
Warning labels can be found in this manual and <strong>SV5000C</strong> machine. Indicate situations that<br />
require extra attention during installation, operation and maintenance of <strong>SV5000C</strong>. Observe the<br />
associated precautions carefully of indicated potential hazard.<br />
CAUTION WARNING: DANGER<br />
1.2 Personal Safety Instructions<br />
The strapping machine has been designed to provide safe, efficient and trouble-free service for<br />
many years. However, as with any automatic machinery there is a risk of damage or injury if<br />
appropriate precautions are not taken.<br />
You must read and understand the safety section and safety precautions in other sections of this<br />
manual before installation, operation, maintenance, or de-installation of the strapping machine.<br />
Section 1 Safety precautions, details inherent risks and general safety consideration associated with<br />
the operation and maintenance of this machine.<br />
All operation and maintenance personnel must be trained by the manufacturer in the proper<br />
handling, operation, and maintenance of this machine. Failure to follow the precautions could result<br />
in equipment damage, personal injury, or loss of life.<br />
The following safety instruction must be observed when using or working on the <strong>SV5000C</strong>.<br />
Read this operation manual before using the strapping machine.<br />
The operation manual should be attached to the machine all the time.<br />
Only trained personnel should operate the machine.<br />
Use protective equipment when machine running.<br />
Always disconnect the power supply when moving machine.<br />
Do not put any part of your body in bundle operating when machine is running.<br />
Do not put any part and tool onto the machine.<br />
Machine is only to be operated when it is in good condition.<br />
All safety and productive devices must be in place and fully functional.<br />
Check machine is fully safe before operation.<br />
<strong>2012</strong>.03 5
Model: <strong>SV5000C</strong><br />
<br />
<br />
All maintenance work and repairs have to through trained technician or engineer.<br />
Keep machine in dry condition.<br />
1.3 Mechanical safety<br />
The following safety precautions must be observed when using or working on the machine.<br />
1. Keep working area safety and clean before operating.<br />
2. Work on or operate the machine only in good status and make sure that safety switch or<br />
emergency stop can be operated in normal.<br />
3. If machine malfunction, please had the machine repaired by the trained and experienced<br />
engineers.<br />
4. Before doing the maintenance or moving the machine, make sure to disconnect the power supply<br />
first.<br />
5. Make sure to tighten all contact or connection after performing the maintenance.<br />
6. Appropriate footwear is required when moving the strapping machine.<br />
When using a lift or forklift, make sure work with adequate capacity.<br />
7. The using of suitable eye and ear protection is required while operating the machine or performing<br />
the maintenance.<br />
8. Keep body and clothing out of the strapping position, arch and dispenser while running the<br />
machine.<br />
9. Don’t put unnecessary parts, tools, food or drinks on the table top.<br />
10. Don’t try to stand or sit on the table top.<br />
See Section 3, OPERATING INSTRUCTIONS, Section 4, ADJUSTMENTS, Section 5,<br />
PREVENTIVE MAINTENANCE, Section 7 SAFETY DURING INSTALLATION, and<br />
Section 8 SAFETY DURING DE-INSTALLATION for additional safety information..<br />
<strong>2012</strong>.03 6
Model: <strong>SV5000C</strong><br />
1.4 Electrical safety<br />
The following safety precautions must be observed when using or working on the machine.<br />
1. Strapping machine need to be grounded to avoid the risk of electric shock.<br />
Single phase machine is equipped with an electric plug including green earth (E).<br />
Three phase machine is equipped with a cord including green earth wire (with yellow wire<br />
for CE), make sure the electric plug or green earth wire all connect to the grounded socket or<br />
breaker to meet local electrical regulation<br />
2. Before turning on the power, make sure the machine configured for the right phase and<br />
voltage.<br />
3. If something wrong in the control system, please turn the power off first.<br />
4. Only experienced and qualified electricians can perform on the electric works.<br />
5. Regular inspect and make sure tighten all contacts and wires after doing the maintenance.<br />
6. DO NOT attempt to remove the safety switches.<br />
1.6 Pneumatic Safety<br />
The following safety precautions must be observed when using or working on the <strong>SV5000C</strong><br />
1. Do not exceed the maximum operating pressure of the <strong>SV5000C</strong><br />
2. Inspect all connections, horses, and fittings on a regular basis.<br />
3. Periodically check the <strong>SV5000C</strong> pneumatic component operation.<br />
4. Ensure all components are correctly assembled before applying air pressure.<br />
1.7 Environment Safety<br />
<br />
1. Environmental temperature 0~50℃.<br />
2. Environmental humidity 20%~85% RH.<br />
3. Operation under high pollution environment, such as flying dust, salt and caustic gas, should<br />
be avoided.<br />
4. Avoid working in a dim light. Providing sufficient light is necessary.<br />
5. Working place should equip with fire extinguisher.<br />
6. Don’t expose the machine in rain or damp environment.<br />
7. The exhaust system shall be installed in order to prevent possible harmful gases, fumes or dust<br />
generated during heating.<br />
<strong>2012</strong>.03 7
2<br />
Introduction<br />
Model: <strong>SV5000C</strong><br />
2.1 Purpose of the strapping machine<br />
The strapping machine has been designed to strap individual bundle with PP strapping. The strap<br />
is automatically applied around the bundle, securely heat sealed, and severed from the strap supply.<br />
See STRAPPING MACHINE TECHNICAL SPECIFICATIONS in section 2.3 for performance<br />
parameters and specifications for the strapping machine. Use of the strapping machine, for any<br />
purpose other than described in this publication or expressly approved by the manufacturer prior to<br />
implementation should be avoided. The strapping machine must be shut down for all maintenance<br />
procedures for which operation is not required.<br />
2.2 Purpose Of This <strong>Manual</strong><br />
The purpose of this manual is to:<br />
1. Explain the operating principles.<br />
2. Outline the maintenance and operating procedures.<br />
3. Detail recommended adjustments of the strapping machine.<br />
Figures are included in the text illustrating the general arrangement and identifying major<br />
components. A more breakdown of the strapping machine will be found in drawings of each<br />
major assembly as well as a complete parts list.<br />
2.3 Technical Specifications<br />
MACHINE WEIGHT: 440 lbs / 200 kg<br />
CURRENT: 220V~490V (210/220/230/240/440/460/480/490) 3<br />
STRAP WIDTH:<br />
STRAP THICKNESS:<br />
STRAP MATERIAL:<br />
CYCLE SPEED:<br />
Maximum bundle weight:<br />
5mm, 6mm, 9mm.<br />
0.40mm ~ 0.8mm<br />
Polypropylene.<br />
<strong>2012</strong>.03 8<br />
up to 52 straps per minutes<br />
(Depending on arch size and package size).<br />
110 lbs ( 50 kg)<br />
MINIMUM BUNDLE SIZE: Height: 4mm / 1/8 inch. ,<br />
LENGTH:<br />
POWER CONSUMPTION:<br />
Width:<br />
100mm / 4 inch.<br />
0.7 kw<br />
250mm / 10 inch.<br />
ATTN: 5,6,9mm strap width can be changed by optional accessory but 12mm should be<br />
specified from manufacturer due to different track system.
Model: <strong>SV5000C</strong><br />
The exhaust system shall be installed in order to prevent possible harmful gases, fumes or dust<br />
generated during heating. For the extraction of harmful substances, the exhaust system shall be<br />
positioned at the vent circulating location.<br />
<strong>2012</strong>.03 9
Model: <strong>SV5000C</strong><br />
3<br />
Operating Instructions<br />
3.1 Introduction<br />
The strapping machine is designed for manual or automatic<br />
strapping operation. All the operation, adjustment, maintenance of<br />
strapping machine must be carried out by trained and authorized<br />
personnel.<br />
Transportation<br />
The equipment is delivered in transport units. Each transport<br />
unit is loaded onto a wooden pallet, secured by<br />
Polypropylene strapping, covered with a carton box for<br />
protection. Lift the unit using forklift truck or other lifting<br />
device. The machine can be removed from the pallet by<br />
using forklift truck or other lifting device.<br />
CAUTION:<br />
Do not carry machine by having the forklift’s fork under the<br />
arch, but only under the machine frame. Inappropriate<br />
mounting the load can cause serious injuries or death.<br />
Installation<br />
Remove the packing material and check that the machine is complete and without any shipping<br />
damage. DO NOT move the machine unless it is necessary. Before the movement, be sure to turn off<br />
the power.<br />
<strong>2012</strong>.03 10
Model: <strong>SV5000C</strong><br />
3.2 Operator controls and indicators<br />
Auto Feed ON/OFF Switch:<br />
Turn the switch to “OFF”:<br />
The brake of the dispenser is released. The<br />
dispenser can be turned freely so that strap can be<br />
fed manually through the accumulator’s feeding<br />
rollers.<br />
Turn the switch to “ON”:<br />
Before switching to auto-feed mode, make sure<br />
that strap is properly inserted within the<br />
accumulator‘s feeding rollers.<br />
Select ‘Off mode to manually feed the strap into<br />
the accumulator’s feed rollers. Turn switch to<br />
“On” to perform auto loading, and the strap is fed<br />
into the accumulator and then filled through the<br />
arch.<br />
OFF<br />
ON<br />
POWER ON-OFF Switch:<br />
The main power ON-OFF switch, which<br />
controls the main electrical power to the<br />
strapping machine. The front door can only be<br />
opened when the switch is on OFF position.<br />
Emergency Stop Push Button:<br />
This push button is to stop the machine<br />
immediately but the power remains. It is a<br />
push-pull twist to release the button. To restart<br />
the machine, pull or twist clockwise to release the<br />
emergency stop push button and press the circuit<br />
power button to retrieve the power.<br />
<strong>2012</strong>.03 11
Model: <strong>SV5000C</strong><br />
1<br />
2<br />
7<br />
8<br />
3 4 5 6<br />
1. Circuit power: to start the machine when the main power is switched on and emergency stop is<br />
released. Push the circuit power switch to start the equipment. It will be illuminated after started. Then<br />
heater is on.<br />
2. Emergency stop (E-Stop): push the E-Stop button to stop the operation of this machine. Motors and<br />
heater would be off and then red alarm light is illuminated. To restart, release E-stop button by turning<br />
the E-stop clockwise then push the circuit power button.<br />
3. Open track / cut strap: in case of miss-feed, push the button to open the track. Push the button again<br />
to cut strap. Yellow light would be illuminated.<br />
4. Strap feed: if strap is not fed to sealing position, push the button to feed strap. Green light would be<br />
illuminated. If the strap is still no to sealing position, green light would flash.<br />
5. <strong>Manual</strong> strap: to operate under manual mode. Push “<strong>Manual</strong>” button on HMI. <strong>Manual</strong> mode –<br />
orange light flashing. Auto mode – orange light illuminates.<br />
6. Auto load On/Off: OFF - release dispenser brake. ON – starts to feed in the strap automatically<br />
7. F1 push button: to push the button back to welcome page.<br />
8. F2 push button: Press F2, enter into PLC INPUT/OUTPUT status display.<br />
<strong>2012</strong>.03 12
Model: <strong>SV5000C</strong><br />
Welcome page<br />
<strong>2012</strong>.03 13
Model: <strong>SV5000C</strong><br />
3.3 HMI system<br />
1.Welcome page:<br />
Welcome page show after power on, touch any place<br />
in the screen then enter to BASIC screen.<br />
2.BASIC page:<br />
F-1<br />
2.1 AUTO<br />
2.1 2.2<br />
2.7<br />
2.5<br />
2.2 MANUAL<br />
2.3 STRAP NUMBER<br />
Touch the buttun to select the number of strap<br />
1 STRAP – apply one strap in one bundle<br />
2 STRAP – apply two straps in one bundle<br />
3 STRAP – apply three straps in one bundle<br />
2.3 2.4<br />
F-2<br />
BY PASS –press this button then the conveyor table top is only driving without strapping.<br />
2.6<br />
2.4 COUNTER<br />
The button displays the number of straps that<br />
the strapping machine has applied.<br />
To reset counter, touch the Counter button (FIG-2)<br />
and the screen (FIG-3) appears. Select YES to reset<br />
the number of the counter.<br />
F-3<br />
2.5 AUX FUNCTION<br />
Press AUX FUNCTION button<br />
and enter the adjustment page<br />
(FIG-4).<br />
<strong>2012</strong>.03 14
Model: <strong>SV5000C</strong><br />
Tension:<br />
Touch<br />
Touch<br />
to incrase the strapping tension<br />
to reduce the strapping tension<br />
Temperature of heater:<br />
Touch to incrase the temperature of heater<br />
Touch to reduce the temperature of heater<br />
Press:<br />
Select ‘ON’ to activate the pneumatic unit<br />
Select ‘OFF to stop the pneumatic unit.<br />
2.5.1 2.5.2 2.5.3 2.5.4<br />
F-4<br />
2.5.1 BASIC<br />
Press this button to go back to Basic Page<br />
2.5.2 STRAP PLACEMENT (FIG-5)<br />
D30-1 st strap position<br />
D31-2 nd strap position<br />
D32-3 rd strap position<br />
D37-Cylinder OFF – delay time after cylinder hits<br />
the package<br />
D38-Auto Feeding Time –controls feed roller<br />
activation time. The larger value, the longer<br />
feeding time.<br />
F-5<br />
2.5.3 Error (FIG-6)<br />
This page displays the error logs of the strapping machine.<br />
F-6<br />
<strong>2012</strong>.03 15
Model: <strong>SV5000C</strong><br />
2.5.4 I/O Moniter (FIG-7)<br />
F-7<br />
2.6 RESTRICTED button (FIG-2):<br />
To adjust all parameter settings (FIG-8) from PLC<br />
2.1 2.2<br />
2.7<br />
2.5<br />
for engineer or maintenance such as Feeding,<br />
re-tracking. High tension time, Sleep mode delay time,<br />
buzzer time, conveyor speed,<br />
complusion heating time, Buzz on/off.<br />
2.3 2.4<br />
2.6<br />
F-2<br />
<strong>2012</strong>.03 16
Model: <strong>SV5000C</strong><br />
F-8<br />
T190-Sleep mode delay time: pre-set as 2 mins. After the certain amount of time without any new<br />
strapping signals (applying straps, reset…etc), the machine will stop its table belt transit and turn on sleep<br />
mode.<br />
C5-Compulsion heating time: after certain number of straps (set by this value), heater blade would be<br />
heated up again complusorily for maintaning the strapping performance.<br />
2.7 Strap Eject button (FIG-2):<br />
Press this button to remove all PP strap from accumulator and arch. The strap will be ejected from the<br />
strap inlet.<br />
<strong>2012</strong>.03 17
Model: <strong>SV5000C</strong><br />
3.4 Starting the strapping machine<br />
1. Ensure the electrical power supply and compressed air supply are properly connected to the<br />
strapping machine (see 2.3 Strapping Machine Technical Specifications)<br />
2. Ensure all doors and top plates are closed and latched.<br />
3. Ensure the Emergency Stop push button is pulled and released.<br />
4. Rotate the ON-OFF switch clockwise so it is in the ON position with a “1” visible in the<br />
switch position indicator slot.<br />
5. Press the Start/Strap push button once. It will illuminate to indicate the machine has been<br />
started.<br />
6. Approximate 1 minute for loading the program and rising the temperature of the heater blade.<br />
3.5 Loading the strap<br />
1. Turn on the strapping machine. Turn the<br />
select AUTO FEED switch to ”OFF”.<br />
1 5<br />
2. Release the reel nut handle and remove the<br />
outer flange plate. Place a strap coil on the<br />
reel drum according to the arrow direction<br />
indicated on the reel out circular. Put back<br />
the flange plate and re-tighten the reel nut<br />
handle<br />
2<br />
6<br />
3. Make sure the end of the strap is even.<br />
4. Thread the strap under the strap exhaust<br />
switch, and through the accumulator’s<br />
feeding roller.<br />
3<br />
7<br />
5. Turn AUTO FEED to “ON” to start<br />
loading. PP Strap will be filled through the<br />
accumulator and the arch automatically.<br />
The start button illuminates when the<br />
strapping machine is ready for strapping.<br />
4 8<br />
<strong>2012</strong>.03 18
Model: <strong>SV5000C</strong><br />
3.6 <strong>Manual</strong> operation<br />
1. Turn on the strapping machine and ensure the E-stop released, all door and safety interlock<br />
are ready for operation.<br />
2. Ensure the accumulator and track have been filled with strap.<br />
3. Set the <strong>Manual</strong>/Auto under <strong>Manual</strong> mode. And the light of manual strap is flashed<br />
4. Position a package under the arch, on the top plate. To strap the package, press the Start Strap<br />
push button. Once push the start button then it keep continuing strapping till released from the<br />
start button.<br />
3.7 Automatic operation<br />
1. Turn on the strapping machine and ensure door closed and table top latched.<br />
2. Ensure the accumulator and track have filled with strap.<br />
3. Set the <strong>Manual</strong>/Auto under Auto mode. Circuit power and strap feed illuminated.<br />
4. Select single or double strapping or pass.<br />
5. Conveyors starts then the equipment perform the automatic strapping.<br />
Attention! KEEPS HANDS AWAY FROM THE STRAPPING AREA. If hands are caught by<br />
PP strap accidentally or incident happens, push the E-stop button to stop all the operation, and<br />
then cut the strap.<br />
3.8 Unloading the strap<br />
1. Turn on the machine and ensure that strap is loaded in the machine. Press the ‘strap eject’<br />
button on HMI screen to eject all strap in the arch and accumulator.<br />
2. Take outer flange out of coil dispenser.<br />
3. Take strap coil from dispenser. Then put the flange back to the dispenser.<br />
3.9 Shutdown<br />
1. Eject the strap from machine.<br />
2. Turn the ON/OFF power switch to the OFF position. An “O” should be visible in the indicator<br />
of panel.<br />
<strong>2012</strong>.03 19
Model: <strong>SV5000C</strong><br />
4<br />
Adjustments<br />
4.1 General Safety Precautions<br />
Carefully read Section 1, Safety precautions, before making any adjustments to the strapping<br />
machine. The safety section details inherent risks and general safety considerations associated with<br />
the operation of the strapping machine. Failure to follow these instructions could result in equipment<br />
damage, personal injury and/or death.<br />
4.1.1 Safety Warnings<br />
Warning labels that correspond with warning labels on the strapping machine are used<br />
throughout this manual. The signal situations that are required extra attention during machine<br />
installation, operation, or maintenance. Observe the associate precautions carefully as they indicate a<br />
potentially hazardous situation.<br />
CAUTION WARNING: DANGER<br />
4.1.2 Personal Safety Provisions<br />
The operation of strapping machine is fully automatic. Any inattention while close to the<br />
strapping machine could result in personal injury or equipment damage. Precautions must be taken to<br />
avoid material being automatically conveyed to the strapping machine when it is out of service. Shut<br />
down the strapping machine does not necessary prevent other equipment in the line from operating.<br />
For all maintenance activities not requiring the strapping machine to be in operation, a lockout, tagout<br />
procedure applies, see Preventive maintenance. All personnel working on or around the strapping<br />
machine during installation must be qualified for their position.<br />
<strong>2012</strong>.03 20
4.2 Home Position Switch Adjustment<br />
Home position<br />
Measure the gap from the switch to the face<br />
earlier<br />
of cam. It should be 0.25mm. If the gap varies<br />
Later<br />
from this distance, adjust the switch by loosing<br />
the cross recessed screw, move the proximity<br />
switch upward or downward.<br />
4.3 Feed Stop Switch Adjustment<br />
4.3.1 Move the ‘feed stop switch lever’ to be close to the switch<br />
0.25mm<br />
4.3.2 The gap between switch and lever<br />
should be 0.25mm. (refer to the photo)<br />
4.3.3 If the lever and the switch do not line up,<br />
loosen switch locknut, move proximity switch,<br />
and re-tighten.<br />
0.25mm<br />
4.4 Feed / re-tracking pinch force Adjustment<br />
To set the force of Feed/Re-tracking roller,<br />
loosen the left nut first and adjust the right nut to<br />
change the tension of the spring.<br />
Increase the force of feed/re-tracking roller:<br />
Tighten the right nut to move the hexagon screw<br />
to the right, which adds the tension on the spring.<br />
Decrease the force of feed/re-tracking roller:<br />
Loosen the right nut to move the hexagon screw<br />
to the left, which leaves the tension on the spring.<br />
21
Model: <strong>SV5000C</strong><br />
4.5 Second tension pinch wheel adjustment<br />
The second tension roller pinch force to be<br />
adjusted through the spring force as illustrated on<br />
the picture. To secure higher pinch force, please<br />
turn the stop nut clockwise then re-tighten<br />
locknut. The higher compression force is for<br />
higher pinch force on main roller.<br />
L<br />
H<br />
4.6 Accumulator feeding roller proximity switch<br />
The accumulator feeding roller sensor<br />
← →<br />
saves<br />
whether the strap is in feeding roller or not. Make<br />
sure the sensor is activated when strap is there.<br />
The gap is 0.2m/m.<br />
0.2m/m<br />
4.7 Accumulator fill proximity switch adjustment<br />
The accumulator wand goes down and<br />
activates the accumulator fill proximity switch<br />
when there is and adequate strap supply in the<br />
accumulator. To adjust the proximity switch,<br />
loosen the two nuts, adjust the switch as shown<br />
for proper operation, and then re-tighten the nuts<br />
(Figure).<br />
0.25mm<br />
<strong>2012</strong>.03 22
Model: <strong>SV5000C</strong><br />
4.8 Accumulator fill volume adjustment<br />
To adjust the strap volume to the desired<br />
amount of strap, loosen or tighten the tension on<br />
the wand spring by adjusting the length of the<br />
spring mounting screw.<br />
To reduce the amount of strap in the accumulator,<br />
spin the jam nuts on the mounting screw<br />
counterclockwise. To increase the amount of<br />
strap in the accumulator, spin the lock nuts in a<br />
clockwise direction.<br />
High volume<br />
Low volume<br />
4.9 Accumulator Fill Force Adjustment<br />
The different hook position is designed for<br />
adjusting the pinch force of accumulator feeding<br />
pinch force, the higher position for high pinch,<br />
vice versa.<br />
4.10 Strapping Height Adjustment<br />
WARNING: DON NOT LOOSENS THE LEG<br />
WARNING: USE FORKLIFT IN A SAFE BOLTS PRIOR TO SUPPORTING THE<br />
AND APPROPRIATE MANNER. ENSURE MACHINE WEIGHT.<br />
THAT ALL LIFTING OF THE STRAPPING<br />
MACHINE IS DONE IN A SAFE AND<br />
RESPONSIBLE MANNER. FALLING<br />
OBJECTS ARE A LIFE THREATENING<br />
HAZARD.<br />
To adjust the height of the machine, first support the<br />
weight of the machine and loosen the two hex-head<br />
bolts on each leg of the machine. Lift the machine<br />
Lift the machine<br />
until the top plated are at the desired working height.<br />
until the top plated<br />
Then release the tension on the retaining bolts and<br />
Loose the four are at the desired<br />
slide the legs to the floor. Tighten the retaining bolts<br />
hex-head bolts working height<br />
to retain position.<br />
<strong>2012</strong>.03 23
Model: <strong>SV5000C</strong><br />
4.11 Strap Width Adjustment<br />
To adjust the left strap guide and right strap<br />
guide as following;<br />
(a). To release the two screw, and take out<br />
the strap guide cover.<br />
(b). release the screw then adjust the strap<br />
path width about strap width + 1mm.<br />
Strap width +0.5mm<br />
4.12 Feeding roller gap adjustment<br />
Adjust the feeding pinch force by moving the<br />
spring hook position, the higher k value for<br />
higher pinch force. Vice versa.<br />
Low<br />
High<br />
4.13 Heater temperature adjustment<br />
Heater temperature<br />
Heater’s temperature is monitored all the time. The temperature controlling system would heat<br />
up or off to keep the heater temperature kept as preset value. The machine is set at 190℃ for<br />
5mm strap, 280℃ for 12mm strap.<br />
Tension<br />
The tension is decided by the second retracting time. Operator may adjust the tension<br />
according to the needs.<br />
Weld cooling<br />
Under higher strapping tension requirements, the machine should be adjusted to higher<br />
cooling time. The higher tension is set, the longer cooling time is required.<br />
<strong>2012</strong>.03 24
Model: <strong>SV5000C</strong><br />
4.14 Track opener wiring Adjustment<br />
The arch opening can be adjusted by setting<br />
the screw as shown in the picture. To adjust the<br />
wire, loosen the two nuts, adjust the wire as<br />
shown on proper position and then re-tighten the<br />
nuts. Be aware that wire must be the original<br />
parts supplied by Joinpack, different<br />
unauthorized parts may create problems. To make<br />
sure the adjustment is proper, turn jog nuts to see<br />
if the arch chute is well closed against the side<br />
cover plate.<br />
4.15 Cutter Block cleaning and Adjustment<br />
The cutting block is allowed to be taken out<br />
for maintenance. The step of taking out cutter<br />
block as following:<br />
(a). Release the spring in the heater arm.<br />
(b). Release the wing nut of exhaust fan.<br />
(c). Release four hexagon screws.<br />
(d). Taking out the whole cutting block.<br />
a<br />
c<br />
b<br />
4.16 Strap Sealing Alignment Adjustment<br />
To take off the strap guide cover by loosing<br />
2 screws as sown on fig. xx, to adjust the side<br />
plate to fit the strap width, the strap width +<br />
0.5mm to be set for strap guide width.<br />
Strap width +0.5mm<br />
Cover<br />
<strong>2012</strong>.03 25
Model: <strong>SV5000C</strong><br />
4.17 Table Belt Adjustment<br />
To loosen or tighten the screw to adjust the<br />
tension of belt.<br />
Screw<br />
<strong>2012</strong>.03 26
5<br />
Preventive Maintenance<br />
Model: <strong>SV5000C</strong><br />
5.1 General Safety Instructions<br />
The strapping machine has been designed to provide safe, efficient and trouble-free service for<br />
many years. However, as with any automatic machinery there is a risk of damage or injury if<br />
appropriate precautions are not taken. You must read and understand the safety section and safety<br />
precautions in other sections of this manual before installation, operation, maintenance, or<br />
de-installation of the strapping machine.<br />
Section 1 Safety precautions, details inherent risks and general safety considerations associated with<br />
the operation and maintenance of this machine. Failure to follow these precautions could result in<br />
equipment damage, personal injury, or loss of life. All operation and maintenance personnel must be<br />
trained by the manufacturer in the proper handling, operation, and maintenance of this machine.<br />
5.1.1 Safety Warnings<br />
Warning labels found in this manual and on the strapping machine indicate situation that require<br />
extra attention during strapping machine installation, operation, maintenance, or de-installation.<br />
Observe the associated precautions carefully as they indicate potentially hazardous situations.<br />
CAUTION WARNING: DANGER<br />
5.2 Lockout Tag out Procedure<br />
The strapping machine is an automatic machine. Any inattention while close to the strapping<br />
machine could result in a mishap. Precautions must be taken to avoid material being automatically<br />
conveyed to the strapping machine when it is not in service. Shutting down the strapping machine<br />
does not necessary prevent other equipment in the line from operating.<br />
For all maintenance activities not explicitly requiring the strapping machine to be in operating, a<br />
lockout tagout procedure applies. All personnel working on or around the strapping machine during<br />
installation must be qualified for their position. All local laws and facility specified lockout tagout<br />
requirements that meet or exceed this procedure must be strictly adhered to.<br />
<strong>2012</strong>.03 27
Model: <strong>SV5000C</strong><br />
5.2.1.1 Ensure no product can be conveyed into the strapping machine.<br />
5.2.1.2 Press the red Emergency Stop push button.<br />
5.2.1.3 Turn the ON/OFF switch to the OFF position.<br />
5.2.1.4 Lock the ON/OFF switch on the OFF position.<br />
5.2.1.5 Tag the pendant with a sign: Maintenance Activities in Progress<br />
To re-establish the normal strapping machine operation, reverse the lockout tagout<br />
procedure, and follow the instructions as shown in Section 3, Operation Instructions.<br />
5.3 Pneumatic Safety (If so equipped)<br />
The following safety precautions must be observed when operating or doing maintenance:<br />
1. DO NOT exceed the maximum operating pressure of the strapping machine.<br />
2. DO NOT stand, sit or lie on the strapping machine.<br />
3. Inspect all connections, hoses and fittings on a regular basis.<br />
4. Periodically check strapping machine pneumatic component operation (if equipped).<br />
5.4 Maintenance required after each 15,000 straps<br />
Maintenance Item Maintenance activity Safety Warning<br />
1.Blow out machine<br />
2.Apply bearing grease<br />
1.Blow the strap dust and<br />
other debris off of the<br />
interior and exterior of the<br />
machine at the end of<br />
every 15,000 straps.<br />
2.Apply “SKF bearing<br />
grease” (LGHP 2/1, high<br />
performance polyurea)<br />
onto front gripper, press<br />
bar, and rear gripper.<br />
Caution: Do not use the air<br />
horse to clean anything other<br />
than the machine.<br />
Caution: Flying debris can<br />
cause injury to the eyes and<br />
noise can result in hearing<br />
loss. Wear eye and hearing<br />
protection at all times.<br />
<strong>2012</strong>.03 28
Model: <strong>SV5000C</strong><br />
5.5 Maintenance required after each 150,000 straps<br />
<br />
Maintenance Item Maintenance activity Safety Warning<br />
1. Blowing down internal<br />
portion of sealing head<br />
2. Visually check the<br />
machine for wear and<br />
general condition.<br />
3. Apply bearing grease<br />
Blow out the sealing<br />
head with compressed<br />
air.<br />
Apply “SKF bearing<br />
grease” (LGHP 2/1, high<br />
performance polyurea)<br />
onto front gripper, press<br />
bar, and rear gripper.<br />
Caution:<br />
Be careful of pinch points<br />
when opening and closing<br />
doors and cover.<br />
Caution:<br />
Do not use air horse to clean<br />
anything other than the<br />
machine.<br />
Caution:<br />
Flying debris can cause<br />
injury to the eyes and noise<br />
can result in hearing loss.<br />
Wearing eye and hearing<br />
protection at all times.<br />
5.6 Maintenance required after each 300,000 straps<br />
Maintenance Item Maintenance activity Safety Warning<br />
1. Check heater<br />
blade temperature<br />
setting.<br />
2. Check condition<br />
of clutch’s gap.<br />
3. Check condition<br />
of all drive and<br />
conveyer belts<br />
4. Check condition<br />
of all pneumatic<br />
(if is equipped)<br />
connections hoses<br />
and fittings.<br />
5. Apply bearing<br />
grease<br />
Apply “SKF bearing<br />
grease” (LGHP 2/1, high<br />
performance polyurea)<br />
onto front gripper, press<br />
bar, and rear gripper.<br />
Caution:<br />
Be carefully of pinch point when<br />
opening and closing machine<br />
doors and cover. DO NOT touch<br />
the heater blade. A severe burn<br />
may result from contact.<br />
<strong>2012</strong>.03 29
5.7 Maintenance required after each 500,000 straps<br />
Maintenance Item Maintenance activity Safety Warning<br />
Model: <strong>SV5000C</strong><br />
1.Check adjustment<br />
of right hand gripper,<br />
height and force<br />
2.Apply bearing<br />
grease<br />
Apply “SKF bearing<br />
grease” (LGHP 2/1, high<br />
performance polyurea)<br />
onto front gripper, press<br />
bar, and rear gripper.<br />
Caution:<br />
Be carefully of pinch point when<br />
opening and closing machine<br />
doors and cover. DO NOT touch<br />
the heater blade. A severe burn<br />
may result from contact.<br />
5.8 Maintenance for Applying Bearing Grease<br />
Grease spec:<br />
GHP 2/1, high performance polyurea<br />
Procedure:<br />
Following the instruction of maintenance, regularly apply the grease onto front gripper, press bar,<br />
and rear gripper of sealing head unit. Paste bearing grease on the sides of bars/cutter, to ensure<br />
smooth movement of bars.<br />
<strong>2012</strong>.03 30
Model: <strong>SV5000C</strong><br />
6<br />
Trouble Shooting<br />
Before troubleshooting, read Section 1 ‘Safety Precautions’ and Section 5 ‘Preventative<br />
Maintenance’ in the operation manual. Adjustments made to the strapping machine must be<br />
performed by trained and authorized personnel. Ensure the area is clear before restarting the<br />
machine. A maintenance log should be kept to track the machine’s malfunctions. Recommend to<br />
record:<br />
The date of problem occurrence<br />
A description of the encountered problem<br />
Pertinent machine settings at the time of problem occurrence or machine settings that seem<br />
to result in a problem.<br />
Any corrective actions taken<br />
If a pattern of mechanical problems becomes evident, please inform your dealer and provide<br />
recorded log information, photos, or videos.<br />
The following troubleshooting chart is designed to assist maintenance personnel in the<br />
identification and correction of problems that may occur with the strapping machine. If problems<br />
persist or cannot be resolved, contact your dealer for further assistance.<br />
<strong>2012</strong>.03 31
Model: <strong>SV5000C</strong><br />
<br />
Symptom Probable cause Remedy<br />
1. Strapping machine not started 1. Refer to starting the strapping<br />
properly.<br />
machine.<br />
Machine not start 2. Emergency stop push on. 2. Release the E-Stop button.<br />
3. Door with Safety key open. 3. Close the Electrical control box’s<br />
door.<br />
<br />
Strap not loaded<br />
<br />
Strap not feed<br />
around track<br />
1. Strap accumulator motor pinch<br />
rollers out of adjustment.<br />
2. Strap feed idle roller interfering<br />
with strap guide cover.<br />
3. Strap accumulator fill proximity<br />
sensor out of adjustment.<br />
4. Machine configured for incorrect<br />
strap width.<br />
1. Obstruction in feed path.<br />
2. Track out of adjustment.<br />
3. Feed wheel gap too wide.<br />
4. Feed distance too short.<br />
5. Idler wheel not rotating.<br />
6. Lubrication or contamination<br />
1. Adjust the accumulator pinch<br />
force. (Section 4.6).<br />
2. If feel the idle roller interfered,<br />
then move out the cover so it may<br />
freely turn.<br />
3. Adjust feed proximity sensor.<br />
(Section 4.6.)<br />
4. Change the strap according the<br />
instructions.<br />
1. Hand feeding the strap through the<br />
track, remove the obstruction.<br />
Verify the sealing head is in the<br />
home position during the feed<br />
cycle.<br />
2. Adjust the track (Section 4.16).<br />
Make sure the track is close<br />
against the side frame. And<br />
opening is wide enough.<br />
3. Adjust the feed roller setting gap<br />
which should be 0.1mm.<br />
4. Adjust the feeding time which to<br />
be set according to the<br />
adjustments.<br />
5. Feed idle roller to be interfered<br />
with strap guide or guide cover.<br />
Eliminate those interferes.<br />
6. Clean wheel surface.<br />
<strong>2012</strong>.03 32
Model: <strong>SV5000C</strong><br />
6<br />
Trouble Shooting<br />
Symptom Probable cause Remedy<br />
7. Strap reservoir out of strap. 7. Check if the strap reservoir is<br />
empty. If so, adjust according to<br />
4.8 fill volume.<br />
8. Strap is jammed – feed idle<br />
roller not rotating.<br />
8. Feed idle roller to be interfered<br />
with strap guide or guide cover.<br />
Eliminate those interferes.<br />
9. Strap is jammed – Strap guide<br />
cover loose.<br />
10. Strap is jammed – obstruction in<br />
the strap auto loading path.<br />
9. Fasten the strap cover plate.<br />
10. Hand feed the strap to find out the<br />
obstruction then remove it.<br />
<br />
Strap not tension<br />
<br />
Poor or no seal<br />
11. Strap feeding out of sealing<br />
head.<br />
12. Pinch rollers are worn.<br />
1. Tension force not adequate.<br />
2. Lubrication or contamination on<br />
wheels.<br />
3. Strap is jammed – strap guide<br />
cover loose.<br />
4. Primary tension pinch rollers are<br />
worn.<br />
1. Heater blade temperature<br />
incorrect.<br />
2. Heater blade mounting screws<br />
loose.<br />
3. Platen press time too short.<br />
4. Second tension set too high.<br />
5. Poor strap seal alignment.<br />
11. Adjust the home position. (See<br />
adjustment section 4.2).<br />
12. Change roller.<br />
1. Adjust the tension force according<br />
to 4.14.<br />
2. Clean wheel surface.<br />
3. Fasten the strap cover plate.<br />
4. Change roller.<br />
1. Set the temperature. (See<br />
adjustment 4.14).<br />
2. Check screws and tighten if<br />
necessary.<br />
3. Change the setting. (See section<br />
4.14 weld cooling time).<br />
4. Adjust the second tension. (See<br />
section 4.14).<br />
5. See adjustment 4.19.<br />
<strong>2012</strong>.03 33
Model: <strong>SV5000C</strong><br />
6<br />
Trouble Shooting<br />
Symptom Probable cause Remedy<br />
Misalignment due to improper<br />
adjustment of the entry plate<br />
guide.<br />
6. Heater bus bar dirty.<br />
See adjustment 4.19.<br />
6. Clean the bus bar.<br />
1. Tension force not adequate. 1. Adjust the tension force according<br />
Strap does not<br />
to 4.14.<br />
tension<br />
2. Lubrication or contamination on<br />
wheels.<br />
3. Strap is jammed – strap guide<br />
cover loose.<br />
4. Primary tension pinch rollers are<br />
2. Clean wheel surface.<br />
3. Fasten the strap cover plate.<br />
4. Change roller.<br />
worn.<br />
1. Dull or damaged strap cutter. 1. Reverse or replace the strap<br />
Strap is not<br />
cutter.<br />
being cut.<br />
2. Strap cut under tension. 2. Check adjustment of the home<br />
position (See section 4.2).<br />
<strong>2012</strong>.03 34
7<br />
Safety During Installation<br />
Model: <strong>SV5000C</strong><br />
7.1 Introduction<br />
The strapping machine has been designed to provide safe, efficient, and trouble-free service for<br />
many years. Component design and material selection have been carefully considered to ensure<br />
operator safety, ease of operation, and machine longevity. Our engineering and manufacturing<br />
procedures are designed to ensure consistent high quality.<br />
However, with any powered and/or automatic machine, there is a risk of damage or injury if<br />
appropriate precautions are not taken. Carefully read and understand Section 1, Safety<br />
PRECUTIONS, and related safety precautions in other sections of this manual before installing the<br />
strapping machine. The safety section details inherent risks and general safety considerations<br />
associated with the operation and maintenance of this machine.<br />
Failure to follow the precautions could be result in equipment damage, personal injury, and/or loss of<br />
life. All installation personnel must be trained and qualified their particular job.<br />
7.2 Safety Warnings<br />
Safety warning found in this manual and on the strapping machine indicate situation that require<br />
extra attention during installation of the machine. Observe the associated precautions carefully as they<br />
indicate potentially hazardous situations. The different warnings are<br />
CAUTION WARNING: DANGER<br />
CAUTION: indicates a potentially hazardous situation which, if not avoided, may result in minor or<br />
moderate injury.<br />
WANNING: indicates a potentially hazardous which, if not avoided, could result in death or serious<br />
injury.<br />
DANGER: indicates an imminently hazardous situation, which if not avoid, will result in death or<br />
serious injury.<br />
<strong>2012</strong>.03 35
Model: <strong>SV5000C</strong><br />
7.3 Personal Safety Provisions<br />
The strapping machine is an automatic machine. Any inattention while close to the strapping<br />
machine could result in personal injury or equipment damage. Precautions must also be taken to avoid<br />
material being automatically conveyed to the strapping machine while it is not in service.<br />
Shutting down the strapping does not necessary prevent other equipment in the line from operating.<br />
For all installation activities not requiring the strapping machine to be in operation, a lockout<br />
procedure applies. All personnel working on or around the strapping machine during installation must<br />
be qualified for their position.<br />
7.4 Mechanical Safety<br />
The following safety precautions must be observed when using or working the strapping<br />
machine:<br />
a. Never work on strapping machine when it is running.<br />
b. Never put any part of your body in the bundle opening when the strapping machine is in the<br />
automatic mode.<br />
c. Keep body and clothing clear of the conveyors (if so equipped), bundle stop (if so equipped),<br />
compactors (if so equipped) and strap coils when the strapping machine is running.<br />
d. Never circumvent safety switches or operate the strapping machine with the safety guarding<br />
removed or any doors opened or removed.<br />
e. Do not stand, sit, or lie on the strapping machine.<br />
f. The use of suitable eye and ear protection is required when operating the strapping machine or<br />
performing certain maintenance functions.<br />
g. Appropriate footwear is required when moving the strapping machine.<br />
7.5 Electrical Safety<br />
The following safety precautions must be observed when installing or working on the strapping<br />
machine:<br />
a. Ensure the power source for the strapping machine is the correct voltage and current rating.<br />
b. Verify the strapping machine is properly grounded to the facility ground.<br />
c. Do not use the strapping machine is a wash down application.<br />
d. Do not remove plug-in cables with the power supply under load.<br />
<strong>2012</strong>.03 36
Model: <strong>SV5000C</strong><br />
7.6 Pneumatic Safety (If So Equipped)<br />
The following safety precautions must be observed when using or working on the strapping<br />
machine:<br />
1. Do not exceed the maximum operation pressure of the strapping machine.<br />
2. Inspect all connections, hoses, and fittings on a regular basis.<br />
3. Periodically check strapping machine pneumatic component operation.<br />
4. Ensure that all components are correctly assembled before applying air pressure.<br />
Carefully read and under the safety sections of the manual before installing the strapping machine.<br />
The safety sections of this manual identify general safety issue and inherent risks associated with the<br />
strapping machine. Failure to follow this precaution may result in personal injury and or equipment<br />
damage.<br />
7.7 General Product Information<br />
The strapping machine is to be manually rolled into place or lifted with a forklift suitable for the<br />
weight of this equipment. Do not lift the strapping by the arch.<br />
Approximate Weight:<br />
Strapping Machine:<br />
440 lbs / 200 kg.<br />
Coil: 26lbs / 12 kg<br />
7.8 Installing The Strapping Machine<br />
The following procedure must be followed for the proper installation of the strapping machine.<br />
1. Turn the ON/OFF switch to the “OFF” position.<br />
2. Plug machine into a properly sized and ground power source.<br />
3. Connect to compressed air supply.<br />
4. Lock caster to prevent unintentional rolling.<br />
5. Refer to “Starting the Strapping Machine” and “Loading the Strap”.<br />
<strong>2012</strong>.03 37
8<br />
Safety During De-Installation<br />
Model: <strong>SV5000C</strong><br />
8.1 Introduction<br />
Read this section of the manual carefully before you start de-installation of the strapping<br />
machine, as it deals with potential risks occurring during de- installation. Failure to follow mentioned<br />
precautions and safety warnings could result in personal injury. Before starting electrical<br />
de-installation activities on the strapping machine, ensure that all electrical sources are disconnected.<br />
8.2 General product information<br />
The strapping machine is to be manually rolled into place or lifted with a forklift suitable for the<br />
weight of this equipment only. DO NOT lift the strapping machine by the arch.<br />
8.3 Clearing the strapping machine<br />
Remove the strap from the strapping machine as described “Unloading the strap”.<br />
8.4 Electrical shutdown of the strapping machine<br />
Prior to unplugging the strapping machine, verify that ON/OFF switch is in the “OFF” position.<br />
All the local codes pertaining to electrical activities must be followed.<br />
WARNING: The shut down procedure must be followed for all work performed on the<br />
strapping machine electrical circuit. High voltage represents a life threatening danger.<br />
<strong>2012</strong>.03 38
SV-5000C<br />
PARTS LIST<br />
FOR<br />
AUTOMATIC STRAPPING MACHINE<br />
POLYCHEM Corporation<br />
6277 Heisley Road, Mentor OH 44060.<br />
TEL : 440-358-7060 FAX : 440-358-7061
9.1<br />
Control Unit<br />
Fig-1A Cam unit<br />
<strong>2012</strong>.02<br />
38<br />
<strong>SV5000C</strong>
Fig-1A Cam unit<br />
No. Part no. Part name Part Name Quantity<br />
<strong>2012</strong>.02<br />
1 A68-1A0101 Proximity switch 1<br />
2 A68-1A0102 Bracket for proximity switch 1<br />
3 A68-1A0103-1 Servo motor<br />
(see Appendix A)<br />
A68-1A0103-2 Servo motor<br />
(see Appendix A)<br />
Yaskawa (old),<br />
until August 31th, 2010<br />
Yaskawa (new),<br />
September, 2010 - present<br />
4 A68-1A0104 Cam for home position. 1<br />
5 A68-1A0105 Cam for arch opening 1<br />
6 A68-1A0106 Gear Reducer 1<br />
7 A68-1A0107 Plastic turning knob 1<br />
8 A68-1A0108 Cam - slide table 1<br />
9 A68-1A0109 Cam - left gripper 1<br />
10 A68-1A0110 Cam – Press bar with cutter 1<br />
11 A68-1A0<strong>111</strong> Cam – front gripper 1<br />
12 A68-1A0112 Cam - heater 1<br />
13 A68-1A0113 Bearing. 1<br />
14 A68-1A0114 Cam – tension 1<br />
51 A68-1A0151 TMS 3x25 2<br />
52 A68-1A0152 HBS 4x8 2<br />
53 A68-1A0153 HBS 5x15 4<br />
54 A68-1A0154 HBS 6x15 1<br />
55 A68-1A0155 HBS 6x25 6<br />
56 A68-1A0156 HSS 6x10 7<br />
57 A68-1A0157 SW 4mm 2<br />
<strong>SV5000C</strong><br />
1<br />
1<br />
39
<strong>SV5000C</strong><br />
Fig-1A Cam unit<br />
No. Part No. Part Name Part Name Quantity<br />
58 A68-1A0158 PW 4mm 2<br />
59 A68-1A0159 SW 6mm 7<br />
60 A68-1A0160 PW 6mm 4<br />
61 A68-1A0161 PW 6mm (19) 2<br />
62 A68-1A0162 PW 6mm (25) 1<br />
63 A68-1A0163 HN 6mm 1<br />
64 A68-1A0164 KYA 1<br />
65 A68-1A0165 KYA 1<br />
66 A68-1A0166 KYA 1<br />
67 A68-1A0167 KYA 1<br />
68 A68-1A0168 SW 5mm 4<br />
<strong>2012</strong>.02<br />
40
9.1<br />
Control Unit<br />
Fig-1B-AB Slide Table Unit<br />
Fig- 1B SLIDE TABLE UNIT<br />
<strong>2012</strong>.02<br />
41<br />
<strong>SV5000C</strong>
<strong>2012</strong>.02<br />
<strong>SV5000C</strong><br />
Fig-1B-AB Slide Table Unit<br />
No. Part No. Part Name Part Name Quantity<br />
1 A68-1B0221 Front Gripper 1<br />
2 A68-1B0220 Compression Spring 3<br />
3 A68-1B0219 Shaft of cutter 3<br />
4 A68-1B0288 SP 5 mm 3<br />
5 A68-1B0218 Bearing 3<br />
6 A68-1B0287 SP 3 mm 3<br />
7 A68-1B0222 Press bar 1<br />
8 A68-1B0226 Hexagon screw 3<br />
9 A68-1B0227 Spring 3<br />
10 A68-1B0225 Plastic 1<br />
11 A68-1B0224 Spring 1<br />
12 A68-1B0223 Rear gripper 1<br />
14 A68-1B0229 Cover of gripper bracket 1<br />
15 A68-1B0292 HBS 4x25 1<br />
16 A68-1B0268 HBS 5x15 1<br />
17 A68-1B0230 Hexagon screw 3<br />
21 A68-1B0232 Plastic pad 1<br />
22 A68-1B0286 FLG 6mm 1<br />
23 A68-1B02103 HN 4 mm 1<br />
24 A68-1B0233 L type bracket 1<br />
25 A68-1B0236 Fan bracket 3<br />
26 A68-1B0262 HBS 4x8 1<br />
27 A68-1B02104 HBS 4x12 4<br />
28 A68-1B0277 SW 4mm 2<br />
42
<strong>SV5000C</strong><br />
Fig-1B-AB Slide Table Unit<br />
No. Part No. Part Name Part Name Quantity<br />
29 A68-1B0278 PW 4mm 1<br />
30 A68-1B0237 Fan 2<br />
31 A68-1B0265 PMS 4x30 4<br />
32 A68-1B0274 HBS 6x55 3<br />
33 A68-1B0283 PW 6mm 4<br />
34 A68-1B0228 Gripper bracket 1<br />
<strong>2012</strong>.02<br />
43
9.2<br />
Control Unit<br />
Fig-2B-AB Slide Table Unit<br />
Fig- 2B SLIDE TABLE UNIT<br />
<strong>2012</strong>.02<br />
44<br />
<strong>SV5000C</strong>
<strong>SV5000C</strong><br />
Fig-2B-AB Slide Table Unit<br />
No. Part No. Part Name Part Name Quantity<br />
1 A68-2B0290 RR 2<br />
2 A68-2B0241 Bearing 2<br />
3 A68-2B0238 Spring 1<br />
4 A68-2B02105 FLG 8mm 1<br />
5 A68-2B0286 FLG 6mm 1<br />
6 A68-2B0208 Self lubricating bearing 4<br />
7 A68-2B0239 Hexagon screw 1<br />
8 A68-2B0289 SR 1<br />
9 A68-2B0212 Hexagon screw 1<br />
10 A68-2B0211 Bearing 628 2<br />
11 A68-2B0240 Swing leveler of arch 1<br />
12 A68-2B0291 SR 1<br />
13 A68-2B0248 Shaft 1<br />
14 A68-2B0250 Hexagon shaft 1<br />
15 A68-2B0264 FMS 4x12 2<br />
16 A68-2B0243 Stainless plate 1<br />
17 A68-2B0244 Heat insulation plate 2<br />
18 A68-2B0245 Bakelite 1<br />
25 A68-2B0251 Spring 1<br />
26 A68-2B0273 HBS 6x45 1<br />
27 A68-2B02106 FLG 4mm 2<br />
28 A68-2B02109 Heater 1<br />
29 A68-2B02110 Heater Bracket 1<br />
<strong>2012</strong>.02<br />
45
<strong>SV5000C</strong><br />
Fig-2B-AB Slide Table Unit<br />
No. Part No. Part Name Part Name Quantity<br />
30 A68-AB02<strong>111</strong> Bracket 1<br />
31 A68-AB02112 Spring 2<br />
32 A68-2B02113 Heater Screw 2<br />
33 A68-2B02114 Locking nut 2<br />
34 A68-2B 0268 HBS 5x15 2<br />
35 A68-2B 02115 Heater arm 1<br />
36 A68-2B02116 HN 8mm 1<br />
<strong>2012</strong>.02<br />
46
9.1<br />
Control Unit<br />
Fig-3B Slide Table Unit<br />
<strong>2012</strong>.02<br />
47<br />
<strong>SV5000C</strong>
<strong>SV5000C</strong><br />
Fig-3B Slide Table Unit<br />
No. Part No. Part Name Part Name Quantity<br />
1 A68-3B0201 Sealing head Housing 1<br />
2 A68-3B0241 Bearing 1<br />
3 A68-3B0290 RR 1<br />
4 A68-3B0208 Self lubricating bearing 2<br />
5 A68-3B0252 Track swing pole 1<br />
6 A68-3B0289 SR 1<br />
7 A68-3B0253 Spring 1<br />
8 A68-3B0285 FLG 5mm 1<br />
9 A68-3B0254 Bearing 635 1<br />
10 A68-3B02108 FMS 5x16 1<br />
11 A68-3B0262 HBS 4x8 2<br />
12 A68-3B0277 SW 4mm 2<br />
13 A68-3B0278 PW 4mm 2<br />
14 A68-3B0202 Bracket for proximity switch 1<br />
15 A68-3B0203 Proximity switch 1<br />
16 A68-3B0299 Bracket 1<br />
17 A68-3B0280 PW 5mm 2<br />
18 A68-3B0279 SW 5mm 2<br />
19 A68-3B0268 HBS 5x15 1<br />
20 A68-3B0232 Plastic pad 1<br />
21 A68-3B0286 FLG 6mm 1<br />
22 A68-3B02107 TMS 3x16 2<br />
<strong>2012</strong>.02<br />
48
9.1<br />
Control Unit<br />
Fig-4B Slide Table Unit<br />
<strong>2012</strong>.02<br />
49<br />
<strong>SV5000C</strong>
<strong>2012</strong>.02<br />
<strong>SV5000C</strong><br />
Fig-4B Slide Table Unit<br />
No. Part No. Part Name Part Name Quantity<br />
1 A68-4B0276 HBS 8x15 1<br />
2 A68-4B0204 Bearing 1<br />
3 A68-4B0284 SW 8mm 2<br />
4 A68-4B0206 Slide table arm 1<br />
5 A68-4B0205 Rubber pad (with screw) 1<br />
6 A68-4B0275 HSS 6x10 2<br />
7 A68-4B0286 FLG 6mm 1<br />
8 A68-4B0282 SW 6mm 1<br />
9 A68-4B0210 HEX Screw 1<br />
10 A68-4B02100 Spring 1<br />
11 A68-4B0208 Self lubricating bearing 2<br />
12 A68-4B0209 Inner slide table arm 1<br />
13 A68-4B0211 Bearing 1<br />
14 A68-4B0212 Hexagon screw 1<br />
15 A68-4B02101 Spring 1<br />
16 A68-4B0213 Hexagon 1<br />
17 A68-4B0271 HBS 6x15 4<br />
18 A68-4B0207 Slide table 1<br />
19 A68-4B0217 Striker 1<br />
20 A68-4B0216 Spring 1<br />
21 A68-4B0215 Inner slide table 1<br />
22 A68-4B0280 PW 5mm 1<br />
23 A68-4B0279 SW 5mm 1<br />
24 A68-4B0268 HBS 5x15 1<br />
50
<strong>SV5000C</strong><br />
Fig-4B Slide Table Unit<br />
No. Part No. Part Name Part Name Quantity<br />
25 A68-4B0266 THS 5x10 1<br />
26 A68-4B0263 THS 4x6 1<br />
27 A68-4B0214 Washer 1<br />
<strong>2012</strong>.02<br />
51
9.2<br />
Cam Unit<br />
Fig-1C Roller Block Unit<br />
<strong>2012</strong>.02<br />
52<br />
<strong>SV5000C</strong>
<strong>SV5000C</strong><br />
Fig-1C Roller Block Unit<br />
No. Part No. Part Name Part Name Quantity<br />
1 A68-1C0301 Feeding, re-tracking housing 1<br />
2 A68-1C0305 Tension Roller shaft 1<br />
3 A68-1C0306 Bearing 6002 4<br />
4 A68-1C0304 Shaft 1<br />
5 A68-1C0374 KYA 1<br />
6 A68-1C0307 Shaft housing 1<br />
7 A68-1C0375 SR 2<br />
8 A68-1C0303 Compression spring 1<br />
9 A68-1C0302 Round head screw 1<br />
10 A68-1C0373 FLG 8mm 1<br />
11 A68-1C0312 Hexagon shaft 1<br />
12 A68-1C0376 SR 1<br />
13 A68-1C0313 Self-lubricated bearing 2<br />
14 A68-1C0314 Hexagon shaft 1<br />
15 A68-1C0322 Spring 1<br />
16 A68-1C0321 Hex screw 1<br />
17 A68-1C0318 Hexagon shaft 1<br />
18 A68-1C0361 HBS 8x15 1<br />
19 A68-1C0319 Bearing 1<br />
20 A68-1C0369 SW 8mm 2<br />
21 A68-1C0382 Self-lubricated bearing 1<br />
22 A68-1C0379 SR 1<br />
23 A68-1C0320 Cam for tensioning 1<br />
<strong>2012</strong>.02<br />
53
9.2<br />
Cam Unit<br />
Fig.-3C-AB Roller Block Unit<br />
Fig- 3C ROLLER BLOCK UNIT<br />
<strong>2012</strong>.02<br />
54<br />
<strong>SV5000C</strong>
<strong>SV5000C</strong><br />
Fig.-3C-AB Roller Block Unit<br />
No. Part No. Part Name Part Name Quantity<br />
1 A68-3C0384 HBS 4x12 6<br />
2 A68-3C0325-1 Strap guide plate (5-6mm) 1<br />
A68-3C0325-2 Strap guide plate (9mm) 1<br />
3 A68-3C0326-1 Strap chute (5-6mm) 1<br />
A68-3C0326-2 Strap chute (9mm) 1<br />
4 A68-3C0365 PW 5mm 3<br />
5 A68-3C0364 SW 5mm 3<br />
6 A68-3C0356 HBS 5x20 3<br />
10 A68-3C0327 Strap guide plate 1<br />
11 A68-3C0328-1 Strap guide (5-6mm) 1<br />
A68-3C0328-2 Strap guide (9mm) 1<br />
12 A68-3C0321 Hex screw 1<br />
13 A68-3C0359 HBS 6x15 1<br />
14 A68-3C0367 SW 6mm 1<br />
15 A68-3C0368 PW 6mm (25) 1<br />
16 A68-3C0330-1 Tension roller - lower (5-6mm) 1<br />
A68-3C0330-2 Tension roller – lower (9mm) 1<br />
17 A68-3C0331 Gear 1<br />
18 A68-3C0333-1 Strap guide (5-6mm) 1<br />
A68-3C0333-2 Strap guide (9mm) 1<br />
19 A68-3C0334 Strap guide plate 1<br />
20 A68-3C0357 HBS 5x25 2<br />
<strong>2012</strong>.02<br />
55
<strong>SV5000C</strong><br />
Fig.-3C-AB Roller Block Unit<br />
No. Part No. Part Name Part Name Quantity<br />
21 A68-3C0332-1 Guide plate (5-6mm) 1<br />
A68-3C0332-2 Guide plate (9mm) 1<br />
23 A68-3C0386 Nut 4mm 6<br />
<strong>2012</strong>.02<br />
56
9.2<br />
Cam Unit<br />
Fig.-4C-AB Roller Block Unit<br />
Fig- 4C ROLLER BLOCK UNIT<br />
<strong>2012</strong>.02<br />
57<br />
<strong>SV5000C</strong>
<strong>SV5000C</strong><br />
Fig.-4C-AB Roller Block Unit<br />
No. Part No. Part Name Part Name Quantity<br />
1 A68AB-4C0386 Feeding, re-tracking housing 1<br />
3 A68AB-4C0378 ER 1<br />
6 A68AB-4C0317 Bearing 628 1<br />
7 A68AB-4C0377 RR 1<br />
13 A68AB-4C0353 HBS 4x8 2<br />
15 A68AB-4C0384 HBS 4x12 1<br />
20 A68AB-4C0359 HBS 6x15 1<br />
21 A68AB-4C0367 SW 6mm 1<br />
22 A68AB-4C0368 PW 6mm (25) 1<br />
23 A68AB-4C0335-1 Tension roller - upper (5-6mm) 1<br />
A68AB-4C0335-2 Tension roller - upper (9mm) 1<br />
24 A68AB-4C0331 Gear 1<br />
25 A68AB-4C0396 Roller Block Cover 1<br />
26 A68AB-4C0397 Sleeve for fixing shaft 1<br />
27 A68AB-4C0398 HBS 5x15 2<br />
29 A68AB-4C03100 Spring 1<br />
30 A68AB-4C03101 HBS 5x12 1<br />
31 A68AB-4C03102 Feed, re-tracking roller shaft 1<br />
32 A68AB-4C0316 Upper Re-tracking roller 1<br />
33 A68AB-4C0403 Spring holder plate 1<br />
<strong>2012</strong>.02<br />
58
9.2<br />
Cam Unit<br />
Fig.-1D-AB Roller Block Unit<br />
Fig- 1D ROLLER BLOCK UNIT<br />
<strong>2012</strong>.02<br />
59<br />
<strong>SV5000C</strong>
<strong>2012</strong>.02<br />
<strong>SV5000C</strong><br />
Fig.-1D-AB Roller Block Unit<br />
No. Part No. Part Name Part Name Quantity<br />
1 A68-1D0405 Feeding, re-tracking shaft 1<br />
2 A68-1D0406 Bearing 2<br />
3 A68-1D0407 Gear 1<br />
4 A68-1D0408 Clutch 1<br />
5 A68-1D0451 HBS 3x6 3<br />
6 A68-1D0416 Round Head screw 1<br />
7 A68-1D0466 RR 1<br />
8 A68-1D0460 KYA 2<br />
9 A68-1D0404-1 Spring (5-6mm) 1<br />
A68-1D0404-2 Spring (9mm) 1<br />
10 A68-1D0452 HBS 4x8 2<br />
11 A68-1D0456 SW 4mm 9<br />
12 A68-1D0403 Spring holder plate 1<br />
13 A68-1D0471 PW 4mm 2<br />
14 A68-1D0402 Motor fixing bracket 1<br />
15 A68-1D0459 KYA 1<br />
16 A68-1D0454 HBS 4x16 4<br />
17 A68-1D0453 HBS 4x12 4<br />
18 A68-1D0401-1 Servo motor<br />
(see Appendix A)<br />
A68-1D0401-2 Servo motor<br />
(see Appendix A)<br />
Yaskawa (old)<br />
until August 30th, 2010<br />
Yaskawa (new)<br />
September, 2010 - present<br />
19 A68-1D0470 TMS 4x6 2<br />
20 A68-1D0469 Roller Block Cover 1<br />
1<br />
1<br />
60
<strong>SV5000C</strong><br />
Fig.-1D-AB Roller Block Unit<br />
No. Part No. Part Name Part Name Quantity<br />
21 A68-1D0468 HBS 4x12 1<br />
22 A68-1D0417 Bearing 1<br />
23 A68-1D0419-1 Feed/Re-tracking roller (5-6mm) 1<br />
A68-1D0419-2 Feed/Re-tracking roller (9mm) 1<br />
24 A68-1D0472 SW 14mm 1<br />
25 A68-1D0473 HN 14mm 1<br />
<strong>2012</strong>.02<br />
61
9.2<br />
Cam Unit<br />
Fig.-2D Roller Block Unit<br />
<strong>2012</strong>.02<br />
62<br />
<strong>SV5000C</strong>
<strong>SV5000C</strong><br />
Fig.-2D Roller Block Unit<br />
No. Part No. Part Name Part Name Quantity<br />
1 A68-2D0412 Gear Shaft 3<br />
2 A68-2D0411 Gear 3<br />
3 A68-2D0410 Gear 3<br />
4 A68-2D0409 Shim 6<br />
5 A68-2D0461 KYA 4x24 2<br />
6 A68-2D0462 KYA 4x12 2<br />
7 A68-2D0413 Shim 1<br />
8 A68-2D0414 Gear 1<br />
9 A68-2D0415 Gear Shaft 1<br />
10 A68-2D0463 KYA 1<br />
11 A68-2D0464 KYA 1<br />
12 A68-2D0418 Bearing 6001 6<br />
13 A68-2D0465 SR 3<br />
14 A68-2D0417 Bearing 2<br />
15 A68-2D0455 THS 5x10 3<br />
16 A68-2D0457 SW 5mm 3<br />
17 A68-2D0458 PW 5mm (16) 3<br />
18 A68-2D0467 ER 1<br />
<strong>2012</strong>.02<br />
63
9.3<br />
Accumulator Unit<br />
Fig.-2E Accumulator Box<br />
<strong>2012</strong>.02<br />
64<br />
<strong>SV5000C</strong>
<strong>SV5000C</strong><br />
Fig.-2E Accumulator Box<br />
No. Part No. Part Name Part Name Quantity<br />
1 A68-2E0535 Gear rack 1<br />
2 A68-2E0536 Gear rack cover 1<br />
3 A68-2E0569 HN 4mm 2<br />
4 A68-2E0554 PMS 4x8 2<br />
5 A68-2E0551 TMS 4x6 2<br />
6 A68-2E0537 Spring 1<br />
7 A68-2E0565 PW 4mm 8<br />
8 A68-2E0564 SW 4mm 10<br />
9 A68-2E0555 HBS 4x8 6<br />
10 A68-2E0572 SP 3mm 1<br />
11 A68-2E0553 HBS 4x6 2<br />
12 A68-2E0532 Fixing bracket of solenoid 1<br />
13 A68-2E0534 Gear rack bracket 1<br />
14 A68-2E0533 Solenoid 1<br />
15 A68-2E0582 Hexagon screw 1<br />
16 A68-2E0570 FLG 5mm 1<br />
17 A68-2E0583 L type bracket 1<br />
18 A68-2E0519 Proximity switch 1<br />
19 A68-2E0527 Bracket for proximity switch 1<br />
20 A68-2E0525 Proximity switch 1<br />
<strong>2012</strong>.02<br />
65
9.3<br />
Accumulator Unit<br />
Fig.-3E Accumulator Box<br />
<strong>2012</strong>.02<br />
66<br />
<strong>SV5000C</strong>
<strong>2012</strong>.02<br />
<strong>SV5000C</strong><br />
Fig.-3E Accumulator Box<br />
No. Part No. Part Name Part Name Quantity<br />
1 A68-3E0508 Accumulator 1<br />
2 A68-3E0585 Guide plate 1<br />
3 A68-3E0555 HBS 4x8 11<br />
4 A68-3E0510-1 Strap guide (5~6mm) 1<br />
A68-3E0510-2 Strap guide (9mm) 1<br />
5 A68-3E0584 FLG 6mm 1<br />
6 A68-3E0509-1 Strap Guide (5~6mm) 1<br />
A68-3E0509-2 Strap Guide (9mm) 1<br />
7 A68-3E0509-1 Strap Guide (5~6mm) 1<br />
A68-3E0509-2 Strap Guide (9mm) 1<br />
8 A68-3E0513 Guide plate 1<br />
9 A68-3E0518 Balance Bar 1<br />
10 A68-3E0517 Balance bar fixing bracket 1<br />
11 A68-3E0516 Bearing 605 2<br />
12 A68-3E0570 FLG 5mm 1<br />
13 A68-3E0584 FLG 6mm 2<br />
14 A68-3E0514 Pinch tension holding plate 1<br />
15 A68-3E0512 Adjust Bolt M6x40 1<br />
16 A68-3E0515 Spring 1<br />
17 A68-3E0586 PMS 4x30 1<br />
18 A68-3E0569 HN 4mm 1<br />
19 A68-3E0568 FLG 4mm 1<br />
20 A68-3E0587 HBS 5x30 4<br />
21 A68-3E0566 SW 5mm 9<br />
67
<strong>SV5000C</strong><br />
Fig.-3E Accumulator Box<br />
No. Part No. Part Name Part Name Quantity<br />
22 A68-3E0567 PW 5mm (14 ) 9<br />
23 A68-3E0574 HBS 5x25 5<br />
24 A68-3E0559 HBS 5x10 5<br />
25 A68-3E0588 PW 5mm (12) 4<br />
<strong>2012</strong>.02<br />
68
9.3<br />
Accumulator Unit<br />
Fig.-4E Accumulator Box<br />
<strong>2012</strong>.02<br />
69<br />
<strong>SV5000C</strong>
<strong>SV5000C</strong><br />
Fig.-4E Accumulator Box<br />
No. Part No. Part Name Part Name Quantity<br />
1 A68-4E0570 FLG 5mm 8<br />
2 A68-4E0543 Accumulator cover – left 1<br />
3 A68-4E0576 Accumulator cover 1<br />
4 A68-4E0552 THS 4x6 2<br />
5 A68-4E0538 Hex screw 8<br />
6 A68-4E0581 THS 5x10 1<br />
7 A68-4E0541 Solenoid 1<br />
8 A68-4E0542 Door latch 2<br />
9 A68-4E0579 HBS 4x10 8<br />
10 A68-4E0564 SW 4mm 8<br />
11 A68-4E0565 PW 4mm 8<br />
12 A68-4E0540 Accumulator cover – center 1<br />
13 A68-4E0539 Accumulator cover – right 1<br />
<strong>2012</strong>.02<br />
70
9.3<br />
Accumulator Unit<br />
Fig.-5E-AB Accumulator Box<br />
<strong>2012</strong>.02<br />
71<br />
<strong>SV5000C</strong>
Fig.-5E-AB Accumulator Box<br />
No. Part No. Part Name Part Name Quantity<br />
<strong>2012</strong>.02<br />
1 A68AB-5E0505 Bearing 626 2<br />
2 A68AB-5E0507 Bearing fixing bracket 1<br />
3 A68AB-5E0577 RR-19 1<br />
4 A68AB-5E0506 Rod 1<br />
5 A68AB-5E0504 Gear 1<br />
6 A68AB-5E0555 HBS 4x8 1<br />
7 A68AB-5E0567 PW 5mm 7<br />
8 A68AB-5E0566 SW 5mm 4<br />
9 A68AB-5E0560 HBS 5x18 4<br />
10 A68AB-5E0501 Motor 1<br />
11 A68AB-5E0502 Bearing 6800 2<br />
12 A68AB-5E0581 THS 5x10 2<br />
13 A68AB-5E0503 Motor fixing bracket 1<br />
14 A68AB-5E0559 HBS 5x10 3<br />
15 A68AB-5E0556 FMS 4x10 2<br />
16 A68AB-5E0563 HSS 6X10 1<br />
17 A68AB-5E0511 Idle roller 1<br />
18 A68AB-5E0573 ER - 8 1<br />
19 A68AB-5E0520 Shaft 1<br />
20 A68AB-5E0522 Bearing 628 2<br />
21 A68AB-5E0578 RR-24 1<br />
22 A68AB-5E0521 Upper feeding roller 1<br />
23 A68AB-5E0571 FLG 8mm 2<br />
24 A68AB-5E0523 Bracket 1<br />
<strong>SV5000C</strong><br />
72
Fig.-5E-AB Accumulator Box<br />
No. Part No. Part Name Part Name Quantity<br />
25 A68AB-5E0524 Spring 1<br />
26 A68AB-5E0579 HBS 4x10 1<br />
27 A68AB-5E0568 FLG 4mm 1<br />
28 A68AB-5E0553 HBS 4x6 1<br />
29 A68AB-5E0590 Strap guide cover 1<br />
30 A68AB-5E0569 HN 4mm 1<br />
31 A68AB-5E0575 Spring 1<br />
32 A68AB-5E0574 HBS 5x25 1<br />
33 A68AB-5E0580 HBS 4x12 2<br />
34 A68AB-5E0562 FMS 5x30 1<br />
35 A68AB-5E0592 Self-loading feeding leveler 1<br />
36 A68AB-5E0591-1 Lower strap guide (5~6mm) 1<br />
A68AB-5E0591-2 Lower strap guide (9mm) 1<br />
37 A68AB-5E0531 Bearing 605 1<br />
38 A68AB-5E0530 Idle roller 1<br />
<strong>SV5000C</strong><br />
<strong>2012</strong>.02<br />
73
9.4<br />
Fig.-1F-AB<br />
<strong>2012</strong>.02<br />
Arch Unit<br />
Fig- 1F ARCH UNIT<br />
74<br />
<strong>SV5000C</strong>
<strong>SV5000C</strong><br />
Fig.-1F-AB Arch Unit<br />
No. Part No. Part Name Part Name Quantity<br />
1 A68-1F0656 HBS 5x15 3<br />
2 A68-1F0667 RR 1<br />
3 A68-1F0607 Bearing 635 2<br />
4 A68-1F0608 Pulley 2<br />
5 A68-1F0660 SW 5mm 10<br />
6 A68-1F0662 PW 5mm(15) 7<br />
7 A68-1F0609 Pulley fix bracket 1<br />
8 A68-1F0665 FLG 5mm 5<br />
9 A68-1F0654 HBS 5x10 8<br />
10 A68-1F0663 PW 5mm 4<br />
11 A68-1F0655 HBS 5x12 2<br />
12 A68-1F0610 Strap guide fix plate 1<br />
13 A68AB-1F0606-1 Strap guide plate – right (W650) 1<br />
A68AB-1F0606-2 Strap guide plate – right (W850) 1<br />
14 A68AB-1F0605-1 Strap guide plate – left (W650) 1<br />
A68AB-1F0605-2 Strap guide plate – left (W850) 1<br />
16 A68-1F0664 FLG 4mm 2<br />
26 A68-1F0651 HBS 4x8 2<br />
27 A68-1F0658 SW 4mm 2<br />
28 A68-1F0659 PW 4mm 2<br />
29 A68-1F0669 HBS 4x25 1<br />
30 A68-1F0618 Aluminum block 1<br />
<strong>2012</strong>.02<br />
75
9.4<br />
Fig.-2F<br />
<strong>2012</strong>.02<br />
Arch Unit<br />
76<br />
<strong>SV5000C</strong>
<strong>2012</strong>.02<br />
<strong>SV5000C</strong><br />
Fig.-2F Arch Unit<br />
No. Part No. Part Name Part Name Quantity<br />
1 A68AB-2F0601-1 Arch cover – rear (W650*H400mm) 1<br />
A68AB-2F0601-2 Arch cover – rear (W650*H600mm) 1<br />
A68AB-2F0601-3 Arch cover – rear (W650*H800mm) 1<br />
A68AB-2F0601-4 Arch cover – rear (W650*H1200mm) 1<br />
A68AB-2F0601-5 Arch cover – rear (W850*H400mm) 1<br />
A68AB-2F0601-6 Arch cover – rear (W850*H600mm) 1<br />
A68AB-2F0601-7 Arch cover – rear (W850*H800mm) 1<br />
A68AB-2F0601-8 Arch cover – rear (W850*H1200mm) 1<br />
2 A68-2F0602-1 Brush on top arch (W650mm) 1<br />
A68-2F0602-2 Brush on top arch (W850mm) 1<br />
3 A68-2F0603-1 Brush of side arch (H400mm) 2<br />
A68-2F0603-2 Brush of side arch (H600mm 2<br />
A68-2F0603-3 Brush of side arch (H800mm) 2<br />
A68-2F0603-4 Brush of side arch (H1200mm) 2<br />
4 A68AB-2F0604-1 Arch cover – front (W650*H400mm) 1<br />
A68AB-2F0604-2 Arch cover – front (W650*H600mm) 1<br />
A68AB-2F0604-3 Arch cover – front (W650*H800mm) 1<br />
A68AB-2F0604-4 Arch cover – front (W650*H1200mm) 1<br />
A68AB-2F0604-5 Arch cover – front (W850*H400mm) 1<br />
A68AB-2F0604-6 Arch cover – front (W850*H600mm) 1<br />
A68AB-2F0604-7 Arch cover – front (W850*H800mm) 1<br />
A68AB-2F0604-8 Arch cover – front (W850*H1200mm) 1<br />
5 A68-2F0653 THS 5x10 10<br />
6 A68-2F0668 Control Board Hanger 1<br />
77
<strong>SV5000C</strong><br />
Fig.-2F Arch Unit<br />
No. Part No. Part Name Part Name Quantity<br />
7 A68-2F0670 FLG 8mm 1<br />
<strong>2012</strong>.02<br />
78
9.4<br />
Fig.-1G<br />
<strong>2012</strong>.02<br />
Arch Unit<br />
79<br />
<strong>SV5000C</strong>
<strong>SV5000C</strong><br />
Fig.-1G Arch Unit<br />
No. Part No. Part Name Part Name Quantity<br />
1 A68-1G0701-1 Bracket for connecting rod (5~6mm) 1<br />
A68-1G0701-2 Bracket for connecting rod (9mm) 1<br />
2 A68-1G0702 Bearing 6800 2<br />
3 A68-1G0703 Strap guide fixing plate 1<br />
4 A68AB-1G0704-1 Connecting rod shaft (650mm) 1<br />
A68AB-1G0704-1 Connecting rod shaft (850mm) 1<br />
5 A68-1G0705 Strap guide fixing plate - left 1<br />
6 A68-1G0706-1 Connect rod bracket – left (5~6mm) 1<br />
A68-1G0706-2 Connect rod bracket – left (9mm) 1<br />
7 A68-1G0764 FLG 5mm 3<br />
8 A68-1G0763 HN 5mm 2<br />
9 A68-1G0759 HSS 5x16 2<br />
10 A68-1G0756 HBS 5x15 5<br />
11 A68-1G0707 Bearing 1<br />
12 A68-1G0708 Link 1<br />
13 A68-1G0716 Pulley 1<br />
14 A68-1G0717 Bearing 635 1<br />
15 A68-1G0765 RR 1<br />
16 A68-1G0755 HBS 5x12 3<br />
17 A68-1G0709 Connecting rod 1<br />
<strong>2012</strong>.02<br />
80
<strong>SV5000C</strong><br />
Fig.-1G Arch Unit<br />
No. Part No. Part Name Part Name Quantity<br />
18 A68AB -1G0710-1 Wire rob (W650*H400mm) 1<br />
A68AB -1G0710-2 Wire rob (W650*H600mm) 1<br />
A68AB-1G0710-3 Wire rob (W650*H800mm) 1<br />
A68AB-1G0710-4 Wire rob (W650*H1200mm) 1<br />
A68AB-1G0710-5 Wire rob (W850*H400mm) 1<br />
A68AB-1G0710-6 Wire rob (W850*H600mm) 1<br />
A68AB-1G0710-7 Wire rob (W850*H800mm) 1<br />
A68AB-1G0710-8 Wire rob (W850*H1200mm) 1<br />
19 A68-1G0711 Bearing 605 2<br />
20 A68-1G0760 SW 5mm 6<br />
21 A68-1G0761 PW 5mm 6<br />
22 A68-1G0721 Cable wire 1<br />
23 A68-1G0767 FLG 6mm 1<br />
24 A68-1G0712 Auxiliary fasten plate 2<br />
25 A68-1G0753 THS 5x10 4<br />
26 A68-1G0768 Spacer 5mm 2<br />
<strong>2012</strong>.02<br />
81
9.4<br />
Fig.-2G-AB<br />
<strong>2012</strong>.02<br />
Arch Unit<br />
82<br />
Fig- 2G ARCH UNIT<br />
<strong>SV5000C</strong>
<strong>SV5000C</strong><br />
Fig.-2G-AB Arch Unit<br />
No. Part No. Part Name Part Name Quantity<br />
1 A68AB-2G0732-1 Strap guide (upper) (W650)(5~6mm) 1<br />
A68AB-2G0732-2 Strap guide (upper) (W650)(9mm) 1<br />
A68AB-2G0732-3 Strap guide (upper) (W850)(5~6mm) 1<br />
A68AB-2G0732-4 Strap guide (upper) (W850)(9mm) 1<br />
2 A68-2G0760 SW 5mm 7<br />
3 A68-2G0718 Bearing 605 10<br />
4 A68-2G0759 HSS 5x16 20<br />
5 A68-2G0764 FLG 5mm 20<br />
6 A68-2G0719 Chute connecting rod 4<br />
7 A68-2G0757 HBS 5x25 2<br />
8 A68-2G0724 Chute fix plate 8<br />
9 A68-2G0715 Chute connecting plate 4<br />
10 A68-2G0731 Rubber plate 8<br />
11 A68-2G0714 Chute 4<br />
12 A68-2G0713 Spring 4<br />
13 A68-2G0768 Spacer 5mm 5<br />
14 A68AB-2G0720-1 Strap guide (left) (H400mm)(5~6mm) 1<br />
A68AB-2G0720-2 Strap guide (left) (H400mm)(9mm) 1<br />
A68AB-2G0720-3 Strap guide (left) (H600mm)(5~6mm) 1<br />
A68AB-2G0720-4 Strap guide (left) (H600mm)(9mm) 1<br />
A68AB-2G0720-5 Strap guide (left) (H800mm)(5~6mm) 1<br />
A68AB-2G0720-6 Strap guide (left) (H800mm)(9mm) 1<br />
<strong>2012</strong>.02<br />
83
<strong>SV5000C</strong><br />
Fig.-2G-AB Arch Unit<br />
No. Part No. Part Name Part Name Quantity<br />
15 A68AB-2G0725-1 Strap guide (left, bottom) (W650) (5~6mm) 1<br />
A68AB-2G0725-2 Strap guide (left, bottom) (W650) (9mm) 1<br />
A68AB-2G0725-3 Strap guide (left, bottom) (W850) (5~6mm) 1<br />
A68AB -2G0725-4 Strap guide (left, bottom) (W850) (9mm) 1<br />
16 A68-2G0728 Strap width adjust plate 1<br />
17 A68-2G0751 PMS 4x8 3<br />
18 A68-2G0769 SW 4mm 3<br />
19 A68-2G0726 Strap width adjust plate 1<br />
20 A68AB-2G0729-1 Strap guide (right, bottom) (W650) (5~6mm) 1<br />
A68AB-2G0729-2 Strap guide (right, bottom) (W650) (9mm) 1<br />
A68AB-2G0729-3 Strap guide (right, bottom) (W850) (5~6mm) 1<br />
A68AB-2G0729-4 Strap guide (right, bottom) (W850) (9mm) 1<br />
21 A68AB-2G0730-1 Strap guide (right) (H400) (5~6mm) 1<br />
A68AB-2G0730-2 Strap guide (right) (H400) (9mm) 1<br />
A68AB-2G0730-3 Strap guide (right) (H600) (5~6mm) 1<br />
A68AB-2G0730-4 Strap guide (right) (H600) (9mm) 1<br />
A68AB-2G0730-5 Strap guide (right) (H800) (5~6mm) 1<br />
A68AB-2G0730-6 Strap guide (right) (H800) (9mm) 1<br />
22 A68-2G0758 HBS 5x100 1<br />
23 A68-2G0770 HBS 5x30 1<br />
24 A68-2G0723 Swing block 1<br />
25 A68-2G0717 Bearing 635 1<br />
26 A68-2G0733 Left 1<br />
<strong>2012</strong>.02<br />
84
<strong>SV5000C</strong><br />
Fig.-2G-AB Arch Unit<br />
No. Part No. Part Name Part Name Quantity<br />
27 A68AB-2G0735 Link 1<br />
29 A68-2G0734 Right 1<br />
30 A68-2G0766 HBS 5x40 1<br />
31 A68-2G0756 HBS 5x15 4<br />
32 A68-2G0775 HBS 4x8 2<br />
33 A68-2G0722 Hexagon shaft 2<br />
34 A68-2G0712 Auxiliary fasten plate 2<br />
35 A68-2G0761 PW 5mm 6<br />
36 A68-2G0755 HBS 5x12 2<br />
37 A68-2G0776 Iron Sheet 2<br />
38 A68-2G0777 HSS 5x10 4<br />
39 A68-2G0778 Stops the slippery cap nut 4<br />
<strong>2012</strong>.02<br />
85
9.5<br />
Fig.-6H-AB<br />
<strong>2012</strong>.02<br />
18<br />
17<br />
11<br />
19<br />
16<br />
15<br />
Body Unit<br />
11<br />
13<br />
14<br />
20<br />
21<br />
86<br />
8<br />
9<br />
23 24<br />
7<br />
6<br />
10<br />
11<br />
12<br />
25<br />
22<br />
5<br />
26<br />
4<br />
3<br />
2<br />
1<br />
<strong>SV5000C</strong>
<strong>2012</strong>.02<br />
<strong>SV5000C</strong><br />
Fig.-6H-AB Body Unit<br />
No. Part No. Part Name Part Name Quantity<br />
1 A68AB-6H08152 HMI touch screen 7” 1<br />
2 A68AB-6H08150 E-Stop 1<br />
3 A68AB-6H08151 Push button - white 1<br />
4 A68AB-6H08155 Select Switch 1<br />
5 A68AB-6H08156 Push Button - orange 1<br />
6 A68AB-6H08157 Push Button – Green 1<br />
7 A68AB-6H08158 Push Button – yellow 1<br />
8 A68AB-6H08148 Stack Light 1<br />
9 A68AB-6H08149 Operating Panel 1<br />
10 A68AB-6H08159 Bracket 1<br />
11 A68AB-6H08172 Cover 1<br />
12 A68AB-6H08182 Rear right cover 1<br />
13 A68AB-6H08146-1 Rear cover (W650mm) 1<br />
A68AB-6H08146-2 Rear cover (W850mm) 1<br />
14 A68AB-6H08145-1 Frame (W650mm) 1<br />
A68AB-6H08145-2 Frame (W850mm) 1<br />
15 A68AB-6H08181 Rear left cover 1<br />
16 A68AB-6H08180 Centre left cover 1<br />
17 A68AB-6H08174 Front left cover 1<br />
18 A68AB-6H08147-1 Front cover (W650mm) 1<br />
A68AB-6H08147-2 Front cover (W850mm) 1<br />
19 A68AB-6H08169 Front right cover 1<br />
20 A68AB-6H08168 Low Strap Sensor Bracket 1<br />
21 A68AB-6H08167 Reflector 1<br />
87
<strong>SV5000C</strong><br />
Fig.-6H-AB Body Unit<br />
No. Part No. Part Name Part Name Quantity<br />
22 A68AB-6H08185 Handle 1<br />
23 A68AB-6H08166 Low Strap Sensor Bracket 1<br />
24 A68AB-6H08127 Low Strap Photocell 1<br />
25 A68AB-6H08101 Empty Strap Sensor 1<br />
26 A68AB-6H08165 Sensor Bracket 1<br />
<strong>2012</strong>.02<br />
88
9.5<br />
Fig.-7H-AB<br />
<strong>2012</strong>.02<br />
8<br />
19<br />
9<br />
11<br />
10<br />
12<br />
6<br />
20<br />
13<br />
5<br />
7<br />
14<br />
Body Unit<br />
15<br />
16<br />
8<br />
17<br />
18<br />
89<br />
20<br />
4<br />
2<br />
18<br />
19<br />
1<br />
3<br />
<strong>SV5000C</strong>
<strong>2012</strong>.02<br />
<strong>SV5000C</strong><br />
Fig.-7H-AB Body Unit<br />
No. Part No. Part Name Part Name Quantity<br />
1 A68AB-7H08183-1 Right Rear Cover (W650mm) 1<br />
A68AB-7H08183-2 Right Rear Cover (W850mm) 1<br />
2 A68AB-7H08184-1 Left Rear Cover (W650mm) 1<br />
A68AB-7H08184-2 Left Rear Cover (W850mm) 1<br />
3 A68AB-7H08136 Cover 1<br />
4 A68AB-7H08135 Transformer 1<br />
5 A68AB-7H08178 Electrical Control Box Door 1<br />
6 A68AB-7H08177 Acrylic 1<br />
7 A68AB-7H08179 Electrical Control Box 1<br />
8 A68AB-7H08160 Table Height Indicator 4<br />
9 A68AB-7H08164 Caster 2<br />
10 A68AB-7H0804 Heater Transformer 1<br />
11 A68AB-7H0805 Transformer Cover 1<br />
12 A68AB-7H08153-1 Front Door (Left) (W650mm) 1<br />
A68AB-7H08153-2 Front Door (Left) (W850mm) 1<br />
13 A68AB-7H0813 Latch 1<br />
14 A68AB-7H08154-1 Front Door (Right) (W650mm) 1<br />
A68AB-7H08154-2 Front Door (Right) (W850mm) 1<br />
15 A68AB-7H0814 Safety Switch Key 1<br />
16 A68AB-7H0815 Safety Switch 1<br />
17 A68AB-7H08161 Right Adjustable Led 2<br />
18 A68AB-7H08163 Caster with Brake 2<br />
19 A68AB-7H08162 Left Adjustable Led 2<br />
20 A68AB-7H0887 Fasten Plate 8<br />
90
9.5<br />
Fig.-8H-AB<br />
<strong>2012</strong>.02<br />
Body Unit<br />
91<br />
<strong>SV5000C</strong>
<strong>SV5000C</strong><br />
Fig.-8H-AB Body Unit<br />
No. Part No. Part Name Part Name Quantity<br />
1 A68AB-8H0866 SR-12 1<br />
2 A68AB-8H0834 Bearing 6002 2<br />
3 A68AB-8H0862 PW 6mm (19 ) 4<br />
4 A68AB-8H0861 SW 6mm 4<br />
5 A68AB-8H0857 HBS 6x16 4<br />
6 A68AB-8H0873 HBS 6x33 3<br />
7 A68AB-8H0886 Magnetic Brake Bracket 1<br />
8 A68AB-8H0832 Magnetic Brake 1<br />
9 A68AB-8H0865 KYA 5x15 1<br />
10 A68AB-8H0885 Shaft 1<br />
11 A68AB-8H0867 SR-8 1<br />
12 A68AB-8H0890 Roller Holder 1<br />
13 A68AB-8H0889 Arm 1<br />
14 A68AB-8H0842 Ball Bearing 628 2<br />
15 A68AB-8H8343 Idle Roller 1<br />
16 A68AB-8H0855 HSS 6x10 2<br />
17 A68AB-8H0882 Dispenser Bracket 1<br />
18 A68AB-8H0883 Dispenser Flange (Flat) 1<br />
19 A68AB-8H0884 Dispenser Inner Ring 1<br />
20 A68AB-8H0829 Dispenser Flange 1<br />
21 A68AB-8H0830 Dispenser Handle 1<br />
22 A68AB-8H08<strong>111</strong> HBS 6x10 8<br />
<strong>2012</strong>.02<br />
92
9.5<br />
Fig.-9H-AB<br />
<strong>2012</strong>.02<br />
Body Unit<br />
93<br />
<strong>SV5000C</strong>
<strong>SV5000C</strong><br />
Fig.-9H-AB Body Unit<br />
No. Part No. Part Name Part Name Quantity<br />
1 A68AB-9H08175 Photocell Bracket 1<br />
2 A68AB-9H08176 Photocell for Strapping position 1<br />
3 A68AB-9H08171 Reflector 1<br />
4 A68AB-9H08170 Reflector Bracket 1<br />
<strong>2012</strong>.02<br />
94
9.6<br />
Fig.-2J-AB<br />
<strong>2012</strong>.02<br />
Control Box Unit<br />
Fig -2J-AB CONTROL BOX UNIT<br />
SS R4<br />
SS R5<br />
95<br />
<strong>SV5000C</strong><br />
F5<br />
F6<br />
F1<br />
F2<br />
F4<br />
F3<br />
F7
<strong>2012</strong>.02<br />
<strong>SV5000C</strong><br />
Fig.-2J-AB Control Box Unit<br />
No. Part No. Part Name Part Name Quantity<br />
1 A68AB-2J0901 Control Box Bottom Plate 1<br />
2 A68AB-2J0930 SSR 2<br />
3 A68AB-2J0926 Fuse 8<br />
4 A68AB-2J0928 Power Switch 1<br />
5 A68AB-2J0929 Stop Button 1<br />
6 A68AB-2J0906-1 Cam Shaft Servo Driver<br />
(see Appendix A)<br />
A68AB-2J0906-2 Cam Shaft Servo Driver<br />
(see Appendix A)<br />
Yaskawa (old),<br />
until August 30th, 2010<br />
Yaskawa (new),<br />
September, 2010 - present<br />
7 A68AB-2J0907 Counter 1<br />
8 A68AB-2J0908 Fan 1<br />
9 A68AB-2J0909 Connector (PCB and Driver) 2<br />
10 A68AB-2J0910 Servo power Cord 2<br />
11 A68AB-2J0911 Servo Signal Cable 2<br />
12 A68AB-2J0912-1 Feed Re-tracking Servo Driver<br />
(see Appendix A)<br />
A68AB-2J0912-2 Feed Re-tracking Servo Driver<br />
(see Appendix A)<br />
Yaskawa (old),<br />
until August 30th, 2010<br />
Yaskawa (new),<br />
September, 2010 - present<br />
13 A68AB-2J0913 Magnet Contactor 1<br />
14 A68AB-2J0914 Power Supply 1<br />
15 A68AB-2J0915 PLC 1<br />
16 A68AB-2J0923 Inverter 1<br />
17 A68AB-2J0924 Resistance for Clutch Braking 1<br />
18 A68AB-2J0935 Relay base 1<br />
1<br />
1<br />
1<br />
1<br />
96
<strong>SV5000C</strong><br />
Fig.-2J-AB Control Box Unit<br />
No. Part No. Part Name Part Name Quantity<br />
19 A68AB-2J0936 Relay (Omron, LY2N-J) 8<br />
20 A68AB-2J0925 Power Cord 1<br />
21 A68AB-2J0933 External Connector socket -1 1<br />
22 A68AB-2J0934 External Connector Socket 2 1<br />
23 A68AB-2J0937 Relay Base 2<br />
24 A68AB-2J0938 Relay IDEC (RJ2S-CL-D24) 2<br />
51 A68AB-2J0951 HBS 6x15 4<br />
52 A68AB-2J0952 SW 6mm 4<br />
53 A68AB-2J0953 PW 6mm 4<br />
<strong>2012</strong>.02<br />
97
9.7<br />
Fig.-1K-AB<br />
<strong>2012</strong>.02<br />
Fig- 1K-AB<br />
Belt Driving Table Top Assembly<br />
98<br />
<strong>SV5000C</strong>
<strong>SV5000C</strong><br />
Fig.-1K-AB Belt Driving Table Top Assembly<br />
No. Part No. Part Name Part Name Quantity<br />
1 A68AB-1K1001-1 Rear Cover (W650mm) 1<br />
A68AB-1K1001-2 Rear Cover (W850mm) 1<br />
2 A68AB-1K1002-1 Front Cover (W650mm) 1<br />
A68AB-1K1002-2 Front Cover (W850mm) 1<br />
3 A68AB-1K1003-1 Tope Plate Reinforce (W650mm) 2<br />
A68AB-1K1003-2 Tope Plate Reinforce (W850mm) 2<br />
4 A68AB-1K1039 Rear Cover Plate 1<br />
5 A68AB-1K1040 Front Cover Plate 1<br />
6 A68AB-1K1041 Strap width Adjustment Assembly 1<br />
7 A68AB-1K1042 Front Cover Plate 1<br />
8 A68AB-1K1008 Shaft Backet 8<br />
9 A68AB-1K1009 Washer 8<br />
10 A68AB-1K1010 Ball Bearing 8<br />
11 A68AB-1K1043 Multi Grove Front Roller 4<br />
12 A68AB-1K1044 Shaft 4<br />
13 A68AB-1K1051 HBS 5x25 4<br />
14 A68AB-1K1053 5x12 FMS 12<br />
15 A68AB-1K1052 5x8 FMS 28<br />
16 A68AB-1K1055 FLG 5mm 12<br />
17 A68AB-1K1060 HBS 5x30 8<br />
18 A68AB-1K1054 HN 5mm 8<br />
19 A68AB-1K1066 Front Cover Plate 1<br />
20 A68AB-1K1067 Rear Cover Plate 1<br />
<strong>2012</strong>.02<br />
99
9.7<br />
Belt Driving Table Top Assembly<br />
Fig.-2K-AB<br />
Fig- 2K-AB 桌頮 面 傳 動<br />
<strong>2012</strong>.02<br />
100<br />
<strong>SV5000C</strong>
<strong>SV5000C</strong><br />
Fig.-2K-AB Belt Driving Table Top Assembly<br />
No. Part No. Part Name Part Name Quantity<br />
1 A68AB-2K1024 Base Frame 1<br />
2 A68AB-2K1030 Sleeve Bearing MB2010 4<br />
3 A68AB-2K1029 Fixed Collar 4<br />
4 A68AB-2K1028 Bearing 6004 4<br />
5 A68AB-2K1031 Shaft 2<br />
6 A68AB-2K1027-1 Rear Belt Driving Roller (W650mm) 1<br />
A68AB-2K1027-2 Rear Belt Driving Roller (W850mm) 1<br />
7 A68AB-2K1026 Rear Aluminum Basket 1<br />
8 A68AB-2K1056 HBS 6x20 8<br />
9 A68AB-2K1014 Shaft Collar 4<br />
10 A68AB-2K1013 Shaft Base 4<br />
11 A68AB-2K1060 Puller 1 4<br />
12 A68AB-2K1061 Puller 2 4<br />
13 A68AB-2K1062 Puller 3 4<br />
14 A68AB-2K1058 HBS 5x15 8<br />
15 A68AB-2K1063 THS 5x10 8<br />
16 A68AB-2K1064 HBS 4x8 4<br />
17 A68AB-2K1065 HBS 5x25 4<br />
18 A68AB-2K1057 HBS 6x16 6<br />
19 A68AB-2K1017 Pulley Guide Base 1<br />
20 A68AB-2K1018 Ball Bearing 6002 6<br />
21 A68AB-2K1019 Pulley 3<br />
22 A68AB-2K1020 SR-12 3<br />
<strong>2012</strong>.02<br />
101
<strong>SV5000C</strong><br />
Fig.-2K-AB Belt Driving Table Top Assembly<br />
No. Part No. Part Name Part Name Quantity<br />
23 A68AB-2K1045 Transmission Belt 9-73’ 1<br />
24 A68AB-2K1059 HSS 6x10 2<br />
25 A68AB-2K1038 Motor Pulley (Grooved) 1<br />
26 A68AB-2K1037 Reducing Motor 1<br />
27 A68AB-2K1035 Proximity Switch Bracket 2<br />
28 A68AB-2K1036 Proximity Switch 2<br />
29 A68AB-2K1021 Table Plate Frame Bracket 4<br />
30 A68AB-2K1025 Front Aluminum Base Frame 1<br />
31 A68AB-2K1046 Table Top driving Belt 59-24’ 4<br />
32 A68AB-2K1047-1 Front Belt Roller (W650mm) 1<br />
A68AB-2K1047-2 Front Belt Roller (W850mm) 1<br />
33 A68AB-2K1023 Front Left Aluminum Base Frame 1<br />
34 A68AB-2K1022 Adjustment Base Frame 1<br />
35 A68AB-2K1016 Belt Guiding Roller Bracket 1<br />
<strong>2012</strong>.02<br />
102
9.8<br />
Fig.-1L-AB<br />
<strong>2012</strong>.02<br />
9<br />
8<br />
27<br />
Pneumatic Assembly (if equipped)<br />
7<br />
24<br />
26<br />
23<br />
25<br />
10<br />
4<br />
11<br />
5<br />
6<br />
3<br />
22<br />
2<br />
1<br />
21<br />
15<br />
28<br />
17<br />
12<br />
14<br />
13<br />
16<br />
15<br />
21<br />
24<br />
18<br />
24<br />
19<br />
20<br />
103<br />
27<br />
<strong>SV5000C</strong>
<strong>2012</strong>.02<br />
<strong>SV5000C</strong><br />
Fig.-1L-AB Pneumatic Assembly<br />
No. Part No. Part Name Part Name Quantity<br />
1 A68AB-1L1101-1 Frame (W650mm) 1<br />
A68AB-1L1101-2 Frame (W850mm) 1<br />
2 A68AB-1L1102 Bearing 4<br />
3 A68AB-1L1103-1 Guiding Rod (H400mm) 4<br />
A68AB-1L1103-2 Guiding Rod (H600mm) 4<br />
A68AB-1L1103-3 Guiding Rod (H800mm) 4<br />
A68AB-1L1103-4 Guiding Rod (H1200mm) 4<br />
4 A68AB-1L1104-1 Cylinder (H400mm) 1<br />
A68AB-1L1104-2 Cylinder (H600mm) 1<br />
A68AB-1L1104-3 Cylinder (H800mm) 1<br />
A68AB-1L1104-4 Cylinder (H1200mm) 1<br />
5 A68AB-1L1105 Adaptor 2<br />
6 A68AB-1L1106 Plate 1<br />
7 A68AB-1L1107 Pressure gauge 1<br />
8 A68AB-1L1108 Triad 1<br />
9 A68AB-1L1109 Triad housing 1<br />
10 A68AB-1L<strong>111</strong>0 Air vent valve 2<br />
11 A68AB-1L<strong>111</strong>1 Air vent valve holder 1<br />
12 A68AB-1L<strong>111</strong>2 Cushion rubber 2<br />
13 A68AB-1L<strong>111</strong>3 Bracket 1<br />
14 A68AB-1L<strong>111</strong>4-1 Pressure lever (back) (W650mm) 1<br />
A68AB-1L<strong>111</strong>4-2 Pressure lever (back) (W850mm) 1<br />
15 A68AB-1L<strong>111</strong>5 Shaft 6<br />
16 A68AB-1L<strong>111</strong>6 Screw M10 2<br />
104
<strong>SV5000C</strong><br />
Fig.-1L-AB Pneumatic Assembly<br />
No. Part No. Part Name Part Name Quantity<br />
17 A68AB-1L<strong>111</strong>7 Cylinder adaptor 1<br />
18 A68AB-1L<strong>111</strong>8-1 Pressure lever (front) (W50mm) 1<br />
A68AB-1L<strong>111</strong>8-2 Pressure lever (front) (W50mm) 1<br />
19 A68AB-1L<strong>111</strong>9 Cloth rope holder 2<br />
20 A68AB-1L1120-1 Cloth rope (W50mm) 2<br />
A68AB-1L1120-2 Cloth rope (W50mm) 2<br />
21 A68AB-1L1121 R ring 12<br />
22 A68AB-1L1122 Retaining ring 4<br />
23 A68AB-1L1123 SW 14 mm 4<br />
24 A68AB-1L1124 Screw cap M14 10<br />
25 A68AB-1L1125 HBS 5 x 10 2<br />
26 A68AB-1L1126 HBS 5 x 6 2<br />
27 A68AB-1L1127 HBS 8 x 16 4<br />
28 A68AB-1L1128 HBS 6 x 20 4<br />
<strong>2012</strong>.02<br />
105
<strong>2012</strong>.02<br />
9.9<br />
Screw Classification List<br />
Shape Classification Name Specification<br />
HBS Hexagon Bot Screw HBS Mˍˍ*ˍˍ<br />
HSS Headless Set Screw HSS Mˍˍ*ˍˍ<br />
HB Hex.hd Blot HB Mˍˍ*ˍˍ<br />
FMS Flat M/C Screw FMS Mˍˍ*ˍˍ<br />
TMS Truss hd.M/C Screw TMS Mˍˍ*ˍˍ<br />
PMS Pan M/C Screw PMS Mˍˍ*ˍˍ<br />
106<br />
<strong>SV5000C</strong>
<strong>2012</strong>.02<br />
Shape Classification Name Specification<br />
PW Plain Washer PW Mˍˍ<br />
HN Hex.Nut HN Mˍˍ<br />
WN WN Mˍˍ<br />
TW TW Mˍˍ<br />
Stop Ring H-ˍˍ<br />
Stop Ring S-ˍˍ<br />
Stop Ring E-ˍˍ<br />
Spring Pin SP Øˍˍ<br />
107<br />
<strong>SV5000C</strong>
9.10<br />
Part List And Drawings<br />
<strong>SV5000C</strong><br />
Appendix A: Motor Application Phase<br />
ATTENTION<br />
As replacing the parts, motors at each application phase have their own corresponding drivers. Motor and driver has to be tied in the same brand.<br />
Different brands cannot be mutually shared. Be sure to check in advance its manufacture date as purchasing spare parts.<br />
1. Motor<br />
In previous version of operational manual, the part numbers of motors are listed as following:<br />
A68-1A0103(servo motor);<br />
A68-1D0401 (servo motor);<br />
Because there is a big parts modification of motors, the part number of motors now is split into different numbers, corresponding different versions.<br />
Old part No. New Part No. brand Part Name Quantity Application Phase<br />
A68-1A0103 A68-1A0103-1 Yaskawa (old) servo motor 1 until August, 2010<br />
A68-1D0401 A68-1D0401-1 Yaskawa (old) servo motor 1 until August, 2010<br />
A68-1A0103 A68-1A0103-2 Yaskawa (new) servo motor 1 September, 2010 - present<br />
A68-1D0401 A68-1D0401-2 Yaskawa (new) servo motor 1 September, 2010 - present<br />
** as demanding the motor, please check first the I.D. plate of the machine or present its serial number for checking its version.<br />
<strong>2012</strong>.02<br />
108
2. Motor driver<br />
<strong>SV5000C</strong><br />
In previous version of operational manual, the part number of motors is listed as following:<br />
A68-2J0906 (cam shaft servo driver)<br />
A68-2J0912 (feed re-tracking servo driver)<br />
Because of the same reason of big parts modification of motors, the part number of motor drivers now is split into different numbers, corresponding<br />
its different versions.<br />
Old part No. New Part No. Brand Part Name Quantity Application Phase<br />
A68AB-2J0912 A68AB-2J0912-1 Yaskawa (old) feed re-tracking servo driver 1 until August, 2010<br />
A68AB-2J0906 A68AB-2J0906-1 Yaskawa (old) cam shaft servo driver 1 until August, 2010<br />
A68AB-2J0912 A68AB-2J0912-2 Yaskawa (new) feed re-tracking servo driver 1 September, 2010 - present<br />
A68AB-2J0906 A68AB-2J0906-2 Yaskawa (new) cam shaft servo driver 1 September, 2010 - present<br />
** as demanding the motor, please check first the I.D. plate of the machine or present its serial number for checking its version.<br />
<strong>2012</strong>.02<br />
109