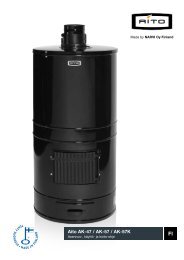
NARVI SAUNA HEATERS NC 16, NC 20, NC 24 and NC ... - Narvi Oy
NARVI SAUNA HEATERS NC 16, NC 20, NC 24 and NC ... - Narvi Oy
NARVI SAUNA HEATERS NC 16, NC 20, NC 24 and NC ... - Narvi Oy

Create successful ePaper yourself
Turn your PDF publications into a flip-book with our unique Google optimized e-Paper software.
EN<br />
<strong>NARVI</strong> <strong>SAUNA</strong> <strong>HEATERS</strong> <strong>NC</strong> <strong>16</strong>, <strong>NC</strong> <strong>20</strong>,<br />
<strong>NC</strong> <strong>24</strong> <strong>and</strong> <strong>NC</strong> <strong>20</strong> VS.<br />
INSTALLATION, USER AND<br />
MAINTENA<strong>NC</strong>E INSTRUCTIONS<br />
<strong>Narvi</strong> <strong>Oy</strong> • Yrittäjäntie 14 • FI-27230 LAPLAND, FINLAND • Phone: 0<strong>20</strong>7 4<strong>16</strong> 740 • www.narvi.fi • narvi@narvi.fi
EN<br />
INSTALLATION, USER AND<br />
MAINTENA<strong>NC</strong>E INSTRUCTIONS<br />
<strong>NARVI</strong> <strong>SAUNA</strong> <strong>HEATERS</strong> <strong>NC</strong> <strong>16</strong>, <strong>NC</strong> <strong>20</strong>, <strong>NC</strong> <strong>24</strong> <strong>and</strong> <strong>NC</strong> <strong>20</strong> VS.<br />
SAFETY INTERVALS<br />
Before installing the sauna heater ensure the required safety clearances for<br />
structures made of inflammable material are met. The safety clearances of the<br />
wood-burning sauna heater are 500 mm to the sides <strong>and</strong> to the rear <strong>and</strong> 1<strong>20</strong>0<br />
mm upwards. At the base of the sauna heater, a concrete board of at least 70<br />
mm or KOTA installation base must be used. If you are unsure please contact<br />
your local rescue board for guidance.<br />
NB! If the sauna heater is installed on top of floor heating, a KOTA installation<br />
base must be used.<br />
Inflammable construction parts, such as<br />
wooden walls, sauna seats, etc.<br />
500<br />
1. Minimum distance from the vertical surfaces<br />
of the sauna heater to unprotected wooden<br />
parts 500 mm. (Figure 1)<br />
500 250<br />
Figure 1<br />
The protection must also be clear of the floor<br />
<strong>and</strong> the ceiling.<br />
2. The safety clearance mentioned in<br />
paragraph 1 can, however, be reduced by<br />
half (250 mm) when “light-single” protection<br />
is used. Single-light protection of this type<br />
can be made of 500 a non-combustible, fibrereinforced<br />
cement board of at least 7 mm thick<br />
or of a metal plate of at least 1 mm, which has<br />
been fastened securely enough to the wall. A<br />
ventilation gap of at least 30 mm must be left<br />
between the wooden surface to be protected<br />
<strong>and</strong> the safety plate by using piping collars.<br />
(Figure 2)<br />
500<br />
250<br />
250<br />
50<br />
500<br />
400<br />
Firgure 2<br />
30 mm ventilation gap<br />
1 mm metal plate or 7 mm<br />
non-combustible, fibrereinforced<br />
concrete board<br />
2<br />
3. The safety clearance in paragraph 2 can be A<br />
further reduced to half (125 mm) when double<br />
protection is used. Double protection can be<br />
made 250of two plates 400 as described in paragraph<br />
2 <strong>and</strong>, then a ventilation gap of at least 30 mm<br />
must be left between the wall <strong>and</strong> the plates.<br />
(Figure 3)<br />
250<br />
A<br />
500<br />
50<br />
125<br />
30 mm ventilation gap<br />
400<br />
125<br />
Firgure 3<br />
1 mm metal plate or 7 mm<br />
non-combustible, fibrereinforced<br />
concrete board<br />
X<br />
400<br />
110/55
500<br />
500<br />
4. For brick walls, a ventilation gap of 50 mm between<br />
the vertical surfaces of the sauna heater <strong>and</strong> the wall is<br />
sufficient. (Figure 4)<br />
250<br />
500<br />
The dimension A is determined<br />
250<br />
based on the safety<br />
method used for wooden surfaces: 400<br />
A<br />
50<br />
Figure 4<br />
- without protection 500 mm<br />
- single-light protection 250 mm<br />
- double-light protection 125 mm<br />
5. Brickwork of 55 mm that is open at the edges <strong>and</strong><br />
at least 30 mm clear of the surface to be protected<br />
A<br />
corresponds to single-light protection. Brickwork which<br />
is 110 mm of the surface to be protected corresponds<br />
to double-light protection. (Figure 5)<br />
50<br />
400<br />
A<br />
50<br />
125<br />
400<br />
Figure 5<br />
X<br />
00<br />
00<br />
50<br />
Protection of the ceiling:<br />
When the distance from the upper surface of the sauna<br />
heater to the ceiling is at least 1<strong>20</strong>0 mm no special<br />
protection of the ceiling is necessary. If the distance<br />
is less than 1<strong>20</strong>0 mm the protection method for the<br />
ceiling is selected from paragraphs 400 1-3. (Figure 6)<br />
Protection of the floor in front of the sauna heater:<br />
Floors made of inflammable material must be protected<br />
with a metal plate that reaches at least 100 mm to both<br />
sides of the sauna heater <strong>and</strong> 400 mm in front.<br />
There must be 1000 mm free<br />
110/55 mm<br />
125<br />
room in front of the hatch.<br />
(Figure 7)<br />
400<br />
125<br />
400<br />
X<br />
110/55 mm<br />
The ceiling without<br />
protection<br />
100 100<br />
X mm<br />
1<strong>20</strong>0<br />
Single-light protection 900<br />
Figure 6<br />
INSTALLATION OF THE <strong>SAUNA</strong> HEATER<br />
In all our sauna heater models there is the smoke<br />
opening in the connective 100 flue on 100 top <strong>and</strong> rear of the<br />
firebox. Block the unused opening with the cover plate<br />
included in the delivery. Also included in the delivery<br />
is a <strong>20</strong>0 mm flue pipe connector for connection of the<br />
sauna wood-burning heater to a rear flue pipe. When<br />
connecting the sauna wood-burning heater to the flue<br />
from the top of the wood-burning heater, always use<br />
KOTA chimney pipes or KOTA chimney flues.<br />
Do not install the flue adapter pipe too deeply into the<br />
chimney flue, as this will reduce the flue draw. The gap<br />
100 100<br />
between the flue adapter pipe <strong>and</strong> the chimney flue<br />
must be insulated e.g. with mineral wool. The sauna<br />
wood-burning heater comes fitted with adjustable legs<br />
to assist accurate installation. In connection with the<br />
sauna wood-burning heater installation, ensure that<br />
the wood-burning heater st<strong>and</strong>s firmly on its base <strong>and</strong><br />
that all of the safety clearances mentioned in these<br />
instructions have been observed correctly.<br />
X<br />
400<br />
400<br />
100 100<br />
Figure 7<br />
Figure 8<br />
3
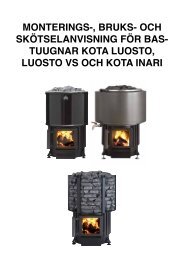
INSTALLATION OF THE FAUCET, water<br />
tank models (<strong>20</strong> <strong>NC</strong> VS)<br />
The water tank is on the side of the<br />
stove <strong>and</strong> it has a large opening for<br />
filling it. The faucet is installed when the<br />
stove is installed.<br />
Figure 9. Place the faucet so that the<br />
threads are visible on the inside of the<br />
tank. Place the washer on the outside of<br />
the tank, turn the locking nut into place<br />
with the smooth side against the washer<br />
<strong>and</strong> tighten, turning the faucet clockwise<br />
<strong>and</strong> holding the keeper in place with a<br />
wrench. Figure 9<br />
AIR FLOW CONTROL PLATES FOR <strong>NARVI</strong> <strong>NC</strong> <strong>16</strong>, <strong>NC</strong><br />
<strong>20</strong>, <strong>NC</strong> <strong>24</strong> <strong>and</strong> <strong>NC</strong> <strong>20</strong> VS.<br />
(There is no air flow control plates for <strong>NC</strong> <strong>20</strong> VS)<br />
Technical data <strong>Narvi</strong> <strong>16</strong> <strong>NC</strong> <strong>Narvi</strong> <strong>20</strong> <strong>NC</strong> <strong>Narvi</strong> <strong>24</strong> <strong>NC</strong> <strong>Narvi</strong> <strong>20</strong> <strong>NC</strong> VS<br />
Height 78 cm 80 cm 82 cm 73 cm<br />
Width 50 cm 54 cm 58 cm 59 cm<br />
Depth 58 cm 58 cm 58 cm 57 cm<br />
Operation weight 122 kg 136 kg <strong>16</strong>2 kg 1<strong>24</strong> cm<br />
Stone Ø 10-15 cm <strong>20</strong> kg 40 kg 40 kg <strong>20</strong> kg<br />
Stone Ø 5-10 cm 30 kg <strong>20</strong> kg 40 kg 30 kg<br />
Steam room size 8–<strong>16</strong> m 3 8–<strong>20</strong> m 3 10–<strong>24</strong> m 3 8–<strong>20</strong> m 3<br />
External diameter of the connective flue 119 mm 119 mm 119 mm 119 mm<br />
Distance of the bottom edge of the<br />
connective flue from the floor (min.) +<br />
adjustment space for adjustable legs<br />
0-35 mm<br />
58 cm 58 cm 58 cm 54 cm<br />
Firebox cover 10 mm 10 mm 10 mm 10 mm<br />
Control plate of the firebox 6 mm 6 mm 6 mm 6 mm<br />
Depth of the firebox 415 mm 415 mm 415 mm 415 mm<br />
Height of the firebox 335 mm 335 mm 335 mm 335 mm<br />
4<br />
Volume of the water tank – – – 23 l
EuraPrint 08/<strong>20</strong>11<br />
PREHEATING<br />
Before use <strong>and</strong> arranging the stones, the sauna heater must be heated to remove<br />
the protective agents. 1-2 fireboxes of wood are sufficient for preheating. During<br />
preheating, ensure that there is plenty of ventilation in the sauna to allow the<br />
combustion gases from protective agents to escape. Preheating can also be<br />
done outdoors. After preheating <strong>and</strong> before arranging the stones remove loose<br />
material from the stone basket. Use a steel brush for example.<br />
<strong>SAUNA</strong> HEATER STONES<br />
We recommend that you use KOTA olive dolerite stones. Arrange the stones so<br />
that bigger stones are in the bottom of the stone basket. Do not heap stones too<br />
tightly because air must circulate between the stones. KOTA sauna heater stones<br />
have been prewashed <strong>and</strong> can be placed directly on the sauna heater. We do<br />
not recommend using light stones. Fresh water must be used as steam water.<br />
Seawater considerably shortens the service life of your sauna heater.<br />
FIREWOOD<br />
Both hardwood <strong>and</strong> softwood can be used in the <strong>NARVI</strong> sauna heater. Fell <strong>and</strong><br />
cut trees into firewood outside of the growing season. Dry the firewood outdoors<br />
in summer <strong>and</strong> move it to a dry store before autumn rain. Store one or two years’<br />
supply of firewood in surroundings where the moisture is < <strong>20</strong> %. Do not burn<br />
chipboards, plastic, impregnated wood <strong>and</strong> waste in the firebox.<br />
HEATING<br />
Before heating the sauna heater, the grate must always be cleaned <strong>and</strong> the ash<br />
pan must be emptied. Start by lightning a small quantity of wood on the upper<br />
surface of the wood. When the wood is burning properly add more wood to 2/3<br />
of the height of the firebox. To burn properly wood needs air. Use the draught<br />
regulator to adjust the amount of air. Avoid heating the sauna stove so that the<br />
channels of the stone basket glow red for a long time because this will overload<br />
the firebox <strong>and</strong> the service life of the sauna stove will be reduced! The water tank<br />
must be filled every time the stove is heated. After your sauna leave a little fire in<br />
the sauna stove to dry the sauna.<br />
MAINTENA<strong>NC</strong>E OF THE <strong>SAUNA</strong> HEATER<br />
Sweep the sauna heater through the soot hatches at least once a year to<br />
maintain a proper draught. At the same time, check the condition of the sauna<br />
stove stones <strong>and</strong> replace any warn-out stones.<br />
WARRANTY<br />
The stove is quaranteed for twelve (12) months. The warranty period starts from<br />
the moment that the goods are delivered to the end user. The supplier is not<br />
liable in any way for defects within the framework of the warranty or other defects<br />
that appear later than two (2) years after the delivery of the goods to the client.<br />
The supplier may decide to either repair defective goods or replace the defective<br />
goods at its discretion. The warranty does not cover possible transport,<br />
unloading or installation costs or other corresponding costs<br />
The client must check the goods immediately after delivery. The client must<br />
submit a written notice of claims to the supplier within two (2) weeks of<br />
discovering the defect or the moment when the defect should have been<br />
discovered.<br />
5