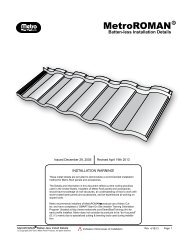
Metro Tile Battenless Installation Guide - Best Buy Metals
Metro Tile Battenless Installation Guide - Best Buy Metals
Metro Tile Battenless Installation Guide - Best Buy Metals

You also want an ePaper? Increase the reach of your titles
YUMPU automatically turns print PDFs into web optimized ePapers that Google loves.
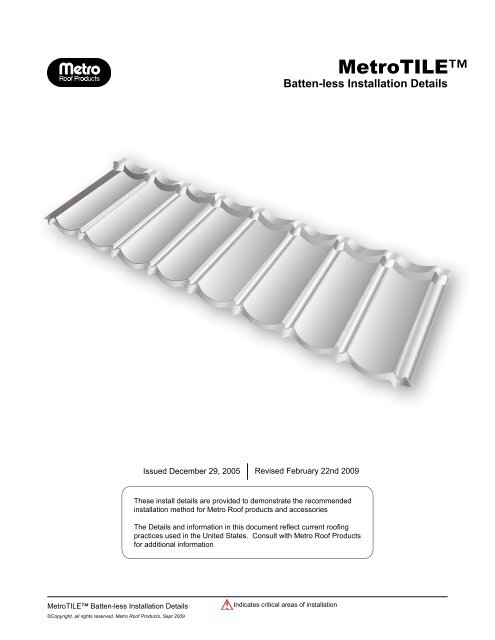
<strong>Metro</strong>TILE<br />
Batten-less <strong>Installation</strong> Details<br />
Issued December 29, 2005 Revised February 22nd 2009<br />
These install details are provided to demonstrate the recommended<br />
installation method for <strong>Metro</strong> Roof products and accessories<br />
<br />
practices used in the United States. Consult with <strong>Metro</strong> Roof Products<br />
for additional information<br />
<strong>Metro</strong>TILE Batten-less <strong>Installation</strong> Details<br />
©Copyright, all rights reserved, <strong>Metro</strong> Roof Products, Sept 2009<br />
Indicates critical areas of installation
<strong>Metro</strong>TILE<br />
Batten-less <strong>Installation</strong> Details<br />
INTRODUCTION<br />
<strong>Installation</strong> Tools:<br />
<strong>Metro</strong> <strong>Installation</strong> Kit<br />
- 1-Cutter, 1-Foot Bender<br />
- 1-Full Panel Bender attachment<br />
- 2-Batten Spacers<br />
<strong>Metro</strong> SMART-Hand Tool Kit<br />
- 12-V Impact Driver<br />
- Red & Green Snips<br />
- 3” Hand Seamers<br />
- Safety Gloves & Safety Glasses<br />
Other Tools:<br />
Nail Gun<br />
Hammer<br />
Tape Measure<br />
<br />
<br />
General:<br />
<br />
in conjunction with <strong>Metro</strong>’s SMART-Start On-Site<br />
<br />
awarded to those installers who are considered to have<br />
satisfactorily completed the <strong>Metro</strong> SMART-Start On-Site<br />
<br />
<strong>Metro</strong> Batten-Less install methods ensure the simplest<br />
<br />
<br />
<br />
<br />
<br />
<br />
check of the job.<br />
In cold climate zones with Cathedral Ceilings<br />
a Counter-Batten and Batten grid system is<br />
suggested to help prevent ice-damming.<br />
SMART-Steps to a perfect install:<br />
1. <br />
2. Full-Field Panels<br />
3. Rake cut sections<br />
4. Hip & Valley cut & sections<br />
5. <br />
6. <br />
7. Trim Caps<br />
8. <br />
<strong>Metro</strong>TILE Batten-less <strong>Installation</strong> Details<br />
©Copyright, all rights reserved, <strong>Metro</strong> Roof Products, Sept 2009<br />
Indicates critical areas of installation Rev 02/22/09 2
<strong>Metro</strong>TILE<br />
Batten-less <strong>Installation</strong> Details<br />
<br />
Side-lap<br />
Back Up-turn<br />
<strong>Metro</strong>TILE Panels:<br />
<br />
<br />
<br />
<br />
<br />
<br />
<br />
Panels Per Pallet - 400-pcs<br />
<br />
<br />
Materials:<br />
<strong>Metro</strong> panels are produced from Aluminum-zinc alloy<br />
<br />
Warranty:<br />
<br />
This limited warranty is transferable and does not cover<br />
<br />
Packing and Storage:<br />
<br />
<br />
a weather-proof cover or inside in an area free from<br />
moisture.<br />
Sealant/Caulking<br />
<br />
should be used for sealant.<br />
Fasteners:<br />
<br />
panels, trim caps and accessory items shall meet or<br />
<br />
<br />
<br />
<br />
<br />
<br />
Testing:<br />
Nose Down-turn<br />
<strong>Metro</strong> panels have been tested in accordance with<br />
<br />
has been conducted to evaluate fire, wind, penetration,<br />
water infiltration, and durability resistance. Information<br />
<br />
from <strong>Metro</strong> Roof Products.<br />
Ventilation:<br />
Ensure proper attic ventilation as prescribed per local<br />
<br />
<br />
Dissimilar <strong>Metals</strong>:<br />
To avoid adverse corrosion effects caused by<br />
<br />
should not be used with <strong>Metro</strong> roof products<br />
and accessories. (refer to <strong>Metro</strong> SMARTbrief #02004)<br />
Finish coating<br />
<br />
a Touch-Up kit from <strong>Metro</strong> Roof Products. Use the<br />
Touch-Up kit <strong>Metro</strong> basecoat (not caulking)<br />
<br />
aerosol paints. Colored aerosol paints should never be<br />
sprayed on panels or accessories made by <strong>Metro</strong> Roof<br />
Products.<br />
<br />
<br />
<br />
<br />
Colored areosol paints should<br />
never be used on stone-coated<br />
panels & accessories.<br />
<strong>Metro</strong>TILE Batten-less <strong>Installation</strong> Details<br />
©Copyright, all rights reserved, <strong>Metro</strong> Roof Products, Sept 2009<br />
Indicates critical areas of installation Rev 02/22/09 3
<strong>Metro</strong>TILE<br />
Batten-less <strong>Installation</strong> Details<br />
STONE-COATED ACCESSORIES<br />
<strong>Metro</strong>TILE<br />
<br />
‘V’ Trim<br />
<br />
Trim End Disc<br />
<br />
Rake Channel <strong>Tile</strong><br />
79” X 2” X 1” - 3.0lbs.<br />
Rake Channel <strong>Tile</strong>-l<br />
79” X 2” X 1-1/2” - 3.0lbs.<br />
<strong>Tile</strong>-<strong>Tile</strong> ‘V’-Bat Riser<br />
79” X 2-3/4” - 3.75 lbs.<br />
Flat-Stock<br />
<br />
1-3/8” Z-Bar<br />
79” X 2” X 3-1/4” - 3.3lbs.<br />
2.5” Z-Bar<br />
79” X 2-1/2” - 3.5lbs.<br />
Tie-In Metal<br />
79” X 4” - 4.0lbs.<br />
<strong>Tile</strong> Rake Metal<br />
79” X 2” X 2” X 1-3/4” - 3.5lbs.<br />
Valley Center Cover<br />
79” X 5” - 3.5lbs<br />
2”<br />
2-1/2”<br />
FL Drip Edge<br />
79” X 2” X 3-1/4” 3.3lbs.<br />
2.5” Head-wall<br />
<br />
<strong>Metro</strong>TILE Batten-less <strong>Installation</strong> Details<br />
©Copyright, all rights reserved, <strong>Metro</strong> Roof Products, Sept 2009<br />
Indicates critical areas of installation Rev 02/22/09 4
METRO SMART ACCESSORIES - STONE COATED<br />
<strong>Metro</strong>TILE<br />
Batten-less <strong>Installation</strong> Details<br />
<strong>Metro</strong><strong>Tile</strong> SMARTvent<br />
<br />
Net Free Vent Area 82.5”<br />
SMART-jack<br />
<br />
Fits 1” - 3” Dia., pipes.<br />
SMART-Sleeve Universal<br />
Pipe Cover<br />
Fits pipes 3/4” to 4” in Dia., Avail-<br />
<br />
<br />
PAINTED ACCESSORIES<br />
20” Double ‘V’ Valley Metal<br />
<br />
12.5 lbs.<br />
Flat-Stock<br />
<br />
Chimney Saddle<br />
<br />
6.75 lbs.<br />
Drip Edge<br />
120” X 2” X 1-1/2” - 1.0lbs.<br />
Side-Wall Under-pan metal<br />
<br />
5 lbs.<br />
<strong>Metro</strong>TILE Batten-less <strong>Installation</strong> Details<br />
©Copyright, all rights reserved, <strong>Metro</strong> Roof Products, Sept 2009<br />
Indicates critical areas of installation Rev 02/22/09 5
<strong>Metro</strong>TILE<br />
Batten-less <strong>Installation</strong> Details<br />
GENERAL<br />
<strong>Metro</strong> Batten-less <strong>Tile</strong> panels are Installed on new<br />
<br />
<br />
local code and manufacturers instructions.<br />
DRIP EDGE<br />
<br />
<br />
<br />
<br />
2”<br />
3.25”<br />
Florida and other high wind areas<br />
use the <strong>Metro</strong> FL-FASCIA Stone-<br />
Coated metal.<br />
<br />
<br />
20” DOUBLE ‘V’ VALLEY<br />
<br />
<br />
<br />
locations as shown. Site fabricated clips may also be<br />
used to secure valley metal.<br />
Extend valley a<br />
min of 1” past the<br />
fascia/eave edge.<br />
<strong>Metro</strong>TILE Batten-less <strong>Installation</strong> Details<br />
©Copyright, all rights reserved, <strong>Metro</strong> Roof Products, Sept 2009<br />
Indicates critical areas of installation Rev 02/22/09 6
<strong>Metro</strong>TILE<br />
Batten-less <strong>Installation</strong> Details<br />
RISER METAL<br />
Alternate fasteners from<br />
front to back of V-Batten<br />
as shown.<br />
Use the V-Bat Riser Metal, which incorporates an<br />
<br />
fascia. The V-Bat Riser Metal creates a 3/4” off-<br />
<br />
<br />
<br />
Riser Metal intersects a Rake Channel or Valley it<br />
must be notched and bent as shown to allow water to<br />
<br />
RISER METAL - VALLEY METAL INTERSECTION<br />
Bird-stop metal<br />
extends into valleys<br />
as shown.<br />
INTERNAL VALLEY CORNER NOTCHING DETAIL<br />
<strong>Metro</strong>TILE Batten-less <strong>Installation</strong> Details<br />
©Copyright, all rights reserved, <strong>Metro</strong> Roof Products, Sept 2009<br />
Indicates critical areas of installation Rev 02/22/09 7
<strong>Metro</strong>TILE<br />
Batten-less <strong>Installation</strong> Details<br />
HIP & RIDGE BATTENS<br />
Space 5” apart.<br />
<br />
<br />
<br />
<br />
<br />
the battens.<br />
RIDGE<br />
5”<br />
HIP<br />
5”<br />
TILE RAKE METAL - TRIM CAPS UP RAKE<br />
Barrel Trim (stone-coated)<br />
2X2 Rake Batten<br />
1x4 Support Batten<br />
Bird-stop (stone-coated)<br />
15/16 Solid Sheathing<br />
FL Drip-edge (stone-coated)<br />
<strong>Tile</strong> Rake Metal<br />
<br />
<br />
of <strong>Metro</strong> Trim Caps. The <strong>Metro</strong> Trim Caps install over<br />
the rake build-up and folded-up <strong>Metro</strong> panels.<br />
”<br />
5”<br />
5”<br />
2” X 1-3/4” X 1-1/2”<br />
<strong>Metro</strong>TILE Rake Metal is<br />
now available in stone-coat<br />
<br />
RAKE METAL<br />
“V”-Batten<br />
<strong>Metro</strong>TILE Batten-less <strong>Installation</strong> Details<br />
©Copyright, all rights reserved, <strong>Metro</strong> Roof Products, Sept 2009<br />
Install <strong>Metro</strong> panels over Drip<br />
<br />
the outside channel as shown. If<br />
<br />
washer, apply a bead of sealant<br />
around each one. Rake metal is<br />
notched to lap at joints a minimum<br />
<br />
channels.<br />
Lap 2” (50mm) minimum<br />
to prevent leakage<br />
through seams.<br />
Indicates critical areas of installation Rev 02/22/09 8
<strong>Metro</strong>TILE<br />
Batten-less <strong>Installation</strong> Details<br />
HVHZ FASTENING LOCATIONS<br />
<br />
<br />
Code HVHZ Approval FL-6710 for details.<br />
<br />
<br />
fasteners are used in each panel.<br />
<br />
located out of main water channels.<br />
<br />
HVHZ FASTENING SEQUENCE<br />
<strong>Metro</strong>TILE Batten-less <strong>Installation</strong> Details<br />
©Copyright, all rights reserved, <strong>Metro</strong> Roof Products, Sept 2009<br />
Indicates critical areas of installation Rev 02/22/09 9
<strong>Metro</strong>TILE<br />
Batten-less <strong>Installation</strong> Details<br />
FASTENING SEQUENCE<br />
<br />
<br />
<br />
Fasten top left corner<br />
<br />
Fasten bottom left corner.<br />
PANEL LAYOUT<br />
<br />
<br />
<br />
<br />
<br />
<strong>Metro</strong>TILE panels cannot<br />
be straight laid<br />
<strong>Metro</strong>TILE Batten-less <strong>Installation</strong> Details<br />
©Copyright, all rights reserved, <strong>Metro</strong> Roof Products, Sept 2009<br />
Indicates critical areas of installation Rev 02/22/09 10
<strong>Metro</strong>TILE<br />
Batten-less <strong>Installation</strong> Details<br />
FASTENING LOCATIONS - NAILS<br />
<br />
<br />
<br />
All fasteners used on a <strong>Metro</strong> roof shall meet or<br />
<br />
<br />
<br />
FASTENING BATTEN-LESS TILE PANELS - NAILS<br />
<br />
NAILS:<br />
<br />
Details shown below utilize a stick nail-gun<br />
with a special ‘Nose Fastener-Angle’ device attached.<br />
Contact <strong>Metro</strong> for information regarding<br />
this item.<br />
<br />
<br />
<br />
<br />
<br />
<br />
<strong>Metro</strong>TILE Batten-less <strong>Installation</strong> Details<br />
Indicates critical areas of installation Rev 02/22/09 11<br />
©Copyright, all rights reserved, <strong>Metro</strong> Roof Products, Sept 2009
<strong>Metro</strong>TILE<br />
Batten-less <strong>Installation</strong> Details<br />
FASTENING LOCATIONS - SCREWS<br />
<br />
<br />
<br />
All fasteners used on a <strong>Metro</strong> roof shall meet or<br />
<br />
<br />
<br />
<br />
<br />
Code HVHZ Approval FL-6710 for details.<br />
<br />
SCREWS:<br />
<br />
FASTENING BATTEN-LESS TILE PANELS - SCREWS<br />
<br />
<br />
<br />
<br />
screw to penetrate the back up-stand of the panel<br />
beneath and into the deck.<br />
<strong>Metro</strong>TILE Batten-less <strong>Installation</strong> Details<br />
©Copyright, all rights reserved, <strong>Metro</strong> Roof Products, Sept 2009<br />
Indicates critical areas of installation Rev 02/22/09 12
1ST ROW FASTENING - NAILS OR SCREWS<br />
<strong>Metro</strong>TILE<br />
Batten-less <strong>Installation</strong> Details<br />
<br />
<br />
acceptable behind <strong>Metro</strong> SMART-Vents, Chimneys<br />
<br />
<br />
fasteners then cover with <strong>Metro</strong> touch-up kit.<br />
Use the <strong>Metro</strong> “Touch-up”<br />
kit to cover each top nose<br />
fastener at the fascia.<br />
RIDGE PANELS<br />
Deduct 1/4” (12mm) from actual measure-<br />
<br />
<br />
<br />
<br />
board as shown.<br />
Always fold full panels at ridges before cutting<br />
off the excess. The cut & bent ridge panels<br />
may need to be bowed in the center after pinning<br />
each end of the panel as you install them.<br />
<strong>Metro</strong>TILE Batten-less <strong>Installation</strong> Details<br />
©Copyright, all rights reserved, <strong>Metro</strong> Roof Products, Sept 2009<br />
Indicates critical areas of installation Rev 02/22/09 13
<strong>Metro</strong>TILE<br />
Batten-less <strong>Installation</strong> Details<br />
HIP PANELS<br />
<br />
line. Install hip section panels similar to other panels<br />
<br />
<br />
At hips, use either a full panel or a cut section<br />
long enough to obtain the hip cut.<br />
Always deduct 1/2” (12mm) from your<br />
measurements for Hip & Ridge cuts to<br />
<br />
VALLEY CUTS<br />
<br />
<br />
<br />
<br />
<br />
<br />
<br />
<br />
<br />
Install a <strong>Metro</strong> Valley Cover metal down the center<br />
<br />
<br />
course where it intersects the valley.<br />
<br />
the valley metal, use small Stitch screws to secure the<br />
valley cover.<br />
Start the 1st panel 12” (300mm) from the Valley<br />
edge. This allows for a valley cut section<br />
that can be securely fastened to the roof deck<br />
without penetrating the valley pan.<br />
<strong>Metro</strong>TILE Batten-less <strong>Installation</strong> Details<br />
©Copyright, all rights reserved, <strong>Metro</strong> Roof Products, Sept 2009<br />
Indicates critical areas of installation Rev 02/22/09 14
<strong>Metro</strong>TILE<br />
Batten-less <strong>Installation</strong> Details<br />
CLOSED VALLEY<br />
Sticth Screw<br />
Panel<br />
Valley Metal<br />
<br />
Install a <strong>Metro</strong> Valley Cover metal down the center<br />
<br />
<br />
course where it intersects the valley.<br />
Make sure you do not penetrate the valley<br />
metal, use small Stitch screws to secure the<br />
valley cover<br />
OPEN valleys (min-6-inches) between each<br />
side of the <strong>Metro</strong> panels are recommended for<br />
areas where trees or other debris may block<br />
the valley. This detail facilitates easier periodic<br />
cleaning of the valley pans.<br />
3-IN-1 SMART-JACK<br />
The <strong>Metro</strong> 3-in-1 SMART-jack is a moldable stone-<br />
<br />
vent pipes, 1” to 3” in. dia. Apply sealant under 3-in-1<br />
SMART-jack to keep it secured to panel beneath.<br />
18”<br />
If a vent location prevents SMART-jack<br />
3-in-1 from being able to fold up and over the<br />
<br />
method should be used<br />
18”<br />
SMART-JACK PREPARATION<br />
<br />
<br />
<br />
out onto the panel below.<br />
<strong>Metro</strong>TILE Batten-less <strong>Installation</strong> Details<br />
©Copyright, all rights reserved, <strong>Metro</strong> Roof Products, Sept 2009<br />
Indicates critical areas of installation Rev 02/22/09 15
PIPE FLASHING - SMART-JACK & SMART-SLEEVE METHOD<br />
<strong>Metro</strong>TILE<br />
Batten-less <strong>Installation</strong> Details<br />
<br />
<br />
<br />
<br />
each side and around the hole of the pipe as shown.<br />
<br />
it into the sealant and conform the SMART-Jack Flash-<br />
<br />
<br />
<br />
Dissimilar <strong>Metals</strong><br />
To avoid adverse corrosion effects caused by<br />
<br />
ings should not be used with <strong>Metro</strong> roof products<br />
and accessories<br />
For added protection and appearance, SMARTsleeves<br />
are cut to conform to the panels and are<br />
installed over pipes. SMART-sleeves are fastened<br />
<br />
into the pipe.<br />
<strong>Metro</strong>TILE Batten-less <strong>Installation</strong> Details<br />
©Copyright, all rights reserved, <strong>Metro</strong> Roof Products, Sept 2009<br />
Indicates critical areas of installation Rev 02/22/09 16
PIPE FLASHING - UNDERPAN SANDWICH METHOD - SMART-JACK<br />
<strong>Metro</strong>TILE<br />
Batten-less <strong>Installation</strong> Details<br />
<br />
<br />
<br />
<br />
Seal Vent Pipe around bottom of cone and around<br />
<br />
Pipe<br />
SMARTjack<br />
<br />
<br />
Dissimilar <strong>Metals</strong><br />
To avoid adverse corrosion effects caused by<br />
<br />
ings should not be used with <strong>Metro</strong> roof products<br />
and accessories<br />
Panel<br />
Underpan<br />
Underlayment<br />
Decking<br />
<strong>Metro</strong>TILE Batten-less <strong>Installation</strong> Details<br />
©Copyright, all rights reserved, <strong>Metro</strong> Roof Products, Sept 2009<br />
Indicates critical areas of installation Rev 02/22/09 17
<strong>Metro</strong>TILE<br />
Batten-less <strong>Installation</strong> Details<br />
SMART-VENT - BATTEN-LESS TILE-II<br />
<br />
<br />
<br />
<br />
<br />
Seal Back up-turn Prior<br />
to overlaying panel.<br />
Secure SMART-vent<br />
with screws (#10x2” HH)<br />
(50mm)<br />
Always check local codes and ensure you have<br />
adequate intake ventilation for the quantity of<br />
exhaust SMART-vents you are installing.<br />
<br />
<br />
<strong>Metro</strong>TILE Batten-less <strong>Installation</strong> Details<br />
©Copyright, all rights reserved, <strong>Metro</strong> Roof Products, Sept 2009<br />
Indicates critical areas of installation Rev 02/22/09 18
<strong>Metro</strong>TILE<br />
Batten-less <strong>Installation</strong> Details<br />
CHIMNEY SADDLE PREPARATION<br />
On the sides of the Chimney Saddle create side-hems<br />
<br />
CHIMNEY FLAT-STOCK PREPARATION<br />
CHIMNEY FLAT-STOCK W/ FOAM CLOSURE<br />
Use a V-Bat Riser Metal piece as shown to elevate<br />
<br />
<br />
V-Bat Riser.<br />
Position the Foam strip in a bead of sealant and fasten<br />
as shown. Use <strong>Metro</strong> Touch-up kit to seal top fasteners.<br />
<strong>Metro</strong>TILE Batten-less <strong>Installation</strong> Details<br />
©Copyright, all rights reserved, <strong>Metro</strong> Roof Products, Sept 2009<br />
Indicates critical areas of installation Rev 02/22/09 19
<strong>Metro</strong>TILE<br />
Batten-less <strong>Installation</strong> Details<br />
CHIMNEY / SIDE-WALL / HEADWALL<br />
<br />
Measure, cut, and fold up panel 2”<br />
from the back of the panel to the<br />
front of protrusion.<br />
<br />
and fold tabs around protrusion.<br />
Cut and fold up panels 2” at sides<br />
of protrusion as shown.<br />
<br />
<br />
sion.<br />
Seal around perimeter of folded<br />
<br />
protrusion.<br />
<br />
<br />
sion.<br />
Install chimney saddle metal at<br />
<br />
Saddle metal a minimum of 4” past<br />
each side of protrusion.<br />
<br />
al over folded sections as shown.<br />
For added protection install a foam<br />
weather block as shown to seat the<br />
panel onto.<br />
<strong>Metro</strong>TILE Batten-less <strong>Installation</strong> Details<br />
©Copyright, all rights reserved, <strong>Metro</strong> Roof Products, Sept 2009<br />
Indicates critical areas of installation Rev 02/22/09 20
<strong>Metro</strong>TILE<br />
Batten-less <strong>Installation</strong> Details<br />
SIDE-WALL UNDER-PAN METAL<br />
<br />
<br />
<br />
weatherproofed over the up stand of the side-wall under-pan<br />
metal.<br />
Fold up nose of panel where under-pan metal<br />
<br />
SHORT COURSE<br />
<br />
sects with the stepped fascia as shown.<br />
<br />
cut & remove the section as shown.<br />
Apply either a bead of sealant or a strip of foam<br />
<br />
behind the dotted line where the nose of the top panel<br />
will sit.<br />
Finished slip-course detail with all parts in place<br />
<strong>Metro</strong>TILE Batten-less <strong>Installation</strong> Details<br />
©Copyright, all rights reserved, <strong>Metro</strong> Roof Products, Sept 2009<br />
Indicates critical areas of installation Rev 02/22/09 21
<strong>Metro</strong>TILE<br />
Batten-less <strong>Installation</strong> Details<br />
TRIM CAPS<br />
HIP/RIDGE IN TER SECTION<br />
<br />
<br />
<br />
caps as shown.<br />
RIDGE CEN TER CAP<br />
<br />
<br />
can be made where cap pieces<br />
arrive from different directions.<br />
Attach end disc with<br />
stitch screws.<br />
HIP CORNER<br />
Notch & fold the end disc as shown to form a<br />
closed 3-di men sional end cap. Fit end disc to<br />
bottom hip corner with stitch screws and install<br />
balance of trim caps up the hip. To maintain a<br />
<br />
<br />
<strong>Metro</strong>TILE Batten-less <strong>Installation</strong> Details<br />
©Copyright, all rights reserved, <strong>Metro</strong> Roof Products, Sept 2009<br />
RIDGE/GABLE END<br />
<br />
<br />
as shown to follow the Rake Channel<br />
sections previously installed.<br />
After installing trimcaps at intersections, seal<br />
cut edges and apply <strong>Metro</strong> basecoat and stone<br />
<br />
Indicates critical areas of installation Rev 02/22/09 22