The Wonder Box Cooker - Peace of Preparedness
The Wonder Box Cooker - Peace of Preparedness
The Wonder Box Cooker - Peace of Preparedness

You also want an ePaper? Increase the reach of your titles
YUMPU automatically turns print PDFs into web optimized ePapers that Google loves.
<strong>The</strong> <strong>Wonder</strong> <strong>Box</strong> <strong>Cooker</strong><br />
peace<strong>of</strong>preparedness.com<br />
For more info: www.ecowonderoven.com<br />
Recipes and instructions originated from a booklet published by Compassion <strong>of</strong> South Africa in<br />
1978,1979 and 1980. Compassion registered name <strong>Wonder</strong> <strong>Box</strong> and the logo <strong>of</strong> the kneeling<br />
figure. This information may be freely quoted, acknowledgments being made to Compassion<br />
<strong>Wonder</strong> <strong>Box</strong>es work like vacuum flasks. In these days when we are being warned <strong>of</strong> worldwide<br />
shortages <strong>of</strong> food and fuel, this wonder box and it's simplicity is designed to keep food at the<br />
temperature needed for cooking. Using very little fuel you only use about 15 minutes <strong>of</strong> energy<br />
to bring the food to the required temperature and then put it into the <strong>Wonder</strong> box. It makes it as<br />
though it were a thermos. On the flip side it will also keep ice-cream cold for about 4 hours.<br />
Brief Instructions:<br />
Boil your food on the stove for 10 - 15 minutes until the food is heated right through. (In practice<br />
this is too long.)<br />
Use any cooking pot, provided it does not have a long handle, but do not use a large pot for a<br />
small amount <strong>of</strong> food. <strong>The</strong> W'box does not work well if there is a large air space. Remember that<br />
the more food or liquid that you have in the pot, the longer and better it will cook.<br />
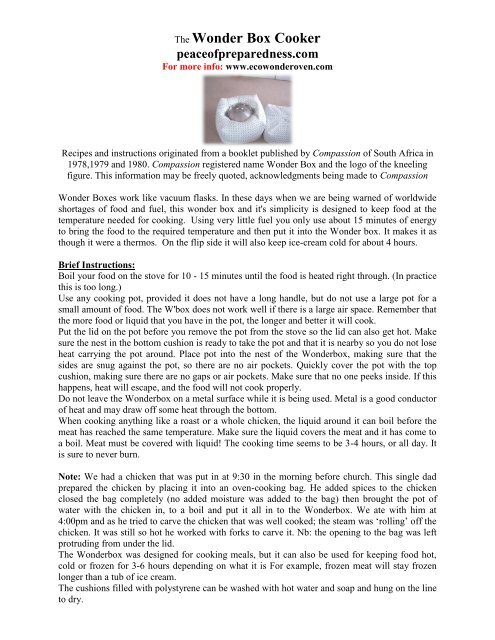
Put the lid on the pot before you remove the pot from the stove so the lid can also get hot. Make<br />
sure the nest in the bottom cushion is ready to take the pot and that it is nearby so you do not lose<br />
heat carrying the pot around. Place pot into the nest <strong>of</strong> the <strong>Wonder</strong>box, making sure that the<br />
sides are snug against the pot, so there are no air pockets. Quickly cover the pot with the top<br />
cushion, making sure there are no gaps or air pockets. Make sure that no one peeks inside. If this<br />
happens, heat will escape, and the food will not cook properly.<br />
Do not leave the <strong>Wonder</strong>box on a metal surface while it is being used. Metal is a good conductor<br />
<strong>of</strong> heat and may draw <strong>of</strong>f some heat through the bottom.<br />
When cooking anything like a roast or a whole chicken, the liquid around it can boil before the<br />
meat has reached the same temperature. Make sure the liquid covers the meat and it has come to<br />
a boil. Meat must be covered with liquid! <strong>The</strong> cooking time seems to be 3-4 hours, or all day. It<br />
is sure to never burn.<br />
Note: We had a chicken that was put in at 9:30 in the morning before church. This single dad<br />
prepared the chicken by placing it into an oven-cooking bag. He added spices to the chicken<br />
closed the bag completely (no added moisture was added to the bag) then brought the pot <strong>of</strong><br />
water with the chicken in, to a boil and put it all in to the <strong>Wonder</strong>box. We ate with him at<br />
4:00pm and as he tried to carve the chicken that was well cooked; the steam was ‘rolling’ <strong>of</strong>f the<br />
chicken. It was still so hot he worked with forks to carve it. Nb: the opening to the bag was left<br />
protruding from under the lid.<br />
<strong>The</strong> <strong>Wonder</strong>box was designed for cooking meals, but it can also be used for keeping food hot,<br />
cold or frozen for 3-6 hours depending on what it is For example, frozen meat will stay frozen<br />
longer than a tub <strong>of</strong> ice cream.<br />
<strong>The</strong> cushions filled with polystyrene can be washed with hot water and soap and hung on the line<br />
to dry.
<strong>Wonder</strong> <strong>Box</strong> Recipes<br />
Yogurt<br />
2 cups dry skim milk powder 2 quarts warm water 1/2 C plain yogurt w/active<br />
cultures<br />
Mix well, heat to scald, cool to luke warm. Add 1 cup <strong>of</strong> yogurt or product saved from this<br />
finished recipe may be used to start a new batch. Refresh monthly with commercial starter. Mix<br />
well, put into a gallon glass jar with a lid and place into the <strong>Wonder</strong> box. Leave undisturbed for<br />
12-14 hours. It will thicken more after refrigeration. May be used plain or add your favorite fruits<br />
to flavour.<br />
Porridge<br />
2 c quick oats 4 c boiling water salt to taste<br />
Stir oats into boiling water, put lid on and place quickly between cushions <strong>of</strong> the W’box for 15<br />
minutes or more. Stir before serving<br />
Rice<br />
2 cups rice 3 ½ c <strong>of</strong> salted boiling water.<br />
Place quickly into W’box, and leave for 40 minutes or longer until ready to eat.<br />
Vegetables<br />
Potatoes or root vegetables may be cooked in their skins. Bring them to a boil in a pot full <strong>of</strong><br />
water and place quickly between cushions <strong>of</strong> the W’box for about twice as long as you would<br />
normally cook them. <strong>The</strong>y may be left all day without overcooking and can be more easily<br />
peeled after cooking<br />
Try waterless cooking by using the crisp kind <strong>of</strong> bags used for cooking roasts, etc. Submerge the<br />
bag into the water and bring to a boil. <strong>The</strong> bag should be left with opening protruding out from<br />
under the lid. Place quickly into W’box.<br />
Chicken and other joints <strong>of</strong> Meat<br />
Place chicken into an Oven cooking bag with desired spices, and close bag. Place in pot <strong>of</strong> water<br />
with chicken in it bring to a good boil. Quickly place into the W’box and place top cushion on.<br />
Leave alone for at least 3-4 hours.<br />
How to Steam Bake Bread in a <strong>Wonder</strong>box Oven<br />
For questions regarding how to steam bake bread or how to use your wonderbox<br />
Please contact me: Noelle Kei,crunchygreenjello@gmail.com<br />
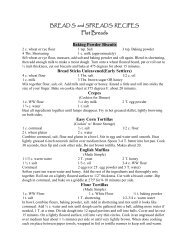
Bread recipe:<br />
4 cups flour (I have used: ½ white - ½ wheat; 3C whole wheat - 1C white<br />
1 tsp salt added 1 cup <strong>of</strong> warm water 1 tsp yeast<br />
1 tsp sugar ¼ cup <strong>of</strong> warm water<br />
Dissolve salt in 1 c. warm water and yeast and sugar in ¼ c. warm water, then mix all ingredients<br />
together in a bowl until moist (add a little extra water if needed). Knead the dough on a floured<br />
surface for about 10 minutes and transfer dough to *baking container.<br />
<strong>The</strong>re are several different ways to steam bake bread in a wonderbox oven. I have used a cereal<br />
bag with Reynolds bag method, and I have also used mason jars to bake my bread. I will describe<br />
the two methods below.
Cereal bag/Reynolds bag method:<br />
After kneading your bread, place the dough into an oiled (Pam spray) cereal bag (wax paper<br />
like/plastic cereal bag that's the inner lining bag found in a cereal box). Twist the end tight and<br />
secure the bag with either a twist tie, rubber band or hair tie. Place the cereal dough bag into a<br />
Reynolds bag and secure bag shut so that water will not seep into the bag. (If your bag is not<br />
sealed tight enough or cannot withstand the heat <strong>of</strong> boiling water you will end up with soggy<br />
bread and will have to start over). Carefully place your bag <strong>of</strong> dough into a pot <strong>of</strong> warm water<br />
(the same pot you will be placing into your wonderbox) and let it sit there to rise.<br />
When your dough has finished rising, turn your burner (or other heat source) on and boil the bag<br />
<strong>of</strong> dough for 10 minutes. If your Reynolds bag has expanded too much (making it impossible to<br />
place a lid on the pot) you will have to untie the bag and let out some <strong>of</strong> the air. Retie the bag and<br />
place the lid on the pot for the last few minutes <strong>of</strong> cooking so that you can capture the steam and<br />
heat. You may need to keep your hand on the lid to prevent it from opening. I have found that<br />
silicone pot holders work best for helping to secure a lid when you transport your pot from it's<br />
fuel source into the wonderbox. After boiling your dough, place the pot with its lid on,<br />
immediately into the bottom cushion <strong>of</strong> your wonderbox. Secure your wonderbox top cushion<br />
and let your dough steam bake for approximately 1 hour 45 minutes. No peeking! <strong>The</strong> bread will<br />
be moist and crust less. Perfect for children who refuse to eat crusted bread. <strong>The</strong>re is no harm in<br />
leaving your bread to steam bake longer. If you forgot the time, or return home later than<br />
planned, your bread will still retain it's moist texture and will not become dry or overdone. That's<br />
the beauty <strong>of</strong> a wonderbox. It's a very forgiving non-electric slow cooker.<br />
Mason jar method:<br />
I am not a fan <strong>of</strong> plastic therefore the mason jar method has been my preferred way <strong>of</strong> steam<br />
baking bread. I have read <strong>of</strong> others using recycled fruit/vegetable/juice cans but I am not a fan <strong>of</strong><br />
BPA lined cans either. I have used half pint/pint size and quart sized WIDE MOUTH mason jars.<br />
Be sure to oil the inside <strong>of</strong> the jars with either spray Pam or simply wipe the entire inside <strong>of</strong> the<br />
jars with your choice <strong>of</strong> oil. After you have kneaded your dough, divide the dough amongst your<br />
jars. To speed up the process <strong>of</strong> getting your dough to rise, place your jars (no lids) into a stock<br />
pot and carefully add warm water to @1-2 inch below the bottom lip <strong>of</strong> the jars. If needed, add<br />
an extra jar or glass baby bottle to the pot to prevent your jars from tipping over and ruining your<br />
dough. Place the stock pot lid onto the pot and let your bread rise. When your dough has finished<br />
rising, carefully secure either a canning jar lid, reusable BPA free mason jar plastic cap, or tin<br />
foil with a rubber band placed around the top <strong>of</strong> your jar. Your goal is to keep moisture and<br />
water out <strong>of</strong> the jars so that your dough will properly steam bake. Carefully boil your jars for 10<br />
minutes. Be sure to cover your stock pot (or smaller size pot if using smaller sized jars) with the<br />
lid and keep closed for the last few minutes <strong>of</strong> cooking. When your dough has finished boiling,<br />
carefully move your lidded pot and place it directly into the bottom cushion <strong>of</strong> your wonderbox.<br />
Cover the pot with the top cushion <strong>of</strong> your wonderbox and let your dough steam bake for<br />
approximately 1 ½ hours. No peeking! When your bread is finished steam baking carefully<br />
remove jars (they will be hot so either use a silicone pot holder or canning jar lifter) to remove<br />
jars from the stock pot. Remove the lid and turn your jars upside down onto a cooling rack. If<br />
your bread does not slide out easily, use a non-serrated knife or metal frosting spatula to gently<br />
coax your bread out. You will have mini sized loaves <strong>of</strong> bread perfect for the kids to eat. You<br />
can either slice the bread or just dig in. Enjoy!<br />
I recently read on a blog <strong>of</strong> someone using an asparagus steamer to steam bake bread. It will hold<br />
two loaves <strong>of</strong> bread. Follow the same directions as the mason jar method. I would steam bake the<br />
dough for at least 2 hours though. Here is a link to what this blogger used.http://www.williamssonoma.com/products/all-clad-stainless-steel-asparagus-pot/<br />
I am going to research a cheaper,<br />
but similar pot.