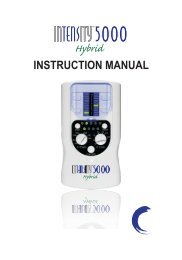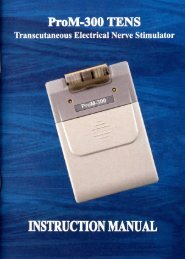
BodyMed TENS/EMS A7000 Operations Manual
BodyMed TENS/EMS A7000 Operations Manual
BodyMed TENS/EMS A7000 Operations Manual

Create successful ePaper yourself
Turn your PDF publications into a flip-book with our unique Google optimized e-Paper software.
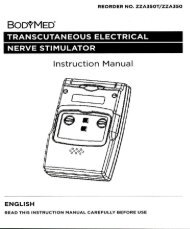
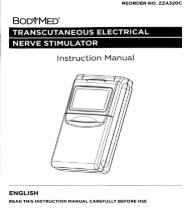
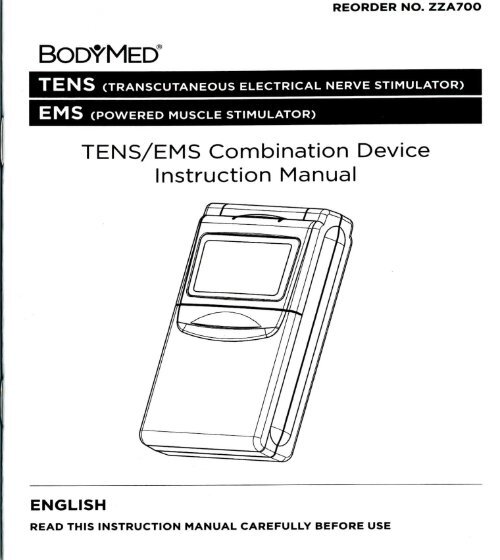
<strong>TENS</strong> (TRANSCUTANEOUS ELECTRICAL NERVE STIMULATOR)<br />
<strong>EMS</strong> (POWERED MUSCLE STIMULATOR)<br />
<strong>TENS</strong>/<strong>EMS</strong> Combination Device<br />
Instruction <strong>Manual</strong><br />
ENGLISH<br />
READ THIS INSTRUCTION MANUAL CAREFULLY BEFORE USE<br />
REORDER NO. ZZA7OO
TABLE OF CONTENTS<br />
GENERAL DESCRIPTION<br />
General Description 1<br />
System Components 1<br />
Limited Product Warranty 1<br />
Indications and Contraindications 2<br />
Electric myostimulation has proven to be highly valuable as a method of pain<br />
therapy. The unit is a dual-channel electric stimulator for active treatment application,<br />
which is equipped with a Liquid Crystal Display indicating operation<br />
modes and output, as well as an 8-bit microcomputer for controlling the system.<br />
The unit creates electrical impulses. The intensity, duration, frequency and<br />
modulation of these impulses can be adjusted through the device controls.<br />
Warnings/Precautions 4<br />
About the Device 7<br />
SYSTEM COMPONENTS<br />
The Device Controls 7<br />
The following components or accessories should be included:<br />
Attaching the Lead Wires 9<br />
Electrode Selection and Care 9<br />
Unit<br />
Carrying case<br />
2 lead wires<br />
4 Electrodes (1 pack)<br />
9-Volt battery<br />
Operation manual<br />
Connecting the Device 9<br />
Battery Information 10<br />
Changing the Battery 11<br />
If you are missing any of these items, please contact <strong>BodyMed</strong>® at<br />
1-866-528-2152 before using the unit.<br />
LIMITED PRODUCT WARRANTY<br />
Cleaning the Device 11<br />
Troubleshooting 11<br />
Technical Specifications 12<br />
Distributed by <strong>BodyMed</strong>®<br />
Your <strong>BodyMed</strong>8 ZZA7OO COMBO <strong>TENS</strong> <strong>EMS</strong> unit is warranted to be free from<br />
defects in materials and workmanship occurring within one year from date of<br />
purchase, when used in strict accordance with the instructions provided with the<br />
<strong>BodyMed</strong>* ZZA7OO COMBO <strong>TENS</strong> <strong>EMS</strong> unit. The sole remedy for a breach of this<br />
warranty is replacement of the defective materials or components. This warranty<br />
extends only to the original purchaser. The purchase receipt or other proof of date<br />
of original purchase is required before full replacement will be provided.<br />
i
LIMITED PRODUCT WARRANTY<br />
INDICATIONS AND CONTRAINDICATIONS<br />
Please contact <strong>BodyMed</strong>" at 1-866-528-2152.<br />
BODYMED® MAKES NO OTHER WARRANTY, EXPRESS OR IMPLIED, INCLUD-<br />
ING, WITHOUT LIMITATION ANY IMPLIED WARRANTY OF MERCHANTABILITY<br />
OR FITNESS FOR A PARTICULAR PURPOSE ALL SUCH WARRANTIES BEING<br />
HEREBY EXPRESSLY EXCLUDED.<br />
The warranty described above does not extend to the normal wear of the product<br />
and is void if the product housing has been removed or if the product fails to<br />
function properly as a result of an accident, misuse, abuse, neglect, mishandling,<br />
misapplication, defective batteries, faulty installation, set-up, adjustments, improper<br />
maintenance, alteration, maladjustment of controls, modification, power surges,<br />
commercial use of product, use of product which differs from the suggested use<br />
set forth in the product instructions, service by anyone other than an authorized<br />
service center of acts beyond the control of the manufacturer.<br />
BODYMED® SHALL NOT BE LIABLE FOR ANY INDIRECT, INCIDENTAL, CON-<br />
SEQUENTIAL OR SPECIAL DAMAGES WHETHER ARISING UNDER CONTRACT,<br />
TORT, STRICT LIABILITY, STATUTE OR OTHER FORM OF ACTION OR ANY<br />
DAMAGES IN EXCESS OF THE COST OF THE REPLACEMENT OF THE PRODUCT.<br />
INDICATIONS AND CONTRAINDICATION<br />
THE FOLLOWING STATEMENTS APPLY TO THE <strong>TENS</strong> OPERATION FUNCTION:<br />
INDICATIONS FOR USE<br />
This device is available by prescription only and is to be used only for symptomatic<br />
relief of chronic intractable pain as prescribed by a physician or licensed<br />
practitioner.<br />
CONTRAINDICATIONS<br />
Any electrode placement that applies current to the carotid sinus<br />
(neck) region.<br />
The use of <strong>TENS</strong> whenever pain syndromes are undiagnosed, until cause<br />
is determined.<br />
Patients with implanted electronic devices (for example, a pacemaker) or<br />
metallic implants should not use this device.<br />
Any electrode placement that causes current to flow through the head.<br />
THE FOLLOWING STATEMENTS APPLY TO THE <strong>EMS</strong> OPERATION FUNCTION:<br />
INDICATIONS FOR USE<br />
Relaxation of muscle spasms<br />
Prevention or retardation of muscle atrophy<br />
Increasing local blood circulation<br />
Muscle re-education<br />
Read the operation manual before using the device. Federal Law restricts this<br />
device to sale by, or on the order of, a physician or licensed practitioner. Follow<br />
your physician's or licensed practitioner's precise instructions and let him/her<br />
show you where to apply the electrodes. For successful therapy, the correct<br />
application of the electrodes is an important factor. Carefully write down the<br />
settings your physician or licensed practitioner recommends.<br />
Immediate post-surgical stimulation of calf muscles to prevent venous<br />
thrombosis<br />
• Maintaining or increasing range of motion
INDICATIONS AND CONTRAINDICATIONS<br />
WARNINGS/PRECAUTIONS<br />
CONTRAINDICATIONS<br />
Powered muscle stimulators should not be used on patients with cardiac<br />
demand pacemakers.<br />
WARNINGS/PRECAUTIONS<br />
THE FOLLOWING STATEMENTS APPLY TO THE <strong>TENS</strong> OPERATION FUNCTION:<br />
The device must be kept out of reach of children.<br />
• The safety of device for use during pregnancy or delivery has not been<br />
established.<br />
Do not place electrodes on front of the throat. This may result is spasms of<br />
the laryngeal and pharyngeal muscles.<br />
Do not place the electrodes over the carotid nerve (the front and sides of<br />
the neck).<br />
The device is not effective for headaches.<br />
Caution should be used when applying the device to patients suspected of<br />
having heart disease. Further clinical data is needed to show if there are<br />
adverse side effects on those with heart disease.<br />
The device may interfere with electronic monitoring equipment (such as<br />
ECG monitors and ECG alarms).<br />
Electrodes should not be placed over the eyes, in the mouth, or internally.<br />
These devices have no curative value. <strong>TENS</strong> is a symptomatic treatment that<br />
suppresses the sensation of pain, which would otherwise serve as a<br />
protective mechanism.<br />
<strong>TENS</strong> devices should be used only under the continued supervision of a<br />
physician or licensed practitioner.<br />
Do not use on broken skin.<br />
• Effectiveness is highly dependent upon patient selection by a person<br />
qualified in pain management using <strong>TENS</strong>.<br />
If the device treatment becomes ineffective or unpleasant, stimulation<br />
should be discontinued until re-evaluation by a physician or licensed<br />
practitioner.<br />
Always turn the device off before applying or removing electrodes.<br />
The device does not have AAP/APG protection. An explosion hazard is<br />
possible if used in the presence of explosives, f l a m m a b l e materials or<br />
flammable anesthetics.<br />
PRECAUTIONS/ADVERSE REACTIONS<br />
Isolated cases of skin irritation may occur at the site of electrode placement<br />
following long-term application.<br />
• Skin irritation and electrode burns are potential adverse reactions.<br />
THE FOLLOWING STATEMENTS APPLY TO THE <strong>EMS</strong> OPERATION FUNCTION:<br />
The device must be kept out of reach of children.<br />
Portable powered muscle stimulators should not be used while driving,<br />
operating machinery, or during any activity in which involuntary muscle<br />
contractions may put the user at risk of injury.<br />
The safety of the device for use during pregnancy or delivery has not been<br />
established.<br />
Do not place electrodes on front of the throat. This may result in spasms of<br />
the laryngeal and pharyngeal muscles.<br />
Do not place the electrodes over the carotid sinus (neck).
WARNINGS/PRECAUTIONS<br />
ABOUT THE DEVICE<br />
Caution should be used when applying the device to patients suspected of<br />
having heart disease. Further clinical data is needed to show if there are<br />
adverse side effects on those with heart disease.<br />
The device may interfere with electronic monitoring equipment (such as<br />
ECG monitors and ECG alarms).<br />
Electrodes should not be placed over the eyes, in the mouth, or internally.<br />
<strong>EMS</strong> devices should be used only under the continued supervision of a physician.<br />
Do not use on broken skin.<br />
The device offers two controllable output channels. This device creates electrical<br />
impulses whose amplitude, duration, and modulation can be altered with the<br />
device controls. The device controls are easy to use, the cap and slide cover<br />
protect accidental changes in settings.<br />
CH1 Output Receptacle<br />
CH1 ON/OFF and Amplitude Control<br />
CH2 ON/OFF and Amplitude Control<br />
CH2 Output Receptacle<br />
• If the device treatment becomes ineffective or unpleasant, stimulation<br />
should be discontinued until re-evaluation by a physician/clinician.<br />
Always turn the device off before applying or removing electrodes.<br />
KEY Control<br />
The device does not have AAP/APG protection. An explosion hazard is<br />
possible if used in the presence of explosives, flammable materials or<br />
flammable anesthetics.<br />
Caution should be used for patients with suspected or diagnosed epilepsy.<br />
© ©<br />
© ©<br />
ADVERSE REACTIONS<br />
Skin irritation and electrode burns are potential adverse reactions.<br />
Stimulation should be stopped and electrodes removed until the cause of<br />
the irritation can be determined.<br />
Isolated cases of skin irritation may occur at the site of electrode placement<br />
following long-term application. Always properly clean skin before use.<br />
If skin irritation occurs, discontinue use. Do not resume use of the ZZA7OO<br />
Powered Muscle Stimulator (<strong>EMS</strong>) unit until you have seen your physician or<br />
licensed practitioner.<br />
THE DEVICE CONTROLS<br />
SLIDE COVER: A cover conceals the controls for Mode, Time, Width *^ (SET/<br />
ENT), Rate AT (AT). Press the topside of the cover and pull down in order to<br />
open the cover.<br />
IN<strong>TENS</strong>ITY: The Amplitude Control knobs are located on the top of the unit<br />
under the cap for the strength adjustment of the stimulation, and also function<br />
as ON/OFF controls.
THE DEVICE CONTROLS<br />
ATTACHING THE LEAD WIRES<br />
MODE: The Mode key is used to select/set the type of treatment utilized. The<br />
seven modes are Burst (B), Continuous (C), Modulation (M), Strength-Duration<br />
and Rate modulation (SDR), Strength Duration and Width modulation (SOW),<br />
Synchronous (S) and Alternation (A).<br />
TIME: Treatment time can be preselected/set with Time key. There are three<br />
programs of fixed duration 15, 3O and 6O minutes, and one program of continuous<br />
output. Press the key until engaged in position desired.<br />
15 min : 15-min symbol light on<br />
30 min : 15- and 3O-min symbols light on<br />
6O min : 15-, 30-, and 6O-min symbols light on<br />
Continuous : 15- and 3O-min symbols light on, and the 6O-min symbol flashes<br />
To reset timer, turn both channels off. When you are ready to begin another<br />
treatment cycle, turn the unit on as normal. The timer will be reset to its current<br />
setting.<br />
WIDTH AT; The Width key regulates the pulse width for both channels.<br />
Insert the lead wires into the output receptacle located on top of the unit by<br />
holding the insulated portion of the connector and pushing the plug end of the<br />
wire into one of the jacks. After connecting the wires to the unit, attach each wire<br />
to an electrode. Lead wires provided with the device are compliant with mandatory<br />
compliance standards as set forth by the FDA. Note: Use caution when you<br />
plug and unplug the wires. Pulling on the lead wire instead of the insulated<br />
connector may cause wire breakage.<br />
Caution: Never insert the plug of the lead wire into an AC power supply socket.<br />
ELECTRODE SELECTION AND CARE<br />
Your physician or licensed practitioner should decide which type of electrode<br />
is best for your condition. Follow application procedures outlined in electrode<br />
packaging to maintain stimulation and prevent skin irritation. The packaging will<br />
provide instructions for care, maintenance and proper storage of the electrodes.<br />
RATE AT: The Rate key regulates the number of pulse per second for both<br />
channels.<br />
SET/ENT: The SET/ENT keys are used to select the type of treatment utilized.<br />
The type of treatment utilized includes Cycle On time, On Ramp time and Cycle<br />
Off time. The selected parameter will flash during adjust.<br />
Be sure to use the electrodes provided by <strong>BodyMed</strong>® and/or similar FDA legally<br />
marketed electrodes that are the same size, or larger than, the electrodes that<br />
are provided with this ZZA7OO COMBO <strong>TENS</strong> <strong>EMS</strong> unit.<br />
CONNECTING THE DEVICE<br />
The AT keys regulate the number of On, Ramp and Off values.<br />
After completing new values setting, press ENT key to update the new value.<br />
IMPORTANT: Be sure both Amplitude Control knobs for Channel 1 and 2 are<br />
turned to the OFF position before connecting the device.<br />
1. Prepare the Skin. Always clean the electrode site with mild soap and water,<br />
rinse well and blot dry thoroughly. Any excess hair should be clipped, not
CONNECTING THE DEVICE<br />
CHANGING THE BATTERY<br />
shaved, to ensure good electrode contact with the skin. You may choose to<br />
use a skin treatment or preparation that is recommended by your physician<br />
or licensed practitioner. This will reduce the chance of skin irritation and<br />
extend the life of the electrodes.<br />
2. Connect lead wires to the electrodes. Connect the lead wires to the<br />
electrodes before applying the electrodes to the skin.<br />
3. Place electrodes on skin. Place the electrodes on the skin as recommended<br />
by your physician or licensed practitioner. Avoid excessive stretching of the<br />
skin when applying electrodes. This is best accomplished by applying the<br />
electrode and smoothly pressing it in place from the center outward.<br />
4. Insert lead wire connector to device. Plug end of lead wire into the channel<br />
output receptacle to be used, pushing plug in as far as it will go.<br />
5. Select treatment settings. Check that the unit is set to the proper settings<br />
as recommended by your physician or licensed practitioner.<br />
6. Adjusting channel amplitude control. Locate the Amplitude Control<br />
knobs at the top of the unit. Slowly turn the Amplitude Control knob for<br />
Channel 1 c l o c k w i s e until you reach the intensity recommended by your<br />
physician or licensed practitioner. Always start with the lowest intensity and<br />
increase slowly. Repeat the same process for Channel 2, if appropriate.<br />
If the stimulation levels are uncomfortable or become uncomfortable, reduce<br />
the stimulation amplitude to a comfortable level. If problems persist, stop<br />
treatment and contact your physician or licensed practitioner.<br />
BATTERY INFORMATION<br />
When the low-battery indicator appears on the LCD panel, the battery should<br />
be replaced with a new battery.<br />
1. Remove the slide cover by pressing the top and sliding down until it is<br />
completely removed from the unit. This will reveal the battery compartment.<br />
2. Remove the old battery from the device.<br />
3. Place a new battery in the compartment. Note the proper polarity<br />
alignment indicated on the battery and the compartment.<br />
4. Make sure to safely dispose of the old battery.<br />
CLEANING THE DEVICE<br />
The device may be cleaned by wiping gently with a damp cloth moistened with<br />
mild soap and water. Never immerse the device in water or other liquids.<br />
Wipe lead wires with a damp cloth if they become soiled.<br />
To properly store the device for an extended period of time, remove the battery<br />
from the unit. Put the unit and accessories in the carrying case and store in a<br />
cool, dry location.<br />
TROUBLESHOOTING<br />
A 9-volt disposable battery is provided with the unit. When the low-battery indicator<br />
appears, the battery has become too weak to power the unit and will need<br />
to be changed. At this point, the unit will shut off until a new battery is inserted.<br />
10<br />
If the device does not function properly:<br />
1. Make sure the battery is properly installed, or replace the battery. Be sure to<br />
observe proper polarity markings when replacing the battery. If the low-battery<br />
indicator appears when the unit is turned on, replace the battery and recheck. 11
TROUBLESHOOTING<br />
TECHNICAL SPECIFICATIONS<br />
2. If the intensity has been adjusted and there is no stimulation, check that the<br />
lead wires are properly connected and the electrodes are in place. If the unit<br />
appears to be functioning and no stimulation occurs, the lead wires or<br />
electrodes may need to be replaced.<br />
3. If the battery appears to be charged and the unit is not functioning, turn<br />
both Amplitude Control knobs to the OFF position (counterclockwise) for<br />
about 5 seconds. Next, gradually turn the Amplitude Control Knob clock<br />
wise until stimulation is felt. If device is still not working, turn the unit off and<br />
contact <strong>BodyMed</strong>".<br />
If any other problems occur, please consult or return the device to <strong>BodyMed</strong>".<br />
Do not repair a defective device.<br />
Patient Compliance Meter:<br />
Patient Lock System:<br />
Timer:<br />
LCD:<br />
Shows the treatment times in hours<br />
Prevents the user from changing any<br />
fixed parameters set by the physician or<br />
licensed practitioner<br />
15-, 3O-, and 6O-minute; and continuous<br />
mode<br />
<strong>TENS</strong> - Shows modes, pulse rate, pulse<br />
width, timer and CH1/CH2 on LCD<br />
panel. <strong>EMS</strong> - Shows modes, pulse rate,<br />
on time, off time, timer and CH1/CH2<br />
on LCD panel.<br />
TECHNICAL SPECIFICATIONS<br />
Channel:<br />
Dual, isolated between channels.<br />
Pulse Amplitude:<br />
Adjustable O-8O mA peak into 500 Q<br />
load each channel, constant current.<br />
Pulse Rate:<br />
1 -16O Hz (adjustable). 1 Hz/step (1-2O Hz),<br />
5 Hz/step (2O-16O Hz).<br />
Pulse Width:<br />
50-26O fjs (adjustable <strong>TENS</strong>), 1O ^is/step.<br />
25O ^s fixed for <strong>EMS</strong>.<br />
Software Ramp Up:<br />
By changing mode, the output will reset<br />
to zero; then, ramp up to its original<br />
setting intensity. It will protect users<br />
from a sudden surge.<br />
Function Modes:<br />
<strong>TENS</strong>:<br />
B: Cycle Bursts, 2 bursts/sec, 9 pulses/Burst, TOO Hz; adjustable width.<br />
C: Continuous mode. Pulse rate, pulse width and intensity are fully adjustable.<br />
M: Modulated Width. Pulse width is automatically varied in a six-second interval.<br />
The modulation range of pulse width is from setting value to 35% less than the<br />
control setting value, then returns to the setting value. Rate, width and intensity<br />
are fully adjustable.<br />
SDR: Strength, Duration and Rate Modulation. SDR consists of alternating modulated<br />
intensity (amplitude) and pulse rate; meaning that one parameter is always<br />
increasing while the other is decreasing, and vice versa. The stimulation intensity<br />
decreases 2O% from the intensity control setting and returns to the setting value;<br />
while the pulse rate increases 45% from the modulated rate to the setting value<br />
and returns to the modulated rate. Total cycle time is six seconds. Rate, Width and<br />
Intensity are fully adjustable.
SOW: Strength, Duration and Width Modulation. SOW consists of alternating modulated<br />
intensity (amplitude) and pulse width; meaning that one parameter is always<br />
increasing while the other is decreasing, and vice versa. The stimulation intensity<br />
decreases 2O% from the intensity control setting and returns to the setting value;<br />
the pulse width increases 54% from the modulated width to the setting value, and<br />
returns to the modulated width. Total cycle time is six seconds. Rate, width and<br />
intensity are fully adjustable.<br />
<strong>EMS</strong>:<br />
S: Synchronous<br />
C: Constant<br />
A: Alternation<br />
On Ramp: Adjustable 1-8 seconds<br />
Cycle ON Time: Adjustable 1-3O seconds<br />
Cycle OFF Time: Adjustable 1-3O seconds<br />
Wave Form: Asymmetrical biphasic square pulse<br />
Maximum Charge per Pulse: 21 micro-coulombs maximum<br />
Voltage: O-11O Volts (Open Circuit)<br />
Power Source: 9-Volt Battery<br />
Dimensions: 1O8 mm(H) x 61.5 mm(W) x 25 mm(T)<br />
Weight: 14O grams (battery included)<br />
AM electrical specifications are ±1O% 5OO Q load<br />
BOD^MED*<br />
REORDER NO. ZZA7OO<br />
Distributed by <strong>BodyMed</strong>®<br />
Hudson, Ohio 44236 1-866-528-2152<br />
Made in Taiwan. Rev. O90910
In doctor mode, press the Mode key, release and then press the Width key (down arrow). This<br />
unlocks the device, and the "lock symbol" will no longer be displayed, The device can then be<br />
switched off and used normally.<br />
Patient Compliance Meter<br />
1. Viewing the meter<br />
After you enter the doctor mode, the patient compliance meter appears on the LCD with the<br />
"hr" symbol.<br />
2. Resetting the meter<br />
In the doctor mode, press the Mode key, release and then press the Rate key (down arrow), This<br />
will reset the treatment time hours.<br />
Distributed by <strong>BodyMed</strong>® | Hudson, OH 44236 ] 1-866-528-2152<br />
ZZA320C_ZZA700_DrAppendix<br />
Doctor Mode (for physician or licensed practitioner use only)<br />
It is possible for a physician or licensed practitioner to set treatment parameters, and then lock<br />
those into the device to prevent a patient from altering the settings. This is achieved using<br />
doctor mode.<br />
Patient Lock System<br />
1. Set treatment parameters<br />
The device is set up as usual, with the Width, Rate, Time and Mode entered (see previous<br />
chapters of this operation manual).<br />
2. Enter doctor mode<br />
First, switch the device off as explained previously.<br />
Then, hold down the Time key as you switch the machine on.<br />
If the "hr" symbol appears on the display, the device is now in doctor mode.<br />
If the "hr" symbol does not appear, turn the machine off and try again.<br />
3. Locking the parameters<br />
Press the Mode key, release and then press the Width key (up arrow). This locks the device, and<br />
a small "lock" symbol will appear on the display. The "lock" symbol indicates that the device<br />
parameters cannot be changed until the physician or licensed practitioner unlocks the device<br />
(see #4 below). The device can be switched off and used only with the parameters selected by<br />
the physician or licensed practitioner. Note; The amplitude of each channel can always be<br />
controlled by the patient, physician or licensed practitioner, even if the device is "locked."<br />
4. Unlocking the parameters