

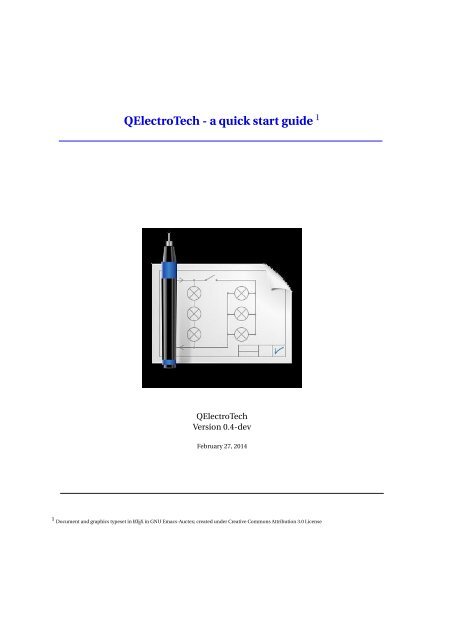
QElectroTech - a quick start guide

Create successful ePaper yourself
Turn your PDF publications into a flip-book with our unique Google optimized e-Paper software.
<strong>QElectroTech</strong> - a <strong>quick</strong> <strong>start</strong> <strong>guide</strong> 1<br />
<strong>QElectroTech</strong><br />
Version 0.4-dev<br />
February 27, 2014<br />
1 Document and graphics typeset in LAT EX in GNU Emacs-Auctex; created under Creative Commons Attribution 3.0 License
Author<br />
The team <strong>QElectroTech</strong><br />
License<br />
This work is licensed under the Creative Commons Attribution 3.0 base License<br />
http://creativecommons.org/licenses/by/3.0/deed.en<br />
Logo<br />
Nuno Pinheiro<br />
B nuno@nuno-icons.com<br />
<strong>QElectroTech</strong><br />
Home Project: www.qelectrotech.org<br />
Authors <strong>QElectroTech</strong><br />
Original idea: Benoit Ansieau B benoit@qelectrotech.org<br />
Collection of elements and Development: Laurent Trinques B scorpio@qelectrotech.org<br />
Development: Cyril Frausty B cyril@qelectrotech.org<br />
Development: Joshua Claveau B Joshua@qelectrotech.org<br />
Development: Abhishek Bansal B abhishek@qelectrotech.org<br />
Documentation<br />
Documentation English: Eswara Arun Kishore B arunkishoree@imu.co.in<br />
i
Contents<br />
1 Introduction ..................................................... 1<br />
1.1 About <strong>QElectroTech</strong> ............................................ 1<br />
1.2 Installation .................................................. 1<br />
1.3 Comments .................................................. 1<br />
1.4 Creating diagrams ............................................. 1<br />
2 Description of the drawing window ....................................... 2<br />
2.1 Title bar: ................................................... 2<br />
2.2 Main Menu bar: ............................................... 2<br />
2.3 Tool bar: ................................................... 2<br />
2.4 Panel of elements: ............................................. 3<br />
2.5 Control tabs: ................................................. 4<br />
2.6 Help bar: ................................................... 4<br />
2.7 Project title tab: ............................................... 4<br />
2.8 Scheme title tab: .............................................. 5<br />
2.9 Workspace: ................................................. 5<br />
3 Creating new project ................................................ 6<br />
4 Creating a new diagram .............................................. 7<br />
5 Configuring <strong>QElectroTech</strong> ............................................. 8<br />
6 Inserting elements ................................................. 10<br />
6.1 Folio report ................................................. 10<br />
7 Text field ....................................................... 13<br />
7.1 Inserting text field ............................................. 13<br />
7.2 Orientation of the text field in work space ............................... 13<br />
7.3 Moving and editing text field in work space ............................... 13<br />
8 Working with connectors ............................................. 14<br />
8.1 Re-sizing connectors ............................................ 14<br />
9 Element’s editor ................................................... 16<br />
9.1 Creating a new element .......................................... 16<br />
9.2 Description of Element Editor ...................................... 17<br />
10 Sample tutorial - Creating Globe valve element ................................ 23<br />
11 Title block template editor ............................................. 29<br />
11.1 Opening title block editor ......................................... 29<br />
11.2 Title block editor features ......................................... 30<br />
11.3 Custom tab ................................................. 32<br />
11.4 Working with the title block editor - (a tutorial) ............................ 33<br />
12 Printing, Exporting and Saving .......................................... 38<br />
12.1 Printing .................................................... 38<br />
12.2 Saving .................................................... 38<br />
12.3 Exporting ................................................... 38<br />
13 Some sample drawings created in <strong>QElectroTech</strong> ................................ 40<br />
ii
<strong>QElectroTech</strong> - A <strong>quick</strong> <strong>start</strong> <strong>guide</strong><br />
1 Introduction<br />
1.1 About <strong>QElectroTech</strong><br />
<strong>QElectroTech</strong> is an application to create electrical drawings. Some functional mechanical objects are also provided.<br />
<strong>QElectroTech</strong> has an element editor, which permits creation of elements like switches, valves etc., as per user’s<br />
requirements. This feature enables <strong>QElectroTech</strong> to facilitate 2D sketching of electrical, hydraulic, mechanical and<br />
pneumatic systems. It is a good option for P&ID drafting and can render output to wide variety of formats like<br />
‘dxf’, ‘pdf’, ‘jpg’, ‘png’ etc.,. A number of international languages are also supported in <strong>QElectroTech</strong> for preparing<br />
electronic / electrical circuit diagrams. Elements created in QElectoTech are saved in XML format. <strong>QElectroTech</strong> is<br />
available for both MS Windows and Linux operating systems.<br />
<strong>QElectroTech</strong> is Free Software released under the GNU / GPL license. As on the date, a stable version 0.3 is released<br />
for systems operating on MS Windows, GNU / Linux and MacOS. The present English documentation is developed<br />
for 0.4-dev version, which is yet to be released. However, this document can serve as a complete documentation for<br />
version 0.3 as well.<br />
1.2 Installation<br />
You can download the latest version of <strong>QElectroTech</strong> from http://qelectrotech.org/download.html. For GNU/Linux<br />
systems source files can be downloaded and configured. Ready made packages for some distros are also available<br />
for download.<br />
For MS Windows systems, ready to use executable installation files (.exe) are available for download which are<br />
packed in ‘zip’ folder.<br />
1.3 Comments<br />
A collection of articles with the current version of <strong>QElectroTech</strong> are given without any warranty. It allows you to edit,<br />
modify and use the items without conditions and regardless of the final license.<br />
1.4 Creating diagrams<br />
In the case of using all or part of the <strong>QElectroTech</strong> library for purposes other than to create wiring diagrams, you must<br />
abide by the terms of the Creative Commons-by license: This work is licensed under the terms of the Creative License<br />
Commons Attribution 3.0. For a copy of the license please visit the website: http://creativecommons.org/licenses/by/3.0/<br />
or send a letter to Creative Commons, 171 Second Street, Suite 300, San Francisco, California, 94105, USA.<br />
Document and graphics created under Creative Commons Attribution 3.0 License Page 1 of 45
<strong>QElectroTech</strong> - A <strong>quick</strong> <strong>start</strong> <strong>guide</strong><br />
2 Description of the drawing window<br />
Title bar<br />
Main Menu bar<br />
Title scheme<br />
Tool bar Panel Elements<br />
Tool bar<br />
Project title bar<br />
Project title & Section title block<br />
Collection of QET elements<br />
Panel of elements Work Area<br />
User’s collection<br />
Switch pane for history snapshot view<br />
Help bar<br />
Drawing title block<br />
Figure 1: <strong>QElectroTech</strong> editor main window<br />
2.1 Title bar:<br />
It contains the standard controls for <strong>QElectroTech</strong>, like ‘maximize’, ‘minimize’, ‘resize’, ‘move’ or ‘close’ among others.<br />
The controls appear by ‘left clicking’ the left corner of the title bar.<br />
2.2 Main Menu bar:<br />
It is a standard menu bar, which allows you to access all the features of the application such as ‘File’, ‘Edit’, ‘Project’,<br />
‘Display’, ‘Settings’, ‘Windows’ and ‘Help’.<br />
2.3 Tool bar:<br />
It contains buttons for basic functions in the drawing window. Three separate bars make up the ‘Tool bar’ as shown<br />
in Figure 1 . All bars begins with a ‘k’ marker. The tool bars can be moved by left clicking these markers & drag<br />
dropping to a new location. Each bar is further segregated by separators to group shortcuts according to the field<br />
of operation. Options like ‘new’ diagram etc., that effects the entire window are grouped together separated from<br />
options like ‘cut’ etc., which operate only on objects in diagram. The tools available are discussed below with<br />
graphics.<br />
Figure 2: Tool bar<br />
Document and graphics created under Creative Commons Attribution 3.0 License Page 2 of 45
<strong>QElectroTech</strong> - A <strong>quick</strong> <strong>start</strong> <strong>guide</strong><br />
The first tool bar is shown in Figure 2 and 3. It contains the standard tools available with regular programs. The<br />
options include shortcuts for <strong>start</strong>ing a ‘new diagram’, ‘opening a saved diagram’, ‘saving changes to the active<br />
diagram’, ‘closing the drawing’, ‘printing the present diagram’, ‘undo’ and ‘redo’ changes, ‘cut’, ‘copy’ and ‘paste’.<br />
These options are available in the left to right order on the tool bar. The icons that operate on objects in the diagram<br />
are not active in the Figure 2. The ‘undo’ shortcut activates with the first input to the drawing and ’redo’ is activated<br />
only after an ’undo’ action is performed. Other shortcuts become active only when object(s) is/are selected in the<br />
drawing.<br />
Figure 3: Tool bar<br />
The last segment of the first bar and the remaining two bars, which constitute ‘Tool bar’ are shown in Figure 3.<br />
Shortcuts for exclusive editing and building your diagram are provided here. ‘Delete’, ‘rotate element(s)’ and<br />
’selection properties’ are available on the first segment. An element properties can be viewed by selecting it and left<br />
clicking the ‘selection properties’ button. Element editor can be launched from the properties window by clicking<br />
the ‘Edit element’ button on the properties window. The elements from the QET collections are read only and<br />
cannot be edited. However, an element can be imported into ‘User’s collection’ and edited. Please refer section 9.1<br />
on page 16, for guidance on editing or creating elements.<br />
The second bar contains buttons to ‘select object(s)’, ‘Move’, ’zoom to contents’, ‘fit in view’ and ‘default zoom’.<br />
Select object(s) allows selection of one or more objects at a time. To select more than one element, hold ‘control’ key<br />
from keyboard and left click the elements. ‘Move’ option facilitates to view the entire drawing without modifying it,<br />
it shuffles the drawing area on the screen. In physical terms it can be described as moving the entire diagram sheet<br />
to view contents. ‘Zoom to contents’ zooms view to the extent of all the elements placed in the diagram. ‘Fit in view’<br />
sizes the drawing to display complete diagram in the window. The ‘default zoom’ option sets the zoom level of the<br />
diagram to a default value.<br />
The third bar has options to set ‘diagram properties’, ‘reset conductors’ connecting the objects, ‘add a text field’<br />
to the diagram and to ‘insert picture’ in the diagram. ‘Reset conductor’ option is activated only when one or<br />
more conductors are selected. The description of each of these functions is explained in the later sections of this<br />
document.<br />
2.4 Panel of elements:<br />
The dark green colored box (refer Figure 1) in the panel contains essential tools for drawing in the ‘Work Area’. The<br />
panel consists of the following categories of elements:<br />
Tool bar panel elements:<br />
The ‘tool bar panel elements’ is organized into three groups separated by markers. The first group has a shortcut to<br />
reload all collections; second group has options to create new category, edit category and delete category; third<br />
group has options to create a new element, edit an element and a button to open a new element file.<br />
Filter:<br />
A filter is provided to <strong>quick</strong>ly search elements by searching for the input keywords is provided. When a keyword<br />
is entered, each matching element is displayed along with its tree, i.e under the category in which the element is<br />
located. Only the categories which hold a matching element for the searched keyword are displayed in the project<br />
title section and in the collection of QET elements (refer Figure 1). The entered keyword can be cleared by ‘left<br />
clicking the ‘X’ button (provided left to the search keyword text input field), to display normal categories and QET<br />
elements. The keyword can also be cleared by using backspace key from keyboard or selecting the text with mouse<br />
and deleting the entered keyword(s).<br />
Document and graphics created under Creative Commons Attribution 3.0 License Page 3 of 45
<strong>QElectroTech</strong> - A <strong>quick</strong> <strong>start</strong> <strong>guide</strong><br />
Project title & section title block:<br />
Project title can be given the drawing title name in the ‘diagram properties’ or by double clicking the ‘drawing title<br />
block’. There are other options that can be set in this action. Once a name is given to the drawing, it gets displayed in<br />
the ‘project title’ block. The project title section gets updated as the drawing is made. The ‘title block’ has templates<br />
on which the drawing is made. Standard templates are provided with installation with the template set to ’default’.<br />
Other templates can be applied to the drawing by selecting the template and drag dropping it on to the ‘work area’.<br />
The templates can be edited from ’diagram properties’ using the drop down clickable button provided right to the<br />
template field.<br />
QET collection:<br />
<strong>QElectroTech</strong> provides a set of readily available elements grouped under a relevant category, to <strong>quick</strong>ly place<br />
elements in the drawing. Elements can be selected and drag dropped onto the work area to prepare the diagram. An<br />
element can be <strong>quick</strong>ly searched using keywords in the filter.<br />
User’s title block:<br />
User can add a title block (template) by ‘right clicking’ user title block and selecting ’new template’ and choosing a<br />
new name. The title block can then be set according to the users choice for continued use in future projects. User<br />
has many options like adding a logo and details to the template alongwith many other editable options.<br />
User’s collection:<br />
‘Right clicking’ the user collection gives options to the user to add new categories, elements and to delete categories.<br />
User can import elements from QET collection and customize the elements for use in a project. The user also has<br />
option to import new elements stored in a file. This is category under which user can create customized categories<br />
and elements.<br />
2.5 Control tabs:<br />
To the bottom of the elements panel, two tabs ‘undo’ and ‘elements panel’ are provided. Elements panel is default<br />
view in <strong>QElectroTech</strong>. ‘Undo’ tab records each change to a diagram in the chronological order. At any point if the<br />
user wishes to go back to any previous point in the diagram, he can select the tab ‘undo’ select a point in the history<br />
where he/she wishes to return and switch back the tab to ‘elements panel’ and continue drawing. The changes<br />
that were effected after the event will be undone. BThe changes will be lost with this action. After the actions<br />
are undone, user will find that the actions that were undone are highlighted in light pink color, under appropriate<br />
category in the elements panel. These actions are marked internally by <strong>QElectroTech</strong> as unused in the project. The<br />
tabs can be turned off or on from the main menu bar Settings —> Display. Unchecking a choice would turn off the<br />
tab in the window.<br />
2.6 Help bar:<br />
The help bar is the space below the control tabs. It is very useful for beginners of <strong>QElectroTech</strong> in the way that it<br />
gives information about the field that is pointed by the cursor. A user can learn about a field by simply pointing it<br />
with the mouse and looking at the help bar.<br />
2.7 Project title tab:<br />
By default, <strong>QElectroTech</strong> displays the project name as ‘untitled project’ in the project title tab. The user can save the<br />
project by giving it a name of his/her choice. The project title tab displays the name of the project, which is saved as<br />
*.qet file on the computer. There is an option to close the project, by clicking x at the top right corner of the project<br />
title bar. A new project can be opened in the same window, which opens as a new tab in the project title. User can<br />
switch from one project to the other that are opened in the same window by left clicking the tab with the mouse or<br />
pressing ’control + tab’ key from keyboard. The project title can be changed from main menu Project —> Project<br />
Properties and entering a name for the project in the project title field.<br />
Document and graphics created under Creative Commons Attribution 3.0 License Page 4 of 45
<strong>QElectroTech</strong> - A <strong>quick</strong> <strong>start</strong> <strong>guide</strong><br />
2.8 Scheme title tab:<br />
By default the scheme title tab shows ’Untitled’. Double left clicking the tab opens the diagram properties window,<br />
which has a field to assign a name to the drawing among other options to set author’s name, date etc.,. The tab<br />
shows the name of the drawing. A new drawing to the present project can be added by right clicking the project in<br />
the project title and section title block and selecting ’Add a diagram’ option in the popped up window. The same<br />
action can also be achieved by clicking the provided at the right end of scheme title tab. Each scheme tab is one<br />
drawing in a project and many drawings can be added to a project. Also, each drawing can be assigned its own<br />
properties from the diagram properties window.<br />
2.9 Workspace:<br />
By default, work space defined by ‘A’ to ‘H’ rows and ‘1’ to ‘17’ columns. The rows and columns can be added or<br />
reduced from the diagram properties window. The default size of each column is 60 pixels and that of each row<br />
is 80 pixels, both of them can be adjusted in the diagram properties. Workspace is the area where the diagram is<br />
prepared, by including elements, conductors, text and pictures.<br />
Document and graphics created under Creative Commons Attribution 3.0 License Page 5 of 45
<strong>QElectroTech</strong> - A <strong>quick</strong> <strong>start</strong> <strong>guide</strong><br />
3 Creating new project<br />
A new project can be opened from File —> New or by clicking the shortcut icon<br />
Next click Main Menu —> Project —> Project Properties; a pop up window for project properties opens up, which<br />
is shown below. A name for the project created can be given in the ‘Project Title’ field and click ‘OK’ to continue<br />
Figure 4: Project properties window<br />
drawing. The project title tab now displays the project name and comments ‘[modified]’. The project should now be<br />
saved as a file ‘file_name.qet’, the project title tab then shows Project “project_name”. In the above window if the<br />
properties for ‘New diagram’ are set, they are applied only to subsequent new schemes added to the project. The<br />
present scheme properties should be set from the ‘Diagram properties’ option from the tool bar or by double left<br />
clicking the scheme title tab.<br />
Document and graphics created under Creative Commons Attribution 3.0 License Page 6 of 45
<strong>QElectroTech</strong> - A <strong>quick</strong> <strong>start</strong> <strong>guide</strong><br />
4 Creating a new diagram<br />
By default, <strong>QElectroTech</strong> opens a “Untitled” diagram. Diagram name and other properties can be set by invoking<br />
diagram properties i window. Options to invoke the diagram properties include Double left clicking the scheme<br />
title tab, selecting the ‘Diagram properties’ from the tool bar, from main menu bar Edit —> Diagram properties or<br />
by using ‘Control + L’ keys from key board. The diagram properties window has options to assign a name to the<br />
diagram, author’s name, date, changing the dimensions of the work area by adjusting number and dimensions<br />
of rows and columns, or selecting a standard template for the drawing etc.,. There is a custom tab provided for<br />
versions from 0.3, to define and use user defined keys.<br />
Figure 5: Diagram properties window<br />
The diagram properties is explained further along with the use of custom tab in section 11.3 on page 32. The<br />
conductor type and properties options are explained under section 8.1 on page 15.<br />
Document and graphics created under Creative Commons Attribution 3.0 License Page 7 of 45
<strong>QElectroTech</strong> - A <strong>quick</strong> <strong>start</strong> <strong>guide</strong><br />
5 Configuring <strong>QElectroTech</strong><br />
<strong>QElectroTech</strong> permits customizations through configure option. To access the configuration wizard, left click<br />
‘Settings’ from main menu bar and select ‘Configure <strong>QElectroTech</strong>’; (Settings —> Configure <strong>QElectroTech</strong>). The<br />
wizard permits setting users preferences for <strong>QElectroTech</strong> covering - ‘General’, ‘New Diagram’, ‘Export’ and ‘Printing’<br />
aspects. The options are more or less self explanatory.<br />
‘General’ options<br />
‘New Diagram’ options<br />
‘Exporting’ options<br />
‘Printing’ options<br />
1. General options :<br />
(a) Appearance: Check this option to use system colors for <strong>QElectroTech</strong><br />
(b) Projects: Check this option how windows (different diagrams in projects) should appear in <strong>QElectroTech</strong>.<br />
Tab option is default and is illustrated in this documentation (Pictures of <strong>QElectroTech</strong>). ‘Window option’<br />
causes diagrams to appear in windows and new additions show up in new windows.<br />
(c) Elements management: The options provided are to integrate elements and new elements created<br />
automatically to projects, default option to highlight newly added elements and to set default author<br />
and credits options for new elements created.<br />
Document and graphics created under Creative Commons Attribution 3.0 License Page 8 of 45
<strong>QElectroTech</strong> - A <strong>quick</strong> <strong>start</strong> <strong>guide</strong><br />
(d) Language: A language combo box lets to set default language for <strong>QElectroTech</strong>. For English choose<br />
English (Great Britain country flag).<br />
2. New Diagram: Please refer section 4 on page 7. The New diagram is composed of three tabs the first two are<br />
the same as displayed for ‘Diagram properties’. An additional tab ‘Report folio’ lets you use the defined names<br />
for values in report folio. An explanation to report folio is provided in section 6.1 on page 10.<br />
3. Exporting options: <strong>QElectroTech</strong> default exporting properties for diagrams can be set here. Options include<br />
selecting an output format (‘PNG’ format is shown here), default location of exported files and rendering<br />
options. Rendering specifies the kind of information to be included in the output file.<br />
4. Printing options: <strong>QElectroTech</strong> can print a drawing to a physical printer connected to the computer. The<br />
options that can be specified in the configuration window under print options are the rendering options.<br />
There are five options provided - each specifies whether to include the option in the print output. Checking<br />
an option, includes the data requested in the physical print diagram.<br />
Document and graphics created under Creative Commons Attribution 3.0 License Page 9 of 45
<strong>QElectroTech</strong> - A <strong>quick</strong> <strong>start</strong> <strong>guide</strong><br />
6 Inserting elements<br />
<strong>QElectroTech</strong> has a number of elements listed as a tree under QET Collection, under relevant categories in the<br />
collection of elements field shown in Figure 1. Alternatively a element can be searched <strong>quick</strong>ly using ’Filter’ field.<br />
Each element can be selected using left mouse click and drag dropped on to the work area to include it in a diagram.<br />
The elements can be positioned any where in the work area and rotated in quantum steps of 90 o . Rotation of<br />
elements can be performed by selecting the element in the work area with left mouse click and pressing ‘space’ key<br />
from key board. Alternatively, rotate option in the tool bar gets active upon selecting at least one element in work<br />
area, which can be clicked to orient the selected element(s) to the required rotation. A number of elements can<br />
be selected together by holding ‘control’ key from key board and left clicking required number of elements in the<br />
work area. Once the required elements are selected (evident from light gray box enclosing each selected element),<br />
rotation operation can now be performed on all the selected elements together as described earlier. You will also<br />
find some elements like for example, a horizontal ammeter that cannot be rotated for obvious reasons.<br />
Figure 6: Rotation of an element in work space<br />
6.1 Folio report<br />
Folio report is included in the ‘QET Collection’ in collection of QET Elements. The element performs the referencing<br />
roles in the drawings. Refer sample drawings enclosed “Ship’s electrical generation and distribution” on page 45.<br />
The function of the folio report is explained with the following illustrations.<br />
Document and graphics created under Creative Commons Attribution 3.0 License Page 10 of 45
<strong>QElectroTech</strong> - A <strong>quick</strong> <strong>start</strong> <strong>guide</strong><br />
Click ‘+’ of folioreport<br />
Two elements ‘Previous’ and ‘Next’ folio are provided<br />
Drag drop each element to a drawing<br />
Double click an element for properties window<br />
Select report folio tab<br />
Select the radio button in ‘report folio available’. Click ‘Apply’<br />
Watch the ‘\’ field of element is updated to text<br />
Add each element again as shown to create four elements<br />
The ‘\’ field of element is updated to text showing that ‘from folio 1-A3 cell’ and ‘to folio 1-C2 cell’. The report<br />
folio elements perform referencing roles. This kind of referencing is widely used in electrical and process drawings.<br />
Document and graphics created under Creative Commons Attribution 3.0 License Page 11 of 45
<strong>QElectroTech</strong> - A <strong>quick</strong> <strong>start</strong> <strong>guide</strong><br />
Double click any element to watch its properties window<br />
Two options are now available in ‘report folio available’<br />
Add a new drawing to the project<br />
and add the two report folio elements to it<br />
Switch back to first drawing and double click an element<br />
Three options are now available in ‘report folio available’<br />
Observe the new element from another drawing<br />
(Folio 2) is available for referencing<br />
Select the folio 2- reference and click ‘Apply’<br />
The element updates to ‘to folio 2 - cell C3’ reference<br />
Switch back to second drawing and observe<br />
The previous folio element is updated to show ‘from folio 1 - cell C1’<br />
Document and graphics created under Creative Commons Attribution 3.0 License Page 12 of 45
<strong>QElectroTech</strong> - A <strong>quick</strong> <strong>start</strong> <strong>guide</strong><br />
7 Text field<br />
7.1 Inserting text field<br />
Text field appears like an underscore and it can be either used in association with an element or as an additional<br />
field inserted in the work space. Some elements are provided with a text field at each of their terminals and one for<br />
the entire element. Additional text fields can be entered any where in the work space by left clicking the ‘Add a text<br />
field’ short cut icon from the tool bar (this action depresses the shortcut text icon in the tool bar) and left clicking<br />
the location in the work space where you want to include a text field. The text field can be edited in the work space<br />
by simply double left clicking it with the mouse and keying in text from key board and deselecting the text field by<br />
left clicking any where else in the work space. The text field supports multi-line entry of text.<br />
7.2 Orientation of the text field in work space<br />
By default all the text fields are horizontally oriented in the work space. They can be oriented in any direction in the<br />
work space and are provided with two methods of applying rotation to the field.<br />
1. Selecting the text field by left clicking it with the mouse and rotating it with the ‘Rotate’ shortcut provided in<br />
the tool bar. Alternatively, the text field can also be rotated by left clicking it with the mouse to select it and<br />
pressing space bar to achieve desired orientation. This action rotates the text field in quantum steps of 90 o .<br />
2. Left clicking the text field with mouse to select it and pressing ‘control + space’ bar on keyboard pops up a<br />
GUI window to orient text filed in any direction, with the precision of two decimal places. The GUI window<br />
also facilitates rotation in quantum steps of 45 o by clicking the green dots on the yellow circle. A double spin<br />
box is also provided to manually enter an angle of orientation upto two decimal places. The double spin box<br />
can also be interacted with left mouse click on the up or down arrow keys to increment or decrement angles<br />
in steps of 1 o .<br />
Figure 7: [Left] Text rotate gui window (‘control + space’) & [Right] Blue shade while moving text<br />
7.3 Moving and editing text field in work space<br />
Text field can be moved any where in the workspace by left clicking it with mouse and dragging it to a new place and<br />
releasing the mouse click. Text fields that are associated with elements require ‘control key’ to be pressed from the<br />
keyboard to permit moving its text field. Moving an element’s text field produces a blue colored highlight over the<br />
element during relocation as shown in the Figure 7 (right). This is a feature of <strong>QElectroTech</strong> to help user perform<br />
such actions in a large diagram containing a lot of elements.<br />
Text fields that are not associated with elements have an additional editing option accessible by selecting the text<br />
field with a left mouse click and using the keyboard shortcut ‘Control+e’ or from main menu bar, ‘Edit —> Edit<br />
the text field’. A simple text editor window opens up to facilitate increasing the font size, font color, applying bold<br />
/ italics / underlining texts and inserting a hyperlink. The hyperlink is resourceful for diagrams printed to ‘pdf’<br />
format.<br />
Document and graphics created under Creative Commons Attribution 3.0 License Page 13 of 45
<strong>QElectroTech</strong> - A <strong>quick</strong> <strong>start</strong> <strong>guide</strong><br />
8 Working with connectors<br />
Elements have terminals, which facilitate connecting them with other elements with the help of connectors. Making<br />
connections between terminals can be summarized as follows:<br />
1. Position the cursor on the element connector or terminal you want to connect; you will see that a blue dot<br />
develops on the terminals you want to join.<br />
2. Left click the blue dot and hold and drag the pointer to the connector or terminal to join the other element<br />
you want to connect. If a green dot appears on the target terminals, it means that the union is complete. A red<br />
dot means a “forbidden connection”.<br />
3. Release the left mouse button and the line (left) will be completed, if the line does not take the desired position<br />
or does not generate acceptable paths, the connectors can be edited by selecting the line and drag from the<br />
green markers that form when you position the cursor over the connector line.<br />
Step 1 Step 2 Step 3<br />
Steps of making connections between terminals<br />
8.1 Re-sizing connectors<br />
Adjusting connectors by moving elements<br />
1. Select an element in a circuit by left clicking it and hold it in the work space.<br />
2. Drag the selected element in the circuit, the connectors linking the element to the rest of the circuit also<br />
moves.<br />
Initial circuit Select an element Drag & release<br />
Adjusting connectors by moving element in a circuit<br />
Adjusting connectors with handles<br />
1. Select a connector with a left mouse click. The segment of the selected connector between two elements<br />
turns red, indicating that the conductor is selected.<br />
Document and graphics created under Creative Commons Attribution 3.0 License Page 14 of 45
<strong>QElectroTech</strong> - A <strong>quick</strong> <strong>start</strong> <strong>guide</strong><br />
2. Position the cursor over the selected connector; you will find thick green colored squares appear over this<br />
segment, one each in a bend.<br />
3. The connector can now be adjusted as per the users demands by left clicking these thick little squares and<br />
holding and dragging to a new position. The connector changes its path during this action.<br />
4. To reset the altered path, left click the short cut icon ‘Reset conductors’ provided in the tool bar with the<br />
connector selected (highlighted red). This action will undo all the earlier changes effected to the connector.<br />
Select a connector Hold a green square and drag Drag another connector Reset connectors<br />
Adjusting connectors in a circuit<br />
Adding text to connectors<br />
Connectors are provided with text fields. Additional text fields can be inserted at desired locations. Text fields for<br />
connectors have the same behavior as the text fields for elements discussed under section 7. Double left click a<br />
connector text field and enter the text. The text can orient horizontally or vertically depending on the section of the<br />
connector where the text field is provided. The text fields can be rotated and re-positioned as required.<br />
Connector properties window<br />
A connector’s properties window can be activated by double left clicking it. The connector and its text field properties<br />
can be set from this window. Only multiline connectors have text fields. Selecting ‘simple’ or ‘single line’ radio<br />
buttons deactivates the text field. The ‘single line’ option has further options to format the connector as an earth,<br />
phase or a neutral conductor or a combination of any. Selecting the ‘neutral’ option further facilitates formatting<br />
the conductor as ‘Protective Earth Neutral’. Number of phases can also be set upto 3 by selecting the ‘phase’ radio<br />
button and using the slider or keying a value into the double spin field. Color and styles to a connector can be<br />
applied irrespective of other choices.<br />
Text orientation Dragging a connector’s text field Connector properties window<br />
Connector’s text field & properties window<br />
Document and graphics created under Creative Commons Attribution 3.0 License Page 15 of 45
<strong>QElectroTech</strong> - A <strong>quick</strong> <strong>start</strong> <strong>guide</strong><br />
9 Element’s editor<br />
9.1 Creating a new element<br />
Elements in <strong>QElectroTech</strong> are stored in ‘xml’ format. Elements created in Linux distros are usually saved in an<br />
invisible folder ‘.qet’. It is created by <strong>QElectroTech</strong> in ‘/home/USER/’ directory.<br />
Select ‘User collection’ click ‘New category’ Enter the internal name Enter a display name<br />
Step 1 Step 2 Step 3 Step 4<br />
Elements provided in the QET Collection are read only and should not be edited. However, they can be added to<br />
‘User collection’ and subsequently edited and saved. The above pictures summarize the first four steps in creating<br />
a new element.<br />
1. Select the ‘User collection’ with a left mouse click over it. Then elements can directly be created under it.<br />
However, it is a good practice to first create a ‘category’ under ‘User collection’.<br />
2. Left click the shortcut icon ‘New category’. ’Add a new category’ wizard opens up, which <strong>guide</strong>s the user.<br />
3. Enter a name to the new category (internal name); the field takes only small letters, numbers and ‘-’,‘_’ and ‘.’.<br />
4. Double left click the text field, enter a name that the category should display and hit ‘enter’ from keyboard. By<br />
default, the field shows ‘Name of the new category’ and language ‘en’ for English versions. Additional support<br />
languages can also be added by left clicking the ‘Add a line’ button. Now left click ‘OK’ button to add the<br />
category to user collection. This action can also be achieved by hitting ‘enter’ key from keyboard.<br />
New category added click ‘New element’ Select the category Left click on ‘Next’<br />
Step 5 Step 6 Step 7 Step 8<br />
A new category is now added under ‘User collection’; its internal name is displayed in the tool tip and the name<br />
displayed is from the text entered in the text field in step 4.<br />
1. Select this category with left mouse click.<br />
2. Click on the shortcut icon on tool bar to create a ‘New element’.<br />
3. A ‘Create a new element’ wizard opens up, which <strong>guide</strong>s the user to create an element. Select the category in<br />
which the new element created will be placed.<br />
4. Click ‘Next’ button.<br />
Document and graphics created under Creative Commons Attribution 3.0 License Page 16 of 45
<strong>QElectroTech</strong> - A <strong>quick</strong> <strong>start</strong> <strong>guide</strong><br />
Enter an internal name Select the text to display Enter the text to display Element editor opens<br />
Step 9 Step 10 Step 11 Step 12<br />
Step 8 opens up a request for a file name for the element to be created.<br />
1. Enter a name for the element to be created. Naming convention is similar to that of the internal name for<br />
category explained earlier in section 9.1. Click ‘Next’ to continue the wizard.<br />
2. Select the text field and left double click on the default text displayed. The field will be editable now.<br />
3. Enter a name by which the element will be displayed under ‘User collection’. The text field accepts all valid<br />
keys. After entering a name, hit ‘Enter’ from key board. Hit ‘Enter’ key from key board one more time or click<br />
‘Finish’ button to complete the wizard.<br />
4. The wizard now completes opening up ‘Element editor’ window. The Element editor facilitates drawing of a<br />
new element or editing imported elements under ‘User collection’. The element editor has a plain drawing<br />
area with two thin red colored reference cross hairs. The cross hair is for reference and does not show up in<br />
the finished element sketch when saved.<br />
Title bar<br />
Main menu<br />
Main tool bar<br />
Information panel<br />
Drawing bar<br />
Drawing Area<br />
Terminals<br />
Active area<br />
Element<br />
Text fields of element<br />
Undo drawing and Element parts<br />
Figure 8: Element editor window<br />
9.2 Description of Element Editor<br />
Title bar:<br />
The title bar has buttons that all standard windows are provided with.<br />
Drawing area:<br />
This is the dotted grid over which the elements are drawn.<br />
Document and graphics created under Creative Commons Attribution 3.0 License Page 17 of 45
<strong>QElectroTech</strong> - A <strong>quick</strong> <strong>start</strong> <strong>guide</strong><br />
Figure 9: Comparison of Cartesian coordinates (Mathematics notation) with Element editor field.<br />
(The letters ‘x’ and ‘y’ show positive direction of axes in Cartesian field).<br />
Undo & Parts:<br />
By default the element’s ‘parts’ is the active tab. It contains the all the individual segments that make up an element<br />
in the chronological order. The ‘Active area’ segment is highlighted in this tab. Undo tab records each action made<br />
in the element editor and the user can visit any stage by selecting the corresponding entry in this tab.<br />
Main menu:<br />
Main menu has ‘File’, ‘Edit’, ‘Display’, ‘Settings’ and ‘Help’ icons.<br />
File: The file option has standard windows options for creating a new element, opening a saved ‘*.elmt’ file or ‘*.xml’<br />
drawings, opening an element from ‘User collection’ or ‘imported collection’, saving the drawing to their<br />
respective locations and inter alia. ‘Reload’ option reloads the element drawing neglecting all the changes<br />
effected.<br />
Edit: ‘Edit’ has standard options like ‘cut’, ‘copy’, ‘paste’, ‘select all’, ‘undo’, ‘redo’ and ‘delete’. ‘Invert selection’<br />
selects all geometry in the drawing area other than the ‘active area’. There is an option to paste a drawing or<br />
an element from a saved ‘*.xml’ or *.elmt’ format file to the existing drawing. A file location or an element<br />
from ‘User collection’ or ‘imported collection’ can also be selected. The ‘Edit’ also has special commands<br />
‘raise’, ‘lower’, ‘bring forward’ and ‘send backward’ to adduce to overlapping geometry. The order sets priority<br />
as to which geometry should overlap the other in the drawing area. It has analogy similar to shuffling a pack<br />
of playing cards. Options to set the author name and his license and adding language features to the drawing<br />
are also available.<br />
Display: This icon has the zoom in / zoom out options for the drawing. Settings: Settings has features to turn on or<br />
off panels or tabs that constitute the drawing editor, a full screen mode and configure <strong>QElectroTech</strong> options.<br />
Configuring <strong>QElectroTech</strong> will be described in a later section.<br />
Information panel:<br />
It is also the properties window for the selected individual segments that make up an element. The information<br />
panel contains two groups of properties ‘appearance’ and ‘geometry’. Geometry defines the segment selected in the<br />
work area (active area). It is possible to fine tune the coordinates of the segment from the information panel. The<br />
geometry describes the‘active area’ selected. A simple line, a square or a rectangle, a circle, text fields, a terminal<br />
and an arc will have their own set of specific parameters, which are displayed in the information panel. Try drawing<br />
each of the drawing tools in the work area and select them to define ‘active area’ and check the information area.<br />
Watch how the parameters change with each geometry; also try changing the parameters to note their effect on the<br />
‘active area’. The appearance properties define the line style, color, weight, filling for closed geometry like rectangle,<br />
Document and graphics created under Creative Commons Attribution 3.0 License Page 18 of 45
<strong>QElectroTech</strong> - A <strong>quick</strong> <strong>start</strong> <strong>guide</strong><br />
square etc., and another property called ‘Anti-Aliasing’, which is to remove distortions of the sketches and smoothen<br />
them for better appearance. Geometry parameters define the ‘active area’ and they are shape specific; for example,<br />
a line segment will have <strong>start</strong> and finish coordinates, beginning side or ending styles (to draw arrows, diamonds<br />
etc.,) and corresponding weight factor to size these ending styles.<br />
Active area:<br />
Active area is the part of the element that is selected with a left mouse click. The active area data is displayed in the<br />
information panel and the segment will be highlighted in the ‘element parts’ of the editor.<br />
Element:<br />
Element is the completed drawing of a symbol, which is used to represent a component in a circuit drawing.<br />
Elements can be given names to describe them and saved either in a *.elmt or a *.xml format. An element should be<br />
provided with at least one terminal to facilitate its integration in a drawing. The element can also be saved to ‘User<br />
collection’ among others. Two types of text fields are possible to be added to an element to either describe it or its<br />
segments and terminals. The text fields are described in detail later under section 9.2. One text field is not editable<br />
when the element is saved and used in the <strong>QElectroTech</strong> drawing while the other has users text input feature.<br />
Main tool bar:<br />
The main tool bar is a collection of <strong>quick</strong>ly accessible shortcuts to the features available in ‘Main menu’ group under<br />
‘File’, ‘Edit’ and ‘Display’.<br />
Drawing bar:<br />
The drawing bar has the tools for constructing an element. The options include a cursor tool to permit selection of<br />
either individual segments of the drawing or a combination of these, including text and terminals. The drawing<br />
tools are each described below:<br />
Line tool: Use a left mouse click to select and activate the ‘Add a line’ tool from the drawing bar. Use a single left<br />
click in the drawing area to select a coordinate and hold and drag release to another coordinate to define the<br />
line segment. The line segment can be re-sized either from its information panel or using the sizing handles<br />
from its ‘active area’. Drag dropping a line segment to another location in the drawing is also possible.<br />
The line segment information is shown here in Figure 9.<br />
The line segment geometry can be defined by a <strong>start</strong> coordinate<br />
and ending coordinate. The default end style<br />
is ‘normal’; options to set this style to ‘simple arrow’,<br />
‘triangle arrow’, ‘circle arrow’ and ‘diamond arrow’ are<br />
available. End 1 is the initial point from where the line<br />
segment is drawn and End 2 is the ending point of the<br />
line segment. Triangle, circle and diamond arrow spaces<br />
can be filled with a color using the ‘Filling’ combo box.<br />
The line segment can be colored ‘white’, ‘red’, ‘green’ and<br />
‘blue’ apart from default red color. The line style can have<br />
‘normal’, ‘dashed’, ‘dotted’ or ‘dashed & dotted’ styles. The<br />
thickness of the line segment can be defined from the<br />
‘weight’ combo box. A slanted line can have rough outline<br />
which can be smoothed by selecting the ‘anti-aliasing’<br />
option.<br />
Figure 10: Line tool and information<br />
Rectangle tool: Select ‘Add a rectangle’ icon with a left mouse click from the drawing bar to activate it. Use a left<br />
mouse click to select a point in the drawing area and hold and drag to another coordinate and release the click<br />
to complete a rectangle. The geometry can be re-sized from its information panel or by using the resizing<br />
Document and graphics created under Creative Commons Attribution 3.0 License Page 19 of 45
<strong>QElectroTech</strong> - A <strong>quick</strong> <strong>start</strong> <strong>guide</strong><br />
handles from its ‘active area’. Drag dropping the rectangle to another position in the drawing area is also<br />
possible.<br />
The Rectangle tool permits drawing of rectangular geometric<br />
sketches in the element editor. Some of the formatting<br />
that can be done from the information window<br />
to a rectangle is shown in the Figure 10. The geometry is<br />
defined by a point and the size of the rectangle (length<br />
and breadth). The appearance options are the same as<br />
available for line tool.<br />
Figure 11: Rectangle tool and information<br />
Terminal tool: Terminals have to be provided for the element to integrate it in a circuit. The element editor will<br />
not save a drawing without at least one terminal. Terminals can be drawn from the short red-blue line icon<br />
provided in the drawing bar. It is described in the Figure 11. Left mouse click on the ‘Add a terminal tool’<br />
from the drawing bar to activate it and left click on a point in the drawing area where you want to place this<br />
terminal. Once added it can be selected and drag dropped to a suitable location.<br />
Terminal is a not a simple drawing tool like ‘line’ or ‘circle’.<br />
It is a tool which gives an element a scope to be connected<br />
to other elements in a circuit. Terminal is mandatory for<br />
each element, more terminals can be provided depending<br />
on the type of element being drawn. It appears as<br />
a line in two distinct colors ‘blue’ and ‘red’. It has fixed<br />
dimensions and cannot be changed. It has a special directional<br />
property by way of ‘North’, ‘South’, ‘East’ and<br />
‘West’, which can be changed from the information panel,<br />
when the terminal is the ‘active area’. This direction is<br />
determined by the blue end of the terminal; in the direction<br />
that it points. It is described in the working area by<br />
a single coordinate, the point where it is added. The red<br />
end of the terminal joins to the element geometry. The<br />
terminal gives an element a dynamic property in <strong>QElectroTech</strong>.<br />
When you point cursor to an element terminal<br />
after it is added in a drawing, the blue end turns to a big<br />
blue dot, indicating its intention to be connected to a<br />
point in the circuit.<br />
Figure 12: Terminal tool and information<br />
Ellipse tool: Select the ‘Add an ellipse’ icon from the drawing bar to activate it. Use a left mouse click in the drawing<br />
area to select a point and hold and drag to another coordinate and release the click to form a geometry. You<br />
can re-size the geometry developed to your desired intention either by using re-sizing handles of its ‘active<br />
area’ or using its information panel. Drag dropping of the geometry to a desired position after selecting it is<br />
possible.<br />
Polygon tool: Select the ‘Add a polygon’ icon with a left mouse click to activate the tool. With the tool activated, use<br />
left mouse clicks to select a number of points that define your geometry in the ‘drawing area’. To finalize the<br />
Document and graphics created under Creative Commons Attribution 3.0 License Page 20 of 45
<strong>QElectroTech</strong> - A <strong>quick</strong> <strong>start</strong> <strong>guide</strong><br />
Ellipse tool permits drawing ellipses and circles in the<br />
drawing editor. The geometry of an ellipse is defined by<br />
point coordinate and its horizontal and vertical diameters.<br />
Standard line formatting and styles are possible with<br />
ellipse tool. Some of them are illustrated in the Figure 12.<br />
Anti-Aliasing is a default option with ellipse tool, which<br />
makes its appearance smooth. This option is deselected<br />
for some of the illustrations shown in Figure 12, can you<br />
identify these ? ©<br />
Figure 13: Ellipse tool and information<br />
geometry, use a right mouse click. You can re-size the geometry using the handles of its ‘active area’ or from<br />
its information panel.<br />
‘Add a polygon’ tool is essentially a utility tool, which<br />
permits creation of varied geometry. It is a handy tool<br />
for creative users trying to create complicated symbols.<br />
Some samples are drawn in Figure 13 to display some of<br />
its abilities. The geometry of a polygon is defined by a set<br />
of coordinates, which are created by left mouse clicks in<br />
the drawing area. The appearance properties are same<br />
as that of a line tool. There is an additional option for<br />
polygon tool in the information panel, a ‘Closed polygon’<br />
selection button. If the button is selected with a sketch as<br />
‘active area’ drawn with the polygon tool, a closed geometry<br />
is developed. This action permits further formatting<br />
by the ‘Filling’ combo box in the appearance section of<br />
the information panel. Only the closed polygons accept<br />
filling with colors.<br />
Figure 14: Polygon tool and information<br />
Arc tool: Select the ‘Add an arc’ icon with a left mouse click to activate the tool in the drawing bar. With the tool<br />
activated, use left mouse click to select a point in the ‘drawing area’ and hold and drag to a new position<br />
and release the click. The new point can be described at a distance of horizontal diameter along x-axis<br />
and a vertical diameter distance along y-axis from the initial point. You can re-size the geometry using the<br />
handles of its ‘active area’ or from its information panel. Arc tool also has anti-aliasing as its default option for<br />
smoothness.<br />
Add Text: Select the ‘Add text’ icon with a left mouse click to activate the tool in the drawing bar. With the tool<br />
activated, use left mouse click to select a point in the ‘drawing area’. A text box with default font size and<br />
orientation appears at the point selected. You can re-size the geometry using the handles of its ‘active area’ or<br />
from its information panel. The add text field is used to label the element and its components. The text added<br />
with this tool cannot be edited while using the element in <strong>QElectroTech</strong> drawings.<br />
Add a text field: Select the ‘Add a text field’ icon with a left mouse click to activate the tool in the drawing bar. With<br />
the tool activated, use left mouse click to select a point in the ‘drawing area’. A text box with default font size<br />
and orientation appears at the point selected. You can re-size the geometry using the handles of its ‘active<br />
area’ or from its information panel. The add text field is used to label the element and its components. A<br />
default ‘_’ is added to this text field to give an indication of the location of the field when the element is added<br />
in a <strong>QElectroTech</strong> drawing. This field accepts the users input in the <strong>QElectroTech</strong> drawing.<br />
Document and graphics created under Creative Commons Attribution 3.0 License Page 21 of 45
<strong>QElectroTech</strong> - A <strong>quick</strong> <strong>start</strong> <strong>guide</strong><br />
The ‘Add arc’ tool permits creation of an arc along a circle’s<br />
circumference or in an elliptical path. Some samples<br />
using arc tool are drawn in Figure 14. The geometry of an<br />
arc created by this tool is defined by a coordinate, which<br />
is the initial point selected by a left mouse click in the<br />
drawing area, a horizontal diameter and a vertical diameter<br />
defined as distances along x and y axes from its initial<br />
point, a <strong>start</strong> angle and an arc angle. Start angle is the<br />
angle from the ‘North’ line and arc angle is the total angle<br />
that the arc subtends at the center of the circle or an<br />
ellipse to which it belongs. The appearance properties<br />
are same as that of a line tool. The arc can be re-sized<br />
either from the handles of its ‘active area’ or from the<br />
information panel. Drag and drop functions are possible<br />
and are similar to those described earlier for other tools.<br />
Figure 15: Arc tool and information<br />
‘Add text’ tool permits fixed naming of the element and its<br />
parts at the time of its drawing. Add text appears as a text<br />
box with a default font size and orientation at the point<br />
selected. The dimensions of the text box can be altered<br />
either from the handles of its ‘active area’ or from the<br />
information panel. Drag and drop functions are possible<br />
and are similar to those described earlier for other tools.<br />
The information panel describes the text box position<br />
by a single point coordinate, font size, color as either<br />
‘black’ or ‘white’, text to display and orientation. Text can<br />
be oriented in any direction possible from 0 to 359.99 °.<br />
Figure 15 shows the text added to rectangles filled with<br />
different colors.<br />
Figure 16: Add text and information<br />
Often ‘Add a text field’ tool is associated with elements<br />
or their parts at the time of its drawing. The text field<br />
appears as a text box with a default font size and orientation<br />
at the point selected. The dimensions of the text box<br />
can be altered either from the handles of its ‘active area’<br />
or from the information panel. Drag and drop functions<br />
are possible and are similar to those described earlier<br />
for other tools. The information panel describes the text<br />
box position by a single point coordinate, font size, default<br />
text as ‘_’ and orientation of 0°. Add a text field can<br />
be oriented in any direction possible from 0 to 359.99 °.<br />
The Figure 16 shows the Add a text field. This tool has<br />
an additional selection box named ‘Do not follow parent<br />
element rotations’. If this check box is selected, the<br />
field does not rotate even if the element to which it is<br />
associated is rotated in the <strong>QElectroTech</strong> drawing.<br />
Figure 17: Add a text field and information<br />
Document and graphics created under Creative Commons Attribution 3.0 License Page 22 of 45
<strong>QElectroTech</strong> - A <strong>quick</strong> <strong>start</strong> <strong>guide</strong><br />
10 Sample tutorial - Creating Globe valve element<br />
The tutorial here explains the creation of a globe valve element. The final element should look somewhat like<br />
this: (Note: Steps 34 to 39 demonstrate the functionality of the newly created valve element.)<br />
Refer section 9.1 how to create a new element<br />
Select add a polygon tool<br />
Step 1 Step 2<br />
Start constructing a triangle<br />
Complete the triangle<br />
Step 3 Step 4<br />
Document and graphics created under Creative Commons Attribution 3.0 License Page 23 of 45
<strong>QElectroTech</strong> - A <strong>quick</strong> <strong>start</strong> <strong>guide</strong><br />
Select close polygon<br />
Select anti-aliasing<br />
Step 5 Step 6<br />
Draw another triangle as shown and select anti-aliasing The sketch should now appear as shown. Select ellipse tool<br />
Step 7 Step 8<br />
Draw an ellipse near the center Set its center to origin i.e. (0,0)<br />
Step 9 Step 10<br />
Fill the circle drawn with black color<br />
Select the line tool<br />
Step 11 Step 12<br />
Document and graphics created under Creative Commons Attribution 3.0 License Page 24 of 45
<strong>QElectroTech</strong> - A <strong>quick</strong> <strong>start</strong> <strong>guide</strong><br />
Draw a line segment towards north<br />
Select the line tool again<br />
Step 13 Step 14<br />
Draw a line segment towards west as shown Select the line tool again and draw a line towards east as shown<br />
Step 15 Step 16<br />
Select anti-aliasing for all line segments drawn<br />
Select the terminal tool<br />
Step 17 Step 18<br />
Click on the line segment end to add a terminal The terminal appears in default orientation (North)<br />
Step 19 Step 20<br />
Document and graphics created under Creative Commons Attribution 3.0 License Page 25 of 45
<strong>QElectroTech</strong> - A <strong>quick</strong> <strong>start</strong> <strong>guide</strong><br />
Set the terminal orientation to the west<br />
The terminal is now correctly positioned<br />
Step 21 Step 22<br />
Select the terminal tool again<br />
Add the terminal to the other end<br />
Step 23 Step 24<br />
Set the terminal orientation towards east<br />
Select the add a text field tool<br />
Step 25 Step 26<br />
Add the text field to the valve element created<br />
Click the save button to save to ‘User collection’<br />
Step 27 Step 28<br />
Document and graphics created under Creative Commons Attribution 3.0 License Page 26 of 45
<strong>QElectroTech</strong> - A <strong>quick</strong> <strong>start</strong> <strong>guide</strong><br />
Open the <strong>QElectroTech</strong> main window<br />
Select the reload button<br />
Step 29 Step 30<br />
Wait for the new element to appear in<br />
The category under ‘User collection’ gets updated to a tree<br />
a category created under ‘User collection’<br />
’+’ appears for the category<br />
Step 31 Step 32<br />
Click on the ‘+’ sign to view the element added<br />
Select the element, hold and drag drop<br />
into drawing area<br />
Step 33 Step 34<br />
Give a description in the text field<br />
Select the tank element and drag drop it to drawing area<br />
Step 35 Step 36<br />
Document and graphics created under Creative Commons Attribution 3.0 License Page 27 of 45
<strong>QElectroTech</strong> - A <strong>quick</strong> <strong>start</strong> <strong>guide</strong><br />
Click on the valve element terminal, hold<br />
The new valve element is connected<br />
drag to the tank terminal<br />
to the tank, demonstrating functionality<br />
Step 37 Step 38<br />
Click ‘zoom content’ on the tool bar for a closer view<br />
Step 39<br />
Document and graphics created under Creative Commons Attribution 3.0 License Page 28 of 45
<strong>QElectroTech</strong> - A <strong>quick</strong> <strong>start</strong> <strong>guide</strong><br />
11 Title block template editor<br />
<strong>QElectroTech</strong> comes with five different templates to work with, namely - ‘A4_1’, ‘default’, ‘DIN_A4’, ‘double-logo’ and<br />
‘single logo’. <strong>QElectroTech</strong> also permits custom template designing with user defined title block. In this section an<br />
introduction to the title block editor is presented. Also, a tutorial to design a referenced title block is included, to<br />
familiarize users with the behavior of the title block editor.<br />
11.1 Opening title block editor<br />
Click on the diagram properties<br />
Click the button to the left of the template combo box<br />
and select ‘edit this template’<br />
Title block editor opens the title block for editing<br />
There are three types of cells - ‘empty’, ‘text’ and ‘logo’<br />
Title bar<br />
Main menu bar<br />
Tool bar<br />
Double click to edit<br />
work area<br />
Undo<br />
Single click to view & edit cell properties<br />
Cell properties area<br />
Figure 18: Title block editor<br />
Title block editor has ‘Title bar’,‘Main menu’, ‘Tool bar’, ‘undo’, ‘cell properties’ and ‘work area’ (to edit or design a template)<br />
Document and graphics created under Creative Commons Attribution 3.0 License Page 29 of 45
<strong>QElectroTech</strong> - A <strong>quick</strong> <strong>start</strong> <strong>guide</strong><br />
11.2 Title block editor features<br />
Double click total width preview cell to adjust<br />
Double click column width cells<br />
Total width and row height can be specified in ‘pixels’ while columns can be sized in absolute or in relative terms of ‘%’ or ‘pixels’<br />
Double click row height cells<br />
Single click a cell to display cell properties<br />
Selecting display a label adds the label to the cell<br />
Changing cell type to ‘logo’<br />
Click ‘Manage logos’ button to import logos<br />
Logo manager<br />
Document and graphics created under Creative Commons Attribution 3.0 License Page 30 of 45
<strong>QElectroTech</strong> - A <strong>quick</strong> <strong>start</strong> <strong>guide</strong><br />
Click add a logo to search for logos<br />
Choose a logo window opens with default type ‘*.svg’<br />
File types ‘png’, ‘jpg’,‘jpeg’,‘gif’ and ‘xpm’ are supported<br />
Choose a logo file and click ‘OK’<br />
The logo is added, click close<br />
Look for the added logo in the logo combo box<br />
The logo is spread over the cell<br />
‘Split cell’ option activates for merged cells only<br />
Note: Logo cell should be sized to match the logo aspect to prevent distortions. Image editor like GIMP may<br />
be used to measure the logo image aspect ratio. Logo cells can then be sized as illustrated earlier to maintain the<br />
aspect.<br />
Document and graphics created under Creative Commons Attribution 3.0 License Page 31 of 45
<strong>QElectroTech</strong> - A <strong>quick</strong> <strong>start</strong> <strong>guide</strong><br />
‘Merge cells’ option activates when multiple cells<br />
are selected with ‘control’+left clicks<br />
A template can be saved by clicking ‘save’ in tool bar<br />
A saved template is visible under embedded template<br />
It is highlighted in light pink color<br />
A saved template can be selected<br />
and drag dropped to apply to the diagram<br />
11.3 Custom tab<br />
In the diagram properties select ‘custom’ tab<br />
In the fields you can define a name and a value<br />
For example, some names and values are defined above<br />
Switch back to ‘main’ tab and use the names as shown<br />
‘%’ should be used before before the assigned names.<br />
Document and graphics created under Creative Commons Attribution 3.0 License Page 32 of 45
<strong>QElectroTech</strong> - A <strong>quick</strong> <strong>start</strong> <strong>guide</strong><br />
Assigned names are entered for all fields<br />
Watch the updated fields in the layout<br />
‘Author’ field is not updated by its value, while other fields successfully show values for the names entered.<br />
‘Author’ field is changed for proper display of name<br />
Switch back to layout to watch the updated field<br />
Note: Some names that are assigned a value may not update properly in the title block. Always verify for intended<br />
results. If some names are not updated by their values, edit the field to enter complete text from the title block editor.<br />
‘Custom tab’ may not work for all variable names.<br />
11.4 Working with the title block editor - (a tutorial)<br />
In the following slides an example is illustrated, which will familiarize users with the title block editor. The following<br />
slides demonstrate how to imitate the title block from the referenced drawing in <strong>QElectroTech</strong>. The slides are in<br />
continuation to the slides illustrated under the section opening title block editor.<br />
Introduction to Print Reading DOE-HDBK-1016/1-93 INTRODUCTION TO THE TYPES<br />
OF DRAWINGS, VIEWS, AND PERSPECTIVES<br />
Figure 11 Example of a Fabrication Drawing<br />
Rev. 0 Page 15<br />
PR-01<br />
Figure 19: Reference drawing (Source: DOE Handbook, Dept. of Energy, US)<br />
Document and graphics created under Creative Commons Attribution 3.0 License Page 33 of 45
<strong>QElectroTech</strong> - A <strong>quick</strong> <strong>start</strong> <strong>guide</strong><br />
Click ‘save as’ button on tool bar<br />
A window pops up to assign a name to the template<br />
Give a name and click ‘OK’ to continue<br />
The template is now saved with the name<br />
Select the title cell with left click<br />
Click the split-cells button that is activated<br />
The ‘split cell’ reverts the earlier merged cells<br />
Add rows from ‘Edit’ option in tool bar to create 7 rows<br />
Document and graphics created under Creative Commons Attribution 3.0 License Page 34 of 45
<strong>QElectroTech</strong> - A <strong>quick</strong> <strong>start</strong> <strong>guide</strong><br />
Add columns from ‘Edit’ to total 9 in number<br />
Change column widths to absolute units as shown<br />
Select the cells using ‘control + left click’<br />
Click the ‘merge cells’ to merge selected cells<br />
Follow similar actions to select a group of cells and merging them to arrive at the sketch illustrated below. This<br />
forms the skeleton structure for the intended title block.<br />
A skeleton structure of title block is achieved<br />
Change the cell type to text<br />
Select the title cell with left click, the cell is empty<br />
Note: Empty cells will appear empty in the title block, no lines are drawn around it.<br />
Set the alignment for the text in the cell<br />
Uncheck ‘display label’ click ‘Edit’ to change text<br />
In the pop up window type ‘en’ for English under language<br />
Double click the text field and type text to display<br />
Text can be added to other fields as demonstrated - uncheck ‘display label’ and click the ‘Edit’ button next to the<br />
text field. A window to edit the text to be displayed pops up. A language code should be entered under language<br />
Document and graphics created under Creative Commons Attribution 3.0 License Page 35 of 45
<strong>QElectroTech</strong> - A <strong>quick</strong> <strong>start</strong> <strong>guide</strong><br />
field. Type ‘en’ for English. Double click the text field to edit it, type text and click ‘OK’ to continue. Once all the text<br />
fields are filled up, the cells can be dimensioned suitably.<br />
After text fields are updated the cells are dimensioned<br />
Total width for preview is set to 700pixels<br />
columns widths are set in relative terms as shown<br />
Finally column heights are adjusted to 15pixels<br />
Click ‘Save’ button to save the title block<br />
to the ‘new_template’<br />
Watch the template in the <strong>QElectroTech</strong> window<br />
The title block will be updated, reflecting changes<br />
Note: Close the title block editor only after confirming that the changes are written to the template.<br />
Click ‘print’ icon from the tool bar<br />
A print wizard opens up, select ‘pdf’ out put format<br />
Set file path and a name. Click ‘OK’ to continue<br />
<strong>QElectroTech</strong> permits printing to a ‘physical printer’, ‘output to a pdf’ file and ‘output to a .ps’ file. Refer<br />
section 12.<br />
Document and graphics created under Creative Commons Attribution 3.0 License Page 36 of 45
<strong>QElectroTech</strong> - A <strong>quick</strong> <strong>start</strong> <strong>guide</strong><br />
Figure 20: Print preview and properties window. Set properties and click ‘print’ to continue<br />
<br />
<br />
<br />
<br />
<br />
<br />
<br />
<br />
<br />
<br />
<br />
<br />
<br />
<br />
<br />
<br />
<br />
<br />
<br />
<br />
<br />
<br />
<br />
<br />
Figure 21: Finished print output of the template with intended title block<br />
Document and graphics created under Creative Commons Attribution 3.0 License Page 37 of 45
<strong>QElectroTech</strong> - A <strong>quick</strong> <strong>start</strong> <strong>guide</strong><br />
12 Printing, Exporting and Saving<br />
<strong>QElectroTech</strong> has excellent options to save, print or export your drawings created. The full features available are<br />
explained here in this section.<br />
12.1 Printing<br />
1. The completed drawings can be printed from a physical printer connected to the computer.<br />
2. Drawings can be printed to a ‘pdf’ file to a selected directory.<br />
3. Drawings can also be printed as ‘*.ps’ (post script) files to a selected directory. Post script files are used for<br />
creating publishing quality graphics in LATEX.<br />
Select the ‘print’ button from the toolbar Print options can be set in the pop up window, click ‘OK’.<br />
Step 1 Step 2<br />
12.2 Saving<br />
The completed drawings can be saved as ‘*.qet’ project files in a directory. They can be reloaded for further changes<br />
or appended to a larger project. Click ‘Save’ or ‘Save as’ or ‘Save the current diagram’ from the main tool bar to save<br />
the drawing. File save wizard opens and facilitates locating the file in a directory in your computer.<br />
12.3 Exporting<br />
1. <strong>QElectroTech</strong> can export drawings to ‘PNG’, ‘JPEG’, ‘Bitmap’, ‘SVG’ and ‘DXF’ formats.<br />
2. The dimensions for export can be defined either with the same aspect ratio or even modifying aspect ratio.<br />
3. A preview option is available to preview before exporting.<br />
4. <strong>QElectroTech</strong> can also export the drawings to clipboard, which facilitates pasting the images in other applications.<br />
5. <strong>QElectroTech</strong> also features a host of rendering options - a choice to select each or all of the options -<br />
(a) Export the border<br />
(b) Draw the border<br />
(c) Draw the inset<br />
(d) Keep conductors colors<br />
(e) Exporting only elements<br />
(f) Draw the grid<br />
(g) Draw the terminals<br />
Document and graphics created under Creative Commons Attribution 3.0 License Page 38 of 45
<strong>QElectroTech</strong> - A <strong>quick</strong> <strong>start</strong> <strong>guide</strong><br />
Select the ‘File’ button from the main menu bar<br />
Select export from the drop down window<br />
Step 1 Step 2<br />
Aspect ratio locked<br />
Click this button to unlock aspect ratio<br />
Copy to clipboard button<br />
Give a file name here<br />
Choose dimensions for export in pixels<br />
Preview button<br />
Exporting format can be selected from this combo box<br />
Click the browse button to choose a<br />
directory to export the drawing<br />
Select or deselect optional rendering options<br />
Figure 22: Export wizard in <strong>QElectroTech</strong><br />
Step 3: Choose your export options and click ‘Export’<br />
Document and graphics created under Creative Commons Attribution 3.0 License Page 39 of 45
<strong>QElectroTech</strong> - A <strong>quick</strong> <strong>start</strong> <strong>guide</strong><br />
13 Some sample drawings created in <strong>QElectroTech</strong><br />
741.png (PNG Image, 969 × 666 pixels) - Scaled ...<br />
http://download.tuxfamily.org/qet/manuals/es/741.png<br />
1 of 1 02/01/2014 09:27 PM<br />
Document and graphics created under Creative Commons Attribution 3.0 License Page 40 of 45
<strong>QElectroTech</strong> - A <strong>quick</strong> <strong>start</strong> <strong>guide</strong><br />
schema_indus.png (PNG Image, 967 × 663 pixels)...<br />
http://download.tuxfamily.org/qet/manuals/es/sc...<br />
1 of 1 02/01/2014 09:27 PM<br />
Document and graphics created under Creative Commons Attribution 3.0 License Page 41 of 45
<strong>QElectroTech</strong> - A <strong>quick</strong> <strong>start</strong> <strong>guide</strong><br />
arduino-lcd.png (PNG Image, 686 × 637 pixels) - ...<br />
http://download.tuxfamily.org/qet/manuals/es/ard...<br />
1 of 1 02/01/2014 09:27 PM<br />
Document and graphics created under Creative Commons Attribution 3.0 License Page 42 of 45
<strong>QElectroTech</strong> - A <strong>quick</strong> <strong>start</strong> <strong>guide</strong><br />
exemple_dinstallation_domestique.png (PNG Imag...<br />
http://download.tuxfamily.org/qet/manuals/es/exe...<br />
1 of 1 02/01/2014 09:28 PM<br />
Document and graphics created under Creative Commons Attribution 3.0 License Page 43 of 45
<strong>QElectroTech</strong> - A <strong>quick</strong> <strong>start</strong> <strong>guide</strong><br />
eclairage_va_et_vient.png (PNG Image, 630 × 439...<br />
http://download.tuxfamily.org/qet/manuals/es/ecla...<br />
1 of 1 02/01/2014 09:28 PM<br />
Document and graphics created under Creative Commons Attribution 3.0 License Page 44 of 45
<strong>QElectroTech</strong> - A <strong>quick</strong> <strong>start</strong> <strong>guide</strong><br />
<br />
<br />
<br />
<br />
<br />
<br />
<br />
<br />
<br />
<br />
<br />
<br />
<br />
<br />
<br />
<br />
<br />
<br />
<br />
<br />
<br />
<br />
<br />
<br />
<br />
<br />
<br />
<br />
<br />
<br />
<br />
<br />
<br />
<br />
<br />
<br />
<br />
<br />
<br />
<br />
<br />
<br />
<br />
<br />
<br />
<br />
<br />
<br />
<br />
<br />
<br />
<br />
<br />
<br />
<br />
<br />
<br />
<br />
<br />
<br />
<br />
<br />
<br />
<br />
<br />
<br />
<br />
<br />
<br />
<br />
<br />
<br />
<br />
<br />
<br />
<br />
<br />
<br />
<br />
<br />
<br />
<br />
<br />
<br />
<br />
<br />
<br />
<br />
<br />
<br />
<br />
<br />
<br />
<br />
<br />
<br />
<br />
<br />
<br />
<br />
<br />
<br />
<br />
<br />
<br />
<br />
<br />
<br />
<br />
<br />
<br />
<br />
<br />
<br />
<br />
<br />
<br />
<br />
<br />
<br />
<br />
<br />
<br />
<br />
<br />
<br />
<br />
Document and graphics created under Creative Commons Attribution 3.0 License Page 45 of 45