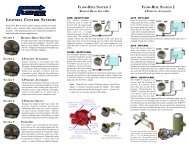
Portable Watering Cart - Flow-Rite
Portable Watering Cart - Flow-Rite
Portable Watering Cart - Flow-Rite

You also want an ePaper? Increase the reach of your titles
YUMPU automatically turns print PDFs into web optimized ePapers that Google loves.
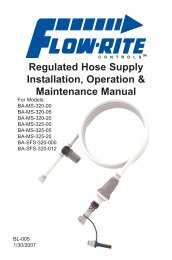
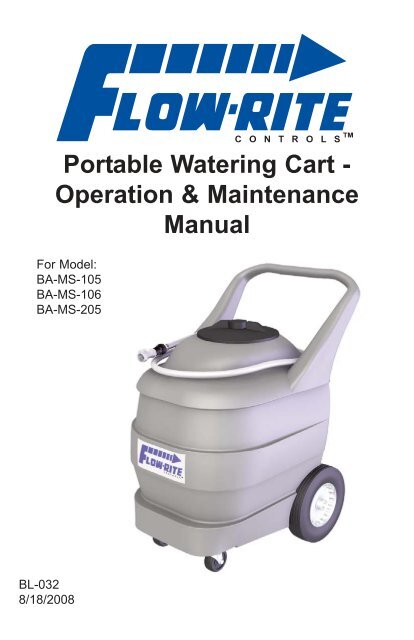
<strong>Portable</strong> <strong>Watering</strong> <strong>Cart</strong> -<br />
Operation & Maintenance<br />
Manual<br />
For Model:<br />
BA-MS-105<br />
BA-MS-106<br />
BA-MS-205<br />
BL-032<br />
8/18/2008
General Information & Precautions<br />
This publication provides detailed instructions for<br />
installing the single point watering system kit and/or<br />
related water supply. Thoroughly review this<br />
document before any installation procedures are<br />
performed.<br />
The following safety statements relate to specific safety issues and must be<br />
read, understood, and heeded before a kit is installed. Failure to do so could<br />
result in personal injury and/or property damage.<br />
DANGER<br />
• Battery – Explosive gases! Do not smoke. Keep sparks and flames away from<br />
the vehicle and service area. Ventilate when charging or operating vehicle in<br />
an enclosed space. Wear a full face shield and rubber gloves when working on<br />
or near batteries.<br />
• Battery – Poison! Contains acid! Causes severe burns. Avoid contact with<br />
skin, eyes, or clothing. Antidotes:<br />
- External: Flush with water. Call a physician immediately.<br />
- Internal: Drink large quantities of milk or water. Follow with milk of<br />
magnesia or vegetable oil. Call a physician immediately.<br />
- Eyes: Flush with water for 15 minutes. Call a physician immediately.<br />
WARNING<br />
• Follow the procedures exactly as stated in this instruction, and heed all<br />
DANGER, WARNING, and CAUTION statements in this instruction as well as<br />
those on the vehicle and battery charger.<br />
• Only trained technicians should service or repair the single point watering<br />
system. Anyone doing even simple repairs or service should have knowledge<br />
and experience in plumbing, electrical and mechanical repair. The appropriate<br />
instructions must be used when performing maintenance, service, or accessory<br />
installation.<br />
• Prior to servicing the vehicle or leaving the vehicle unattended, turn the key<br />
switch OFF, remove the key, and chock the wheels when servicing the vehicle.<br />
• Wear safety glasses or approved eye protection when servicing any part of the<br />
watering system. Wear a full face shield and rubber gloves when working on<br />
or near batteries.<br />
• Do not wear loose clothing or jewelry such as rings, watches, chains, etc.,<br />
when servicing the vehicle or battery charger.<br />
• Moving parts! Do not attempt to service the vehicle while it is running.<br />
• Hot! Do not attempt to service hot engine, exhaust system, or motor. Failure to<br />
heed this warning could result in severe burns.<br />
• Use insulated tools when working near batteries or electrical connections. Use<br />
extreme caution to avoid shorting of components or wiring.<br />
• If wires are removed or replaced, make sure wiring and wire harness are<br />
properly routed and secured. Failure to properly route and secure wiring could<br />
result in vehicle malfunction, property damage, personal injury, or death.<br />
2
<strong>Watering</strong> Procedures<br />
1. Water After Charge<br />
- Electrolyte levels drop during discharge and rise during charge. In addition,<br />
charging generates heat, fluid expansion and explosive gases. <strong>Watering</strong> a<br />
battery before charge (or with a low charge level) can lead to boil over<br />
resulting in potential damage of the watering system, battery and vehicle.<br />
Water, when needed, must be added to fully charged battery. Prior to<br />
charging, there must be sufficient water to cover the plates. If the battery<br />
has been discharged (partially or fully), the water level should still be above<br />
the plates.<br />
2. <strong>Watering</strong> Intervals<br />
- <strong>Watering</strong> intervals are dependent on the local climate, charging methods,<br />
application, and age of batteries. <strong>Flow</strong>-<strong>Rite</strong> recommends that new batteries<br />
be checked once a month and older batteries be checked weekly until you<br />
get a feel for your water consumption rate.<br />
Typically for a heavy use application, we recommend watering a maximum<br />
of once per week, and for light use applications once per month. Generally<br />
it is best to water on Wednesdays for most applications. Specifically you<br />
should not water a battery that has been sitting for an extended period of<br />
time with no activity (non use or not on charge) such as a battery that has<br />
sat idle over the weekend. It is best to water a warm battery that has just<br />
been fully charged.<br />
Important: Water quality is important to maintain the life of your battery<br />
and watering system. Always use water that meets the quality<br />
requirements of your batteries’ manufacturer.<br />
Model<br />
Number<br />
BA-MS-105<br />
BA-MS-106<br />
Power Requirements<br />
Power<br />
Requirement<br />
100-115 VAC<br />
100-240 VAC<br />
Battery Requirements<br />
12 VDC (sealed)<br />
Included<br />
12 VDC (sealed)<br />
Included<br />
BA-MS-205 115 VAC Not Applicable<br />
3
Operation<br />
For continued successful operation of your Single Point <strong>Watering</strong><br />
system always:<br />
1. Only use <strong>Flow</strong>-<strong>Rite</strong> approved equipment<br />
Warning! Use of unapproved equipment or modification<br />
of approved equipment can lead to system<br />
failure and will void your warranty<br />
2. Always follow <strong>Flow</strong>-<strong>Rite</strong>’s required watering procedures.<br />
3. Perform regular scheduled maintenance!<br />
4. For indoor use only!<br />
Warning! Only fill batteries after they have been fully charged,<br />
and require water.<br />
Step 1 - Fill Tank<br />
- Ensure the water supply has ample water to fill battery. If<br />
necessary, remove lid and fill cart with water. All carts are<br />
compatible with deionized water.<br />
Step 2 - Power Up <strong>Cart</strong><br />
- For AC powered, first plug into a GFCI outlet. See power<br />
requirements of your specific models on page 3. Turn on rocker<br />
switch.<br />
- For DC powered carts turn on rocker switch, and check voltage<br />
meter to ensure battery is charged. The cart should not be<br />
operated once the voltage falls below 12 volts.<br />
Recharging Battery: Plug in battery charger (to a GFCI outlet)<br />
when cart is not in use to ensure the battery is fully charged. The<br />
on-board charger will maintain charge levels as necessary. See<br />
page 3 for charger power requirements.<br />
NOTE: Once the water supply has been powered on, the pump will<br />
turn on briefly to develop pressure in the supply hose and then will<br />
turn off. The power switch can be left on in between refilling<br />
batteries. The pumps will turn on occasionally to maintain pressure<br />
in supply hose. This occasional cycling will not damage the water<br />
supply. The water supply should be powered down if it will<br />
be inactive for 15 minutes or more to prevent overheating.<br />
4
Step 3<br />
Operation Continued<br />
- Remove Dust Cover<br />
Step 4 - Mate Couplers<br />
- Insert the male coupler on the spw<br />
system into the female coupler on the<br />
end of the water supply.<br />
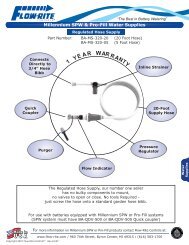
Step 5 - Observe <strong>Flow</strong> Indicator<br />
- The red balls inside the flow indicator<br />
will begin to spin indicating that water<br />
is flowing into the battery. As the cells<br />
fill and the valves shut off, the balls will<br />
begin to spin slower until they come to<br />
a stop. This indicates that all valves<br />
have shut off and filling is complete.<br />
Step 6 - Disconnect<br />
- When the balls stop spinning, and not<br />
before, immediately disconnect the<br />
couplers by depressing the push<br />
button on the female coupler. If the<br />
water supply is left connected after the<br />
filling process is finished it could lead to an overfill. Disconnecting<br />
before the balls come to a complete stop will lead to underfilled<br />
cells.<br />
CAUTION: If at any time during the filling process you<br />
have a valve failure disconnect immediately<br />
Step 7 - Replace Dust Cover<br />
- Place dust cover back over the male<br />
coupler. Do not push cover past the<br />
large barb on the coupler.<br />
Tip:<br />
If you slightly squeeze the dust cover<br />
when sliding it over the coupler it will<br />
create a vacuum allowing it to hold<br />
tightly.<br />
5
Regular Maintenance<br />
Your single point watering system requires regular preventative maintenance<br />
on at least a quarterly basis.<br />
1. Check all screens<br />
Clean or replace all strainers as necessary. Failure to do so can cause a<br />
reduction in the water pressure and flow rates needed to operate the system<br />
properly.<br />
B<br />
Regulator Filter<br />
Screen (A)<br />
Line Strainer (B)<br />
A<br />
Note: Pictures may differ slightly from your specific application.<br />
2.<br />
Inspect the condition of all tubing connections, red end caps, swivel<br />
T's, and couplers.<br />
Make sure that all parts are in good working condition and are secure, leak<br />
free, and properly connected. The coupler must have an O-ring and dust<br />
cover properly attached.<br />
3. Electrolyte Levels<br />
<strong>Flow</strong>-<strong>Rite</strong> recommends checking the electrolyte level in each cell for<br />
accuracy after the system has been installed and operational for three<br />
months.<br />
Seasonal Maintenance<br />
Water Supplies<br />
Water supplies must be drained and stored in an empty state if they will be<br />
exposed to freezing temperatures. Failure to do so can cause permanent<br />
damage.<br />
<strong>Watering</strong> Systems<br />
If you have vehicles that are taken out of service or put into storage for a<br />
period of 6 weeks or longer, your single point watering system will require<br />
seasonal maintenance. Check you system instructions for details.<br />
6
Operating Specifications<br />
Operating Requirements of SPW system<br />
<strong>Flow</strong>-Rate:<br />
2-5 gallons per minute*<br />
Pressure Range: 3-35 PSI (no flow, static)<br />
Temp. Range: Freezing - 150 O F<br />
Freezing- 65.5 O C<br />
Temp. Range<br />
Water supply Operating Requirements<br />
33 - 150 O F<br />
1 - 65.5 O C<br />
All product specifications should be met for proper operation of your <strong>Flow</strong>-<br />
<strong>Rite</strong> SPW system. Contact battery supplier or <strong>Flow</strong>-<strong>Rite</strong> Controls if you<br />
have any questions regarding product specifications or how to verify a<br />
water supply.<br />
*<strong>Flow</strong> rate should be measured at the end of a purger (female / male<br />
coupler combination).<br />
1<br />
FLOW-RITE CONTROLS<br />
1 YEAR WARRANTY<br />
Visit www.flow-rite.com for details<br />
7
<strong>Flow</strong>-<strong>Rite</strong> Controls<br />
960 74th Street<br />
Byron Center, MI 49315<br />
PH: 616-583-1700 FAX: 616-878-5151<br />
www.flow-rite.com<br />
Printed in USA © 8/2008<br />
Protected under U.S. & foreign patents and patents pending