Manual and Semi-Automatic Grease Interceptor - Josam
Manual and Semi-Automatic Grease Interceptor - Josam
Manual and Semi-Automatic Grease Interceptor - Josam

Create successful ePaper yourself
Turn your PDF publications into a flip-book with our unique Google optimized e-Paper software.
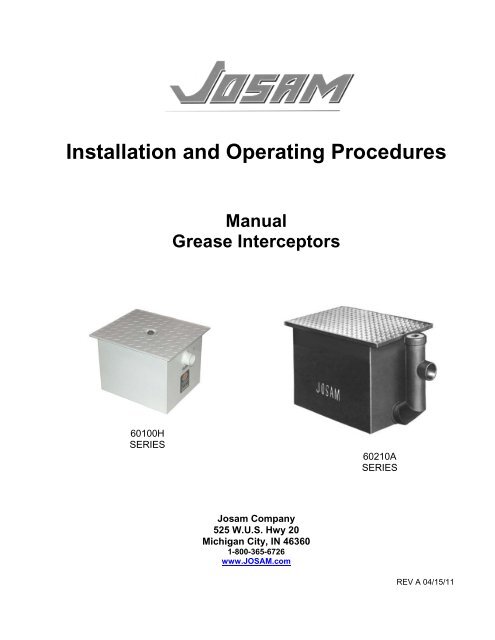
Installation <strong>and</strong> Operating Procedures<br />
<strong>Manual</strong><br />
<strong>Grease</strong> <strong>Interceptor</strong>s<br />
60100H<br />
SERIES<br />
60210A<br />
SERIES<br />
<strong>Josam</strong> Company<br />
525 W.U.S. Hwy 20<br />
Michigan City, IN 46360<br />
1-800-365-6726<br />
www.JOSAM.com<br />
REV A 04/15/11
MANUAL INTERCEPTOR<br />
Installation <strong>and</strong> Operating Instructions<br />
Table of Contents<br />
1.0 General Description .................................................................................................3<br />
2.0 Installation ................................................................................................................3<br />
3.0 Flow Control <strong>and</strong> Venting .........................................................................................4<br />
4.0 <strong>Grease</strong> Removal Maintenance .................................................................................5<br />
5.0 Periodic Unit Cleaning ..............................................................................................5<br />
6.0 Troubleshooting........................................................................................................6<br />
7.0 Typical Installations ..................................................................................................7<br />
8.0 Warranty ...................................................................................................................8<br />
Page 2
MANUAL INTERCEPTOR<br />
Installation <strong>and</strong> Operating Instructions<br />
1.0 General Description<br />
<strong>Grease</strong> interceptors serve the purpose of separating grease from water so that<br />
cleaner water is allowed to continue on in the drainage line. <strong>Manual</strong> interceptors<br />
(units without an automatic grease removal function) require regular checking <strong>and</strong><br />
grease layer removal.<br />
FOG (fats, oils, <strong>and</strong> grease) from kitchens is less dense than water <strong>and</strong> therefore will<br />
naturally separate to the top over time. Units that rely only on this difference in<br />
density for grease separation are termed “gravity-type” units. These types require a<br />
very large holding capacity so that separation has ample time to occur before water is<br />
passed on.<br />
“Hydro-mechanical” type units are designed to separate FOG more efficiently using<br />
an air intake, flow control, <strong>and</strong> baffle system. This engineered approach allows for a<br />
smaller capacity unit than a gravity-type unit for the same application.<br />
<strong>Josam</strong> interceptors are hydro-mechanical types designed to meet or exceed industry<br />
st<strong>and</strong>ards PDI-G101 <strong>and</strong> ASME A112.4.3.<br />
2.0 Installation<br />
Locate the grease interceptor as close as possible to the fixture(s) being served.<br />
This will reduce the length of piping subject to grease-laden wastewater <strong>and</strong> minimize<br />
the risk of blockages.<br />
Do not allow solids to enter the grease interceptor. Solids can accumulate in the<br />
bottom of the interceptor <strong>and</strong> eventually block the outlet. Decaying solids are a<br />
primary source of objectionable odors <strong>and</strong> can produce dangerous gases. Consider<br />
strainers in fixture outlets or a solids interceptor upstream of the grease interceptor.<br />
<strong>Interceptor</strong>s can be located on-floor, recessed, or on a level below. Plan for<br />
connections to piping <strong>and</strong> the need to remove the cover <strong>and</strong> baffle for grease<br />
removal <strong>and</strong> periodic cleaning. (Reference separate baffle drawing for dimensions.)<br />
Cleanouts are provided near the outlet end of the interceptor <strong>and</strong> may be internal or<br />
external to the grease separation chamber. Removal of the interceptor cover may be<br />
necessary to access the cleanout.<br />
Page 3
MANUAL INTERCEPTOR<br />
Installation <strong>and</strong> Operating Instructions<br />
Provide cleanouts as necessary in the piping from the fixtures to the interceptor as<br />
this area is subject to grease-laden wastewater which can congeal <strong>and</strong> cause<br />
blockages.<br />
It is recommended to use a separate grease interceptor for each commercial<br />
dishwasher. Refer to the dishwasher specifications regarding discharge flowrate <strong>and</strong><br />
size the interceptor accordingly.<br />
If the cover of the interceptor will be subject to loads greater than foot traffic, a unit<br />
with a higher load capacity cover will need to be installed. Specify this option at time<br />
of unit order.<br />
If the grease interceptor is serving a source of high concentration levels (i.e. a fat<br />
drippings tray in a rotisserie cooker), the grease must be diluted with water before<br />
entering the pipeline leading to the interceptor.<br />
CAUTION: Installation except as instructed, tested, <strong>and</strong> rated may result in<br />
performance failure.<br />
CAUTION: Please take proper precautions when installing these units. Many<br />
models will require multiple people or machinery to position for installation.<br />
Always consult local code requirements before installation.<br />
3.0 Flow Control <strong>and</strong> Venting<br />
A flow control with air intake connection is supplied with each interceptor. This flow<br />
control has been properly sized for this specific interceptor unit.<br />
The orifice size <strong>and</strong> air intake are key components in a hydro-mechanical interceptor<br />
design. Performance testing to industry st<strong>and</strong>ards <strong>and</strong> unit rating are dependent on<br />
the use of the proper flow control <strong>and</strong> correct installation location.<br />
The flow control should be placed after the last fixture being served <strong>and</strong> before the<br />
grease interceptor. The air intake must be properly vented to allow air to mix with the<br />
wastewater flow as it enters the interceptor to aid in grease separation.<br />
The air intake may be connected to the vent stack if the fixtures themselves are<br />
trapped <strong>and</strong> vented.<br />
In order to prevent siphoning, the outlet of a grease interceptor must be vented.<br />
Reference appropriate plumbing codes for venting requirements.<br />
Page 4
MANUAL INTERCEPTOR<br />
Installation <strong>and</strong> Operating Instructions<br />
4.0 <strong>Grease</strong> Removal Maintenance<br />
Regular maintenance is critical to the proper function of a manual grease interceptor.<br />
If grease is not removed, separation performance can deteriorate resulting in<br />
unacceptable levels of grease being passed downstream. Failure to maintain a<br />
grease interceptor has resulted in penalties <strong>and</strong> fines to the responsible<br />
establishment.<br />
A regular maintenance schedule should be set, but will vary in time by installation site<br />
due to differences in usage frequency <strong>and</strong> grease concentration. <strong>Grease</strong> removal<br />
intervals can range from days to weeks.<br />
After installation, the buildup of grease should be monitored. As a rule to maintain a<br />
high level of performance, the grease should be removed when its layer is no more<br />
than 25% of the depth of the interceptor. This buildup rate should be checked for<br />
several cycles before setting a schedule without monitoring.<br />
Regular <strong>Grease</strong> Removal Maintenance Instructions<br />
• Loosen cover securing fasteners <strong>and</strong> remove cover<br />
• Lift out baffle <strong>and</strong> wipe clean<br />
• Remove the separated layer of grease <strong>and</strong> dispose properly<br />
• Check the cover gasket <strong>and</strong> replace, if needed<br />
• Replace the baffle <strong>and</strong> cover <strong>and</strong> tighten securely<br />
5.0 Periodic Unit Cleaning<br />
In addition to regular grease removal, a complete unit cleaning should be scheduled<br />
at least twice per year. This will ensure a clear outlet pathway to minimize the risk of<br />
blockages <strong>and</strong> help maintain optimum grease separation performance. The unit<br />
should be emptied of all liquid <strong>and</strong> any solids or sludge removed. Wipe the inside of<br />
the unit clean <strong>and</strong> replace the baffle <strong>and</strong> cover securely.<br />
Page 5
MANUAL INTERCEPTOR<br />
Installation <strong>and</strong> Operating Instructions<br />
6.0 Troubleshooting<br />
Problem<br />
Water is backing up into the fixtures<br />
Recommended Solution(s)<br />
Remove grease build-up from interceptor<br />
Remove sludge or solids that may be blocking interceptor outlet<br />
Check cleanout <strong>and</strong> pipes for blockages<br />
Problem<br />
There is a bad odor coming from the interceptor<br />
Recommended Solution(s)<br />
Perform a periodic unit cleaning to remove decaying solids<br />
Check for proper venting<br />
Inspect cover gasket for proper seal<br />
Problem<br />
The interceptor is passing grease downstream<br />
Recommended Solution(s)<br />
Remove grease build-up in interceptor<br />
Increase frequency of grease removal<br />
Increase size of interceptor<br />
Problem<br />
The pipe leading to the interceptor block regularly<br />
Recommended Solution(s)<br />
Check for source of high grease concentration<br />
Add water to highly concentrated grease before entering pipe<br />
Frequently flush clean water down pipe<br />
Page 6
MANUAL INTERCEPTOR<br />
Installation <strong>and</strong> Operating Instructions<br />
7.0 Typical Installations<br />
ON-FLOOR<br />
FLUSH WITH FLOOR<br />
RECESSED<br />
Page 7
MANUAL INTERCEPTOR<br />
Installation <strong>and</strong> Operating Instructions<br />
8.0 Warranty<br />
<strong>Josam</strong> Company warrants the <strong>Manual</strong> <strong>Grease</strong> <strong>Interceptor</strong>s to be free of defects in<br />
workmanship <strong>and</strong> material for a period of one (1) year following the date of shipment.<br />
<strong>Josam</strong> shall not be responsible for any labor charges or any loss, injury or damages<br />
whatsoever, including incidental or consequential damages. The sole <strong>and</strong> exclusive remedy<br />
shall be limited to the replacement or repair of the defective goods at the Seller’s discretion.<br />
Evidence of v<strong>and</strong>alism, unauthorized modifications, acts of God, or failure to follow<br />
installation <strong>and</strong> operating instructions will void this warranty.<br />
Page 8