RF3D Manual - Psiber Data Systems, Inc.
RF3D Manual - Psiber Data Systems, Inc.
RF3D Manual - Psiber Data Systems, Inc.

You also want an ePaper? Increase the reach of your titles
YUMPU automatically turns print PDFs into web optimized ePapers that Google loves.
2<br />
manual<br />
®<br />
2<br />
back to table of contents<br />
1<br />
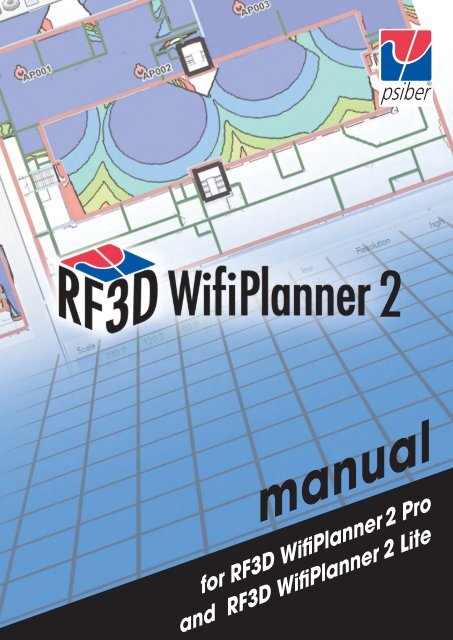
manual<br />
for <strong>RF3D</strong> WifiPlanner 2 Pro<br />
and <strong>RF3D</strong> WifiPlanner 2 Lite
2<br />
manual<br />
Content<br />
1 Introduction 3<br />
1.1 PC 1.1PC Hardware Requirements 4<br />
1.2 Installation and Activation 4<br />
1.3 Product Updates 6<br />
2 Fundamentals of Wireless Network Planning 6<br />
2.1 Standardization in Wireless Networking 6<br />
2.1.1 The IEEE 802.11b Specification 6<br />
2.1.2 The IEEE 802.11g Specification 6<br />
2.1.3 The IEEE 802.11a Specification 7<br />
2.1.4 The IEEE 802.11h Specification 7<br />
2.1.5 The IEEE 802.11n Specification 7<br />
2.2 Frequencies and Channels 7<br />
2.3 Cellular Structure of a Wireless Network 10<br />
2.4 Special Characteristics of 802.11n 10<br />
2.4.1 Spatial Streams 11<br />
2.4.2 Channel Bonding 11<br />
2.4.3 Short Guard Interval 12<br />
2.4.4 Greenfield Mode 12<br />
2.5 Antennas 12<br />
2.5.1 Omnidirectional Antennas 12<br />
2.5.2 Patch Antennas 13<br />
2.5.3 Yagi Antennas 13<br />
2.6 Attenuation 13<br />
2.7 Theoretical Throughput Rates 13<br />
2.8 Redundancy 14<br />
3 The <strong>RF3D</strong> User Interface 14<br />
3.1 Importing Building Plans 15<br />
3.2 The Toolbox 17<br />
3.3 Drawing and Selecting Elements 19<br />
3.4 The Simulation Tab 19<br />
3.5 The Access Point Tab 21<br />
3.5.1 Access Point Options 21<br />
3.6 Levels 22<br />
3.7 Advanced Settings 22<br />
4 Planning Wireless Networks 23<br />
4.1 What Application Is Intended? 23<br />
4.2 Entering Environmental Factors 23<br />
4.3 Positioning Access Points 24<br />
4.4 Optimizing Wireless Networks 26<br />
back to table of contents<br />
1
2<br />
manual<br />
5 Advanced Settings 27<br />
5.1 Editing Wall and Floor Libraries 27<br />
5.2 Editing the Access Point/Antenna Library 28<br />
5.3 Options and Settings 29<br />
6 Advanced Settings 29<br />
6.1 Editing Wall and Floor Libraries 29<br />
6.2 Editing the Antenna Library 30<br />
6.3 Editing the Access Point Library 34<br />
6.4 Options and Settings 36<br />
6.5 Floors with Openings 37<br />
6.6 Split-Level Buildings 38<br />
Appendix A The Antenna Library 39<br />
Appendix B The Wall and Floor Library 45<br />
Appendix C Table of Colors 48<br />
Appendix D EULA 51<br />
back to table of contents<br />
2
2<br />
manual<br />
1 Introduction<br />
Thank you very much for choosing <strong>RF3D</strong> WifiPlanner 2! <strong>RF3D</strong> WifiPlanner 2 is an advanced<br />
program for planning wireless networks in conformance with the IEEE 802.11a, b,<br />
g, h and n standards. <strong>RF3D</strong> WifiPlanner 2 helps you design more efficient wireless networks<br />
and ensure that they deliver optimum service even under heavy loads. Such planning<br />
usually saves costs too, not least by eliminating unnecessary access points. This<br />
also means less radiation, which is another benefit that should not be underestimated.<br />
The number of wireless networks in professional use is constantly growing. For companies<br />
that want full WiFi coverage using multiple access points, there is no substitute for<br />
professional and efficient planning. Until now, however, it has been difficult to optimize<br />
the time and money spent on planning robust, high-availability wireless networks,<br />
especially in multi-story buildings. <strong>RF3D</strong> WifiPlanner 2 software by <strong>Psiber</strong> <strong>Data</strong> meets<br />
this need, providing economical, application-specific planning of both simple and<br />
complex wireless networks.<br />
<strong>RF3D</strong> WifiPlanner 2 provides true three-dimensional simulation of radio signal distribution<br />
in the building, and is thus the first tool to visualize co-channel and next-channel<br />
interference from access points on other floors. Furthermore, the number of access<br />
points required can be easily optimized through on-screen interactive planning. And<br />
this planning software pays for itself with the first unnecessary access point you save.<br />
Wireless network planners usually provide for too many access points, and more access<br />
points do not generally improve the network quality. Instead, they cause channel<br />
overlap, which is often unavoidable, especially in 2.4 GHz networks. As a result,<br />
complex wireless networks are usually relatively error-free at low data rates, but as<br />
data rates increase, errors become more frequent. But <strong>RF3D</strong> WifiPlanner lets you optimize<br />
your network specifically for the use you anticipate.<br />
<strong>RF3D</strong> WifiPlanner 2 uses theoretical principles to calculate signal distribution. The network<br />
as installed and its actual coverage may deviate from the results of such calculations.<br />
Because the calculations are based on theoretical values, <strong>Psiber</strong> <strong>Data</strong> assumes<br />
no liability for the accuracy of the results.<br />
back to table of contents<br />
3
2<br />
manual<br />
1.1 1.1PC Hardware Requirements<br />
Minimum requirements:<br />
• Processor: Intel Pentium, 1.5 GHz or faster<br />
• Display: 1024×768 or greater<br />
• RAM: 1024 MB for networks with less than 30 access points.<br />
Recommended configuration:<br />
• Processor: Intel Pentium 2 GHz<br />
• Display: 1280×960 or greater<br />
• RAM: 2048 MB for moderate-sized plans; more for larger network plans or highresolution<br />
reports.<br />
1.2 Installation and Activation<br />
Before installing the software, please open Add or Remove Programs under Start / Control<br />
Panel, and verify that the Microsoft .NET Framework 4 (or higher) and the Microsoft<br />
Visual J# Version 2.0 Redistributable Package have been installed on your computer. If<br />
they are not already installed, please download the Microsoft .NET Framework and the<br />
Visual J# Package from www.microsoft.com and install them before you continue.<br />
Furthermore, make sure that you have Administrator privileges on your PC and a working<br />
connection to the Internet.<br />
Insert the installation CD into your drive. If the installer does not start automatically,<br />
double-click the installation file to start it.<br />
After starting the installer, you will see the welcome message.<br />
Click Next.<br />
back to table of contents<br />
4
2<br />
manual<br />
Now choose the installation folder for the program. We recommend using the default<br />
directory path. Please do not change the name of the application folder, “<strong>RF3D</strong>WifiPlanner”.<br />
Click Next and wait for the installation to be completed.<br />
After you click Finish, <strong>RF3D</strong> starts and displays a license activation dialog:<br />
If you would like to evaluate the software in demo mode, simply click Cancel. Otherwise,<br />
enter the serial number from your CD box or online purchase confirmation, your<br />
name, the name of your company, and your e-mail address. Click OK.<br />
After you have successfully activated the software, you will see the following dialog:<br />
Click Close to conclude the installation and activation, and start working with your<br />
<strong>RF3D</strong> WifiPlanner 2.<br />
back to table of contents<br />
5
2<br />
manual<br />
1.3 Produkt Updates<br />
New versions of <strong>RF3D</strong> WifiPlanner 2 are released from time to time. To search for updates,<br />
please visit www.rf3d.com in the Internet. The <strong>RF3D</strong> website has a download<br />
area where you can download the latest program version.<br />
The same website allows you to upgrade from <strong>RF3D</strong> WifiPlanner 2 Lite to the next higher<br />
version. Or you can order an upgrade by e-mail to sales@rf3d.com.<br />
2 Fundamentals of Wireless Network Planning<br />
To plan an efficient wireless network, it helps to understand a little radio communication<br />
theory. In this document we can only provide a brief summary with regard to<br />
wireless networks. For more detailed information, please consult the specialist literature.<br />
2.1 Standardization in Wireless Networking<br />
n designing standards for wireless networks as they are used in the industry today, the<br />
IEEE built on the Ethernet standard, IEEE 802.3. Like Ethernet, an IEEE WLAN functions<br />
as a shared medium with a decentralized access control mechanism. Every station<br />
competes for access with all other stations, and is responsible for regulating its own use<br />
of the medium. In this situation, the CSMA/CD access protocol (Carrier Sense Multiple<br />
Access with Collision Detection) ensures that every station gets an opportunity to transmit<br />
data over the medium. Because it uses the same media access technique, 802.11<br />
WLAN is often called “wireless Ethernet”.<br />
The IEEE 802.11 standard defines several different Ethernet-based wireless networks. The<br />
most common of these are 802.11a, b, g, h and n. In general, two different radio techniques<br />
are used in two different frequency bands. The 2.4 GHz ISM band is most often<br />
used. This band is reserved worldwide for license-free industrial, scientific and medical<br />
applications. The frequency band used can vary from one country to another, however.<br />
For example, eleven channels can be used in the 2.4 GHz band in the United<br />
states, while up to 14 channels are available in other parts of the world. The other frequency<br />
band used for wireless Ethernet is around 5 GHz. In addition to the frequency<br />
bands, the IEEE standards also specify transmitter power, data rates, packet structure,<br />
management packets, and much more.<br />
2.1.1 The IEEE 802.11b Specification<br />
The wireless Ethernet standard IEEE 802.11b, adopted in late 1999, is the first such<br />
standard to be widely supported for both industrial and home use. Networking components<br />
that support this standard communicate in the 2.4 GHz band. The specified<br />
data transfer rates are 1, 2, 5.5 and 11 Mbit/s.<br />
2.1.2 The IEEE 802.11g Specification<br />
The IEEE 802.11g wireless Ethernet specification is an advanced extension of the widely<br />
accepted 802.11b standard, and was adopted in mid-2003. Like its predecessor,<br />
back to table of contents<br />
6
2<br />
manual<br />
802.11g also uses the 2.4 GHz frequency band. The data transfer rates were substantially<br />
increased, however, so that the 802.11g standard permits throughput of 1,<br />
2, 6, 9, 12, 18, 24, 36 and 54 Mbit/s. Networking components that conform to the g<br />
specification are also compatible with the earlier b standard. For this reason, such<br />
components are often designated as “802.11 b/g compatible”.<br />
2.1.3 The IEEE 802.11a Specification<br />
The 802.11a extension to the IEEE wireless Ethernet standard was adopted in late<br />
1999. Unlike b and g networks, 802.11a uses the 5 GHz band. The advantage here is<br />
that channel overlap is less frequent. The drawback, however, is that the 5 GHz band<br />
is subject to various regulations and restrictions in some countries. Like the g standard,<br />
802.11a specifies throughput rates of 1, 2, 6, 9, 12, 18, 24, 36 and 54 Mbit/s.<br />
2.1.4 The IEEE 802.11h Specification<br />
Although IEEE 802.11b equipment became widespread all over the world around<br />
the turn of the millennium, the market for IEEE 802.11a products developed relatively<br />
slowly. In some countries, the regulatory agencies had not yet approved public use<br />
of the frequency band. The IEEE 802.11h extension was a substantial prerequisite to<br />
the use of products in conformance with the a standard in Europe. One major innovation<br />
of the h specification is that components monitor the desired channel for other<br />
applications, such as radar, which could otherwise be impaired by wireless network<br />
operation. In case of such interference, the WLAN equipment either reduces its transmitter<br />
power or shuts down. The operator can then select a different channel.<br />
2.1.5 The IEEE 802.11n Specification<br />
In 2009, the IEEE responded to increasing bandwidth demands by adopting the “n”<br />
extension to the wireless standard. Because there are very few non-overlapping<br />
channels in the 2.4 GHz band, 802.11n was developed for both the 2.4 GHz and the<br />
5 GHz band. An important step towards regulatory approval of the 5 GHz band was<br />
the h extension, adopted in 2003. Technically, the n standard defines a new generation<br />
of wireless networking, since it introduces new technologies in transport-oriented<br />
protocol layers. The Multiple Input–Multiple Output (MIMO) technology allows transmitters<br />
to send several signals, called spatial streams, over the same channel, and<br />
receivers to separate them reliably. This multiplies the effective throughput without<br />
using additional frequencies. Furthermore, the actual bandwidth is doubled to 40<br />
MHz by combining two adjacent 20-MHz channels.<br />
2.2 Frequencies and Channels<br />
However, the channels in the ISM band overlap. For example, with reference to the<br />
actual radio output of an access point, we find that an access point transmitting on<br />
channel three also emits a signal on the neighboring channels 1, 2, 4, and 5. This means<br />
that other WLAN components communicating on any of those four channels will<br />
back to table of contents<br />
7
2<br />
manual<br />
receive interference. This happens whenever the components transmit data. <strong>Data</strong><br />
transmission generally occurs even when no user data is transported over the network<br />
— in other words, when the network is idle — because management information,<br />
beacons, keep-alive packets and the like still have to be transported at regular<br />
intervals. This phenomenon is called near-channel interference.<br />
However, the channels in the ISM band overlap. For example, with reference to the actual<br />
radio output of an access point, we find that an access point transmitting on channel<br />
three also emits a signal on the neighboring channels 1, 2, 4, and 5. This means that other<br />
WLAN components communicating on any of those four channels will receive interference.<br />
This happens whenever the components transmit data. <strong>Data</strong> transmission generally<br />
occurs even when no user data is transported over the network — in other words,<br />
when the network is idle — because management information, beacons, keep-alive<br />
packets and the like still have to be transported at regular intervals. This phenomenon is<br />
called near-channel interference.<br />
back to table of contents<br />
8
2<br />
manual<br />
Interference arises whenever data is transmitted, and therefore networks that carry little<br />
or no data generate less interference. This also means that, although a network with<br />
lower data traffic still functions in spite of channel overlap, problems can be expected<br />
as traffic increases. In planning, of course, attention must be given to avoiding channel<br />
overlaps. This is done by planning overall WLAN network as a cellular structure in which<br />
adjacent cells use channels that are far apart in the frequency spectrum. Among the<br />
eleven channels available in the US, no more than three can be used with no overlapping:<br />
channels 1, 6, and 11.<br />
It is also helpful to know that the maximum permissible transmitter power in this ISM band<br />
for indoor use is 20 dBm, or 100 mW.<br />
The 5 GHz frequency band offers a greater number of non-overlapping channels, but<br />
is often subject to national regulations. Different countries permit different maximum indoor<br />
and outdoor transmitter power levels, for example.<br />
back to table of contents<br />
9
2<br />
manual<br />
2.3 Cellular Structure of a Wireless Network<br />
The size of a wireless cell — that is, the coverage area of an access point — is limited<br />
by the transmitter power. To cover larger areas, a structure of several adjacent cells is<br />
recommended. Because the adjacent cells overlap spatially, they must use distinct,<br />
non-overlapping channels.<br />
Note that, in this cellular structure, channel overlap must be avoided not only within<br />
each floor of a building, but also between adjacent floors. In other words, access points<br />
above and below one another should not use the same channels.<br />
Another important consideration is the security of a company-wide wireless network.<br />
Usually the operator wants to avoid WLAN transmission beyond the boundaries of the<br />
company’s premises in order to prevent unauthorized access from outside. Furthermore,<br />
in designing the network’s cellular structure, you should also consider what applications<br />
are to be transported over the network. If an application such as telephony is to be provided<br />
over the WLAN, then each cell — that is, each access point — is usually supposed<br />
to support a specific number of simultaneous calls. This is usually not feasible in cells of<br />
the greatest possible size, so the network should be designed with smaller cells.Smaller<br />
cells can be achieved by reducing the transmitter power of specific access points. In this<br />
case, of course, more access points are required to cover a given area.<br />
Another consideration in planning wireless cells is that the data rate depends in part<br />
on the signal power received at any given point. For applications with low data traffic,<br />
such as warehouse or logistics applications, it can be efficient to use the outer fringes<br />
of a cell in spite of weaker signal power.<br />
2.4 Special Characteristics of 802.11n<br />
As mentioned, the 802.11n standard brings many changes and new technologies. In<br />
addition to the use of both the 2.4 GHz and 5 GHz bands, there are a number of special<br />
characteristics that must be taken into account in planning 802.11n networks.<br />
back to table of contents<br />
10
2<br />
manual<br />
2.4.1 Spatial Streams The MIMO technology defined in the standard allows the transmission<br />
of up to four separate data streams over the same channel. MIMO thus multiplies<br />
the effective throughput without using a broader frequency spectrum. Currently, most<br />
manufacturers’ 802.11n access points use only two spatial streams. Generating and separating<br />
more spatial streams requires greater computational performance. To provide<br />
this power, n-capable access points must incorporate faster CPUs than earlier models.<br />
Faster CPUs bring with them both higher acquisition costs and greater power consumption.<br />
For this reason, many n-capable access points that use power-over-Ethernet (PoE,<br />
the IEEE 802.3af standard) offer a lower maximum transmitter power than the maximum<br />
permitted by regulators. As the network planner, you must therefore bear in mind when<br />
purchasing access points that their range, and hence the cell size, depends directly on<br />
their transmitter power.<br />
2.4.2 Channel Bonding<br />
<strong>Inc</strong>reasing bandwidth by bonding two adjacent 20-MHz channels to form a 40-MHz channel<br />
has the advantage of more than doubling the effective throughput. However, each<br />
40-MHz channel used leaves fewer channels available for other access points. This can<br />
lead to greater congestion, especially in the 2.4 GHz band. Whereas three 20-MHz channels<br />
in this band can be used in parallel with low interference (see Section 2.2), no more<br />
than two access points with overlapping coverage cells can use channel bonding without<br />
interference. Hence there is no way to realize a robust 2.4 GHz network with complete<br />
area coverage using access points with channel bonding activated. The logical consequence<br />
is to escape into the 5 GHz band, where sufficient channels are available.<br />
An example:<br />
Activating channel bonding creates a channel 40 MHz wide by adding the non-overlapping<br />
20-MHz channel to the channel nominally in use. This means that channel 1 can be<br />
back to table of contents<br />
11
2<br />
manual<br />
bonded with channel 5, channel 2 with channel 6, and so on. The highest available 40-<br />
MHz channel is the one composed of channels 7 and 11. (In Europe, bonding channels 9<br />
and 13 is permitted. Before you plan on bonding high channels, however, make sure that<br />
the hardware you are using supports this.) The frequency interval between channel 5 and<br />
channel 7 is only 10 MHz. These two channels cannot be bonded, as they interfere with<br />
each other (see Section 2.2).<br />
2.4.3 Short Guard Interval Another optimization introduced by n standard is the<br />
reduction of the guard interval, or the delay between the transmissions of successive<br />
symbols, from 800 ns to 400 ns. This is made possible in part by the same technology that<br />
is used to combine spatial streams. This technique allows significantly better separation<br />
of the original signal from phase-shifted reflections.<br />
2.4.4 Greenfield Mode To understand 802.11n’s “greenfield mode”, you must be<br />
aware of all the differences between 802.11n and the earlier WLAN standards. In addition<br />
to the spatial streams, channel bonding and short guard interval techniques described<br />
above, the n standard also provides for modified precoding of the data and a<br />
greater number of component data streams. All of these changes result in a signal that<br />
cannot be recognized by earlier WLAN receivers, however: a pure 802.11n-standard<br />
network would be received by earlier equipment only as noise. For this reason, 802.11ncapable<br />
equipment also has a compatibility mode for interoperation with earlier networks.<br />
This compatibility mode is generally activated in the default configuration, and<br />
results in lower performance and somewhat lower net throughput, even while using the<br />
raw bandwidth of the 802.11n standard. “Greenfield mode,” also called “high throughput”<br />
or HT mode, designates not an additional capability, but the disabling of compatibility<br />
with earlier networks.<br />
2.5 Antennas<br />
Antenna technology would take up a full chapter in a survey of WLAN fundamentals.<br />
For planning purposes, you need to know that cell shapes can be optimized by using<br />
appropriate antennas. In office floors, for example, signal radiation in a horizontal plane<br />
is very important, while vertical radiation is often undesirable, since it causes interference<br />
in the floors above and below. A highly directional antenna, such as a panel<br />
antenna, may be used to cover a long corridor. Yagi antennas have an even narrower<br />
beam and are used for point-to-point communications, such as radio links between<br />
two buildings.<br />
2.5.1 Omnidirectional Antennas Omnidirectional antennas are generally used to increase<br />
the communication range within offices or homes. The antennas commonly supplied<br />
with access points are omnidirectional. Omnidirectional antennas have a beam<br />
angle of 360° in the horizontal plane. Vertically, their radiation pattern is compressed, and<br />
may cover an angle of 80°. These antennas can have a gain of 2 to 5 dB, and may be<br />
used to increase an access point’s horizontal range.<br />
Please see appendix A: The Antenna Library<br />
back to table of contents<br />
12
2<br />
manual<br />
2.5.2 Patch Antennas Patch antennas typically offer gain of 4 to 6 dB, with horizontal<br />
and vertical beam angles of 80° to 65°. A patch antenna can increase the communication<br />
range by up to 100%.<br />
2.5.3 Yagi Antennas Yagi antennas are extremely directional antennas, and are used<br />
to set up point-to-point radio links, bridging distances of up to 300 m at 54 Mbit/s, 1 km<br />
at 11 Mbit/s, or 2 km at 2 Mbit/s for example using 2.4 GHz WLAN. In this way separate<br />
buildings can be interconnected using WLAN equipment.<br />
Please see appendix A: The Antenna Library<br />
2.6 Attenuation<br />
Once the signal leaves the access point’s antenna, it is subject to attenuation, or loss: that<br />
is, it becomes weaker. In the ideal case, the signal attenuation with increasing distance<br />
from the antenna is called free-space loss. The theoretical rate of free space loss is different<br />
for the different frequency bands, 2.4 GHz and 5 GHz. A 5 GHz signal is subject to<br />
greater loss than a 2.4 GHz signal. Indoors, the actual attenuation depends on the given<br />
building. The signal loss through wooden walls is clearly different from the loss through<br />
stone or reinforced concrete. It is therefore important to determine the building materials<br />
involved and their specific properties.<br />
Please see appendix B: The Wall and Floor Library<br />
2.7 Theoretical Throughput Rates<br />
Signal strength is one of the factors that determine the theoretical throughput of a wireless<br />
LAN. Wireless LAN components lower their data rate automatically when the received signal<br />
power is no longer sufficient for a higher throughput. Furthermore, the received signal must<br />
also be greater than the noise due to interference, typically by 10 dB. Thus the signal quality<br />
is characterized in terms of the signal-to-noise ratio (SNR).<br />
In 802.11n networks, the net throughput depends on the access point’s configuration settings.<br />
The table below shows the base data rates, which are then multiplied by the number of<br />
parallel spatial streams used. Thus the raw throughput, at maximum received signal strength<br />
with channel bonding and short guard interval, is 300 Mbit/s with two spatial streams, 450<br />
Mbit/s with three spatial streams, and 600 Mbit/s with the maximum of four spatial streams.<br />
back to table of contents<br />
13
2<br />
manual<br />
Modulation RSSI (dBm) SNR (dB) <strong>Data</strong> Rate for 802.11 n<br />
20 MHz channel 40 MHz channel<br />
800ns GI 400ns GI 800ns GI 400ns GI<br />
BPSK -86 9 6.50 7.20 13.50 15.00<br />
QPSK -82 10 13.00 14.40 27.00 30.00<br />
QPSK -86 11 19.50 21.70 40.50 45.00<br />
16-QAM -84 11 26.00 28.90 54.00 60.00<br />
16-QAM -80 11 39.00 43.30 81.00 90.00<br />
64-QAM -75 11 52.00 57.80 108.00 120.00<br />
64-QAM -71 11 58.50 65.00 121.50 135.00<br />
64-QAM -69 11 65.00 72.20 135.00 150.00<br />
2.8 Redundancy<br />
To protect the supported applications against failures, a certain redundancy must be designed<br />
into a wireless network. This means that, if a given access point fails, the stations it served<br />
can join neighboring radio cells. However, since access points too close together generally<br />
cause interference, redundancy planning always involves a compromise between reliability<br />
and throughput.<br />
3 The <strong>RF3D</strong> User Interface<br />
<strong>RF3D</strong> WifiPlanner 2’s user interface has been designed to display even complex WLAN plans<br />
understandably. <strong>RF3D</strong> WifiPlanner 2 calculates three-dimensional radio characteristics in real<br />
time, and displays them in horizontal cross-sections corresponding to the floors of a building.<br />
A navigation column at the left presents simplified thumbnails of all the floor plans. The selected<br />
floor is displayed in detail in the main window, where you can edit it interactively. The<br />
tabs at the bottom of the window allow you to select the Simulation, Access Points, Levels<br />
and Advanced options.<br />
back to table of contents<br />
14
2<br />
manual<br />
3.1 Importing Building Plans<br />
For an exact simulation of floors one above another, the building plans must be aligned. For<br />
this purpose the <strong>RF3D</strong> WifiPlanner 2 includes an Import Wizard to assist you in importing individual<br />
floor plans in alignment with one another. Floor plans can be imported in the common<br />
image formats JPG, BMP and PNG. In selecting floor plans, you should choose image files<br />
of moderate size and resolution, since high-definition floor plans consume memory unnecessarily.<br />
We recommend that you use images of less than 1000 × 1000 pixels. If your plans<br />
are currently in DXF format (as produced by Auto-CAD for example), you can convert them<br />
either using the graphics program they were created with, or using commonly available<br />
utilities. Other ways of obtaining the necessary plans include scanning paper drawings or<br />
photographing the emergency exit plans posted on each floor of most buildings. It doesn’t<br />
matter if the individual floor plans have different resolutions or orientations: the Import Wizard<br />
solves such problems easily.<br />
To start the Wizard, select the menu command File/New.<br />
On the first tab, New Level, you can a import a floor plan from an image file, choose<br />
a name for it, and specify the height of the new floor. When you have entered all the<br />
information, click the Next button to proceed to the next tab.<br />
back to table of contents<br />
15
2<br />
manual<br />
The Rotation tab allows you to rotate the imported floor plan with fine control until the<br />
lines are exactly vertical and horizontal. This will make it much simpler to draw in walls<br />
later. Click Next again to proceed to the next step.<br />
o ensure that all the floor plans are aligned with one another vertically, identify a coordinate<br />
origin and another reference point in each floor plan. <strong>RF3D</strong> WifiPlanner 2 then aligns<br />
these two points in each plan to position the different levels exactly one above another.<br />
To ensure that all the floor plans for the whole building are aligned one above another,<br />
you must choose two corresponding reference points in each plan. <strong>RF3D</strong> WifiPlanner 2<br />
automatically scales and rotates the individual plans to align the selected points exactly<br />
in vertical lines. You only need to take care to select the two points so that they can be<br />
identified exactly on every floor plan. It is a good idea to select the upper left and right<br />
corners of the building as reference points, for example. Furthermore, you must enter the<br />
exact distance between the two reference points. Specify the distance in the measurement<br />
unit selected in the program options, feet or meters.<br />
back to table of contents<br />
16
2<br />
manual<br />
Now click Add New Level to import the next plan. When adding subsequent levels, you<br />
do not need to rotate them. Simply import the floor plan and specify the coordinate origin<br />
and the reference point in the same order as before. Repeat this procedure until you have<br />
imported all the floor plans. Click Finish to close the Wizard.<br />
3.2 The Toolbox<br />
The Toolbox provides all the tools you need to design a wireless LAN. When you select Floor,<br />
Supp. Wall, or Wall, the drop-down list to the right in the Toolbox contains a list of the possible<br />
material types for the corresponding building element. To draw in building elements on the<br />
plan, select a material type in the list. The material types are stored in the program as libraries,<br />
which can be easily expanded. For details, see Chapter 5, “Advanced Settings”.<br />
As described in Chapter 4, it is a good idea to draw in the plan elements — floors, walls,<br />
access points, etc. — in a certain order.<br />
back to table of contents<br />
17
2<br />
manual<br />
1. Arrow symbol: Use the arrow tool to select elements in the plan. You can drag<br />
and drop elements in the floor plan to move them. To select several elements,<br />
press and hold the Ctrl key while you click on them. Clicking on a wall selects<br />
only one segment of it.<br />
2. Access Point: Use this tool to place an access point with its antenna in the plan.<br />
Each of the access point’s radio transceivers has an antenna type, which is<br />
specified in the access point options. Antenna types can be selected from an<br />
extensive library. To add new antenna types to the library, see Chapter 6. You<br />
can also download additional antenna libraries from www.rf3d.com.<br />
3. Floor: Select this tool to describe floors or ceilings. A floor element is a polygon<br />
with any number of sides. If there is an opening in a floor, such as a courtyard<br />
surrounded by the building, you must draw the floor accordingly. For detailed instructions,<br />
see Chapter 6. To draw a floor, click with the left mouse button at the<br />
corners of the desired area. At the last corner, click with the right mouse button<br />
to complete the polygon.<br />
4. Wall: Use the Wall tool to draw partition walls. When the Wall tool is selected,<br />
the Toolbox automatically expands to provide wall-drawing options. You can<br />
create walls with a vertical height that reaches from the floor of the current<br />
level to the floor of the level you select in the drop-down list. The default setting<br />
creates a partition wall from floor to ceiling of the current level. You can<br />
also create walls of any height desired by entering the additional height in the<br />
numeric field to the right of the wall type. You can also use this option to draw<br />
half-height walls within a level to represent room dividers, cubicles or shelves,<br />
for example. Half-height walls are shown in the floor plan as thinner lines than<br />
partition walls that extend the full height of the floor level. Supporting walls<br />
(those that extend through several levels) are shown as thicker lines. Many<br />
material types are available for walls, and the more exactly you draw all the<br />
walls that exist in your building, the better the results of your planning will be.<br />
To draw a wall, click with the left mouse button where the wall begins and at<br />
each angle, then with the right mouse button where the wall ends.<br />
back to table of contents<br />
18
2<br />
manual<br />
3.3 Drawing and Selecting Elements<br />
First select the desired element in the Toolbox, then choose the appropriate type of<br />
material. Draw in plan elements using both the left and right mouse buttons: first use the<br />
left mouse button to mark corners, then the right mouse button to finish the element.<br />
Walls, floors and supporting walls are ordinarily drawn only in horizontal and vertical segments.<br />
But you can also draw diagonal segments at any angle simply by pressing the<br />
Ctrl key as you move the mouse. In this way you can draw walls and floors of any shape<br />
desired.<br />
You can also select several walls at once, copy them to the Clipboard, and duplicate<br />
them in a different floor. Press and hold the Ctrl key while you select the desired elements<br />
by clicking on them with the left mouse button. Then select the menu command<br />
Edit/Copy (or press Ctrl+C). Choose the desired floor among the thumbnails in the left<br />
panel, then select the menu command Edit/Paste (or press Ctrl+V). If you make a mistake<br />
in editing the plan, use the menu command Edit/Undo (Ctrl+Z) to reverse the operation.<br />
To restore what you have undone, select Edit/Redo (Ctrl+Y).<br />
3.4 The Simulation Tab<br />
The Simulation tab provides a great deal of information and several configuration<br />
options during the simulation of your projected WLAN.<br />
A. When you first start the <strong>RF3D</strong> WifiPlanner 2, the option Automatic selective recompute<br />
is activated. This means that the wireless network characteristics are recalculated automatically<br />
whenever you draw or move elements in the plan. This makes interactive<br />
planning easy. However, you may want to turn off automatic recomputing until you<br />
have completed at least a rough draft of your network plan. When the automatic recompute<br />
option is deactivated, you can click the “Tot.Recomp.” button at any time to<br />
recompute the wireless network characteristics.<br />
B. The box labeled Info contains the basic information about the current floor.<br />
C. The “Resolution” control allows you to choose how precisely you want the WLAN characteristics<br />
to be computed. Low resolution uses yields a rough estimation of the wireless network<br />
characteristics, while high resolution results in very precise calculations. Note that the<br />
resolution setting has drastic effects on the computation time and the program’s memory<br />
needs, however. Low resolution is therefore recommended for interactive planning work.<br />
D. The Network Load control allows you to simulate various data traffic levels in your projected<br />
wireless network. This is very helpful since it allows you to design your network<br />
according to the types of applications it will support. Low network loads can be expected<br />
for example in warehousing and logistics applications, while office applications<br />
and Voice-over-IP usually generate higher traffic loads.<br />
back to table of contents<br />
19
2<br />
manual<br />
E. View: In this drop-down list you can choose the network characteristic that you want<br />
to display. The list contains the following views:<br />
Log. Power<br />
This is the received signal strength of the strongest access point at each location. Use<br />
this view to gauge the quality of your network coverage. A value of –70 dB or higher<br />
is sufficient. (Remember that, since the values in dB are negative, a higher value is one<br />
that is closer to zero.)<br />
Log. SNR<br />
This view shows the signal-to-noise ratio at each location, which reflects the effects of<br />
co-channel interference. A value of 10 dB or higher is good.<br />
<strong>Data</strong> Rate<br />
The data rate view shows the estimated attainable data rate at each location. This is<br />
a very useful prediction of how the projected network will actually perform. The display<br />
shows values between 1 and 54 Mbit/s. Higher data rates are better.<br />
Interference<br />
Interference is a major concern in wireless network planning. Interference is caused<br />
mainly by co-channel overlap with other access points. Reduce interference by selecting<br />
different channels for adjacent access points, or by reducing the output power of<br />
certain access points. This will reduce the size of the cell. How much interference you<br />
want to accept depends on your specific needs for redundancy and for throughput.<br />
Redundancy (full version only)<br />
Access point redundancy is important in areas that require continuous network availability<br />
even when local failures or system overloads occur. The <strong>RF3D</strong> WifiPlanner provides<br />
various views to help you plan access point redundancy. Each view simulates a certain<br />
scenario in which you can ensure that critical areas have adequate backup coverage.<br />
Log. Power, Reliability Level 1<br />
This view displays the signal strength received from the second strongest access point at<br />
each location, assuming that the strongest access point is no longer working.<br />
Log. Power, Reliability Level 2<br />
This view displays the signal strength received from the third strongest access point at<br />
each location, assuming that the strongest access point is no longer working.<br />
Log. SNR, Reliability Level 1<br />
This view displays the signal-to-noise ratio at each location assuming that the strongest<br />
access point is no longer working.<br />
Log. SNR, Reliability Level 2<br />
This view displays the signal-to-noise ratio at each location assuming that the two strongest<br />
access points are no longer working.<br />
F. The color scale indicates what numeric values correspond to the colors in the main<br />
display. You can modify the range and the number of gradations in the input fields<br />
below the color scale. This is practical when you would like to display finer distinctions<br />
in the plan.<br />
back to table of contents<br />
20
2<br />
manual<br />
3.5 The Access Point Tab<br />
The Access Points tab lists all the access points currently planned, and you can modify<br />
their properties in the Access Point Options dialog. This dialog shows selected<br />
properties of the given access point, including its name, type, the number of radio<br />
transceivers it has, the level in which the access point is installed, and its height above<br />
the floor. The list of access points contains a column for each radio transceiver, showing<br />
its channel settings and spatial orientation. Select the access point whose options<br />
you want to edit in the table.<br />
3.5.1 Access Point Options<br />
The Access Point Options dialog is divided into left and right panels. On the left,<br />
you can edit general information such as the name, type, height and description<br />
of the access point. On the right you see a tab with the options for each of the<br />
access point’s radio transceivers. Switch from one radio to the next by selecting a<br />
tab on the right, or by selecting a row in the list of radios on the left. Click the Reset<br />
AP button to reset all of the access point’s settings to their default values. Click<br />
the Reset Unit button to reset the currently selected radio transceiver’s settings.<br />
Click OK to confirm the changes you have made, or click Cancel to discard them.<br />
You can edit the following access point options:<br />
• Type: Enter the name of the access point type in this field.<br />
• Name: Specify a unique name for the individual access point in this field.<br />
• Height: In this field, specify the height above the floor at which this access point is<br />
installed.<br />
• Description: This field allows you to enter any text that may be helpful to you in connection<br />
with this access point, such as the room number in which it is installed.<br />
• Radios: This is a list of the access point’s radio transceivers. Select one in the list to<br />
open the tab for its radio options.<br />
Radio Options:<br />
• Supports: This field indicates whether the selected radio supports the 2.4 GHz or<br />
the 5 GHz band, and whether it supports the 802.11n standard.<br />
back to table of contents<br />
21
2<br />
manual<br />
• Active: Click on this checkbox to switch the selected radio on or off.<br />
• Antenna: This field shows the antenna currently selected for the given radio. To<br />
change it, select a different antenna in the drop-down list.<br />
• Set as default antenna ...: Click either of these two buttons to set the antenna<br />
currently shown as the default antenna type for all future access points with which<br />
it is compatible.<br />
• Standard/Channel: Change the wireless standard and the channel used by selecting<br />
values from these lists.<br />
• TX: Adjust the transmitter power by entering the desired value in this field. Bear in<br />
mind the antenna gain when you determine the necessary transmitter power.<br />
• n Condition: Click on this checkbox to enable or disable the 802.11n standard for<br />
this radio transceiver.<br />
- Spatial Streams: Set the number of spatial streams to be used on this channel.<br />
- Short Guard Interval: Click on this checkbox to enable or disable the short guard<br />
interval.<br />
- Greenfield Mode: Activate this checkbox to disable compatibility with pre-802.11n<br />
networks.<br />
- Bond Channels: Activate this checkbox to combine two adjacent channels.<br />
• Direction: Set the spatial orientation of the antenna by specifying the horizontal<br />
and vertical angles in these fields. This is important if you have selected a directional<br />
antenna. The symbols to the right illustrate the current setting.<br />
- Rotation (horizontal): Specify the antenna’s orientation in the horizontal plane here.<br />
- Tilt (vertical): Specify the antenna’s upward or downward angle here.<br />
3.6 Levels<br />
The Levels tab shows you the number of floor levels at a glance, and allows you to edit<br />
each floor level, if you have not yet begun inserting floors, walls or access points. Click<br />
on a level in the list to modify its properties. To add a new level, click on the New Level<br />
button, or click on the Copy Level button to duplicate the selected level. To remove<br />
the selected level, click on Delete Level. To change the order of the existing levels, select<br />
the level you want to move and click on the up or down arrow button. To adjust the<br />
orientation of the current level’s floor plan, as you did on importing the floor plan, click<br />
on the Rescale Level button. To import a new floor plan, click on New Floor Plan Image.<br />
3.7 Advanced Settings<br />
In addition to walls and floors, enclosed spaces also contain many movable obstacles,<br />
such as people in offices and merchandise in warehouses, and objects that<br />
would be too difficult to draw in individually, such as furniture, shelves etc. For this<br />
reason, the Advanced tab allows you to set a global average attenuation factor to<br />
account for such objects in different kinds of spaces.<br />
back to table of contents<br />
22
2<br />
manual<br />
Select Free Space if there is no additional loss to be anticipated, as in outdoor areas<br />
such as parking lots or campus yards.<br />
The default setting, Factory/Warehouse, factors in low to moderate loss for low-density<br />
spaces such as warehouses.<br />
The Office setting adds moderate to high attenuation to account for the furniture<br />
and persons present in typical office environments.<br />
4 Planning Wireless Networks<br />
4.1 What Application Is Intended?<br />
To plan a wireless network, start by determining which applications will eventually be<br />
transported over the projected network. There are critical differences between applications<br />
that require greater redundancy, but only low data traffic, such as warehousing<br />
and logistics, and applications that require high bandwidth, such as voice-over-WLAN.<br />
For a warehouse application, for example, you should design the wireless cells larger<br />
and tolerate a higher level of interference. This increases reliability, since the second<br />
nearest access point to a given location will probably be usable in case the nearest one<br />
fails. To change the size of the wireless cells, click the Access Points tab and adjust the<br />
transmitter power of each access point. The higher the transmitter power of an access<br />
point, the larger the cell it covers.<br />
Inversely, if you are designing a network for voice-over-WLAN, you should plan smaller<br />
cells. This is because interference should be minimized for voice-over-WLAN, since voice<br />
packets that are lost due to interference are not resent, as lost packets in other applications<br />
are. Thus interference affects voice fidelity, and in extreme cases can make voice<br />
communication impossible.<br />
4.2 Entering Environmental Factors<br />
In planning a wireless network with the <strong>RF3D</strong> WifiPlanner 2, you should follow a certain sequence<br />
of steps in order to achieve your objective quickly and easily. Furthermore, performing<br />
the steps in the order described here minimizes the computation involved, and hence<br />
the processing time as well. The process can be divided into five simple steps:<br />
back to table of contents<br />
23
2<br />
manual<br />
Once you have imported all the building plans as described in Section 3.1, you should first<br />
draw in the floors in each level. If all the floors in the building are of the same shape and the<br />
same materials, you can copy the first floor to all the other plans using the menu command<br />
Edit/Paste Floor to Other Levels.<br />
Hint: Before you begin drawing in all the building elements, you can turn off the Automatic<br />
selective recompute function as described in Section 3.4. This will save processor time, since<br />
otherwise the <strong>RF3D</strong> WifiPlanner recomputes the wireless network characteristics each time<br />
you draw an element of the building plan.<br />
There are two different kinds of walls in the <strong>RF3D</strong> WifiPlanner 2: supporting walls, drawn with<br />
the Supp. Wall tool in the Toolbox, and partition walls, drawn with the Wall tool. When you<br />
draw a supporting wall, it is automatically inserted in all levels of the building, and the <strong>RF3D</strong><br />
WifiPlanner treats it as a single element. You should use supporting walls to represent all the<br />
walls in your building that have the same position and material composition in all levels. This<br />
can significantly reduce the processing time in comparison to normal walls drawn in on<br />
each level separately, since there are fewer elements to be processed by the computing<br />
algorithms.<br />
After you have drawn in all the supporting walls, you should draw in the partition walls on<br />
each level.<br />
4.3 Positioning Access Points<br />
Now that you have drawn all the elements of the building, you can begin to design the<br />
WLAN itself by positioning the access points and defining their properties. <strong>RF3D</strong> WifiPlanner<br />
2 has a library containing a number of access point and corresponding external<br />
antenna definitions. When you use a directional antenna, you can aim it in your plan<br />
as described in Section 3.5.<br />
Select the desired access point type in the Toolbox list.<br />
back to table of contents<br />
24
2<br />
manual<br />
When you begin to position your access points, you should make sure that sufficient<br />
signal power can be received everywhere in the building. Sufficient signal power generally<br />
means a value of –60 dBm or better. Another thing to consider in your planning<br />
is interference. Primarily, this means avoiding co-channel interference, which occurs<br />
when adjacent access points use overlapping channel settings.<br />
Sufficient signal power (–60 dBm or better) throughout the building.<br />
Start your planning with the access points in the lowest level, and use a cellular structure<br />
as described in Section 2.3. Set the communication channels of the access points<br />
in conformance with national restrictions. When you continue with the access points<br />
in the other levels, remember that access points transmit through floors and ceilings.<br />
Your cellular structure should therefore take into account the access points located<br />
above and below one another.<br />
back to table of contents<br />
25
2<br />
manual<br />
When you choose channels for the access points, it can be helpful to switch the view<br />
mode from signal power to data rate, because the data rate view reflects any adverse<br />
effects of co-channel or near-channel interference due to channel settings.<br />
Checking the results of access point settings in the <strong>Data</strong> Rate view.<br />
4.4 Optimizing Wireless Networks<br />
When you have finished planning wireless signal coverage for the building, you can begin<br />
to optimize the network. You can do this in several ways, using the <strong>RF3D</strong> WifiPlanner’s<br />
various views on the Simulation tab, such as data rate, interference, etc. One approach<br />
is to display the expected data rates. The data rate view reflects all radio effects, including<br />
interference, signal-to-noise ratio and network traffic loads. Gaps or areas with<br />
lower data rates indicate room for improvement. To analyze the causes of lower data<br />
rates, you can use the interference or SNR views. The problems can be alleviated by<br />
changing the access point settings.<br />
When you are satisfied with your basic WLAN plan, you can then simulate its behavior<br />
in case of faults, such as access point failures. Do this by deactivating individual access<br />
points on the Access Points tab. A better way, however, is to use the “Log. Power Reliability<br />
Level 1” view. In this view, <strong>RF3D</strong> WifiPlanner 2 displays the signal power that would<br />
be received at each location in the plan if the strongest access point for that location<br />
had failed. For high-reliability applications, gaps in the coverage in this view can be a<br />
problem. You can fill such gaps by adding access points.<br />
There is always more than one way to design a wireless network. The need for a reliable<br />
or “high-availability” network is often difficult to reconcile with the need to ensure high<br />
data rates by avoiding interference. You will find, however, that networks you have<br />
designed using <strong>RF3D</strong> WifiPlanner 2 are efficient, optimum solutions.<br />
back to table of contents<br />
26
2<br />
manual<br />
5 Creating Reports<br />
(not available in <strong>RF3D</strong> WifiPlanner 2 Lite)<br />
<strong>RF3D</strong> WifiPlanner 2 allows documenting your plan in a summary report by exporting the<br />
project in a number of parallel output formats.<br />
• Portable Document Format (PDF): For quick and easy printing, you can create a complete<br />
report in the common PDF format.<br />
• Rich Text Format (RTF): If you want to edit the report in a word processor (such as Microsoft<br />
Word), generate it in RTF. The style, display and compatibility features of this format allow<br />
you to customize your report’s appearance as desired.<br />
• Web (HTML): In case you want to publish your report on the Internet or an intranet, <strong>RF3D</strong><br />
WifiPlanner 2 allows you to export the project as an HTML file.<br />
To generate a report, first open the project. Then select the Report button in the tool bar, or<br />
select the Report command in the File menu, to open the Report dialog. The Report dialog<br />
contains two tabs labeled Content and Output.<br />
5.1 Specifying the Contents of the Report<br />
On the Content tab, select the levels you want to include in the report, and the information<br />
you want to display for those levels.<br />
back to table of contents<br />
27
2<br />
manual<br />
In addition to the field views described in Section 3.4, “The Simulation Tab”, you can<br />
also include individual calculations for each active radio transceiver, coverage<br />
charts that summarize the coverage information of the field views, and an access<br />
point summary. The size of the report depends on the number of levels and diagram<br />
options you select in the lists in the Diagrams option group. A preview appears at<br />
right. The level shown here changes as you move the focus in the level list. When<br />
you have finished selecting the desired report contents, click Next to set the report<br />
output options.<br />
5.2 Report Output Options<br />
Once you have specified the contents of your report, the Output tab allows you to specify<br />
output options.<br />
In the Resolution option group, select the desired paper format and the resolution of<br />
the radio field calculations. The higher the resolution setting, the more precisely the<br />
radio fields are calculated in the report. Higher resolution also requires more memory<br />
and processing time. Higher resolutions are only allowed if sufficient memory for the<br />
calculation is available.<br />
Specify the desired output formats and the folder where you want <strong>RF3D</strong> WifiPlanner 2<br />
to create the report files.<br />
Finally, you can choose whether you want to schedule the report generation at a later<br />
time. When you have set the output options as desired, click on the button at the<br />
lower right to start generating the report, or to activate the scheduled report job.<br />
back to table of contents<br />
28
2<br />
manual<br />
5.3 Report Progress<br />
The window shown above displays the progress of<br />
the report generation. Click on the left button to<br />
open the output folder, or the right button to cancel<br />
the operation. If you cancel the report, <strong>RF3D</strong><br />
WifiPlanner 2 asks you whether you want to delete<br />
any output files already created.<br />
6 Advanced Settings<br />
6.1 Editing Wall and Floor Libraries<br />
The properties and settings of wall and floor materials are stored in the library. You<br />
can easily edit and expand this library. Each type of wall or floor is saved in a separate<br />
XML file. These files are contained in the folder <strong>RF3D</strong>WifiPlanner/WallsFloors.<br />
The names of the wall and floor files must follow certain rules in order to be recognized<br />
by the <strong>RF3D</strong> WifiPlanner 2 program. Example: ft_003_6-_Brick_7_18dB. The file name must<br />
begin with ‚ft‘ or ‚m‘ to indicate whether this wall or floor is defined in feet or in meters.<br />
The wall or floor is then available in the Toolbox only when the same measurement unit<br />
is selected in the program options. The next part of the file name after the measurement<br />
unit abbreviation is an underscore followed by a three-digit number. This number<br />
determines the position at which the given wall or floor type appears in the toolbox list.<br />
After another underscore comes the name you want to use for this wall or floor type.<br />
The best way to create a wall or floor type is to find a file that defines a similar, existing<br />
type, open it in Notepad, and save it under a new name before editing its contents.<br />
The lines you can edit are explained with examples below.<br />
The Type line defines the name displayed in the Toolbox.<br />
6“ Brick 7/18dB<br />
The DampA_dB line indicates the signal attenuation through such a wall or floor in dB<br />
in the 5 GHz band used for 802.11 a and h networks.<br />
7<br />
The DampBG_dB line indicates the signal attenuation through such a wall or floor in<br />
dB in the 2.4 GHz band used for 802.11 b and g networks.<br />
18<br />
The GaugeFeet line indicates the thickness of the wall or floor in feet. If you enter a<br />
non-zero value here, you should enter zero in the GaugeMeter line below.<br />
0.5<br />
back to table of contents<br />
29
2<br />
manual<br />
The GaugeMeter line indicates the thickness of the wall or floor in meters. If you enter<br />
a non-zero value here, you should enter zero in the GaugeFeet line above.<br />
0<br />
The knownColor line defines the color in which you will draw the wall or floor in the level<br />
plans. For permissible color names, see the table in Appendix c.<br />
142<br />
The IsFloor line determines whether the building element described in this file is a wall<br />
or a floor. If IsFloor is true, it‘s a floor. If IsFloor is false, the file describes a wall.<br />
false<br />
If you have edited a copy of an existing library file, you must leave all other parts of<br />
the file unchanged. Otherwise, the program may behave unexpectedly.<br />
6.2 Editing the Antenna Library<br />
The antenna library, like the wall and floor library, is stored in the form of individual files<br />
for each antenna type. These files are contained in the folder <strong>RF3D</strong>WifiPlanner/Antennas,<br />
and can be edited with Notepad. The best way to create an antenna type<br />
is to find the file that defines a similar, existing type, open it in Notepad, and save it<br />
under a new name before editing its contents.<br />
Any antenna can be defined for the 2.4 GHz band, the 5 GHz band, or both bands.<br />
The example used in the following explanation defines an antenna for the 2.4 GHz<br />
band only.<br />
An antenna file describes the antenna‘s radiation pattern in terms of its horizontal<br />
and vertical cross-sections, as well as some additional parameters. The antenna‘s<br />
radiation pattern must be described for the antenna‘s normal installation orientation.<br />
Theta (θ) represents the upward elevation angle from the horizontal plane in degrees.<br />
Negative values indicate downward elevation. Phi (φ) designates the azimuth angle<br />
in degrees — that is, the rotational angle in the horizontal plane, where positive values<br />
represent a clockwise rotation from 12 o‘clock. Directional antennas should be<br />
described so that their greatest gain is at phi=0° and theta=0°.<br />
You can enter as many directional gain values (data points) as you want, and the<br />
number of data points only has to be entered in a few places, as described below.<br />
The data points you specify can also be at any angles desired, and their distribution<br />
can vary within an antenna file. However, both the precision of the program display<br />
and the time required to recompute and refresh the display increase as the number<br />
of data points increases.<br />
In computing the antenna gain, the program adds the directional gain in dBi to the<br />
global gain (in the example, 4 dBi). This means that the directional gain value should<br />
be normalized to 0 dBi.<br />
Please note that the decimal point must be a period (‚.‘). Note too that the tags and<br />
values are case-sensitive.<br />
back to table of contents<br />
30
2<br />
manual<br />
The Type line contains the text displayed for this antenna type in the toolbox.<br />
SOA 2400/360/4/0/DS<br />
The TypeShort line is not currently used in the program. You can use it for your comments.<br />
Bild 6, 139.26.0044<br />
The Gain_dB_2_4GHz line defines the antenna gain in the 2.4 GHz band.<br />
4<br />
The IsZIsotropic_2_4GHz line indicates whether the antenna is approximately omnidirectional<br />
in the horizontal plane in the 2.4 GHz band. The value true indicates that its radiation<br />
pattern is roughly rotationally symmetric with respect to the vertical axis.<br />
true<br />
The Gain_dB_5GHz line defines the antenna gain in the 5 GHz band.<br />
0<br />
The IsZIsotropic_5GHz line indicates whether the antenna is approximately omnidirectional<br />
in the horizontal plane in the 5 GHz band. The value true indicates that its radiation<br />
pattern is roughly rotationally symmetric with respect to the vertical axis.<br />
false<br />
The Is2_4GHz line specifies whether the antenna can be used in the 2.4 GHz band.<br />
true<br />
The Is5GHz line specifies whether the antenna can be used in the 5 GHz band.<br />
false<br />
The next few lines are references to data defined later in the file. Do not change these lines!<br />
<br />
<br />
<br />
<br />
<br />
<br />
<br />
<br />
<br />
<br />
0<br />
back to table of contents<br />
31
2<br />
manual<br />
The knownColor line specifies the color in which the given antenna is displayed in<br />
the level plans. For the permissible color values, see Appendix C.<br />
59<br />
1<br />
<br />
<br />
The array, or list of values, which follows contains phi values (angle measures in degrees)<br />
for 72 data points at 2.4 GHz. If you use a different number of data points,<br />
replace the „72“ in this line with the number of data points you want to define.<br />
<br />
-180<br />
-175<br />
-170<br />
.<br />
.<br />
.<br />
165<br />
170<br />
175<br />
<br />
The next array, with the attribute id=“ref-7“, contains theta values (angle measures in<br />
degrees) for 72 data points at 2.4 GHz.<br />
<br />
-90<br />
-85<br />
-80<br />
.<br />
.<br />
.<br />
255<br />
260<br />
265<br />
<br />
The next array, with the attribute id=“ref-8“, contains gain values in dBi for the values<br />
of phi listed above, representing 72 data points at 2.4 GHz.<br />
<br />
-2.381<br />
-2.399<br />
-2.388<br />
.<br />
.<br />
.<br />
back to table of contents<br />
32
2<br />
manual<br />
-2.005<br />
-2.175<br />
-2.303<br />
<br />
The next array, with the attribute id=“ref-9“, contains gain values in dBi for the values<br />
of theta listed above, representing 72 data points at 2.4 GHz.<br />
<br />
-16.683<br />
-12.24<br />
-7.157<br />
.<br />
.<br />
.<br />
-5.032<br />
-7.721<br />
-12.307<br />
<br />
The next array, with the attribute id=“ref-10“, contains a phi value (angle measure in<br />
degrees) for one data point at 5 GHz. This array is rudimentary, since the antenna is<br />
not used for the 5 GHz band.<br />
<br />
0<br />
<br />
The next array, with the attribute id=“ref-11“, contains a theta value (angle measure<br />
in degrees) for one data point at 5 GHz.<br />
<br />
0<br />
<br />
The next array, with the attribute id=“ref-12“, contains a gain value in dBi for the value<br />
of phi listed above, representing one data point at 5 GHz.<br />
<br />
0<br />
<br />
The next array, with the attribute id=“ref-13“, contains a gain value in dBi for the value<br />
of theta listed above, representing one data point at 5 GHz.<br />
<br />
0<br />
<br />
All other lines in the file must remain unchanged.<br />
back to table of contents<br />
33
2<br />
manual<br />
6.3 Editing the Access Point Library<br />
The Access Point database contains information about access points in the<br />
form of SOAP messages in the easily editable XML format. We recommend you<br />
do not change the number of transmitters in an access point. If you corrupt<br />
the format of the access point definitions, <strong>RF3D</strong> WifiPlanner 2 will be unable to<br />
process them.<br />
The Type element contains the text displayed for the given<br />
access point type in the Toolbox.<br />
Generic n DualBand AccessPoint<br />
The DiversityGain element indicates the effective gain achieved by signal separation.<br />
0<br />
The NumAntennaSockets element indicates the number of radio transceivers in the<br />
access point.<br />
2<br />
The isN element indicates whether the access point supports 802.11n.<br />
true<br />
The minStreams element indicates the minimum number of spatial streams in an<br />
802.11n access point’s configuration.<br />
1<br />
The maxStreams element indicates the maximum number of spatial streams in an<br />
802.11n access point’s configuration.<br />
4<br />
The defStreams element indicates the number of spatial streams used in an 802.11n<br />
access point’s default configuration.<br />
2<br />
The defSGI element indicates whether the short guard interval is enabled in an<br />
802.11n access point’s default configuration.<br />
true<br />
The changeSGI element indicates whether the short guard interval can be enabled<br />
and disabled in an 802.11n access point’s configuration.<br />
true<br />
back to table of contents<br />
34
2<br />
manual<br />
The defGFM element indicates whether the “greenfield” or high-throughput mode is<br />
enabled in an 802.11n access point’s default configuration.<br />
false<br />
The changeGFM element indicates whether the “greenfield” or high-throughput<br />
mode can be enabled and disabled in an 802.11n access point’s configuration.<br />
true<br />
The defChanBond element indicates whether channel bonding is enabled in an<br />
802.11n access point’s default configuration.<br />
true<br />
The changeChanBond element indicates whether channel bonding can be enabled<br />
and disabled in an 802.11n access point’s configuration.<br />
true<br />
The XML elements used to specify the characteristics of an access point’s individual<br />
radio transceivers are described below.<br />
The defTXmW element indicates the transmitter power setting, in milliwatts, in the<br />
access point’s default configuration.<br />
50<br />
The minTXmW element indicates the minimum configurable power of the given<br />
transmitter, in milliwatts.<br />
1<br />
The maxTXmW element indicates the maximum configurable power of the given<br />
transmitter, in milliwatts.<br />
100<br />
The is2_4Ghz element indicates whether the transceiver uses the 2.4 GHz band.<br />
true<br />
The is5Ghz element indicates whether the transceiver uses the 5 GHz band.<br />
false<br />
The isN element indicates whether the transceiver supports the 802.11n standard.<br />
true<br />
back to table of contents<br />
35
2<br />
manual<br />
The ChanBondState element indicates the initial setting of an 802.11n transceiver’s<br />
channel bonding option.<br />
true<br />
The SGIState element indicates the initial setting of an 802.11n transceiver’s short<br />
guard interval option.<br />
true<br />
The GFmode element indicates the initial setting of an 802.11n transceiver’s greenfield<br />
mode option.<br />
false<br />
The NumStreams element indicates the initial number of spatial streams used by an<br />
802.11n transceiver.<br />
2<br />
6.4 Options and Settings<br />
To adjust other program settings, select the the menu command Tools/Options. The<br />
Country option group allows you to set appropriate parameters for the country where<br />
you are located. The Geometry option group lets you specify default values for the<br />
height of new access points above the floor, the vertical distance between floors,<br />
etc. The options in the Graphics group allow you to set display properties, and the<br />
Physics option group allows you to set basic physical parameters for radio signal calculations.<br />
Finally, the options in the Printer group allow you to control how your planning<br />
diagrams are printed.<br />
back to table of contents<br />
36
2<br />
manual<br />
To change any setting, click on the existing value. A description of the parameter appears<br />
in the box below the options list. After you have changed one or more of these<br />
settings, you must exit the program and restart it for your new settings to take effect.<br />
To reset all options to their original values, click the „Defaults“ button.<br />
6.5 Floors with Openings<br />
Some buildings have open areas in the floors, such as inner courtyards. Such areas<br />
must be left open in your plans as well in order for interference to be computed correctly.<br />
You can draw floors with open areas as follows: First, draw some of the edges<br />
of the floor along the outer walls, but do not complete the polygon. Then draw the<br />
edges of the open space in the interior.<br />
back to table of contents<br />
37
2<br />
manual<br />
In this way you can draw the floor in one piece while leaving an interior area open.<br />
6.6 Split-Level Buildings<br />
To represent buildings with split levels, import a drawing for each partial level and<br />
draw in partial floors for the existing floor areas. Remember, though, that walls you<br />
draw in on a lower level extend only to the height of the next higher level, even if they<br />
do not meet a floor there. If your building has walls that extend through a split level,<br />
you must draw them on the lower level and again in the unfloored space on the next<br />
higher, partially floored level.<br />
back to table of contents<br />
38
2<br />
manual<br />
Appendix A The Antenna Library<br />
Antenna Diagrams<br />
The Antenna Diagrams for Generic Antenna included in the <strong>RF3D</strong> WifiPlanner 2<br />
Antenna Library<br />
Generic Access Point w/ Dipole Ant a/b/g 2dBi<br />
Horizontal section of a/b/g Net<br />
Vertical section of a/b/g Net<br />
back to table of contents<br />
39
2<br />
manual<br />
Generic Antenna a/b/g 7dBi Omni<br />
Horizontal section of b/g Net<br />
Vertical section of b/g Net<br />
back to table of contents<br />
40
2<br />
manual<br />
Horizontal section of a/h Net<br />
Vertical section of a/h Net<br />
back to table of contents<br />
41
2<br />
manual<br />
Generic Antenna a/b/g 8dBi directional<br />
Horizontal section of a/b/g Net<br />
Vertical section of a/b/g Net<br />
back to table of contents<br />
42
2<br />
manual<br />
Generic Antenna a/b/g 13,9 dBi Directional Yagi<br />
Horizontal section of a/b/g Net<br />
Vertical section of a/b/g Net<br />
back to table of contents<br />
43
2<br />
manual<br />
Generic Antenna a/b/g 18 dBi Directional<br />
Horizontal section of a/b/g Net<br />
Vertical section of a/b/g Net<br />
back to table of contents<br />
44
2<br />
manual<br />
Appendix B The Wall and Floor Library<br />
List of wall & floor materials measurement unit: feet<br />
Floor /<br />
Wall<br />
Att. 2.4<br />
GHz<br />
[dB]<br />
Att. 5<br />
GHz<br />
[dB]<br />
Thickness<br />
[in]<br />
<strong>RF3D</strong><br />
Toolbox Text<br />
Wall 16,0 24,0 8 8“ Concrete Block w/<br />
Steel 16/24dB<br />
Wall 22,0 33,0 12 12“ Concrete Block w/<br />
Steel 22/33dB<br />
Nr <strong>RF3D</strong><br />
Nr <strong>RF3D</strong><br />
Lite<br />
Color-<br />
Code<br />
Discribtion<br />
1 1 144 Concrete block, when reinforced with concrete columns<br />
and tie beams, is a very common building material for<br />
the load-bearing walls of buildings, in what is termed CBS<br />
construction for Concrete Block Structure.<br />
2 2 146 Concrete block, when reinforced with concrete columns<br />
and tie beams, is a very common building material for<br />
the load-bearing walls of buildings, in what is termed CBS<br />
construction for Concrete Block Structure.<br />
Wall 7,0 18,0 6 6“ Brick 7/18dB 3 3 142 Brick wall<br />
Wall 10,0 25,0 10 10“ Brick 10/25dB 4 83 Brick wall<br />
Wall 13,0 32,5 20 20“ Brick 13/32.5dB 5 39 Brick wall<br />
Wall 17,0 25,5 8 8“ Concrete w/Steel 6 6 102 Steel reinforced concrete wall<br />
17/25dB<br />
Wall 24,0 36,0 12 12“ Concrete w/Steel 7 7 101 Steel reinforced concrete wall<br />
24/36dB<br />
Wall 33,0 49,5 16 16“ Concrete w/Steel 8 8 68 Steel reinforced concrete wall<br />
33/50dB<br />
Wall 2,0 3,0 8 8“ Light-Weight Concrete<br />
w/Steel 2/3dB<br />
9 61 Light-weight concrete wall<br />
Wall 0,8 0,8 N/A 5“ Drywall (2 sides)<br />
Over Framing .8/0.8dB<br />
Wall 0,8 0,8 N/A 7“ Drywall (2 sides)<br />
Over Framing .8/0.8dB<br />
Wall 1,5 1,5 N/A 4“ Plywood (1<br />
side) Over Framing<br />
1.5/1.5dB<br />
Wall 3,0 3,0 N/A 4.5“ Plywood (2 sides)<br />
Over Framing 3/3dB<br />
Wall 15,0 15,0 1 1“ Stucco Over 2x4<br />
Wood or Steel 15/15dB<br />
Wall 3,0 4,5 1 Window-1“ Dual Glazed<br />
3/4.5dB<br />
Wall 28,0 42,0 1 Window-1“ IR-blocking<br />
28/42dB<br />
Wall 2,0 3,0 2“-4“ Office divider<br />
glass/wood 2/3dB<br />
Wall 1,0 1,5 2 2“ Office cubical<br />
1/1.5dB<br />
Wall 1,5 2,3 36 Shelf/Rack 3‘<br />
1.5/2.25dB<br />
10 10 97 Drywall, also commonly known as gypsum board, plasterboard.<br />
A drywall panel is made of a paper liner wrapped<br />
around an inner core made primarily from gypsum plaster.<br />
11 11 92 Drywall, also commonly known as gypsum board, plasterboard.<br />
A drywall panel is made of a paper liner wrapped<br />
around an inner core made primarily from gypsum plaster.<br />
12 80 One layer Plywood wall<br />
13 53 Two layer Plywood wall<br />
14 14 95 Modern Stucco usually consists of 1 layer of wire lath and<br />
2 layers of portland cement-based plaster<br />
15 91 Glass window<br />
16 69 Infrared blocking window<br />
17 127 Office divider<br />
18 128 Office divider<br />
19 56 Shelf/rack<br />
Wall 3,0 4,5 72 Shelf/Rack 6‘ 3/4.5dB 20 125 Shelf/rack<br />
Wall 4,0 6,0 96 Shelf/Rack 8‘ 4/6dB 21 126 Shelf/rack<br />
Wall 30,0 45,0 Wall or Ceiling-Corrugated<br />
Steel 30/45dB<br />
22 62 Metal wall sheeting in the form of Corrugated galvanized<br />
iron<br />
Wall 30,0 45,0 Elevator shaft 30/45dB 23 23 35 Elevator shaft<br />
Floor 17,0 25,5 8 8“ Concrete w/Steel 100 100 102 Steel reinforced concrete floors<br />
17/25.5dB<br />
Floor 18,0 27,0 8 8“ Concrete/Steel<br />
w/Nonmetallic Drop<br />
Ceiling 18/27dB<br />
Floor 27,0 40,0 8 8“ Concrete/Steel w/<br />
Metallic Drop Ceiling<br />
27/40dB<br />
Floor 20,0 30,0 10 10“ Concrete w/Steel<br />
20/30dB<br />
Floor 21,0 31,5 10 10“ Concrete/Steel<br />
w/Nonmetallic Drop<br />
Ceiling 21/31dB<br />
101 101 152 Steel reinforced concrete floors with nonmetallic dropped<br />
ceiling<br />
102 82 Steel reinforced concrete floors with metallic dropped<br />
ceiling<br />
103 103 101 Steel reinforced concrete floors<br />
104 104 156 Steel reinforced concrete floors with nonmetallic dropped<br />
ceiling<br />
back to table of contents<br />
45
2<br />
manual<br />
Floor /<br />
Wall<br />
Att. 2.4<br />
GHz<br />
[dB]<br />
Att. 5<br />
GHz<br />
[dB]<br />
Thickness<br />
[in]<br />
<strong>RF3D</strong><br />
Toolbox Text<br />
Floor 30,0 45,0 10 10“ Concrete/Steel w/<br />
Metallic Drop Ceiling<br />
30/45dB<br />
Floor 24,0 36,0 12 12“ Concrete w/Steel<br />
24/36dB<br />
Floor 25,0 37,5 12 12“ Concrete/Steel<br />
w/Nonmetallic Drop<br />
Ceiling 25/37dB<br />
Floor 34,0 51,0 12 12“ Concrete/Steel w/<br />
Metallic Drop Ceiling<br />
34/51dB<br />
Floor 4,0 6,0 1,5 1.5“ Wood Flooring w/<br />
Subfloor 4/6dB<br />
Floor 6,0 8,0 1,5 1.5“ Tile w/ Subfloor<br />
6/8dB<br />
Nr <strong>RF3D</strong><br />
Nr <strong>RF3D</strong><br />
Lite<br />
Color-<br />
Code<br />
Discribtion<br />
105 55 Steel reinforced concrete floors with metallic dropped<br />
ceiling<br />
106 106 68 Steel reinforced concrete floors<br />
107 107 162 Steel reinforced concrete floors with nonmetallic dropped<br />
ceiling<br />
108 84 Steel reinforced concrete floors with metallic dropped<br />
ceiling<br />
120 53 Wood Flooring with subfloor<br />
121 60 Tile with subfloors<br />
back to table of contents<br />
46
2<br />
manual<br />
List of wall & floor materials measurement unit: meter<br />
Floor /<br />
Wall<br />
Att. 2.4<br />
GHz<br />
[dB]<br />
Att. 5<br />
GHz<br />
[dB]<br />
(Mean)<br />
Thickness<br />
cm<br />
<strong>RF3D</strong> Text Nr Lite Nr Color-<br />
Code<br />
Comment<br />
Wall 8 20 18 Brick wall 18cm 8/20dB 1 1 142 Brick wall<br />
Wall 10 25 25 Brick wall 25cm 10/25dB 2 2 83 Brick wall<br />
Wall 13 32,5 50 Brick wall 50cm 13/32.5dB 3 3 39 Brick wall<br />
Wall 15 22,5 18 Steel reinforced concrete wall<br />
18cm 15/22.5dB<br />
4 4 102 Steel reinforced concrete wall<br />
Wall 20 30 25 Steel reinforced concrete wall<br />
25cm 20/30dB<br />
5 5 101 Steel reinforced concrete wall<br />
Wall 25 37,5 31 Steel reinforced concrete wall<br />
31cm 25/37.5dB<br />
6 6 68 Steel reinforced concrete wall<br />
Wall 2 3 18 Light-Weight concrete/gas concrete<br />
18cm 2/3dB<br />
7 61 Light-weight concrete wall<br />
Wall 0,8 0,8 N/A Dry wall/1.5cm plasterboard<br />
each side 0.8/0.8dB<br />
Wall 1,6 1,6 N/A Dry wall/3.0 cm plasterboard at<br />
each side 1.6/1.6dB<br />
8 8 97 Drywall, also commonly known as gypsum<br />
board, plasterboard. A drywall panel<br />
is made of a paper liner wrapped<br />
around an inner core made primarily<br />
from gypsum plaster.<br />
9 9 92 Drywall, also commonly known as gypsum<br />
board, plasterboard. A drywall panel<br />
is made of a paper liner wrapped<br />
around an inner core made primarily<br />
from gypsum plaster.<br />
Wall 4 6 3,8 Wood Wall 3.8cm 4/6dB 10 80 One layer wood wall<br />
Wall 8 12 N/A Wood Wall/3.8cm each side<br />
8/12dB<br />
11 53 Two layer wood wall<br />
Wall 15 15 2,6 Stucco wall 2.6cm 15/15dB 12 95 Modern Stucco usually consists of 1 layer<br />
of wire lath and 2 layers of portland<br />
cement-based plaster<br />
Wall 3 4,5 3 Double Glazed Window 3cm<br />
3/4.5dB<br />
14 91 Glass window<br />
Wall 28 42 3 IR-blocking<br />
28/42dB<br />
Window 3cm 15 69 Infrared blocking window<br />
Wall 2 3 N/A Office divider<br />
5-10cm 2/3dB<br />
glass/wood 16 127 Office divider<br />
Wall 1 1,5 5 Office cubical 5cm 1/1.5dB 17 128 Office divider<br />
Wall 1,6 2,4 100 High rise rack 100cm 1.6/2.4dB 18 56 High rise rack approx 1m thick<br />
Wall 30 45 N/A Profiled sheeting 30/45dB 18 62 Metal wall sheeting in the form of Corrugated<br />
galvanized iron<br />
Wall 30 45 N/A Elevator shaft 30/45dB 20 20 35 Elevator shaft<br />
Floor 15 22,5 18 Steel reinforced concrete floor<br />
18cm 15/22.5dB<br />
Floor 16 24 18 Srcf with nonmetallic dropped<br />
ceiling 18cm 16/24dB<br />
Floor 25 37,5 18 Srcf with metallic dropped ceiling<br />
18cm 25/37.5dB<br />
Floor 20 30 25 Steel reinforced concrete floor<br />
25cm 20/30dB<br />
Floor 21 31,5 25 Srcf with nonmetallic dropped<br />
ceiling 25cm 21/31.5dB<br />
Floor 30 45 25 Srcf with metallic dropped ceiling<br />
25cm 30/45dB<br />
Floor 25 37,5 31 Steel reinforced concrete floor<br />
31cm 25/37.5dB<br />
Floor 26 39 31 Srcf with nonmetallic dropped<br />
ceiling 31cm 26/39dB<br />
Floor 35 52,5 31 Srcf with metallic dropped ceiling<br />
31cm 35/52.5dB<br />
Floor 4 6 3,8 Wood floor (w/ or w/o carpet)<br />
3.8cm 4/6dB<br />
Floor 6 8 4,5 Wood floor with tiles 4.5cm<br />
6/8dB<br />
100 100 102 Steel reinforced concrete floors<br />
101 101 152 Steel reinforced concrete floors with<br />
nonmetallic dropped ceiling<br />
102 82 Steel reinforced concrete floors with metallic<br />
dropped ceiling<br />
103 103 101 Steel reinforced concrete floors<br />
104 104 156 Steel reinforced concrete floors with<br />
nonmetallic dropped ceiling<br />
105 55 Steel reinforced concrete floors with metallic<br />
dropped ceiling<br />
106 106 68 Steel reinforced concrete floors<br />
107 107 162 Steel reinforced concrete floors with<br />
nonmetallic dropped ceiling<br />
108 84 Steel reinforced concrete floors with metallic<br />
dropped ceiling<br />
120 53 Wood Flooring with carpet<br />
121 60 Wood Flooring with tiles<br />
back to table of contents<br />
47
2<br />
manual<br />
Appendix C Table of Colors<br />
Color knownColor R G B A<br />
Aqua 30 0 255 255 255<br />
Aquamarine 31 127 255 212 255<br />
Black 35 0 0 0 255<br />
BlanchedAlmond 36 255 235 205 255<br />
Blue 37 0 0 255 255<br />
BlueViolet 38 138 43 226 255<br />
Brown 39 165 42 42 255<br />
BurlyWood 40 222 184 135 255<br />
CadetBlue 41 95 158 160 255<br />
Chartreuse 42 127 255 0 255<br />
Chocolate 43 210 105 30 255<br />
Coral 44 255 127 80 255<br />
CornflowerBlue 45 100 149 237 255<br />
Crimson 47 220 20 60 255<br />
Cyan 48 0 255 255 255<br />
DarkBlue 49 0 0 139 255<br />
DarkCyan 50 0 139 139 255<br />
DarkGoldenrod 51 184 134 11 255<br />
DarkGray 52 169 169 169 255<br />
DarkGreen 53 0 100 0 255<br />
DarkKhaki 54 189 183 107 255<br />
DarkMagenta 55 139 0 139 255<br />
DarkOliveGreen 56 85 107 47 255<br />
DarkOrange 57 255 140 0 255<br />
DarkOrchid 58 153 50 204 255<br />
DarkRed 59 139 0 0 255<br />
DarkSalmon 60 233 150 122 255<br />
DarkSeaGreen 61 143 188 139 255<br />
DarkSlateBlue 62 72 61 139 255<br />
DarkSlateGray 63 47 79 79 255<br />
DarkTurquoise 64 0 206 209 255<br />
DarkViolet 65 148 0 211 255<br />
DeepPink 66 255 20 147 255<br />
DeepSkyBlue 67 0 191 255 255<br />
DimGray 68 105 105 105 255<br />
DodgerBlue 69 30 144 255 255<br />
Firebrick 70 178 34 34 255<br />
ForestGreen 72 34 139 34 255<br />
Fuchsia 73 255 0 255 255<br />
Gold 76 255 215 0 255<br />
Goldenrod 77 218 165 32 255<br />
Gray 78 128 128 128 255<br />
Green 79 0 128 0 255<br />
GreenYellow 80 173 255 47 255<br />
back to table of contents<br />
48
2<br />
manual<br />
Color knownColor R G B A<br />
HotPink 82 255 105 180 255<br />
IndianRed 83 205 92 92 255<br />
Indigo 84 75 0 130 255<br />
Khaki 86 240 230 140 255<br />
LawnGreen 89 124 252 0 255<br />
LightBlue 91 173 216 230 255<br />
LightCoral 92 240 128 128 255<br />
LightGray 95 211 211 211 255<br />
LightGreen 96 144 238 144 255<br />
LightPink 97 255 182 193 255<br />
LightSalmon 98 255 160 122 255<br />
LightSeaGreen 99 32 178 170 255<br />
LightSkyBlue 100 135 206 250 255<br />
LightSlateGray 101 119 136 153 255<br />
LightSteelBlue 102 176 196 222 255<br />
Lime 104 0 255 0 255<br />
LimeGreen 105 50 205 50 255<br />
Magenta 107 255 0 255 255<br />
Maroon 108 128 0 0 255<br />
MediumAquamarine 109 102 205 170 255<br />
MediumBlue 110 0 0 205 255<br />
MediumOrchid 111 186 85 211 255<br />
MediumPurple 112 147 112 219 255<br />
MediumSeaGreen 113 60 179 113 255<br />
MediumSlateBlue 114 123 104 238 255<br />
MediumSpringGreen 115 0 250 154 255<br />
MediumTurquoise 116 72 209 204 255<br />
MediumVioletRed 117 199 21 133 255<br />
MidnightBlue 118 25 25 112 255<br />
Moccasin 121 255 228 181 255<br />
NavajoWhite 122 255 222 173 255<br />
Navy 123 0 0 128 255<br />
Olive 125 128 128 0 255<br />
OliveDrab 126 107 142 35 255<br />
Orange 127 255 165 0 255<br />
OrangeRed 128 255 69 0 255<br />
Orchid 129 218 112 214 255<br />
PaleGoldenrod 130 238 232 170 255<br />
PaleGreen 131 152 251 152 255<br />
PaleTurquoise 132 175 238 238 255<br />
PaleVioletRed 133 219 112 147 255<br />
PeachPuff 135 255 218 185 255<br />
Peru 136 205 133 63 255<br />
Pink 137 255 192 203 255<br />
Plum 138 221 160 221 255<br />
PowderBlue 139 176 224 230 255<br />
back to table of contents<br />
49
2<br />
manual<br />
Color knownColor R G B A<br />
Purple 140 128 0 128 255<br />
Red 141 255 0 0 255<br />
RosyBrown 142 188 143 143 255<br />
RoyalBlue 143 65 105 225 255<br />
SaddleBrown 144 139 69 19 255<br />
Salmon 145 250 128 114 255<br />
SandyBrown 146 244 164 96 255<br />
SeaGreen 147 46 139 87 255<br />
Sienna 149 160 82 45 255<br />
Silver 150 192 192 192 255<br />
SkyBlue 151 135 206 235 255<br />
SlateBlue 152 106 90 205 255<br />
SlateGray 153 112 128 144 255<br />
SpringGreen 155 0 255 127 255<br />
SteelBlue 156 70 130 180 255<br />
Tan 157 210 180 140 255<br />
Teal 158 0 128 128 255<br />
Thistle 159 216 191 216 255<br />
Tomato 160 255 99 71 255<br />
Turquoise 161 64 224 208 255<br />
Violet 162 238 130 238 255<br />
White 164 255 255 255 255<br />
Yellow 166 255 255 0 255<br />
YellowGreen 167 154 205 50 255<br />
back to table of contents<br />
50
2<br />
manual<br />
Appendix D EULA<br />
PSIBER DATA END USER SOFTWARE LICENSE AGREEMENT<br />
IF YOU DO NOT AGREE, DO NOT USE THIS SOFTWARE.<br />
This Software Agreement („Agreement“) is between You (either an individual or an entity), the<br />
End User, and <strong>Psiber</strong> <strong>Data</strong> GmbH („<strong>Psiber</strong>“). The Agreement authorizes you to use the Software<br />
specified in Clause 1 below, which may be stored on physical media, sent to You by electronic<br />
mail, downloaded from <strong>Psiber</strong>‘s Web pages or Servers or from other sources under the terms and<br />
conditions set forth below. This is an agreement on end user rights and not an agreement for sale or<br />
resale. <strong>Psiber</strong> continues to own the copy of the Software and the physical media contained in the<br />
sales package and any other copy that You are authorised to make pursuant to this Agreement.<br />
Read this Agreement carefully before installing, downloading or using the Software. By using,<br />
copying or distributing all or any portion of the <strong>Psiber</strong> Software, You agree to the terms and conditions<br />
of this Agreement. If You do not agree to all of the terms and conditions of this Agreement<br />
then do not use this software, cancel the installation or downloading, or destroy or return the<br />
Software and accompanying documentation to <strong>Psiber</strong>. YOU AGREE THAT YOUR USE OF THE SOFT-<br />
WARE ACKNOWLEDGES THAT YOU HAVE READ THIS AGREEMENT, UNDERSTAND IT, AND AGREE TO BE<br />
BOUND BY ITS TERMS AND CONDITIONS.<br />
1. DEFINITIONS<br />
As used in this Agreement, the term „Software“ means, collectively: (i) all of the contents of the<br />
files (provided either by electronic download, on physical media or any other method of distribution),<br />
disk(s), CD/DVD-ROM(s) or other media with which this Agreement is provided, (ii) all the<br />
contents of the disk(s), CD-ROM(s), electronic mail and its file attachments, including the object<br />
code form of the software delivered on physical media, electronic mail or Web page (iii) digital<br />
images, stock photographs, clip art, or other artistic work („Stock Files“) (iv) related explanatory<br />
written materials and any other possible documentation related thereto („Documentation“); (v)<br />
fonts (vi) upgrades, modified versions, updates, additions (collectively „Updates“), if any, licensed<br />
to You by <strong>Psiber</strong> under this Agreement.<br />
„Use“ or „Using“ means to access, install, download, copy, or otherwise benefit from using the<br />
functionality of the Software in accordance with the Documentation. „Permitted Number“ means<br />
one (1) unless otherwise indicated under a valid license (e.g., volume license) granted by <strong>Psiber</strong>.<br />
„Computer“ means an electronic device that accepts information in digital or similar form and<br />
manipulates it for a specific result<br />
based on a sequence of instructions.<br />
2. END USER RIGHTS AND USE.<br />
<strong>Psiber</strong> grants to You a non-exclusive, non-transferable end user right to install the Software on the local<br />
hard disk(s) of one computer or other permanent storage media including a computer file server<br />
within your internal network and use the Software on a single computer or terminal at a time.<br />
3. LIMITATIONS ON END USER RIGHTS.<br />
You may not copy, distribute, or make derivative works of the Software except as follows:<br />
(a) You may make one copy of the Software on physical media as an archival backup copy,<br />
provided Your archival backup copy is not installed or used on any computer. Any other copies<br />
You make of the Software are in violation of this Agreement.<br />
back to table of contents<br />
51
2<br />
manual<br />
(b) You may not use, modify, translate, reproduce or transfer the right to use the Software or copy<br />
the Software except as expressly provided in this Agreement.<br />
(c) You may not resell, sublicense, rent, lease, lend the Software assign or transfer your rights in the<br />
Software, or authorize all or any portion of the Software to be copied onto another user‘s Computer<br />
except as may be expressly permitted herein.<br />
You may, however, transfer all your rights to Use the Software to another person or legal entity<br />
provided that: (a) you also transfer (i) this Agreement, and (ii) the Software and all other software<br />
or hardware bundled or pre-installed with the Software, including all copies, Updates and prior<br />
versions, to such person or entity, (b) you retain no copies, including backups and copies stored<br />
on a Computer, and (c) the receiving party accepts the terms and conditions of this Agreement<br />
and any other terms and conditions upon which you legally purchased a license to the Software.<br />
Notwithstanding the foregoing, you may not transfer education, pre-release, or not for resale copies<br />
of the Software.<br />
(d) You may not reverse engineer, reverse compile, disassemble or otherwise attempt to discover<br />
the source code of the Software (except to the extent that this restriction is expressly prohibited<br />
by law) or create derivative works based on the Software.<br />
(e) Unless stated otherwise in the Documentation, You shall not display, modify, reproduce and<br />
distribute any of the Stock Files included with the Software. In the event that the Documentation<br />
allows You to display the Stock Files, You shall not distribute the Stock Files on a stand-alone basis,<br />
i.e., in circumstances in which the Stock Files constitute the primary value of the product being<br />
distributed. You should review the „Read-Me“ files associated with the Stock Files that You use to<br />
ascertain what rights You have with respect to such materials. Stock Files may not be used in the<br />
production of libelous, defamatory, fraudulent, infringing, lewd, obscene or pornographic material<br />
or in any otherwise illegal manner. You may not register or claim any rights in the Stock Files or<br />
derivative works thereof.<br />
(f) You agree that You shall only use the Software in a manner that complies with all applicable<br />
laws in the jurisdiction in which You use the Software, including, but not limited to, applicable restrictions<br />
concerning copyright and other intellectual property rights.<br />
4. COPYRIGHT, INTELLECTUAL PROPERTY OWNERSHIP.<br />
The Software and all rights, without limitation including proprietary rights therein, are owned by<br />
<strong>Psiber</strong> and/or its licensors and affiliates and are protected by international treaty provisions and<br />
all other applicable national laws of the country in which it is being used. The structure, organization<br />
and code of the Software are the intellectual property, valuable trade secrets and confidential<br />
information of <strong>Psiber</strong> and/or its licensors and affiliates. You must not copy the Software, except<br />
as set forth in clause 3 (Limitations On End User Rights). Any copies which You are permitted to<br />
make pursuant to this Agreement must contain the same copyright and other proprietary notices<br />
that appear on the Software. <strong>Psiber</strong> permits you to Use the Software only in accordance with<br />
the terms of this Agreement. Use of some third party materials included in the Software may be<br />
subject to other terms and conditions typically found in a separate license agreement.<br />
5. MULTIPLE ENVIRONMENT SOFTWARE / MULTIPLE LANGUAGE SOFTWARE / DUAL MEDIA SOFTWARE /<br />
MULTIPLE COPIES / UPDATES.<br />
If the Software supports multiple platforms or languages, if You receive the Software on multiple<br />
media, of if You otherwise receive multiple copies of the Software, the number of computers on<br />
back to table of contents<br />
52
2<br />
manual<br />
which all versions of the Software are installed shall be one computer. You may not rent, lease,<br />
sublicense, lend or transfer versions or copies of the Software You do not use. If the Software is an<br />
Update to a previous version of the Software, You must possess a valid end user right to such previous<br />
version in order to use the Update and You may use the previous version for ninety (90) days<br />
after you receive the Update in order to assist You in the transition to the Update. After such time<br />
You no longer have a right to use the previous version, except for the sole purpose of enabling<br />
You to install the Update.<br />
6. COMMENCEMENT & TERMINATION.<br />
This Agreement is effective from the first date You install the Software. You may terminate this<br />
Agreement at any time by permanently deleting, destroying and returning, at your own costs,<br />
the Software, all back up copies and all related materials provided by <strong>Psiber</strong>. Your end user rights<br />
automatically and immediately terminate without notice from <strong>Psiber</strong> if You fail to comply with<br />
any provision of this Agreement. In such event, You must immediately delete, destroy or return at<br />
Your own cost, the Software, all backup copies and all related material to <strong>Psiber</strong>.<br />
7. YOU ACKNOWLEDGE THAT THE SOFTWARE IS PROVIDED „AS IS“ WITHOUT WARRANTY OF ANY KIND,<br />
EXPRESS OR IMPLIED, AND TO THE MAXIMUM EXTENT PERMITTED BY APPLICABLE LAW NEITHER PSIBER<br />
ITS LICENSORS OR AFFILIATES NOR THE COPYRIGHT HOLDERS MAKE ANY REPRESENTATIONS OR WAR-<br />
RANTIES, EXPRESS OR IMPLIED, INCLUDING BUT NOT LIMITED TO THE WARRANTIES OF MERCHANTABI-<br />
LITY OR FITNESS FOR A PARTICULAR PURPOSE OR THAT THE SOFTWARE WILL NOT INFRINGE ANY THIRD<br />
PARTY PATENTS, COPYRIGHTS, TRADEMARKS OR OTHER RIGHTS. THERE IS NO WARRANTY BY PSIBER<br />
OR BY ANY OTHER PARTY THAT THE FUNCTIONS CONTAINED IN THE SOFTWARE WILL MEET YOUR RE-<br />
QUIREMENTS OR THAT THE OPERATION OF THE SOFTWARE WILL BE UNINTERRUPTED OR ERROR-FREE.<br />
YOU ASSUME ALL RESPONSIBILITY AND RISK FOR THE SELECTION OF THE SOFTWARE TO ACHIEVE YOUR<br />
INTENDED RESULTS AND FOR THE INSTALLATION, USE AND RESULTS OBTAINED FROM IT.<br />
LIMITED WARRANTY FOR USERS RESIDING IN GERMANY OR AUSTRIA. If you obtained the Software<br />
in Germany or Austria, and you usually reside in such country, then the paragraph above under<br />
Section 7 does not apply, instead, <strong>Psiber</strong> warrants that the Software provides the functionalities<br />
set forth in the Documentation (the „agreed upon functionalities“) for the limited warranty period<br />
following receipt of the Software when used on the recommended hardware configuration.<br />
As used in this Section, „limited warranty period“ means one (1) year if you are a business user<br />
and two (2) years if you are not a business user. Non-substantial variation from the agreed upon<br />
functionalities shall not be considered and does not establish any warranty rights. THIS LIMITED<br />
WARRANTY DOES NOT APPLY TO SOFTWARE PROVIDED TO YOU FREE OF CHARGE, FOR EXAMPLE,<br />
UPDATES, PRE-RELEASE, TRYOUT, PRODUCT SAMPLER, NOT FOR RESALE (NFR) COPIES OF SOFTWARE,<br />
OR SOFTWARE THAT HAS BEEN ALTERED BY YOU, TO THE EXTENT SUCH ALTERATIONS CAUSED A DE-<br />
FECT. To make a warranty claim, during the limited warranty period you must return, at our expense,<br />
the Software and proof of purchase to the location where you obtained it. If the functionalities<br />
of the Software vary substantially from the agreed upon functionalities, <strong>Psiber</strong> is entitled -- by way<br />
of re-performance and at its own discretion -- to repair or replace the Software. If this fails, you are<br />
entitled to a reduction of the purchase price (reduction) or to cancel the purchase agreement<br />
(rescission).<br />
The provisions of Section 7 and Section 9 shall survive the termination of this Agreement, howsoever<br />
caused, but this shall not imply or create any continued right to Use the Software after<br />
termination of this Agreement.<br />
8. NO OTHER OBLIGATIONS.<br />
This Agreement creates no obligations on the part of <strong>Psiber</strong> other than as specifically set forth<br />
herein.<br />
back to table of contents<br />
53
2<br />
manual<br />
9. LIMITATION OF LIABILITY.<br />
TO THE MAXIMUM EXTENT PERMITTED BY APPLICABLE LAW, IN NO EVENT SHALL PSIBER, ITS EMPLO-<br />
YEES OR LICENSORS OR AFFILIATES BE LIABLE FOR ANY DAMAGES, CLAIMS OR COSTS, ANY LOST<br />
PROFITS, REVENUE, SALES, DATA OR COSTS OF PROCUREMENT OF SUBSTITUTE GOODS OR SERVICES,<br />
PROPERTY DAMAGE, PERSONAL INJURY, INTERRUPTION OF BUSINESS, LOSS OF BUSINESS INFORMA-<br />
TION OR FOR ANY SPECIAL, DIRECT, INDIRECT, INCIDENTAL, ECONOMIC, COVER, PUNITIVE, SPECIAL<br />
OR CONSEQUENTIAL DAMAGES, HOWEVER CAUSED AND WHETHER ARISING UNDER CONTRACT,<br />
TORT, NEGLIGENCE, OR OTHER THEORY OF LIABILITY ARISING OUT OF THE USE OF OR INABILITY TO<br />
USE THE SOFTWARE, EVEN IF PSIBER OR ITS LICENSORS OR AFFILIATES ARE ADVISED OF THE POSSIBI-<br />
LITY OF SUCH DAMAGES. BECAUSE SOME COUNTRIES/STATES/JURISDICTIONS DO NOT ALLOW THE<br />
EXCLUSION OR LIMITATION OF LIABILITY, BUT MAY ALLOW LIABILITY TO BE LIMITED, IN SUCH CASES,<br />
PSIBER, ITS EMPLOYEES OR LICENSORS OR AFFILIATES‘ LIABILITY SHALL BE LIMITED TO U.S. $50.<br />
Nothing contained in this Agreement shall prejudice the statutory rights of any party dealing as a<br />
consumer. Nothing contained in this Agreement limits <strong>Psiber</strong>‘s liability to You in the event of death<br />
or personal injury resulting from <strong>Psiber</strong>‘s negligence. <strong>Psiber</strong> is acting on behalf of its employees and<br />
licensors or affiliates for the purpose of disclaiming, excluding and/or restricting obligations, warranties<br />
and liability as provided in this clause 9, but in no other respects and for no other purpose.<br />
IF YOU OBTAINED THE SOFTWARE IN GERMANY OR AUSTRIA, and you usually reside in such country,<br />
then the paragraphs above under Section 9 do not apply. Instead, <strong>Psiber</strong>‘s statutory liability for<br />
damages shall be limited as follows: (i) <strong>Psiber</strong> shall be liable only up to the amount of damages<br />
as typically foreseeable at the time of entering into the purchase agreement in respect of damages<br />
caused by a slightly negligent breach of a material contractual obligation and (ii) <strong>Psiber</strong> shall<br />
not be liable for damages caused by a slightly negligent breach of a non-material contractual<br />
obligation. The aforesaid limitation of liability shall not apply to any mandatory statutory liability,<br />
in particular, to liability under the German Product Liability Act, liability for assuming a specific guarantee<br />
or liability for culpably caused personal injuries. You are required to take all reasonable<br />
measures to avoid and reduce damages, in particular to make back-up copies of the Software<br />
and your computer data subject to the provisions of this Agreement.<br />
10. TECHNICAL SUPPORT.<br />
<strong>Psiber</strong> has no obligation to furnish You with technical support unless separately agreed in writing<br />
between You and <strong>Psiber</strong>.<br />
11. EXPORT CONTROL.<br />
You agree that the Software will not be shipped, transferred or exported into any country or used<br />
in any manner prohibited by the United States Export Administration Act or any other export laws,<br />
restrictions or regulations (collectively the „Export Laws“). In addition, if the Software is identified<br />
as export controlled items under the Export Laws, you represent and warrant that you are not a<br />
citizen, or otherwise located within, an embargoed nation (including without limitation Iran, Syria,<br />
Sudan, Libya, Cuba, and North Korea) and that you are not otherwise prohibited under the Export<br />
Laws from receiving the Software. All rights to Use the Software are granted on condition that<br />
such rights are forfeited if you fail to comply with the terms of this Agreement.<br />
The Software, including technical data, may be subject to export controls under the U.S. Export<br />
Administration Regulations („EAR“) and to import or export controls in other countries. The EAR<br />
prohibits the use of the Software and technical data by a Government End-User, as defined hereafter,<br />
without a license from the U.S. government. A Government End-User is defined in Part 772 of<br />
the EAR as „any foreign central, regional or local government department, agency or other enti-<br />
back to table of contents<br />
54
2<br />
manual<br />
ty performing governmental functions; including governmental research institutions, governmental<br />
<strong>Data</strong> corporations or their separate business units (as defined in part 772 of the EAR) which<br />
are engaged in the manufacture or distribution of items or services controlled on the Wassenaar<br />
Munitions List, and international governmental organizations. This term does not include: utilities<br />
(telecommunications companies and Internet service providers; banks and financial institutions;<br />
transportation; broadcast or entertainment; educational organizations; civil health and medical<br />
organizations; retail or wholesale firms; and manufacturing or industrial entities not engaged in<br />
the manufacture or distribution of items or services controlled on the Wassenaar Munitions List.)“<br />
You agree to comply strictly with all applicable import and export regulations and acknowledge<br />
that You have the responsibility to obtain licenses to export, re-export, transfer or import the Software.<br />
You further represent that You are not a Government End User as defined above, and You<br />
will not transfer the Software to any Government End user without a license.<br />
12. NOTICES.<br />
All notices and return of the Software and Documentation should be delivered to:<br />
<strong>Psiber</strong> <strong>Data</strong> GmbH or PSIBER DATA SYSTEMS INC.<br />
Felix-Wankel-Str. 4<br />
7075-K Mission Gorge Road<br />
D-82152 Krailling San Diego, CA 92120<br />
GERMANY<br />
UNITED STATES OF AMERICA<br />
13. APPLICABLE LAW & GENERAL PROVISIONS.<br />
This Agreement will be governed by and construed in accordance with the substantive laws in<br />
force: (a) in the State of California, if a license to the Software is obtained when you are in the<br />
United States, Canada, or Mexico; or (b) Germany, if a license to the Software is purchased when<br />
you are in any other jurisdiction not described above. The respective courts shall each have nonexclusive<br />
jurisdiction over all disputes relating to this Agreement. This Agreement will not be governed<br />
by the conflict of law rules of any jurisdiction or the United Nations Convention on Contracts<br />
for the International Sale of Goods, the application of which is expressly excluded.<br />
If any part of this Agreement is found void and unenforceable, it will not affect the validity of the<br />
balance of the Agreement, which shall remain valid and enforceable according to its terms. This<br />
Agreement may only be modified by a writing signed by an authorized officer of <strong>Psiber</strong>, although<br />
<strong>Psiber</strong> may vary the terms of this Agreement.<br />
This is the entire agreement between <strong>Psiber</strong> and You relating to the Software and it supersedes<br />
any prior representations, discussions, undertakings, end user agreements, communications or<br />
advertising relating to the Software.<br />
If you have any questions regarding this Agreement or if you wish to request any information from<br />
<strong>Psiber</strong> please use the address and contact information included with this product or via the web<br />
at www.psiber.com to contact the <strong>Psiber</strong> office serving your jurisdiction<br />
<strong>Psiber</strong>, <strong>RF3D</strong> are either registered trademarks or trademarks of <strong>Psiber</strong> <strong>Data</strong> GmbH in Europe or<br />
<strong>Psiber</strong> <strong>Data</strong> <strong>Systems</strong> <strong>Inc</strong>orporated in the United States and/or other countries.<br />
PLEASE SUBMIT ANY ACCOMPANYING REGISTRATION FORMS TO RECEIVE REGISTRATION BENEFITS<br />
WHERE APPLICABLE<br />
back to table of contents<br />
55
2<br />
manual<br />
For more information or<br />
updates please contact:<br />
www.<strong>RF3D</strong>.com<br />
<strong>Psiber</strong> USA:<br />
PSIBER DATA <strong>Systems</strong> <strong>Inc</strong>.<br />
7075-K Mission Gorge Road<br />
San Diego, CA 92120<br />
phone 1-619-287-9970<br />
fax 1-619-287-9978<br />
E-mail info@psiber.com<br />
<strong>Psiber</strong> Europe:<br />
PSIBER DATA GmbH<br />
Felix-Wankel-Straße 4<br />
D-82152 Krailling<br />
Tel +49 (0) 89 89 13 60 - 60<br />
Fax +49 (0) 89 89 13 60 - 66<br />
E-Mail info@psiber-data.com<br />
back to table of contents<br />
56