interim evacuation plan â david caro building 192 - School of Physics
interim evacuation plan â david caro building 192 - School of Physics
interim evacuation plan â david caro building 192 - School of Physics
Create successful ePaper yourself
Turn your PDF publications into a flip-book with our unique Google optimized e-Paper software.
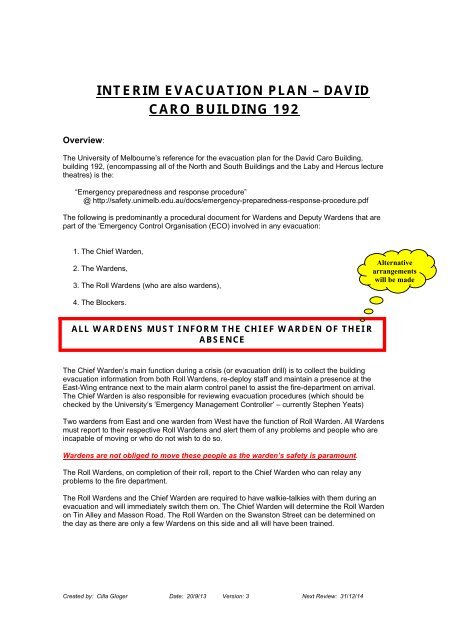
INTERIM EVACUATION PLAN – DAVID<br />
CARO BUILDING <strong>192</strong><br />
Overview:<br />
The University <strong>of</strong> Melbourne’s reference for the <strong>evacuation</strong> <strong>plan</strong> for the David Caro Building,<br />
<strong>building</strong> <strong>192</strong>, (encompassing all <strong>of</strong> the North and South Buildings and the Laby and Hercus lecture<br />
theatres) is the:<br />
“Emergency preparedness and response procedure”<br />
@ http://safety.unimelb.edu.au/docs/emergency-preparedness-response-procedure.pdf<br />
The following is predominantly a procedural document for Wardens and Deputy Wardens that are<br />
part <strong>of</strong> the ‘Emergency Control Organisation (ECO) involved in any <strong>evacuation</strong>:<br />
1. The Chief Warden,<br />
2. The Wardens,<br />
3. The Roll Wardens (who are also wardens),<br />
Alternative<br />
arrangements<br />
will be made<br />
4. The Blockers.<br />
ALL WARDENS MUST INFORM THE CHIEF WARDEN OF THEIR<br />
ABSENCE<br />
The Chief Warden’s main function during a crisis (or <strong>evacuation</strong> drill) is to collect the <strong>building</strong><br />
<strong>evacuation</strong> information from both Roll Wardens, re-deploy staff and maintain a presence at the<br />
East-Wing entrance next to the main alarm control panel to assist the fire-department on arrival.<br />
The Chief Warden is also responsible for reviewing <strong>evacuation</strong> procedures (which should be<br />
checked by the University’s ‘Emergency Management Controller’ – currently Stephen Yeats)<br />
Two wardens from East and one warden from West have the function <strong>of</strong> Roll Warden. All Wardens<br />
must report to their respective Roll Wardens and alert them <strong>of</strong> any problems and people who are<br />
incapable <strong>of</strong> moving or who do not wish to do so.<br />
Wardens are not obliged to move these people as the warden’s safety is paramount.<br />
The Roll Wardens, on completion <strong>of</strong> their roll, report to the Chief Warden who can relay any<br />
problems to the fire department.<br />
The Roll Wardens and the Chief Warden are required to have walkie-talkies with them during an<br />
<strong>evacuation</strong> and will immediately switch them on. The Chief Warden will determine the Roll Warden<br />
on Tin Alley and Masson Road. The Roll Warden on the Swanston Street can be determined on<br />
the day as there are only a few Wardens on this side and all will have been trained.<br />
Created by: Cilla Gloger Date: 20/9/13 Version: 3 Next Review: 31/12/14
There are four (4) walkie-talkies and these are normally set to channel (03) – alternative<br />
channel is (13). It is the responsibility <strong>of</strong> the Chief Warden and Safety Officer to regularly check<br />
the state <strong>of</strong> the units (at least once a year). Generally, the Chief Warden will co-ordinate the<br />
gathering <strong>of</strong> the required information from the Roll Wardens<br />
See<br />
<strong>evacuation</strong><br />
maps<br />
There are three assembly areas:<br />
1. MASSON ROAD (FOOT-PATH CORNER SPENCER AND MASSON ROAD)<br />
2. SWANSTON STREET (FOOT-PATH, ADJACENT TO THE POTTER<br />
GALLERY LAWN)<br />
3. TIN ALLEY CORNER (ON SWANSTON STREET)<br />
ALL WARDENS (INCLUDING DEPUTY WARDENS) MUST REPORT TO THE ROLL WARDENS<br />
There are three rooms in which the respective <strong>Physics</strong> Rolls are housed along with the walkietalkies:<br />
1. West-Wing items: Outside Room 103<br />
2. Masson Road items:<br />
Perspex document holder in the Science Faculty Technical Workshop <strong>of</strong>fice (Room 167)<br />
3. East-Wing items:<br />
Perspex document holder in the Undergraduate Labs Staff Room (Room P3.17)<br />
For procedural reasons, the Chief and Deputy Warden should be selected from the 1 st level Admin<br />
Offices.<br />
There are six (6) blocking stations:<br />
Created by: Cilla Gloger Date: 20/9/13 Version: 3 Next Review: 31/12/14
After wardens have reported to their respective Roll Wardens, they will be provided with blocking<br />
cards and must assume their blocking positions mentioned on the cards to stop traffic through the<br />
David Caro Building.<br />
Position 1: West stairwell exit door [this station will be manned immediately by level 1 Warden]<br />
Position 2: Ground level near <strong>Physics</strong> pond, in front <strong>of</strong> Laby IDEAS Centre<br />
Position 3: Base <strong>of</strong> the ramp on Spencer road<br />
Position 4: Ground floor entrance to Lecture Theatres adjacent to Kiosk on South Side<br />
Position 5: Swanston Street overpass<br />
Position 6: Loading Bay entrance on Swanston Street<br />
All Blockers should follow the instructions on their cards which are:<br />
• Ensure that you (Fire Warden) are wearing your emergency hat.<br />
• Attend the blocking position after being allocated this position by the Chief Warden or<br />
delegate.<br />
• Do not stand too close to the <strong>building</strong>.<br />
• Check for signs <strong>of</strong> danger and avoid hazards<br />
• Your OWN personal safety is paramount!<br />
• Advise people not to enter the <strong>building</strong>.<br />
• Never indicate that the event is a drill (it may not be!).<br />
• Do not physically restrain people from entering the <strong>building</strong>.<br />
• If it is too dangerous to perform this duty, report back to the Chief Warden.<br />
• WAIT for the “ALL CLEAR” signal from the Chief Warden (or delegate) before leaving this<br />
role. The All Clear may not be given until sometime after the bells stop sounding.<br />
• Return this Blocking Card to the Roll Warden.<br />
To have their area details noted, Roll wardens are easily identified by their red<br />
folder and are located on the pedestrian footpath on Masson Road corner<br />
Spencer road, the corner <strong>of</strong> Tin Alley and on the Swanston Street foot-path<br />
near Potter lawn.<br />
The actual people who fill the above positions are listed on the <strong>School</strong> <strong>of</strong> <strong>Physics</strong><br />
OH&S website and also posted on each and every floor.<br />
It is the responsibility <strong>of</strong> the Chief Warden/Safety Officer to change their sheets<br />
whenever the staffing in the <strong>building</strong> has changed.<br />
Created by: Cilla Gloger Date: 20/9/13 Version: 3 Next Review: 31/12/14
MAIN BUILDING:<br />
Level 0<br />
Evacuees:<br />
Warden:<br />
Level 1<br />
Evacuees:<br />
Warden:<br />
Level 1<br />
Evacuees:<br />
Warden:<br />
Evacuate up nearest staircase and exit. Upon exiting turn right and walk around<br />
to the front <strong>of</strong> the <strong>building</strong> (follow the fence) to the corner <strong>of</strong> Tin Alley and<br />
Swanston street. Assemble Tin Alley Corner.<br />
Note: The Western Exit (Spencer Rd) will open.<br />
Circuit <strong>evacuation</strong>, then up West Staircase and exit by West Door. Report to Roll<br />
Warden at Tin Alley Corner. Do not evacuate into Nuclear Building, beyond ramp<br />
and fire-door adjacent to room 060.<br />
The <strong>Physics</strong>-South Warden will control.<br />
East corridor (encompassing Student and Science Faculty Workshop, Melbourne<br />
Materials Institute (MMI), Bionic Vision Australia (BVA) and Laby IDEAS Centre)<br />
Preferred <strong>evacuation</strong> by side entrance. Assemble on Masson road.<br />
Evacuate corridor from east to side exit and then evacuate the Laby IDEAS<br />
Centre. Report to Roll Warden at Masson road.<br />
Administration area<br />
Evacuate through West emergency exit, upon exiting second door turn right<br />
following the fencing to the front <strong>of</strong> the <strong>building</strong> at corner Tin Alley and Swanston<br />
Street. Assemble on Tin Alley Corner.<br />
The Chief Warden designates a Roll Warden (normally the Deputy Chief Warden)<br />
from the area who collects a walkie-talkie and folder and evacuates to Tin Alley<br />
Corner. Chief Warden collects a walkie talkie and <strong>evacuation</strong> folder and stands at<br />
the EWIS panel.<br />
The other warden, upon clearing their area stands at the western stairwell outer<br />
door to direct anyone exiting to turn right and walk around to the front <strong>of</strong> the<br />
<strong>building</strong> (follow the fence) to the corner <strong>of</strong> Tin Alley and Swanston Street (Tin Alley<br />
Corner assembly area).<br />
Level 2<br />
Evacuees:<br />
Warden:<br />
Evacuate by nearest exit. If evacuating via central stairwell, upon reaching the<br />
ground floor turn left and exit via the main entrance to <strong>Physics</strong> towards Swanston<br />
Street. If evacuating via west stairwell, upon exiting at ground floor turn right<br />
following the fencing to the front <strong>of</strong> the <strong>building</strong> at corner Tin Alley and Swanston<br />
Street. Assemble on Tin Alley Corner.<br />
One warden evacuate east (direct people to central stairwell) to west (direct<br />
people to West stairwell). Report to Roll Warden at Tin Alley Corner.<br />
The second warden walks across to <strong>Physics</strong> South and directs people in the<br />
Graduate <strong>School</strong> computer lab to the ramp. Proceed to 1st level Laby entrance to<br />
evacuate to the front <strong>of</strong> the lecture theatre. Loop around to the Hercus theatre<br />
and proceeds to sweep out any remnants. Report to Roll Warden at Masson road.<br />
Note:<br />
If there is a warden available in the Graduate Centre they must assist in the<br />
<strong>evacuation</strong> and report to Masson road.<br />
Created by: Cilla Gloger Date: 20/9/13 Version: 3 Next Review: 31/12/14
Level 3<br />
Evacuees:<br />
Warden:<br />
Preferred <strong>evacuation</strong> to main stairwell and west stairwell. If evacuating via central<br />
stairwell, upon reaching the ground floor turn left and exit via the main entrance to<br />
<strong>Physics</strong> towards Swanston Street. If evacuating via west stairwell, upon exiting at<br />
ground floor turn right following the fencing to the front <strong>of</strong> the <strong>building</strong> at corner Tin<br />
Alley and Swanston Street. Assemble on Tin Alley Corner.<br />
Evacuate east to west. The Warden is to sweep the area from the eastern firedoor<br />
to the West stairwell exit. Report to Roll Warden at Tin Alley Corner.<br />
Level 4<br />
Evacuees:<br />
Warden:<br />
CoEPP<br />
Evacuate via East stairwell. Assemble on Swanston Street.<br />
Evacuate CoEPP areas. Report to Roll Warden at Swanston Street.<br />
Level 4<br />
Evacuees:<br />
Warden:<br />
Level 5<br />
Evacuees:<br />
Warden:<br />
Level 6<br />
Evacuees:<br />
Warden:<br />
West corridor<br />
Evacuate by West stairwell, upon exiting at ground floor turn right following the<br />
fencing to the front <strong>of</strong> the <strong>building</strong> at corner Tin Alley and Swanston Street.<br />
Assemble on Tin Alley Corner.<br />
Evacuate room 459 and sweep to the western exit. Report to Roll Warden at Tin<br />
Alley Corner.<br />
Preferred <strong>evacuation</strong> to main stairwell or West stairwell exit. If evacuating via<br />
central stairwell, upon reaching the ground floor turn left and exit via the main<br />
entrance to <strong>Physics</strong> towards Swanston Street. If evacuating via west stairwell,<br />
upon exiting at ground floor turn right following the fencing to the front <strong>of</strong> the<br />
<strong>building</strong> at corner Tin Alley and Swanston Street. Assemble on Tin Alley Corner.<br />
Evacuate east to west. Report to Roll Warden at Tin Alley Corner.<br />
(encompassing Ge<strong>of</strong>f Opat Seminar room and Baker Lab)<br />
Preferred <strong>evacuation</strong> via main stairwell and West stairwell exit. If evacuating via<br />
central stairwell, upon reaching the ground floor turn left and exit via the main<br />
entrance to <strong>Physics</strong> towards Swanston Street. If evacuating via west stairwell,<br />
upon exiting at ground floor turn right following the fencing to the front <strong>of</strong> the<br />
<strong>building</strong> at corner Tin Alley and Swanston Street. Assemble on Tin Alley Corner.<br />
Evacuate east to west. Report to Roll Warden at Tin Alley Corner.<br />
Level 7<br />
Evacuees:<br />
Warden:<br />
Preferred <strong>evacuation</strong> to main stairwell and West stairwell exit. If evacuating via<br />
central stairwell, upon reaching the ground floor turn left and exit via the main<br />
entrance to <strong>Physics</strong> towards Swanston Street. If evacuating via west stairwell,<br />
upon exiting at ground floor turn right following the fencing to the front <strong>of</strong> the<br />
<strong>building</strong> at corner Tin Alley and Swanston Street. Assemble on Tin Alley Corner.<br />
Evacuate east to west. Report Roll Warden at Tin Alley Corner.<br />
Created by: Cilla Gloger Date: 20/9/13 Version: 3 Next Review: 31/12/14
NUCLEAR BUILDING - PHYSICS SOUTH (encompasses Lecture Theatres, Castros Kiosk and<br />
Graduate <strong>School</strong> <strong>of</strong> Science)<br />
Level 0<br />
Evacuees:<br />
Warden:<br />
EPP evacuate up nearest staircase to service yard. Assemble on Swanston<br />
Street.<br />
Pelletron evacuate up nearest exit. Assemble at Masson Road<br />
Start room 060 (Materials Lab) and evacuate west to east. Report to Roll Warden<br />
at Swanston Street.<br />
Level 1<br />
Evacuees:<br />
Warden:<br />
Level 2<br />
Evacuees:<br />
Warden:<br />
Level 2<br />
Evacuees:<br />
Warden:<br />
Part 2/3 Lab evacuate by nearest exit. Assemble on Swanston Street.<br />
Castros evacuates passed Elizabeth Murdoch. Assemble on Swanston Street.<br />
Evacuate east to west exit towards Castros Kiosk and check that the area is clear.<br />
Report to Roll Warden at Swanston Street.<br />
Graduate <strong>School</strong> <strong>of</strong> Science staff area<br />
Evacuate by eastern exit. Assemble on Swanston Street.<br />
Follow the evacuees and report to Roll Warden at Swanston Street.<br />
Graduate <strong>School</strong> <strong>of</strong> Science computer lab and lecture theatres<br />
Evacuate via the ramp, turn left past Castros and Elisabeth Murdoch.<br />
Assemble on Masson Road.<br />
Warden from level 2 East and Graduate Centre warden directs people in the<br />
computer lab to the ramp. Proceed to 1st level Laby entrance to evacuate to the<br />
front <strong>of</strong> the lecture theatre. Loop around to the Hercus theatre and proceeds to<br />
sweep out any remnants. Report to Roll Warden at Masson road.<br />
PART 1 PRAC ROOMs AND PODIUM LEVEL:<br />
Level 2<br />
Evacuees:<br />
Warden:<br />
Level 3<br />
Evacuees:<br />
Warden:<br />
Podium level<br />
Preferred <strong>evacuation</strong> to bridge stairs. Assemble on Swanston Street.<br />
One warden who has come from the Part 1 prac rooms is to direct people to the<br />
fire exit adjacent to room PP2.11 and then do a sweep <strong>of</strong> Graduate Centre<br />
Computer Lab and Lecture Theatres to check that areas are clear. Another<br />
warden who has come from the Part 1 prac room should sweep people in rooms<br />
PP2.11 to PP2.06 to exit via the ramp and then proceed to room PP2.01 to<br />
PP2.04 and direct to exit via bridge stairs. Both wardens to report to Roll Warden<br />
on Swanston Street.<br />
Evacuate down nearest Staircase and exit. Assemble on Swanston Street.<br />
Evacuate west to east. Assemble on Swanston Street.<br />
Created by: Cilla Gloger Date: 20/9/13 Version: 3 Next Review: 31/12/14
Level 4<br />
Evacuees:<br />
Warden:<br />
Note 1:<br />
Note 2:<br />
Evacuate down nearest Staircase and exit. Assemble on Swanston Street.<br />
Evacuate west to east. Assemble on Swanston Street.<br />
In the absence <strong>of</strong> either Warden, the other clears their own area and then takes<br />
on the role <strong>of</strong> deputy <strong>of</strong> the other and reports to the assembly area <strong>of</strong> the absent<br />
warden.<br />
It is the Warden’s responsibility to instruct the Laboratory Demonstrators in<br />
<strong>evacuation</strong> procedure. In the event the warden is not present the Demonstrator<br />
will take on role <strong>of</strong> Warden.<br />
Created by: Cilla Gloger Date: 20/9/13 Version: 3 Next Review: 31/12/14


