You also want an ePaper? Increase the reach of your titles
YUMPU automatically turns print PDFs into web optimized ePapers that Google loves.
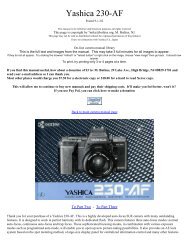
<strong>Ricoh</strong> <strong>RZ</strong>-<strong>3000</strong><br />
This camera manual library is for reference and historical purposes, all rights reserved.<br />
This page is copyright by M. <strong>Butkus</strong>, NJ.<br />
This page may not be sold or distributed without the expressed permission of the producer<br />
On-line camera manual library<br />
This is the full text and images from the manual. This may take 3 full minutes for all images to appear.<br />
If they do not all appear. Try clicking the browser "refresh" or "reload button" or right click on the image, choose "view image" then go back. It should now appear.<br />
To print, try printing only 3 or 4 pages at a time.<br />
If you find this manual useful, how about a donation of $3 to:<br />
M. <strong>Butkus</strong>, 29 Lake Ave., High Bridge, NJ 08829<br />
This will allow me to continue to buy new manuals and pay their shipping costs.<br />
It'll make you feel better, won't it?<br />
If you use Pay Pal, use the link below. Use the above address for a check, M.O. or cash.<br />
Back to my main Chinon information page<br />
We are most gratified that you have selected a RICOH camera. Before using your camera, please be<br />
sure to read these Instructions carefully.<br />
LOCATING THE CONTROLS<br />
(1) Drive Dial<br />
(2) Distance Measuring Window<br />
(3) Shutter Release Button<br />
(4) Battery Compartment Cover<br />
(5) Strap Holder<br />
(6) Remote Control Sensor<br />
(7) AF Auxiliary Light Window Self-timer Lamp<br />
(8) Lens<br />
(9) Viewfinder Window<br />
(10) Photocell<br />
(11) Built-in Flash
(12) Mode Dial<br />
(13) LCD Panel<br />
(14) Flash Button<br />
(15) Zoom Lever4www.butkus.<strong>org</strong><br />
(18) Viewfinder<br />
(19) Back Cover Latch<br />
(20) Tripod Socket<br />
(21) Manual Film rewind Button
(16) Flash Monitor<br />
(17) AF Monitor<br />
× Combining the modes<br />
(22) Film Loaded Window<br />
(23) Back Cover4www.butkus.<strong>org</strong><br />
It is possible to set the camera to combine the Self-timer and Remote Control with the shooting modes and the<br />
flash modes. Some of the shooting modes can also be combined with the flash modes, as shown below.<br />
Shooting Modes<br />
Flash Modes<br />
A (Auto)<br />
Mode<br />
Portrait<br />
Mode<br />
Action Mode Infinity Mode Super Night Mode Single AF<br />
Mode<br />
Normal O O O x O O<br />
Red Eye Reduction Mode O O x x O O O x x O<br />
Flash-off Mode O O O O x O<br />
Flash-on Mode O O O x x O<br />
Slow Synchro Mode O x x x x O<br />
Red Eye Reduction<br />
Slow Synchro Mode<br />
O x x x x O<br />
MAIN FEATURES<br />
⋅ Powerful 38-130 mm multi coated zoom lens with aspheric lens elements<br />
⋅ 7-zone passive multi autofocus in 1024 measuring steps<br />
⋅ High-power zoom flash for tele shooting<br />
⋅ Easy to access 2-dial control with illuminator
⋅ Creative modes (portrait, action, super night, infinity, etc.)<br />
⋅ Compact and light weight body4www.butkus.<strong>org</strong><br />
BEFORE USING<br />
* A fast film such as ISO 200 or ISO 400 is recommended to prevent blurriness and to obtain a longer<br />
flash range.<br />
* When focusing is difficult or impossible, AF monitor blinks to warn you that an out-of-focus picture will<br />
occur. Set infinity mode or use focus lock function. (page 24, 29)<br />
* Do not hold the camera by the lens<br />
* Before taking important pictures (at weddings, on trips abroad, etc.) test the camera and learn how it<br />
works.<br />
CAUTIONS<br />
?This camera has a high voltage circuit. Because it is dangerous, do not attempt to take the camera<br />
apart.<br />
? If the built-in flash does not operate, do not touch the internal parts of the camera, as it<br />
contains a high voltage circuit. Take the camera to the shop where it was purchased, or to your<br />
nearest <strong>Ricoh</strong> service center.<br />
ATTACHING THE STRAP<br />
1. Insert the small loop at the end of the Strap under the Strap Holder. (Fig. 1 (a)<br />
2. Insert the other end of the Strap through the loop to tie the Strap onto the Strap Holder (Fig. 1 (b)<br />
INSERTING THE BATTERIES<br />
The camera will not operate unless the batteries are installed. Make sure that the batteries are installed<br />
correctly.<br />
1. Insert a coin in the slot of the Battery Compartment Cover to open it. (Fig. 2)<br />
2. Slide the inner cover latch in the direction indicated to open. (Fig. 3)<br />
3, Insert the recommended 3 volt lithium batteries, checking that the + and - are inserted correctly.<br />
(Fig. 4)
4. Press down the inner cover to close.<br />
5. Close the Battery Compartment Cover by pushing it in the direction indicated until it locks firmly in<br />
place. (Fig. 5)4www.butkus.<strong>org</strong><br />
* Do not remove the batteries from the camera until you<br />
are ready to replace them.<br />
* The date display ["00 0 0] blinks when the batteries are<br />
replaced. By pressing either the Mode Button, Select<br />
Button, or Set Button, [1 1 '95] will be displayed. Reset<br />
the correct time and date. (Optional)<br />
* When replacing the batteries, do so as quickly as possible to avoid erasing camera memory. We<br />
recommend replacing the batteries when there is no film in the camera.<br />
* The batteries can explode or cause burns if disposed of in fire or if shorted, disassembled,<br />
heated or recharged.<br />
* Recommended Replacement 3V Lithium<br />
Batteries<br />
CR-123A, or equivalent X2<br />
TURNING THE POWER ON/OFF<br />
The power is turned on or off by selecting ON or OFF on the Drive Dial. (Fig. 6)<br />
When the power is turned on, the lens moves from the storage position to the wide-angle position, and<br />
the camera is set automatically to the mode selected on the Mode Dial.<br />
CHECKING THE BATTERIES<br />
1. When the batteries are nearly exhausted, will appear on the LCD Panel. Replace with new<br />
batteries as soon as possible.<br />
2. When the batteries are exhausted, the symbol will blink in the LCD Panel. Replace with new<br />
batteries.
* As the battery voltage is reduced in extremely cold temperatures, the do symbol may blink. You may<br />
be able to use the camera if you remove the batteries and warm them up.<br />
* In the following cases, battery voltage is insufficient and the batteries need to be replaced.<br />
1 ) When the power does not turn on.<br />
2) When the symbol blinks.<br />
3) When the shutter does not release.<br />
4) When film advance or rewind do not function.<br />
5) When the Self-timer does not function.<br />
* To avoid tripping the shutter inadvertently and wasting battery power, always turn the power off when<br />
you are not taking pictures.<br />
* If the camera is not operated (buttons, dials and lever) for about 5 minutes, the power automatically<br />
turns off, the LCD Panel display disappears and the lens returns to the storage position. The purpose of<br />
this function, called Auto Power OFF, is to prevent waste of battery power. The power will turn on again<br />
by operating any of the buttons, dials or lever.<br />
LOADING THE FILM<br />
Always avoid direct sunlight when loading the film.<br />
1. Push the Back Cover Latch Downward to open. (Fig. 7)<br />
2. Load the film cassette into the Film Chamber and pull out enough film leader<br />
to extend past the mark of the film leader position. (Fig. 8, 9)
* If there is any dust on the inside lens surface, use a blower to blow the dust<br />
away.4www.butkus.<strong>org</strong><br />
3. Make sure the film stays within the Film Guides and lies flat. (Fig. 10,11)<br />
4. Press the Back Cover shut so that the Back Cover Latch returns to its<br />
original position. When you close the Back Cover the film is automatically<br />
advanced, and the first frame is set in place. The Exposure Counter on the<br />
LCD Panel displays the number of frames remaining to be exposed. (Fig.<br />
12)<br />
* If the film has not advanced correctly and is not taken up onto the Film Takeup<br />
Spool, the Exposure Counter will blink. (Fig. 13) The Shutter Release Button<br />
will also lock so you cannot take a picture until the film is loaded properly. (DX<br />
Film only) Reload the film by following steps 1 -4 shown above.<br />
* Whether there is film in your camera or not can be confirmed by either the Film<br />
Loaded Window or the Exposure Counter in the LCD Panel.<br />
* You can confirm that the Film-Wind or Rewind is working properly by observing<br />
the Exposure Counter.4www.butkus.<strong>org</strong>
* You can load film in your camera with the power off. However, the LCD Panel display will disappear<br />
after loading is complete.<br />
* Do not touch the inner lens with your fingers or the edge of film.<br />
* This camera's Pre-wind System automatically prewinds the film to the end when you load it and<br />
rewinds it back into the film cassette as each shot is taken. If the back cover is accidentally opened<br />
before the film has reached the end, close it immediately. The film will automatically rewind. When it has<br />
completely rewound, the Exposure Counter will display "E". Remove the film and develop.<br />
* Sometimes more exposures can be taken than the standard number of frames listed on the film. For<br />
this reason, the number of frames counted in the Exposure Counter on the LCD Panel may sometimes<br />
be higher than the number of frames listed on the film.<br />
SETTING THE FILM SPEED<br />
DX-coded film cassettes have black-and-silver patterns corresponding to film<br />
speeds that the camera reads and automatically sets. Your camera accepts DX<br />
films with speeds ranging from ISO 50 to 3200. (Fig, 14)<br />
Most color negative films on the market are DX-coded. When using DX-coded films, setting the film<br />
speed is not necessary. Your camera automatically sets the correct film speed.<br />
When using a film without a DX code, your camera will automatically set itself to ISO 100.<br />
HOLDING YOUR CAMERA<br />
1. Always use both hands to steady your camera. (Fig, 15)<br />
* When holding the camera vertically always position it with the flash at the top.<br />
(Fig. 16)
VIEWFINDER (Fig. 18)<br />
* Be careful not to place your fingers over the lens, flash or focusing windows.<br />
(Fig. 17)<br />
* We suggest that you become familiar with your new camera by shooting and<br />
processing at least one roll of film before using your camera to record an<br />
important occasion.<br />
* If the camera moves during the exposure, the whole picture will be blurred. To<br />
help insure sharp pictures, hold the camera steadily and properly.<br />
(1)Field of View Frame:<br />
The subject (such as people or scenery) you wish to photograph should be<br />
contained within the frame.<br />
(2) Parallax Correction Marks (Close Focusing Telephoto)<br />
When taking a picture of a subject that is between m-1.8 m (3.3 ft.-6 ft.) away from your camera, the<br />
subject should be positioned within this mark. Any thing outside the marks will not be included in the<br />
picture even if you can see it through the viewfinder<br />
(3) Single AF Spot<br />
The center spot of multi auto focus mark (in wide)<br />
(4) Multi Auto Focus Marks (in Wide)<br />
(5) Multi Auto Focus Marks (in Tele)<br />
MONITORS<br />
When the Shutter Release Button is pressed lightly, the AF Monitor and the Flash Monitor on the right of<br />
the viewfinder will either light up or blink to indicate the following.<br />
AF Monitor (Green)<br />
Display Description Shutter page<br />
Lights up Subject is in focus Shutter Shutter will release pg. 21<br />
Blinks<br />
Blinks<br />
Subject is out<br />
of focus<br />
Subject too<br />
close<br />
* Shutter Shutter will release pg. 21<br />
Shutter will not release pg. 21
* In certain cases the shutter will not release. However, this is not a malfunction.<br />
Flash Monitor (Red)<br />
Display Description Shutter Page<br />
Lights up Subject within flash range Shutter will release P.23<br />
Blinks Flash is charging Shutter will release P.23<br />
Blinks rapidly<br />
ZOOMING THE LENS<br />
Subject out of<br />
flash range<br />
Shutter will release P.23<br />
The built-in 38-130 mm zoom lens lets you get more in the picture, or closer to your subject without<br />
changing<br />
your position. This allows you to easily select the composition that best suits your subject. (Examples 1,<br />
2)<br />
To zoom the lens, just turn the zoom lever to the led for Tele or to the right for Wide until your subject is<br />
framed properly. (Fig. 19)<br />
* When zooming the lens, keep your fingers away from the moving lens<br />
components.<br />
* When the power is turned off, the lens will return to its storage position<br />
automatically.<br />
* To save on battery life, after about 5 minutes of inactivity, the lens will return to<br />
the Storage Position and the display on the LCD panel will disappear.4www.butkus.<strong>org</strong><br />
When zooming to the telephoto end, be sure to hold the camera firmly to prevent camera shake.
MACRO PHOTOGRAPHY<br />
Used for close-up photography of flowers, etc. (Example 3)<br />
1. Turn the zoom lever to the left to set the 130 mm position. (Fig. 20)<br />
2. If necessary, approach to the minimum distance of 1 m (3.3 ft.) and release<br />
the shutter gently.<br />
* At 130 mm, the magnification at the minimum distance of 1 m (3.3 H.) is approximately 1/7.1 times.<br />
A (AUTO) MODE<br />
(MULTI AUTO-FOCUS MODE)<br />
1. Turn the Mode Dial to A. (Fig. 21 )<br />
2. Set the subject you wish to take within the multi auto-focus area in the<br />
center of the viewfinder. (Fig. 18, Viewfinder)<br />
The multi auto-focus area changes depending on the lens position (wide or tale).<br />
3. Press the Shutter Release Button gently to avoid camera shake.<br />
If the subject is closer than 1 m/3.3 ft., the AF Monitor blinks and the shutter will<br />
lock to prevent out-of focus pictures. (Fig. 22)<br />
The distance between the subject and the camera is measured in 7 zones within the multi auto-focus<br />
marks. Among these zones, focusing will be adjusted to the closest subject. This function will help<br />
prevent out-of-focus pictures.<br />
* The AF system uses an actual image of the subject to focus properly. In low light conditions, the AF<br />
Auxiliary Light automatically lights momentarily to provide a bright target for the AF system to see.<br />
In backlight conditions, make sure the subject is in the center of the multi auto-focus area. Otherwise,<br />
the camera cannot detect the backlit condition, and even if the subject is less than 6 m/20 ft. away, the<br />
flash will not fire.
When the subject is difficult to focus on:<br />
The autofocus sensor determines precise focus b reading the contrast of the subject. In certain rare<br />
situations, there may not be enough contrast for proper focusing. For example, clouds, hazy mountains,<br />
whit walls and dark subjects that do not reflect light well.<br />
In these situations, the camera is designed to warn yo that an out-of-focus picture may occur. It does so<br />
b blinking the green AF monitor in the viewfinder.<br />
When this happens you should:<br />
1. Turn the Mode Dial and select the Infinity Mode (Fig. 23) These modes<br />
automatically set the focus to infinity to assure sharp focus of long<br />
distance subjects.<br />
2. Or for closer subjects use the "pre-focus technique" to lock the focus on a subject of equal distance<br />
but with better contrast. To do this simply hold the shutter release halfway down (while in the single<br />
autofocus mode) on a subject of equal distance and then recompose back to the original subject and<br />
continue to depress the shutter release button to take the picture (see single AF for additional details).<br />
3. If you press the Shutter Release Button all the way down, the shutter can be released. At this time,<br />
focuses either at infinity in daylight or to the pair where AF system estimate in dark condition, to<br />
minimize out of focus pictures.<br />
* In very rare cases, however, shutter may lock such as strongly backlit subject, clear sky etc. Use<br />
prefocus shooting.<br />
SINGLE AF MODE (PRE-FOCUS SHOOTING)<br />
Your camera's multi autofocus system will provide excellent results in most shooting conditions.<br />
However when the subject you wish to focus on is behind a window, fence or bars, or located high or<br />
low in the viewfinder, you should use pre-focus shooting. This will ensure a sharply focused image of<br />
your subject.<br />
When the subject is high or low within the viewfinder:<br />
1. Turn the Mode Dial to S ⋅ AF. (Fig. 24)
2. There may be cases where none of your main subjects are at the Single<br />
Auto-Focus spot located at the center of the viewfinder (eg. subject located<br />
high or low). If you release the shutter then, only the background will be in<br />
focus, and the subject will be out-of-focus. (Fig. 25)<br />
3. To pre-focus, move the camera so that one of the subjects is within the<br />
Single Auto-Focus spot. (Fig. 26)<br />
Press the Shutter Release Button halfway so that the AF Monitor lights up. Keep holding your finger<br />
halfway down on the Shutter Release Button.<br />
When the subject is difficult to focus on:<br />
4. Now return the camera to its original position so that your main subjects are<br />
composed to your liking within the Field of View Frame again, and press the<br />
Shutter Release Button fully to take the picture. (Fig. 27)<br />
1. When you are photographing subjects that are difficult to focus on, or if your main subject is behind<br />
other closer objects, then find another subject at the same distance from the camera. You can pre-focus<br />
on that subject in the same way as described above.4www.butkus.<strong>org</strong><br />
* If you are shooting through a window under low light conditions, aim the camera at a slight angle to the<br />
glass to minimize any direct reflection of the AF Auxiliary Light.<br />
* When you release your finger from the Shutter Release Button, the pre-focus setting is cleared, so that<br />
you can pre-focus again as many times as you wish.<br />
AUTO FILM REWINDING<br />
1. After the end of the film has been reached, the<br />
film will automatically rewind.<br />
2. When the film is fully rewound, the motor stops<br />
automatically and "E" is displayed in the LCD Panel.<br />
(Fig. 28) Open the Back Cover to unload the film.<br />
(Fig. 29)
* If you wish to rewind the film before reaching the end of the film, push the Manual Film Rewind Button<br />
with a pen, etc. (If the Film Rewind Button is pressed with a pen whilst it is rewinding, the film leader will<br />
not be wound into the film cassette and will remain outside.) (Fig. 30)<br />
FLASH PHOTOGRAPHY<br />
* Be careful not to touch the inner lens surface with your fingers or the edge of<br />
film.<br />
1. If additional light is required, the built-in Flash automatically activates.<br />
* Recommended Flash Shooting Range<br />
(ISO 100)<br />
Wide-angle: 1 m-5.3 m (3.3 H.-17.5 ft.)<br />
Telephoto: 1 m-3.2 m (3.3 H.-10.5 ft.)<br />
(ISO 400)<br />
Wide-angle: 1 m-10.6 m (3.3 H.-35 H.)<br />
Telephoto: 1 m-6.4 m (3.3ft. -21 ft. ft.)<br />
* To increase shooting range, use higher speed film such as ISO 400.<br />
* To check if the subject is within the recommended flash shooting range, press the Shutter Release<br />
Button halfway.<br />
When Red Flash Monitor turns on steady, it is within the range, and when it blinks fast, it warns that the<br />
subject is out of the range.<br />
2. When the Flash is still charging, the Red Flash Monitor will blink and the<br />
shutter will be locked.<br />
(Fig. 31 ) Wait until the red LED turns off in order to use the flash.<br />
AUTO BACKLIGHT CONTROL/AUTO FILL FLASH<br />
When taking pictures of backlit subjects, important details are open lost in the shadows. Your camera<br />
automatically compensates for these lighting situations. If the subject is backlit and is about 6 meters (20<br />
feet) from the camera, Auto Back-Light Control (ABLC) will be activated. If the subject is within about 6<br />
meters (20 feet) of the camera, the Flash activates automatically and the shadows are lightened up
using automatic daylight fill-flash. Thus, with backlit subjects, natural looking pictures can be taken<br />
easily and automatically. (Fig. 32)<br />
FLASH MODES<br />
* Frame the subject in the center of the viewfinder to activate compensation.<br />
The following Flash Modes can be selected by pressing the Flash Button:<br />
? Red Eye Reduction Mode ? Flash-Off ? Flash-On ? Slow Synchro - Red Eye Reduction Slow Synchro<br />
RED EYE REDUCTION MODE<br />
Minimizing the Red-Eye Effect<br />
Selecting this mode makes it possible to minimize the red-eye effect that sometimes occurs when taking<br />
portrait photographs with flash. Now it's easy for anyone to take superior shots of people.<br />
1. Press the Flash Button until the (eye) symbol appears on the LCD Panel.<br />
(Fig. 33)<br />
2. Press the Shutter Release Button The flash system will begin its Pre-Flash<br />
Cycle. After a brief delay the Main Flash will then fire.<br />
* Be sure to hold the camera still after pressing the Shutter Release Button.<br />
You should advise your subjects that you are using Red Eye Reduction flash and they should wait for a<br />
second.<br />
This mode is not cancelled when the camera is switched off.<br />
* To cancel this mode, press the Flash Button again for any other selection.<br />
Reducing Flash Output<br />
The Flash adjusts the flash brightness to prevent excessively overexposed pictures when<br />
photographing, for example, fair skinned subjects at close range. This function works similarly in any of<br />
the Flash Modes.
FLASH-OFF MODE<br />
This mode forcibly prevents automatic firing of the flash, thus allowing available light photography in<br />
museums, churches, etc. where flash photography is prohibited.<br />
1. Press the flash Button until the ~ symbol appears on the LCD Panel. (Fig. 34)<br />
2. Press the shutter Release Button and the Shutter will be tripped without flash.<br />
* To cancel this mode, press the Flash Button until there is a different mode symbol (or none) on the<br />
LCD Panel.<br />
* In dim light, the camera's shutter speed will be automatically reduced. Take particular care in<br />
Telephoto (130 mm) Mode. To prevent a blurry picture hold the camera steadily and press the Shutter<br />
Release Button gently.<br />
FLASH-ON MODE<br />
This forcibly trips the flash when you want to photograph subjects with sunlight to their side or back. It<br />
lets<br />
you take more natural looking pictures by softening<br />
harsh shadows.<br />
Example 4: When the Flash-On Mode is set<br />
Example 5: When the Flash-On Mode is not set<br />
1. Press the Flash Button until the symbol appears on the LCD Panel.<br />
(Fig. 35)<br />
2. Press the Shutter Release Button. There will now be flash every time the<br />
shutter is tripped.<br />
* The camera will follow a daytime Synchro-Sunlight Exposure program in cases of bright light.<br />
* To cancel this mode, press the Flash Button until there is a different mode symbol (or none) on the<br />
LCD Panel.
SLOW SYNCHRO MODE<br />
Use this mode indoors, at parties and in lighted rooms when you want both the subject and the<br />
background to be sharp. (Example 6)<br />
With Auto-Flash and Flash-On modes the background may be dark because of the limited range of the<br />
flash light. (Example 7)<br />
1. Press the Flash Button until SLOW appears on the LCD panel. (Fig. 36)<br />
* To cancel this mode, press the Flash Button until there is a different mode symbol (or none) on the<br />
LCD panel.<br />
* In dim light, the camera's shutter speed will be automatically reduced up to 2 sec. To prevent a blurry<br />
picture, hold the camera steady and press the Shutter Release Button gently.<br />
(Take particular care in Telephoto (130 mm) mode. )<br />
RED EYE REDUCTION SLOW SYNCH MODE<br />
Set this mode to take red eye reduced slow synch photography.<br />
; At the previous slow synchro mode, red eye reduction<br />
I does not operate.<br />
* Press the Flash Button until SLOW (eye with lighting bolt) symbol appears on<br />
the LCD panel. (Fig. 37)<br />
* To cancel this mode, press the Flash Button un there is a different mode<br />
symbol (or none) on the LCD panel.
CREATIVE MODES<br />
* Portrait Mode<br />
* Action Mode<br />
* Infinity Mode<br />
* Super Night Mode<br />
PORTRAIT MODE<br />
Set this mode for shooting portraits. The camera is set to single auto-focus, the zoom sets automatically,<br />
and the flash fires even in daylight.<br />
1. Turn the Mode Dial to the (person) symbol. (Fig. 38)<br />
2. Press the Shutter Release Button lightly. The camera automatically zooms<br />
and the flash fires when the shutter Release Button is pressed completely.<br />
* Use this mode to obtain photographs with a constant image size, even when the distance to the<br />
subject changes.<br />
* If the Shutter Release Button is pressed lightly again, automatic zooming will also be repeated.<br />
* The flash fires automatically in dim light. A soft flash also fires in sufficient-light conditions.<br />
* If the Zoom Lever is used after pressing the Shutter Release Button lightly, automatic zooming will not<br />
operate. It will operate again after the Shutter Release Button is pressed completely.<br />
ACTION MODE<br />
Set this mode to maintain a moving subject in focus The camera is set to single auto-focus, and pictures<br />
can be taken continually for as long as the Shutter Release Button is pressed.<br />
1. Turn the Mode Dial to the (person running) symbol. (Fig. 39)<br />
* The shutter will release continually for as long as the Shutter Release Button<br />
is pressed.<br />
* This mode cannot be combined with the Red Eye Reduction Mode or the Slow Synchro Mode.
* The camera may not focus on very fast moving subjects.<br />
INFINITY MODE<br />
Set this mode to take beautiful pictures of distant landscapes.<br />
The camera focuses on infinity.<br />
SUPER NIGHT MODE<br />
1. Turn the Mode Dial to the (mountains) symbol. (Fig. 40)<br />
* When the Shutter Release Button is pressed, the' camera focuses on infinity<br />
and the shutter is re leased.<br />
* In dim light, the shutter speed becomes slow. Try prevent blurry pictures, use a<br />
tripod to keep the camera steady.<br />
* The flash does not fire in the Infinity Mode.<br />
With the Super Night Mode, beautiful pictures can be taken at night. The camera automatically selects<br />
the<br />
optimum settings for pictures of night scenery, pictures of people at night (slow synchro photography),<br />
and evening or day landscape pictures. (Example 8)<br />
1. Turn the Mode Dial to the (picture of moon) symbol. (Fig. 41 )<br />
* Use a tripod to keep the camera steady.<br />
2. Gently press the Shutter Release Button to take the picture.<br />
For taking photos of people against a background of night scenery, the camera will first focus on infinity<br />
and open the Shutter for up to 2 second without flash. After closing the Shutter, the camera will then<br />
focus on the people and take another picture with the flash.<br />
* By doing this, beautiful pictures focused on both the night scenery and people are possible. (The<br />
people have to within 6 m (19.7 ft.).<br />
* When taking pictures of night scenery with no subjects, the camera will focus on (infinity). The flash will<br />
not fire, and the shutter will open for one second. (when there is no object within 6 m (19.7 ft.).<br />
* When taking pictures of landscapes in bright daylight, the camera will focus on an (infinity) and set it<br />
self to Auto Exposure. If people are taken in bright daylight, the camera will set itself to daytime<br />
exposure program which will set the flash off.
Reference:<br />
* To prevent blurry pictures from slow shutter speeds, we recommend the use of a tripod or remote<br />
electronic shutter.<br />
* You may wish to advise your subjects not to move until the flash fires, to prevent blurred pictures.<br />
* Also, we recommend that your subject sit on a bench or lean on a fence etc. to be stable.<br />
* Use a wide 38 mm position to reduce the possibility of pictures with a blurred subject and to gain flash<br />
range.<br />
∗ The following shooting modes are automatically selected depending on lighting of the subject and the<br />
shooting distance. (Using a ISO 100 film speed)<br />
Shooting<br />
Distance<br />
Less<br />
than<br />
6M<br />
More<br />
than<br />
6 m<br />
Brightness of the subject<br />
Dark (Less than 5.5 EV) Bright (More than 5.5 EV)<br />
<br />
(Multiple exposure in (1) and (2)<br />
(1) Night scene photography<br />
Focusing: Infinity<br />
Shutter speed: Max. 2 sec.<br />
Flash: Does not fire<br />
(2) Shooting people<br />
Focusing: On the subject<br />
Shutter speed: Automatic<br />
Flash: Fires<br />
<br />
Focusing: Infinity<br />
Shutter speed: Max. 2 sec.<br />
Flash: Does not fire<br />
CONTINUOUS SHOOTING FUNCTION<br />
This mode allows you to shoot continuously as long as<br />
the shutter is pressed.<br />
<br />
Focusing On the subject<br />
Shutter speed: Automatic<br />
Flash: Fires<br />
<br />
Focusing: Infinity<br />
Shutter speed: Automatic<br />
Flash: Does not fire<br />
You can accurately capture continuous action such as competitive sport events, moving subjects, and<br />
even the movements of an infant without missing any important moments.
1. Turn the Drive Dial to the (multiple frame) mark. (Fig. 42)<br />
2 Press and hold down the Shutter Release Button. Your camera will<br />
continuously take pictures at a rate of one frame per second as long as the<br />
Shutter Release Button is held down.<br />
* Auto-focus in continuous shooting is set each time the shutter is released.<br />
USING THE SELF-TIMER<br />
1. Compose your picture with the camera on a steady support.<br />
2. Turn the Drive Dial to the (clock) mark. (Fig. 43)<br />
3. Press the Shutter Release Button.<br />
The Self-Timer lamp on the front of the camera will light steadily for approximately 8 seconds. Then the<br />
lamp will blink for about 2 seconds to indicate that the Shutter is about to release. After a total of about<br />
10 seconds have elapsed, the Shutter will release. (Fig. 44, 45)<br />
Using the Self-timer for Flash Photography:<br />
* If you wish to cancel the self-timer once it has started,<br />
turn the Drive Dial to a different setting.<br />
With Self-Timer photography the built-in Flash will fire automatically whenever there is insufficient light.<br />
* You may not be able to activate the Self-Time when the Flash is just beginning to recharge. Wait about<br />
3 sec. for the flash to charge and try again.<br />
* If the distance between the subject and camera is too close, the AF Monitor will blink. At that time, the<br />
Self-Timer will not activate. Move back a little anc try again.
REMOTE CONTROL UNIT (RC-3/RC-3N)<br />
(SOLD SEPARATELY)<br />
1. When you have decided the composition of your picture, and placed the<br />
camera on a steady support, turn the Drive Dial to (speaker) mark. (Fig. 46)<br />
* Focus Lock cannot be used during Remote Control shooting.<br />
2. Aim the transmitter of the Remote Control Unit toward the front of your<br />
camera, and press the Transmit Button. (Fig. 47)<br />
When the signal is received, the camera is focused automatically, the Self-timer<br />
Lamp lights up and after about 2 seconds the Shutter is released. (Fig. 48)<br />
For another shot, repeat the procedure 2 above.<br />
3. When you are finished shooting with the Remote Control Unit, turn the Drive Dial to a different setting.<br />
* The camera is focused when the signals from the Remote Control Unit are received.<br />
* When the power is switched off, either by Auto Power Off or by the Drive Dial, remote control shooting<br />
is cancelled.<br />
* Be careful to keep the transmitter of the Remote Control Unit clean.<br />
* The operating life of the built-in battery of the RC-3 is about 2 years. If the camera stops responding to<br />
the Remote Control Unit, it is probably because the battery has run down. Take the Remote Control Unit<br />
to your <strong>Ricoh</strong> dealer.<br />
* Operating distance is within about 3.5 m-5 m (12 ft.-16.4 ft.), which varies depending on the angle of<br />
transmission to the camera.
(OPTIONAL) DATABACK SETTINGS<br />
Nomenclature of the Date Imprinting Feature (Fig. 49)<br />
1. LCD Panel<br />
2. Month Indication<br />
3. Day Indication<br />
Imprinting mode<br />
Examples of Date Imprinting (Fig. 50)<br />
Selecting Imprinting Mode (Fig. 50)<br />
4. Set Button<br />
5. Select Button<br />
6. Mode Button<br />
1. 1996 November 3rd.<br />
2. November 3rd. 1996<br />
3. 3rd. November 1996<br />
4. 3rd. 15:59<br />
5. No Imprinting<br />
The Date Imprinting Mode can be divided into 5 types:<br />
Date, Time, and No Imprinting.<br />
Each time the Mode button is pressed, the display changes as shown below. (Fig. 51)
1. Date (Year/Month/Day)<br />
2. Date (Month/Day/Year)<br />
3. Date (Day/Month/Year)<br />
4. Time (Day/Hour/Minute)<br />
5. No Imprinting<br />
Resetting the Date and Time (Fig. 52, 53, 54)<br />
Notes on Date Imprinting Feature<br />
1. Each time the Select button is pressed the flashing digits change in the order of<br />
Year, Month, Day Hour and Minute<br />
2. When the digits to be reset flash, press the Set Button until the desired digits appear.<br />
When the Set button is kept pressed, the digits change rapidly.<br />
3. Imprinting is not possible when the date and time are being reset. When resetting is<br />
complete, press the Select Button until all digits stop flashing<br />
* At temperatures below 0° C (32° F), the battery performance deteriorates. The Date Imprinting Feature may not<br />
function correctly and imprinting may become impossible.<br />
* When the batteries are replaced, ['00 0 Of appears and blinks in the LCD Panel. By pressing either the Mode<br />
Button, Select Button, or Set Button, [1 1 '95] will be displayed. Reset the correct time and date.<br />
* The date is sometimes illegible if it is imprinted on the following objects.<br />
(1) "Warm" - colored objects, such as red, yellow orange, etc.<br />
(2) 0bjects with details similar in size to the imprinted date (gravel, leaves, etc.)<br />
(3) Objects of high luminance (sky, white wall, etc.)
PROPER CARE OF YOUR CAMERA<br />
* If there is dirt on the lens or Distance Measuring Windows and in the camera<br />
body, do not attempt to remove it with your fingers. Use a blower to blow the<br />
dust away, or wipe the surface gently with camera lens tissue or a soft cloth.<br />
(Fig. 55)<br />
* Camera malfunction can be caused by impact, humidity, salt etc. After using<br />
the camera at the beach or places where there is salt spray, high humidity or<br />
chemicals, wipe it off carefully. (Fig. 56)<br />
* Take care not to expose the camera to sudden changes in temperature, as<br />
that may cause condensation on the lens and film or inside the body, or other<br />
malfunctions. (Fig. 57)<br />
* Do not expose the camera for a long period of time to extremely high<br />
temperatures, such as in your car or on the beach, as this may ruin your<br />
film, or cause other malfunctions. (Fig. 58)<br />
* When using a tripod, do not try to force a long screw Into the socket. The<br />
screw length should be less than 5.7 mm (1/4 inch). (Fig. 59)<br />
* Do not place the camera near equipment that has strong magnetic fields<br />
such as a television or radio
TROUBLESHOOTING<br />
When the shutter does not release or the pictures appear blurry, check the table below. If the camera<br />
still does not function properly, take it to your nearest <strong>Ricoh</strong> Service Center.<br />
1. When the shutter does not release<br />
Cause Check Remedy Page<br />
The power is<br />
not on.<br />
The batteries<br />
are exhausted.<br />
The flash is<br />
charging.<br />
The shooting<br />
distance is too<br />
short.<br />
The film is not<br />
loaded<br />
correctly.<br />
The film is<br />
rewound.<br />
Is the lens in the storage<br />
position?<br />
_The power is not on.<br />
Is the Battery Mark blinking in the<br />
LCD Panel?<br />
Is the Flash Monitor (red) next to<br />
the Viewfinder blinking?<br />
Is the AF Monitor (green) next to<br />
the Viewfinder blinking? Or, is the<br />
subject in the auto-focus marks<br />
nearer than 1 m (3.3 ft.) away?<br />
Is "0" blinking in the Exposure<br />
Counter?<br />
Is "E" displayed on the Exposure<br />
Counter?<br />
2. When the pictures appear blurry<br />
Turn the Drive Dial to<br />
ON to turn the<br />
power on.<br />
Replace the batteries<br />
with new ones.<br />
Wait until the Flash<br />
Monitor turns off.<br />
Change the shooting<br />
distance. (Move more<br />
than 1 m away from<br />
the subject. )<br />
Open the Back Cover<br />
and reload the film.<br />
Replace the film with<br />
a new one.<br />
pg. 19<br />
pg. 18<br />
Pg. 25<br />
Pg. 23<br />
pg. 19<br />
pg. 19<br />
Cause Remedy Page<br />
The subject is not in the auto-focus area.<br />
The camera focused on something in front<br />
of the main subject.<br />
The Shutter Release Button was pressed<br />
when the AF Monitor was blinking to<br />
indicate a subject that was difficult to focus.<br />
MAJOR SPECIFICATIONS<br />
Make sure the subject to be focused is within the<br />
multi-focus marks, or use the S. AF Mode. The multi<br />
auto-focus area is larger in telephoto than in wide.<br />
Make sure there is no other object in front of the main<br />
subject in the AF marks.<br />
Press the Shutter Release Button halfway and make<br />
sure the AF Monitor is lit before pressing it<br />
completely.<br />
Type: Fully automatic 35 mm autofocus lens shutter camera with built-in zoom lens<br />
Lens: 38 mm f/4.5-130 mm f/9.5 zoom lens, 6 elements, 3 groups<br />
pg.<br />
23<br />
pg.<br />
23<br />
pg.<br />
24
Focusing: Multi-autofocus type with single AF facility<br />
Passive type with auxiliary AF light in dark conditions<br />
Mulb-autofocus in 7 zones<br />
Min. focus distance: 1.0 m (3.3 ft.) - infinity<br />
Shutter: Programmed electronic shutter: 2-1/330 sec.<br />
Viewfinder: Real image zoom viewfinder<br />
Exposure Adjustment: Dual SPD photocell, Programmed zoom AE with automatic backlight control<br />
Coupling range EV3.5 - 17 (Wide, lSO 100), EV5.8 - 19 3 (Tele) (ISO 100)<br />
Film Speed: ISO 50-3200, Compatible with DX code system, Non-DX films are set to ISO 100<br />
Film Load/Wind/Rewinding: <strong>Ricoh</strong> auto-load system pre-wind system. Film pre-winds to the last frame number<br />
when back cover closed. Mid-roll rewind possible<br />
Exposure Counter: Electronic, Counts down number of exposures left<br />
Built-in Flash: Electronic Flash automatically activates in dim light and backlight.<br />
Modes: Auto, Red eye reduction, On. Off, Slow synchro, Red eye reduction slow synchro<br />
Flash Range: Guide number; 17-21 (ISO 100/m)<br />
56-69 (ISO 100/ft.)<br />
(ISO 100) Wide: 1 m-5.3 m (3.3 ft. - 17.5 ft.,<br />
Tele: 1 m-3.2 m (3.3 ft. - 10.5 ft.)<br />
(ISO 400) Wide 1 m-10.6 m (3.3 ft. - 35 ft.)<br />
Tele: 1 m-6.4 m (3.3 ft. - 21 ft.)<br />
Flash Recycle time: Approx. 4 sec.<br />
Other Features: Twin dial selector with/LED, Zoom flash, Super night mode, Action mode, Port<br />
mode, Inf. mode, Single AF mode. Continuous Shooting mode.<br />
Remote control possible with optional remote controller RC-3/RC-3N<br />
Date imprinting (date version)<br />
Power Source: 3V lithium battery x 2 CR123A or equivalent 4www.butkus.<strong>org</strong><br />
Dimensions: 128 mm (W) X 72 mm (H) x 52 mm (D),<br />
5in.(W) X 2.8in.(H) X 2 in.(D)<br />
Weight: 295 9/10.4 oz. (without battery) Specifications subject to change without notice.