How To Use the Voyager Configuration Migration Tool - Check Point
How To Use the Voyager Configuration Migration Tool - Check Point
How To Use the Voyager Configuration Migration Tool - Check Point

You also want an ePaper? Increase the reach of your titles
YUMPU automatically turns print PDFs into web optimized ePapers that Google loves.
<strong>How</strong> <strong>To</strong> <strong>Use</strong> <strong>the</strong> <strong>Voyager</strong><br />
<strong>Configuration</strong> <strong>Migration</strong><br />
<strong>To</strong>ol<br />
10 April 2012
© 2012 <strong>Check</strong> <strong>Point</strong> Software Technologies Ltd.<br />
All rights reserved. This product and related documentation are protected by copyright and distributed under<br />
licensing restricting <strong>the</strong>ir use, copying, distribution, and decompilation. No part of this product or related<br />
documentation may be reproduced in any form or by any means without prior written authorization of <strong>Check</strong><br />
<strong>Point</strong>. While every precaution has been taken in <strong>the</strong> preparation of this book, <strong>Check</strong> <strong>Point</strong> assumes no<br />
responsibility for errors or omissions. This publication and features described herein are subject to change<br />
without notice.<br />
RESTRICTED RIGHTS LEGEND:<br />
<strong>Use</strong>, duplication, or disclosure by <strong>the</strong> government is subject to restrictions as set forth in subparagraph<br />
(c)(1)(ii) of <strong>the</strong> Rights in Technical Data and Computer Software clause at DFARS 252.227-7013 and FAR<br />
52.227-19.<br />
TRADEMARKS:<br />
Refer to <strong>the</strong> Copyright page (http://www.checkpoint.com/copyright.html) for a list of our trademarks.<br />
Refer to <strong>the</strong> Third Party copyright notices (http://www.checkpoint.com/3rd_party_copyright.html) for a list of<br />
relevant copyrights and third-party licenses.
Important Information<br />
Latest Software<br />
We recommend that you install <strong>the</strong> most recent software release to stay up-to-date with <strong>the</strong> latest functional<br />
improvements, stability fixes, security enhancements and protection against new and evolving attacks.<br />
Latest Documentation<br />
The latest version of this document is at:<br />
http://supportcontent.checkpoint.com/documentation_download?ID=15381<br />
For additional technical information, visit <strong>the</strong> <strong>Check</strong> <strong>Point</strong> Support Center<br />
(http://supportcenter.checkpoint.com).<br />
Revision History<br />
Date<br />
Description<br />
4/10/2012 First release of this document<br />
Feedback<br />
<strong>Check</strong> <strong>Point</strong> is engaged in a continuous effort to improve its documentation.<br />
Please help us by sending your comments<br />
(mailto:cp_techpub_feedback@checkpoint.com?subject=Feedback on <strong>How</strong> <strong>To</strong> <strong>Use</strong> <strong>the</strong> <strong>Voyager</strong><br />
<strong>Configuration</strong> <strong>Migration</strong> <strong>To</strong>ol ).
Contents<br />
Important Information ............................................................................................. 3<br />
<strong>How</strong> <strong>To</strong> <strong>Use</strong> <strong>the</strong> <strong>Voyager</strong> <strong>Configuration</strong> <strong>Migration</strong> <strong>To</strong>ol ....................................... 5<br />
Objective ................................................................................................................. 5<br />
Supported Versions ............................................................................................. 5<br />
Supported Operating Systems ............................................................................. 5<br />
Supported Appliances ......................................................................................... 5<br />
Before You Start ..................................................................................................... 5<br />
Related Documents and Assumed Knowledge .................................................... 5<br />
Using <strong>the</strong> <strong>Voyager</strong> <strong>Configuration</strong> <strong>Migration</strong> <strong>To</strong>ol ................................................. 5<br />
Migrating a System <strong>Configuration</strong> ........................................................................ 5<br />
Migrating <strong>the</strong> <strong>Configuration</strong> Information ............................................................... 7<br />
Verifying <strong>the</strong> Procedure........................................................................................ 10<br />
Index ...................................................................................................................... 11
<strong>How</strong> <strong>To</strong> <strong>Use</strong> <strong>the</strong> <strong>Voyager</strong> <strong>Configuration</strong> <strong>Migration</strong> <strong>To</strong>ol<br />
<strong>How</strong> <strong>To</strong> <strong>Use</strong> <strong>the</strong> <strong>Voyager</strong><br />
<strong>Configuration</strong> <strong>Migration</strong> <strong>To</strong>ol<br />
Objective<br />
This document outlines <strong>the</strong> steps used to migrate <strong>the</strong> IPSO configuration from one IP appliance to ano<strong>the</strong>r<br />
with <strong>the</strong> <strong>Configuration</strong> <strong>Migration</strong> tool in <strong>Voyager</strong>. With this tool, <strong>the</strong> IP appliance and IPSO version to which<br />
you migrate is irrelevant. For example: migration from IPSO 3.8 to IPSO 6.2 is supported.<br />
Supported Versions<br />
<strong>Check</strong> <strong>Point</strong> versions that are supported on IPSO 6.x (NGX R65 for IPSO 6, R70.x, R71.x R75.x)<br />
Supported Operating Systems<br />
IPSO 6.1 and higher<br />
Supported Appliances<br />
Any IP Appliance<br />
Before You Start<br />
Related Documents and Assumed Knowledge<br />
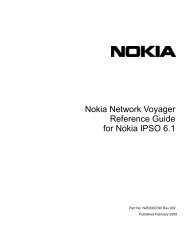
Network <strong>Voyager</strong> for IPSO 6.2 Reference Guide<br />
(http://downloads.checkpoint.com/dc/download.htm?ID=10293)<br />
Using <strong>the</strong> <strong>Voyager</strong> <strong>Configuration</strong><br />
<strong>Migration</strong> <strong>To</strong>ol<br />
Migrating a System <strong>Configuration</strong><br />
<strong>Configuration</strong> migration allows you to map interface configuration across <strong>the</strong> platforms. For example, you<br />
can map interface A on <strong>the</strong> source to interface B on <strong>the</strong> target so that interface B is configured identically to<br />
A.<br />
<strong>How</strong> <strong>To</strong> <strong>Use</strong> <strong>the</strong> <strong>Voyager</strong> <strong>Configuration</strong> <strong>Migration</strong> <strong>To</strong>ol | 5
For Example: <strong>Migration</strong> from an IP350 with IPSO 3.9 to an IP1280 with IPSO 6.2:<br />
Using <strong>the</strong> <strong>Voyager</strong> <strong>Configuration</strong> <strong>Migration</strong> <strong>To</strong>ol<br />
IP350 (Source) Interface settings:<br />
IP1290 (Destination) Interface settings:<br />
<strong>To</strong> Acquire <strong>Configuration</strong> Information:<br />
You can acquire configuration information from a <strong>Check</strong> <strong>Point</strong> platform with any version of IPSO between<br />
3.7 and 4.2 (inclusive). <strong>To</strong> acquire configuration information, you copy an IPSO configuration file or backup<br />
file from <strong>the</strong> source to <strong>the</strong> target.<br />
You can move <strong>the</strong>se files directly from <strong>the</strong> source to <strong>the</strong> target (with <strong>Voyager</strong> or ano<strong>the</strong>r method) or move<br />
<strong>the</strong>m to a workstation. <strong>To</strong> move <strong>the</strong> file to <strong>the</strong> target with <strong>Voyager</strong>, use <strong>the</strong>se options on <strong>the</strong> Acquire<br />
<strong>Configuration</strong> window:<br />
<br />
<br />
Remote Device: <strong>Use</strong> this option to transfer a file directly from <strong>the</strong> source to <strong>the</strong> target.<br />
<br />
<br />
<br />
You must have network access to <strong>the</strong> source.<br />
If you specify a file (configuration file or backup file), you must specify <strong>the</strong> complete path.<br />
If you do not specify a file, IPSO automatically copies <strong>the</strong> current configuration database file from <strong>the</strong><br />
source.<br />
Upload: <strong>Use</strong> this option if you have moved <strong>the</strong> IPSO configuration file or backup file from <strong>the</strong> source to<br />
your workstation (<strong>the</strong> computer with Network <strong>Voyager</strong>).<br />
<strong>How</strong> <strong>To</strong> <strong>Use</strong> <strong>the</strong> <strong>Voyager</strong> <strong>Configuration</strong> <strong>Migration</strong> <strong>To</strong>ol | 6
Using <strong>the</strong> <strong>Voyager</strong> <strong>Configuration</strong> <strong>Migration</strong> <strong>To</strong>ol<br />
Local File: <strong>Use</strong> this option if you have moved <strong>the</strong> IPSO configuration file or backup file from <strong>the</strong> source<br />
to <strong>the</strong> target with FTP or a similar method. If you use this option, you must save <strong>the</strong> configuration file or<br />
backup file in one of several specified directories. <strong>To</strong> see which directories you can use, expand <strong>the</strong><br />
directory tree in <strong>the</strong> Select File to Acquire box.<br />
Example of a remote configuration set:<br />
Navigate to System > <strong>To</strong>ols > <strong>Configuration</strong> <strong>Migration</strong> > Acquire <strong>Configuration</strong>:<br />
See Managing <strong>Configuration</strong> Sets and Creating Backup Files sections in <strong>the</strong> Network <strong>Voyager</strong> for IPSO<br />
6.2 Reference Guide (http://downloads.checkpoint.com/dc/download.htm?ID=10293) for instructions to<br />
create <strong>the</strong> <strong>Configuration</strong> Sets and <strong>the</strong> Backups.<br />
Regardless of which method you choose, click Apply once you have selected <strong>the</strong> appropriate file. If IPSO<br />
recognizes that <strong>the</strong> file is a valid configuration file or backup file (and transfers it to <strong>the</strong> target, if necessary),<br />
you see a message that indicates that <strong>the</strong> process is successful and tells you to access <strong>the</strong> Migrate<br />
<strong>Configuration</strong> window.<br />
Migrating <strong>the</strong> <strong>Configuration</strong> Information<br />
Navigate to System > <strong>To</strong>ols > <strong>Configuration</strong> <strong>Migration</strong> > Migrate <strong>Configuration</strong>:<br />
<strong>How</strong> <strong>To</strong> <strong>Use</strong> <strong>the</strong> <strong>Voyager</strong> <strong>Configuration</strong> <strong>Migration</strong> <strong>To</strong>ol | 7
Using <strong>the</strong> <strong>Voyager</strong> <strong>Configuration</strong> <strong>Migration</strong> <strong>To</strong>ol<br />
<strong>Voyager</strong> displays <strong>the</strong> IPSO version of <strong>the</strong> source configuration at <strong>the</strong> top of <strong>the</strong> page to help you verify that<br />
you acquired appropriate configuration information. IPSO needs to know <strong>the</strong> model number of <strong>the</strong> source<br />
platform. If IPSO is able to determine <strong>the</strong> number because of <strong>the</strong> method used to acquire <strong>the</strong> configuration<br />
or backup file, <strong>the</strong> number is displayed near <strong>the</strong> top of <strong>the</strong> page. O<strong>the</strong>rwise <strong>the</strong>re is a menu from which you<br />
must select <strong>the</strong> model of <strong>the</strong> source platform.<br />
<strong>Use</strong> <strong>the</strong> Migrate <strong>Configuration</strong> page to determine how to map <strong>the</strong> interfaces from <strong>the</strong> Source platform to <strong>the</strong><br />
Target platform. When you map a physical interface, IPSO migrates all <strong>the</strong> logical configuration for that<br />
interface to <strong>the</strong> physical interface on <strong>the</strong> target. That includes VLAN information (see above).<br />
Migrating Features<br />
If you include <strong>Use</strong>rs as one of <strong>the</strong> features to migrate (<strong>the</strong> default setting), <strong>the</strong> admin password of <strong>the</strong> source<br />
platform becomes <strong>the</strong> admin password of <strong>the</strong> target platform after you reboot it. If you want to prevent this,<br />
remove <strong>Use</strong>rs from <strong>the</strong> list of features to migrate before you finish <strong>the</strong> migration. In this case, <strong>the</strong> original<br />
admin password of <strong>the</strong> target platform is retained after you reboot <strong>the</strong> target. <strong>Configuration</strong> information for<br />
certain features cannot be migrated because it is not stored in IPSO configuration files. Examples include:<br />
<br />
<br />
<br />
<br />
<br />
<br />
IP Clustering<br />
HA <strong>Voyager</strong><br />
Packages<br />
optional disks<br />
PPPoE<br />
ISDN<br />
IPv6 host address (if <strong>the</strong> source configuration is from an IPSO version previous to 6.1)<br />
<strong>How</strong> <strong>To</strong> <strong>Use</strong> <strong>the</strong> <strong>Voyager</strong> <strong>Configuration</strong> <strong>Migration</strong> <strong>To</strong>ol | 8
Using <strong>the</strong> <strong>Voyager</strong> <strong>Configuration</strong> <strong>Migration</strong> <strong>To</strong>ol<br />
If configuration information for a feature cannot be migrated, <strong>the</strong> feature is not included in <strong>the</strong> list.<br />
Once <strong>the</strong> proper features are added (or removed) click <strong>the</strong> Finish button.<br />
<strong>How</strong> <strong>To</strong> <strong>Use</strong> <strong>the</strong> <strong>Voyager</strong> <strong>Configuration</strong> <strong>Migration</strong> <strong>To</strong>ol | 9
If desired you can now use <strong>the</strong> provided link to view <strong>the</strong> configuration migration process details.<br />
Verifying <strong>the</strong> Procedure<br />
Verifying <strong>the</strong> Procedure<br />
<strong>To</strong> verify that <strong>the</strong> migration is successful, simply check <strong>the</strong> interface configuration on <strong>the</strong> Target platform to<br />
ensure all of <strong>the</strong> Source interface configurations (and features) appear correctly.<br />
<strong>How</strong> <strong>To</strong> <strong>Use</strong> <strong>the</strong> <strong>Voyager</strong> <strong>Configuration</strong> <strong>Migration</strong> <strong>To</strong>ol | 10
Index<br />
B<br />
Before You Start • 5<br />
H<br />
<strong>How</strong> <strong>To</strong> <strong>Use</strong> <strong>the</strong> <strong>Voyager</strong> <strong>Configuration</strong><br />
<strong>Migration</strong> <strong>To</strong>ol • 5<br />
I<br />
Important Information • 3<br />
M<br />
Migrating a System <strong>Configuration</strong> • 5<br />
Migrating <strong>the</strong> <strong>Configuration</strong> Information • 7<br />
O<br />
Objective • 5<br />
R<br />
Related Documents and Assumed Knowledge •<br />
5<br />
S<br />
Supported Appliances • 5<br />
Supported Operating Systems • 5<br />
Supported Versions • 5<br />
U<br />
Using <strong>the</strong> <strong>Voyager</strong> <strong>Configuration</strong> <strong>Migration</strong> <strong>To</strong>ol<br />
• 5<br />
V<br />
Verifying <strong>the</strong> Procedure • 10