Am Fässlegrund 8 78054 VS - Schwenningen phone 07720 33964 ...
Am Fässlegrund 8 78054 VS - Schwenningen phone 07720 33964 ...
Am Fässlegrund 8 78054 VS - Schwenningen phone 07720 33964 ...

Create successful ePaper yourself
Turn your PDF publications into a flip-book with our unique Google optimized e-Paper software.
Maintenance<br />
Avoid sand in the thread bore of the backaxle and the other fasteners,<br />
this will lead to a seizure of the fasteners and destroys the threads.<br />
Should sand get into the threads, they can cleanded with an<br />
old toothbrush.To protect fastener threads and the ball bearings of<br />
the wheels and downtube from corrosion they should be lubricat with<br />
salt water resistant grease, anti corrosive Spray or vaseline.<br />
This will prolong the the life spart of the bearings and help you to<br />
save money.<br />
Paint damages and chips can be mended with proprietary paint,<br />
the galvanization of all metall parts makes a metall primming<br />
superfluos.<br />
After running throught saltwater your buggy should be washed with<br />
clear water and all bearings should lubricated new.<br />
Bearings<br />
The bearings are by far the most highly stressed parts of the buggy.<br />
Therefor special attention and maintenance should be paid to them.<br />
After use in saltwater the bearings should be cleaned and lubricated.<br />
For this it is possible to remove the small plastic sealing rings<br />
carefully with a smal screwdriver...<br />
Then clean the bearings with a suitable solvent and lubricat again<br />
with marine bearing grease. By doing this you will extend the life span<br />
of the bearings and prevent corrosion and reduce the cha nge of<br />
bearing seizure which will destroy the wheels.<br />
Safty Notes<br />
This buggy has been designed and buildt exclusivly for purpose<br />
of kitesailing.It must only be used for its special purpose<br />
It must not be coupled to other vehicles, especially engine driven<br />
ones and does not fulfil the demands of Road Traffic Regulations.<br />
For this reason driving on puplic roads is not permitted<br />
Use only with appropriate clothinga helmet and gloves.<br />
Always behave respectfully towards passers-by , animals<br />
the the environment .<br />
Exclusion of liability<br />
Because of the nature of this sports Libre do not take<br />
any responsability for accident that could occur<br />
during the use of this sports equipment<br />
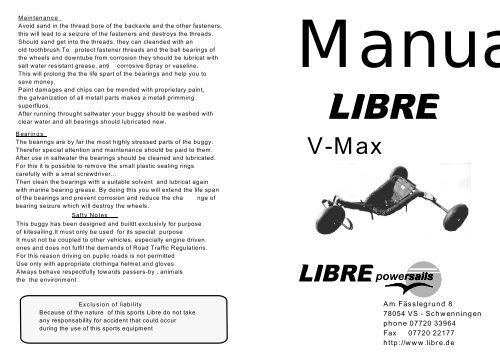
Manua<br />
V-Max<br />
<strong>Am</strong> <strong>Fässlegrund</strong> 8<br />
<strong>78054</strong> <strong>VS</strong> - <strong>Schwenningen</strong><br />
<strong>phone</strong> <strong>07720</strong> <strong>33964</strong><br />
Fax <strong>07720</strong> 22177<br />
http://www.libre.de
Congratulations on the purchase of your new LIBRE V- Max.<br />
With this paracart you have acquired sports equipment of highest<br />
quality. The range of adjustments will make it possible for you to finetine<br />
your Buggy to the needs at competition or leisure riding.<br />
The LIBRE V- Max has been developed especially for the use with<br />
modern high performance kites. It has a 1250 mm back axle ,<br />
splashguard, footstraps and a specially designed comfortable seat.<br />
This paracart is developed for intermediate and race pilots.<br />
We wish you many exciting hours and a lots of fun with this buggy<br />
your<br />
Team of<br />
Content of box<br />
1 Front fork and downtube with pre-mounted front wheel.<br />
1 Splashguard<br />
2 Footpegs with grip tape and foot straps with laces.<br />
2 Side rails with seat .<br />
1 Back axel 125 cm.<br />
2 Back wheels with 20 mm nut and bolt<br />
Mounting<br />
1. pass back axle through the two strap loops that are fixed to the seat<br />
and tension them lightlyy with the buckle. lightly fasten the back axle<br />
to the side rails with the 13 mm bolts.<br />
2. Now unscrew the four M8 screws and join the two siderails loosley,<br />
keep sufficent distance that you can pass the downtube easily<br />
between the two clamp plates .<br />
3. Put the downtube between the clamp plates and lightly fasten the<br />
screws.<br />
4. Bolt the back wheels to the axle and fix the footpegs wit h the 10 mm<br />
bolts to the front fork. Pass the the loop of the foot strap over the<br />
foot peg before bolting the foot pegs on.<br />
5. Find the necessary lenght of the downtube corresponding to<br />
your body height. Fully fasten the screw of the clamp plate and fixing<br />
screws of the back axle.<br />
6. To fix the splash guard pass the rubber band trough the backaxle<br />
and thread them into the buckles.<br />
The foot straps are fixed to the footpegs<br />
as shown in the drawing and tied to the<br />
crosspiece with the laces provided, this lace<br />
supports prevents the treading down of the foot<br />
straps, keeps them open and makes the entry in the<br />
buggy easier.<br />
Attention<br />
Too tight an adjustment of the footstraps can lead to injuiries in<br />
an accident. When adjusting the footstraps make sure that<br />
you can quickly remove your feet from the straps<br />
without getting caught.<br />
Mounting the wheels<br />
To prevent the wheels from coming loose while running the M 20<br />
wheel bolts should be locked against the back axle with the lock nuts<br />
provided. This is done by using a spanner / socket on the bolt tightening<br />
the lock nut against the axle with a second spanner (30 mm) there<br />
should be no lateral movement of the wheel on the bolt.<br />
Tyre pressure<br />
A correct tyre pressure increases the riding comfort and determines the<br />
speed of your buggy on different surfaces. On soft sand you will be<br />
much faster with the correct air pressure in the wheel.<br />
we suggest following pressures:<br />
Seat adjustment<br />
Front 0.4 - 1,0 bar Rear 0.5 - 1,2 bar<br />
The lower you set the seat, the more stable your buggy will be to the<br />
side forces of the kite..<br />
On flat and even ground the seat can be fixed in a low position.<br />
on uneven ground the seat should be put higher.<br />
The seat is adjusted by moving the belt straps<br />
in the side clasp buckles of the seat A<br />
and the two back straps that fixed the<br />
seat to the backaxle B<br />
B<br />
A