INSTRUCTION AND OPERATION MANUAL - CMC Espresso
INSTRUCTION AND OPERATION MANUAL - CMC Espresso
INSTRUCTION AND OPERATION MANUAL - CMC Espresso

You also want an ePaper? Increase the reach of your titles
YUMPU automatically turns print PDFs into web optimized ePapers that Google loves.
IBERITAL DE RECAMBIOS, S.A.<br />
2.5.1.- SPRING LOADED SAFETY VALVE<br />
In the case of anomalies in the heating control pressure system the spring loaded safety valve (31),<br />
located on the boiler guarantees the integrity of the boiler by releasing the excess pressure when the<br />
boiler reaches 1.8 bar.<br />
The safety valves are manufactured under strict conditions and respect severe technical criteria, they<br />
are sealed after testing in the factory.<br />
2.5.2.- PRESSURE ELIMINATING VALVE (empty valve)<br />
This valve (32), which is located on the boiler, prevents depressurization inside the boiler therefore<br />
avoiding the risk of liquids being sucked back through the steam jet.<br />
2.5.3.- OPTICAL LEVEL CONTROL <strong>AND</strong> AUTOMATIC WATER LEVEL DEVICE<br />
48) Solenoid valve<br />
A probe (62) (consisting of a stainless steel rod which is in contact with the water inside the boiler)<br />
positioned the water level in the optical level device (11). The probe is connected to the electronic<br />
control (CPU)(1) signaling a low water level in the boiler. Then, the CPU switches on the pump (29)<br />
and activates the solenoid valve, therefore allowing passing water until the correct water level in the<br />
boiler has been reached.<br />
2.5.4.- VALVE UNIT<br />
35) Expansion valve (set to open at approx. 12 bar -/+1)<br />
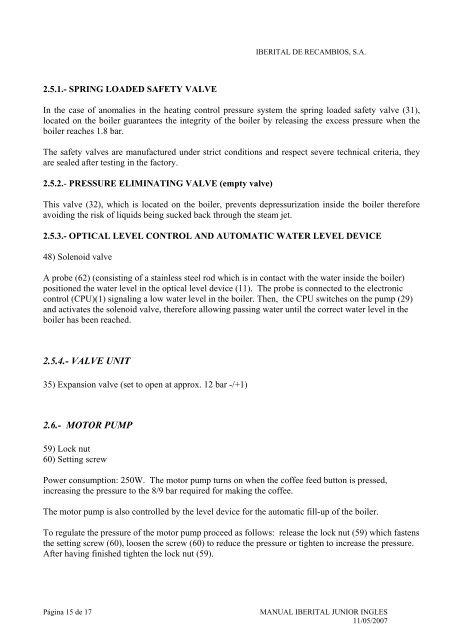
2.6.- MOTOR PUMP<br />
59) Lock nut<br />
60) Setting screw<br />
Power consumption: 250W. The motor pump turns on when the coffee feed button is pressed,<br />
increasing the pressure to the 8/9 bar required for making the coffee.<br />
The motor pump is also controlled by the level device for the automatic fill-up of the boiler.<br />
To regulate the pressure of the motor pump proceed as follows: release the lock nut (59) which fastens<br />
the setting screw (60), loosen the screw (60) to reduce the pressure or tighten to increase the pressure.<br />
After having finished tighten the lock nut (59).<br />
Página 15 de 17<br />
<strong>MANUAL</strong> IBERITAL JUNIOR INGLES<br />
11/05/2007