
Create successful ePaper yourself
Turn your PDF publications into a flip-book with our unique Google optimized e-Paper software.
Doc.-No.: 01/EHTD400<br />
Date: 01.03.2003<br />
Revision:<br />
Rev. date:<br />
Page: 1 of 40<br />
Equipment Handbook<br />
TD400<br />
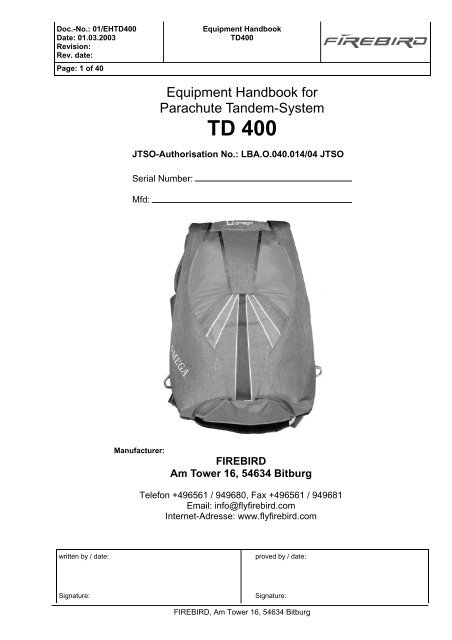
Equipment Handbook for<br />
Parachute <strong>Tandem</strong>-System<br />
TD 400<br />
JTSO-Authorisation No.: LBA.O.040.014/04 JTSO<br />
Serial Number:<br />
Mfd:<br />
Manufacturer:<br />
FIREBIRD<br />
Am Tower 16, 54634 Bitburg<br />
Telefon +496561 / 949680, Fax +496561 / 949681<br />
Email: info@flyfirebird.com<br />
Internet-Adresse: www.flyfirebird.com<br />
written by / date:<br />
proved by / date:<br />
Signature:<br />
Signature:<br />
FIREBIRD, Am Tower 16, 54634 Bitburg
Doc.-No.: 01/EHTD400<br />
Date: 01.03.2003<br />
Revision:<br />
Rev. date:<br />
Page: 2 of 40<br />
Register of valid Pages/Capter:<br />
Equipment Handbook<br />
TD400<br />
Number: Titel: Released: Edition:<br />
Page 01 Main 01.03.2003 First Issue<br />
Page 02 Register of valid Pages/Capter 01.03.2003 First Issue<br />
Page 03 Table of Contents 01.03.2003 First Issue<br />
Page 04 Foreword 25.10.06 Rev. 2<br />
Page 05 Technical Data, Quick 400 01.03.2003 First Issue<br />
Page 06 System Operating Data 01.03.2003 First Issue<br />
Page 07 Main Parachute 01.03.2003 First Issue<br />
Page 08 Harness and Container 01.03.2003 First Issue<br />
Page 09 <strong>Tandem</strong>-, Passengerharness 01.12.2005 Rev. 1<br />
Page 10 Assembly Instructions 01.03.2003 First Issue<br />
Page 11 Attaching Toggles 01.03.2003 First Issue<br />
Page 12 Periodic Inspection Instructions 01.12.2005 Rev. 1<br />
Page 13 Periodic Inspection Instructions 01.12.2005 Rev. 1<br />
Page 14 Safekeeping and Storage 01.03.2003 First Issue<br />
Page 15 Packing Instructions for the Quick 01.03.2003 First Issue<br />
Page 16 Packing Instructions for the Quick 01.03.2003 First Issue<br />
Page 17 Packing Instructions for the Quick 01.03.2003 First Issue<br />
Page 18 Packing Instructions for the Quick 01.03.2003 First Issue<br />
Page 19 Packing Instructions for the Quick 01.03.2003 First Issue<br />
Page 20 Packing Instructions for the Quick 01.03.2003 First Issue<br />
Page 21 Packing Instructions for the Quick 01.03.2003 First Issue<br />
Page 22 Packing Instructions for the Quick 01.03.2003 First Issue<br />
Page 23 Packing Instructions for Contrail 01.03.2003 First Issue<br />
Page 24 Packing Instructions for Contrail 01.03.2003 First Issue<br />
Page 25 Packing Instructions for Contrail 01.03.2003 First Issue<br />
Page 26 Packing Instructions for Contrail 01.03.2003 First Issue<br />
Page 27 Packing Instructions for Contrail 01.12.2005 Rev. 1<br />
Page 28 Packing Instructions for Contrail 01.03.2003 First Issue<br />
Page 29 Packing Instructions for Contrail 01.03.2003 First Issue<br />
Page 30 Packing Instructions for Contrail 01.03.2003 First Issue<br />
Page 31 Packing Instructions for Contrail 01.03.2003 First Issue<br />
Page 32 Putting on the Parachute 01.03.2003 First Issue<br />
Page 33 Preinspection before each jump 01.12.2005 Rev. 1<br />
Page 34 Preinspection before each jump 01.12.2005 Rev. 1<br />
Page 35 <strong>Tandem</strong>-Pilot Candidate Training 01.12.2005 Rev. 1<br />
Page 36 Malfunction Chart 01.12.2005 Rev. 1<br />
Page 37 Standard Jump Procedures 01.12.2005 Rev. 1<br />
Page 38 Emergency Procedures 01.12.2005 Rev. 1<br />
Page 39 <strong>Tandem</strong>-Pilot Requirements 01.12.2005 Rev. 1<br />
Page 40 Address 01.12.2005 Rev. 1<br />
Page<br />
Page<br />
Page<br />
FIREBIRD, Am Tower 16, 54634 Bitburg
Doc.-No.: 01/EHTD400<br />
Date: 01.03.2003<br />
Revision:<br />
Rev. date:<br />
Page: 3 of 40<br />
Equipment Handbook<br />
TD400<br />
Table of Contents<br />
Page<br />
1. Foreword 04<br />
2. Description of Container System 04<br />
3. Description of Quick Reserve Parachute 04<br />
4. Technical Data, Quick 05<br />
5. System Operating Data 06<br />
6. System Parts List 06<br />
7. Parachute Canopies 06-07<br />
8. Harness and Container 08-09<br />
9. Assembly Instructions 10<br />
10. Attaching to Risers 10<br />
11. Attaching Toggles 11<br />
12. Periodic Inspection Instructions 12-13<br />
13. Safekeeping and Storage 14<br />
14. Cleaning 14<br />
15. Repair, Alteration and Replacement 14<br />
16. Packing Instructions for the Quick Reserve 400 15-22<br />
17. Packing Instructions for Contrail 390 23-31<br />
18. Putting on the Parachute 32<br />
19. Manual Activation of the Reserve Parachute 32<br />
20. Allowable Service Life 32<br />
21. Preinspection before each jump 33<br />
22. <strong>Tandem</strong>-Pilot Candidate Training 35<br />
23. Malfunction chart 36<br />
24. Standard Jump Procedures 37<br />
25. Emergency Procedures 38<br />
26. <strong>Tandem</strong>-Pilot Requirements 39<br />
27. Adress 40<br />
FIREBIRD, Am Tower 16, 54634 Bitburg
Doc.-No.: 01/EHTD400<br />
Date: 01.03.2003<br />
Revision: 2<br />
Rev. date: 25.10.06<br />
Page: 4 of 40<br />
1. Foreword<br />
Equipment Handbook<br />
TD400<br />
This Handbook applies to the TD 400 (Parachute System <strong>Omega</strong> <strong>Tandem</strong> with Quick 400<br />
and Contrail 390 maincanopy) from the firm FIREBIRD, Am Tower 16, 54634 Bitburg.<br />
It describes the Harness-Container and the Parachutes as well as the operating, packing<br />
and Maintenance Instructions. It is the duty of the Owner/User to make himself well versed<br />
in the contents of this Handbook. Before using the Parachute System and to strictly<br />
adhere to the Instructions contained within this Handbook in the use of the Parachute<br />
System. Because the described Parachute System contains a reserve Parachute with<br />
Steering and Braking Capabilities, we strongly recommend that the user obtain a through<br />
theoretical and practical briefing in dealing with this Equipment from the Manufacturer. In<br />
this way the Owner/User would guarantee himself the optimal functional safety aswell as<br />
a long life expectancy for the Parachute. In addition, with his proper behavior, he contributes<br />
to the avoidance of accidents, which in the least spares him and the general public<br />
annoyance and damage.<br />
General Data, Classification: JTSO-Authorization C23d according to AS 8015 b<br />
Related Equipment Paperwork:<br />
„Form 1“ Release Certification<br />
Packing Data Card (control pamphlet with date of last reserve packing)<br />
Equipment Handbook<br />
2. Description of Container System<br />
Type of Container<br />
Number, Reserve Container Flaps 6<br />
Reserve Pilot Chute<br />
Manufacturer<br />
Reserve Automatic Opener<br />
Main and Reserve Canopy Container<br />
Spring loaded, Inside<br />
FIREBIRD<br />
Cypres ready<br />
Harness Material Type 7 and Type 8<br />
Hardware<br />
Mil-Spec / PIA-Spec<br />
3. Description of Quick 400 Reserve Parachute<br />
Type of Parachute<br />
Number of Cells 9<br />
Construction Technique<br />
Manufacturer<br />
Suspension Line Connectors<br />
Ram Air Square Reserve<br />
I-Beam Chord-Wise<br />
FIREBIRD<br />
Canopy Fabric Nylon F-111<br />
Suspension Lines<br />
Double-L connector links<br />
Dacron / Vectran<br />
FIREBIRD, Am Tower 16, 54634 Bitburg
Doc.-No.: 01/EHTD400<br />
Date: 01.03.2003<br />
Revision:<br />
Rev. date:<br />
Page: 5 of 40<br />
4. Technical Data, Quick 400<br />
Equipment Handbook<br />
TD400<br />
Fro nt<br />
Topsurface ~ 900 cm<br />
Ba c k<br />
Außenecke<br />
1 3 5 7<br />
233<br />
~ 397 cm<br />
293<br />
A-494 B-507 C-530 D-561<br />
All Mesuarements in<br />
Centimeter<br />
4<br />
70<br />
~100<br />
Trimmung<br />
13<br />
23<br />
31<br />
Max Exit Weight: 225 Kg<br />
Max Deployment Speed: 175 KEAS, 324,1 Km/h<br />
~78<br />
~89<br />
~90<br />
Type Size Span Chord Volume Weight Exit Weight Lines<br />
ft² ft. ft. in³ lbs. lbs. Vectran<br />
Quick 400 400 30.70 13.03 900 15.4 500 D 900 lbs.<br />
V 1050 lbs.<br />
FIREBIRD, Am Tower 16, 54634 Bitburg
Doc.-No.: 01/EHTD400<br />
Date: 01.03.2003<br />
Revision:<br />
Rev. date:<br />
Page: 6 of 40<br />
5. System Operating Data<br />
Weight:<br />
Max Load on Canopy:<br />
Max. Deployment Speed:<br />
Max. Reserve Repack Cycle:<br />
Allowable Service Life:<br />
Equipment Handbook<br />
TD400<br />
circa. 25 Kg<br />
500 lbs. / 225 Kg<br />
240 Km/h<br />
365 Days<br />
15 Years<br />
6. System Parts List<br />
Harness-Container<br />
Harness Passenger<br />
Drogue Chute with Bridel<br />
Spring loaded Pilot chute with Bridel<br />
Reserve Freebag<br />
Main Canopy Bag (POD)<br />
Maincanopy<br />
Reservecanopy<br />
3-Ring release Handle<br />
Second Release Handle<br />
Reservehandle/Reserve Ripcord with Pillow<br />
7. Reserve Parachute Canopy<br />
9-Cell Ram Air rectangular Parachute of F-111 Fabric in I-Beam / Cordwise construction.<br />
1<br />
2 3 4 5 6 7 8 9<br />
20 21 22 23 24 25 26 27 28 29 30 31 32 33 34 35 36 37<br />
19<br />
10 11 12 13 14 15 16 17 18<br />
38 39<br />
FIREBIRD, Am Tower 16, 54634 Bitburg
Doc.-No.: 01/EHTD400<br />
Date: 01.03.2003<br />
Revision:<br />
Rev. date:<br />
Page: 7 of 40<br />
8. Main Parachute<br />
Equipment Handbook<br />
TD400<br />
9-Cell Ram Air semi elliptical Parachute of zero perosity Fabric in I-Beam / Cordwise<br />
construction.<br />
FIREBIRD, Am Tower 16, 54634 Bitburg
Doc.-No.: 01/EHTD400<br />
Date: 01.03.2003<br />
Revision:<br />
Rev. date:<br />
Page: 8 of 40<br />
9. Harness and Container<br />
Equipment Handbook<br />
TD400<br />
The Container of Cordura Fabric is integrated<br />
in the Harness of Mil Spec Typ 7+8 Webbing.<br />
The Container is closed by a metal Pin for a<br />
manual deployment. The Harness is equipped<br />
with a 3-Point closure and has an adjustable<br />
chest strap as well as adjustable leg Straps.<br />
The attechment to the Reserve Parachute takes<br />
place at the suspension line Connector<br />
links and the integrated reserve risers. The<br />
Main Parachute is attached by means of the<br />
suspension line Connector Links and main Risers<br />
to the largest ring of the 3-ring release<br />
System.<br />
FIREBIRD, Am Tower 16, 54634 Bitburg
Doc.-No.: 01/EHTD400<br />
Date: 01.03.2003<br />
Revision: 1<br />
Rev. date: 01.12.05<br />
Page: 9 of 40<br />
<strong>Tandem</strong>harness:<br />
Equipment Handbook<br />
TD400<br />
Passengerharness:<br />
PAX Sholderhook<br />
Back- and<br />
Sholderpadding<br />
Cut-away Handel<br />
Pax Attachement<br />
Reservehandel<br />
Cheststrap<br />
PAX Hiphook<br />
Pax Attachement<br />
Legpadding<br />
Legstrap<br />
Broken Hardware / Lockingspring have to be replaced immediatly<br />
FIREBIRD, Am Tower 16, 54634 Bitburg
Doc.-No.: 01/EHTD400<br />
Date: 01.03.2003<br />
Revision:<br />
Rev. date:<br />
Page: 10 of 40<br />
Equipment Handbook<br />
TD400<br />
9. Assembly Instructions<br />
Your new FIREBIRD reserve canopy must be assembled and packed into your parachute<br />
system by an qualified person (FAA rigger). Before you begin, be sure the risers, toggles,<br />
free bag, pilot chute, harness, container and other items are compatible with your<br />
FIREBIRD reserve canopy.<br />
10. Attaching to Risers<br />
When assembling the canopy onto risers with reserve<br />
links, it is important that the following directions be followed<br />
precisely.<br />
The connector links supplied by FIREBIRD for use with<br />
their reserve canopies are of the highest quality and carefully<br />
inspected and tested. It is important that no substitute<br />
links be used. Other links may look similar, or even identical,<br />
to those supplied by FIREBIRD, but any substitute<br />
could be considerably weaker than the original. (Original<br />
MS 22002-2 tensile strenght: 3000 lbs)<br />
If these directions are followed correctly, and only parts<br />
supplied by FIREBIRD are used, these links will provide<br />
excellent service.<br />
1) Remove all grease and dirt from links, using a solvent that will leave no residue. Trichloreothlane<br />
or any electrical contact cleaner is recommended.<br />
2) Inspect the link carefully. Check for nicks, burrs or any sign of bending or stress.<br />
3) Safe the screws, don’t drop them. Slide one half of the L- link onto riser.<br />
4) Than slide on the secound half of the riser don’t rotate them! Check for linetwist!<br />
4) Perform a thorough line check at this point, making absolutely sure that the canopy is<br />
straight. After the links are tightened with locking compound (LOCtite, Permanex or Truelock),<br />
it will be very difficult to correct any errors.<br />
5) When you are sure the canopy is straight, unscrew the screws and put one drop of<br />
locking compound on the threads. Immediately tighten them gently tight. Clean off any<br />
excess thread lock with a clean, dry rag. Do not use water or solvents.<br />
6) Make a small match mark along the screw and the link. This mark will serve as an<br />
easy method to check for tightness. If the match mark remains intact, then the screw is<br />
still in place. If the upper and lower parts of the mark become mis-aligned, then the<br />
screw has shifted. Should this happen, the link must be immediately disassembled,<br />
cleaned and inspected. If no damage has occurred, the riser/link/line assembly may be<br />
reattached according to steps 1 through 5.<br />
FIREBIRD, Am Tower 16, 54634 Bitburg
Doc.-No.: 01/EHTD400<br />
Date: 01.03.2003<br />
Revision:<br />
Rev. date:<br />
Page: 11 of 40<br />
Equipment Handbook<br />
TD400<br />
11. Attaching Toggles<br />
Make sure the steering line goes through the grommet<br />
of the slider.<br />
Route the steering line through the guide ring on the<br />
riser. Then route it through the grommet in the toggle,<br />
starting from the side with Velcro. Pull the toggle<br />
through the finger-trap loop and tighten.<br />
( Only use <strong>Tandem</strong> Reserve Toggles!)<br />
FIREBIRD, Am Tower 16, 54634 Bitburg
Doc.-No.: 01/EHTD400<br />
Date: 01.03.2003<br />
Revision: 1<br />
Rev. date: 01.12.05<br />
Page: 12 of 40<br />
Equipment Handbook<br />
TD400<br />
12. Periodic Inspection Instructions<br />
The equipment should be re-examined every 12 months.<br />
The main parachute canopy and the container system should be thoroughly examined<br />
every 50 jumps or every 120 days after assembly, whichever comes first.<br />
This examination is considerably more detailed than the inspection that is to be carried<br />
out each time the parachute is packed.<br />
Every 365 days the reserve parachute must be opened, aired and thoroughly inspected<br />
before it is re-packed by a rigger or equivalent specialist.<br />
The inspection can be carried out according to the following directions.<br />
The container should be examined in place that is clean, dry, well lighted and large<br />
enough that the parachute can be completely laid out.<br />
The following inspection sequence is systematic and meaningful:<br />
1. Drogue Chute, Drogue Chute Bridle and POD<br />
Check the drogue chute and its bridle for secure attachment to the top skin of the canopy<br />
as well as for damage.<br />
The parachute fabric and the reinforcment tapes, as well as their stitching, should not be<br />
damaged. Check for perfect function of the drogue-chute kill line. If the kill line is twisted,<br />
straighten it. The grommets on the POD (Pack Opening Device—also known as the<br />
deployment bag), including the grommet at the bottom of the POD, should be free of damage,<br />
have no sharp edges and be firmly attached to the POD material. Replace old packing<br />
rubber bands.<br />
FIREBIRD prescribes <strong>Tandem</strong>Tube Stoes for the POD.<br />
2. Canopy Top Skin<br />
The canopy should be completely spread out. Pay attention to all seams, potential tears,<br />
burns and separations.<br />
3. Canopy Bottom Skin<br />
Turn the canopy over and check it in the same manner the top skin was inspected. In<br />
addition, pay special attention to the suspension line attachments.<br />
4. Interior Ribs<br />
Each rib of the canopy, from the nose to the trailing edge, should be examined. This requires<br />
crawling into each cell. Pay special attention to the reinforcement tapes, the suspension<br />
line attachment points and the pilot-chute attachment. Also check that the crossports<br />
are not frayed.<br />
5. Outer Side of Canopy<br />
Lay the canopy on its side, so that the cells are stacked one on top of the other. In this<br />
way the condition of the stabilizers and slider stops can be examined.<br />
6. Suspension Lines<br />
The entire length of the lines should be examined for damage. Pay special attention to<br />
the cascades and the connector links. Check that the connector links are securely fastened.<br />
FIREBIRD, Am Tower 16, 54634 Bitburg
Doc.-No.: 01/EHTD400<br />
Date: 01.03.2003<br />
Revision: 1<br />
Rev. date: 01.12.05<br />
Page: 13 of 40<br />
Equipment Handbook<br />
TD400<br />
7. Slider<br />
The slider should be checked for damage to the fabric, the reinforcement tapes and the<br />
seams. The grommets should have no sharp edges, must be tight and securely attached to<br />
the slider.<br />
8. Steering Lines<br />
Check that the steering lines and secondary flairs run straight and orderly through the slider<br />
and also through the small ring on the main riser and are correctly fastened to the steering<br />
toggles. If the steering lines or secondary flairs are twisted, they should be straightened by<br />
twisting in the opposite direction.<br />
9. Main Risers<br />
There should be no apparent damage to the material, grommets or rings of the main risers.<br />
Check the performance of the Velcro and clean it if necessary.<br />
10. 3-Ring System<br />
The 3-ring system must perform flawlessly; the rings must be round and undamaged.<br />
The closing loop should also show no apparent damage. The 3-ring system should funtion<br />
with a light pull, as soon as the cable is released.<br />
11. 3Ring Release System, Reserve Ripcord, RSL und Release Cable<br />
Check that the release device as well as both release cables run freely and unobstructed.<br />
The Velcro should be clean and close securely. The reserve ripcord cable should also run<br />
smoothly and unobstructed in its housing. Check the function of the RSL, its attachment<br />
points and the ease with which it is released and attached.<br />
12. Harness, Hardware and Stitching<br />
An examination of the harness, hardware and stitching can only be performed visually.<br />
Pay attention that the type-7 webbing (with a yellow fiber running along the outside edges) is<br />
not damaged and that no stitching is broken. All hardware must be free of corrosion and<br />
move freely as designed.<br />
13. Container Material<br />
Examine the container for possible tears or separations. The grommets should have no<br />
sharp edges or separation. The loop should be flawless. It is better to replace the loop too<br />
soon rather than too late. The interior of the container should be clean.<br />
14. Passenger Harness<br />
An examination of the harness, hardware and stitching can only be performed visually. Pay<br />
attention that the type-7 webbing (with a yellow fiber running along the outside edge) is not<br />
damaged and that there are no broken stitches. All hardware must be free of corrosion and<br />
move freely as designed. Check that the padding is in good condition and is easily moved.<br />
Examine the attachment hooks for perfect functioning.<br />
Should something unusual be noticed during the inspection,<br />
contact the manufacturer immediately.<br />
When it doubt - play it safe and contact us!<br />
FIREBIRD, Am Tower 16, 54634 Bitburg
Doc.-No.: 01/EHTD400<br />
Date: 01.03.2003<br />
Revision:<br />
Rev. date:<br />
Page: 14 of 40<br />
Equipment Handbook<br />
TD400<br />
13. Safekeeping and Storage<br />
The container system should be kept dry (at 45-70% relative humidity) and cool (10-15°C /<br />
50-60°F), in a container through which light will not pass. Ultraviolet light can cause invisible<br />
damage to the fabric through decay of the nylon fibers. The parachute canopies and<br />
the harness-container should be kept away from all types of corrosive substances such as<br />
lye, acids, fuels, varnishes and solvents. Also, storage in areas with operating electric<br />
motors (electrosmog-O³-ozone forming) should be avoided.<br />
In extremely hot and humid climates the canopies should be re-packed every 30 days.<br />
14. Cleaning<br />
Basically, parachute canopies and containers should only be cleaned with fresh water.<br />
The use of brushes or rough sponges should be avoided.<br />
After contact with salt water, the parachutes and container should be rinsed with fresh water<br />
at least three times withing the first 24 hours.<br />
The removal or oil, tar or similiar substances should be discussed with the manufacturer.<br />
The equipment should not be cleaned in a washing machine.<br />
Only dry the canopies and container by hanging them in the shade. After cleaning the canopies<br />
and container should be subject to a thorough re-examination.<br />
15. Repair, Alteration and Replacement<br />
When repairs are necessary, they should be performed only by the manufacturer or by a<br />
facility authorized by the manufacturer.<br />
Repairs, alterations and modifications may only be performed by the manufacturer or by<br />
arrangement with the manufacturer. Only official replacement parts or those approved by<br />
the manufacturer may be used.<br />
Disregard for these procedures<br />
can void the airworthiness!<br />
FIREBIRD, Am Tower 16, 54634 Bitburg
Doc.-No.: 01/EHTD400<br />
Date: 01.03.2003<br />
Revision:<br />
Rev. date:<br />
Page: 15 of 40<br />
Equipment Handbook<br />
TD400<br />
16. Packing Instructions for the Quick Reserve 400<br />
The modern, ram-air parachutes produced today are very reliable canopies. As long as<br />
the parachute is packed with straight and untangled lines, it will usually open.<br />
Nevertheless, we recommend the packing instructions illustrated on the following pages in<br />
order to achieve consistently good, soft openings that are better for the fabric and the skydiver.<br />
The parachute should be packed carefully and in the same manner after each jump or according<br />
to the periodic re-pack cycle. Part of this careful procedure is to make sure that<br />
the packing area is clean and not in direct sunlight. Ultraviolet light can cause irreversible<br />
damage to the canopy fabric.<br />
Reserve parachutes should only be packed in a closed area on carpet or a similar surface.<br />
Packing on concrete or asphalt should be avoided, since rough surfaces like these can damage<br />
the fabric, lines and hardware.<br />
! Important !<br />
The Quick Reserve 400 tandem reserve parachute may only be packed by<br />
qualified, expert personnel who have been specifically introduced to the<br />
Quick Reserve 400 production series and trained by FIREBIRD.<br />
<strong>Tandem</strong> pilots are not authorized<br />
to pack a tandem reserve!<br />
Since the reserve may only be repacked by qualified personnel with the appropriate specialized<br />
knowledge, we prefer not to explain the packing procedure with step-by-step individual<br />
illustrations but instead to merely illustrate the most outstanding points of the packing<br />
method preferred by FIREBIRD.<br />
FIREBIRD, Am Tower 16, 54634 Bitburg
Doc.-No.: 01/EHTD400<br />
Date: 01.03.2003<br />
Revision:<br />
Rev. date:<br />
Page: 16 of 40<br />
Equipment Handbook<br />
TD400<br />
The packing method that we recommend is described in the following text and<br />
illustrations:<br />
1. After checking that the lines and canopy are<br />
straight, set the brakes.<br />
2. The Quick Reserve 400 should be packed in a<br />
reserve pro-pack method. The slider should be pulled<br />
into the shape of a star.<br />
Center cell, top surface<br />
Nose<br />
3. Now find the openings to all the cells. Start with<br />
an outside end cell. Pull each cell (both sections)<br />
completely out. Be careful that no cell is overlooked<br />
or dropped. And put the complete Nose between<br />
your knees.<br />
FIREBIRD, Am Tower 16, 54634 Bitburg
Doc.-No.: 01/EHTD400<br />
Date: 01.03.2003<br />
Revision:<br />
Rev. date:<br />
Page: 17 of 40<br />
Equipment Handbook<br />
TD400<br />
4. After being laid flat, the canopy—especially<br />
the lines in the center—should again be checked<br />
and sorted and the stabilizers flaked out.<br />
5. The center cell is pulled over as a cover.<br />
The canopy should now be shaped together to<br />
the width of the POD/deployment bag.<br />
The 4 outer cells should be rolled toward the<br />
center cell 3 or 4 times.<br />
6. The canopy should be stacked up in neat S-<br />
folds.<br />
FIREBIRD, Am Tower 16, 54634 Bitburg
Doc.-No.: 01/EHTD400<br />
Date: 01.03.2003<br />
Revision:<br />
Rev. date:<br />
Page: 18 of 40<br />
Equipment Handbook<br />
TD400<br />
7. Two "horns“ or "ears“ should be formed and<br />
stowed in the freebag.<br />
8. The freebag is closed with the shock-cord<br />
³safety stow.“<br />
9. The suspension lines are stowed in S-folds<br />
in the line bag compartment of the freebag.<br />
FIREBIRD, Am Tower 16, 54634 Bitburg
Doc.-No.: 01/EHTD400<br />
Date: 01.03.2003<br />
Revision:<br />
Rev. date:<br />
Page: 19 of 40<br />
Equipment Handbook<br />
TD400<br />
10. Pay attention that the L-bar connector<br />
links are side-by-side at the bottom of the reserve<br />
container.<br />
11. The freebag should be placed in the container<br />
with the lines at the bottom. The loop<br />
should be brought through, and the first, bottom<br />
flap closed. The Cypres cutter is on this flap.<br />
11a. The triangular top part of the freebag<br />
should be carefully tucked into the container.<br />
FIREBIRD, Am Tower 16, 54634 Bitburg
Doc.-No.: 01/EHTD400<br />
Date: 01.03.2003<br />
Revision:<br />
Rev. date:<br />
Page: 20 of 40<br />
Equipment Handbook<br />
TD400<br />
12. The pilot-chute bridle of the freebag should<br />
be placed on top of the first flap of the freebag<br />
in 5 to 6 medium-size S-folds. Each subsequent<br />
S-fold should be slightly shorter than the<br />
previous one. There should be at least 2m (6½<br />
ft.) of bridle remaining unstowed.<br />
12a. Carefully lay the second (top) flap on top<br />
of the S-folds and close the flap with a temporary<br />
closing pin.<br />
13. The remaining bridle should be S-folded in<br />
a "V“ shape on top of the first two flaps.<br />
14. The pilot chute should be centered and<br />
secured by means of the temporary closing pin.<br />
Make sure that no fabric is caught in the spring<br />
of the pilot chute.<br />
FIREBIRD, Am Tower 16, 54634 Bitburg
Doc.-No.: 01/EHTD400<br />
Date: 01.03.2003<br />
Revision:<br />
Rev. date:<br />
Page: 21 of 40<br />
Equipment Handbook<br />
TD400<br />
15. Carefully tuck the pilot-chute fabric together<br />
under the edge of the cap.<br />
16. Close the design flap and then both side<br />
flaps...<br />
16a. ...in doing so,<br />
the sequence of the<br />
side flaps is not critical.<br />
FIREBIRD, Am Tower 16, 54634 Bitburg
Doc.-No.: 01/EHTD400<br />
Date: 01.03.2003<br />
Revision:<br />
Rev. date:<br />
Page: 22 of 40<br />
Equipment Handbook<br />
TD400<br />
17. While closing the top flap with the reserve<br />
pin, make sure that the RSL line (when<br />
used) is cleanly attached to the reserve<br />
cable.<br />
18. After the rigger has sealed the reserve with<br />
the red safety tie, the top-most flap (reserve pin<br />
protector flap with see-through panel) should<br />
be closed.<br />
19. The see-through panel allows a reserve<br />
pin-check to be made at any time—and without<br />
opening the pin protector flap.<br />
FIREBIRD, Am Tower 16, 54634 Bitburg
Doc.-No.: 01/EHTD400<br />
Date: 01.03.2003<br />
Revision:<br />
Rev. date:<br />
Page: 23 of 40<br />
Equipment Handbook<br />
TD400<br />
17. Packing Instructions for Contrail 390<br />
The modern, ram-air parachutes produced today are very reliable canopies. As long as<br />
the parachute is packed with straight and untangled lines, it will usually open.<br />
Nevertheless, we recommend the packing instructions illustrated on the following pages in<br />
order to achieve consistently good, soft openings that are better for the fabric and the skydiver.<br />
The parachute should be packed carefully and in the same manner after each jump. Part<br />
of this careful procedure is to make sure that the packing area is clean and not in direct<br />
sunlight. Ultraviolet light can cause irreversible damage to the canopy fabric. When it is<br />
not possible to pack indoors at the dropzone, minimize the amount of time the canopy is<br />
subject to direct sunlight and the corresponding ultraviolet rays. When it can not be immediately<br />
packed, the canopy and harness-container should be covered and protected<br />
from damage.<br />
Packing on concrete or asphalt should be avoided, since rough surfaces like these can damage<br />
the fabric, lines and hardware.<br />
! Important !<br />
Parachutes may only be packed by the jumper or a qualified individual<br />
(rigger or equivalent). Contact the manufacturer immediately with any questions.<br />
Pre-inspection Before Each Pack Job<br />
The complete skydiving system should be checked for compliance with the manufacturer‘s<br />
specifications. The harness-container and parachute canopy should be stretched out with<br />
the lines taut. The lines should be checked that they are straight and not tangled and the<br />
slider should be undamaged.<br />
FIREBIRD recommends using a pro-pack method for the main canopy CONTRAIL 390<br />
production series.<br />
Should something unusual be noticed during the inspection,<br />
contact the manufacturer immediately.<br />
When it doubt - play it safe and contact us!<br />
FIREBIRD, Am Tower 16, 54634 Bitburg
Doc.-No.: 01/EHTD400<br />
Date: 01.03.2003<br />
Revision:<br />
Rev. date:<br />
Page: 24 of 40<br />
Equipment Handbook<br />
TD400<br />
Stretch the rig and parachute out so that the reserve flaps of the container face up.<br />
It is advisable to weight down the container so that it doesn‘t slide so easily during packing.<br />
1. Set the brakes of the main steering lines by<br />
pulling the line down until the fingertrapped<br />
loop in the steering line is below the ring on<br />
the riser. Then the tip of the steering toggle<br />
can be<br />
Inserted in the loop below the ring on the riser.<br />
On the Contrail 390, the secondary flairs are<br />
not set.<br />
Grasp the front and back suspension line<br />
groups between the fingers and separate<br />
them, in this way pushing the slider to the top<br />
of the lines against the stabilizers.<br />
Pay attention that there is no twist, line-over<br />
or line-through the right or left suspension line<br />
groups.<br />
2.Now find the openings to all the cells. Start<br />
with an outside end cell. Pull each cell (both<br />
sections) completely out. Be careful that no<br />
cell is overlooked or dropped. And put the<br />
complete Nose between your knees.<br />
FIREBIRD, Am Tower 16, 54634 Bitburg
Doc.-No.: 01/EHTD400<br />
Date: 01.03.2003<br />
Revision:<br />
Rev. date:<br />
Page: 25 of 40<br />
Equipment Handbook<br />
TD400<br />
3. Pull the stabilizers out, to the left and right, of<br />
the canopy.<br />
Reach inside the canopy, beyond the slider from<br />
above, between the A and B lines, and flake the<br />
fabric to the side.<br />
4. Do the same between the B and C lines. Repeat<br />
this process on the other side of the canopy.<br />
5. Follow the D lines on one side with your<br />
hand, gently pull them out and place them toward<br />
the center of the canopy, so that there‘s an<br />
S-fold between the C and D lines.<br />
Repeat this process on the other side.<br />
Now grasp the steering lines on one side at the<br />
edge of the canopy and pull them out with the<br />
trailing edge. Lay the trailing edge (tail) in S-<br />
folds in the center of the canopy. Repeat the<br />
process on the other side.<br />
Take care that all the lines stay in the middel of<br />
the canopy. Avoid lineover-malfunktion, be carefull!<br />
FIREBIRD, Am Tower 16, 54634 Bitburg
Doc.-No.: 01/EHTD400<br />
Date: 01.03.2003<br />
Revision:<br />
Rev. date:<br />
Page: 26 of 40<br />
Equipment Handbook<br />
TD400<br />
6. Flake the slider so that it forms a star at the<br />
base of the canopy. Grasp the middle cell of<br />
the trailing edge (tail) and pull this over the entire<br />
parachute.<br />
7. Now roll the 4 cell openings towards the center<br />
cell 5 or 6 times.<br />
8. Place the rolled cells into the center cell, so<br />
that the right-side cells are on the right of the<br />
center cell and the left-side cells are on the left<br />
half of the center cell.<br />
FIREBIRD, Am Tower 16, 54634 Bitburg
Doc.-No.: 01/EHTD400<br />
Date: 01.03.2003<br />
Revision: 1<br />
Rev. date: 01.12.05<br />
Page: 27 of 40<br />
Equipment Handbook<br />
TD400<br />
9. Be careful when pulling the tail around the<br />
rest of the canopy, so that the steering lines and<br />
cascades stay in the middle and DON‘T go<br />
around the canopy. Otherwise this could lead<br />
to a line-over situation upon opening, which in<br />
turn could result in a malfunction or severely<br />
damaged canopy.<br />
Take both sides of the tail in one hand and roll<br />
them several times towards the center of the<br />
canopy. Pay attention that the canopy fabric<br />
stays taut while being rolled, so that it rolls up to<br />
the base.<br />
Then gently ease the evenly finished rolled tail<br />
toward the center cell of the canopy nose.<br />
10. With your free hand, reach under the<br />
middle of the entire bundled canopy. Use a little<br />
forward swing to carefully lay this "cocoon“<br />
out on a flat surface. Pay attention that the suspension<br />
lines remain taut and that the cocoon<br />
stays together.<br />
FIREBIRD, Am Tower 16, 54634 Bitburg
Doc.-No.: 01/EHTD400<br />
Date: 01.03.2003<br />
Revision:<br />
Rev. date:<br />
Page: 28 of 40<br />
Equipment Handbook<br />
TD400<br />
11. Secure the base of this cocoon (at the lines)<br />
with both knees and carefully squeeze the<br />
air out of the canopy. While forcing the air out,<br />
narrow the cocoon to the width of the POD/<br />
deployment bag by carefully working the fabric<br />
sideways, under the cocoon. Watch out that<br />
the seam of the center cell stays in the middle.<br />
12. Move to the side of the canopy, put one<br />
hand under the base of the cocoon, and fold the<br />
parachute upward in an S-fold as shown.<br />
13. Secure the first S-fold with both knees and<br />
reach under the cocoon with one hand to<br />
compress the material against your thighs.<br />
Now fold the upper part of the canopy material<br />
over your lower arm and squeeze the rest of the<br />
air out, so that it can be folded in an S-fold in<br />
the opposite direction from the first S-fold. Continuously<br />
secure the canopy material with one<br />
hand.<br />
14. Then place one side of the canopy into the<br />
POD. Use your knee to make sure that the<br />
other (still free) side doesn‘t slip away while<br />
you‘re doing this.<br />
FIREBIRD, Am Tower 16, 54634 Bitburg
Doc.-No.: 01/EHTD400<br />
Date: 01.03.2003<br />
Revision:<br />
Rev. date:<br />
Page: 29 of 40<br />
Equipment Handbook<br />
TD400<br />
15. Now place the second side into the POD.<br />
Secure the canopy with one hand so that it<br />
doesn‘t slip out.<br />
16. Stow the suspension lines. Make the loops<br />
uniform in length; pay attention that there is no<br />
exceptionally long loop. The loops should be<br />
about the width of 3 fingers. Stow the suspension<br />
lines until about 50cm (20") of line remains<br />
unstowed.<br />
17. Attach the drogue-release with the double<br />
loop before puting in the POD. It is much easier.<br />
FIREBIRD, Am Tower 16, 54634 Bitburg
Doc.-No.: 01/EHTD400<br />
Date: 01.03.2003<br />
Revision:<br />
Rev. date:<br />
Page: 30 of 40<br />
Equipment Handbook<br />
TD400<br />
18. Next place the POD upright, with the lines<br />
underneath, in the container. Stow the risers<br />
alongside the reserve container so that the<br />
toggles face towards the reserve.<br />
19. Turn the POD about 90° in the container. .<br />
Make sure that the release grip is again seated<br />
and the cable correctly positioned.<br />
20. The flaps of the main container should be<br />
closed in this order: Bottom, top, right, left.<br />
During the closing process, the kill-line of the<br />
drogue chute should be routed out down and to<br />
the right. Close the container with the pin. Attach<br />
the big Releasering with the double Loop.<br />
Only one yellow cable through one end of the<br />
Loop.<br />
Stow the excess kill-line centered under the closed<br />
flaps of the main container.<br />
21. The Bridel should be routed through that<br />
small corner in the pouch.<br />
FIREBIRD, Am Tower 16, 54634 Bitburg
Doc.-No.: 01/EHTD400<br />
Date: 01.03.2003<br />
Revision:<br />
Rev. date:<br />
Page: 31 of 40<br />
Equipment Handbook<br />
TD400<br />
22. Lay the drogue chute beside the container,<br />
fold it in half and lay the bridle in S-folds inside.<br />
23. Now fold the drogue chute to the size of the<br />
BOC pocket and stow it there.<br />
24. Close all the flaps of the container so that<br />
neither the kill-line nor the drogue-chute bridle<br />
is visible.<br />
25. Here is the end product of a perfect pack<br />
job!<br />
Have fun and enjoy your Skydive!<br />
FIREBIRD, Am Tower 16, 54634 Bitburg
Doc.-No.: 01/EHTD400<br />
Date: 01.03.2003<br />
Revision:<br />
Rev. date:<br />
Page: 32 of 40<br />
Equipment Handbook<br />
TD400<br />
18. Putting on the Parachute<br />
The user puts the rig on over his shoulders like a backpack. The leg straps are brought<br />
up between the legs and the ends are fed through the buckles. The chest strap is also<br />
fastened with a buckle onto the main-lift web. The leg and chest straps should be pulled<br />
tight, so that the parachute fits the body snugly but without restricting movement. If the fit<br />
is too tight, the rig hinders the wearer; a fit that is too loose can lead to the uneven<br />
distribution of opening shock and possibly to the injury or endangerment of the wearer.<br />
19. Manual Activation of the Reserve Parachute<br />
After separation from the main canopy, the parachutist should pull the reserve ripcord<br />
handle from the pocket on the left vertical main-lift web with an even, strong pull. The<br />
steel cable attached to the ripcord handle will be pulled out of the housing and the pin at<br />
the end will slid out of the closing loop. At this point the reserve flaps of the rig open to<br />
free the spring-loaded pilot chute. This reaches the air stream and, with the attached<br />
bridle, pulls the freebag out. The suspension lines come out of the line bag, straighten<br />
out and, with the last two stows of the “running loops,” free the reserve parachute. The<br />
parachute stretches out of the freebag and becomes filled with air, during which the slider<br />
slides downward and comes to rest on the connector links.<br />
20. Allowable Service Life<br />
On the condition that the parachute is in accordance with the regulations and has been<br />
handled corresponding to the instructions contained in this Equipment Handbook, the<br />
allowable service life is 15 years.<br />
FIREBIRD, Am Tower 16, 54634 Bitburg
Doc.-No.: 01/EHTD400<br />
Date: 01.03.2003<br />
Revision: 1<br />
Rev. date: 01.12.05<br />
Page: 33 of 40<br />
Equipment Handbook<br />
TD400<br />
21. Preinspection before each jump<br />
The following points we recommend to be inspected befor you take on or jumping the parachute.<br />
The documantation wich belongs to the parachute and the reservepack<br />
data card.<br />
AAD is switched on.<br />
Check all handles. 3ring release systems and the routing of the<br />
cable housings.<br />
We recommend to not hook the RSL on the riser. But we leave it<br />
in the rig as additional reserve handle.<br />
Main release riser.<br />
Cabel routing through the loop. Only one cable in one end of the<br />
loop.<br />
Check the reserve cable in it‘s housing.<br />
Pin check and RSL mounting.<br />
Main pin check, shape of the main loop.<br />
FIREBIRD, Am Tower 16, 54634 Bitburg
Doc.-No.: 01/EHTD400<br />
Date: 01.03.2003<br />
Revision: 1<br />
Rev. date: 01.12.05<br />
Page: 34 of 40<br />
Equipment Handbook<br />
TD400<br />
21. Preinspection before each jump<br />
BOC and Droguechutes.<br />
Main release.<br />
Before exit the airplane:<br />
Student/passenger hook on, tight straps, hooks locked.<br />
Cheststrapt of the passenger harnes closed and tightened.<br />
Student/passenger jumpsuit closed.<br />
Headgear and goggle on.<br />
Check 3-ring release left and right.<br />
Check cut away handle / 2nd release handle and reserve handle.<br />
Check droguechute.<br />
Check main release.<br />
FIREBIRD, Am Tower 16, 54634 Bitburg
Doc.-No.: 01/EHTD400<br />
Date: 01.03.2003<br />
Revision: 1<br />
Rev. date: 01.12.05<br />
Page: 35 of 40<br />
Equipment Handbook<br />
TD400<br />
22. <strong>Tandem</strong>-Pilot Candidate Training<br />
With System TD400 (<strong>Omega</strong> <strong>Tandem</strong> / Contrail 390).<br />
Before using the TD400 (<strong>Omega</strong> <strong>Tandem</strong>) it is absolutely necessary to have<br />
participated in tandem-pilot training according to the minimum requirements<br />
and performance limitations specified by the manufacturer. Every<br />
owner or user of a TD 400 must have read the manual and these training<br />
instructions before the first use.<br />
The tandem-pilot training must be carried out exclusively through the manufacturer<br />
or his designated agent.<br />
Attention must be paid that, during training as well as in use, the TD400 is<br />
only be used within the operating limits.<br />
Remember: Successfully complete training. Read manual. Use within<br />
limits.<br />
FIREBIRD, Am Tower 16, 54634 Bitburg
Doc.-No.: 01/EHTD400<br />
Date: 01.03.2003<br />
Revision: 1<br />
Rev. date: 01.12.05<br />
Page: 36 of 40<br />
Equipment Handbook<br />
TD400<br />
Activate Drogue<br />
immediately<br />
Pulled wrong handle<br />
(Drogue-Release first)<br />
First Drogue- Release is activated<br />
but Drogue doesn‘t disconnect<br />
Stable Exit<br />
Pull Drogue<br />
out of Pouch<br />
Main Canopy<br />
opens normally<br />
Pull 2nd Drogue<br />
Release<br />
Main Canopy<br />
Malfunction<br />
Drogue inflates<br />
normally<br />
Drogue still<br />
fully inflated<br />
Collapsed<br />
Drogue in tow<br />
Pull<br />
Cutway Handle<br />
Pull Drogue-<br />
Release<br />
If still in tow at<br />
3300 feet /<br />
1000m AGL<br />
PULL RESERVE<br />
Main Canopy<br />
opens correctly<br />
Bag stays in<br />
Container<br />
Pull 1st Drogue<br />
- Release<br />
Drogue<br />
doesn‘t release<br />
Container<br />
opens with Drogue<br />
attached<br />
Possible<br />
Malfunction<br />
PULL Cutaway<br />
Handle<br />
Bag leaves<br />
Container<br />
Pull 1st Drogue<br />
- Release<br />
Drogue doesn‘t<br />
release<br />
Main Canopy<br />
opens but<br />
Drogue entangled<br />
with<br />
Main Canopy<br />
Decide if<br />
canopy is safe<br />
to land - if not<br />
then....<br />
Main Canopy<br />
Malfunction<br />
Pull 2nd Drogue-<br />
Release<br />
PULL RESERVE<br />
Pull 2nd Drogue-<br />
Release<br />
Pull Cutaway Handle<br />
Main Canopy<br />
opens normally<br />
Main Canopy<br />
opens normally<br />
(unlikely)<br />
Pull Reserve Ripcord<br />
Unable to activate<br />
blocked Drogue<br />
Activate Reserve<br />
immediately<br />
Drogue Bridle<br />
entangled<br />
with Pilot or<br />
Harness<br />
Drogue Chute<br />
entangled<br />
with Pilot or<br />
Harness<br />
Drogue not<br />
inflated<br />
Pull Drogue-<br />
Release after<br />
6-8 seconds<br />
Drogue- Release<br />
not traceable<br />
Pull Reserve 3300 feet (1000m) AGL<br />
Right Arm<br />
blocked by<br />
PAX or<br />
Injury<br />
Activate<br />
Drogue<br />
1st Release<br />
on left side<br />
Activate<br />
Drogue<br />
2nd Release<br />
on right side<br />
Left Arm<br />
blocked by<br />
PAX or<br />
Injury<br />
Main Canopy<br />
opens normally<br />
Main Canopy<br />
Malfunction<br />
Main Canopy<br />
opens normally<br />
Bite or Beat<br />
PAX to<br />
release<br />
Right Hand<br />
If use of right<br />
hand still not<br />
possible<br />
then....<br />
Pull Cutaway<br />
Handle<br />
Pull Reserve<br />
with left Hand<br />
Pull Cutaway<br />
Handle<br />
Pull Reserve<br />
with right hand<br />
FIREBIRD, Am Tower 16, 54634 Bitburg
Doc.-No.: 01/EHTD400<br />
Date: 01.03.2003<br />
Revision: 1<br />
Rev. date: 01.12.05<br />
Page: 37 of 40<br />
Equipment Handbook<br />
TD400<br />
24. Standard Jump Procedures<br />
Before exit: Check all PAX-Hooks. Are straps and belts tight? Head protection? Altimeter? etc.<br />
Stable Exit<br />
Stable Exit<br />
Set Drogue<br />
Pull Drogue<br />
out of pouch<br />
After 5-8 sec. in stable position<br />
grab Drogue correctly and pull<br />
vigorously. Then throw it out in<br />
the airstream. Look over your<br />
shoulder to be sure that the<br />
drogue is fully inflated and not<br />
collapsed.<br />
Drogue opens<br />
normally<br />
Practice correct dummy procedure<br />
sequence with all handles.<br />
Release OK 2nd Release, CAH Reserve OK<br />
Sequence:<br />
A: 1st Release<br />
B: 2nd Release, Cutawayhandle (CAH)<br />
C: Reserve-Ripcord<br />
D: Altimeter-Control<br />
At 5000 ft. (1500m) AGL „PULL“<br />
Pull Drogue-<br />
Release<br />
Pull release completely and<br />
hold it tightly.<br />
Main Canopy<br />
opens normally<br />
Check main canopy!<br />
Check 3-Ring left, right!<br />
Check cutaway-handle!<br />
Check reserve-ripcord!<br />
FIREBIRD, Am Tower 16, 54634 Bitburg
Doc.-No.: 01/EHTD400<br />
Date: 01.03.2003<br />
Revision: 1<br />
Rev. date: 01.12.05<br />
Page: 38 of 40<br />
Equipment Handbook<br />
TD400<br />
25. Emergency Procedures<br />
This is one of several correct variations.<br />
Stable Exit<br />
Pull Drogue<br />
out of pouch<br />
Drogue is not<br />
inflated<br />
Pull 1st Drogue-<br />
Release after<br />
6-8 sec.<br />
1st Drogue-<br />
Release ist activated<br />
but Drogue is<br />
still inactive<br />
Pull 2nd Drogue-<br />
Release<br />
Main Canopy<br />
Malfunction<br />
Pull Cutaway<br />
Handle<br />
PULL RESERVE<br />
FIREBIRD, Am Tower 16, 54634 Bitburg
Doc.-No.: 01/EHTD400<br />
Date: 01.03.2003<br />
Revision: 1<br />
Rev. date: 01.12.05<br />
Page: 39 of 40<br />
Equipment Handbook<br />
TD400<br />
25. <strong>Tandem</strong>-Pilot Requirements<br />
500 freefalls with square canopies. Total of 5 hours of freefall time. Current Jump-License.<br />
Maximum Limits:<br />
Exit Weight: (<strong>Tandem</strong>-Pilot + Passenger + Equipment)<br />
Suggested deployment altitude main canopy:<br />
Suggested deployment altitude reserve canopy:<br />
An electronic AAD for your reserve is suggested.<br />
(Avoid any high-speed freefall)<br />
225 kg / 500 lbs.<br />
1500 m GND / 5000 feet AGL<br />
1000 m GND / 3300 feet AGL<br />
Training-Jumps Summary:<br />
Take care that all training jumps are done under realistic conditions.<br />
It is required that each tandem-pilot candidate has read and understood this handbook and has passed an examination<br />
on packing the main canopy.<br />
Be aware of the differences in all activation and opening devices between the TD400 and other systems.<br />
Before the tandem-pilot candidate uses the tandem equipment the first time, he or she must be familiar with all<br />
opening, activation, safety and emergency procedures.<br />
Level 1:<br />
Level 2:<br />
Level 3:<br />
Level 4:<br />
Level 5:<br />
Level 6:<br />
Level 7:<br />
Level 8:<br />
Level 9:<br />
Level 10:<br />
Candidate acting as Passanger:<br />
Complete jump sequence with ideal preparation.<br />
Sample jump sequence for the candidate<br />
Candidate acting as <strong>Tandem</strong> Pilot:<br />
With an examiner as Passenger<br />
Candidate acting as <strong>Tandem</strong> Pilot:<br />
With an experienced passenger (passenger with a minimum of 100 jumps)<br />
Candidate acting as <strong>Tandem</strong> Pilot:<br />
With a non-experienced passenger<br />
Candidate acting as <strong>Tandem</strong> Pilot:<br />
With a non-experienced passenger<br />
Candidate acting as <strong>Tandem</strong> Pilot:<br />
With a non-experienced passenger<br />
Candidate acting as <strong>Tandem</strong> Pilot:<br />
High-speed freefall until 2200 - 2000 m GND / 7200 - 6600 feet AGL<br />
Candidate acting as <strong>Tandem</strong> Pilot:<br />
With a non-experienced passenger<br />
Candidate acting as <strong>Tandem</strong> Pilot:<br />
Accompanied by a video cameraperson<br />
Candidate acting as <strong>Tandem</strong> Pilot:<br />
With an uncooperative passenger<br />
FIREBIRD, Am Tower 16, 54634 Bitburg
Doc.-No.: 01/EHTD400<br />
Date: 01.03.2003<br />
Revision: 1<br />
Rev. date: 01.12.05<br />
Page: 40 of 40<br />
Equipment Handbook<br />
TD400<br />
We are available at your convenience<br />
to answer questions and provide further information at:<br />
Am Tower 16<br />
54634 Bitburg<br />
Germany<br />
Telephone (49) 6561-949680<br />
Fax (49) 6561-949680<br />
E-mail: info@flyfirebird.com<br />
Internet Address: www.flyfirebird.com<br />
FIREBIRD, Am Tower 16, 54634 Bitburg