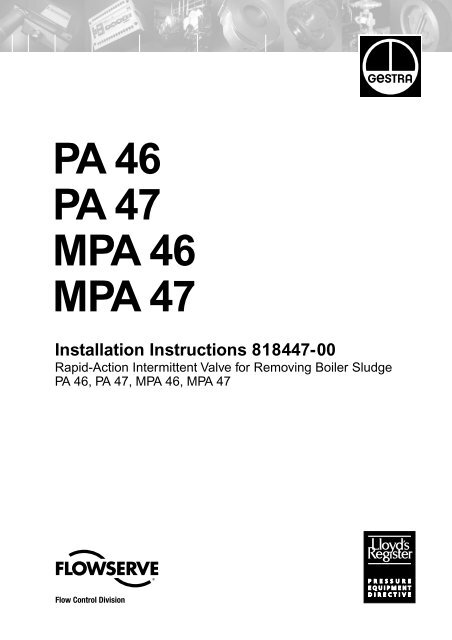
PA 46 PA 47 MPA 46 MPA 47 - Flowserve Corporation
PA 46 PA 47 MPA 46 MPA 47 - Flowserve Corporation
PA 46 PA 47 MPA 46 MPA 47 - Flowserve Corporation

You also want an ePaper? Increase the reach of your titles
YUMPU automatically turns print PDFs into web optimized ePapers that Google loves.
<strong>PA</strong> <strong>46</strong><br />
<strong>PA</strong> <strong>47</strong><br />
M<strong>PA</strong> <strong>46</strong><br />
M<strong>PA</strong> <strong>47</strong><br />
Installation Instructions 8184<strong>47</strong>-00<br />
Rapid-Action Intermittent Valve for Removing Boiler Sludge<br />
<strong>PA</strong> <strong>46</strong>, <strong>PA</strong> <strong>47</strong>, M<strong>PA</strong> <strong>46</strong>, M<strong>PA</strong> <strong>47</strong><br />
1
2<br />
Contents<br />
Important Notes<br />
Usage for the intended purpose ................................................................................... 4<br />
Safety note .................................................................................................................... 4<br />
Danger ........................................................................................................................... 4<br />
Classification pursuant to Article 9 of the Pressure Equipment Directive (PED) 97/23/EC ..... 5<br />
Classification pursuant to Annex 1 of ATEX Directive 94/9/EC .................................. 5<br />
Explanatory Notes<br />
Page<br />
Scope of supply ............................................................................................................. 6<br />
Description .................................................................................................................... 7<br />
Function ......................................................................................................................... 7<br />
Technical Data<br />
End connection ............................................................................................................. 8<br />
Pressure ratings ............................................................................................................ 8<br />
Materials ........................................................................................................................ 8<br />
Pressure & temperature ratings ................................................................................... 8<br />
Corrosion resistance ..................................................................................................... 9<br />
Sizing ............................................................................................................................. 9<br />
Name plate/ marking ..................................................................................................... 9<br />
Capacity chart <strong>PA</strong> <strong>46</strong>, <strong>PA</strong> <strong>47</strong>, M<strong>PA</strong> <strong>46</strong>, M<strong>PA</strong> <strong>47</strong> ......................................................... 10<br />
Control pressure chart M<strong>PA</strong> <strong>46</strong>, M<strong>PA</strong> <strong>47</strong> ................................................................... 11<br />
Design<br />
<strong>PA</strong> <strong>46</strong>, <strong>PA</strong> <strong>47</strong> ............................................................................................................... 12<br />
M<strong>PA</strong> <strong>46</strong>, M<strong>PA</strong> <strong>47</strong> ......................................................................................................... 13<br />
Key ............................................................................................................................... 14<br />
Installation<br />
<strong>PA</strong> <strong>46</strong>, <strong>PA</strong> <strong>47</strong>, M<strong>PA</strong> <strong>46</strong>, M<strong>PA</strong> <strong>47</strong> ................................................................................. 15<br />
Flanged design ........................................................................................................... 15<br />
Socket-weld design .................................................................................................... 15<br />
Butt-weld design ......................................................................................................... 16<br />
Heat treatment of welds .............................................................................................. 16<br />
Mounting of hand lever ............................................................................................... 16<br />
Commissioning<br />
<strong>PA</strong> <strong>46</strong>, <strong>PA</strong> <strong>47</strong>, M<strong>PA</strong> <strong>46</strong>, M<strong>PA</strong> <strong>47</strong> ................................................................................. 16<br />
Operation<br />
Duration and frequency of intermittent boiler blowdown .......................................... 17
Contents - continued -<br />
Emergency operation M<strong>PA</strong> <strong>46</strong>, M<strong>PA</strong> <strong>47</strong><br />
Page<br />
Danger ......................................................................................................................... 17<br />
Fit hand lever for emergency operation ..................................................................... 17<br />
Maintenance<br />
Danger ......................................................................................................................... 17<br />
Replacing stuffing box <strong>PA</strong> <strong>46</strong>, <strong>PA</strong> <strong>47</strong> ......................................................................... 18<br />
Replacing stuffing box, valve seat and valve plug <strong>PA</strong> <strong>46</strong>, <strong>PA</strong> <strong>47</strong> ............................. 19<br />
Replacing stuffing box M<strong>PA</strong> <strong>46</strong>, M<strong>PA</strong> <strong>47</strong> ................................................................... 20<br />
Replacing stuffing box, valve seat and valve plug M<strong>PA</strong> <strong>46</strong>, M<strong>PA</strong> <strong>47</strong> ....................... 21<br />
Retightening stuffing box ............................................................................................ 22<br />
Replacing control membrane in diaphragm actuator M<strong>PA</strong> <strong>46</strong>, M<strong>PA</strong> <strong>47</strong> ................... 22<br />
Torques ....................................................................................................................... 23<br />
Tools ............................................................................................................................ 23<br />
Single parts of stuffing box, valve plug, valve seat .................................................... 24<br />
Mounting/removing valve seat ................................................................................... 25<br />
Mounting/removing control membrane ...................................................................... 26<br />
Key ............................................................................................................................... 27<br />
Retrofitting<br />
Danger ......................................................................................................................... 27<br />
Mounting diaphragm actuator .................................................................................... 27<br />
Mounting forkhead ...................................................................................................... 28<br />
Tools ............................................................................................................................ 28<br />
Torques ....................................................................................................................... 28<br />
Spare Parts<br />
Spare parts list ............................................................................................................ 29<br />
Parts for retrofitting<br />
List of parts for retrofitting ........................................................................................... 30<br />
Decommissioning<br />
Danger ......................................................................................................................... 30<br />
Disposal ...................................................................................................................... 30<br />
Annex<br />
Declaration of Conformity ........................................................................................... 31<br />
3
Important Notes<br />
Usage for the intended purpose<br />
<strong>PA</strong> <strong>46</strong>, <strong>PA</strong> <strong>47</strong>, M<strong>PA</strong> <strong>46</strong>, M<strong>PA</strong> <strong>47</strong>:<br />
Use the rapid-action intermittent valves*) only for removing boiler water containing<br />
accumulated non-metallic sediments from steam boilers within the admissible<br />
pressure und temperature ratings.<br />
Use only compressed air (at room temperature) or pressurized water (at room<br />
temperature) as control fluid for the GESTRA diaphragm actuator in accordance with<br />
the specified pressure/temperature ratings.<br />
Application in potentially explosive atmospheres as classified according to Annex I<br />
of ATEX Directive 94/9/EC.<br />
*) Please note:<br />
In British English an intermittent valve for removing boiler sludge is referred to as<br />
"(intermittent) bottom blowdown valve".<br />
In American English the term "(intermittently operating) blowoff valve" is used, but<br />
only in conjunction with a slow-opening valve (ASME code).<br />
Safety Note<br />
The equipment must only be installed and commissioned by qualified and<br />
competent staff.<br />
Retrofitting and maintenance work must only be performed by qualified staff<br />
who - through adequate training - have achieved a recognised level of competence.<br />
4<br />
Danger<br />
The valve is under pressure during operation.<br />
When loosening flanged connections, sealing plugs or stuffing boxes, hot<br />
water and steam may escape.<br />
Before carrying out installation and maintenance work make sure the<br />
system is depressurized.<br />
Isolate the valve from both upstream and downstream pressure.<br />
Depressurize control lines!<br />
The valve becomes hot during operation.<br />
This presents the risk of severe burns to hands and arms.<br />
Before carrying out installation and maintenance work make sure that the<br />
valve is cold.<br />
Risk of severe burns and scalds to the whole body!<br />
Before carrying out any maintenance work on the valve or loosening<br />
flanged connections, stuffing box unions or sealing plugs make sure that<br />
all connected lines are depressurized (zero bar) and cooled down to<br />
room temperature (20 °C).<br />
During operation moving internals can pinch one’s hands or fingers,<br />
causing severe injuries. Do not touch the valve during operation! The<br />
intermittent valves for removing boiler sludge M<strong>PA</strong> <strong>46</strong>, M<strong>PA</strong> <strong>47</strong> are time<br />
controlled and can open and close abruptly.<br />
Sharp edges on internals present a danger of cuts to hands. Always wear<br />
industrial gloves when replacing the packing, valve seat or valve plug!
Classification pursuant to Article 9 of the Pressure Equipment Directive (PED) 97/23/EC<br />
Type <strong>PA</strong> <strong>46</strong>, <strong>PA</strong> <strong>47</strong> M<strong>PA</strong> <strong>46</strong>, M<strong>PA</strong> <strong>47</strong><br />
Fluid Gas, steam Liquid Gas, steam Liquid<br />
Fluid group 1 2 1 2 1 2 1 2<br />
Application no yes no yes no yes no yes<br />
Type PN CLASS<br />
Nominal size DN<br />
Exception pursuant to article 3.3<br />
Category I<br />
M<strong>PA</strong> <strong>46</strong> CL 150 20, 25, 32, 40, 50<br />
M<strong>PA</strong> <strong>46</strong> CL 300 20, 25, 32 40, 50<br />
M<strong>PA</strong> <strong>46</strong> PN 40 20, 25, 32 40, 50<br />
M<strong>PA</strong> <strong>47</strong> CL 400 25 40, 50<br />
M<strong>PA</strong> <strong>47</strong> PN 63 25 40, 50<br />
<strong>PA</strong> <strong>46</strong> CL 150 20, 25, 32, 40, 50<br />
<strong>PA</strong> <strong>46</strong> CL 300 20, 25, 32 40, 50<br />
<strong>PA</strong> <strong>46</strong> PN 40 20, 25, 32 40, 50<br />
<strong>PA</strong> <strong>47</strong> CL 400 25 40, 50<br />
<strong>PA</strong> <strong>47</strong> PN 63 25 40, 50<br />
CE Marking no 0525<br />
Classification pursuant to Annex 1 of ATEX Directive 94/9/EC<br />
Type <strong>PA</strong> <strong>46</strong>, <strong>PA</strong> <strong>47</strong> M<strong>PA</strong> <strong>46</strong>, M<strong>PA</strong> <strong>47</strong><br />
Equipment group II II<br />
Equipment category 2 2<br />
Potentially explosive<br />
atmosphere (1999/92/EC)<br />
CE Marking<br />
EX Marking<br />
1,2, 21, 22<br />
II 2 G/D c X<br />
1, 2, 21, 22<br />
II 2 G/D c X<br />
Marking "X"<br />
The equipment itself does not generate inadmissibly high surface<br />
temperatures. The user must make sure that the operating fluid<br />
does not generate inadmissibly high surface temperatures.<br />
5
Explanatory Notes<br />
Scope of supply<br />
<strong>PA</strong> <strong>46</strong><br />
1 Intermittent valve for removing boiler sludge <strong>PA</strong> <strong>46</strong><br />
1 Hand lever<br />
1 Installation manual<br />
<strong>PA</strong> <strong>47</strong><br />
1 Intermittent valve for removing boiler sludge <strong>PA</strong> <strong>47</strong><br />
1 Hand lever<br />
1 Installation manual<br />
M<strong>PA</strong> <strong>46</strong><br />
1 Intermittent valve for removing boiler sludge M<strong>PA</strong> <strong>46</strong><br />
1 Installation manual<br />
M<strong>PA</strong> <strong>47</strong><br />
1 Intermittent valve for removing boiler sludge M<strong>PA</strong> <strong>47</strong><br />
1 Installation manual<br />
Retrofitting kit for <strong>PA</strong> <strong>46</strong>, <strong>PA</strong> <strong>47</strong><br />
1 Diaphragm actuator<br />
1 Spacer disc<br />
1 Installation manual<br />
Hand lever for emergency operation<br />
1 Hand lever for emergency operation<br />
1 Forkhead G 10 x 20, DIN 71752<br />
1 Hexagon-head cap screw<br />
Spare Parts<br />
1 Kit according to spare parts list (see page 29)<br />
6
Explanatory Notes - continued -<br />
Description<br />
Intermittent valves for manual or automatic and programme-controlled removing of<br />
boiler sludge from land or marine installations, particularly if these installations are<br />
operated without constant supervision in accordance with TRD 604. Sludge<br />
sediments, which are accumulated precipitates from boiler water that settle at the<br />
bottom of the boiler, will be removed from the steam boiler with the the aid of valves<br />
<strong>PA</strong> and M<strong>PA</strong>. These valves give the boiler a short blow at regular intervals, thereby<br />
discharging accumulated sludge and sediments.<br />
■ <strong>PA</strong> <strong>46</strong> and <strong>PA</strong> <strong>47</strong> are designed for manual operation (diaphragm actuator can be<br />
retrofitted).<br />
■ M<strong>PA</strong> <strong>46</strong> and M<strong>PA</strong> <strong>47</strong> feature a diaphragm actuator for compressed air or pressurized<br />
water.<br />
Function<br />
The intermittent valves for removing boiler sludge <strong>PA</strong> <strong>46</strong> and <strong>PA</strong> <strong>47</strong> are openend by<br />
means of a hand lever. A pressure pin forces the spring-loaded valve plug out of the<br />
valve seat. The large cross-sectional area of the orifice creates a suction effect, giving<br />
a short-term high water flow which will discharge the precipitated sludge and<br />
sediments and - if installed - move them to a mixing cooler (= blowdown receiver).<br />
The intermittent valve for removing boiler sludge must be completely opened for<br />
about 2 seconds with the aid of the hand lever in order to give the boiler a short and<br />
highly effective blow.<br />
The intermittent valves for removing boiler sludge M<strong>PA</strong> <strong>46</strong> and M<strong>PA</strong> <strong>47</strong> are openend<br />
by the diaphragm actuator. The guide pin of the diaphragm actuator acts upon the<br />
pressure pin, which in turn forces the spring-loaded valve plug out of the valve seat.<br />
The large cross-sectional area of the orifice creates a suction effect, giving a shortterm<br />
high water flow which will discharge the precipitated sludge and sediments and -<br />
if installed - move them to a mixing cooler (= blowdown receiver). Compressed air (at<br />
room temperature) or pressurized water (at room temperature) can be used as control<br />
fluid for the diaphragm actuator in accordance with the specified pressure and<br />
temperature ratings (see diagram on page 11).<br />
The duration of the bottom blowdown, i. e. the time when the valve is open, should be<br />
approx. 2 seconds. The time period when the valve remains closed and hence the<br />
frequency of the bottom blowdown must be established as a function of the size and<br />
capacity of the steam boiler. We recommend that approx. 10 per cent of the total<br />
amount of boiler water to be removed is discharged via the intermittent valve for<br />
removing boiler sludge.<br />
The duration and frequency of the bottom blowdown must be established individually<br />
by the user as a function of the size and capacity of the steam boiler, the boiler water<br />
quality and the corresponding load.<br />
7
Technical Data<br />
CONNECTIONS<br />
Type<br />
(M)<strong>PA</strong> <strong>46</strong><br />
(M)<strong>PA</strong> <strong>47</strong><br />
Standard<br />
Flanges to DIN, PN 40<br />
Flanges to DIN, PN 63<br />
On request<br />
Flanges to Class 150, 300<br />
Butt-weld ends for DIN and ASME pipes<br />
Socket-weld ends for DIN and ASME pipes<br />
Flanges to Class 400<br />
Butt-weld ends for DIN and ASME pipes<br />
Socket-weld ends for DIN and ASME pipes<br />
Pressure Ratings<br />
( M)<strong>PA</strong> <strong>46</strong><br />
EN – PN 40<br />
Class 150, 300<br />
( M)<strong>PA</strong> <strong>47</strong><br />
EN – PN 63<br />
Class 400<br />
Materials<br />
Designation<br />
Body *)<br />
<strong>PA</strong>..., M<strong>PA</strong>...<br />
DIN EN<br />
DIN<br />
ASTM<br />
P 250GH (1.0<strong>46</strong>0)<br />
C 22.8 (1.0<strong>46</strong>0)<br />
A 105<br />
S tuffing box union *) P 250GH (1.0<strong>46</strong>0)<br />
C 22.8 (1.0<strong>46</strong>0)<br />
A 105<br />
S ealing plug *)<br />
42CrMo4<br />
(1.7225)<br />
A193 B7<br />
G asket<br />
X 5CrNi18-10 (1.4301)<br />
X 5 CrNi 18 10 (1.4301)<br />
S eat, hardened<br />
X <strong>46</strong>Cr13 (1.4034)<br />
X <strong>46</strong>Cr 13 (1.4034)<br />
V alve cone, hardened X 39CrMo17-1 (1.4122)<br />
X 35 CrMo 17 (1.4122)<br />
D isk springs<br />
51CrV4<br />
(1.8159)<br />
50 CrV 4 (1.8159)<br />
Compression<br />
springs<br />
DIN EN 10270-1-SH<br />
DIN 17223-C<br />
D iaphragm actuator<br />
StW 23 (1.0334)<br />
Packing<br />
Control<br />
membrane<br />
PTFE-silk<br />
EPDM<br />
Pressure / Temperature Ratings<br />
Acc. to EN 1092-1 for 1.0<strong>46</strong>0 acc. to PED and AD 2000 or<br />
(M)<strong>PA</strong> <strong>46</strong><br />
(M)<strong>PA</strong> <strong>47</strong><br />
Ratings according to<br />
A 105 acc. to PED<br />
max.<br />
pressure [bar] at<br />
100<br />
°C 200<br />
° C 00 ° C t<br />
t =<br />
3 s/p max<br />
PN 40 1.0<strong>46</strong>0 EN 1092-1<br />
37.<br />
3 30.<br />
2 25.<br />
8 234/29<br />
PN 40 A105 EN 1092-1<br />
40<br />
37.<br />
9 33.<br />
5 2<strong>46</strong>/36<br />
Class<br />
150 A105 ASME B16.34<br />
17.<br />
7 14.<br />
0 10.<br />
2 198/14<br />
Class<br />
300 A105 ASME B16.34<br />
<strong>46</strong>.<br />
4 43.<br />
9 38.<br />
9 254/41<br />
PN 63 1.0<strong>46</strong>0 EN 1092-1<br />
58.<br />
8 <strong>47</strong>.<br />
6 40.<br />
6 257/44<br />
PN 63 A105 EN 1092-1<br />
63<br />
59.<br />
6 52.<br />
7 271/55<br />
Class<br />
400 A105 ASME B16.34<br />
61.<br />
8 58.<br />
4 51.<br />
7 270/54<br />
Control<br />
fluid<br />
Water<br />
or<br />
compressed<br />
air<br />
Control<br />
pressure<br />
Max.<br />
8 bar<br />
8
Technical Data - continued -<br />
Corrosion resistance<br />
If the unit is used for the intended purpose, its safety is not impaired by corrosion.<br />
Sizing<br />
The housing must not be subjected to sharp increases in pressure. The dimensional<br />
allowances for corrosion reflect the latest state of technology.<br />
Name plate / Marking<br />
According to EN 19 the name plate and the housing indicate the valve type and<br />
design:<br />
■ Type designation <strong>PA</strong> <strong>46</strong>, <strong>PA</strong> <strong>47</strong>: Design with hand lever<br />
M<strong>PA</strong> <strong>46</strong>, M<strong>PA</strong> <strong>47</strong>: Design with diaphragm actuator<br />
■ Marking according to ATEX: Marking: II 2G/D c X<br />
4<br />
■ Stamp on valve body, e. g. 04 indicates term and year of production<br />
(Example: 4th quarter 2004)<br />
Code letter „M“<br />
for diaphragm<br />
actuator<br />
Nominal size<br />
PN / CL<br />
Direction of flow<br />
CE marking if required<br />
Type of<br />
equipment<br />
9
Technical Data - continued -<br />
Capacity chart <strong>PA</strong> <strong>46</strong>, <strong>PA</strong> <strong>47</strong>, M<strong>PA</strong> <strong>46</strong>, M<strong>PA</strong> <strong>47</strong><br />
Calculation of the amount of boiler water to be<br />
discharged according to the following formula:<br />
A = Q · S<br />
K – S<br />
Conductivity of<br />
feedwater:<br />
S [µS/cm]<br />
Admissible conductivity<br />
of boiler water: K [µS/cm]<br />
Boiler capacity: Q [kg/h]<br />
Amount of boiler water<br />
to be discharged: A [kg/h]<br />
Fig. 1<br />
Example<br />
Conductivity of<br />
feedwater:<br />
S = 20 µS/cm<br />
Admissible conductivity<br />
of boiler water: K = 4000 µS/cm<br />
Boiler capacity: Q = 2000 kg/h<br />
Amount of boiler water<br />
to be discharged: A ≈10 kg/h<br />
How to read chart fig. 1<br />
Boiler pressure: 25 bar<br />
Nominal size of intermittent valve for removing<br />
boiler sludge DN 32<br />
Capacity:<br />
2.5 kg/s<br />
10
Technical Data - continued -<br />
Control pressure chart M<strong>PA</strong> <strong>46</strong>, M<strong>PA</strong> <strong>47</strong><br />
Control pressure [bar]<br />
Fig. 2<br />
11
Design <strong>PA</strong> <strong>46</strong>, <strong>PA</strong> <strong>47</strong><br />
W<br />
1<br />
V<br />
U<br />
A<br />
3<br />
T<br />
S<br />
R<br />
Q<br />
B<br />
C<br />
P<br />
O<br />
N<br />
M<br />
L<br />
K<br />
J<br />
D<br />
E<br />
I<br />
H<br />
Fig. 3<br />
F<br />
G<br />
12
Design M<strong>PA</strong> <strong>46</strong>, M<strong>PA</strong> <strong>47</strong><br />
Z<br />
Y<br />
X<br />
V<br />
W<br />
T<br />
4<br />
3<br />
B<br />
2<br />
C<br />
S<br />
R<br />
Q<br />
P<br />
O<br />
N<br />
M<br />
L<br />
K<br />
J<br />
D<br />
E<br />
Fig. 4<br />
I<br />
H<br />
F<br />
G<br />
13
Key<br />
A Locking lever<br />
B Mounting bracket<br />
C Check hole<br />
D Valve plug<br />
E Name plate<br />
F Gasket D 38 x 44 (DN 20-32), D 52 x 60 (DN 40-50)<br />
G Sealing plug<br />
H Valve seat<br />
I Valve body<br />
J Base bushing<br />
K Packing ring 14 x 28 x 7<br />
L Wiper ring<br />
M Pressure ring<br />
N Disc springs (15 pcs.)<br />
O Union nut<br />
P Compression spring<br />
Q Check pin<br />
R Pressure pin<br />
S Split pin 2.5 x 40, ISO 1234<br />
T Forkhead G 10 x 20, DIN 71752<br />
U Centering screw<br />
V Pressure plate<br />
W Hexagon-head cap screw M10 x 200, ISO 4014<br />
X Spacer disc<br />
Y GESTRA Diaphragm actuator<br />
Z Screwed connection ( 3 /8") for control fluid<br />
1 Hand lever for <strong>PA</strong> <strong>46</strong>, <strong>PA</strong> <strong>47</strong><br />
2 Hand lever for emergency operation M<strong>PA</strong> <strong>46</strong>, M<strong>PA</strong> <strong>47</strong><br />
3 Retaining piece for hand lever<br />
4 Hexagon-head cap screw for forkhead M 10 x 25, ISO 4017<br />
14
Installation<br />
Danger<br />
Risk of death, severe injuries, physical damage or destruction caused by<br />
explosive mixtures!<br />
If the equipment is electrically insulated and installed between pipe<br />
flanges, electrostatic charges may build up.<br />
When using the equipment in explosion-risk areas make sure that static<br />
electricity will be discharged (earthing).<br />
<strong>PA</strong> <strong>46</strong>, <strong>PA</strong> <strong>47</strong>, M<strong>PA</strong> <strong>46</strong>, M<strong>PA</strong> <strong>47</strong><br />
The intermittent valve for removing boiler sludge can be installed in horizontal or<br />
vertical pipes. The hand lever of the <strong>PA</strong> <strong>46</strong>, <strong>PA</strong> <strong>47</strong> and the hand lever for the<br />
emergency operation of M<strong>PA</strong> <strong>46</strong>, M<strong>PA</strong> <strong>47</strong> must be freely movable.<br />
Attention<br />
■ To avoid waterhammer lay the pipe downstream of the intermittent<br />
valve in such a way that it has a slight fall, or evacuate the pipe before<br />
carrying out the boiler blowdown.<br />
■ The length of the pipe between the steam boiler and the intermittent<br />
valve for removing boiler sludge must not exceed two metres!<br />
Flanged design<br />
1. Observe position of installation. The hand lever 1 or the hand lever for emergency<br />
operation 2 (M<strong>PA</strong>...) must be freely movable.<br />
2. Observe the direction of flow. The arrow indicating the flow direction is specified<br />
on the name plate E .<br />
3. Consider space required for opening the valve. When the intermittent valve for<br />
removing boiler sludge is installed, a minimum space of at least 150 mm is<br />
required for removing or retrofitting the actuator!<br />
4. Remove plastic plugs. They are only used as transit protection.<br />
5. Clean seating surfaces of both flange faces.<br />
6. Install intermittent valve for removing boiler sludge.<br />
Socket-weld design<br />
1. Observe position of installation. The hand lever 1 or the hand lever for emergency<br />
operation 2 (M<strong>PA</strong>...) must be freely movable.<br />
2. Observe the direction of flow. The arrow indicating the flow direction is specified<br />
on the name plate E .<br />
3. Consider space required for opening the valve. When the intermittent valve for<br />
removing boiler sludge is installed a minimum space of at least 150 mm is<br />
required for removing or retrofitting the actuator!<br />
4. Remove plastic plugs. They are only used as transit protection.<br />
5. Clean socket-weld ends.<br />
6. Arc weld trap only manually (welding processes 111 and 141 in accordance with ISO 4063).<br />
15
Installation - continued -<br />
Butt-weld design<br />
1. Observe position of installation. The hand lever 1 or the hand lever for<br />
emergency operation 2 (M<strong>PA</strong>...) must be freely movable.<br />
2. Observe the direction of flow. The arrow indicating the flow direction is specified<br />
on the name plate E .<br />
3. Consider space required for opening the valve. When the intermittent valve for<br />
removing boiler sludge is installed a minimum space of at least 150 mm is<br />
required for removing or retrofitting the actuator!<br />
4. Remove plastic plugs. They are only used as transit protection.<br />
6. Arc-weld trap only manually (welding processes 111 and 141 in accordance with<br />
ISO 4063) or use gas welding process (welding process 3 in accordance with<br />
ISO 4063).<br />
Attention<br />
■ Only qualified welders certified e. g. according to DIN EN 287-1 may<br />
weld the valve into pressurized lines.<br />
Heat treatment of welds<br />
A subsequent heat treatment of the welds is not required.<br />
Mounting hand lever <strong>PA</strong> <strong>46</strong>, <strong>PA</strong> <strong>47</strong><br />
1. Release retaining piece for hand lever 3 and pull it out of the forkhead T .<br />
2. Apply lubricant (e. g. WINIX 5000) to the retaining piece, forkhead and hole for<br />
attaching the hand lever.<br />
3. Push hand lever 1 through mounting bracket B into the forkhead T and fix it in<br />
place by means of the retaining piece 3 .<br />
Commissioning<br />
The flanged connections of the <strong>PA</strong> <strong>46</strong>, <strong>PA</strong> <strong>47</strong>, M<strong>PA</strong> <strong>46</strong>, M<strong>PA</strong> <strong>47</strong> must be permanently<br />
bolted and leakproof.<br />
After starting up the steam boiler or pressure vessel, the intermittent valve for<br />
removing boiler sludge should be completely opened and closed once. The valve<br />
must close automatically, ensuring tight shut-off.<br />
The stuffing box must be leakproof! Inspect the check hole C in order to detect any<br />
fluid leakage.<br />
If the equipment is mounted in a new and unpurged installation increase the<br />
blowdown frequency a little at the beginning.<br />
16<br />
<strong>PA</strong> <strong>46</strong>, <strong>PA</strong> <strong>47</strong>, M<strong>PA</strong> <strong>46</strong>, M<strong>PA</strong> <strong>47</strong><br />
WINIX ® 5000 is a registered trademark of WINIX GmbH, Norderstedt
Operation<br />
Duration and frequency of intermittent boiler blowdown<br />
When the GESTRA intermittent valve opens, a localized low-pressure area forms<br />
around the blowoff opening and the boiler sludge rushes out at high velocity, giving the<br />
steam boiler a short blow. The discharge of sludge and precipitated solids (valve fully open)<br />
takes approx. 2 seconds. In order to ascertain the blowdown frequency, the operating<br />
data of the installation have to be taken into account:<br />
1. Use formula of fig. 1 to calculate the amount of boiler water in [kg/h] that must be<br />
discharged so that the admissible conductivity value of the boiler water will not<br />
be exceeded. Example: 10 kg/h<br />
2. Use the capacity chart to determine the discharge capacity in [kg/h] of the existing<br />
intermittent valve or of the intermittent valve that has been selected according to the<br />
size of the boiler standpipe. Example: 2.5 kg/s<br />
3. The results of item 1) and 2) give a blowdown duration of 4 seconds.<br />
For an effective blowdown the valve must only be open for 2 seconds, which means<br />
that according to the above calculation 2 cycles per hour are required.<br />
The time period between blowdowns (valve closed) is therefore 30 minutes.<br />
The GESTRA automatic intermittent blowdown control TA.... features the following<br />
settings: Blowdown duration (valve open) usually 2 seconds. Blowdown frequency<br />
(time between blowdowns - valve closed) adjustable, e. g. 30 minutes. It is possible to<br />
reduce the intermittent blowdown frequency if continuous (top) boiler blowdown is<br />
performed instead (see installation instructions BA.../ BAE...).<br />
Emergency operation M<strong>PA</strong> <strong>46</strong>, M<strong>PA</strong> <strong>47</strong><br />
Danger<br />
Risk of severe injuries to the whole body. Make sure that the line for the<br />
control fluid of the diaphragm actuator is depressurized (zero bar) and<br />
isolated during the emergency operation of the M<strong>PA</strong> <strong>46</strong>, M<strong>PA</strong> <strong>47</strong>.<br />
Insert the hand lever for emergency operation only to operate the valve and<br />
remove it immediately after operation.<br />
Fit hand lever for emergency operation<br />
1. Fit hand lever for emergency operation 2 , operate intermittent valve for removing<br />
boiler sludge.<br />
2. Remove hand lever for emergency operation 2 immediately after operation.<br />
Maintenance<br />
GESTRA intermittent valves for removing boiler sludge <strong>PA</strong> <strong>46</strong>, <strong>PA</strong> <strong>47</strong>, M<strong>PA</strong> <strong>46</strong> and<br />
M<strong>PA</strong> <strong>47</strong> are usually free of maintenance.<br />
After starting up the steam boiler or pressure vessel, the intermittent valve for<br />
removing boiler sludge should be completely opened and closed once. The valve<br />
must close automatically, ensuring tight shut-off.<br />
The stuffing box must be leakproof! Inspect the check hole C in order to detect any<br />
fluid leakage.<br />
17
Maintenance - continued -<br />
Danger<br />
Risk of severe burns and scalds to the whole body!<br />
Before carrying out any maintenance work on the valve or loosening<br />
flanged connections, stuffing box unions or sealing plugs make sure that<br />
all connected lines are depressurized (zero bar) and cooled down to<br />
room temperature (20 °C).<br />
18<br />
Replacing stuffing box <strong>PA</strong> <strong>46</strong>, <strong>PA</strong> <strong>47</strong><br />
1.Undo retaining piece 3 for forkhead T and pull out hand lever 1 . Fig. 3<br />
2.Unscrew hexagon-head cap screws W and remove locking lever A .<br />
3.Remove pressure plate V and mounting bracket B .<br />
4.Pull out split pin S .<br />
5.Use open-end spanner A. F. 28 mm to unscrew the pressure pin R from the valve<br />
plug D .<br />
6.Remove compression spring P .<br />
7.Use open-end spanner A. F. 32 mm to unscrew the union nut O .<br />
8.Unscrew sealing plug G and remove gasket F .<br />
9.Pull out valve plug D .<br />
10. Take out internal parts N M L K L J of stuffing box.<br />
11. Clean stuffing box, valve body and valve plug.<br />
12. Re-insert valve plug D and use abrasive paste type TETRABOR ® F400 for<br />
polish grinding.<br />
13. Insert new gasket F and screw in sealing plug G. Tighten with a torque of 350 Nm.<br />
14. Re-insert internal parts of stuffing box according to order as specified on page<br />
24. Fig. 5, Fig. 6<br />
15. Apply heat-resistance lubricant to stuffing box thread (use e.g. WINIX ® 2150).<br />
16. Align valve plug D such that the hole for the split pin S is perpendicular to the<br />
flow direction of the intermittent valve.<br />
17. Use open-end spanner A. F. 32 mm to screw in union nut O and tighten at room<br />
temperature with a torque of 55 Nm.<br />
18. Apply heat-resistant lubricant to both sides of the compression spring P (use<br />
e. g. WINIX ® 2150) and place it onto the union nut O .<br />
19. Use open-end spanner A. F. 28 mm to screw the pressure pin R onto the valve plug<br />
D until the holes for the split pin S in the valve plug and the pressure pin overlap.<br />
20. Insert split pin S .<br />
21. Re-insert mounting bracket B and pressure plate V . Align check hole C to the right.<br />
22. Insert and screw in hexagon-head cap screws W and locking lever A and<br />
tighten them in diagonally opposite pairs, applying a torque of 20 Nm.<br />
23. Insert hand lever 1 and fix it to the forkhead T by means of retaining piece 3 .<br />
24. Operate valve once (open it until it hits the stop).<br />
WINIX ® 2150 is a registered trademark of WINIX GmbH, Norderstedt<br />
TETRABOR ® is a registered trademark of Wacker-Chemie GmbH, Kempten
Maintenance - continued -<br />
Replacing stuffing box, valve seat and valve plug <strong>PA</strong> <strong>46</strong>, <strong>PA</strong> <strong>47</strong><br />
1.Undo retaining piece for forkhead T and pull out hand lever 1 . Fig. 3<br />
2.Unscrew hexagon-head cap screws W and remove locking lever A .<br />
3.Remove pressure plate V and mounting bracket B .<br />
4.Pull out split pin S .<br />
5.Use open-end spanner A. F. 28 mm to unscrew the pressure pin R from the<br />
valve plug D .<br />
6.Remove compression spring P .<br />
7.Use open-end spanner A. F. 32 mm to unscrew the union nut O .<br />
8.Unscrew sealing plug G and remove gasket F .<br />
9.Pull out valve plug D .<br />
10. Take out internal parts N M L K L J of stuffing box.<br />
11. Use steel punch to knock the valve seat H out of the valve body I . Fig. 7<br />
12. Clean stuffing box and valve body.<br />
13. Insert new valve seat H such that two opposite holes are in the flow direction<br />
of the intermittent valve.<br />
14. Use punch made of CuZn to fix the valve seat in the valve body. Fig. 8<br />
15. Re-insert valve plug D and use abrasive paste type TETRABOR ® F400 for polish<br />
grinding.<br />
16. Insert new gasket F and screw in sealing plug G . Tighten with a torque of 350 Nm.<br />
17. Re-insert internal parts of stuffing box according to order as specified on<br />
page 24. Fig. 5, Fig. 6<br />
18. Apply heat-resistance lubricant to stuffing box thread (use e.g. WINIX ® 2150).<br />
19. Align valve plug D such that the hole for the split pin S is perpendicular to the<br />
flow direction of the intermittent valve.<br />
20. Use open-end spanner A. F. 32 mm to screw in union nut O and tighten at room<br />
temperature with a torque of 55 Nm.<br />
21. Apply heat-resistant lubricant to both sides of the compression spring P<br />
(use e. g. WINIX ® 2150) and place it onto the union nut O .<br />
22. Use open-end spanner A. F. 28 mm to screw the pressure pin R onto the valve plug D<br />
until the holes for the split pin S in the valve plug and the pressure pin overlap.<br />
23. Insert split pin S .<br />
24. Put mounting bracket B and pressure plate V in place. Align check hole C to the right.<br />
25. Insert and screw in hexagon-head cap screws W and locking lever A and<br />
tighten them in diagonally opposite pairs, applying a torque of 20 Nm.<br />
26. Insert hand lever 1 and fix it to the forkhead T by means of retaining piece 3 .<br />
27. Operate valve once (open it until it hits the stop).<br />
WINIX ® 2150 is a registered trademark of WINIX GmbH, Norderstedt<br />
TETRABOR ® is a registered trademark of Wacker-Chemie GmbH, Kempten<br />
19
Maintenance - continued -<br />
Replacing stuffing box M<strong>PA</strong> <strong>46</strong>, M<strong>PA</strong> <strong>47</strong><br />
1.Detach presssure line for the control fluid of the diaphragm actuator from the<br />
screwed socket Z .<br />
2.Remove diaphragm actuator Y . Fig. 4<br />
3.Remove spacer disk X and pressure plate V .<br />
4.Unscrew hexagon-head cap screws W .<br />
5.Remove pressure plate V and mounting bracket B .<br />
6.Pull out split pin S .<br />
7.Use open-end spanner A. F. 28 mm to unscrew the pressure pin R from the valve<br />
plug D .<br />
8.Remove compression spring P .<br />
9.Use open-end spanner A. F. 32 mm to unscrew the union nut O .<br />
10. Unscrew sealing plug G and remove gasket F .<br />
11. Pull out valve plug D .<br />
12. Take out internal parts N M L K L J of stuffing box.<br />
13. Clean stuffing box, valve body and valve plug.<br />
14. Re-insert valve plug D and use abrasive paste type TETRABOR ® F400 for polish<br />
grinding.<br />
15. Insert new gasket F and screw in sealing plug G . Tighten with a torque of 350 Nm.<br />
16. Re-insert internal parts of stuffing box according to order as specified on page<br />
24. Fig. 5, Fig. 6<br />
17. Apply heat-resistance lubricant to stuffing box thread (use e.g. WINIX ® 2150).<br />
18. Align valve plug D such that the hole for the split pin S is perpendicular to the<br />
flow direction of the intermittent valve.<br />
19. Use open-end spanner A. F. 32 mm to screw in union nut O and tighten at room<br />
temperature with a torque of 55 Nm.<br />
20. Apply heat-resistant lubricant to both sides of the compression spring P<br />
(use e. g. WINIX ® 2150) and place it onto the union nut O .<br />
21. Use open-end spanner A. F. 28 mm to screw the pressure pin R onto the valve plug<br />
until the holes for the split pin S in the valve plug and the pressure pin overlap.<br />
22. Insert split pin S .<br />
23. Re-insert mounting bracket B and pressure plate V . Align check hole C to the<br />
right.<br />
24. Insert hexagon-head cap screws W and tighten them in diagonally opposite pairs<br />
with a torque of 20 Nm.<br />
25. Put spacer disk X onto pressure plate V .<br />
26. Screw on diaphragm actuator Y with a torque of 120 Nm.<br />
27. Attach presssure line for the control fluid of the diaphragm actuator.<br />
28. Operate the valve once.<br />
D<br />
WINIX ® 2150 is a registered trademark of WINIX GmbH, Norderstedt<br />
TETRABOR ® is a registered trademark of Wacker-Chemie GmbH, Kempten<br />
20
Maintenance - continued -<br />
Replacing stuffing box, valve seat and valve plug M<strong>PA</strong> <strong>46</strong>, M<strong>PA</strong> <strong>47</strong><br />
1.Detach presssure line for the control fluid of the diaphragm actuator from the<br />
screwed socket Z .<br />
2.Remove diaphragm actuator Y . Fig. 4<br />
3.Remove spacer disk X and pressure plate V .<br />
4.Unscrew hexagon-head cap screws W .<br />
5.Remove pressure plate V and mounting bracket B .<br />
6.Pull out split pin S .<br />
7. Use open-end spanner A. F. 28 mm to unscrew the pressure pin R from the valve plug D .<br />
8.Remove compression spring P .<br />
9.Use open-end spanner A. F. 32 mm to unscrew the union nut O .<br />
10. Unscrew sealing plug G and remove gasket F .<br />
11. Pull out valve plug D .<br />
12. Take out internal parts N M L K L J of stuffing box.<br />
13. Use steel punch to knock the valve seat H out of the valve body I . Fig. 7<br />
14. Clean stuffing box, valve body and valve plug.<br />
15. Insert new valve seat H such that two opposite holes are in the flow direction<br />
of the intermittent valve.<br />
16. Use punch made of CuZn to fix the valve seat in the valve body. Fig. 8<br />
17. Insert valve plug D and apply abrasive paste type TETRABOR ® F400 for polish<br />
grinding.<br />
18. Insert new gasket F and screw in sealing plug G . Tighten with a torque of 350 Nm.<br />
19. Re-insert internal parts of stuffing box according to order as specified on page<br />
24. Fig. 5, Fig. 6<br />
20. Apply heat-resistance lubricant to stuffing box thread (use e. g. WINIX ® 2150).<br />
21. Align valve plug D such that the hole for the split pin S is perpendicular to the flow<br />
direction of the intermittent valve.<br />
22. Use open-end spanner A. F. 32 mm to screw in union nut O and tighten at room<br />
temperature with a torque of 55 Nm.<br />
23. Apply heat-resistant lubricant to both sides of the compression spring P<br />
(use e. g. WINIX ® 2150) and place it onto the union nut O .<br />
24. Use open-end spanner A. F. 28 mm to screw the pressure pin R onto the valve plug D<br />
until the holes for the split pin S in the valve plug and the pressure pin overlap.<br />
25. Insert split pin S .<br />
26. Re-insert mounting bracket B and pressure plate V .<br />
27. Insert hexagon-head cap screws W and tighten them in diagonally opposite pairs<br />
with a torque of 20 Nm.<br />
28. Put spacer disk X onto pressure plate V .<br />
29. Screw on diaphragm actuator Y with a torque of 120 Nm.<br />
30. Attach presssure line for the control fluid of the diaphragm actuator.<br />
31. Operate the valve once.<br />
WINIX ® 2150 is a registered trademark of WINIX GmbH, Norderstedt<br />
TETRABOR ® is a registered trademark of Wacker-Chemie GmbH, Kempten<br />
21
Maintenance - continued -<br />
Retightening stuffing box<br />
If fluid leaks out of the control hole C , re-tighten the stuffing box with the union<br />
nut O .<br />
1. Insert pin punch through opening of the mounting bracket B and push it into one<br />
of the holes of the union nut O . Carefully tighten union nut clockwise until the fluid<br />
stops leaking out of the control hole C .<br />
2. Operate valve once - the valve must close automatically, ensuring tight shut-off.<br />
Attention<br />
■ If the stuffing box cannot be tightened further by means of the union<br />
nut O all internal parts of the stuffing box must be replaced!<br />
■ If the force of the spring does not close the valve automatically loosen<br />
the union nut O a little. If fluid leaks out of the control hole the internals<br />
of the stuffing box must be replaced.<br />
Replacing control membrane in diaphragm actuator M<strong>PA</strong> <strong>46</strong>, M<strong>PA</strong> <strong>47</strong><br />
1.Detach presssure line for the control fluid of the diaphragm actuator.<br />
2.Unscrew hexagon-head bolts 5 and hexagon nuts. Fig. 9<br />
3.Remove and clean upper part 6 of the diaphragm actuator.<br />
4.Take out old control membrane 7 . Clean lower part 8 .<br />
5.Insert new control membrane 7 , aligning its holes with the holes of the lower part.<br />
6.Put upper part 6 on top and align its holes with the holes of the control membrane<br />
and the lower part.<br />
7.Insert hexagon-head bolts 5 and tighten them with the respective hexagon nuts<br />
in diagonally opposite pairs to a torque of 5 Nm.<br />
8.Attach presssure line for the control fluid of the diaphragm actuator.<br />
9.Check tightness. If necessary retighten hexagon-head bolts 5 carefully in<br />
diagonally opposite pairs.<br />
10. To grease the guide plate pin 9 apply lubricant to the grease nipple in the<br />
connecting socket of the diaphragm actuator (use e. g. WINIX 5000).<br />
Attention<br />
■ The torque for tightening the hexagon-head cap screws 5 must not<br />
exceed 5 Nm because higher torques could damage the control<br />
membrane!<br />
WINIX ® 5000 is a registered trademark of WINIX GmbH, Norderstedt<br />
22
Maintenance - continued -<br />
Torques<br />
Item<br />
G<br />
O<br />
Intermittent valves for removing boiler sludge<br />
<strong>PA</strong> <strong>46</strong>, <strong>PA</strong> <strong>47</strong>, M<strong>PA</strong> <strong>46</strong>, M<strong>PA</strong> <strong>47</strong><br />
<strong>PA</strong> <strong>46</strong>, <strong>PA</strong> <strong>47</strong>, M<strong>PA</strong> <strong>46</strong>, M<strong>PA</strong> <strong>47</strong><br />
Torques [Nm]<br />
350<br />
55<br />
W<br />
U<br />
<strong>PA</strong> <strong>46</strong>, <strong>PA</strong> <strong>47</strong>, M<strong>PA</strong> <strong>46</strong>, M<strong>PA</strong> <strong>47</strong> 20<br />
<strong>PA</strong> <strong>46</strong>, <strong>PA</strong> <strong>47</strong> 60<br />
Y<br />
M<strong>PA</strong> <strong>46</strong>, M<strong>PA</strong> <strong>47</strong><br />
120<br />
5 M<strong>PA</strong> <strong>46</strong>, M<strong>PA</strong> <strong>47</strong><br />
5<br />
All torques indicated in the table are based at a room temperature of 20 °C.<br />
Tools<br />
■ Spanner A. F. 13 mm, DIN 3113, Form B<br />
■ Spanner A. F. 17 mm, DIN 3113, Form B<br />
■ Spanner A. F. 28 mm, DIN 3113, Form B<br />
■ Spanner A. F. 32 mm, DIN 3113, Form B<br />
■ Spanner A. F. 36 mm, DIN 3113, Form B<br />
■ Spanner A. F. 41 mm, DIN 3113, Form B<br />
■ Torque spanner 1-12 Nm, ISO 6789<br />
■ Torque spanner 20-120 Nm, ISO 6789<br />
■ Torque spanner 80-400 Nm, ISO 6789<br />
■ Socket spanner 13x250, DIN 3112<br />
■ Punch 20x200, made of steel<br />
■ Punch 20x200, made of CuZn (brass)<br />
■ Pin punch 8x150, DIN 6450 C<br />
■ Grease gun (for valve plug)<br />
23
Maintenance - continued -<br />
Single parts of stuffing box, valve plug, valve seat<br />
N<br />
M<br />
L<br />
K<br />
L<br />
J<br />
H<br />
Fig. 5<br />
D<br />
24<br />
Fig. 6
Maintenance - continued -<br />
Mounting/removing valve seat<br />
Fig. 7<br />
Fig. 8<br />
25
Maintenance - continued -<br />
Mounting/removing control membrane<br />
5<br />
6<br />
7<br />
8<br />
9<br />
Fig. 9<br />
26
Key<br />
5<br />
6<br />
7<br />
8<br />
9<br />
Hexagon-head bolt M8 with hexagon nut M8<br />
Upper part of the diaphragm actuator<br />
Control membrane<br />
Lower part of the diaphragm actuator with connector socket<br />
Guide pin with plate<br />
Retrofitting<br />
GESTRA intermittent valves <strong>PA</strong> <strong>46</strong> and <strong>PA</strong> <strong>47</strong> can be retrofitted with a GESTRA<br />
diaphragm actuator (M<strong>PA</strong> <strong>46</strong>, M<strong>PA</strong> <strong>47</strong>).<br />
Danger<br />
Risk of severe burns and scalds to the whole body!<br />
Before carrying out any retrofitting work on the valve or loosening flanged<br />
connections, stuffing box unions or sealing plugs make sure that all<br />
connected lines are depressurized (zero bar) and cooled down to room<br />
temperature (20 °C).<br />
Insert the hand lever for emergency operation 2 only to operate the valve<br />
and remove it immediately after operation.<br />
Mounting diaphragm actuator<br />
1.Undo centering screw U . Fig. 3<br />
2.Undo retaining piece 3 for forkhead T and pull out hand lever 1 .<br />
Note that the hand lever must not be mounted again!<br />
3.Snap retaining piece 3 on forkhead T .<br />
4.Unscrew hexagon-head cap screws W and remove locking lever A .<br />
5.Insert hexagon-head cap screws W and tighten them with a torque of 20 Nm.<br />
6.Put spacer disk X onto pressure plate V .<br />
7.Apply heat-resistant lubricant to the connector socket of the diaphragm actuator<br />
(use e.. g. WINIX ® 2150).<br />
8.Screw on diaphragm actuator Y with a torque of 120 Nm.<br />
9.Attach presssure line (3/8") for the control fluid of the diaphragm actuator.<br />
10. Operate the valve once.<br />
27
Retrofitting - continued -<br />
Mounting the forkhead (hand lever for emergency operation)<br />
1.Align and fit forkhead T together with hexagon-head cap screw 4 to the<br />
pressure plate V . Tighten the hexagon-head cap screw 2 with a torque of<br />
20 Nm. Fig. 4<br />
2.Fit hand lever for emergency operation 2 , operate intermittent valve for<br />
removing boiler sludge.<br />
3.Remove hand lever for emergency operation 2 immediately after operation.<br />
Tools<br />
■ Spanner A. F. 16 mm, DIN 3113, Form B<br />
■ Spanner A. F. 17 mm, DIN 3113, Form B<br />
■ Spanner A. F. 41 mm, DIN 3113, Form B<br />
■ Torque spanner 20-120 Nm, ISO 6789<br />
Torques<br />
Item<br />
Y<br />
4<br />
Intermittent valves for removing boiler sludge<br />
M<strong>PA</strong> <strong>46</strong>, M<strong>PA</strong> <strong>47</strong><br />
M<strong>PA</strong> <strong>46</strong>, M<strong>PA</strong> <strong>47</strong><br />
Torques [Nm]<br />
120<br />
20<br />
W<br />
<strong>PA</strong> <strong>46</strong>, <strong>PA</strong> <strong>47</strong>, M<strong>PA</strong> <strong>46</strong>, M<strong>PA</strong> <strong>47</strong> 20<br />
All torques indicated in the table are based at a room temperature of 20 °C.<br />
28
Spare Parts<br />
Spare parts list<br />
Item<br />
Designation<br />
Stock code<br />
<strong>PA</strong> <strong>46</strong><br />
<strong>PA</strong> <strong>47</strong><br />
Stock code<br />
M<strong>PA</strong> <strong>46</strong><br />
M<strong>PA</strong> <strong>47</strong><br />
J<br />
L<br />
N<br />
K<br />
M<br />
F<br />
Internal parts of stuffing box, DN 20 to<br />
DN 50:<br />
Base bushing, wiper ring,<br />
Packing ring 14x28x7, pressure ring,<br />
disk springs (15 pcs.),<br />
Gasket D 38x44, D 52x60<br />
335064<br />
335064<br />
D<br />
J<br />
L<br />
N<br />
H<br />
K<br />
M<br />
F<br />
Valve plug, valve seat and internal parts<br />
of stuffing box, DN 20, DN 25, DN 32:<br />
Base bushing, wiper ring,<br />
Packing ring 14x28x7, pressure ring,<br />
disk springs (15 pcs.),<br />
Gasket D 38x44<br />
335063<br />
335063<br />
D<br />
J<br />
L<br />
N<br />
H<br />
K<br />
M<br />
F<br />
Valve plug, valve seat and internal parts of<br />
stuffing box, DN 40, DN 50:<br />
Base bushing, wiper ring,<br />
Packing ring 14x28x7, pressure ring,<br />
disk springs (15 pcs.),<br />
Gasket D 52x60<br />
335065 335065<br />
7<br />
Control membrane for diaphragm<br />
actuator<br />
353131<br />
2<br />
4<br />
3<br />
T<br />
Hand lever for emergency operation<br />
with forkhead<br />
335060<br />
9<br />
Guide pin with plate 335130<br />
N<br />
F<br />
Diaphragm actuator with spacer disk 335093<br />
29
Parts for retrofitting<br />
List of parts for retrofitting<br />
Item<br />
Designation<br />
Stock code<br />
<strong>PA</strong> <strong>46</strong><br />
<strong>PA</strong> <strong>47</strong><br />
Stock code<br />
M<strong>PA</strong> <strong>46</strong><br />
M<strong>PA</strong> <strong>47</strong><br />
Y<br />
X<br />
Diaphragm actuator with spacer disk 335093<br />
2<br />
4<br />
3<br />
T<br />
Hand lever for emergency operation<br />
with forkhead<br />
335060<br />
Decommissioning<br />
Danger<br />
Risk of severe burns and scalds to the whole body!<br />
Before loosening flanged connections, stuffing box unions or sealing<br />
plugs make sure that all connected lines are depressurized (zero bar)<br />
and cooled down to room temperature (20 °C).<br />
Disposal<br />
Dismantle the valve and separate the waste materials, using the material<br />
specifications in the table "Materials" on page 8 as a reference.<br />
For the disposal of the valve observe the pertinent legal regulations concerning<br />
waste disposal.<br />
30
Annex<br />
Declaration of Conformity<br />
We hereby declare that the pressure equipment <strong>PA</strong> <strong>46</strong>, <strong>PA</strong> <strong>47</strong>, M<strong>PA</strong> <strong>46</strong> and M<strong>PA</strong> <strong>47</strong><br />
conform to the following European Directives:<br />
■ Pressure Equipment Directive 97/23/EC of 29 May 1997 for equipment of<br />
category 1 according to the table "Pressure Equipment Directive" on page 5.<br />
■ ATEX Directive 94/9/EC of 23 March 1994<br />
Applied conformity assessment procedure according to 97/23/EC: Annex III,<br />
Module H, verified by the Notified Body 0525.<br />
Applied conformity assessment procedure according to 94/9/EC: Annex VIII<br />
This declaration is no longer valid if modifications are made to the equipment<br />
without consulation with us.<br />
Bremen, 8th March 2004<br />
GESTRA GmbH<br />
Dipl.-Ing. Uwe Bledschun<br />
(Academically qualified<br />
engineer)<br />
Head of the Design Dept.<br />
Dipl.-Ing. Lars Bohl<br />
(Academically qualified<br />
engineer)<br />
Quality Assurance Manager<br />
31
GESTRA Gesellschaften · GESTRA Companies · Sociétés GESTRA · Sociedades Gestra · Società GESTRA<br />
Vertretungen weltweit · Agencies all over the world · Représentations dans le monde entier · Representaciones en todo el mundo · Agenzie in tutto il mondo<br />
Great Britain<br />
<strong>Flowserve</strong> Flow Control (UK) Ltd.<br />
Burrel Road, Haywards Heath<br />
West Sussex RH 16 1TL<br />
Tel. 00 44 14 44 / 31 44 00<br />
Fax 00 44 14 44 / 31 45 57<br />
E-mail: sales@flowserve.com<br />
Italia<br />
<strong>Flowserve</strong> S.p. A<br />
Divisione Italgestra<br />
Via Prealpi, 30 – 20032 Cormano (MI)<br />
Tel. 003902/663251<br />
Fax 00 39 02 / 66 32 55 60<br />
E-mail: infoitaly@flowserve.com<br />
France<br />
<strong>Flowserve</strong> Flow Control S. A. S.<br />
10 Avenue du Centaure, BP 8263<br />
F-95801 CERGY PONTOISE CEDEX<br />
Tél. 00.33.1 / 34 43 26 60<br />
Fax 00.33.1 / 34 43 26 87<br />
E-mail: contact@gestra.fr<br />
Portugal<br />
<strong>Flowserve</strong> Portuguesa, Lda.<br />
Av. Dr. Antunes Guimarães, 1159<br />
Porto 4100-082<br />
Tel. 00351 22 / 6 19 87 70<br />
Fax 00351 22 / 6 10 75 75<br />
E-mail: gestra@gestra.pt<br />
España<br />
GESTRA ES<strong>PA</strong>ÑOLA S.A.<br />
Luis Cabrera, 86-88<br />
E-28002 Madrid<br />
Tel. 00 34 91 / 5 152 032<br />
Fax 00 34 91 / 4 136 7<strong>47</strong>; 5 152 036<br />
E-mail: gestra@gestra.es<br />
®<br />
GESTRA GmbH<br />
P. O. Box 10 54 60, D-28054 Bremen, Münchener Str. 77, D-28215 Bremen<br />
Tel. ++49 (0) 421 35 03 - 0, Fax ++49 (0) 421 35 03 - 393<br />
E-Mail gestra.gmbh@flowserve.com, Internet www.gestra.de<br />
A Unit of <strong>Flowserve</strong> <strong>Corporation</strong><br />
8184<strong>47</strong>-00/404cm · © 2004 GESTRA GmbH · Bremen · Printed in Germany<br />
32