LASER POWER METER - Ophir Optronics
LASER POWER METER - Ophir Optronics
LASER POWER METER - Ophir Optronics

Create successful ePaper yourself
Turn your PDF publications into a flip-book with our unique Google optimized e-Paper software.
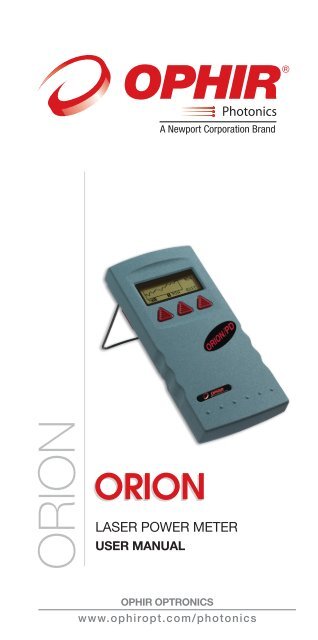
ORION<br />
ORION<br />
<strong>LASER</strong> <strong>POWER</strong> <strong>METER</strong><br />
USER MANUAL<br />
OPHIR OPTRONICS<br />
www.ophiropt.com/photonics
Table of Contents<br />
Chapter 1 Introduction: How to Use This Manual ................... 2<br />
Chapter 2 Quick Reference ........................................................... 3<br />
2.1 Getting Started............................................................................3<br />
2.2 Orion TH - Thermal Heads .......................................................5<br />
2.3 Photodiode Heads .....................................................................6<br />
2.4 Pyroelectric and Photodiode Energy Heads.......................9<br />
Chapter 3 The Orion Display Unit ............................................... 13<br />
3.1 General Description ............................................................... 13<br />
3.2 Smart Connectors and Multihead Operation................... 13<br />
3.3 Soft Keys and Rightmost Button ......................................... 14<br />
3.4 Power Up and Shut Down .................................................... 16<br />
3.5 Orion Functions which are independent of Head........... 16<br />
3.6 Backlight.................................................................................... 18<br />
3.7 Kickstand................................................................................... 18<br />
3.8 Charging .................................................................................... 18<br />
3.9 Chart Recording....................................................................... 19<br />
Chapter 4 Orion TH Operation with Thermopile Heads................ 20<br />
4.1 Thermopile Absorber Heads................................................ 20<br />
4.2 Selecting Settings from the Orion TH Screen.................. 21<br />
4.3 Power Measurement............................................................. 22<br />
4.4 BC20 Heads for Scanned Beams........................................ 24<br />
Chapter 5 Orion PD Operation with Photodiode Heads.............. 27<br />
5.1 Photodiode Heads .................................................................. 27<br />
5.2 Setting up PD300 to display user chosen wavelengths.. 28<br />
5.3 Selecting Settings from the Orion PD Screen ................. 29<br />
5.4 Special Photodiode Heads ................................................... 34<br />
Chapter 6 Using the Orion PE with Energy Heads........ 35<br />
6.1 Pyroelectric and Photodiode Energy Heads .................. 35<br />
6.2 Selecting Settings and Saving Defaults............................ 36
6.3 Energy Measurement ............................................................ 41<br />
6.4 Measuring Repeating Pulses of High Energy.................. 43<br />
6.5 Energy Log ................................................................................ 44<br />
Chapter 7 Circuit Description...................................................... 46<br />
Chapter 8 Calibration, Maintenance and Troubleshooting... 48<br />
8.1 Calibration of Thermopile Heads......................................... 48<br />
8.2 Calibration of Photodiode type Heads............................... 53<br />
8.3 Calibration of Pyroelectric and Photodiode Heads.......... 55<br />
8.4 Error Messages....................................................................... 58<br />
8.5 Troubleshooting....................................................................... 58<br />
Chapter 9 Orion Specifications................................................... 60<br />
9.1 System/Display Specifications............................................ 60<br />
9.2 Head Specifications ............................................................... 61<br />
1
Chapter 1 Introduction: How to Use<br />
This Manual<br />
The <strong>Ophir</strong> Orion is a microprocessor-based Laser<br />
Power/Energy Meter for measuring laser power or energy<br />
with <strong>Ophir</strong> measuring heads. It uses smart connector<br />
technology where just connecting the head configures and<br />
calibrates the instrument.<br />
This manual tells you what you need to know to make full<br />
use of the Orion for all your laser measurement needs. It<br />
includes a "Quick Reference", (Chapter 2) to allow you to<br />
perform basic measurements immediately, without reading<br />
the whole manual.<br />
The main measurement sections, Chapters 3 through 6<br />
include a general description and a section detailing<br />
operating options.<br />
2
Chapter 2 Quick Reference<br />
2.1 Getting Started<br />
The Orion is equipped with "soft keys." That is, the functions<br />
of the keys change as indicated by the legend above each<br />
key. (See Figure 2).<br />
When the Orion is first switched on, the first screen usually<br />
has a digital display with a bargraph at the bottom. In order<br />
to access the soft keys, press the rightmost button, located<br />
on the right of the panel. Pressing the button again will<br />
access more functions. Pressing it yet again will bring you<br />
back in a cyclical manner to the original bargraph screen.<br />
To connect head to the Orion Display<br />
Insert the D type connector of the measuring head cable<br />
into the socket marked "Head Input" on the rear panel of the<br />
Orion display. (See Figure 1)<br />
To switch the Orion on:<br />
Figure 1<br />
Orion Rear Panel View<br />
1. Push up the slide switch on the left side of the Orion<br />
display. (See Figure 2).<br />
3
Figure 2.<br />
Orion Top View<br />
The unit will switch on, and the display will appear. Note<br />
that the head must be plugged in before the unit is switched<br />
on.<br />
To switch the Orion off:<br />
1. Return the slide switch to its original position.<br />
2. If you wish to save the current Orion configuration, use<br />
the "config" function before switching off. Refer to the<br />
main body of the manual for details.<br />
To set the line frequency:<br />
1. Disconnect the head and switch off then on again. "No<br />
Head Connected" will appear.<br />
2. Press "select" until "line freq" is highlighted.<br />
3. Press "go" then change to correct frequency.<br />
4. Press "exit" and change will be saved.<br />
4
To zero instrument<br />
1. Disconnect the head, turn off then on again. "No Head<br />
Connected" will be displayed.<br />
2. Press "select" until "zero" is highlighted.<br />
3. Press "go".<br />
4. Make sure instrument is not in an electrically noisy<br />
environment and is undisturbed. Press "go" and wait for<br />
message, "zeroing completed". Press "exit".<br />
5. For thermal heads, zeroing with the head may also be<br />
necessary. See section 3.5.2.<br />
2.2 Orion TH - Thermal Heads<br />
2.2.1 Use of the Orion TH with thermal type<br />
heads<br />
To set to the type of laser being used:<br />
1. While the Orion TH is off, plug in the head then switch it<br />
on again.<br />
2. From bargraph measurement screen, press the leftmost<br />
button and press "config".<br />
3. Press “value” to choose the desired laser wavelength<br />
then press “exit”.<br />
4. Press “yes” or “no” depending if you want the<br />
wavelength chosen to be the startup default or not.<br />
2.2.2 To choose manual or automatic<br />
ranging in power measurement:<br />
1. From the bargraph measurement screen, press the<br />
leftmost button and press "config".<br />
2. Press “select” then “value” to choose the desired<br />
power range then press “exit”.<br />
3. Press “yes” or “no” depending if you want the<br />
wavelength chosen to be the startup default or not.<br />
5
2.2.3 Power Measurement<br />
Warning:<br />
Do not exceed maximum head limits for power, energy,<br />
power density and energy density as listed in tables 6<br />
and 7 in section 9.2. Otherwise, there is a risk of<br />
damaging the absorber.<br />
To subtract background and set current reading to zero:<br />
1. From the bargraph power measurement screen press<br />
the rightmost button then press "offset". Press the<br />
“next” twice to return to the bargraph screen.<br />
2. Press "offset" again to cancel. See Section 4.4.2.1. for<br />
full details.<br />
To use the Orion TH to fine tune Laser power:<br />
1. From the bargraph power measurement screen press<br />
the rightmost button twice then press "tune".<br />
2. Set the percentage range of the power scale to be<br />
displayed by repeatedly pressing the left key.<br />
3. Set the horizontal sweep time using the middle soft key<br />
See Section 4.4.2.2. for full details.<br />
2.3 Photodiode Heads<br />
2.3.1 Use of the Orion PD with photodiode<br />
type heads<br />
To set type of laser being used:<br />
1. From the bargraph power measurement screen, press<br />
the rightmost button once and press "config".<br />
2. Press “value” and “select” to choose the laser<br />
wavelength. Press “exit”. If you want the choice to be<br />
saved permanently as the startup default, press “yes”,<br />
otherwise press “no”.<br />
6
2.3.2 To choose manual or automatic<br />
ranging or dBm<br />
1. From the bargraph measurement screen, press the<br />
rightmost button then press “config”.<br />
2. Select RANGE: and with “value” choose the<br />
appropriate manual range, autorange or dBm<br />
(logarithmic scale).<br />
3. Press "exit" and then press “yes” if you want the choice<br />
to be the startup default or “no” if not.<br />
2.3.3 Selecting Chosen Wavelengths<br />
1. From the power measurement mode with the bargraph<br />
display, press the rightmost button twice and then<br />
press “wvlnth”<br />
2. Press "select" until the wavelength you wish to change<br />
is highlighted. Press "change".<br />
3. Press "up" and "down" to change the wavelength. Press<br />
"done". Repeat step 2 for other wavelengths desired.<br />
When finished press exit and the new values will be<br />
saved.<br />
2.3.4 Choosing Wavelength Used<br />
1. From the bargraph measurement screen, press the<br />
rightmost button twice and press "wvlnth". Press<br />
“select” until the correct laser type or wavelength is<br />
displayed.<br />
2. Press “exit” to return to the bargraph screen. (If the<br />
wavelength you want is not among the 6 choices see<br />
section 2.3.3).<br />
2.3.5 Choosing Measurement Range and<br />
Filter Setting<br />
1. From the bargraph measurement screen, press the<br />
rightmost button once and press “config”.<br />
2. Press "select" and then choose the appropriate manual<br />
power range, autorange or dBm by pressing the "up" or<br />
"down" buttons.<br />
3. Press “select” again and choose the desired setting,<br />
filter IN or OUT.<br />
7
4 Press "exit" and then press the “yes” if you want the<br />
choice to be the default startup. Press “no” if you only<br />
want the choice until the instrument is turned off.<br />
2.3.6 Power Measurement<br />
Warning:<br />
Do not exceed maximum head limits for power, energy,<br />
power density and energy density as listed in tables 6<br />
and 7 section 9.2 Head Specifications. Otherwise, there<br />
is a risk of damaging the absorber.<br />
To offset current reading and set to zero:<br />
1. From the bargraph power measurement screen press<br />
the rightmost button, press "offset" then press “next”<br />
twice to return to the bargraph screen.<br />
2. Press "offset" again to cancel. See Section 4.4.2.1 for<br />
more details.<br />
To use the Orion PD to fine tune laser power:<br />
1. From the bargraph power measurement screen press<br />
the rightmost button twice then press "tune".<br />
2. To set the power expansion scale to ±50% ,±120% or<br />
±20% as desired, press the left hand soft key several<br />
times. The default value is ±50%. If the laser power will<br />
change a lot, use a large value; if a little, use a small<br />
value.<br />
3. Set the horizontal sweep time to the rate desired, using<br />
the middle soft key. The default value is 1 minute.<br />
4. Press “tune” to return to the measurement screen.<br />
Measure the power of the laser and adjust the laser<br />
until you determine that the power has reached a<br />
maximum.<br />
8
2.4 Pyroelectric and Photodiode Energy Heads<br />
2.4.1 Selecting Chosen Wavelengths<br />
(not applicable to BB heads)<br />
1. From the bargraph display, press the rightmost button<br />
twice, press “more” then press “wavelength” then<br />
“go”.<br />
2. Press "select", "change" then "up" and "down" to change<br />
the first wavelength desired. Press "done". Repeat for<br />
other wavelengths desired up to 6. Now press exit. The<br />
change will be saved. For details see section 6.2.1<br />
2.4.2 To set type of laser being used:<br />
1. From bargraph measurement screen, press the<br />
rightmost button and press "config". Press “value” until<br />
the correct laser type or wavelength is displayed and<br />
press “exit”.<br />
2. If you want the value saved as the startup default, press<br />
“yes”. Otherwise press “no”.<br />
2.4.3 To set Laser Pulse Width and Average<br />
1. From the bargraph measurement screen,<br />
press the rightmost button twice and<br />
press "setup".<br />
2. Now press "value" to select proper<br />
setting for your laser pulse width. If your<br />
laser pulses are longer than the short<br />
pulse setting, then the long pulse setting<br />
should be selected and if shorter, then<br />
the short pulse setting should be<br />
selected.<br />
3. Now press "select" until "average over" is<br />
highlighted. Now press "value" until the<br />
time period you wish to average over is<br />
displayed. If you do not want to<br />
average, but collect individual pulses<br />
then select "none".<br />
4. Press "exit". If you wish to save the new<br />
settings, then after the above changes,<br />
from the bargraph screen press the<br />
9
ightmost button, press “config”, press<br />
“exit” and “yes”.<br />
10
Warning:<br />
Incorrect readings will result if pulse width is not set up<br />
correctly.<br />
Note:<br />
Some heads have only one time setting for all pulse<br />
widths. In that case “N.A.” appears.<br />
2.4.4 Setting Configuration<br />
1. After you have set up the pulse width and average<br />
settings (see section 2.4.3.) from the bargraph<br />
measurement screen press the rightmost button and<br />
press “config”.<br />
2. Press "select" until the laser wavelength is highlighted.<br />
Now press value to select the laser wavelength you<br />
want to be the default. The Orion PE will now be<br />
correctly calibrated for the absorption of the detector at<br />
the wavelength of the laser type selected.<br />
3. Press "select" and "value" to choose the default energy<br />
range. Now press “select” and value again to see if you<br />
want to be in the display or scope mode.<br />
4. Now press exit when all selections have been made.<br />
Now press "yes" if you want to save all current settings<br />
(including those selected previously in the setup<br />
screen), or "no" if you want to save the settings only<br />
until the instrument is turned off.<br />
2.4.5 Setting up PE-DIF diffuser heads to<br />
diffuser IN or OUT setting<br />
1. Press the rightmost button twice and press “setup”.<br />
2. Press “select” until the diffuser setting is highlighted<br />
and select “IN” or “OUT” as desired. With “select” and<br />
“value” choose the correct pulse width setting.<br />
3. Press “exit” and press the rightmost button then<br />
“config”. Choose the correct wavelength setting. Note<br />
that only wavelengths compatible with the diffuser<br />
setting are visible.<br />
11
4. If you wish to save these settings as the defaults, from<br />
the main display, press the rightmost button then press<br />
“config”. Press “exit” and “yes” to save all present<br />
settings including diffuser IN or OUT and pulse width<br />
setting.<br />
2.4.6 Energy Measurement<br />
Warning:<br />
Do not exceed maximum head limits for power, energy,<br />
power density and energy density as listed in tables 6<br />
and 7 section 9.2 Head Specifications. Otherwise, there<br />
is a risk of damaging the absorber.<br />
With the pyroelectric head, you have been supplied a test<br />
slide with the same coating as on your pyroelectric<br />
detector. You can also obtain this slide from your dealer.<br />
You should use this slide to test the damage threshold with<br />
your laser pulses. If the slide is damaged, then either<br />
enlarge your beam or lower the laser energy until damage<br />
is no longer seen.<br />
To use the Orion PE to measure Laser Energy<br />
Press the rightmost button once then press "config" then<br />
“select” until RANGE is highlighted. Press “value” to<br />
choose the correct energy range, then press exit. If you<br />
wish to save this value as the default, press “yes”,<br />
otherwise “no”.<br />
Note:<br />
The correct energy scale is the lowest one which is<br />
higher than the maximum energy measured. If the<br />
energy measured is lower than 10% of full scale,<br />
choose the next lower scale. Otherwise the readings<br />
will not be accurate.<br />
12
Chapter 3 The Orion Display Unit<br />
3.1 General Description<br />
The model Orion laser power/energy meter represents a<br />
new level of sophistication, sensitivity, compactness and<br />
accuracy, coupled with ease of operation. It can operate<br />
with all <strong>Ophir</strong> thermal heads. It has smart connector<br />
technology. Simply plugging in the head configures and<br />
calibrates the Orion to operate with that head.<br />
The Orion displays power or energy measurements in both<br />
digital and analog form at the same time. It will also<br />
autorange, so you do not have to set scales; or it can<br />
manual range if you wish. It will remember what mode you<br />
were using before you turned it off and will return to that<br />
mode when turned on. You can subtract background. You<br />
can also zero the Orion at the touch of a button.<br />
The main instructions are clearly shown on the screen so<br />
you should not have to refer to this manual very often.<br />
Above all, the Orion has advanced circuitry and digital<br />
signal processing for excellent sensitivity, signal to noise<br />
ratio, accuracy, and response time. It also has special<br />
circuitry to reject electromagnetic interference.<br />
3.2 Smart Connectors and Multihead Operation<br />
The Orion display is very compact and can operate with<br />
either any <strong>Ophir</strong> laser measuring head compatible with the<br />
Orion model you have chosen. The Orion TH is compatible<br />
with all <strong>Ophir</strong> thermal heads, the Orion PD is compatible<br />
with all <strong>Ophir</strong> photodiode heads and the Orion PE is<br />
compatible with all <strong>Ophir</strong> pyroelectric heads. If you need to<br />
work with several heads of different types, you should<br />
choose the <strong>Ophir</strong> Nova display which is compatible with all<br />
types. The head configuration and calibration information<br />
is stored in an EEROM in the head connector plug. This<br />
means that when the head is plugged in, the Orion<br />
automatically identifies the head type, calibration and<br />
configuration. The user does not have to adjust anything.<br />
13
Note:<br />
The Orion automatically loads the head information<br />
when first turned on, so when changing heads, the<br />
display should be turned off, the new head plugged in<br />
and then be turned on again.<br />
When no head is plugged in and the Orion is turned on, the<br />
display indicates "No Head Connected" and gives the user<br />
the opportunity to change the power line frequency or<br />
rezero the instrument. See section 3.5.<br />
3.3 Soft Keys and Rightmost Button<br />
3.3.1 Rightmost Button<br />
The Orion is equipped with "soft keys". That is, the functions<br />
of the keys change as indicated by the legend above each<br />
key. (See Figure 4).<br />
When the Orion is first switched on, the first screen usually<br />
has a digital display with a bargraph along the bottom. In<br />
order to access the soft keys, press the rightmost button,<br />
located on the right of the panel. Pressing the rightmost<br />
button again will access more functions. Pressing it yet<br />
again will bring it back in a cyclical manner to the original<br />
bargraph screen.<br />
Note:<br />
The first set of menu choices can be accessed without<br />
pressing the right hand key. Simply pressing the<br />
appropriate key from the bargraph screen will operate<br />
that key even though the label is not visible. So if you<br />
remember the position of the key you can take a<br />
shortcut. If the soft key is an alternating "toggle" type,<br />
the label will be visible while the key is being pressed.<br />
3.3.2 Soft Keys<br />
The soft keys accessed by the rightmost button have<br />
functions defined by the legend above the key. The legend<br />
usually indicates what will happen when pressing the key.<br />
For example, if "config" appears above a key, pressing that<br />
key will change the Orion into the configuration mode.<br />
14
Some functions operate when the key is pressed and are<br />
canceled when the key is pressed again. The keys show<br />
reverse highlighting when operational. Pressing the same<br />
key again cancels the operation and the highlighting.<br />
Figure 3<br />
Orion Rear Panel View<br />
Figure 4.<br />
Orion Top View<br />
15
3.4 Power Up and Shut Down<br />
To turn the Orion on:<br />
1. Push up the slide switch on the left side of the Orion<br />
display. (See Figure 4)<br />
2. The unit will switch on, and the display will appear. If<br />
no head is connected, a display showing "No Head<br />
Connected" will appear. If a head is connected, the<br />
appropriate default measurement screen will appear.<br />
To switch the Orion off:<br />
1. Return the Switch to its original position.<br />
2. If you wish to save the current Orion configuration, use<br />
the "config" function before switching off. For<br />
measurements of the same type, the Orion does not<br />
need to be set up each time. See section 4.2<br />
3.5 Orion Functions which are independent of Head<br />
Type<br />
When no head is connected to the Orion and it is turned on,<br />
the message "No Head Connected" appears. In this mode,<br />
the user can adjust either the power line frequency so the<br />
instrument can be adjusted for minimum interference at the<br />
power line frequency, or the user can zero the instrument to<br />
eliminate any offsets.<br />
3.5.1 Line Frequency<br />
The Orion is factory set for 50 Hz. If your country uses 60 Hz<br />
you must reset the line frequency.<br />
To reset the line frequency:<br />
1. Turn on the Orion while the head is disconnected.<br />
2. Press "select" until "line frequency" is highlighted.<br />
3. Press "go" then change to select the correct line<br />
frequency.<br />
4. Press "exit" to save the new value and exit.<br />
16
3.5.2 Zero Adjustments<br />
In the Orion, all adjustments, including zeroing internal<br />
circuits, are done from the software. This ensures simple<br />
and accurate realignment. It is recommended to rezero<br />
the Orion every 2 months for best performance. The simple<br />
zeroing procedure follows.<br />
1. If a head is connected, disconnect the head, turn off the<br />
instrument then back on again so the Orion can identify<br />
that no head is connected. "No Head Connected" will<br />
be displayed.<br />
2. Turn on the Orion, and let it run for at least 30 seconds<br />
before performing zero adjustment.<br />
3. Press "go".<br />
4. Make sure the instrument is not in an electrically noisy<br />
environment and is undisturbed. Press "go" and wait for<br />
message, "zeroing completed". Now press "exit" and<br />
"saved" will be exhibited, indicating that the zero<br />
configuration has been saved.<br />
Note:<br />
For best results using the Orion TH with thermal heads,<br />
it may be necessary to do the procedure once with the<br />
head disconnected then afterwards again with the<br />
head connected.<br />
After completing steps 1 - 4 above, Connect the head<br />
and make sure it is at room temperature and well<br />
shielded from any stray thermal power. It may be best<br />
advised to lay the head with the absorber face down on<br />
the table.<br />
5. Switch the instrument off then on again with the head<br />
connected.<br />
6. Press the rightmost button twice then "zero".<br />
7. Now press “go”. Zeroing completed will appear when<br />
the zeroing is finished. Press “exit”.<br />
3.5.3 Baud Rate<br />
If your Orion is equipped with the RS232 feature, the<br />
baud rate can be set by selecting “baud rate”, pressing<br />
“go”, and selecting the appropriate rate. For most<br />
purposes, the default of 9600 Baud will suffice.<br />
17
3.6 Backlight<br />
The backlight illuminates the display from the rear and is<br />
operated by a push button on the back panel (See Figure 3).<br />
Since the backlight consumes considerable power, it is<br />
operable only when the charger is plugged in. The<br />
electroluminescent backlight does have a finite lifetime of<br />
about 10,000 hours. Therefore, it is recommended only to<br />
use it when necessary. To turn on the backlight, push the<br />
push button while the charger is connected. To turn off the<br />
backlight, push the button again.<br />
3.7 Kickstand<br />
The Orion is equipped with a kickstand on the underside of<br />
the case so the display can be tilted for easy viewing. The<br />
kickstand folds away in a recessed slot when not in use.<br />
When the Orion is folded flat, it is only 203 x 95 x 35 mm, the<br />
most compact unit of this type on the market.<br />
3.8 Charging<br />
The Orion is operated by a rechargeable battery. To charge<br />
the battery, plug the charger into the jack labeled “12VDC”<br />
on the back panel, (Figure 3). Note the polarity of the<br />
charger. The Orion will charge the batteries at about the<br />
same rate whether it is on or off and whether the backlight<br />
is on or off – it fully charges in about 14 hours. However, it<br />
will charge more slowly while operating a pyroelectric type<br />
head. It is not recommended to leave the charger plugged<br />
in for much longer than 14 hours, in order to preserve the<br />
battery lifetime. The unit will operate about 18 hours from<br />
one battery charge. When the battery is low, "BAT" flashes<br />
on and off indicating that the battery needs recharging.<br />
However, even with “BAT” displayed, the unit will operate<br />
properly for about one hour before its accuracy will be<br />
impaired.<br />
18
3.9 Chart Recording<br />
The instrument provides an analog voltage output via a<br />
2.5mm pin jack labeled "AN OUT" on the rear panel (See<br />
figure 3).<br />
This is useful for driving chart recorders and other analog<br />
devices.<br />
The voltage is proportional to the reading on the display and<br />
scaled such that full scale equals 1.00 volts.<br />
The output can drive up to 2mA into an external device.<br />
19
Chapter 4 Orion TH Operation with<br />
Thermopile Absorber Heads<br />
Warning:<br />
Before using the head for power or energy<br />
measurement, check that your laser power, energy and<br />
energy density do not exceed the head ratings. See<br />
tables in section 9.2 Head Specifications.<br />
If the head is a water-cooled type, ensure that the cooling<br />
water is flowing at an adequate rate; see table below. Also,<br />
note that the reflectance from the absorber could be as<br />
much as 10% and with CO 2 lasers, the reflected beam can<br />
be quite specular, so it is advisable to provide a beam stop<br />
for the reflected beam with the highest power lasers.<br />
HEAD<br />
TYPE<br />
LITERS<br />
PER<br />
MIN<br />
MIN<br />
PRESSURE<br />
BAR<br />
20<br />
US<br />
GALLONS<br />
PER<br />
MINUTE<br />
8000W 7 1.5 2<br />
5000W 4.5 0.8 1.2<br />
1500W 2.5 0.5 0.7<br />
300W 1.0 0.3 0.25<br />
Table 1.<br />
Minimum Flow Rates For Water-cooled Heads<br />
4.1 Thermopile Absorber Heads<br />
When a radiant heat source, such as a laser, is directed at<br />
the absorber head aperture, a temperature gradient is<br />
created across the thermopile of the enclosed detector<br />
disc. This generates a voltage proportional to the incident<br />
power. The display unit amplifies this signal and indicates<br />
the power level received by the head.<br />
At the same time, signal processing software causes the<br />
display unit to respond faster than the thermal rise time of<br />
the detector disc, thus reducing the response time of the<br />
Orion TH.
4.2 Selecting Settings from the Orion TH Screen<br />
The Orion TH can be set to various chosen settings while<br />
operating. In addition, it can be set so that it will be in the<br />
desired configuration when turned on the next time.<br />
4.2.1 To Set Type of Laser being Used<br />
Thermopile heads have somewhat different absorption at<br />
different wavelengths. In order to compensate for this, each<br />
head has been calibrated by laser at several wavelengths.<br />
When you choose the correct laser wavelength, the<br />
correction factor for that wavelength is automatically<br />
introduced. Note that the laser wavelength correction in<br />
use is displayed in the upper right corner of the display.<br />
In order to choose the laser type, do the following:<br />
1. From the bargraph power measurement screen, press<br />
the rightmost button twice and press "config".<br />
2. Press “value” to choose the laser wavelength. Press<br />
“exit”. If you want the choice to be saved permanently<br />
as the startup default, press “yes”, otherwise press<br />
“no”.<br />
4.2.2 To choose Manual or Automatic<br />
Ranging in Power Measurement<br />
Autorange - The Orion TH allows you to choose autorange<br />
or manual ranging. In autorange mode, you do not have to<br />
change scales. When the reading of the meter or bar is<br />
more than 100% of full scale, the range goes to the next<br />
higher one. The ranges are arranged in factors of 1, 10, 100,<br />
etc. When the reading falls below 90% of full scale, the<br />
range changes to one range lower. This change only<br />
occurs after a few seconds delay.<br />
This provides overlap (hysteresis) to keep the Orion TH from<br />
flipping back and forth when reading close to the end of the<br />
scale.<br />
21
Manual Range - There are certain disadvantages to<br />
autorange since it changes scale even if you don't want it<br />
to do so. If you want to measure the same range all the<br />
time, it is better to use manual range. To select manual<br />
range press the rightmost button then press “config”.<br />
Press "select" until the power rage setting is highlighted.<br />
Press “value” to choose the setting you wish then press<br />
“exit”. Now press yes if you want the choice saved as the<br />
default value, otherwise press “no”. The correct range to<br />
select is the lowest one which is larger than the largest<br />
expected measurement.<br />
To choose auto or manual range, follow these steps:<br />
1. From the bargraph measurement screen, press the<br />
leftmost button then press “config”.<br />
2. Press "select" and then select the appropriate manual<br />
range or autorange by pressing the "value" repeatedly.<br />
3. Press "exit" and then press either “yes” or “no”<br />
depending on whether you want this choice to be the<br />
startup default or not.<br />
4.3 Power Measurement<br />
The next section describes the procedure for basic power<br />
measurement<br />
4.3.1 Power Measurement, Basic Operation<br />
1. Switch the Orion TH on by means of the switch on the<br />
left side. (See Figure 4). The Orion TH will enter the<br />
mode of operation last saved with the "configure"<br />
operation. For basic operation, you need only set up<br />
the parameters for the type of measurement you wish<br />
and the Orion TH will be ready to perform that type of<br />
measurement each time it is switched on. The normal<br />
default mode is the bargraph autoranging power<br />
measurement screen.<br />
2. Center the laser beam carefully on the absorber<br />
surface and read the power.<br />
22
4.3.2 Advanced Power Measurement<br />
Features<br />
The following section describes additional Orion TH<br />
functions in power mode in addition to the basic power<br />
measurement mode described above.<br />
4.3.2.1 Offset<br />
The offset function subtracts background from the signal.<br />
If the ambient environment has a thermal background, so<br />
that the Orion TH shows a nonzero power reading even<br />
when there is no laser, you can subtract the background<br />
using the zero function. For example, the Orion TH display<br />
reads 0.1 Watts when the laser is blocked, and 20.5 Watts<br />
with laser power applied. In this case, the true power is<br />
20.5 - 0.1 = 20.4 Watts. To subtract the background, press<br />
the middle button and press "offset" while the laser is<br />
blocked.<br />
Now press the rightmost key again to return to the bargraph<br />
screen. The Orion TH will now read zero, and the 0.1 Watt<br />
background will be subtracted from all subsequent<br />
readings. The laser power reading will thus be 20.4 Watts.<br />
When "offset" is engaged, the legend is highlighted. To<br />
cancel, press "offset" again. If the "offset" is engaged, and<br />
you wish to subtract out a new value of the background,<br />
press "offset" twice. The first press will cancel the old<br />
value, and the second will activate a new value. If you<br />
suspect that the Orion TH has a permanent zero offset, then<br />
disconnect the head while it is in the power measurement<br />
mode. If the Orion TH still shows a similar offset even when<br />
the head is not connected, the instrument internal zero<br />
should be reset. See Section 3.5.2.<br />
4.3.2.2 Tune (See Figure 5)<br />
The Tune function, an exclusive <strong>Ophir</strong> feature, makes<br />
adjusting your laser to its maximum power easier than ever<br />
before.<br />
23
Unlike a bargraph or mechanical meter, this display shows<br />
graphically what came before as well as the current<br />
reading and the trend. This allows you to determine if you<br />
have reached maximum power.<br />
Figure 5<br />
Tune Screen<br />
The screen is completely autoranging. Therefore, as soon<br />
as the cursor goes over the top or under the bottom edge of<br />
the display, it rescales to put the cursor back to the middle<br />
of the screen. This allows you to devote all your attention<br />
to tuning the laser, without having to worry about the Orion<br />
TH settings.<br />
To use the Orion TH to fine tune laser power:<br />
1. From the bargraph power measurement screen press<br />
the rightmost button twice then press "tune".<br />
2. To set the power expansion scale to ±50% ,±120% or<br />
±20% as desired, press the left hand soft key several<br />
times. The default value is ±50%. If the laser power will<br />
change a lot, use a large value; if a little, use a small<br />
value.<br />
3. Set the horizontal sweep time to the rate desired, using<br />
the middle soft key. The default value is 1 minute.<br />
4. Press “tune” to return to the measurement screen.<br />
Measure the power of the laser and adjust the laser<br />
until you determine that the power has reached a<br />
maximum.<br />
4.4 BC20 Heads for Scanned Beams<br />
Note: Although this head is a photodiode head, it is set up in<br />
the software as a thermal head and is therefore in this<br />
24
sections. However, many of the functions of the BC20 head<br />
are the same as the PD300. This section only describes the<br />
PD300 functions which are different from ordinary PD300<br />
functions. For standard PD300 functions, please refer to<br />
chapter 5.<br />
4.4.1 General Description<br />
Model BC20 scanned beam laser power meter has become<br />
the industry standard for measuring scanned laser beams<br />
as well as hard to reach static beams. The BC20 smart head<br />
has built into its smart plug innovative circuitry to measure<br />
scanned as well as static beams of up to 20 milliwatts with<br />
a noise level of microwatts.<br />
The BC20 has the same patented dynamic background<br />
subtraction as the PD300 which eliminates over 95% of<br />
background light and allows measurement in normal room<br />
light.<br />
4.4.2 Setting up the startup defaults:<br />
1. From the power measurement bargraph screen, press<br />
the rightmost button located on the right side then<br />
press “next”. Press “config”.<br />
2. Press "select" and "value" to choose the default laser<br />
wavelength and the default power range.<br />
3. Now press "select" then "value" to choose whether you<br />
want the instrument to operate in “continuous” or<br />
“hold” mode. In continuous mode, the peak reading of<br />
every 1/3 sec period is displayed and in “hold” mode,<br />
the peak reading of every 5s period is displayed.<br />
Note:<br />
Do not use autorange when in hold mode.<br />
25
4. Press "exit" when all selections have been made and<br />
press "yes" to save all current Nova settings.<br />
4.4.3 Measuring Scanned Beams with the<br />
BC20<br />
1. Verify that the head is plugged in.<br />
2. Set to the proper power range or autorange.<br />
3. Set up the startup defaults and choose “continuous” if<br />
you want continuous readings or “hold”.if you want<br />
readings to be held for 5s before updating. (See section<br />
5.4.2 above).<br />
4. Hold the wand so the beam strikes the detector<br />
vertically. While the beam is scanning, move the<br />
scanner slightly up and down in a direction<br />
perpendicular to the scan direction so that the scanned<br />
beam is sure to cross the center of the detector. (The<br />
BC20 captures the highest reading so that the most<br />
accurate results are obtained if the beam scans across<br />
the center of the detector). The unit will also measure<br />
static beams as would a normal laser power meter.<br />
4.4.4. Spectral Response<br />
A graph of the approximate relative spectral response of<br />
the BC20 is given for purpose of interpolation. This is in<br />
case the user wishes to use the instrument at a wavelength<br />
other than the ones which are factory calibrated.<br />
%<br />
100<br />
90<br />
80<br />
70<br />
60<br />
50<br />
40<br />
30<br />
20<br />
10<br />
0<br />
340 440 540 640 740 840 940 1040<br />
Wavelength, nm<br />
26
Chapter 5 Orion PD Operation with<br />
Photodiode Type Heads<br />
Warning:<br />
Before using the head for power or energy<br />
measurement, check that your laser power or energy<br />
and energy density does not exceed the head ratings.<br />
See table 6.<br />
5.1 Photodiode Heads<br />
When a photon source, such as laser, is directed at one of<br />
the PD300, 3A-IS or BC20 series photodiode detectors, a<br />
current is created proportional to the light intensity and<br />
dependent on the wavelength.<br />
The PD300, PD300-3W and BC20 heads have a unique dual<br />
detector head (patented) in which the two detectors are<br />
identical and connected back to back. When a uniform<br />
signal, such as room light background, falls on the detector<br />
head the signal from the two detectors cancels.<br />
On the other hand, when a laser beam falls on the head, it<br />
illuminates only the first detector and therefore is detected.<br />
Thus the PD300 subtracts most of the background while<br />
detecting the desired signal. The subtraction is not perfect<br />
but usually 98% of the background signal is eliminated so<br />
the detector can usually be used in ordinary laboratory<br />
lighting conditions.<br />
The Orion PD display unit amplifies this signal and indicates<br />
the power level received by the head. Due to the superior<br />
circuitry of the Orion PD, the noise level is very low, and the<br />
PD300 series heads with the Orion PD display have a large<br />
dynamic range from nanowatts to hundreds of milliwatts.<br />
Since many low power lasers have powers on the order of 5<br />
to 30mW, and most photodiode detectors saturate at about<br />
2mw, most heads of the PD300 series have been<br />
constructed with a built in filter so the basic head can<br />
measure to 30mW or more without saturation.<br />
27
When the additional filter is installed, the maximum power<br />
is on the order of 300mW or 3W with model PD300-3W. The<br />
PD300 saturates when the output current exceeds 1.3mA so<br />
the exact maximum power depends on the sensitivity of the<br />
detector at the wavelength used. When saturated the<br />
legend "SAT" will appear on the screen. Table 2 gives the<br />
actual maximum power as a function of wavelength.<br />
FILTER OUT<br />
WAVE- PD200 PD300 PD300- PD300- 3A-IS WAVE- PD300-IR<br />
LENGTH<br />
3W UV<br />
LENGTH<br />
250-350nm N.A. N.A. N.A. 1mW N.A. 800nm 20mW<br />
400nm 200mW 30mW 30mW 3mW N.A. 1-1.3µm 30mW<br />
633nm 200mW 20mW 20mW 3mW 1W 1.4µm 25mW<br />
670nm 200mW 13mW 13mW 3mW 2W 1.5µm 15mW<br />
800nm 200mW 10mW 10mW 2.5mW 3W 1.6µm 10mW<br />
900mm 200mW 10mW 10mW 2.5mW 3W 1.8µm 25mW<br />
1060nm 200m 25mW 25mW 3mW 3W<br />
FILTER IN<br />
WAVE- PD300 PD300- PD300- 3A-IS WAVE- PD300-<br />
LENGTH<br />
3W UV<br />
LENGTH IR<br />
250-<br />
350nm<br />
N.A. N.A. 100mW N.A. 800nm 200mW<br />
400nm 300mW 3W 300mW N.A. 1-1.3µm 300mW<br />
633nm 300mW 3W 300mW N.A. 1.4µm 150mW<br />
670nm 200mW 3W 300mW N.A. 1.5µm 80mW<br />
800nm 100mW 1W 250mW N.A. 1.6µm 50mW<br />
900mm 150mW 1.5W 250mW N.A. 1.8µm 100mW<br />
1060nm 250mW 2.5W 300mW N.A.<br />
Table 2.<br />
Maximum Measurable Laser Power as a Function of Wavelength<br />
5.2 Setting up the PD300 and 3A-IS to display the<br />
user's chosen wavelengths<br />
The PD300 and 3A-IS series have built in wavelength<br />
correction curves for measurements either with the<br />
removable filter installed (filter-in) or removed (filter-out).<br />
These curves are stored in the head EEROM. the correction<br />
curves, with a resolution of 1nm, ensure that the power<br />
reading is correct at all laser wavelengths.<br />
28
In order to simplify changing from one laser wavelength to<br />
another, the user can program up to 6 different<br />
wavelengths to be available from the screen menu. Please<br />
use the following procedure to set the PD300 to your laser<br />
wavelengths.<br />
1. From the power measurement mode with the bargraph<br />
display, press the rightmost button twice and then<br />
press “wvlnth”.<br />
2. Press "select" until the wavelength you wish to change<br />
is highlighted. Press "change".<br />
3. Press "up" and "down" to change the wavelength. Press<br />
"done". Repeat step 2 for other wavelengths desired.<br />
When finished press exit and the new values will be<br />
saved.<br />
5.3 Selecting Settings from the Orion PD Screen<br />
The Orion PD can conveniently be set to various chosen<br />
parameters from the screen. In addition these settings can<br />
be saved as startup defaults so the head will be in the<br />
desired configuration when turned on.<br />
5.3.1 To Set to the Laser Wavelength Being<br />
Used:<br />
Photodiode heads have a different sensitivity at different<br />
wavelengths. Moreover, the filters used in the head have a<br />
different transmission at different wavelengths. In order to<br />
compensate for this, each head has a built in calibration<br />
curve (with 1nm resolution) over the measurement range.<br />
When you choose the correct laser wavelength, the<br />
correction factor for that wavelength is automatically<br />
introduced. Note that the laser wavelength presently<br />
corrected for is displayed in the upper right corner of the<br />
display. In order to define the laser wavelengths to choose<br />
from, See Section 5.2.<br />
29
In order to choose the laser wavelength, do the following:<br />
1. From the bargraph measurement screen, press the<br />
rightmost button twice and press "wvlnth". Press<br />
“select” until the correct laser type or wavelength is<br />
displayed.<br />
2. Press “exit” to return to the bargraph screen. (If the<br />
wavelength you want is not among the 6 choices see<br />
section 5.2).<br />
(The wavelength may also be chosen using the “config”<br />
function).<br />
5.3.2 To choose Manual or Automatic<br />
Ranging or dBm<br />
Autorange - The Orion PD allows you to choose autorange<br />
or manual ranging when the reading is in watts. In<br />
autorange mode, you do not have to change scales. When<br />
the reading of the meter or bar is more than 100% of full<br />
scale, the range goes to the next higher one. When the<br />
reading falls below 90% of full scale, the range changes to<br />
one range lower. This change occurs after a short delay.<br />
This provides overlap (hysteresis) to keep the Orion PD<br />
from flipping back and forth when reading close to the end<br />
of the scale.<br />
Manual Range - There are certain disadvantages to<br />
autorange since it changes scale even if you don't want it<br />
to do so. If you want to measure the same range all the<br />
time, it is better to use manual range. The correct range to<br />
select is the lowest one which is larger than the largest<br />
expected measurement. If you wish the Orion PD to be in<br />
manual mode when switched on, save this configuration<br />
before switching off. See Section 5.3.<br />
dBm - The Orion PD allows the measurement to be made in<br />
units of dBm which is a logarithmic scale. dBm units are<br />
defined as:<br />
10 x log (reading in mW)<br />
At 1mW the reading will be 0 dBm, at 100mW it will be 20<br />
dBm etc.<br />
30
To choose auto, manual or dBm range, follow these<br />
steps:<br />
1. From the bargraph measurement screen, press the<br />
rightmost button once and press “config”.<br />
2. Press "select" and then choose the appropriate manual<br />
power range, autorange or dBm by pressing the "up" or<br />
"down" buttons.<br />
3. Press "exit" and then press the “yes” if you want the<br />
choice to be the default startup. Press “no” if you only<br />
want the choice until the instrument is turned off.<br />
5.3.3 Operation with Filter In or Out<br />
The PD300 head is equipped with a built in filter so that the<br />
photodiode can measure up to 30mW without saturating the<br />
detector. In addition, the PD300 comes with an additional<br />
removable filter for measuring up to 300mW. Other models<br />
of the PD300 series also have built-in and removable filters.<br />
The exact maximum power is reached when the reading<br />
reaches full scale or the output current from the head<br />
reaches 1.3mA, whichever comes first. See Table 2 for the<br />
exact maximum as a function of wavelength.<br />
Depending on what powers you wish to measure, you<br />
should choose to work with the removable filter installed or<br />
not. For this purpose, the Orion PD has a "filter" setting and<br />
uses the proper correction curve depending on whether the<br />
filter is installed or not.<br />
Warning:<br />
If the PD300 is used in the "filter in" setting and the filter<br />
is not installed or vice versa the readings will be<br />
completely incorrect.<br />
If the power of your laser exceeds the maximum for filter in,<br />
you can purchase a thermal head and display for that<br />
wavelength. Consult your <strong>Ophir</strong> agent for details.<br />
31
To choose the filter setting:<br />
1. From the bargraph measurement screen press the<br />
rightmost button then press “config”.<br />
2. If you wish to work with filter installed, press "value"<br />
until display says "filter IN". Be sure to install<br />
removable filter on detector head.<br />
3. If you wish to work with the filter out, press "value" until<br />
display says "filter OUT". Be sure to remove the filter<br />
from the detector head.<br />
4. Press "exit" and then press the “yes” if you want the<br />
choice to be the default startup. Press “no” if you only<br />
want the choice until the instrument is turned off.<br />
5.3.4 Offset<br />
The PD300 and PD300-3W heads have automatic<br />
background subtraction as described in Section 5.1. In<br />
addition, the offset function can be used to subtract the<br />
residual background signal which remains if desired. If the<br />
Orion PD shows a nonzero power reading even when there<br />
is no laser, you can subtract the background using the zero<br />
function. For example, the Orion PD display reads 0.1mW<br />
when the laser is blocked and 20.5 mW with laser power<br />
applied. In this case, the true power is 20.5 - 0.1 = 20.4 mW.<br />
To subtract the background, press the rightmost button and<br />
press "offset" while the laser is blocked. The Orion PD will<br />
now read zero (0.0), and the 0.1 mW background will be<br />
subtracted from all subsequent readings. The laser power<br />
reading will thus be 20.4 mW.<br />
When "offset" is engaged, the legend is highlighted. To<br />
cancel, press "offset" again. If the "offset" is engaged, and<br />
you wish to subtract a new value of the background, press<br />
"offset" twice. The first press will cancel the old value, and<br />
the second will activate a new value. If you suspect that<br />
the Orion PD has a permanent zero offset, then disconnect<br />
the head while it is in the power measurement mode. If the<br />
Orion PD still shows a nonzero reading even when the head<br />
is not connected, the instrument internal zero should be<br />
reset. See Section 3.5.2.<br />
32
5.3.5 Tune (See Figure 6)<br />
The Tune function, an exclusive <strong>Ophir</strong> feature, makes<br />
adjusting your laser to its maximum power easier than ever<br />
before.<br />
Unlike a bargraph or mechanical meter, this display shows<br />
graphically what came before as well as the current<br />
reading and the trend. This allows you to determine if you<br />
have reached maximum power.<br />
Figure 6.<br />
Tune Screen<br />
The screen is completely autoranging. Therefore, as soon<br />
as the cursor goes over the top or under the bottom edge of<br />
the display, it rescales to put the cursor back to the middle<br />
of the screen. This allows you to devote all your attention<br />
to tuning the laser, without having to worry about the Orion<br />
PD settings.<br />
To use the Orion PD to fine tune laser power:<br />
1. From the bargraph power measurement screen press<br />
the rightmost button twice then press "tune".<br />
2. To set the power expansion scale to ±50% ,±120% or<br />
±20% as desired, press the left hand soft key several<br />
times. The default value is ±50%. If the laser power will<br />
change a lot, use a large value; if a little, use a small<br />
value.<br />
3. Set the horizontal sweep time to the rate desired, using<br />
the middle soft key. The default value is 1 minute.<br />
33
4. Press “tune” to return to the measurement screen.<br />
Measure the power of the laser and adjust the laser<br />
until you determine that the power has reached a<br />
maximum.<br />
5.4 Special Photodiode Heads<br />
5.4.1 PD300-BB Radiometer Head<br />
In addition to photodiode heads for individual wavelengths,<br />
<strong>Ophir</strong> also supplies heads for measuring the output of<br />
broadband light sources. The PD300-BB head has<br />
spectrally flat response from 400 to 1000nm and therefore<br />
can give the true total power of any broadband light<br />
source in that spectral region.<br />
Note:<br />
Because the BB heads are spectrally flat, wavelength<br />
selection is disabled. Other than that, operation is the<br />
same as other PD300 type heads.<br />
5.4.2 PD300-CIE Photometer Head<br />
The PD300-CIE head has a spectral response similar to that<br />
of the human eye and can therefore make measurements<br />
in eye response units of Lux. The PD300-CIE is designed<br />
with a small detector where the source overfills the<br />
detector. It measures the light intensity per unit area in<br />
units of Lux or Foot Candles.<br />
Note:<br />
Because the CIE heads have a spectral response<br />
similar to the human eye wavelength selection is<br />
disabled. Other than that, operation is the same as<br />
other PD300 type heads.<br />
34
Chapter 6 Using the Orion PE with<br />
Pyroelectric and Photodiode Energy<br />
Heads<br />
Warning:<br />
Before using the head for power or energy<br />
measurement, check that your laser power, energy or<br />
energy density do not exceed the head ratings as listed<br />
in the table with the head specifications. Otherwise,<br />
there is a risk of damaging the absorber.<br />
With the pyroelectric head, you have been supplied a test<br />
slide with the same coating as on your pyroelectric<br />
detector. You can also obtain this slide from your dealer.<br />
You should use this slide to test the damage threshold with<br />
your laser pulses. If the slide is damaged, then either<br />
enlarge your beam or lower the laser energy until damage<br />
is no longer seen.<br />
6.1 Pyroelectric and Photodiode Energy Detector Heads<br />
When a pulsed heat source, such as a laser, is directed at<br />
the detector head, a temperature gradient is created across<br />
the pyroelectric crystal mounted in the head. An electric<br />
charge is produced which is proportional to the energy<br />
absorbed. The detector head has sophisticated circuitry<br />
unique to <strong>Ophir</strong> (patented) which determines the baseline<br />
before the pulse is received, measures the voltage after a<br />
pre-determined interval, amplifies it and holds it for a predetermined<br />
time.<br />
Due to this innovative circuitry, <strong>Ophir</strong> pyroelectric heads<br />
can measure very long pulses as well as short ones. They<br />
can measure low energies as well as high. They can also<br />
measure at higher repetition rates than was possible<br />
before.<br />
The Orion PE display amplifies this signal and indicates the<br />
energy received by the head.<br />
The photodiode based PD10 head also uses the same<br />
circuitry but can measure much lower energies due to the<br />
sensitivity of the photodiode.<br />
35
6.2 Selecting Settings from the Orion PE Screen and<br />
Saving Defaults<br />
The Orion PE can conveniently be set to various chosen<br />
parameters from the screen. In addition, it can be set to<br />
startup defaults so it will be in the desired configuration<br />
when turned on.<br />
6.2.1 Setting up the head to display the<br />
user's chosen wavelengths<br />
The sensitivity of the detector varies somewhat with<br />
wavelength. The correction curve for the absorber is<br />
stored in the head EEROM. This correction curve ensures<br />
that the energy reading is correct at all laser wavelengths.<br />
In order to simplify changing from one laser wavelength to<br />
another, the user can program up to 6 different<br />
wavelengths to be available from the screen menu. Please<br />
use the following procedure to set the pyroelectric or PD10<br />
head to your laser wavelengths.<br />
1. From the bargraph display, press the rightmost button<br />
twice, press “more” then press “wavelength” then<br />
“go”.<br />
2. Press "select", "change" then "up" and "down" to change<br />
the first wavelength desired. Press "done". Repeat for<br />
other wavelengths desired up to 6. Now press exit. The<br />
change will be saved.<br />
Note:<br />
The broadband type heads (BB) have less variation with<br />
wavelength, and in those heads, fixed wavelength<br />
ranges are selected similar to thermal heads. This<br />
section is not relevant with those heads.<br />
6.2.2 To set type of laser being used<br />
1. From bargraph measurement screen, press the<br />
rightmost button and press "config". Press “value” until<br />
the correct laser type or wavelength is displayed and<br />
press “exit”.<br />
36
2. If you want the value saved as the startup default, press<br />
“yes”. Otherwise press “no”.<br />
6.2.3 Setup of Laser Pulse Width and<br />
Pulses/Sample<br />
6.2.3.1 Laser Pulse Width<br />
As was mentioned before, the <strong>Ophir</strong> pyroelectric heads can<br />
measure long as well as short pulses. In order to do this,<br />
the user must indicate to the Orion PE if the laser pulses are<br />
going to be longer or shorter than the maximum wavelength<br />
in the short pulse mode. (Some models only have only one<br />
maximum pulse width setting which is usually 3ms. In that<br />
case, “N.A.” for not applicable appears and the setting<br />
cannot be changed).<br />
Warning:<br />
If the pulse width is incorrectly set to shorter than the<br />
laser pulse width, the reading will be erroneously low.<br />
If it is set to a long pulse width when a short one would<br />
suffice, the reading will be correct but noisy.<br />
To set up for pulse width, please do the following:<br />
1. From the bargraph measurement screen, press the<br />
rightmost button twice and press "setup".<br />
2. Now press "value" to select proper setting for your laser<br />
pulse width. If your laser pulses are longer than the<br />
short pulse setting, then the long pulse setting should<br />
be selected and if shorter, then the short pulse setting<br />
should be selected.<br />
6.2.3.2 Setup for Number of Pulses per Sample<br />
The Orion PE has the ability to measure a number of pulses<br />
and display the average value of the energy of the pulses.<br />
This function is useful if the laser energy is not stable. Then<br />
the user can choose to measure a number of pulses and<br />
display only the average.<br />
37
Note:<br />
The Pyroelectric and photodiode energy heads are<br />
capable of measuring pulses up to very high repetition<br />
rates on the order of kilohertz or above. However, at<br />
high repetition rates, the display can capture the pulses<br />
at rates not exceeding 15Hz. The Orion PE samples<br />
individual pulses at a rate of 15Hz from the laser pulse<br />
train. Thus if the user has a laser pulsing at over 15Hz<br />
and wishes to average over a number of pulses, the<br />
average will be over the number of pulses processed by<br />
the Orion PE and not over those emitted by the laser.<br />
Example: If the user's laser is pulsing at 300Hz, and the<br />
user selects to average over 1s, the Orion PE will collect 15<br />
pulses of the 300 emitted during that period, and will<br />
average over those 15 pulses. The Orion PE will then update<br />
the display every 1s.<br />
To set up for averaging over a number of pulses:<br />
1. From the bargraph measurement screen, press the<br />
rightmost button twice and press "setup".<br />
2. Now press "select" until "average over" is highlighted.<br />
Now press "value" until the time period you wish to<br />
average over is displayed. If you do not want to<br />
average, but collect individual pulses then select<br />
"none".<br />
3. Press "exit". If you wish to save the new setting, then<br />
after the above changes, from the bargraph screen<br />
press the rightmost button, press “config”, press “exit”<br />
and “yes”<br />
Note:<br />
The average function only affects the numerical<br />
readings on the screen. The bargraph always shows<br />
individual pulses.<br />
38
6.2.3.3 PD10 Photodiode Energy Head<br />
The PD10 operates in a similar fashion to the pyroelectric<br />
PE heads except it has a photodiode detector instead of<br />
pyroelectric. Because of its great sensitivity, it can operate<br />
down to about 1nJ of energy. It has complete wavelength<br />
correction over its entire measurement range of 200 -<br />
1100nm.<br />
The PD10 operates in a similar fashion to the PE head<br />
except that it has one extra function. When measuring very<br />
low energies, the head will also be sensitive to background<br />
light and therefore show a spuriously high reading.<br />
Therefore we have added a function to measure the<br />
background light. When measuring low energies, block the<br />
laser and press “bkgrnd”. You will see a reading of the<br />
background light. This reading can be subtracted from your<br />
laser reading to obtain a more accurate reading. Also,<br />
making the room darker will reduce this background effect.<br />
6.2.3.4 Saving Default Settings<br />
If you are planning to do repetitive measurements most of<br />
the time, you can set up the Orion PE so that it automatically<br />
goes into the measurement mode you want upon startup.<br />
Since these desired settings are saved in the head "smart<br />
connector", you can save different settings for different<br />
heads.<br />
To set the Orion PE to start up in the chosen<br />
configuration:<br />
1. After you have set up the pulse width and average<br />
settings (see section 6.2.3.2.), from the bargraph<br />
measurement screen press the rightmost button and<br />
press “config”.<br />
39
2. Press "select" until the laser wavelength is highlighted.<br />
Now press value to select the laser wavelength you<br />
want to be the default. The Orion PE will now be<br />
correctly calibrated for the absorption of the detector at<br />
the wavelength of the laser type selected. If you wish<br />
to choose another wavelength, See Section 6.2.1<br />
3. Press "select" and "value" to choose the default energy<br />
range. Now press “select” and value again to see if you<br />
want to be in the display or scope mode.<br />
4. Now press exit when all selections have been made.<br />
Now press "yes" if you want to save all current settings<br />
(including those selected previously in the setup<br />
screen), or "no" if you want to save the settings only<br />
until the instrument is turned off.<br />
6.2.3.5 PE -DIF diffuser heads<br />
PE50BB-DIF and PE50-DIF-ER heads with removable<br />
diffusers have to be set up properly to operate with the<br />
diffuser IN or OUT.<br />
Since the wavelength settings with diffuser in are not the<br />
same as with diffuser out, two things must be changed<br />
every time the head is changed from diffuser IN to OUT.<br />
(In addition to changing the pulse width setting if<br />
necessary).<br />
To change from diffuser OUT to IN and back:<br />
1. Press the rightmost button twice and press “setup”.<br />
2. Press “select” until the diffuser setting is highlighted<br />
and select “IN” or “OUT” as desired. Make sure the<br />
diffuser is physically installed or not installed on the<br />
head.<br />
If it is necessary to change the pulse width setting,<br />
press “select” and press “value” to choose the correct<br />
pulse width. Then press exit.<br />
40
3. Press the rightmost button and press “config”. With<br />
“value” choose the correct wavelength. Note that only<br />
wavelengths compatible with the diffuser setting are<br />
visible. (All wavelengths for diffuser IN have a D suffix,<br />
e.g. 106D = 1.06µm, diffuser in). Press “exit”. If you wish<br />
to save these settings as the defaults, press “yes” to<br />
save all present settings including diffuser IN or OUT<br />
and pulse width setting.<br />
6.3 Energy Measurement<br />
Warning:<br />
Before using the head for energy measurement, check<br />
that your laser energy, energy density and average<br />
power do not exceed the head ratings as listed in the<br />
table with the head specifications at the end of the<br />
manual, otherwise, there is a risk of damaging the<br />
absorber. With the pyroelectric head, you have been<br />
supplied a test slide with the same coating as on your<br />
pyroelectric detector.<br />
You can also obtain this slide from your dealer. You<br />
should use this slide to test the damage threshold with<br />
your laser pulses. If the slide is damaged, then either<br />
enlarge your beam or lower the laser energy until<br />
damage is no longer seen.<br />
Note:<br />
To measure pyroelectric energies properly, it is<br />
important that the head is not grounded to the optical<br />
bench. Make sure that the head is isolated electrically<br />
from the ground. The PE head has been supplied with<br />
an insulating mounting post for this purpose.<br />
6.3.1 Energy Measurement<br />
Figure 6<br />
Energy Screen Using Heads For Pulsed Lasers<br />
41
1. Press the rightmost button once then press<br />
"config" then “select” until RANGE is<br />
highlighted. Press “value” to choose the<br />
correct energy range, then press exit. If you<br />
wish to save this value as the default, press<br />
“yes”, otherwise “no”.<br />
Note:<br />
The correct energy scale is the lowest one which is<br />
higher than the maximum energy measured. If the<br />
energy measured is lower than 10% of full scale,<br />
choose the next lower scale. Otherwise the readings<br />
will not be accurate.<br />
2. Next, choose the pulse width setting and<br />
time period you wish to average over.<br />
Press the right button twice and press<br />
“setup”. With the “select” and “value”<br />
buttons, choose the correct settings.<br />
Now press “exit”. If you wish to save<br />
these values as default, see section<br />
6.2.3.4.<br />
The Orion PE is now ready to measure energy pulses.<br />
The energy reading will operate in the following manner<br />
if "none" selected as the averaging period, following<br />
every 1/15th of a second period, the Orion PE will<br />
display on the screen the next pulse which arrives.<br />
The Orion PE will hold the display of the latest pulse<br />
until a new one arrives. If an averaging period is<br />
selected, the Orion PE will collect pulses at up to 15Hz<br />
and will then display the average of those pulses. When<br />
a new pulse triggers the Orion PE, a "T" will appear in<br />
the upper left corner of the screen. At over 5 Hg, the "T"<br />
stops flashing and appears all the time.<br />
6.3.2 Minimum Energy Threshold<br />
If the pyroelectric heads are used in a electrically or<br />
acoustically noisy environment the instrument may trigger<br />
spuriously. It will then display a spurious pulse. Since<br />
there is always some degree of noise or background, the<br />
instrument is designed not to respond to pulses below some<br />
preset minimum size.<br />
42
This "Minimum Energy Threshold" is typically set to 4% of<br />
full scale of the selected range. Pulses which are very<br />
close to background may read sporadically or inaccurately.<br />
Therefore it is important to always use the lowest energy<br />
range which is larger than the energies you are measuring.<br />
6.3.3 Pyro Scope Adapter<br />
A special adapter can be purchased which is plugged in<br />
between the head connector and the Orion PE head socket.<br />
This adapter has a cable and BNC connector to attach to an<br />
oscilloscope. It enables the user to see on the scope pulses<br />
proportional to energy up to the maximum pulse rating of<br />
the head . Unlike the Orion PE display, which samples at the<br />
maximum rate, the scope adapter shows every single pulse.<br />
Activate the scope adapter as follows:<br />
1. Plug the adapter into the Orion PE display and then plug<br />
the head plug into the adapter. Plug the BNC connector<br />
into a standard 1MΩ scope input.<br />
2. Press the rightmost button twice and then press<br />
“more”. Select “scope” and press “go”. The display<br />
will now say “in scope mode”. If you have to set up the<br />
appropriate measurement range or other parameters,<br />
do it before going into scope mode.<br />
3. You can return to the ordinary measurement mode by<br />
pressing “exit” from the scope mode screen.<br />
4. If you wish the instrument to start up in scope mode,<br />
press the rightmost button and press “config”. Select<br />
“display” and change it to “scope” with the “value”<br />
button. Press “exit” and “yes” and when the instrument<br />
is turned on the next time, it will be in scope mode.<br />
6.4 Measuring Repeating Pulses of High Energy<br />
Because of their construction, pyroelectric heads are<br />
restricted in the energy density they can withstand,<br />
particularly for short pulses on the order of nanoseconds.<br />
43
If the energy density of your laser exceeds the rating of the<br />
pyroelectric absorber, there are several options available.<br />
1. You can use Pyroelectric heads with a diffuser. <strong>Ophir</strong><br />
has several heads with a diffuser which increases the<br />
damage threshold by an order of magnitude. (See table<br />
7 at the end of this manual).<br />
2. You can enlarge your laser beam using a negative lens<br />
until the energy density is below damage threshold.<br />
You should test this using the test slide. See section<br />
6.3.<br />
3. You can use the <strong>Ophir</strong> beam splitter which mounts the<br />
PE heads and splitts off typically 8 -10% of the light. If<br />
you use this method, note that there may be polarization<br />
effects. You can calibrate the beam splitter by running<br />
the laser at an energy below damage threshold and<br />
measuring the energy with and without the beam<br />
splitter. The <strong>Ophir</strong> beam splitter is built to facilitate this<br />
measurement.<br />
4. <strong>Ophir</strong> has models RP which are specifically designed<br />
for pulses with energies up to 100 Joule/cm².<br />
Contact your <strong>Ophir</strong> dealer for details.<br />
6.5 Energy Log<br />
The Orion PE has the option of displaying successive<br />
energy points in a vertical bargraph form. While<br />
measurements are being taken, the Orion PE will record<br />
data until the screen is full or "reset" is pressed.<br />
To use the Orion PE for graphical display of energy:<br />
1. Make sure that the Orion PE is in the correct energy<br />
measurement range. If not, press the right button,<br />
“config”, change the range and exit.<br />
2. From the energy measurement screen press the right<br />
button twice then “more” and then select "energy log".<br />
Press "go". The histogram screen will appear. Now fire<br />
pulses and the measurement will immediately begin.<br />
When the screen is full, the measurement continues<br />
and the screen will scroll.<br />
3. If you wish to see finer variations in the graph, press<br />
the right "zoom" button.<br />
44
Note:<br />
Zoom can only be pressed after at least one pulse<br />
has been recorded.<br />
4. Pressing any button will show you the menu of further<br />
options:<br />
The center button is the "stats" button. Press this<br />
button once to show the legends then again to<br />
show the statistics of the measurements until now.<br />
Pressing the right button twice will get you out and<br />
back to the main screen.<br />
The left button is the start button. Pressing this will<br />
erase any points recorded to now and will start a<br />
new batch of measurements.<br />
The right button is the exit button and will get you<br />
back to the main measurement screen.<br />
45
Chapter 7 Circuit Description<br />
The ORION has three circuit boards: an analog processor, a<br />
digital processor and a power supply.<br />
Analog Processor:<br />
The signal from the detector head enters the analog<br />
processor board and passes through EMI protection<br />
components to a differential transimpedance preamplifier.<br />
From there it is further amplified by a programmable gain<br />
voltage amplifier and passes to a dual slope integrating<br />
analog to digital converter. All calibration data for the<br />
analog processor is stored on a memory chip on the analog<br />
processor board. There are no adjustable components<br />
(trimmers etc.) in the ORION except for the display contrast<br />
adjustment on the rear panel.<br />
Digital Processor:<br />
The digital processor is built around a Motorola MC68332<br />
32-bit central processing unit (CPU) with a 16-bit bus. On<br />
the digital processor board there is a socket containing the<br />
upgradable program ROM and a 256Kbit static RAM.<br />
The processor receives signals from the analog processor<br />
and converts them into current in amps. When used with<br />
thermopile heads the signal is then processed by a<br />
sophisticated digital filter which speeds up the effective<br />
response time of the head and rejects noise. The digital<br />
processor is also responsible for controlling the analog<br />
processor, reading the keypad, and driving the display. The<br />
CPU obtains calibration and capability data from a memory<br />
chip in the plug of the detector head and configures itself<br />
accordingly. Recalibration data and saved settings are also<br />
stored in this memory chip.<br />
46
Power Supply:<br />
The power supply board, which also holds the display<br />
module and the keypad switches, provides the internal DC<br />
voltages for the analog and digital processors. It also<br />
contains the battery charging circuit and the AC supply for<br />
the backlight. All of the power supplies operate in switch<br />
mode with an oscillator frequency of 32KHz.<br />
Electromagnetic Interference:<br />
The Orion and associated heads have extensive circuitry<br />
both to reject outside electromagnetic and electrostatic<br />
interference. The Orion and associated heads are fully CE<br />
qualified and are extremely resistant to EMI. If there is still<br />
some interference in an unusually high EMI environment, it<br />
is recommended to use the Orion without the charger<br />
plugged in.<br />
47
Chapter 8 Calibration, Maintenance<br />
and Troubleshooting<br />
8.1 Calibration of Thermopile Heads<br />
8.1.1 Absorber types and Method of<br />
Calibration of <strong>Ophir</strong> Power Meters<br />
8.1.1.1 Types of <strong>Ophir</strong> Laser Absorbers<br />
Two types of absorber surface are used in <strong>Ophir</strong> thermal<br />
measuring heads.<br />
1. Surface Absorbers:<br />
BB (broadband) absorber<br />
On standard, high power density, broadband <strong>Ophir</strong> power<br />
monitor heads, a special refractory coating is used to<br />
provide high absorptivity from the UV through the IR. This<br />
coating can withstand very high power densities, up to 20<br />
KW/cm², without changing calibration. The absorption of<br />
this coating is above 90% for most of its range, as shown in<br />
Graph 1 below.<br />
EX (excimer) absorber<br />
The EX absorber provides high absorption in the UV, and it<br />
can withstand both the pulse energies and the average<br />
power of excimer lasers. These discs also have excellent<br />
absorption for 10.6 µm and other wave-lengths. They can<br />
therefore be used for other types of lasers as well. The<br />
absorption of the various <strong>Ophir</strong> absorbers as a function of<br />
wavelength is shown in Graph 1 below.<br />
LP (long pulse) absorber<br />
This absorber has a particularly high damage threshold for<br />
long pulse (ms) or continuous lasers and is therefore<br />
offered for use with high power heads. It is calibrated for<br />
use with YAG laser at 1.064µm or CO 2 laser at 10.6µm and<br />
absorbs about 90% at these wavelengths.<br />
48
2. Volume absorbers<br />
P (pulse) type absorber<br />
The models with the P suffix, for use with pulsed lasers,<br />
have a special absorbing glass with an absorbance of 95<br />
+2% over the operating range. Since the surface is a glass,<br />
its reflectivity does not change even if damaged or melted<br />
locally.<br />
HE/HE1 (high energy) absorber<br />
The HE and HE1 types have a particularly high damage<br />
threshold for pulsed and repetitively pulsed lasers of both<br />
the short and long pulse variety and are useful where the<br />
highest pulse energies and average powers are used.<br />
HL (high energy long pulse) absorber<br />
The HL absorber is the absorber of choice for high energy<br />
repetitive pulses longer than 2ms. For these long pulses it<br />
has flatter spectral response than the HE/HE1 and<br />
withstands higher pulse energy and average power.<br />
100<br />
98<br />
96<br />
94<br />
92<br />
90<br />
88<br />
86<br />
84<br />
82<br />
80<br />
Percent absorption<br />
0.1 1<br />
Wavelength, µm<br />
10 100<br />
BB therm. EX P<br />
49
100<br />
95<br />
90<br />
85<br />
80<br />
75<br />
70<br />
65<br />
60<br />
55<br />
Percent absorption<br />
50<br />
0.1 1 Wavelength, µm<br />
10<br />
HE HE1 LP HL<br />
Graph 1.<br />
Absorption of <strong>Ophir</strong> Thermal Absorbers vs. Wavelength<br />
8.1.1.2 Method of Calibration<br />
The absorption of the various <strong>Ophir</strong> thermal absorbers can<br />
vary from disc to disc. Therefore, all <strong>Ophir</strong> absorbers are<br />
individually calibrated against NIST traceable standards.<br />
<strong>Ophir</strong> power/energy meters with the broadband or P type<br />
absorbers are individually calibrated by laser at several<br />
wavelengths against a NIST calibrated standard meter.<br />
The meter can be switched to give the exact calibration at<br />
the various wavelengths (Argon, YAG, and, where<br />
applicable, CO2); or, for some models, an average value is<br />
given.<br />
The EX type detector is calibrated by measuring the ratio of<br />
absorption in the UV to that at 515nm. The total absorption<br />
is measured in both cases using an integrating sphere. The<br />
detector is then calibrated with an argon laser and given a<br />
correction factor from this ratio.<br />
50
8.1.2 Linearity and Accuracy of <strong>Ophir</strong><br />
Thermal Heads<br />
8.1.2.1 Linearity<br />
The linearity of most <strong>Ophir</strong> thermal detectors is specified to<br />
be 1% over the specified power range of each particular<br />
instrument. The linearity is tested by electrical substitution<br />
heating. Models of up to 30 watts maximum rating are<br />
subjected to electrical input up to their maximum rating,<br />
models of up to 300W maximum rating are heated up to 100<br />
watts, and models of 1000W rating and above are heated up<br />
to 200 watts. On CAL models, the built in CAL resistor is<br />
used.<br />
On non CAL models, a CAL resistor is temporarily affixed to<br />
the sensor. For those models for which the linearity is not<br />
tested over their entire range, randomly chosen sample<br />
models are tested periodically over their entire range. The<br />
test is performed with a high power laser that can cover the<br />
entire detector range using a rear leak detector for<br />
comparison. This rear leak detector is a low power <strong>Ophir</strong><br />
detector which has previously been tested for linearity.<br />
Thus, in all cases, the linearity of the detectors is traceable<br />
to electrical standards.<br />
8.1.2.2 Total Accuracy of Calibration<br />
Since the instruments are calibrated against NIST<br />
standards, the accuracy is generally 1% at the power level<br />
at which the calibration has been performed. This accuracy<br />
has been verified by checking the scatter of the results<br />
when several instruments are calibrated against the same<br />
standard. The maximum error in measurement will be less<br />
than the sum of the specified accuracy and linearity. Since<br />
the linearity is also 1%, the maximum error in measurement<br />
will generally be less than 2%.<br />
51
8.1.3 Calibration Factor<br />
For models equipped with the <strong>Ophir</strong> CAL resistor, the<br />
calibration factor is determined at the factory by the<br />
following procedure. After calibration of the sensor as<br />
described above in Section 8.1.1.2, electrical power is<br />
applied to the CAL resistor. The calibration factor is given<br />
by the formula:<br />
CAL factor = reading on meter / applied electrical power.<br />
If you wish to check the power reading, apply electrical<br />
power to the CAL resistor, and measure the voltage and<br />
current to obtain the applied power. The correct power<br />
reading for the meter is the applied electrical power<br />
multiplied by the CAL factor given above.<br />
8.1.4 Guidelines for using the CAL resistor<br />
for checking calibration<br />
1. Do not exceed the maximum electrical power<br />
stated in the table.<br />
MODEL <strong>POWER</strong> APROX. MAX<br />
VOLTAGE<br />
3A Series 1 Watt 7 Volts<br />
10A Series 10 Watts 17 Volts<br />
30A Series 30 Watts 35 Volts<br />
150A Series 100 Watts 65 Volts<br />
300W Series 125 Watts 65 Volts<br />
1500W Series<br />
and above<br />
200 Watts 95 Volts<br />
Table 2.<br />
Maximum Power to Apply to Sensor CAL Resistors<br />
2. Use the resistor to check calibration only.<br />
3. Turn off the power as soon as measurement is done.<br />
4. Do not operate the cal resistor when the sensor disc is<br />
under radiation; the excessive heat may burn out the<br />
calibration resistor.<br />
52
5. To eliminate residual non-linear effects, it is advisable<br />
to check electrical calibration at about the same power<br />
level as that to be measured, so long as the rating of the<br />
heating resistor is not exceeded.<br />
8.2 Calibration of Photodiode type Heads<br />
Photodiode detectors are inherently very linear but also<br />
have a large variation in sensitivity with wavelength. In<br />
addition, the <strong>Ophir</strong> model PD300 is equipped with both a<br />
built in filter and removable filter to allow measurement of<br />
higher powers without detector saturation. These filters<br />
also have a transmission which depends on wavelength.<br />
Therefore, the PD300 has a built in calibration adjustment<br />
for wavelength which is described in the next paragraph.<br />
8.2.1 Method of Factory Calibration<br />
The sensitivity of various <strong>Ophir</strong> photodiode sensors varies<br />
from one head to another as well as with wavelength.<br />
Therefore, <strong>Ophir</strong> photodiode detectors are individually<br />
calibrated against a NIST standard which has been<br />
calibrated at several nm intervals over the entire spectral<br />
range.<br />
The spectral sensitivity curve of the detector, both for filter<br />
out and filter in, is fed into the head EEROM and this<br />
information is used to set the gain to the proper value at all<br />
wavelengths.. When the user selects his wavelength on<br />
the Orion PE, the correction factor for that wavelength is<br />
applied. The BC20 head does not have a calibration curve. It<br />
is calibrated at the fixed wavelengths that are available<br />
with that instrument.<br />
8.2.2 Accuracy of Calibration of PD300 and<br />
3A-IS Heads<br />
Since the instruments are calibrated against NIST<br />
standards, the accuracy is generally ±2% at the wavelength<br />
the calibration has been performed. The maximum error in<br />
measurement will be less than the sum of the calibration<br />
accuracy, linearity, inaccuracy due to errors in the<br />
wavelength curve and variations in gain with temperature.<br />
53
The linearity of the photodiode detector is extremely high<br />
and errors due to this factor can be ignored. The maximum<br />
error due to the above factors is given in Table 4 below.<br />
WAVE<br />
LENGTH<br />
200 -<br />
250nm<br />
250 -<br />
360nm<br />
360 -<br />
400nm<br />
400 -<br />
950nm<br />
950 -<br />
1100nm<br />
1100 -<br />
1600nm<br />
1600-<br />
1800nm<br />
PD300 PD300-<br />
3W<br />
ERROR, FILTER OUT*<br />
54<br />
PD300-<br />
UV<br />
±5%<br />
PD300-<br />
IR<br />
- - ±3% -<br />
±10% ±10% ±3% -<br />
3A-IS<br />
±3% ±3% ±3% 5%<br />
±5% ±5% ±5% ±5% 10%<br />
- - - ±5%<br />
- - - ±7%<br />
Table 4.<br />
Maximum Error as a Function of Wavelength and Filter<br />
* Add ±2% to error for filter in (±3% for PD300-3W and PD300-UV).<br />
8.2.3. Accuracy of calibration of BC20 Heads<br />
The sensitivity of various BC20 sensors varies from one<br />
head to another as well as with wavelength. Therefore,<br />
each BC20 head is individually calibrated at each specified<br />
wavelength against a NIST standard which has been<br />
calibrated at the relevant wavelengths.<br />
Since the instruments are calibrated against NIST<br />
standards, the accuracy is generally ±2% at the wavelength<br />
the calibration has been performed. The maximum error in<br />
measurement will be less than the sum of the calibration<br />
accuracy and linearity. The linearity of the photodiode<br />
detector is extremely high and errors due to this factor can<br />
be ignored. The maximum error due to all factors is the<br />
stated accuracy of ±3%.
The calibration is carried out with a fixed laser. In addition<br />
to the error in calibration, the reading drops somewhat with<br />
scanning speed. The BC20 is specified to deviate from the<br />
static reading no more than –3% up to a scanning velocity<br />
of 30,000 inch/sec.<br />
8.3 Calibration of Pyroelectric and Photodiode Energy<br />
Heads<br />
Several types of absorber are used in <strong>Ophir</strong> pyroelectric<br />
and photodiode energy heads:<br />
1. Metallic type: The type with no suffix in the name have<br />
a partially reflective multilayer metallic coating which<br />
absorbs approximately 50% and whose absorption<br />
graph is shown in graph 2 below. The metallic coating<br />
permits very high repetition rates, up to 5000Hz as well<br />
as high sensitivity.<br />
2. Broadband type: The type with the BB suffix has a<br />
broadband black absorbing coating to provide high<br />
absorptivity from the UV through the IR. This coating<br />
can withstand energy densities, up to 0.3J/cm² for short<br />
pulses and 2J/m² for long pulses without changing<br />
calibration. The absorption of this coating is above 90%<br />
for most of its range, as shown in Graph 2 below. This<br />
coating is available for the PE50 and PE25.<br />
3. High speed broadband type: The type with the BBH<br />
suffix has a special broadband coating spectrally flat<br />
from 190nm to 3µm. Unlike the BB type, it is able to<br />
work at high repetition rates to 1000Hz. On the other<br />
hand, its damage threshold is considerably lower, on<br />
the order of 0.05J/cm².<br />
4. PD10 type: Unlike the other heads, the PD10 has a<br />
silicon photodiode with a neutral density filter mounted<br />
permanently in front of it. The filter detector<br />
combinations are calibrated over the entire wavelength<br />
range similarly to the PD300 power heads and therefore<br />
the heads have a high accuracy at any wavelength in<br />
the range. This is an exclusive feature with <strong>Ophir</strong><br />
energy heads.<br />
55
Absorption (%) vs Wavelength (nm)<br />
100<br />
90<br />
80<br />
70<br />
60<br />
50<br />
40<br />
30<br />
0.1 1 10 100<br />
Graph 2.<br />
Absorption of <strong>Ophir</strong> Pyroelectric Absorbers<br />
8.3.1 Method of Calibration<br />
The sensitivity of the various <strong>Ophir</strong> pyroelectric sensors<br />
can vary from one to another as well as with wavelengths.<br />
Therefore, <strong>Ophir</strong> pyroelectric detectors are individually<br />
calibrated against NIST traceable standards. In addition,<br />
the calibration is corrected in the head for different<br />
wavelengths.<br />
<strong>Ophir</strong> pyroelectric detectors are calibrated using a 1.06µm<br />
repetitively pulsed laser referenced to a NIST traceable<br />
thermal power meter. The average energy is set to the<br />
average power of the standard power meter divided by the<br />
laser frequency.<br />
The spectral absorption of the detector coating is measured<br />
spectroscopically and the absorption curve is used to<br />
correct the calibration for other wavelengths. When the<br />
user selects his wavelength on the Orion PE, the correction<br />
factor for that wavelength is applied.<br />
The PD10 heads are calibrated in a two step fashion. First<br />
the photodiode detector - filter combination are calibrated<br />
against a NIST traceable master in a similar fashion to the<br />
PD300 heads over the wavelength range of the head. (see<br />
photodiode calibration in section 8.2).<br />
56<br />
BB - Broadband<br />
Metallic Coating
Then the head is calibrated at one wavelength using a<br />
905nm repetitively pulsed laser referenced to a NIST<br />
traceable photodiode meter. The average energy is set to<br />
the average power of the standard power meter divided by<br />
the laser frequency.<br />
8.3.2 Accuracy of Calibration<br />
Since the instruments are calibrated against NIST<br />
standards, the accuracy is generally 3% at the energy level<br />
and wavelength at which the calibration has been<br />
performed. This accuracy has been verified by checking<br />
the scatter of the results when several instruments are<br />
calibrated against the same standard. The maximum error<br />
in measurement will be less than the sum of the specified<br />
accuracy, linearity and inaccuracy due to errors in the<br />
wavelength curve.<br />
The non linearity is approximately 2%, and the error due to<br />
wavelength is given in table 5 below.<br />
In addition to the above errors, the reading of pyroelectric<br />
heads changes with frequency. The Orion PE has a built in<br />
correction for this error. For frequencies above 50% of<br />
maximum frequency, inaccuracies in this correction can<br />
increase the total error by up to 3%.<br />
The maximum error in measurement will be less than the<br />
sum of the above errors and in general will be considerably<br />
less.<br />
WAVELENGTH BROAD<br />
BAND<br />
COATING TYPE<br />
METALLIC<br />
ERROR<br />
PD10<br />
190 - 350nm ±1% ±4% 2%<br />
400 - 800nm ±1% ±4% 0<br />
1064nm 0 0 2%<br />
1-1.5µm ±1% ±2% N.A.<br />
2 - 3µm ±2% ±8% N.A.<br />
10.6µm ±5% ±15% N.A.<br />
Table 5.<br />
Additional Measurement Error due to Wavelength<br />
57
8.4 Error Messages<br />
The Orion displays various error messages when operated<br />
outside its normal range:<br />
Overrange: When the power or energy being measured<br />
exceeds the range of the measurement scale being used,<br />
the overrange message is displayed, but the reading still<br />
appears on the display. If the power or energy exceeds the<br />
maximum by more than 10%, the reading on the display is<br />
blanked.<br />
Low Battery: When the battery is almost discharged, the<br />
flashing message "BAT" appears. When the low battery<br />
message appears, the Orion should be connected to the<br />
charger. It will operate normally and charge slowly while<br />
connected to the charger. When connected to the charger<br />
while turned off, the Orion will charge faster, in about 14<br />
hours.<br />
8.5 Troubleshooting<br />
8.5.1 Orion Display<br />
Problem Cause/Remedy<br />
Instrument will not<br />
operate after being<br />
completely discharged<br />
and connected to<br />
charger.<br />
Instrument operates with<br />
charger but not with<br />
battery<br />
58<br />
Check that charger<br />
provides 200mA<br />
Battery is low.<br />
Recharge overnight<br />
with the Orion turned<br />
off for 14-16 hours. If<br />
the Orion still doesn't<br />
work with battery, then<br />
the battery is dead.<br />
Replace battery.
8.5.2 Thermal Heads, Power<br />
Problem Cause/Remedy<br />
Instrument<br />
shows zero<br />
reading in both<br />
power and<br />
energy modes.<br />
Instrument<br />
responds while<br />
head is cold, but<br />
suddenly fails as<br />
it heats up.<br />
Instrument does<br />
not return<br />
completely to<br />
zero on power<br />
measurement.<br />
8.5.3 Replacing Battery<br />
Check connections between<br />
the head and the instrument.<br />
Check that the sensor disc is<br />
operative. Resistance<br />
between pins 1 and 9 of the<br />
head connector should be<br />
about 1.8k. If the sensor is<br />
defective, there will be an<br />
open or short circuit.<br />
Have the sensor disc<br />
replaced.<br />
If head is very hot, allow it to<br />
cool. Disconnect the head<br />
from the instrument. If<br />
readout unit does not zero,<br />
adjust zero with head<br />
disconnected. If the offset<br />
persists, try zeroing with the<br />
head connected as well, as<br />
described in Section 3.5.2.<br />
1. Remove the bottom of the Orion by unscrewing the 4<br />
Phillips screws.<br />
2. Unscrew screw in the center of the PC boards.<br />
Carefully lift the boards up together.<br />
3. Unplug the battery connector from the circuit board.<br />
4. Remove the battery and replace it with a new one<br />
obtained from your <strong>Ophir</strong> representative.<br />
5. Reassemble the boards and screw in the center screw.<br />
Now reassemble into the case and close 4 case<br />
screws.<br />
59
Chapter 9 Orion Specifications<br />
9.1 System/Display Specifications<br />
Detector compatibility Orion TH - thermal heads<br />
Orion PD-photodiode heads<br />
Orion PE-pyroelectric heads<br />
Input ranges 15nA - 1.5mA full scale in 16<br />
ranges<br />
A to D sampling rate 15Hz<br />
A to D resolution 17 bits plus sign. (0.0007%<br />
resolution)<br />
Electrical accuracy ±0.1% ± 20pA new;<br />
±0.3% ±50pA after 1 year<br />
Electrical input noise 500nV or 1.5pA + 0.0015% of<br />
level<br />
input range @3Hz.<br />
Dynamic range 9 decades (1:109 )<br />
Analog output 0-1 Volt with 11-bit (0.05%<br />
resolution.)<br />
Analog output<br />
accuracy<br />
±0.2% ±1mV relative to display<br />
Dimensions 203H x 95W x 37D (mm)<br />
Mass 550g<br />
Display 122 x 32 pixel Super twist LCD<br />
Display digit height 12mm<br />
Backlight EL: Operates from charger<br />
power only<br />
Bargraph segments 120<br />
Battery 2 X RR (Sub-C) 1.8Ah NiCd. Built<br />
in.<br />
Operation between<br />
charges<br />
18 Hrs, 10Hrs with pyroelectric<br />
heads. Battery charge time10-<br />
14 Hrs<br />
(15-30 Hrs if operating)<br />
Charger DC: 11 to 22V: or AC 9 to 15Vrms<br />
3 Watt.<br />
60
9.2 Head Specifications<br />
HEAD<br />
MAX <strong>POWER</strong><br />
(WATTS)<br />
MAX AVG. <strong>POWER</strong><br />
DENSITY<br />
61<br />
ABSORBER<br />
TYPE<br />
PD300/UV/IR 300mW 50W/cm² PD<br />
PD300-3W 3W 50W/cm² PD<br />
3A-IS 3W 200W/cm² Int Sph PD<br />
F100A-IS 100W 200W/cm² Int Sph Ther<br />
2A 2W 200W/cm² BB<br />
3A-P-CAL 3W 50W/cm² P<br />
10A-P 10W 50W/cm² P<br />
30A-P 30W 50W/cm² P<br />
30(150)A-HE 30(150)W 1000W/cm² HE/HE1<br />
10A 10W 20KW/cm² BB<br />
30A 30W 20KW/cm² BB<br />
30(150)A 30(100)W 20KW/cm² BB<br />
F150A 150W 20KW/cm² BB<br />
FL250A 250W 20KW/cm² BB<br />
F300A 300W 20KW/cm² BB/LP<br />
1000W 1000W 6KW/cm² BB<br />
1500W 1500W 6KW/cm² BB/LP<br />
5000W 5000W 5KW/cm² BB/LP<br />
8000W 8000W 5KW/cm² BB/LP<br />
L30A-EX 30W 1KW/cm² EX<br />
FL250A-EX 250W 1KW/cm² EX<br />
PD10 20mW 50W/cm² PD<br />
PE10 2W 50W/cm² PE<br />
PE25 10W 10W/cm² PE<br />
PE50 20W 10W/cm² PE<br />
PE50-DIF 40W 500W/cm² PE<br />
Table 6.<br />
Max Power Specifications of Heads
PD - Photodiode<br />
P - P type volume absorber for short pulse lasers<br />
HE/HE1- volume absorber for high energy pulses<br />
EX - Excimer type, volume absorber<br />
PE - pyroelectric metallic or black absorber<br />
BB - broadband surface absorber, high power density<br />
LP - broadband surface absorber for highest power density<br />
Absorber<br />
Max Energy Density J/cm²<br />
Type<br />
Pulse Length<br />
10ns 1µs 300µs<br />
P 10 10 10<br />
HE/HE1 5 10 100<br />
BB 0.3 0.5 5<br />
EX 0.5 0.6 4<br />
PE, Metallic<br />
PE, BB<br />
PE-DIF<br />
PE BB-DIF<br />
0.1<br />
0.3<br />
1.5<br />
3<br />
62<br />
0.2<br />
0.3<br />
3<br />
3<br />
Table 7.<br />
Maximum Energy Densities for Various Absorbers<br />
4<br />
1<br />
40<br />
10
ev 1.2 first release<br />
1.3 updated damage threshold table 1.4/12.2.01/eg added BC20-SH<br />
1.41/24.5.01/eg updated absorber data 1.42/12.6.01/eg changed size,<br />
graphs 3.27-1/31.3.05/be – new graphics + logo<br />
3.36-1/07.03.07/be – Supports RS232& Orion PD supports PD200<br />
heads<br />
3.36-2/25.03.12/be New <strong>Ophir</strong>-Newport logo<br />
Orion User Manual<br />
<strong>Ophir</strong> P/N 1J06028<br />
25 March 2012<br />
Rev 3.36-2<br />
For latest version please visit our website: www.ophiropt.com/photonics<br />
63