
You also want an ePaper? Increase the reach of your titles
YUMPU automatically turns print PDFs into web optimized ePapers that Google loves.
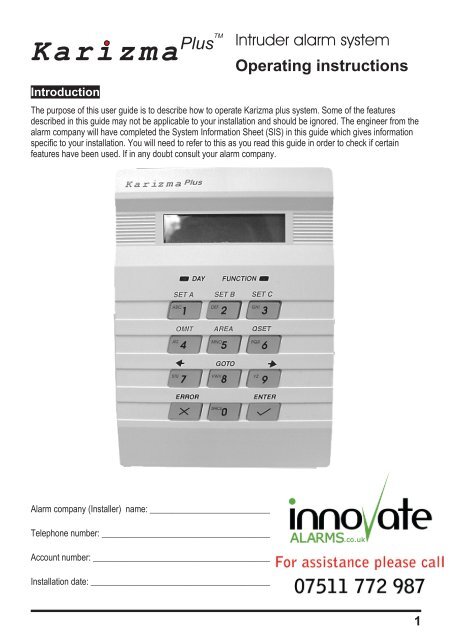
<strong>Karizma</strong> <strong>Plus</strong>TM<br />
Intruder alarm system<br />
Operating instructions<br />
Introduction<br />
The purpose of this user guide is to describe how to operate <strong>Karizma</strong> plus system. Some of the features<br />
described in this guide may not be applicable to your installation and should be ignored. The engineer from the<br />
alarm company will have completed the System Information Sheet (SIS) in this guide which gives information<br />
specific to your installation. You will need to refer to this as you read this guide in order to check if certain<br />
features have been used. If in any doubt consult your alarm company.<br />
Alarm company (Installer) name: __________________________________________<br />
Telephone number: _____________________________________________________<br />
Account number: _______________________________________________________<br />
Installation date: _______________________________________________________<br />
1
Operating instructions<br />
Keypad and Entry<br />
codes<br />
Keypads<br />
K a r i z m a <strong>Plus</strong><br />
Thursday 06-Jan<br />
17:00:36<br />
SET A<br />
ABC<br />
1<br />
OMIT<br />
JKL<br />
4<br />
STU<br />
7<br />
ERROR<br />
DAY FUNCTION<br />
SET B<br />
DEF<br />
2<br />
AREA<br />
MNO<br />
5<br />
GOTO<br />
VWX<br />
8<br />
SPACE<br />
0<br />
SET C<br />
GHI<br />
YZ<br />
3<br />
QSET<br />
PQR<br />
6<br />
9<br />
ENTER<br />
Display 2 - lines of<br />
16 characters per line<br />
DAY mode LED<br />
Function LED<br />
Secondary functions<br />
Primary functions<br />
Secondary functions are actioned when the FUNCTION LED is lit<br />
You operate your intruder alarm system by means of<br />
a keypad. Each keypad has numeric keys (0 to 9),<br />
ENTER and ERROR. Over each key is a label which<br />
describes the secondary function of each key. The<br />
key will perform their secondary function when the red<br />
FUNCTION indicator is lit.<br />
Entry Codes<br />
Before you can do anything with <strong>Karizma</strong>+ you will<br />
need to key in a code using one of the keypads.<br />
There are several types of entry code, which permit<br />
different levels of control over the system. Check the<br />
System Information sheet to see which codes have<br />
been enabled. The different types of codes are:<br />
Normal - this code allows the system to be set,<br />
unset, and reset after an alarm.<br />
Manager - this code has the same functions as a<br />
user code, but in addition the manager code can<br />
add or delete all other codes, test the system,<br />
view the event log, set the time and date, omit<br />
24Hr points, and set the chime function.<br />
Cleaner - special code which unsets only part of<br />
the system, providing restricted access only to<br />
certain areas of the premises.<br />
Duress - a special code which although<br />
appearing to work exactly like a standard user<br />
code will also cause the signalling device to<br />
signal a Personal Attack alarm to the central<br />
station. Do not use this code unless you are<br />
under threat to set or unset the system.<br />
Always press the Enter key<br />
after keying in your code or when making<br />
a selection.<br />
ENTER<br />
2
Setting the<br />
system<br />
Fully Setting the system<br />
When the premises are to completely vacated you<br />
should set the full system. First, check that the<br />
premises are physically secure - are all windows shut,<br />
and all external doors locked ?<br />
Key in a normal user code at the keypad nearest the<br />
final exit door and press the ENTER key.<br />
1) Set system?<br />
The exit period will start and the inside sounder will<br />
produce the exit sound - a pip-pip-pip sound. The<br />
display identify the program that you are setting.<br />
Program A Set<br />
PROGRAM A<br />
The bottom line on the display may have been editted<br />
during installation to read a different message, for<br />
example it may read FULL SYSTEM.<br />
You must now vacate the premises by the exit route<br />
described in the SIS. The length of time that you have<br />
to vacate the premises depends on the exit mode that<br />
has been programmed. Check your SIS to find out the<br />
exit mode of programme A.<br />
Part-Set the System<br />
A part-set allows detection points in part of the<br />
protected premises to be set (turned on), while those<br />
in other areas are not set. In a domestic installation it<br />
is usual for a part-set to be programmed for use at<br />
night time. This would allow the detection points<br />
around the perimeter of the house (doors, windows,<br />
etc), and all downstairs detectors to be enabled, while<br />
detectors in the bedrooms and on the stairs are<br />
disabled.<br />
<strong>Karizma</strong>+ has 2 different part-set programs called B<br />
and C. Check your SIS to see if these programs have<br />
been enabled. If they have not been enabled then you<br />
will not be able to use them.<br />
If a part-set has been enabled you can part-set your<br />
system by doing the following: Enter your code at a<br />
keypad and press the ENTER key. The system will<br />
begin to perform a full-set (setting programme A).<br />
Program A Set<br />
PROGRAM A<br />
<strong>Karizma</strong> <strong>Plus</strong><br />
Within 5 seconds of entering your code (while the red<br />
FUNCTION indicator is still on) you must press either<br />
the SET B or SET C key to select one of the part-set<br />
programmes and press the ENTER key. The display<br />
will acknowledge this by displaying name of the<br />
program being set.<br />
Program B Set<br />
PROGRAM B<br />
The bottom line on the display may have been editted<br />
during installation to read a different message, for<br />
example it may read NIGHT TIME. Leave the<br />
protected area by the exit route appropriate for that<br />
part-set.<br />
3
Operating instructions<br />
Performing a Quick-Set<br />
It is possible to override the programmed exit time by<br />
use of the Quick Set function. This always gives you<br />
3 seconds to vacate the protected area. Quick Set is<br />
selected during the first 5 seconds of the exit period<br />
(while the red FUNCTION indicator is on) by pressing<br />
the QSET key on the keypad. To use this function<br />
with one of the part-set programmes you must first<br />
select the part-set (SET B or SET C), and then press<br />
QSET.<br />
Program QSet<br />
PROGRAM A<br />
Omitting points during setting<br />
It is possible to omit one or more detection points<br />
when you set the system. The omitted points will not<br />
be able to cause an alarm when the system has set.<br />
This facility may be useful if one of your detection<br />
points has become faulty and keeps producing false<br />
alarms.<br />
Because omitting a detection point degrades the<br />
security provided by your alarm system, your engineer<br />
may have programmed only a limited number of<br />
points to be omittable. Check your SIS to see which<br />
points, if any, can be omitted.<br />
Points can be omitted by pressing the OMIT key<br />
during the first 5 seconds of the exit period (while the<br />
red FUNCTION indicator is on).<br />
01:FRONT DOOR<br />
Omit Point: NO<br />
The exit sound will stop, and the keypad will display<br />
the first point from a list of points that can be omitted.<br />
Use the and keys (over the 8 and 9 keys) to<br />
step through the list of points until the point you want<br />
to omit is displayed. Now press the ENTER key. The<br />
symbol will move onto the second line of the<br />
display.<br />
Press the key to change the NO to YES, and<br />
press the ENTER key.<br />
01:KITCHEN PIR<br />
Omit Point:YES<br />
The point will be omitted and the exit period will start<br />
again.<br />
You can omit as many points as you want using this<br />
procedure. To omit points from a part-set program you<br />
must first select the part-set by pressing SET-B or<br />
SET-C.<br />
4
Unsetting the<br />
system<br />
Cancelling the Exit procedure<br />
If you key in your code, and then immediately decide<br />
not to set the system, you can cancel the exit<br />
procedure by one of the following ways:<br />
During the first 5 seconds of the exit period and with<br />
the red FUNCTION indicator still on, just press the<br />
ERROR key twice to cancel the exit procedure.<br />
*** Goodbye ***<br />
MANAGER<br />
The inside sounder will stop, the keypad will display<br />
the ‘Goodbye’ message for a few seconds and then<br />
display the time and date. The green DAY indicator<br />
will remain on.<br />
After the first 5 seconds of exit period you must key in<br />
your code to cancel the exit procedure.<br />
Enter your code?<br />
Unsetting the System<br />
Entering the premises by the designated entry route<br />
will cause the entry period to start. The inside sounder<br />
will emit a slow beep-beep-beep sound. You must<br />
now key in your code and press the ENTER key at the<br />
nearest available keypad to cancel the entry period.<br />
The length of time that you have is called the entry<br />
time; check your SIS to see how long this is. During<br />
the last 10 seconds of the entry period the entry tone<br />
will raise in pitch to inform you of the urgency to enter<br />
your code.<br />
If you enter your code within the entry period the<br />
inside sounder will stop, the keypad will display the<br />
‘System Unset’ message for few seconds and then<br />
display the time and date.<br />
System Unset by<br />
MANAGER<br />
<strong>Karizma</strong> <strong>Plus</strong><br />
The green DAY indicator will light. The system is now<br />
unset.<br />
The inside sounder will stop, the keypad will display<br />
the ‘System Unset by’ message for a few seconds<br />
and display the time and date. The green DAY<br />
indicator will remain on.<br />
System Unset by<br />
MANAGER<br />
5
Operating instructions<br />
Silence Alarm and<br />
Reset system<br />
Silencing an Alarm<br />
If an alarm occurs whilst you are in or near to the<br />
premises the alarm can always be silenced by<br />
entering your code. If the system was set it will be<br />
unset at the same time. If the alarm occurs while you<br />
are away from the premises the outside and inside<br />
sounders will automatically stop after the bell time<br />
programmed by the engineer, see your SIS for the<br />
bell time.<br />
When you enter your code after an alarm, the keypad<br />
will display the cause of the alarm on the top line.<br />
INTRUDER<br />
BACK DOOR<br />
The second line shows additional information, such as<br />
the point which caused the alarm. The system will<br />
now need to be reset as described in the next section.<br />
Resetting after an Alarm<br />
After an alarm the system will need to be reset by<br />
entering a suitable reset code. The display will<br />
alternate between the alarm cause and a prompt to<br />
enter a reset code.<br />
Enter Your<br />
Code<br />
If the this prompt is displayed you can reset the<br />
system using your own code. Key in your code and<br />
press the ENTER key.<br />
After the system has been reset it may enter a fault<br />
lockout described in the next section.<br />
Engineer Reset<br />
Required<br />
If this prompt is displayed you may need to call out<br />
the engineer to reset the system.<br />
6
<strong>Karizma</strong> <strong>Plus</strong><br />
Fault Lockout<br />
System Unset by<br />
STEVE<br />
After resetting the system the keypad display will<br />
either display the ‘System Reset’ message, or it will<br />
show a count of the faults which still exist. This is<br />
called fault lockout.<br />
Faults: 1<br />
ENTER to View<br />
These faults must be cleared before the system can<br />
return to Day mode.<br />
To see a list of the faults press the ENTER key. The<br />
keypad will display each fault for 5 seconds. When all<br />
of the faults have been displayed it will again display a<br />
count of the faults. It will often be necessary to call out<br />
the engineer in order to clear these faults.<br />
If you can, clear the faults until the display shows no<br />
faults, then press the ENTER key to return to Day<br />
mode.<br />
Faults: 0<br />
ENTER to Exit<br />
Remote Reset<br />
If the system needs to be reset by an engineer code<br />
you may need to call out the engineer. Before you do<br />
this, check the SIS to see if either the Remote Reset<br />
or Anti-code Reset options have been enabled. If<br />
either have been enabled it may be possible to reset<br />
the system by following one of the procedures<br />
described here:<br />
Remote Reset<br />
Your engineer will have given you instructions on how<br />
to request a remote reset. Usually you will have to<br />
telephone the central station, give details of the alarm,<br />
and quote a password. The central station can then<br />
reset your system via the signalling device which is<br />
fitted to your system.<br />
System Reset by<br />
STU<br />
When the remote reset is received by your system,<br />
the keypad will display the ‘System Reset’ message<br />
for a few seconds. It will then either revert to the time<br />
and date display, or display the number of faults<br />
which still exist - this is a fault lockout.<br />
Reset by Anti-code<br />
Quote Code<br />
1400<br />
If Anti-code reset has been enabled the keypad will<br />
display the 4-digit Quote code. Make a note of this<br />
number (it is different each time you use this facility)<br />
and telephone your central station. You may need to<br />
give details of the alarm and quote a password. You<br />
will also need to quote the 4 digit number. The central<br />
station will give you a 6 digit number called an<br />
anti-code. Key in the anti-code to reset the system.<br />
The keypad will either display the time and date, or it<br />
will display the number of faults which still exist - this<br />
is a fault lockout.<br />
7
Operating instructions<br />
Cleaner Access<br />
<strong>Karizma</strong>+ has a code which permits selected areas of<br />
the protected premises to be unset for the purpose of<br />
cleaning or maintenance. This cleaner code works in<br />
conjunction with cleaner access points which have<br />
been programmed by the engineer. Check your SIS to<br />
see if any points have been programmed for cleaner<br />
access.<br />
The cleaner code cannot be<br />
used to reset the system in alarm.<br />
Group Shunt<br />
The Group shunt facility allows part of the protected<br />
premises to be unset without unsetting the whole<br />
system. This is often used to allow access to a garage<br />
or loading-bay area independently from the main area<br />
of the protected premises. Check your SIS to see if<br />
this facility has been provided.<br />
The detection points in the group will operate<br />
normally; they will be set when the system is set, and<br />
unset when the system is unset. However, they can<br />
also be unset (dis-armed) at any time by operating the<br />
group shunt keyswitch. Your installation engineer<br />
will give you details on how to do this.<br />
Re-arming the group is done with the keyswitch.<br />
However, if a detection point in the group is in fault,<br />
eg a door has been left open, the group cannot be<br />
re-armed. An led located close to the keyswitch will<br />
light, or a buzzer may sound, when it is not possible to<br />
re-arm the group. You must dis-arm the group by the<br />
keyswitch; this will turn off the led or buzzer. Enter the<br />
protected area and clear the faults before trying to<br />
re-arm the group again.<br />
8
Manager Facilities<br />
The manager code is normally used to carry out<br />
system management functions. It is used to allocate<br />
and delete other user codes, test the system, view the<br />
event memory, etc.<br />
On entry of the manager code in Day mode the<br />
keypad will display the first managers menu option<br />
1) Set System?<br />
The manager has 10 similar menu options. Use the<br />
and keys to move through the menus. To<br />
perform a function press the ENTER key.<br />
The manager code can be used to unset the system<br />
in the normal way. It can also be used to set the<br />
system, but the procedure is slightly different to the<br />
normal user code.<br />
MENU 1 - Set System<br />
Menu 1 allows the manager to set the system. Go to<br />
this menu and press the ENTER key.<br />
1) Set System?<br />
The system will start to set as if a normal user code<br />
had been entered. The options available to the normal<br />
user, such as part-set and omit, are available in the<br />
normal way.<br />
MENU 2 - View Event Log<br />
Menu 2 allows the manager to view the event log,<br />
which is a list of the last 200 events to occur. Go to<br />
menu 2 and press the ENTER key.<br />
2) View<br />
Event Log?<br />
The keypad will display the last event to be logged. In<br />
the example here, 145 is the event number (events<br />
are numbered 1 to 200), USER RESET is the<br />
description of the event.<br />
145) USER RESET<br />
09:36:21 19-Nov<br />
<strong>Karizma</strong> <strong>Plus</strong><br />
The bottom line is the time and date that the event<br />
was logged. Use the and keys to move through<br />
the event log. Press the ERROR key to return to<br />
menu 2.<br />
Some events have additional information which can<br />
be viewed by pressing the ENTER key when the<br />
event is displayed.<br />
MENU 3 - Print event log<br />
With the ADE Opus-42 printer connected it is possible<br />
to print out the entire event log.<br />
With menu 3 on display press the ENTER key.<br />
Printing...<br />
ERROR to Stop<br />
<strong>Karizma</strong>+ will start to print the event log, starting with<br />
the newest event first. Press ERROR at any time to<br />
stop the printer.<br />
9
Operating instructions<br />
MENU 4 - Change User Type<br />
and Name<br />
Menu 4 allows you to add, change or delete users<br />
from the system.<br />
With menu 4 on display press the ENTER key.<br />
01:MANAGER<br />
: MANAGER<br />
The keypad now displays the first code from a list of<br />
16. The top line of the display identifies the user, and<br />
the bottom line gives the user type. Use the and<br />
keys to go to the user to be changed and press<br />
the ENTER key.<br />
02:USER 2<br />
NOT USED<br />
The symbol moves onto the second line. Now use<br />
the and keys to select the user type (refer to<br />
section 3 for a description of the different user types),<br />
and press the ENTER key.<br />
01:User Name<br />
? USER 2<br />
The keypad now displays the name associated with<br />
the code. The flashing cursor will be at the right of the<br />
name. To change the name press the ERROR key<br />
several times until the existing name has been<br />
deleted and the cursor is at the left of the display.<br />
Names are entered one letter at a time by using the<br />
numeric keys on the keypad. On each key are either 2<br />
or 3 letters, for example on the ‘1’ key are the letters<br />
ABC. To enter the letter C press ‘1’ -a1isdisplayed,<br />
press it again and the 1 changes to A, press it again<br />
and the A changes to B, press it again and the B<br />
changes to C. Now press the ENTER key to register<br />
the C and move on to the next letter. Once you have<br />
entered the name press the ENTER key again to<br />
accept it. Momentarily press the ERROR key to exit<br />
the menus.<br />
MENU 5 - Change User Code<br />
Each user has a2to6digit code. Menu 5 allows this<br />
code to be changed. Use the and keys to<br />
select the code to be changed and press the ENTER<br />
key.<br />
01:User Code<br />
?<br />
Now key in a code of between 2 and 6 digits, and<br />
press the ENTER key. If the code is already in use by<br />
another user it will be rejected. Momentarily press the<br />
ERROR key to exit the menus.<br />
MENU 6 - Chime Points<br />
The manager can put any security point on chime.<br />
When a chime point is activated keypad will display<br />
the name of the point, and the inside sounder will emit<br />
a single dee-daa sound and then stop. This is often<br />
useful in shops to warn of a customer entering<br />
through the shop door, or in a house to warn of a<br />
potential intrusion through the back door.<br />
Menu 6 allows you to put a point on chime. Select the<br />
point using the and keys and press the ENTER<br />
key.<br />
01:FRONT DOOR<br />
Chime Pt: NO<br />
Use the and keys again to put the point on<br />
chime, or remove it from chime, and press the ENTER<br />
key again. Momentarily press the ERROR key to exit<br />
the menus.<br />
10
<strong>Karizma</strong> <strong>Plus</strong><br />
MENU 7 - Omit 24 hour points<br />
A 24H point is armed all of the time, whether the<br />
system is set or not. Violating that point will always<br />
cause an alarm. The manager can omit a 24H point if<br />
it has been programmed as omittable by the engineer.<br />
A point which has been omitted cannot cause an<br />
alarm. Check your SIS to see if any 24H points are<br />
omittable.<br />
Menu 7 allows you to omit 24H points. Go to menu 7<br />
and press the ENTER key.<br />
7)Omit<br />
24 Hr Points?<br />
The keypad displays the first point in a list of 24H<br />
points that can be omitted. Use the and keys to<br />
select the point to be omitted, then press the ENTER<br />
key.<br />
06:FIRE DOOR<br />
Omit 24hr:No<br />
The symbol moves onto the second line of the<br />
display. Now use the and keys to change NO<br />
to YES and press the ENTER key.<br />
MENU 8 - Set Time and Date<br />
Select menu 8. The keypad displays the current time<br />
in 24 hour format, so 1am is 13:00. Key in the correct<br />
time and press the ENTER key.<br />
Time and Date<br />
Time? 00:05<br />
The keypad will now display the current date, in a<br />
day-month-year format. Key in the correct date and<br />
press the ENTER key.<br />
Time and Date<br />
Date? 21-02-03<br />
The keypad will now display the current day of the<br />
week. Use the and keys to change the day and<br />
press the ENTER key.<br />
Time and Date<br />
Friday<br />
The keypad will give a double beep to indicate that<br />
the date has been accepted.<br />
Re-Instating 24 hour Points<br />
To re-instate a 24H point which was previously<br />
omitted follow the procedure described above, but<br />
change YES to NO.<br />
Point Fault<br />
If the point cannot be re-instated because it is still<br />
open the keypad will display an error message. You<br />
must close the point and repeat the procedure.<br />
Any 24 hour points which have been omitted by the<br />
manager will automatically be re-instated when the<br />
system is set. It is not possible to omit 24H points<br />
when setting the system.<br />
11
Operating instructions<br />
MENU 9 - Walktest<br />
The walktest allows you to check the operation of all<br />
of the security points in your system in order to prove<br />
that they still work correctly. Your engineer will advise<br />
how often you should carry out a walktest.<br />
In menu 9 press the ENTER key to start the walktest.<br />
A******...*.....<br />
................<br />
The keypad display will show a ‘*’ for each point which<br />
has been enabled but has not yet been tested. Points<br />
which have not been enabled are displayed as dots.<br />
The top left of the display represents point 1, the top<br />
right is point 15, the bottom left is point 16, the bottom<br />
right is point 30. The ‘A’ in the top left indicates that<br />
the points in program A are being tested.<br />
A1111*...*......<br />
................<br />
Each time that an enabled point is activated the inside<br />
sounder will produce a warble sound, and the display<br />
will change to show a ‘1’ in the appropriate position.<br />
The inside sounder will stop when all points are clear.<br />
A1111...........<br />
................<br />
Initially the walktest will allow you to test Security<br />
points that are used in program A. To test security<br />
points used in programs B or C press either 2 or 3<br />
when the walktest is running to select program B or C<br />
respectively. The keypad will display the selected<br />
program at the top left. Press 1 to reselect program A.<br />
MENU 10 - Test OUTPUTS<br />
Menu 10 allows you to test any of the outputs from the<br />
system. It presents you with a list of the outputs which<br />
may be tested. To turn on any output press the<br />
ENTER key, to turn it off press any key. The following<br />
outputs may be tested: BELL, STROBE, SOUNDER<br />
(LOW VOL), and SOUNDER (HIGH VOL).<br />
10)Test Output<br />
BELL<br />
BELL<br />
ON<br />
Press ERROR at any time to stop the walktest.<br />
Momentarily press the ERROR key to exit the menus.<br />
12
System Information Sheet (SIS)<br />
Detection Points<br />
<strong>Karizma</strong> <strong>Plus</strong><br />
No. Description Type SET A SET B SET C Permit<br />
Omit<br />
1<br />
2<br />
3<br />
4<br />
5<br />
6<br />
7<br />
8<br />
9<br />
10<br />
11<br />
12<br />
13<br />
14<br />
15<br />
16<br />
17<br />
18<br />
19<br />
20<br />
21<br />
22<br />
23<br />
24<br />
25<br />
26<br />
27<br />
28<br />
29<br />
30<br />
Cleaner<br />
access<br />
Group<br />
shunt<br />
13
Operating instructions<br />
Programmes<br />
Programme Enabled Exit<br />
Mode<br />
A<br />
<br />
B<br />
C<br />
Entry time<br />
Exit<br />
time<br />
Local<br />
alarm<br />
Entry/exit<br />
route<br />
User number<br />
1<br />
2<br />
3<br />
4<br />
6<br />
7<br />
8<br />
9<br />
10<br />
11<br />
12<br />
13<br />
14<br />
15<br />
16<br />
Level Normal, Manager,<br />
Cleaner and Duress<br />
Code<br />
Signalling Device fitted<br />
Engineer Reset<br />
Permit Entry Deviate<br />
Remote Reset<br />
Anti-code Reset<br />
Bell time<br />
Bell delay<br />
minutes<br />
minutes<br />
14
<strong>Karizma</strong> <strong>Plus</strong><br />
Notes<br />
15
Operating instructions<br />
For Technical Support<br />
☎ : 0906 302 0999<br />
This is a premium rate line, calls are charged at<br />
50 pence per minute<br />
The panel conforms to the<br />
requirements of the European EMC<br />
and Low Voltage directives, and<br />
carries the CE mark.<br />
Novar ED&S<br />
The Arnold Centre<br />
Paycocke Road<br />
Basildon<br />
SS14 3EA<br />
16 4188-756_issue 1_2/03