NSVI Installation Guide - IXL Masonry
NSVI Installation Guide - IXL Masonry
NSVI Installation Guide - IXL Masonry

Create successful ePaper yourself
Turn your PDF publications into a flip-book with our unique Google optimized e-Paper software.
Getting Started (continued...)<br />
Preparation<br />
Work Area<br />
Interiors (Over Drywall)<br />
If drywall is used as the substrate, follow guidelines for<br />
Wire Lath/Mesh and Scratch‐Coat as seen on this page.<br />
Then see, “Applying <strong>NSVI</strong> Stone Veneer” on page 5.<br />
Interiors (Cement Board—Use for Interiors Only)<br />
<br />
<br />
Protect surfaces that could be damaged during the<br />
stone installation process, such as hardwood flooring,<br />
window trim, and other areas that have already<br />
been finished.<br />
Stage material close to the installation area. Layout<br />
stones so they can be easily viewed and reached. It<br />
is important to obtain stones from multiple boxes<br />
and/or crates (if present) and organize them by<br />
size, color, and texture. Opening all boxes and<br />
crates will encourage random distribution.<br />
Moisture Resistant Barriers (MRB)<br />
1 ‐2 layers of housewrap, or felt paper. *<br />
Install from bottom up, overlapping min. 4 inches.,<br />
horizontally and vertically.<br />
Weep screeds may or may not be required.<br />
* Refer to local building codes. *<br />
<br />
<br />
<br />
<br />
<br />
Instead of using moisture resistant barrier and wire<br />
mesh system, cement board products can be used for<br />
interiors. (Exception: Interior water features require MRB.)<br />
Apply cement board, rough side out, over studs<br />
(drywall is not necessary, but can be left in place).<br />
Fasten cement board using corrosion resistant<br />
screws every 16” horizontally on center, and minimum<br />
6” vertically, ensuring minimum 1 inch of stud<br />
penetration.<br />
Tape cement board seams with fiberglass tape and<br />
seal seams with Thinset mortar.<br />
Ensure surface<br />
is clean and<br />
free of debris.<br />
Wire Lath/Mesh<br />
<br />
<br />
<br />
<br />
<br />
Use expanded, galvanized, diamond‐mesh meeting<br />
requirements of ASTM C847‐06 (min 2.5 lb/yd 2 ).<br />
Install tightly, cups up (smooth when felt from bottom<br />
to top, rough when felt top to bottom.)<br />
Overlap sections of lath approximately 1 inch.<br />
Fasten lath every 16” horizontally on‐center, and<br />
maximum 6” vertically.<br />
Wrap corners minimum 16” (inside and outside<br />
corners.)<br />
WOOD STUDS: If anchoring to wood studs with<br />
screws, use washers, and ensure 1 inch of stud<br />
penetration. If anchoring with wide‐crown staples,<br />
ensure staples will penetrate 1 inch deep.<br />
STEEL STUDS: If anchoring to steel studs, ensure<br />
1/2 inch of steel penetration beyond inside surface.<br />
Mortar<br />
Type‐S (ASTM C270) should be used for all <strong>NSVI</strong> stone<br />
products unless drystacking (i.e. Ledgestone Collection).<br />
Consistency of mortar mix is important. If too wet<br />
or too dry, mortar will not adhere to stone or substrate<br />
surface properly. It should stick to the trowel.<br />
<strong>NSVI</strong> recommends adding acrylic bonding agent to<br />
Type‐S mortar. This enhances the flexural, adhesion,<br />
compressive, and tensile strength qualities.<br />
Thinset (ANSI 118.4) when drystacking <strong>NSVI</strong> stone<br />
(also see Pg. 6).<br />
Use medium‐grade ThinSet or<br />
Use high‐grade ThinSet when adhering stone to<br />
water features or when installing in a high moisture<br />
environment (i.e. pool, shower, bath, spa).<br />
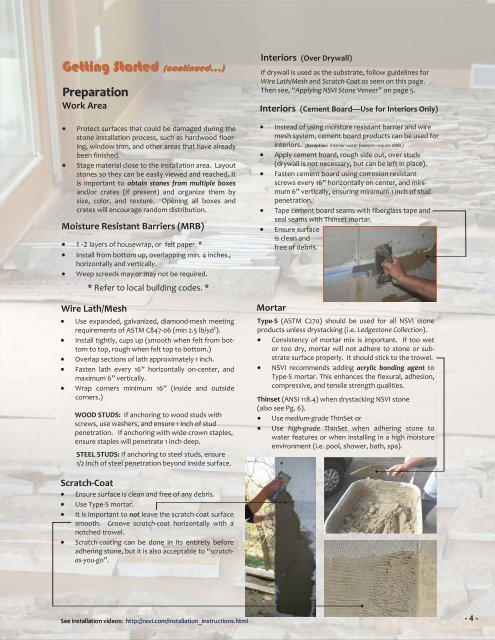
Scratch‐Coat<br />
<br />
<br />
<br />
<br />
Ensure surface is clean and free of any debris.<br />
Use Type‐S mortar.<br />
It is important to not leave the scratch‐coat surface<br />
smooth. Groove scratch‐coat horizontally with a<br />
notched trowel.<br />
Scratch‐coating can be done in its entirety before<br />
adhering stone, but it is also acceptable to “scratchas‐you‐go”.<br />
See installation videos: http://nsvi.com/installation_instructions.html<br />
- 4 -