marcy mwm 981 home gym - Impex Fitness
marcy mwm 981 home gym - Impex Fitness
marcy mwm 981 home gym - Impex Fitness

Create successful ePaper yourself
Turn your PDF publications into a flip-book with our unique Google optimized e-Paper software.
NOTE:<br />
Please read all instructions<br />
carefully before using this<br />
product<br />
Table of Contents<br />
Safety Notice<br />
Hardware Pack<br />
Assembly Instruction<br />
Parts List<br />
Resistance Chart<br />
Warranty<br />
Ordering Parts<br />
Model<br />
MWM-<strong>981</strong><br />
Retain This<br />
Manual for<br />
Reference<br />
100322<br />
OWNER'S<br />
MANUAL<br />
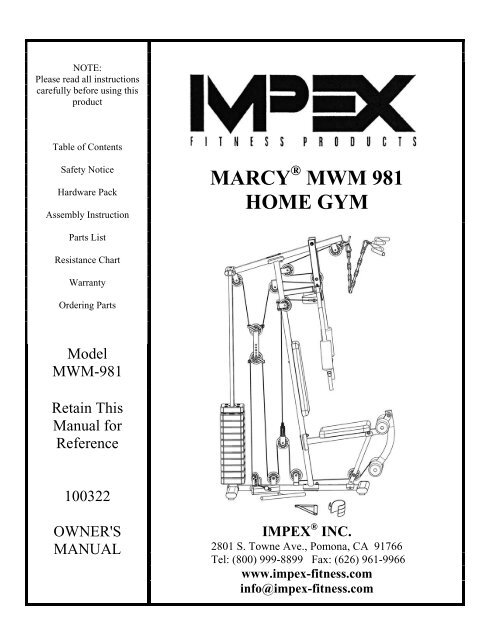
MARCY ® MWM <strong>981</strong><br />
HOME GYM<br />
IMPEX ® INC.<br />
2801 S. Towne Ave., Pomona, CA 91766<br />
Tel: (800) 999-8899 Fax: (626) 961-9966<br />
www.impex-fitness.com<br />
info@impex-fitness.com
TABLE OF CONTENTS<br />
BEFORE YOU BEGIN....................................................................................……….. 1<br />
IMPORTANT SAFETY NOTICES...................................................................……….. 2<br />
HARDWARE IDENTIFIER.....….....................................................................……….. 4<br />
ASSEMBLY INSTRUCTIONS.........................................................................……….. 6<br />
PARTS LIST…………………………………………………………………………………. 21<br />
RESISTANCE CHART………….......................................................................………..22<br />
WARRANTY.................................................................................................…………..23<br />
ORDERING PARTS.......................................................................................………… 23<br />
BEFORE YOU BEGIN<br />
Thank you for selecting the MARCY MWM-<strong>981</strong> HOME GYM by IMPEX ® INC.<br />
For your safety and benefit, read this manual carefully before using the<br />
machine. As a manufacturer, we are committed to provide you complete<br />
customer satisfaction. If you have any questions, or find there are missing or<br />
damaged parts, we guarantee you complete satisfaction through direct<br />
assistance from our factory. To avoid unnecessary delays, please call our<br />
TOLL-FREE customer service number. Our Customer Service Agents will<br />
provide immediate assistance to you.<br />
Toll-Free Customer Service Number<br />
1-800-999-8899<br />
Mon. – Fri. 9 a.m. – 5 p.m. PST<br />
www.impex-fitness.com<br />
info@impex-fitness.com<br />
1
IMPORTANT SAFETY NOTICE<br />
PRECAUTIONS<br />
This exercise machine is built for optimum safety. However, certain precautions apply<br />
whenever you operate a piece of exercise equipment. Be sure to read the entire manual<br />
before you assemble or operate your machine. In particular, note the following safety<br />
precautions:<br />
1. Keep children and pets away from the machine at all times. DO NOT<br />
leave children unattended in the same room with the machine.<br />
2. Only one person at a time should use the machine.<br />
3. If the user experiences dizziness, nausea, chest pain, or any other abnormal<br />
symptoms, STOP the workout at once. CONSULT A PHYSICIAN<br />
IMMEDIATELY.<br />
4. Position the machine on a clear, leveled surface. DO NOT use the machine<br />
near water or outdoors.<br />
5. Keep hands away from all moving parts.<br />
6. Always wear appropriate workout clothing when exercising. DO NOT wear<br />
robes or other clothing that could become caught in the machine. Running<br />
or aerobic shoes are also required when using the machine.<br />
7. Use the machine only for its intended use as described in this manual. DO<br />
NOT use attachments not recommended by the manufacturer.<br />
8. Do not place any sharp object around the machine.<br />
9. Disabled person should not use the machine without a qualified person or<br />
physician in attendance.<br />
10. Before using the machine to exercise, always do stretching exercises to<br />
properly warm up.<br />
11. Never operate the machine if the machine is not functioning properly.<br />
12. A spotter is recommended during exercise.<br />
13. Do not intend to insert weight selector pin while the weight stack or top plate<br />
is in elevated position.<br />
14. Be certain the weight Selector Pin is completely inserted.<br />
15. Never use dumbbells or other means to increase the weight resistance. Use only weight<br />
plates provided by manufacturer.<br />
16. This machine is designed and intended for <strong>home</strong> and consumer use only, not for<br />
commercial use.<br />
CARE AND MAINTENANCE<br />
1. Lubricate moving parts with WD-40 or light oil periodically.<br />
2. Inspect and tighten all parts before using the machine.<br />
3. The machine can be cleaned using a damp cloth and mild non-abrasive detergent.<br />
DO NOT use solvents.<br />
4. Maximum user’s weight: 300 lbs.<br />
WARNING: BEFORE BEGINNING ANY EXERCISE PROGRAM, CONSULT YOUR<br />
PHYSICIAN. THIS IS ESPECIALLY IMPORTANT FOR INDIVIDUALS OVER THE AGE<br />
OF 35 OR PERSONS WITH PRE-EXISTING HEALTH PROBLEMS. READ ALL<br />
INSTRUCTIONS BEFORE USING ANY FITNESS EQUIPMENT. IMPEX INC. ASSUMES<br />
NO RESPONSIBILITY FOR PERSONAL INJURY OR PROPERTY DAMAGE<br />
SUSTAINED BY OR THROUGH THE USE OF THIS PRODUCT.<br />
SAVE THESE INSTRUCTIONS.<br />
2
WARNING LABEL REPLACEMENT<br />
The warning labels shown here have been placed on the Rear Stabilizer and Upper Frame. If the labels are<br />
missing or illegible, please call customer service at 1-800-888-8899 for replacements. Apply the labels in the<br />
location shown.<br />
3
HARDWARE PACK<br />
NOTE: The following parts are not drawn to scale. Please use your own ruler to measure the size.<br />
4
HARDWARE PACK<br />
NOTE: The following parts are not drawn to scale. Please use your own ruler to measure the size.<br />
5
ASSEMBLY INSTRUCTION<br />
Tools Required for Assembling the Machine: Two Adjustable Wrenches and<br />
Allen Wrenches. NOTE: It is strongly recommended that this machine to be<br />
assembled by two or more people to avoid possible injury.<br />
STEP 1 (See Diagram 1)<br />
A.) Insert the two Guide Rods (#11) through Rubber Bumpers and into the holes on<br />
the Rear Stabilizer. Secure each Guide Rod with one M10 x 1” Allen Bolt (#64) and<br />
� ¾” Washer (#73) from the bottom. The Guide Rods has holes on the rod to<br />
lock the weight stack when not in use. The shorter end of the guide rod with<br />
the lock hole will need to be pointed downwards towards the Rear Stabilizer.<br />
B.) Do not tighten all Nuts and Bolts starting from this procedure until instructed<br />
to do so.<br />
C.) Attach two Rubber Bumpers (#28) onto the holes onto the Guide Rods.<br />
D.) Attach the Base Frame (#3) to the Rear Stabilizer. Secure them with two M10 x 4”<br />
Carriage Bolts (#59), one U-shaped Bracket (#20), two Ø ¾” Washers (#73), and<br />
two M10 Aircraft Nuts (#70).<br />
E.) Attach the Vertical Frame (#4) onto the Base Frame. Secure them with two M10 x<br />
2 3/8” Carriage Bolts (#58), one 1 ¾” x 4 ¾” Bracket (#18), two Ø ¾” Washers<br />
(#73), and two M10 Aircraft Nuts (#70).<br />
F.) Slide 11 Weight Plates (#50) onto the Guide Rods. Make sure the deep grooves<br />
on the Weight Plates all face the back of the machine and downward. Align<br />
the holes on the Weight Plates. Insert a Selector Rod (#21) through the center<br />
hole. Slide the Selector Stem (#51) onto the Guide Rods.<br />
G.) Use a Weight Selector Pin (#44) to select the number of Weight Plates to exercise.<br />
Attach the ring on Weight Selector Pin’s cable onto the Selector Rod. Note: Each<br />
Weight Plate weights approximately 10 lbs. Please refer to the Weight<br />
Resistance Chart in page 25.<br />
H.) Attach the Seat Support (#5) to the Vertical Frame. Secure it with two M10 x 2 3/8”<br />
Carriage Bolts (#58), one 1 ¾” x 4 ¾” Bracket (#18), two Ø ¾” Washers (#73), and<br />
two M10 Aircraft Nuts (#70).<br />
I.) Attach the Vertical Seat Support (#6) to Seat Support and Base Frame. Secure<br />
each end of Vertical Seat Support with two M10 x 1” Allen Bolts (#64) and two Ø<br />
¾” Washers (#73).<br />
6
7<br />
DIAGRAM 1
STEP 2 (See Diagram 2)<br />
A.) Attach the holes on the Upper Frame (#1) onto the Guide Rods (#11). Place the Upper<br />
Frame onto the Vertical Frame (#4).<br />
B.) Secure the Upper Frame to the Guide Rods with two M10 x 1” Allen Bolts (#64) and Ø ¾”<br />
Washers (#73).<br />
C.) Secure the Upper Frame to the Vertical Frame with two M10 x 2 3/8” Carriage Bolts (#58),<br />
one 1 ¾” x 4 ¾” Bracket (#18), two � ¾” Washers (#73), and two M10 Aircraft Nuts (#70).<br />
D.) Securely tighten all Nuts and Bolts previously installed in Step-1 and Step-2.<br />
E.) Attach the Leg Developer (#7) to the open bracket on Seat Support (#5). Secure it with one<br />
M12 x 3 1/8” Allen Bolt (#67), two � 1” Washers (#74), and one M10 Aircraft Nut (#71).<br />
F.) Attach Seat Pad (#23) to Seat Support. Secure it with four M8 x 5/8” Allen Bolts (#60) and<br />
four Ø 5/8” Washers (#72).<br />
G.) Attach Backrest Board (#24) to Vertical Frame. Secure it with two M8 x 2 1/8” Allen Bolts<br />
(#63) and two Ø 5/8” Washers (#72).<br />
8
9<br />
DIAGRAM 2
STEP 3 (See Diagram 3)<br />
A.) Attach the Front Press Base (#8) to the Upper Frame (#1). Secure it with one 8 ½” Front Press<br />
Axle (#19), two Ø 1” x Ø 5/8” Washers (#75), and two M10 Aircraft Nuts (#70). Do not over<br />
tighten the Nuts.<br />
B.) Insert the axle on the Left Butterfly (#9) through the open hole on Front Press Base from bottom.<br />
Secure it with one Ø 1” x Ø 5/8” Washers (#75) and one M10 Aircraft Nuts (#70). Do not over<br />
tighten the Nut. Push one large Foam Roll (#27) onto the Left Butterfly.<br />
C.) Repeat Procedure B to install the Right Butterfly (#10).<br />
D.) Insert the two Butterfly Lock Pins (#45) through the holes on Front Press Base into holes on<br />
Butterfly to lock the Butterflies for Front Press exercise.<br />
E.) Pull out the Butterfly Lock Pins and insert into the other open holes on the Front Press Base for<br />
Butterfly exercise.<br />
10
11<br />
DIAGRAM 3
STEP 4 (See Diagram 4)<br />
A.) Insert the Front Press Handle (#12) into the hole on Right Butterfly (#10) and Left<br />
Butterfly (#9). Secure each Handle with one M8 x ¾” Allen Bolt (#61) and one Ø 5/8”<br />
Curved Washer (#76).<br />
B.) Insert 15 ¾” Long Foam Tube (#31) halfway through the hole on Seat Support (#5).<br />
Insert 15” Short Foam Tube (#22) halfway through the hole on Leg Developer (#7).<br />
C.) Push four Foam Rolls (#26) onto the Tubes from both ends of each Tube.<br />
12<br />
DIAGRAM 4
STEP 5 (See Diagram 5)<br />
A.) Attach one Swivel Pulley Bracket (#17) to the open bracket on the back of Vertical<br />
Frame (#4). Secure it with one M10 x 2 ½” Allen Bolt (#66), two Ø ¾” Washers (#73),<br />
and one M10 Aircraft Nut (#70). Do not over tighten the Nut and Bolt. Make sure the<br />
Swivel Pulley Bracket can swivel freely.<br />
B.) Repeat Procedure A to install the other Swivel Pulley Bracket on the other side.<br />
13<br />
DIAGRAM 5
STEP 6 (See Diagram 6 & Cable Loop Diagram)<br />
A.) Attach the 126” Upper Cable (#32) to the front open bracket under the Upper<br />
Frame (#1).<br />
B.) Attach a Pulley (#35) to the bracket. Secure it with one M10 x 1 ¾” Allen Bolt<br />
(#62), two Ø ¾” Washers (#73), and one M10 Aircraft Nut (#70).<br />
C.) Draw the Cable towards the back of the machine to the open bracket on Vertical<br />
Frame (#4). Repeat B to install a Pulley.<br />
D.) Draw the Cable around the Pulley then pull back to the opening on the Front Press<br />
Base (#8).<br />
E.) Attach a Pulley to the opening. Secure it with one M10 x 7 ½” Allen Bolt (#68), two<br />
Ø ¾” Washers (#73), and one M10 Aircraft Nut (#70).<br />
F.) Draw the Cable around the Pulley then through the opening on the Vertical Frame<br />
(#2) to the open bracket on the back of Vertical Frame. Repeat Procedure B to<br />
install a Pulley.<br />
G.) Draw the Cable over the Pulley and pull the Cable downwards. Attach a Pulley to<br />
the upper hole on the two Double Floating Pulley Brackets (#13). Secure it with<br />
one M10 x 1 ¾” Allen Bolt (#62), two Cable Retainers (#29), and one M10 Aircraft<br />
Nut (#70). Let the Bracket hanging for now.<br />
H.) Draw the Cable around the Pulley then pull upwards the open bracket under the<br />
Upper Frame. Repeat Procedure B to install a Pulley.<br />
I.) Draw the Cable downwards between the two Guide Rods (#11) to the Selector<br />
Rod (#21). Securely thread the bolt on the end of the Cable into the Selector Rod.<br />
14
15<br />
DIAGRAM 6
STEP 7 (See Diagram 7& Cable Loop Diagram)<br />
A.) Hook one end of the 98” Butterfly Cable (#34) to Right Butterfly (#10).<br />
B.) Draw the Cable towards the right open Swivel Pulley Bracket (#17).<br />
C.) Attach a Pulley (#35) to the bracket. Secure it with one M10 x 1 ¾” Allen Bolt (#62), two � ¾”<br />
Washers (#73), and one M10 Aircraft Nut (#70).<br />
D.) Draw the Cable over the Pulley then pull downward. Attach the Cable to an Angled Double<br />
Floating Pulley Bracket (#16). Repeat Procedure C to install a Pulley. Let the Bracket hang for<br />
now.<br />
E.) Draw the Cable around the Pulley and pull upward to the left open Swivel Pulley Bracket (#17).<br />
Repeat C to install a Pulley.<br />
F.) Draw the Cable over the Pulley and hook the end to the Left Butterfly (#9).<br />
DIAGRAM 7<br />
16
STEP 8 (See Diagram 8 & Cable Loop Diagram)<br />
A.) Attach the 164” Lower Cable (#33) to the open bracket on the Base Frame (#3).<br />
B.) Attach a Pulley (#35) to the bracket. Secure it with one M10 x 1 ¾” Allen Bolt<br />
(#62), two � ¾” Washers (#73), and one M10 Aircraft Nut (#70).<br />
C.) Draw the Cable underneath the Pulley then pull upward towards the Double<br />
Floating Pulley Brackets (#13) installed in Step-6.<br />
D.) Attach a Pulley to the selected hole on the Brackets. Secure it with one M10 x 1<br />
¾” Allen Bolt (#62), two Cable Retainers (#29), and one M10 Aircraft Nut (#70).<br />
E.) Draw the Cable around the Pulley then downward to an open bracket on Base<br />
Frame. Repeat B to install a Pulley.<br />
F.) Draw the Cable around the Pulley and pull the Cable upward to the Angled<br />
Double Floating Pulley Brackets (#16) previously installed in Step-7. Repeat B to<br />
install a Pulley.<br />
G.) Draw the Cable around the Pulley and downward to the open bracket on Base<br />
Frame. Repeat Procedure B to install another Pulley.<br />
H.) Draw the Cable underneath the Pulley through the opening on Vertical Frame<br />
(#4) to the opening on Vertical Seat Support (#6). Attach a Pulley to the opening.<br />
Secure it with one M10 x 2 ½” Allen Bolt (#66), two Ø 1” x Ø 5/8” Pulley Bushings<br />
(#57), and one M10 Aircraft Nut (#70).<br />
I.) Draw the Cable underneath the Pulley to the bracket on the Leg Developer (#7).<br />
Secure the end of Cable to the bracket with one M10 x 1” Allen Bolt (#64), two Ø<br />
¾” Washers (#73), and one M10 Aircraft Nut (#70).<br />
J.) If the whole Cable system is too loose, adjust the tension of the cable system by<br />
moving up or down the lower pulley on the Double Floating Pulley Bracket.<br />
Moving up the pulley up will increase the tension in the pulley system;<br />
conversely, lowering the pulley will decrease the tension.<br />
17
18<br />
DIAGRAM 8
STEP 9 (See Diagram 9)<br />
A.) Attach Lat Bar (#14) to the Upper Cable (#32) with two Hooks (#53) and one 15-link Chain<br />
(#54) when doing Lat Pull exercises.<br />
B.) Attach Shiver Bar (#15) to the Lower Cable (#33) use the two Hooks (#53) and the 15-link<br />
Chain (#33) from Lat Bar when doing Arm Curl exercises<br />
C.) Replace Shiver Bar with the Ankle Strap (#52) or Single Handle (#78) to the Lower Cable for<br />
various exercises.<br />
D.) Insert a 2” Lock Pin (#46) through the hole on Guide Rod and lock with a Combination Lock<br />
(#47) to prevent any un-authorized usage of the machine.<br />
E.) Unlock the Lock and attach it to Selector Rod before using the machine.<br />
DIAGRAM 9<br />
19
Set up the Lock Combination<br />
A.) The combination is pre-set to 0-0-0 by the factory.<br />
B.) Turn the dials to 0-0-0 and aligned to the Combination Set Up Line.<br />
C.) Pull out the shackle and turn 180 0.<br />
D.) Press down on the shackle.<br />
E.) Turn the dials (aligned to the Combination Set Up Line) to your desired combination.<br />
F.) Pull out the shackle and twist back to normal position and the combination are set.<br />
G.) Repeat Procedure C to F to re-set the combination.<br />
20
PARTS LIST<br />
KEY NO. DESCRIPTION Q’ty<br />
1 Upper Frame 1 51 Selector Stem 1<br />
2 Rear Stabilizer 1 52 Ankle Strap 1<br />
3 Base Frame 1 53 Hook 2<br />
4 Vertical Frame 1 54 15-link Chain 1<br />
5 Seat Support 1 55 2” x 2” End Cap 2<br />
6 Vertical Seat Support 1 56 Ø 1” x 3/8” Bushing 2<br />
7 Leg Developer 1 57 Ø 1” x Ø 5/8” Pulley Bushing 2<br />
8 Front Press Base 1 58 M10 x 2 3/8” Carriage Bolt 6<br />
9 Left Butterfly 1 59 M10 x 4” Carriage Bolt 2<br />
10 Right Butterfly 1 60 M8 x 5/8” Allen Bolt 4<br />
11 Guide Rod 2 61 M8 x ¾” Allen Bolt 2<br />
12 Front Press Handle 2 62 M10 x 1 ¾” Allen Bolt 11<br />
13 Double Floating Pulley Bracket 2 63 M8 x 2 1/8” Allen Bolt 2<br />
14 Lat Bar 1 64 M10 x 1” Allen Bolt 9<br />
15 Shiver Bar 1 65 M10 x 2” Allen Bolt 2<br />
16 Angled Double Floating Pulley Bracket 1 66 M10 x 2 ½” Allen Bolt 3<br />
17 Swivel Pulley Bracket 2 67 M12 x 3 1/8” Allen Bolt 1<br />
18 1 ¾” x 4 ¾” Bracket 3 68 M10 x 7 ½” Allen Bolt 1<br />
19 8 ½” Front Press Axle 1 69 M6 x 5/8” Philips Screw 2<br />
20 U-shaped Bracket 1 70 M10 Aircraft Nut 30<br />
21 Selector Rod 1 71 M12 Aircraft Nut 1<br />
22 15” Short Foam Tube 1 72 Ø 5/8” Washer 6<br />
23 Seat Pad 1 73 Ø ¾” Washer 46<br />
24 Backrest Board 1 74 Ø 1” Washer 2<br />
25 Ø 1 ½” Small Rubber Bumper 2 75 Ø 1” x Ø 5/8” Washer 4<br />
26 Foam Roll 4 76 Ø 5/8” Curved Washer 2<br />
27 Butterfly Large Foam Roll 2 77 ST5 Screw 2<br />
28 Rubber Bumper 2 78 Single Handle 1<br />
29 Cable Retainer 4<br />
30 Cable Retainer Bushing 4<br />
31 15 ¾” Long Foam Tube 1<br />
32 126” Upper Cable 1<br />
33 164” Lower Cable 1<br />
34 98” Butterfly Cable 1<br />
35 Pulley 15<br />
36 Ø 1” Bushing 6<br />
37 1 5/8” x 3 1/8” End Cap 3<br />
38 1 1/8” x 2 3/8” End Cap 4<br />
39 1” x 2” End Cap 2<br />
40 1 5/8” x 3 1/8” Base Frame End Cap 4<br />
41 Ø 2” End Cap 2<br />
42 Ø 1” End Cap 4<br />
43 Ø 1” Corn-shaped End Cap 1<br />
44 Weight Selector Pin 1<br />
45 Butterfly Lock Pin 2<br />
46 2” Lock Pin 1<br />
47 Combination Lock 1<br />
48 4 ¾” Grip 6<br />
49 6” Lat Bar Grip 2<br />
50 Weight Plate 11<br />
21
MWM<strong>981</strong> WEIGHT RESISTANCE CHART<br />
Weight Plate Leg Front Butterfly Lat Low<br />
Developer Press<br />
Pull Pulley<br />
1 30 31 15 30 30<br />
2 40 44 20 40 40<br />
3 50 57 25 50 50<br />
4 60 70 30 60 60<br />
5 70 83 35 70 70<br />
6 80 96 40 80 80<br />
7 90 109 45 90 90<br />
8 100 122 50 100 100<br />
9 101 135 55 110 110<br />
10 102 148 60 120 120<br />
11 103 161 65 130 130<br />
Note: Each plate weights 10 lbs.<br />
Numbers are approximate. Actual weights may vary.<br />
Values for Butterfly are for each arm.<br />
22
IMPEX ® INC.<br />
LIMITED WARRANTY<br />
IMPEX Inc. ("IMPEX ® ") warrants this product to be free from defects in workmanship and material, under<br />
normal use and service conditions, for a period of two years on the Frame from the date of purchase. This<br />
warranty extends only to the original purchaser. IMPEX's obligation under this Warranty is limited to<br />
replacing or repairing, at IMPEX's option.<br />
All returns must be pre-authorized by IMPEX. Pre-authorization may be obtained by calling IMPEX<br />
Customer Service Department at 1-800-999-8899. All freights on products returned to IMPEX must be<br />
prepaid by the customer. This warranty does not extend to any product or damage to a product caused by<br />
or attributable to freight damage, abuse, misuse, improper or abnormal usage or repairs not provided by an<br />
IMPEX authorized service center or for products used for commercial or rental purposes. No other<br />
warranty beyond that specifically set forth above is authorized by IMPEX.<br />
IMPEX is not responsible or liable for indirect, special or consequential damages arising out of or in<br />
connection with the use or performance of the product or other damages with respect to any economic loss,<br />
loss of property, loss of revenues or profits, loss of enjoyments or use, costs of removal, installation or other<br />
consequential damages or whatsoever natures. Some states do not allow the exclusion or limitation of<br />
incidental or consequential damages. Accordingly, the above limitation may not apply to you.<br />
The warranty extended hereunder is in lieu of any and all other warranties and any implied warranties of<br />
merchantability or fitness for a particular purpose is limited in its scope and duration to the terms set forth<br />
herein. Some states do not allow limitations on how long an implied warranty lasts. Accordingly, the<br />
above limitation may not apply to you.<br />
This warranty gives you specific legal right. You may also have other rights which vary from state to state.<br />
Register on-line at www.impex-fitness.com<br />
ORDERING REPLACEMENT PARTS<br />
IMPEX ® INC.<br />
2801 S. Towne Ave.<br />
Pomona, CA 91766<br />
Replacement parts can be ordered by calling our Customer Service Department toll-free at 1-800-999-8899<br />
during our regular business hours: Monday through Friday, 9 am until 5 pm Pacific standard time.<br />
info@impex-fitness.com<br />
When ordering replacement parts, always give the following information.<br />
1. Model<br />
2. Description of Parts<br />
3. Part Number<br />
4. Date of Purchase<br />
23