WINTER COVER WARRANTY - Bel-Aqua Pool Supply, Inc.
WINTER COVER WARRANTY - Bel-Aqua Pool Supply, Inc.
WINTER COVER WARRANTY - Bel-Aqua Pool Supply, Inc.

You also want an ePaper? Increase the reach of your titles
YUMPU automatically turns print PDFs into web optimized ePapers that Google loves.
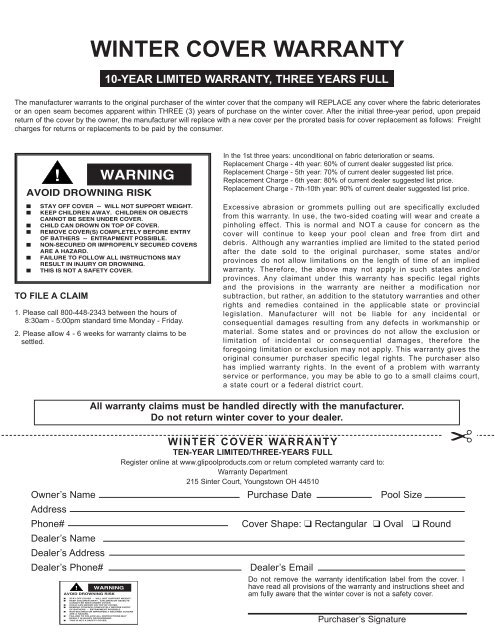
<strong>WINTER</strong> <strong>COVER</strong> <strong>WARRANTY</strong><br />
10-YEAR LIMITED <strong>WARRANTY</strong>, THREE YEARS FULL<br />
The manufacturer warrants to the original purchaser of the winter cover that the company will REPLACE any cover where the fabric deteriorates<br />
or an open seam becomes apparent within THREE (3) years of purchase on the winter cover. After the initial three-year period, upon prepaid<br />
return of the cover by the owner, the manufacturer will replace with a new cover per the prorated basis for cover replacement as follows: Freight<br />
charges for returns or replacements to be paid by the consumer.<br />
In the 1st three years: unconditional on fabric deterioration or seams.<br />
Replacement Charge - 4th year: 60% of current dealer suggested list price.<br />
Replacement Charge - 5th year: 70% of current dealer suggested list price.<br />
Replacement Charge - 6th year: 80% of current dealer suggested list price.<br />
Replacement Charge - 7th-10th year: 90% of current dealer suggested list price.<br />
TO FILE A CLAIM<br />
1. Please call 800-448-2343 between the hours of<br />
8:30am - 5:00pm standard time Monday - Friday.<br />
2. Please allow 4 - 6 weeks for warranty claims to be<br />
settled.<br />
Excessive abrasion or grommets pulling out are specifically excluded<br />
from this warranty. In use, the two-sided coating will wear and create a<br />
pinholing effect. This is normal and NOT a cause for concern as the<br />
cover will continue to keep your pool clean and free from dirt and<br />
debris. Although any warranties implied are limited to the stated period<br />
after the date sold to the original purchaser, some states and/or<br />
provinces do not allow limitations on the length of time of an implied<br />
warranty. Therefore, the above may not apply in such states and/or<br />
provinces. Any claimant under this warranty has specific legal rights<br />
and the provisions in the warranty are neither a modification nor<br />
subtraction, but rather, an addition to the statutory warranties and other<br />
rights and remedies contained in the applicable state or provincial<br />
legislation. Manufacturer will not be liable for any incidental or<br />
consequential damages resulting from any defects in workmanship or<br />
material. Some states and or provinces do not allow the exclusion or<br />
limitation of incidental or consequential damages, therefore the<br />
foregoing limitation or exclusion may not apply. This warranty gives the<br />
original consumer purchaser specific legal rights. The purchaser also<br />
has implied warranty rights. In the event of a problem with warranty<br />
service or performance, you may be able to go to a small claims court,<br />
a state court or a federal district court.<br />
All warranty claims must be handled directly with the manufacturer.<br />
Do not return winter cover to your dealer.<br />
<strong>WINTER</strong> <strong>COVER</strong> <strong>WARRANTY</strong><br />
TEN-YEAR LIMITED/THREE-YEARS FULL<br />
Register online at www.glipoolproducts.com or return completed warranty card to:<br />
Warranty Department<br />
215 Sinter Court, Youngstown OH 44510<br />
Owner’s Name Purchase Date <strong>Pool</strong> Size<br />
Address<br />
Phone# Cover Shape: ❑ Rectangular ❑ Oval ❑ Round<br />
Dealer’s Name<br />
Dealer’s Address<br />
Dealer’s Phone#<br />
Dealer’s Email<br />
Do not remove the warranty identification label from the cover. I<br />
have read all provisions of the warranty and instructions sheet and<br />
am fully aware that the winter cover is not a safety cover.<br />
Purchaser’s Signature
OWNER’S INSTRUCTIONS / SOLID <strong>WINTER</strong> <strong>COVER</strong><br />
<strong>COVER</strong> PERFORMANCE<br />
The Solid Winter Cover is manufactured from a special fabric developed<br />
exclusively for GLI. The material development specification required the<br />
fabric to withstand the environmental extremes of cold and heat. The<br />
finished product had to withstand harsh Canadian winters as well as the<br />
intense sun conditions found at an independent test center in Arizona.<br />
The Winter Cover is lightweight for ease of handling, yet has the strength<br />
and durability to merit an extended warranty. Years of trouble-free use in<br />
the marketplace has confirmed the success of this product.<br />
The Solid Winter cover is designed to:<br />
1. Keep the dirt and debris out of your pool during the non-swimming<br />
months when your pool is closed. When combined with a proper<br />
winterizing program, the cover is especially effective.<br />
2. Protect your investment by sheltering your pool from the wear and<br />
tear of winter weather.<br />
In performing its job, the winter cover will be subjected to considerable<br />
abuse. It will become dirty, grimy and some calcified matter may form on<br />
the cover. This appearance does not mean that your cover is of inferior<br />
material or construction. To the contrary, it indicates the cover is doing its<br />
job of “saving your pool” from the destructive forces of nature.<br />
<strong>WINTER</strong> <strong>COVER</strong> INSTALLATION - IN GROUND<br />
❑ The cover rests upon and is supported by the pool water. Therefore,<br />
prior to cover installation, it is important to make sure the pool is not<br />
leaking.<br />
❑ Follow the pool manufacturer’s/builder’s winterizing instructions for<br />
your pool and accessories.<br />
❑ Consult with your pool dealer on the appropriate winterizing<br />
chemicals to be used. The pool must be chlorinated until<br />
freeze-up to prevent algae growth.<br />
❑ Although your winter cover is made of a tough material, it is required<br />
that you pad sharp corners, abrasive decking, protrusions, rough<br />
edges of the coping, etc. with old towels, foam remnants or<br />
corrugated cardboard, etc.<br />
❑ Lower the water level in your pool below the skimmer<br />
(approximately 18 inches down from the coping) to prevent freezing.<br />
❑ Lay out the cover on the ground, black side down. Then spread it<br />
across the pool.<br />
❑ For covers with straps, insert the unfilled vinyl water tubes through<br />
the straps around the complete perimeter of the pool. It is important<br />
to lay the water tubes end to end to prevent the wind from getting<br />
under the cover. A billowing wind condition can cause serious<br />
damage to your cover. If the tubes are to be subjected to freezing<br />
temperatures, they should be half filled, allowing for ice expansion<br />
to prevent damage.<br />
❑ When the cover is installed on the pool, it is normal for a small<br />
amount of water to seep onto the surface of the cover.<br />
<strong>WINTER</strong> <strong>COVER</strong> INSTALLATION - ABOVE GROUND<br />
❑<br />
❑<br />
❑<br />
❑<br />
❑<br />
❑<br />
❑<br />
❑<br />
❑<br />
The cover rests upon and is supported by the pool water. Therefore, prior to<br />
cover installation, it is important to make sure the pool is not leaking.<br />
Follow the pool manufacturer’s/builder’s winterizing instructions for your pool<br />
and accessories.<br />
Consult with your pool dealer on the appropriate winterizing chemicals to be<br />
used. The pool must be chlorinated until freeze-up to prevent algae growth.<br />
Although your winter cover is made of tough material, it is required that you<br />
pad sharp corners, abrasive decking, protrusions, rough edges of the coping,<br />
etc. with old towels, foam remnants, corrugated cardboard, etc. Also, place<br />
padding underneath the winch (non-deck pools only).<br />
Lower the water level in your pool below the skimmer and return lines<br />
(approximately 18 inches down from the coping) to prevent freezing.<br />
Weave cable through grommets all the way around the cover. Insert one end<br />
of the cable through the hole at the end of the winch and into spindle. Insert<br />
the other end of the cable through the hole on the opposite side of the winch<br />
and into the same spindle. Pull both ends of the cable through as far as<br />
possible. Start turning winch to tighten the cover. If material bunches or<br />
gathers, simply walk around the pool and position neatly.<br />
When the cover is installed on the pool, it is normal for a small amount of<br />
water to seep onto the surface of the cover.<br />
For deck pools, place the cover over the pool with the black side down.<br />
Either weave the cable through the grommet and between the pool deck<br />
stanchions (posts) or run short pieces of cable from the grommet to the<br />
individual stanchions.<br />
It is important to tie down the cover properly to assure that the cover is not<br />
subjected to wind damage.<br />
<strong>WINTER</strong> <strong>COVER</strong> CARE AND MAINTENANCE<br />
Proper care in handling, storing and maintaining your cover will prolong its useful<br />
life.<br />
1. DO NOT use abrasive materials such as concrete blocks, bricks and<br />
boards to hold a cover down.<br />
2. DO NOT remove leaves or debris from the cover with a sharp object such as<br />
a rake.<br />
3. DO NOT install a cover without padding sharp corners, decking protrusions,<br />
rough edges of the coping, etc.<br />
4. DO NOT store your cover without cleaning it with water (mild detergent if<br />
necessary) and soft brush prior to drying thoroughly to prevent mildew. If<br />
excess humidity or moisture is a storage concern, the cover can be dusted<br />
with talcum powder.<br />
5. DO NOT allow water, snow or ice to accumulate on top of your cover.<br />
6. DO NOT remove your cover from the pool without first pumping all the<br />
water off the cover.<br />
Affix<br />
Postage<br />
Warranty Department<br />
215 Sinter Court<br />
Youngstown, OH 44510