You also want an ePaper? Increase the reach of your titles
YUMPU automatically turns print PDFs into web optimized ePapers that Google loves.
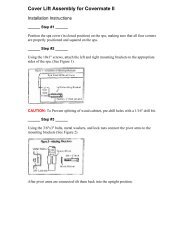
<strong>Cover</strong> <strong>Lift</strong> <strong>Assembly</strong> <strong>for</strong> <strong>Cover</strong>mate <strong>III</strong><br />
Installation Instructions<br />
______ Step #1 ______<br />
Position the spa cover (in closed position) on the spa, making sure that all four corners<br />
are properly positioned and square on the spa.<br />
______ Step #2 ______<br />
Using the 10x1'' screws, attach the left and right mounting brackets to the appropriate<br />
sides of the spa. (See Figure 1)<br />
NOTE: Brackets can be mounted directly to the top rail of the spa or to the side wall of<br />
the spa.<br />
CAUTION: To prevent splitting of wood cabinet, pre-drill holes with a 1/16'' drill bit.<br />
______ Step #3 ______<br />
Starting with the left side first insert the short end of the left cover support arm into the<br />
left pivot arm.(See Figure 2 to determine left support arm and left pivot arm.)<br />
Next lay the long end of the cover support arm on the top of the cover laying parallel to<br />
the spa cover hinge about ½'' away. Insert the U-shaped retainer clip in between the two<br />
cover halves with the horizontal part touching the underside of the cover hinge.
______ Step #4 ______<br />
Connect the left pivot arm to the left mounting bracket. (See Figure 3)<br />
Be sure to run the bolt head as pictured. Lightly tighten the nut and bolt combination so<br />
that the pivot arm moves freely.<br />
NOTE: Do not insert self-tapping screws at this time.<br />
______ Step #5 ______<br />
With the left support arm lying on the cover, slide the straight coupler piece over the long<br />
end of the left cover support arm.<br />
Note:<br />
______ Step #6 ______<br />
Repeat step Three <strong>for</strong> the right side cover support arm and pivot arm and insert the long<br />
end of the cover support arm into the coupler piece.<br />
______ Step #7 ______<br />
Please attach right side pivot arm to the right side pivot arm to the right side mounting<br />
bracket.<br />
______ Step #8 ______<br />
Adjust the coupler piece and support arms so that the coupler piece is lying parallel to the<br />
spa covers hinge about ½'' away, and centered. Be sure that the retainer clips are in their<br />
proper position. Using the #10 self-tapping screws fasten support arms to pivot arms and<br />
the center coupler piece to the support arm. (See Figure 4)<br />
NOTE: Be sure to rotate the coupler piece so that the inserted screws are at the horizontal<br />
angle with the heads facing the back of the spa.
______ Step #9 ______<br />
Using the 3/8'' bolt washers and lock nut attach the wind lock bar to the inside of the left<br />
pivot arm. (See Figure 5)<br />
Be sure to run the blot head the same direction as the pivot arm bolt head.<br />
NOTE: Fully tighten the locknut on the wind lock bar and then loosen it so that the wind<br />
lock bar swings freely when in use.<br />
______ Step #10 ______<br />
Using the <strong>Cover</strong>mate, lift the cover off the spa and place in the upright position. Snap the<br />
gas shocks on to the ball studs.<br />
NOTE: Be sure to install gas shocks with the black body on top. (See Figure 6 <strong>for</strong><br />
completed look.)<br />
______ Step #11 ______<br />
Slip the black hand grips to the edge of the spa cover and snap the black plastic screw<br />
head cover on and finally you are done and can enjoy your spa.<br />
Operation of the <strong>Cover</strong>mate <strong>III</strong><br />
1) Fold the first half of the cover off the spa. Gripping the rubber grip, motion the spa<br />
cover into it’s vertical upright position.<br />
2) When closing spa cover, unlock wind lock bar by lifting up on the bar and pulling<br />
<strong>Cover</strong>mate down.