Installation Manual For Helix HT Series Wind Turbines - Current ...
Installation Manual For Helix HT Series Wind Turbines - Current ...
Installation Manual For Helix HT Series Wind Turbines - Current ...
You also want an ePaper? Increase the reach of your titles
YUMPU automatically turns print PDFs into web optimized ePapers that Google loves.
Please read this manual carefully<br />
Before installation and retain for future reference<br />
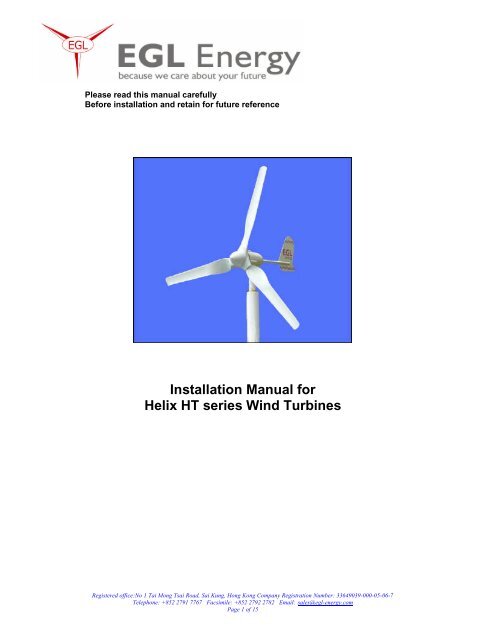
<strong>Installation</strong> <strong>Manual</strong> for<br />
<strong>Helix</strong> <strong>HT</strong> series <strong>Wind</strong> <strong>Turbines</strong><br />
Registered office:No 1 Tai Mong Tsai Road, Sai Kung, Hong Kong Company Registration Number: 33649039-000-05-06-7<br />
Telephone: +852 2791 7767 Facsimile: +852 2792 2782 Email: sales@egl-energy.com<br />
Page 1 of 15
Contents<br />
Introduction Page 4<br />
Characteristics Page 4<br />
Scope of use Page 4<br />
Prior to <strong>Installation</strong> Page 5<br />
Site Selection Page 5<br />
Preparation for <strong>Installation</strong> Page 7<br />
<strong>Wind</strong> Turbine Mounting Page 8<br />
Towers and mounting structures Page 8<br />
Recommended Cable Sizes Page 9<br />
Assembling Rotor Blades Page 10<br />
<strong>Wind</strong> Turbine Charge Controller Page 12<br />
Safety Page 15<br />
Maintenance Page 15<br />
Registered office:No 1 Tai Mong Tsai Road, Sai Kung, Hong Kong Company Registration Number: 33649039-000-05-06-7<br />
Telephone: +852 2791 7767 Facsimile: +852 2792 2782 Email: sales@egl-energy.com
IMPORTANT NOTE !<br />
SAFETY WARNING<br />
The <strong>Helix</strong> range of wind turbines can generate very high voltages and currents and<br />
can cause serious personal injury or death if not handled properly.<br />
When installing a HELIX wind Turbine please seek the assistance of a qualified<br />
electrical engineer if in any doubt.<br />
Registered office:No 1 Tai Mong Tsai Road, Sai Kung, Hong Kong Company Registration Number: 33649039-000-05-06-7<br />
Telephone: +852 2791 7767 Facsimile: +852 2792 2782 Email: sales@egl-energy.com<br />
Page 3 of 15
INTRODUCTION<br />
Congratulations on your acquisition of your <strong>Helix</strong> <strong>HT</strong> series wind turbine which should<br />
give you trouble free service with minimal maintenance or intervention.<br />
The wind turbine is a means to harness the power in the natural wind. Quite simply,<br />
the vanes have been carefully designed to capture the power in the wind and turn the<br />
turbine to generate useful electricity that can be stored in batteries for later use.<br />
The wind turbine generates a three phase AC output and is fed to a wind turbine<br />
charge controller which rectifies the AC to DC and intelligently charges up the<br />
storage batteries in the designed system.<br />
The stored DC power can then be used to power DC loads or converted to 110V or<br />
220V AC via an appropriate inverter to power AC loads.<br />
Characteristics of EGL <strong>Helix</strong> wind turbines<br />
• <strong>Helix</strong> range of wind turbines have low start upwind speeds with little flutter in<br />
operation giving a stable product and low noise. They have been designed for<br />
ease of installation and require low maintenance.<br />
• Inclusion of special internal bearings and electrical bush connections to<br />
eliminate any cable twists when rotating on its vertical axis.<br />
• <strong>Wind</strong> turbine blades optimized and aerodynamically designed then<br />
manufactured by precise injection molding process with a special material<br />
giving a high energy coefficient ratio in terms of size of blades, materials used<br />
and wind swept area.<br />
• Optimized matching of blade size to generator design to obtain best drag<br />
torque characteristics.<br />
• Magnetic brake incorporated in the controller.<br />
• Intelligent controller to guard against overcharge and over-discharge<br />
situations to protect batteries.<br />
• Controller incorporates LED indicators to indicate status of various<br />
parameters of the wind turbine system.<br />
Scope of use<br />
The <strong>Helix</strong> range of wind turbines are designed for standalone applications where<br />
charge is to be stored in batteries and power loads in remote and rural areas where<br />
mains electricity is not available or not economically viable to extend to that area.<br />
It is not suitable for grid tie applications.<br />
Registered office:No 1 Tai Mong Tsai Road, Sai Kung, Hong Kong Company Registration Number: 33649039-000-05-06-7<br />
Telephone: +852 2791 7767 Facsimile: +852 2792 2782 Email: sales@egl-energy.com<br />
Page 4 of 15
<strong>Installation</strong><br />
Note: The installation guide show here is for the model <strong>Helix</strong> <strong>HT</strong>-400.<br />
<strong>Installation</strong> of other <strong>Helix</strong> models should be made with these notes as<br />
reference.<br />
Prior to <strong>Installation</strong><br />
• If possible install the wind turbine on a windless day. Work in daylight. When<br />
mounting the wind turbine immobilise the rotor by tying a blade with strong<br />
rope to a fixing to prevent blades from turning during installation. Release the<br />
blades when installation of controller is complete and safe to put the wind<br />
turbine into proper operation.<br />
• We must emphasize that the wind turbine generates serious levels of<br />
electrical power and serious injury and death can result through improper<br />
handling and use.<br />
• Seek the services of a qualified electrician or electrical engineer.<br />
• Ensure kit has been stored properly and has not been exposed to rain during<br />
storage or been saturated in water. Check no liquids have been spilt on the<br />
kit. Do not store near radiators or areas of excessive heat.<br />
• Do not attempt to open the generator housing, it is difficult to disassemble<br />
and reassemble without the right tools and skills.<br />
• Assess site and choose a stable and solid structure to mount the wind turbine<br />
on.<br />
• Ensure that the controller is housed in a suitable weatherproof cabinet if it is<br />
to be installed outdoors. Also ensure there is sufficient ventilation if batteries<br />
are housed in the same cabinet to avoid any build up of hydrogen gasses<br />
from the batteries.<br />
• Ensure that the whole installation is properly earthed. Drive an earthing rod<br />
next to installation if necessary and connect to this earth.<br />
Site Selection<br />
The selection of a suitable site will have a direct effect on the amount of power<br />
generated, so choose your site carefully.<br />
Ideally choose a location that has no trees over 8 metres tall within a 100m radius of<br />
the site. Most sites will not be able to meet this ideal situation so choose a site which<br />
is reasonably unobstructed by buildings and trees around the site.<br />
As a general rule, the higher the wind turbine can be safely mounted, and within<br />
reason, the more wind will be present.<br />
Registered office:No 1 Tai Mong Tsai Road, Sai Kung, Hong Kong Company Registration Number: 33649039-000-05-06-7<br />
Telephone: +852 2791 7767 Facsimile: +852 2792 2782 Email: sales@egl-energy.com<br />
Page 5 of 15
There are exceptions where the wind turbine can be surrounded by high rise<br />
buildings yet still generate power due to the quirks of wind tunnel effects of the<br />
surrounding buildings.<br />
If possible seek the assistance of professionals on wind patterns for your area.<br />
Registered office:No 1 Tai Mong Tsai Road, Sai Kung, Hong Kong Company Registration Number: 33649039-000-05-06-7<br />
Telephone: +852 2791 7767 Facsimile: +852 2792 2782 Email: sales@egl-energy.com<br />
Page 6 of 15
Preparation for installation<br />
1. Check contents of wind turbine kit<br />
Please check the contents of the boxed kit to ensure all materials are present before<br />
proceeding to avoid frustration and complications.<br />
<strong>Helix</strong> <strong>HT</strong>-400<br />
Item Description<br />
Quantity<br />
Main wind turbine generator body 1<br />
Rotor blades 3<br />
Blade mounting flange 1<br />
Nose cone 1<br />
<strong>Wind</strong> Turbine charge controller 1<br />
Bolts for mounting blades on blade<br />
mounting flange<br />
M8 x 35mm Bolt 6<br />
M8 x 30mm Bolt 3<br />
Ø 8mm Plain washer 9<br />
Ø 8mm spring washer 9<br />
M8 locking nut with nylon<br />
embedded locking ring<br />
9<br />
(not to be reused if blades<br />
disassembled and reassembled)<br />
Bolt and accessories for mounting<br />
nose cone<br />
M6 x 45mm hexagonal head bolt 1<br />
Ø 6mm plain washer 1<br />
Ø 6mm spring washer 1<br />
M6 Hexagon key tool 1<br />
Plastic nose cone tip 1<br />
Bolts for optional use to mount wind<br />
turbine using supplied mounting<br />
shoulder pipe<br />
M8 x 20mm Bolt 4<br />
Ø 8mm Plain washer 4<br />
Ø 8mm spring washer 4<br />
Registered office:No 1 Tai Mong Tsai Road, Sai Kung, Hong Kong Company Registration Number: 33649039-000-05-06-7<br />
Telephone: +852 2791 7767 Facsimile: +852 2792 2782 Email: sales@egl-energy.com<br />
Page 7 of 15
<strong>Wind</strong> turbine mounting shoulder pipe (optional use) 1<br />
Charge Controller 1<br />
These instructions 1<br />
2. <strong>Wind</strong> Turbine mounting shoulder pipe<br />
There is supplied with the kit a mounting shoulder pipe. This pipe is a matched fit for<br />
the wind turbine mounting stem. Once the wind turbine has been fitted into the pipe<br />
turn the wind turbine stem until the threaded holes on the stem line up with the holes<br />
on the shoulder pipe. The wind turbine can now be securely fastened to the shoulder<br />
pipe using the M8 x 20mm bolts, Ø 8mm washers and the Ø 8mm spring washers.<br />
The shoulder pipe has been supplied so that the user can use it as a easy to carry<br />
sample for engineering planning purposes, template, or can be welded to a tower or<br />
structure where the wind turbine is to be installed.<br />
<strong>Wind</strong> Turbine mounting shoulder pipe<br />
Threaded holes in wind turbine stem<br />
3. Towers and mounting structures<br />
Various mounting arrangements can be designed, fabricated and utilized to mount<br />
the wind turbine.<br />
There are various masts that can be used such as guyed masts, self supporting<br />
towers, and adhoc improvised structures.<br />
Registered office:No 1 Tai Mong Tsai Road, Sai Kung, Hong Kong Company Registration Number: 33649039-000-05-06-7<br />
Telephone: +852 2791 7767 Facsimile: +852 2792 2782 Email: sales@egl-energy.com<br />
Page 8 of 15
It is important that whatever structure is used it must be designed to be sturdy, stable<br />
and safe to hold the wind turbine. It is recommended to seek the services of a steel<br />
structure engineer.<br />
Check with your local government offices or relevant government authorities of your<br />
country for design guidelines to ensure that the structure designed and built meets<br />
local safety regulations.<br />
Example of self supporting pole with wind<br />
turbine adapted for street lighting<br />
application<br />
4. Recommended cable sizes<br />
The following is intended to be a guide and if in doubt seek the services of an<br />
electrician or electrical engineer.<br />
The table gives distances between the wind turbine and controller. Read down the<br />
appropriate column against the system voltage to find the recommended cable size<br />
to be used. Cable size is cross sectional surface area of each core.<br />
Distance between wind turbine and<br />
wind turbine controller<br />
Less than 50<br />
metres<br />
50 to 100<br />
metres<br />
100 to 150<br />
metres<br />
12 volt system 6 mm sq. 8 mm sq. 16 mm sq.<br />
24 volt system 4 mm sq. 6 mm sq. 10 mm sq.<br />
48 volt system 4 mm sq. 6 mm sq. 10 mm sq<br />
Registered office:No 1 Tai Mong Tsai Road, Sai Kung, Hong Kong Company Registration Number: 33649039-000-05-06-7<br />
Telephone: +852 2791 7767 Facsimile: +852 2792 2782 Email: sales@egl-energy.com<br />
Page 9 of 15
5. Assembling the rotor blades<br />
Use the 9 x M8 bolts, washers, spring washers and locking nuts.<br />
Step 1<br />
Line up the rotor and blade to ensure right faces of each piece are presented<br />
correctly.<br />
Lineup the rotor and blade to ensure<br />
correct faces of each piece are presented<br />
correctly<br />
Insert the M8 x 35mm bolt and ensure<br />
bolt head sits in recess<br />
On blade side place plain washer then<br />
spring washer over bolt thread<br />
Screw on Locking Nut and tighten well<br />
Registered office:No 1 Tai Mong Tsai Road, Sai Kung, Hong Kong Company Registration Number: 33649039-000-05-06-7<br />
Telephone: +852 2791 7767 Facsimile: +852 2792 2782 Email: sales@egl-energy.com<br />
Page 10 of 15
Fix all three blades using two M8 x 35mm<br />
and one M8 x 30mm on each blade as<br />
shown on diagram opposite<br />
The whole rotor blade assemble can now be fitted onto the main shaft of the wind<br />
turbine generator. The shaft is tapered and the hole in the wind turbine blade<br />
assemble is also tapered so it will only fit in one direction.<br />
Slide complete assembly onto the shaft and secure using the washer, spring washer<br />
and left handed thread nut that is delivered loosely fitted on the shaft.<br />
Lastly, fit the nose cone onto the assembly and fasten in with the M6 x 45mm bolt,<br />
washer and spring washer supplied and tighten with the hexagonal tool key supplied.<br />
Finally push on the finishing plastic nose cone tip. The wind turbine is now ready for<br />
deployment.<br />
Registered office:No 1 Tai Mong Tsai Road, Sai Kung, Hong Kong Company Registration Number: 33649039-000-05-06-7<br />
Telephone: +852 2791 7767 Facsimile: +852 2792 2782 Email: sales@egl-energy.com<br />
Page 11 of 15
<strong>Wind</strong> Turbine charge controller<br />
(<strong>HT</strong>-C12400)<br />
The main purpose of this wind turbine charge controller is to take the generated AC<br />
power from the wind turbine and rectify and condition the power to charge up the<br />
deep cycle batteries in the system.<br />
It has built in intelligence and will also monitor various parameters of the system and<br />
take appropriate actions.<br />
Figure 1 Figure 2<br />
Protection of the wind turbine<br />
When the wind speed reaches 20 m/s and beyond the charge controller recognizes<br />
that the level of generated power has reached such a state that there is potential of<br />
electrical damage to the wind turbine or the charge controller itself. It will disconnect<br />
and open circuit the output leads of the three phases from the wind turbine so<br />
renders the system idle until such time the wind speed drops and the power<br />
generated is back within the prescribed limits.<br />
Protection against over discharge<br />
With any stored power system using batteries, one must not allow the batteries to be<br />
over discharged or permanent damage to batteries may result and certainly their life<br />
cycle will be reduced permanently. The charge controller monitors the charge in the<br />
batteries and will disconnect the power from<br />
Protection against over charge<br />
The controller ensures that the batteries are not over charged which can again<br />
damage the batteries and reduce their lifespans.<br />
Registered office:No 1 Tai Mong Tsai Road, Sai Kung, Hong Kong Company Registration Number: 33649039-000-05-06-7<br />
Telephone: +852 2791 7767 Facsimile: +852 2792 2782 Email: sales@egl-energy.com<br />
Page 12 of 15
Indicators<br />
Referring to figure 2<br />
Item Number<br />
Indication or use<br />
1 LED indicator to inform that wind turbine is generating power.<br />
Flickering green means power being generated but of not<br />
significant magnitude. Constant green is useful charge being<br />
generated.<br />
2 LED Synchronisation, when this LED is green it indicates that<br />
useful power generated by the turbine is being usefully<br />
deployed to charge batteries<br />
3 LED green indicates that solar panels are generating power<br />
4 RED LED indicates over charge<br />
5 Green LED indicates batteries are fully charged<br />
6 This is the brake switch. This switch allows current to be fed<br />
back to the rotor windings of the wind turbine and effectively<br />
turns coils into magnets and lock the armature in place. This<br />
switch should be thrown into BRAKE position when<br />
impending Typhoon or storm is forecasted. If winds are<br />
sufficiently strong the rotor will still turn even in BRAKE mode,<br />
this is perfectly normal but its turning speed can be seen to be<br />
retarded. Light will still operate as normal providing sufficient<br />
charge is present in batteries. Remember to put the switch<br />
back to ‘RUN’ when storm has passed.<br />
7 Green LED indicated batteries are at medium charge levels<br />
8 Green LED indicates that batteries are at low charge<br />
9 RED LED indicates batteries at extremely low charge / or<br />
depleted<br />
Check with a ohmmeter that all three phases (wires) of the wind turbine outputs are<br />
not open circuit before wiring up.<br />
Registered office:No 1 Tai Mong Tsai Road, Sai Kung, Hong Kong Company Registration Number: 33649039-000-05-06-7<br />
Telephone: +852 2791 7767 Facsimile: +852 2792 2782 Email: sales@egl-energy.com<br />
Page 13 of 15
A summary of technical details<br />
Parameter<br />
Specification<br />
Rated Power 400 watts 800 Watts<br />
Operating Voltage in conjunction with 12V / 24V<br />
24V / 48V<br />
appropriate charge controller<br />
Rotor Diameter (metres) 1.7 1.7<br />
Start up <strong>Wind</strong> Speed (m/s) 2.5 - 3 3.5<br />
Cut in <strong>Wind</strong> Speed (m/s) 4 4.5<br />
Rated <strong>Wind</strong> Speed m/s 12 12<br />
Cut Out <strong>Wind</strong> Speed (m/s) 20 20<br />
Survival <strong>Wind</strong> Speed (m/s) 50 50<br />
Type of operation<br />
Off Grid standalone<br />
applications<br />
Off Grid standalone<br />
applications<br />
Explanations<br />
Start up wind speed<br />
This is the minimum wind speed in metres per second when the wind turbine will start<br />
to turn. It is actually not generating any significant or useful power.<br />
Cut In wind speed<br />
This is the minimum wind speed in metres per second when the wind turbine actually<br />
starts to generate power.<br />
Cut Out wind speed<br />
This is the wind speed in metres per second when the wind turbine is deemed to be<br />
generating too high a voltage and power and is at risk of electrical damage. The<br />
associated charge controller will automatically open circuit the wind turbine outputs to<br />
avoid any potential electrical damage to the wind turbine.<br />
Survival wind speed<br />
This is the wind speed when the wind turbine is at risk of physical damage (not<br />
electrical).<br />
Registered office:No 1 Tai Mong Tsai Road, Sai Kung, Hong Kong Company Registration Number: 33649039-000-05-06-7<br />
Telephone: +852 2791 7767 Facsimile: +852 2792 2782 Email: sales@egl-energy.com<br />
Page 14 of 15
Safety<br />
Always seek the services of a qualified electrician to perform preventative<br />
maintenance or repair works as there are some very high and dangerous levels of<br />
voltage present.<br />
Install proper circuit breakers in line with local electrical regulations. Always isolate<br />
properly and in an orderly manner before performing any maintenance or trouble<br />
shooting work.<br />
Maintenance<br />
It is recommended that a preventative maintenance programme be exercised<br />
- Every12 months check and tighten all bolts and nuts and check for rust on<br />
any fixing post<br />
- Every 12 months oil all moving parts.<br />
- Every 24 months check and replace bearings if necessary. Use a qualified<br />
electric motor maintenance electrician as this is a specialized job that requires<br />
the correct tools.<br />
- Every 24 months check for corrosion of body of the wind turbine and paint if<br />
necessary talking care not to get paint into bearings at shaft end.<br />
Further information<br />
If in doubt please contact :-<br />
EGL-Energy Limited<br />
1 Tai Mong Tsai Road<br />
Sai Kung, N.T.,<br />
Hong Kong<br />
Tel: +852 2791 7767<br />
Fax: +852 2792 2782<br />
Mob:+852 9310 8102<br />
Web: www.egl-energy.com<br />
Registered office:No 1 Tai Mong Tsai Road, Sai Kung, Hong Kong Company Registration Number: 33649039-000-05-06-7<br />
Telephone: +852 2791 7767 Facsimile: +852 2792 2782 Email: sales@egl-energy.com<br />
Page 15 of 15


