Toolkit 2011 Installation Guide - activePDF
Toolkit 2011 Installation Guide - activePDF
Toolkit 2011 Installation Guide - activePDF
You also want an ePaper? Increase the reach of your titles
YUMPU automatically turns print PDFs into web optimized ePapers that Google loves.
<strong>Toolkit</strong> <strong>2011</strong> <strong>Installation</strong> <strong>Guide</strong><br />
This document provides installation instructions for <strong>activePDF</strong> <strong>Toolkit</strong> <strong>2011</strong>. Please read this document prior to<br />
installing <strong>Toolkit</strong>.<br />
System Requirements<br />
Operating System Requirements<br />
Microsoft Windows Server TM 2003 32- or 64-bit edition<br />
Microsoft Windows Server TM 2008 32- or 64-bit edition<br />
Minimum Recommended Hardware Requirements<br />
Pentium III 500-MHz or higher<br />
128 MB of RAM<br />
75 MB of hard disk space (for application)<br />
Installing <strong>Toolkit</strong><br />
The installation process copies the <strong>Toolkit</strong> files to the appropriate location on your system.<br />
To install <strong>Toolkit</strong>:<br />
1. Log onto the system where you plan to install <strong>Toolkit</strong>. You may need to use either a Local Administrator account or<br />
a domain account with Local Administrator rights.<br />
2. Download the latest <strong>activePDF</strong> <strong>Toolkit</strong> installer from http://www.activepdf.com/downloads/.<br />
3. When prompted to save the file, navigate to your desktop and click OK.<br />
The file is saved.<br />
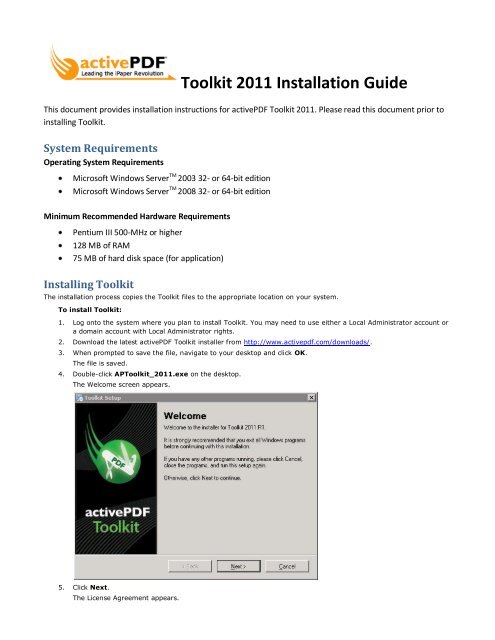
4. Double-click AP<strong>Toolkit</strong>_<strong>2011</strong>.exe on the desktop.<br />
The Welcome screen appears.<br />
5. Click Next.<br />
The License Agreement appears.
6. Read the License Agreement.<br />
7. If you have read and understand the agreement, select I agree to the terms of this license agreement.<br />
NOTE: You should not proceed with the installation if you do not understand, or do not agree with the License<br />
Agreement.<br />
8. Click Next, and then continue to follow the on screen prompts.<br />
The Select Features screen appears.<br />
9. Select the <strong>Toolkit</strong> program features to install:<br />
COM—Installs the <strong>Toolkit</strong> COM DLLs and binary files. Select one or both of the following:<br />
o<br />
o<br />
<strong>Toolkit</strong> (32-bit)—Installs the 32-bit version of the <strong>Toolkit</strong> COM object.<br />
<strong>Toolkit</strong> (64-bit)—Installs the 64-bit version of the <strong>Toolkit</strong> COM object.<br />
.NET—Installs the .NET assemblies for <strong>Toolkit</strong>. Select one or both of the following:<br />
o<br />
o<br />
.NET 1.1 Component—Installs the .NET 1.1 assembly for <strong>Toolkit</strong>.<br />
.NET 2.0 Component—Installs the .NET 2.0 assembly for <strong>Toolkit</strong>.<br />
Examples—Installs example code and files that demonstrate <strong>Toolkit</strong>’s functionality. Select one or both of the<br />
following:<br />
o<br />
o<br />
Professional—Installs examples of features available only in <strong>Toolkit</strong> Pro. Select one or more of the<br />
following:<br />
• Digital Signatures Example—Demonstrates <strong>Toolkit</strong>’s ability to create certificates and utilize<br />
digital signatures.<br />
• Invoice Example—Creates a sample invoice including Flash and Barcode capabilities.<br />
• Flash Examples—Demonstrate <strong>Toolkit</strong>’s support for Flash files.<br />
Standard—Installs examples of features available in both <strong>Toolkit</strong> Standard and Professional versions.<br />
Select one or more of the following:<br />
• Barcode Examples—Demonstrate <strong>Toolkit</strong>’s ability to add barcodes to PDF files.<br />
• Form Field Examples—Demonstrate <strong>Toolkit</strong>’s support for the creation and modification of form<br />
fields in PDF files.<br />
Help Files—Installs the online help documentation for <strong>Toolkit</strong>. Select one or both of the following:<br />
o<br />
o<br />
<strong>Toolkit</strong> API Documentation—Provides technical reference for the methods and properties in <strong>Toolkit</strong><br />
COM and .NET objects.<br />
Help Collection for Visual Studio—Makes the <strong>Toolkit</strong> API documentation accessible directly from Visual<br />
Studio.<br />
Certificate Manager—Installs a shortcut to Certificate Manager for viewing the statuses of certificates on the<br />
local machine. (Certificates are available only with <strong>Toolkit</strong> Pro.)<br />
10. When the Ready to Install screen appears, click Next.<br />
11. When the <strong>Installation</strong> Successful screen appears, click Finish.<br />
<strong>Toolkit</strong> is installed and ready for use.


