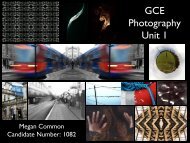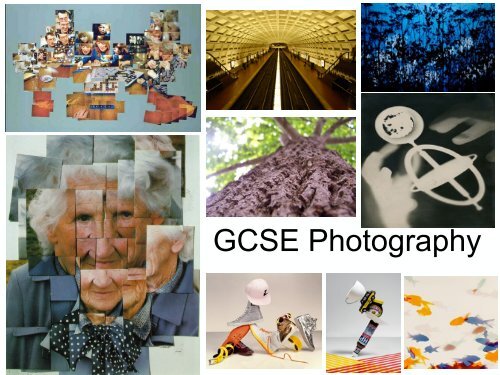
GCSE Photography
Lesson Objectives and Outcomes for GCSE Photography Coursework Projects
Lesson Objectives and Outcomes for GCSE Photography Coursework Projects

Create successful ePaper yourself
Turn your PDF publications into a flip-book with our unique Google optimized e-Paper software.
David Hockney<br />
<strong>GCSE</strong> <strong>Photography</strong>
iWeb Intro<br />
This lesson you must:<br />
• Create your iWeb - Darkroom theme<br />
– welcome page - images and info (see<br />
worksheet)<br />
– blog page<br />
– archive page<br />
– entries page<br />
– albums page<br />
• This is YOUR way to present all YOUR<br />
work for photography. MAKE IT AMAZING!<br />
3
<strong>Photography</strong> Introduction<br />
This lesson you must:<br />
• Discuss and understand each of the keywords and give<br />
a definition in your OWN words explaining it.<br />
• Create a written and visual (use internet image and/or<br />
own) mind map based on your identity. It should include:<br />
– Hobbies<br />
– Important people and objects that represent them<br />
– Places<br />
– Important objects<br />
– Key moments and objects that represent them<br />
• HOMEWORK: complete both mind maps and keywords<br />
worksheet for...
Keywords<br />
APERTURE<br />
ARTIFICIAL LIGHT<br />
B&W<br />
BACKGROUND<br />
BACK-LIGHTING<br />
BALANCE<br />
BRACKET or<br />
BRACKETING<br />
CLOSE-UP/MACRO<br />
COMPLEMENTARY<br />
COLOUR<br />
COMPOSITION<br />
CONTRAST<br />
CROPPING
DEPTH OF FIELD<br />
DIGITAL ZOOM<br />
MULTIPLE EXPOSURE<br />
ENLARGEMENT<br />
ENLARGER<br />
f-NUMBER/f-stop<br />
FILTER<br />
FOREGROUND<br />
FRAME/FRAMING<br />
MONOCHROME<br />
MONTAGE<br />
NEGATIVE<br />
OPTICAL ZOOM<br />
OVEREXPOSURE
PANORAMIC/<br />
PANORAMA<br />
PERSPECTIVE<br />
PINHOLE CAMERA<br />
PORTRAIT<br />
RED EYE<br />
RULE OF THIRDS<br />
SATURATION<br />
SHUTTER SPEED<br />
UNDEREXPOSURE<br />
VIEWPOINT<br />
ZOOM
Keywords<br />
APERTURE<br />
ARTIFICIAL LIGHT<br />
B&W<br />
BACKGROUND<br />
BACK-LIGHTING<br />
BALANCE<br />
BRACKET or<br />
BRACKETING<br />
CLOSE-UP/MACRO<br />
COMPLEMENTARY<br />
COLOUR<br />
COMPOSITION<br />
CONTRAST<br />
CROPPING<br />
A circle-shaped opening through which light passes to strike the film. The aperture is usually<br />
created by an iris diaphragm that is adjustable, enabling the aperture to be made wider or<br />
narrower, thereby letting in more or less light. The size of the aperture is expressed as an f-<br />
number, like f/8 or f/11.<br />
Illumination that comes from a man-made source, such as electronic flash.<br />
Black and white.<br />
The part of a scene that appears to be furthest from the viewer, behind objects in the foreground.<br />
The area within the viewfinder that is behind the subject of a photograph.<br />
Light directed at the subject from behind the subject.<br />
Compositional harmony of a scene based on the placement of elements of different sizes, shapes<br />
and colours.<br />
A series of pictures, at least three, of the same subject with varying exposures - (1) the main<br />
exposure, which is presumed to be correct, but may not be; (2) a slight overexposure, (3) a<br />
slight underexposure “Bracketed” exposures fall on either side of the exposure that is<br />
presumed to be correct.<br />
Generally, a picture of a subject that fills the frame, with the subject looking particularly close to<br />
the camera. Images of tiny objects in frame-filling, larger-than-life sizes.<br />
A complementary colour is one of a pair of primary or secondary colours that are in opposition to<br />
each other on a colour wheel.<br />
Complementary Colours:<br />
Blue and orange Red and green Yellow and purple<br />
The arrangement of the elements (subject and other objects) in a scene or photograph.<br />
The range of difference between highlights and shadow areas in an image.<br />
Removal of parts of an image in order to improve the image’s composition. Cropping is<br />
sometimes also used in reference to a photographer moving closer to a subject, thereby<br />
eliminating (cropping) unnecessary surrounding elements from the composition.
DEPTH OF FIELD<br />
DIGITAL ZOOM<br />
MULTIPLE EXPOSURE<br />
The range of distance in a scene that appears to be in focus. Depth of field is controlled by<br />
the lens aperture.<br />
Zoom effect in some digital cameras that is not true, but is instead an enlargement of the<br />
information.<br />
More than one exposure on the same film frame.<br />
ENLARGEMENT<br />
ENLARGER<br />
f-NUMBER/f-stop<br />
FILTER<br />
Increasing the size of the photograph so that it is larger than the original.<br />
An adjustable light projection device used in a darkroom to project an enlarged image from a<br />
negative through a lens onto photographic paper in various degrees of enlargement.<br />
A number that expresses a lens’ light-transmitting ability - i.e. the size of the lens opening. A<br />
smaller number indicates a larger lens diameter. All lenses set at the same f-number<br />
transmit the same amount of light.<br />
Manual filters: Tinted glass, gelatin or plastic discs, squares or rectangles that modify the<br />
light passing through them. Filters are used in photography to change the appearance<br />
of a scene by emphasizing, eliminating or changing colour or density. Electronic filters:<br />
used in editing software (Photoshop) to alter the whole/section of the surface of an<br />
image.<br />
FOREGROUND The area of a scene that is closer than the subject.<br />
FRAME/FRAMING • The visible boundaries of a camera’s viewfinder.<br />
• An element in a scene, like a branch or doorway that frames the subject.<br />
MONOCHROME<br />
MONTAGE<br />
NEGATIVE<br />
OPTICAL ZOOM<br />
OVEREXPOSURE<br />
• A boarder surrounding a print.<br />
An image of a single colour in differing shades, descriptive of a black and white or sepiatoned<br />
image.<br />
An image made up of a series of photographs in a layered jigsaw style.<br />
An image in which the brightness values are reversed.<br />
A true zoom effect unlike a digital camera's digital zoom.<br />
Overexposure occurs when a photograph receives too much light. It results in a loss of<br />
resolution, more graininess and less detail in highlight areas.
PANORAMIC/<br />
PANORAMA<br />
PERSPECTIVE<br />
PINHOLE CAMERA<br />
PORTRAIT<br />
RED EYE<br />
RULE OF THIRDS<br />
SATURATION<br />
SHUTTER SPEED<br />
UNDEREXPOSURE<br />
VIEWPOINT<br />
ZOOM<br />
An extended, wide view or pictorial representation of a landscape or other scene. A camera<br />
mode that produces a proportionately wider or taller than normal image, depending on the<br />
camera’s orientation.<br />
Technique of depicting volumes and spatial relationships (a scene in three-dimensions) on<br />
a flat surface. Also linked with a ‘vanishing point’ where the objects reduce in size as they<br />
get further away from the viewer.<br />
A camera that uses a very small hole, as if made by a pin instead of a lens, for light to enter<br />
and form an image on the film or other light-sensitive medium.<br />
A photograph of a person or persons.<br />
An image in which a subject’s iris or irises are red instead of black. The red eye effect is<br />
caused by light from a flash travelling through the iris and illuminating the retina.<br />
The rule states that an image should be imagined as divided into nine equal parts by two<br />
equally-spaced horizontal lines and two equally-spaced vertical lines, and that important<br />
compositional elements should be placed along these lines or their intersections.<br />
the subjects on and in between these lines should create a more interesting composition.<br />
The degree of hue in colour as perceived subjectively. Saturated colour can be termed<br />
strong, vivid, intense or deep. Desaturated colour can be termed weak, pale, washed out or<br />
dull.<br />
Controls the duration of an exposure - the faster the Shutter speed, the shorter the<br />
exposure time.<br />
An image is underexposed when the film receives too little light for proper exposure.<br />
Underexposure results in loss of detail in the subject’s dark areas, which can be almost<br />
completely black.<br />
Location of the camera relative to the subject.<br />
The action of varying the focal length of a zoom lens to enlarge (zoom in) or reduce (zoom<br />
out) the image.
Artist/Photographer Analysis<br />
This lesson you must:<br />
•select an image and analyse it<br />
•answer all the questions on the blue<br />
worksheet and use the appropriate<br />
keywords from the worksheet.<br />
•remember to justify your answers, explain<br />
why you think what you think!
BOTTLES
Alternative <br />
Viewpoints<br />
Side<br />
Top<br />
Front<br />
Bottom<br />
Through the middle<br />
Up<br />
Back<br />
Down
Alternative Viewpoints<br />
This lesson you must:<br />
Produce a photo shoot of 30-50 photographs that<br />
show close up alternative compositions.<br />
• Students MUST discuss ways to capture objects<br />
from alternative viewpoints - GRADE D.<br />
• Students SHOULD capture a series of objects from<br />
alternative viewpoints and discuss their images -<br />
GRADE C.<br />
• Students COULD capture each object from a variety<br />
of alternative viewpoints and discuss their images<br />
and ideas - GRADE B.
Alternative Viewpoints<br />
This lesson you must:<br />
• Evaluate your photo shoot in a blog entry -<br />
use the pink worksheet. - Use the PINK<br />
worksheet.<br />
• Show at least your 3 most successful<br />
images in your evaluation and justify why<br />
they are the most successful.
Summer Homework<br />
During the Summer holidays you must:<br />
• capture 30-50 photographs of alternative<br />
composition - this is your DEVELOPED<br />
alternative viewpoint shoot<br />
• evaluate your photo shoot<br />
• find a photograph of an alternative<br />
viewpoint and analyse it
Taking a Photo: The Basics<br />
Flash:!<br />
• Use in low light areas to illuminate your<br />
subject.!<br />
• Use where your subject has a strong<br />
backlight.!<br />
• Do not use a flash when your subject is<br />
more than 1.5m away as it will darken your<br />
image!<br />
!<br />
Focus:!<br />
• Make sure you are focused on the right<br />
part of the image!<br />
• Things to remember:!<br />
Auto or Manual!<br />
Camera shake - hand held or tripod!<br />
Use your shutter button properly - half<br />
press focuses, fully press to capture!<br />
!<br />
Zoom:!<br />
• Optical - Use zoom as little as possible,<br />
walk closer with camera. Sometimes zoom<br />
is needed, if so, this is the one to use.!<br />
• Digital - Do not use this zoom as it will<br />
pixilate your image making it distorted.!<br />
!<br />
Macro (Close up):!<br />
•If you are taking a photograph of something<br />
close up (within 8cm of the object) you must<br />
ensure that the macro setting is switched on<br />
to allow the camera to focus.!<br />
!<br />
Rule of Thirds<br />
Balance<br />
Cropping<br />
Framing<br />
Leading Lines<br />
Viewpoint<br />
Symmetry &<br />
Pattern
Rule of Thirds<br />
This lesson you must:<br />
• photo shoot of at least 30 photographs.<br />
• evaluate the shoot in a blog entry and<br />
show your 4 or 5 most successful images<br />
18
Leading Lines<br />
This lesson you must:<br />
• photo shoot of at least 30 photographs.<br />
• evaluate the shoot in a blog entry and show<br />
your 4 or 5 most successful images
Select one of your own<br />
This lesson you must:<br />
• photo shoot of at least 30 photographs.<br />
• evaluate the shoot in a blog entry and<br />
show your 4 or 5 most successful images
Composition Deadline<br />
By the end of this week you must:<br />
• complete an alternative<br />
viewpoint shoot and evaluation<br />
(this was summer homework)<br />
• complete a rule of thirds shoot<br />
and evaluation<br />
• complete a leading lines shoot<br />
and evaluation<br />
• complete one composition style<br />
of your choice and evaluation<br />
(use worksheet)
Composition Peer Feedback<br />
This lesson you must:<br />
• Give 2 people feedback about their<br />
composition work.<br />
– find 3 positive things to feedback on<br />
– find 2 areas of improvement - be<br />
constructive…<br />
• make notes and then pass your feedback onto<br />
that person<br />
• second part of the lesson you must action this<br />
feedback.
Example iWebs<br />
https://<br />
cloud.hallcross.org/<br />
app/iWebs/
APERTURE
Aperture<br />
!<br />
Aperture is measured in F-stops and determines how much of<br />
the image is in focus.<br />
!<br />
!<br />
!<br />
1.8 2 2.8 4 5.6 8 11 16 22 27<br />
!<br />
The larger the F number the smaller the hole which allows light<br />
into the camera. A small number gives a small depth of field,<br />
whereas a large number gives a large depth of field.
Aperture<br />
The aperture go up to 64 or over which gives lots of detail but a long shutter speed<br />
is required. <br />
Subject Background<br />
!<br />
!<br />
!<br />
!<br />
!<br />
!<br />
Camera Subject Background
Aperture<br />
This image was taken using a large depth<br />
of field (f-stop - ƒ/22) giving a large depth<br />
of field.<br />
This image was taken using a small<br />
depth of field (f-stop ƒ/2) giving a very<br />
shallow depth of field.
Aperture<br />
This lesson you must:<br />
• Present how to use aperture and the<br />
effects it creates in a new blog entry (use<br />
worksheets).<br />
• Find at least 2 examples of a small depth<br />
of field, 2 of a medium depth of field and 2<br />
of a large depth of field.<br />
HOMEWORK: Bring in your camera
Aperture Photo shoot<br />
This lesson you must:<br />
• Take a series of photographs that explore<br />
aperture.<br />
– First Object: f2, f8, f22<br />
– Second Object: f2, f8, f22<br />
– Third Object: f2, f8, f22<br />
• Tips:<br />
– You should take at least 6 photographs for each set.<br />
– The camera should NOT move.<br />
– You need to use manual focus.<br />
– Keep the background plain.
Aperture Experiments Evaluation<br />
This lesson you must:<br />
• Upload you most successful 9 photos into<br />
a album and label them (front f2, front f8,<br />
front f22, middle f… etc)<br />
• Create a blog entry showing the most<br />
successful 9 and explain what you have<br />
done and what the images show.<br />
– for higher marks add some clear analysis of<br />
your photos. Explaining how aperture could be<br />
used in your work in the future.
Shutter Speed<br />
The shutter speed determines how long the shutter is open for therefore<br />
determining how long the film is exposed to light.<br />
The shutter speed is measured in seconds or fractions of seconds. It<br />
determines how quickly the photograph is taken.<br />
1000 500 250 125 100 50 30 20 15 10 4 2 1 2 3 4 10 20 30 BULB<br />
∞<br />
Between 1/1000 of a second and 1/250 of a second are used mainly for<br />
action photography, the shutter opens and closes so quickly that it freezes<br />
the action, whereas 1/25 of a second up to 1/50 of a second can capture<br />
movement at a slower rate or will show slight movement. For 1/30 of a<br />
second to 1/2 second, more movement is captured. Once at a second and<br />
longer, a blurred effect is captured. The bulb setting allows the shutter to be<br />
open for any period of time.<br />
The faster shutter speed works well in well-lit situations, whereas the longer<br />
the exposure a lower light source or larger aperture are required otherwise
Shutter Speed<br />
This lesson you must:<br />
• Present how to use shutter speed and the<br />
effects it creates in a new blog entry (use<br />
worksheets).<br />
• Find at least 2 examples of a slow shutter<br />
speed, 2 of a medium shutter speed and 2<br />
of a fast shutter speed.<br />
• add analysis to your examples for additional<br />
marks<br />
HOMEWORK: Bring in your DSLR camera
Fast Shutter Speed
Medium Shutter Speed
Slow Shutter Speed
Long Exposure Workshop<br />
This lesson you must:<br />
• Create a presentation page on shutter<br />
speed and the effects it creates in your<br />
sketchbook (use worksheet).<br />
• In pairs plan your photoshoot based on<br />
shutter speed.<br />
HOMEWORK: bring in your camera (SLR)<br />
and any equipment you may need for the<br />
shoot (such as light sources)
Movement Photo Shoot<br />
This lesson you must:<br />
• Take a series of photographs that explore<br />
shutter speed and upload them.<br />
– fast shutter<br />
– medium shutter<br />
– slow shutter<br />
• Tips:<br />
– You should take at least 10 photographs for each set.<br />
– The camera should NOT move.<br />
– You need to make sure your model does the same<br />
movement and speed for each set of photos.
Movement Shoot Evaluation<br />
This lesson you must:<br />
• Upload you most successful 30 photos into an<br />
album and label them (1/4000, 1/1000. 1/500,<br />
1/200, 1/100, 1/50, 1/30, 0.5 seconds, 1 second, 2<br />
seconds)<br />
• Create a blog entry showing the most successful<br />
photos (at least 1 example of each shutter speed)<br />
and explain what you have done and what the<br />
images show.<br />
– for higher marks add some clear analysis of<br />
your photos. Explaining how shutter speed<br />
could be used in your work in the future.
Light Drawings Photo Shoot<br />
This lesson you must:<br />
• Take a series of photographs that explore<br />
capturing light drawings.<br />
– fast shutter (0.5 seconds)<br />
– medium shutter (1 second)<br />
– slow shutter (2 seconds)<br />
• Tips:<br />
– You should take at least 10 photographs for each set.<br />
– The camera should NOT move.<br />
– You need to make sure your model makes the torch<br />
visible at all times.
Light Drawings Shoot Evaluation<br />
This lesson you must:<br />
• Upload you most successful 30 photos<br />
into an album and label them (0.5<br />
seconds, 1 second, 2 seconds)<br />
• Create a blog entry showing the most<br />
successful photos (at least 2 examples of<br />
0.5, 1 and 2 seconds) and explain what<br />
you have done and what the images show.<br />
– for higher marks add some clear analysis of<br />
your photos. Explaining how shutter speed<br />
could be used in your work in the future.
Long Exposure Edits<br />
This lesson you must:<br />
• Edit your 2 most successful long exposures<br />
(create at least 3 edits per photo)<br />
• Things to consider:<br />
– Cropping<br />
– Selective edits<br />
– Colour<br />
– filters<br />
• Evaluate your long exposure project.
Homework: Bring in your camera and<br />
5 handheld objects!<br />
Metz & Racine<br />
This lesson you must:<br />
• Create a keynote presentation based on these photographers
Metz and Racine Response<br />
This lesson you must:<br />
• Create a series of photographs (at least 30) that<br />
are inspired by the work of Metz and Racine<br />
using your objects. Your objects should look like<br />
they are piled up on top of each other.<br />
• Things to consider:<br />
– Composition<br />
– Colour<br />
– Number of objects<br />
• then upload your photos to a Metz and Racine<br />
folder in your documents.
Metz and Racine Evaluation<br />
This lesson you must:<br />
• Evaluate your photo shoot using the pink<br />
worksheet<br />
• Select at least one successful image and<br />
analyse it in detail<br />
• EXTENSION: compare and contrast your<br />
image with M&R’s<br />
HOMEWORK: complete all evaluations
Metz and Racine Edits<br />
This lesson you must:<br />
• Create a series of edits of your 3 most<br />
successful Metz and Racine inspired photos (at<br />
least 3 edits of each).<br />
• Things to consider:<br />
– Bold Colour<br />
– Contrast<br />
– Brightness<br />
– Plain background<br />
– Objects look like they’re stacked on top of each other<br />
– YOU MUST SCREEN SHOT THE PROCESS!<br />
• Save all Metz and Racine inspired edits into a<br />
Metz and Racine Edits folder in your documents.
Metz & Racine Edits<br />
1. Rotate<br />
4. Contrast<br />
2. Crop<br />
5. Colour<br />
3. Clone Stamp
Metz and Racine Edits Evaluation<br />
This lesson you must:<br />
• Evaluate your edits using the pink<br />
worksheet. Explain the process and your<br />
successes/improvements (show screen<br />
shots)<br />
• Select at least one successful image and<br />
analyse it in detail.<br />
• EXTENSION: compare and contrast your<br />
edited image with M&R’s<br />
HOMEWORK: complete all evaluations
Metz & Racine Layered Mounting<br />
During this lesson you must:<br />
• cut out one of your M&R images and keep an EVEN<br />
white boarder.<br />
• mount this image in the middle of some mount board.<br />
• cut out the objects on your second image, this MUST<br />
BE NEAT!<br />
• cut foam board slightly smaller than your objects and<br />
mount the image on top of the foam board and line it<br />
up on your first image.<br />
• Develop further by raising more of your objects.
Metz & Racine Layered Mounting<br />
During this lesson you must:<br />
Evaluation<br />
• complete a second layered mounting using a different<br />
M&R edit to show development and refinement<br />
• photograph your finished layered mounting from a<br />
variety of angles.<br />
• upload your images into an album and the best ones<br />
onto a blog entry.<br />
• Evaluate your layered mounting piece - use the pink<br />
worksheet
Christmas Homework<br />
•Magazine research!<br />
• research at least 2 genres (eg: fashion, sport, gossip, cooking)!<br />
• show at least 3 example covers for each genre!<br />
• select one front cover you intend to copy (it must have a person as main feature on cover)!<br />
• present all of this work on a powerpoint presentation. !<br />
• slide 1: Title ‘Magazine Research’ and images!<br />
• slide 2: genre 1 and analysis!<br />
• slide 3: specific analysis of one magazine cover (from slide 2 genre)!<br />
• slide 4: genre 2 and analysis!<br />
• slide 5: specific analysis of one magazine cover (from slide 4 genre)!<br />
•Magazine cover shoot !<br />
• complete a shoot of at least 40 photos for your magazine cover!<br />
• it must be similar poses etc to the magazine cover you are copying!<br />
• think about your background, try and match the magazine cover you are copying. !<br />
•Extension Homework (B grade+)!<br />
• create a powerpoint about a magazine photographer (eg: Mario Testino, Rankin, David<br />
Bailey, !<br />
• slide 1: photographers name and some images of their work!<br />
• slide 2: basic information about the photographer and images of their work!<br />
• slide 3: you opinion about their work generally (yellow worksheet) and images of<br />
their work.!<br />
• slide 4: analysis of one of their images (blue worksheet)!<br />
• slide 5: analysis of a different image (blue worksheet)!<br />
•Work can either be brought in on a USB stick/memory card, uploaded onto google drive or emailed<br />
to me (hs@hallcrossacademy.co.uk)!
Magazine Covers
Magazine Cover<br />
This lesson you must:<br />
Research the different genres of magazine and then select your<br />
specific area.<br />
Analyse your images:<br />
What is included? (title, director, cast, age rating etc)<br />
Colours?<br />
Type of image(s)?<br />
Is it appropriate? Why?<br />
What will you use in your work? How? Why?<br />
Look at the magazine photographers and select an appropriate one<br />
Plan your shoot (use the worksheet)<br />
HOMEWORK: Take your photos for your magazine cover (at least<br />
50). Things to consider:<br />
Type of magazine<br />
Target audience<br />
Model and outfit<br />
Props<br />
Think about the artist you researched – LINK IT!
Annie Leibovitz<br />
Mario Testino<br />
Norman Jean Roy<br />
Olivia Graham<br />
Bob Martin<br />
David La Chapelle<br />
Dave Black
Magazine Cover Planning<br />
This lesson you must:<br />
Select your chosen magazine genre and plan<br />
your own version<br />
Things to consider:<br />
Type of magazine<br />
Target audience<br />
Model and outfit<br />
Props<br />
Think about the artist you researched – LINK IT!<br />
HOMEWORK: bring in your camera and the<br />
items you will need for your photo shoot. Due<br />
Monday
Magazine Photo Shoot<br />
This lesson you must:<br />
• Produce a second photo shoot for your chosen<br />
magazine cover (it should include at least 40<br />
photographs)<br />
• It should be a copy of your chosen magazine cover<br />
• Things to consider:<br />
– Narrative<br />
– Composition<br />
– Background<br />
– Pose<br />
– Props<br />
– Colour<br />
– Lighting
Magazine Shoot Evaluation<br />
This lesson you must:<br />
• Evaluate your photo shoots for your<br />
magazine cover (pink worksheet)<br />
• Things to consider:<br />
– Composition style - space for text?<br />
– Does it link to the cover you are inspired by?<br />
How?<br />
– How could you improve photos with editing?<br />
– Analyse most successful image in detail (blue<br />
worksheet).
Magazine Cover Edits<br />
• This lesson you must:<br />
Produce a series of edits of your 3 most successful<br />
photographs (at least 2 edits of each photo) from<br />
each shoot. You will use one of these images for<br />
you magazine cover<br />
Things to consider:<br />
Cropping<br />
Colour adjustments<br />
Clone stamp<br />
Lighting adjustments<br />
What type of magazine is it for?<br />
Where will the title and other information go?<br />
Will you have any secondary images on your cover?<br />
Make sure you document this process (screen<br />
prints), save the stages and annotate it.
Magazine Edits<br />
1. Rotate<br />
4. Contrast<br />
2. Crop<br />
5. Colour<br />
3. Clone Stamp
Magazine Analysis<br />
Look at the magazines on your table and individually analyse the<br />
covers.<br />
Target Audience Genre Colour Font style<br />
share your feedback with the everyone else on your<br />
table, write your feedback on post it notes and stick on<br />
the magazine cover.
Magazine Cover<br />
Learning Outcomes:<br />
• All Students must (grade D):<br />
– understand the size and proportions used for magazine<br />
covers.<br />
– begin to use layers within Photoshop.<br />
• Most students should (grade C):<br />
– begin to add text to their magazine cover<br />
– evidence the process using screen shots<br />
• Some students could (grade B):<br />
– use appropriate font styles for your magazine cover.<br />
– experiment with font styles for your magazine cover,<br />
evidence with screen shots.
Order the Magazines<br />
• Look at the magazines on your table and<br />
order them - most to least successful<br />
• Things to think about:<br />
– target audience?<br />
– how appealing are they?<br />
– how suitable are they?<br />
– do they grab your attention?<br />
• You MUST be able to give me a reason for<br />
your decisions
Magazine Cover<br />
Learning Outcomes:<br />
• All Students must (grade D):<br />
– continue to use layers within Photoshop.<br />
• Most students should (grade C):<br />
– develop your edited image to make it more appropriate<br />
for your magazine cover.<br />
– continue to add text to your magazine cover<br />
– evidence the process using screen shots<br />
• Some students could (grade B):<br />
– use appropriate font styles for your magazine cover.<br />
– experiment with font styles for your magazine cover,<br />
evidence with screen shots.
Peer Assess<br />
• Look at your partners magazine and give<br />
them 2 pieces of feedback<br />
• 1 thing they have done well:<br />
– colour<br />
– font type<br />
– edited image<br />
• 1 thing they can improve on:<br />
• be CONSTRUCTIVE!!
Magazine Cover<br />
Learning Outcomes:<br />
• All Students must (grade D):<br />
– continue to use layers within Photoshop.<br />
• Most students should (grade C):<br />
– develop your edited image to make it more appropriate<br />
for your magazine cover.<br />
– continue to add text to your magazine cover<br />
– evidence the process using screen shots<br />
• Some students could (grade B):<br />
– use appropriate font styles for your magazine cover.<br />
– experiment with font styles for your magazine cover,<br />
evidence with screen shots.
Magazine Photo Edit Evaluation<br />
This lesson you must:<br />
evaluate your edit process of the photos<br />
!<br />
Grade D<br />
show initial photo and finished edit photo<br />
Grade C<br />
add screen shots to show process and<br />
techniques you have used.<br />
Grade B<br />
Compare and contrast your final edit with the<br />
magazine image you are copying.
Magazine Cover Evaluation<br />
This lesson you must:<br />
• evaluate your edit process of your magazine<br />
and the final cover<br />
!<br />
Grade D<br />
• show initial photo and finished magazine cover<br />
Grade C<br />
• add screen shots to show process and<br />
techniques you have used.<br />
Grade B<br />
• Compare and contrast your final magazine<br />
cover with the magazine you are copying.
Developed Magazine Cover<br />
This lesson you must:<br />
• Design your own magazine cover using<br />
the skills you has learnt.<br />
• Things to consider<br />
– genre<br />
– target audience<br />
– theme<br />
– main story<br />
• dsf<br />
68
Magazine Photo Shoot<br />
This lesson you must:<br />
• Produce a photo shoot for your magazine cover (it should<br />
include at least 40 photographs)<br />
• It should ideally have a person on it but if you use technical<br />
camera skills (aperture) you could use objects instead.<br />
• Things to consider:<br />
– Narrative<br />
– Composition<br />
– Background<br />
– Pose<br />
– Props<br />
– Colour<br />
– Lighting<br />
HOMEWORK: complete a second shoot at home (this time<br />
used appropriate outfit, location and props) and evaluate.<br />
DUE:
Magazine Shoot Evaluation<br />
This lesson you must:<br />
• Evaluate your photo shoots for your<br />
magazine cover (pink worksheet)<br />
• Things to consider:<br />
– Composition style - space for text?<br />
– Is is appropriate for your genre and target<br />
audience? why?<br />
– How could you improve photos with editing?<br />
– Analyse at least one most successful image in<br />
detail (blue worksheet).
Magazine Cover Edits<br />
• This lesson you must:<br />
Produce a series of edits of your 3 most successful<br />
photographs (at least 2 edits of each photo). You<br />
will use one of these images for you magazine<br />
cover<br />
Things to consider:<br />
Cropping - image MUST BE PORTRAIT!<br />
Colour adjustments<br />
Clone stamp<br />
Lighting adjustments<br />
What type of magazine is it for?<br />
Where will the title and other information go?<br />
Will you have any secondary images on your cover?<br />
Make sure you document this process (screen<br />
prints), save the stages and annotate it.
Magazine Edits<br />
1. Rotate<br />
4. Contrast<br />
2. Crop<br />
5. Colour<br />
3. Clone Stamp
Magazine Cover<br />
Learning Outcomes:<br />
• All Students must (grade D):<br />
– understand the size and proportions used for magazine<br />
covers.<br />
– begin to use layers within Photoshop.<br />
• Most students should (grade C):<br />
– begin to add text to their magazine cover<br />
– evidence the process using screen shots<br />
• Some students could (grade B):<br />
– use appropriate font styles for your magazine cover.<br />
– experiment with font styles for your magazine cover,<br />
evidence with screen shots.
Magazine Cover<br />
Learning Outcomes:<br />
• All Students must (grade D):<br />
– continue to use layers within Photoshop.<br />
• Most students should (grade C):<br />
– develop your edited image to make it more appropriate<br />
for your magazine cover.<br />
– continue to add text to your magazine cover<br />
– evidence the process using screen shots<br />
• Some students could (grade B):<br />
– use appropriate font styles for your magazine cover.<br />
– experiment with font styles for your magazine cover,<br />
evidence with screen shots.
Peer Assess<br />
• Look at your partners magazine and give<br />
them 2 pieces of feedback<br />
• 1 thing they have done well:<br />
– colour<br />
– font type<br />
– edited image<br />
• 1 thing they can improve on:<br />
• be CONSTRUCTIVE!!
Magazine Cover<br />
Learning Outcomes:<br />
• All Students must (grade D):<br />
– continue to use layers within Photoshop.<br />
• Most students should (grade C):<br />
– develop your edited image to make it more appropriate<br />
for your magazine cover.<br />
– continue to add text to your magazine cover<br />
– evidence the process using screen shots<br />
• Some students could (grade B):<br />
– use appropriate font styles for your magazine cover.<br />
– experiment with font styles for your magazine cover,<br />
evidence with screen shots.
Magazine Photo Edit Evaluation<br />
This lesson you must:<br />
evaluate your edit process of the photos<br />
!<br />
Grade D<br />
show initial photo and finished edit photo<br />
Grade C<br />
add screen shots to show process and<br />
techniques you have used.<br />
Grade B<br />
Compare and contrast your final edit with the<br />
magazine image you are copying.
Magazine Cover Evaluation<br />
This lesson you must:<br />
• evaluate your edit process of your magazine<br />
and the final cover<br />
!<br />
Grade D<br />
• show initial photo and finished magazine cover<br />
Grade C<br />
• add screen shots to show process and<br />
techniques you have used.<br />
Grade B<br />
• Compare and contrast your final magazine<br />
cover with the magazine you are copying.
Photograms
Photogram Equipment<br />
Enlarger<br />
Chemicals
Photograms<br />
This lesson you must:<br />
• Learn how to create a photogram and present this<br />
method in your blog.<br />
– Grade D<br />
• explain how to create a photogram and show<br />
examples of photograms.<br />
– Grade C<br />
• explain what a photogram is and explain how create<br />
a photogram add images to show equipment used to<br />
create a photogram.<br />
– Grade B+<br />
• Add detailed analysis of at least one photogram<br />
(blue worksheet)<br />
HOMEWORK: bring in a selection of objects to<br />
create your photogram with. (examples: flowers,
Photogram Artists<br />
During these lessons you must:<br />
• Create 2 keynote presentations on 2 artists who use/<br />
create photograms<br />
• Photogram artist suggestions:<br />
– Susan Derges<br />
– Ethan Jantzer<br />
– Man Ray<br />
– Anna Atkins<br />
– Christina Henri<br />
• You must research at least one of the above artists, the<br />
second photogram artist can be one of your choice<br />
• COMPLETE ALL EARLIER WORK...EVERYTHING<br />
SHOULD LOOK AMAZING!
Photogram Artist Analysis<br />
• To complete this work you must create 2 Keynote/<br />
PowerPoints about 2 photogram artists.<br />
!<br />
• Grade D<br />
– give your general opinion on their work (yellow<br />
worksheet) and show images of their work<br />
• Grade C<br />
– analyse at least one image in detail (blue<br />
worksheet)<br />
• Grade B+<br />
– analyse at least 2 images in detail (blue worksheet)
Half Term Homework<br />
Y10 Half Term Homework!<br />
!<br />
Magazine Work:!<br />
Complete a developed magazine shoot for you new magazine cover and evaluate it (pink<br />
worksheet).!<br />
Things to consider:!<br />
•Genre!<br />
•Target Audience!<br />
•Composition - space for title!<br />
•Background!<br />
•Props!<br />
•Subject Matter!<br />
!<br />
Photogram Work:!<br />
Create a visual mind map showing a variety of photograms that inspire you and your work. This<br />
should be either printed out and stuck to a piece of A4 cardboard or can be presented on keynote<br />
or powerpoint. You MUST include at least 15 images on your visual mind map and there should<br />
be NO background visible. !<br />
!<br />
Work can either be brought in on a USB stick/memory card, uploaded onto google drive or<br />
emailed to me (hs@hallcrossacademy.co.uk)!<br />
Due Date: Monday 23rd February 2015
Photogram Artist Analysis<br />
• To complete this work you must create 2 Keynote/<br />
PowerPoints about 2 photogram artists.<br />
• Grade D<br />
– give your general opinion on their work (yellow<br />
worksheet) and show images of their work<br />
• Grade C<br />
– analyse at least two images in detail (blue worksheet)<br />
• Grade B+<br />
– research at least 3 experimental photogram techniques<br />
or photogram edit techniques and analysis them in detail<br />
(blue worksheet).
Photograms<br />
This lesson you must:<br />
• Create a series of photograms using your<br />
objects and experimenting with still/<br />
moving photograms.<br />
• Things to consider:<br />
– Layering your objects<br />
– Composition of your objects<br />
– Adding other items into you composition
Photogram Evaluation<br />
This lesson you must:<br />
evaluate your photograms and the process of<br />
creating them and put them in an album<br />
!<br />
Grade D<br />
show best still photogram and best moving<br />
photogram<br />
Grade C<br />
add images to explain and show equipment used.<br />
analyse one photogram in detail<br />
Grade B+<br />
Discuss ways to improve your photograms either<br />
by doing them again or with editing techniques.
Photogram Edits<br />
This lesson you must:<br />
• Edit your photograms to develop them.<br />
– things to consider - use the worksheet<br />
• colour<br />
• layering<br />
• repeat patterns<br />
• mirror repeats<br />
• do more than one edit of each photogram.<br />
• remember to SCREENSHOT!!<br />
• Produce a keynote animation using your photogram edits<br />
– things to consider<br />
• transitions - keep it simple<br />
• changes - keep them subtle<br />
• 30+ slides.<br />
• Once finished upload your keynote to iWeb and write a<br />
SHORT evaluation
• This lesson you must:<br />
Photogram Edits<br />
• create a series of photogram edits (at least 2 moving<br />
and 2 still) experimenting with a variety of techniques<br />
• Grade D<br />
– edit photograms using steps 1-3<br />
• Grade C<br />
– edit each photogram using steps 1-4 and document<br />
the process with screen shots<br />
• Grade B+<br />
– edit each photogram using at least steps 1-6 and<br />
document the process with screen shots<br />
• Grade A+<br />
– edit each photogram thoroughly using at least steps<br />
1-7 and document the process with screen shots
Easter Homework
Photogram Edits Evaluation<br />
This lesson you must:<br />
evaluate your edit process of the photograms &<br />
create a photogram edits album.<br />
Grade D<br />
show initial photogram and finished edit<br />
photogram<br />
Grade C<br />
add screen shots to show process and<br />
techniques you have used.<br />
Grade B<br />
Compare and contrast your edit techniques to<br />
evidence most successful style.
Photogram Animation<br />
This lesson you must:<br />
• Create a series of 30+ edits from one photogram<br />
– things to consider<br />
• keep the changes subtle<br />
• colour<br />
• layering<br />
• mirror repeats<br />
• Create a keynote presentation with one edit per<br />
slide<br />
– things to consider<br />
• keep the transitions subtle<br />
• get your timings right.<br />
92<br />
• Upload your animation to your iWeb.
David Hockney<br />
This lesson you must:<br />
• Create a keynote presentation based on David Hockney’s joiners
David Hockney Review<br />
• This lesson you must:<br />
Review one of David Hockney’s joiner pieces.<br />
Things to consider:<br />
Which image and why?<br />
What is it about? Narrative etc<br />
What do you think about it? Why?<br />
What will you try and use in your own Hockney inspired<br />
work?<br />
Make sure you include a picture of this image with<br />
the review.<br />
HOMEWORK: Bring in your camera and lead
David Hockney Mask Joiner Shoot<br />
This lesson you must:<br />
Produce a Hockney inspired shoot (30-50 photos<br />
= good joiner, 50-100 = great joiner)<br />
Things to consider:<br />
Composition<br />
How much to include in each image<br />
Proportion and scale, will it be accurate<br />
How much of the background will be involved?<br />
Upload the photos to a folder and also into an<br />
album on your iWeb.
David Hockney Mask Joiner<br />
This lesson you must<br />
Create your mask joiner using Photoshop<br />
•Remember to keep all your images the same<br />
size!<br />
•Don’t forget to document the process using<br />
screen shots!<br />
•Reference Hockney’s ‘Grandmother’ joiner for<br />
help.<br />
HOMEWORK: complete a second Hockney joiner<br />
shoot - your choice of subject matter but<br />
remember you need around 50 photographs!!
Mask Joiner Evaluation<br />
This lesson you must:<br />
evaluate your mask joiner.<br />
Grade D<br />
show completed mask joiner and explain how<br />
you created it<br />
Grade C<br />
add screen shots to show process and<br />
techniques you have used, explain if it was<br />
successful.<br />
Grade B<br />
Compare and contrast your mask joiner with<br />
Hockney’s ‘Grandmother’ joiner.
David Hockney Home Joiner<br />
This lesson you must<br />
Create your home joiner using Photoshop<br />
•Remember to keep all your images the<br />
same size!<br />
•Don’t forget to document the process<br />
using screen shots!
Home Joiner Evaluation<br />
This lesson you must:<br />
evaluate your home joiner.<br />
Grade D<br />
show completed home joiner and explain how<br />
you created it<br />
Grade C<br />
add screen shots to show process and<br />
techniques you have used, explain if it was<br />
successful.<br />
Grade B<br />
Compare and contrast your home joiner with an<br />
appropriate Hockney joiner.
David Hockney Home Joiner<br />
This lesson you must<br />
Create your home joiner off the computer<br />
•Remember to keep all your images the same<br />
size, print them using Preview (16 to a<br />
page)!<br />
•Photos should be securely stuck down in the<br />
correct places and there should be NO gaps<br />
in your joiner.<br />
•Photograph your finished joiner, some close<br />
up sections and the whole thing.<br />
•Upload photos to blog entry.
EXTENSION: Experimental Joiners<br />
This lesson you must:<br />
Experiment with editing your Hockney joiner, all<br />
images could be the same or it could be a<br />
combination of edit techniques.<br />
Things to consider:<br />
colour/b&w<br />
contrast<br />
filters - be selective<br />
Make sure you document the process using<br />
screen shots.<br />
Now present your edits by completing your joiner.<br />
Evaluate your edits in a blog entry
Complete Joiners<br />
This lesson you must:<br />
• Complete all joiner work<br />
– mask joiner - evaluation and album<br />
– home joiner - evaluation and album<br />
– cut and stick home joiner - evaluation with<br />
photo<br />
– album with all finished joiners in.<br />
– EXTENSION: experimental edit joiner -<br />
evaluation and album
Architecture
Ted<br />
VanCleave<br />
Joel<br />
Tjintjelaar
Architecture Shoot<br />
• Homework: Complete a photo shoot of a<br />
variety of architecture.
Architecture<br />
This lesson you must:<br />
• Upload your architecture shoot in to a<br />
folder in your documents.<br />
• Create an album on your iWeb<br />
• Complete an evaluation of your photo<br />
shoot (use the pink worksheet)
Architecture Edits<br />
This lesson you must:<br />
• Edit your architecture photographs (minimum<br />
of 3 photos per shoot and 2 edits per photo)<br />
• Make them look amazing<br />
– contrast<br />
– colour<br />
– crop<br />
– dodge and burn<br />
• Document the process using screen shots<br />
• HOMEWORK: Architecture details shoot and<br />
evaluation. Due date:
Architecture Edits
Layered Mounting<br />
This lesson you must:<br />
select your chosen image & print (2 to a<br />
page using Preview) 2 copies<br />
• Create at least a 2 layered piece (grade D). <br />
• Create at least a 2 layered piece with accurate <br />
cu7ng and neat presenta9on (grade C). <br />
• Create at least a 3 layer moun9ng piece, showing <br />
ability to accurately cut detailed sec9ons (grade <br />
A/B).
Layered Mounting<br />
This lesson you must:<br />
complete your layered mounting piece<br />
• Create at least a 2 layered piece (grade D). <br />
• Create at least a 2 layered piece with accurate <br />
cu7ng and neat presenta9on (grade C). <br />
• Create at least a 3 layer moun9ng piece, showing <br />
ability to accurately cut detailed sec9ons (grade <br />
A/B). <br />
• Photograph your layered moun9ng from mul9ple <br />
angles to show what you have created.
Architecture Details Shoot<br />
Homework: Complete a photo shoot of a<br />
variety of architecture details and evaluate it.<br />
Due: 1st June 2015.
Architecture<br />
This lesson you must:<br />
• Upload your architecture details shoot in to<br />
a folder in your documents.<br />
• Create an album on your iWeb<br />
• Complete an evaluation of your photo<br />
shoot
Architecture Edits Evaluation<br />
This lesson you must:<br />
evaluate your architecture edits & create an<br />
architecture edits album.<br />
Grade D<br />
show initial photograph and finished edit<br />
Grade C<br />
add screen shots to show process and<br />
techniques you have used.<br />
Grade B<br />
Compare and contrast your edit techniques<br />
to evidence most successful style.
Layered Mounting<br />
This lesson you must:<br />
• select your chosen image<br />
• print it (2 to a page using Preview) - 2-4<br />
copies<br />
• Create at least a 3 layered piece with accurate <br />
cu7ng and neat presenta9on (grade C). <br />
• Create at least a 4 layer moun9ng piece and plan <br />
ways to develop the layered moun9ng technique <br />
into a more personal outcome (grade A/B). <br />
• Photograph your layered moun9ng from mul9ple <br />
angles to show what you have created.
Layered Mounting Evaluation<br />
During this lesson you must:<br />
• Evaluate your layered mounting pieces - use the pink<br />
worksheet and create an album with the images in
Section Edits
Section Edit Layered Mounting<br />
This lesson you must:<br />
• select your chosen image<br />
• print it (1 to a page using Preview) - 2 copies<br />
• Create at least a 2 layered piece with accurate <br />
cu7ng and neat presenta9on (grade C). <br />
• Create at least a 3 (one acetate) layer moun9ng <br />
piece and plan ways to develop the layered <br />
moun9ng technique into a more personal <br />
outcome (grade A/B). <br />
• Photograph your layered moun9ng from mul9ple <br />
angles to show what you have created.
Section Edit Layered Mounting<br />
During this lesson you must:<br />
Evaluation<br />
• Evaluate your section edit layered mounting pieces -<br />
use the pink worksheet and create an album with the<br />
images in<br />
118
Zig Zag Edits<br />
This lesson you must:<br />
• Select your most successful photograph so far and create at least<br />
10 edited versions<br />
• Things to consider:<br />
– Cropping<br />
– Layering<br />
– Repeat patterns<br />
– Colour<br />
– Hand edits<br />
– Layered mounting<br />
• These will be presented in a zig zag book with the original<br />
photograph, a title paper with your name on, a page with<br />
information about the edits and a brief evaluation page.<br />
Therefore you will have at least 13 pages.<br />
• You’ll be assessed on the quality of the edits and the<br />
presentation.
Zig Zag Peer Evaluations<br />
This lesson you must:<br />
• Look at others work in your group and then evaluate<br />
someone else's zig zag book.<br />
• Things you should feedback on:<br />
– 3 successes<br />
– 2 constructive criticisms<br />
– Overall marks for book:<br />
• Give a mark for experimentation (AO2) out of 20<br />
• Give a mark for presentation/personal response (AO4) out of 20<br />
• You must write this feedback on paper and leave it in the<br />
zig zag book.<br />
• I need to know the marks given for each book
Presenting Work<br />
This lesson you must:<br />
• Hand in your finished zig zag book.<br />
• Begin to present your work in your sketchbooks.<br />
• Things to consider<br />
– Everything you have done must go in it.<br />
– Neat presentation<br />
– Make it individual<br />
– Titles<br />
– Keep everything in order.<br />
• You should be continuing to present your work in your<br />
sketchbook from now on<br />
• Next lesson we will be starting our photogram work
AO Grids<br />
This lesson you must:<br />
• Complete your AO grid, listing what you<br />
have done and what needs improving or<br />
finishing.<br />
• Speak to me about the work on your AO<br />
grid.<br />
• Ensure ALL work so far is at the highest<br />
standard it can be.