2013 Necromunda Tournament
2013 Necromunda Tournament
2013 Necromunda Tournament

Create successful ePaper yourself
Turn your PDF publications into a flip-book with our unique Google optimized e-Paper software.
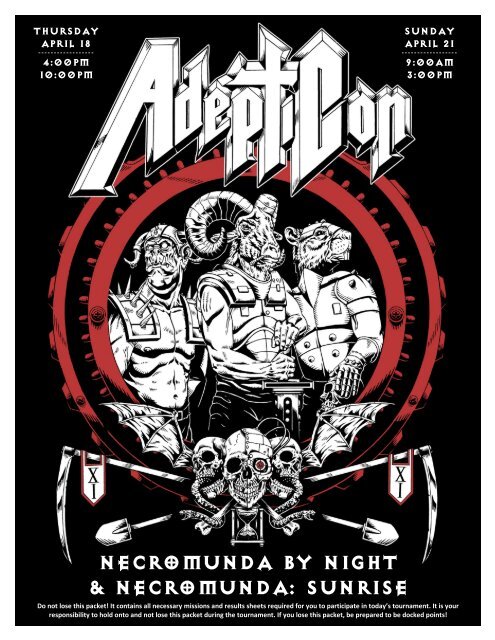
THURSDAY<br />
APRIL 18<br />
------------------<br />
4:00PM<br />
10:00PM<br />
SUNDAY<br />
APRIL 21<br />
------------------<br />
9:00AM<br />
3:00PM<br />
NECROMUNDA BY NIGHT<br />
& NECROMUNDA: SUNRISE<br />
Do not lose this packet! It contains all necessary missions and results sheets required for you to participate in today’s tournament. It is your<br />
responsibility to hold onto and not lose this packet during the tournament. If you lose this packet, be prepared to be docked points!
NECROMUNDA BY NIGHT and NECROMUNDA: SUNRISE<br />
Last Update: 11.15.2012<br />
AdeptiCon reserves the right to modify, update, clarify, or change event rules in the interest of making AdeptiCon the best event<br />
possible. No fundamental rules changes will be made after 2/1/<strong>2013</strong>.<br />
GENERAL RULES<br />
• This tournament utilizes the <strong>Necromunda</strong>: Underhive rulebook and all current gang expansion articles, available free here.<br />
• All players are expected to abide by the AdeptiCon Conduct Policy.<br />
• All models MUST be fully painted to a 3-color minimum standard. Any model not painted to this standard will be removed<br />
from play and any credits spent on it are permanently lost.<br />
• All models MUST REASONABLY ADHERE to WYSIWYG rules. Any model not represented properly will be removed from<br />
play and any credits spent on it are permanently lost.<br />
• All players must have access to their own rule set, dice, counters, gang rosters, etc.<br />
• Players may use 28mm miniatures from any company, provided:<br />
o Models are fully assembled and painted.<br />
o Models are mounted on a 28mm (or larger) round base.<br />
o Models reasonably adhere to the WYSIWYG rules.<br />
• All normal <strong>Necromunda</strong> rules are in effect. This includes the Advanced Rules.<br />
• Each scenario has a time limit of 65 minutes. A post-game sequence of 15 minutes is provided for experience, injury rolls,<br />
and skill selection.<br />
• Players are encouraged to ask questions and solicit the Judge’s opinion if there is a disagreement. Please be aware that<br />
the Judge’s decisions are final.<br />
GANG CREATION, ITEMS & HIRED GUNS<br />
• All official gang listings are allowed.<br />
• Gang creation occurs as per the <strong>Necromunda</strong> rulebook (or applicable article). All normal restrictions apply. Each gang has<br />
1200 credits to spend on gang creation. Any unspent credits are forfeited.<br />
• Gangs will have NO access to territories, income generation, and the Trading Post during the tournament.<br />
• As such, gangs may purchase weapons/items/equipment from either Trading Post, at full cost, that they would not<br />
normally have access to upon gang creation. Weapons must be represented per WYSIWYG rules and all weapon-type<br />
limitations apply (i.e. Juves may not carry heavy weapons, etc.).<br />
• Gangs may hire a maximum of two (2) Hired Guns. The cost for each is their applicable Hire Fee + 40 credits. Because<br />
there is no income generation, players will not have to pay maintenance fees for any Hired Gun. The following Hired Guns<br />
(and their rules) are available below:<br />
o Scum, Bounty Hunter, Ratskin Scout (from Underhive Rulebook)<br />
o PDF Deserter, Ogryn Bodyguard, House Agent, Pit Slave, Ratskin Savage, Sniper (PDF)<br />
o Wyrds (PDF)<br />
EXPERIENCE, INJURIES & RECRUITMENT<br />
• Fighters gain experience and injuries, as normal. Players roll in front of their current opponent during the post-game<br />
sequence. Re-roll any “Capture” results.<br />
• Because there is no income generation, players may not recruit further fighters in the post-game sequence.<br />
Redemptionist players may only recruit two (2) Devotees under the “A Gathering of the Redeemed” special rule. Enforcer<br />
players never lose non-Hired Gun fighters due to the nature of the “Patrol Team” rule.<br />
SCENARIO POINTS & AWARDS<br />
• 52 Points Total; divided as follows:<br />
o 40 Scenario Points: +10 per Win, +5 per Draw, +0 per Loss<br />
o Additionally, 3 Bonus Objective Points are available in each scenario.<br />
• Prizes will be awarded for 1 st , 2 nd , and 3 rd Place and Nightrider.<br />
• The “Nightrider” Award will be presented to the player who assembles the best gang. Points are awarded via the judge<br />
based on painting, modeling, and creativity. Additional points are awarded via player choice.
NECROMUNDA TOURNAMENT<br />
SCENARIO 1: TOTAL WAR<br />
Your gang has been tasked by a local miners' guild to eliminate a large creature that’s been nesting in one of the old abandoned domes.<br />
The creature only leaves its lair during lightsdown and its lair is very well concealed, so it is imperative to kill it before darkness descends.<br />
As placed by event staff.<br />
TERRAIN<br />
SETUP<br />
Each player writes down all the gang members they wish to<br />
deploy at the beginning of the game on pieces of paper and<br />
places them in a cup. The players then take it in turn to nominate<br />
a specific point on the table and pick out one piece of paper. The<br />
picked fighter is then placed on the specified point. This<br />
continues until all fighters in the cup are placed.<br />
Any fighters not placed at the beginning of the game move on to<br />
their player's table edge during Turn 3. Both players then roll a<br />
D6, who scores highest goes first.<br />
SCENARIO CONDITIONS: LIGHTSDOWN<br />
The Underhive has no natural day-night cycle because no light<br />
reaches its depths. Instead, most habitable domes have an<br />
artifical day and night, implemented by increasing or decreasing<br />
the ambient light. It is hoped that this is done gradually, but<br />
often the changes can be abrupt, leaving a dome shrouded in<br />
darkness for hours or increasing the lighting too much.<br />
At the beginning of Turn 2, vision range is reduced to 36”. At the<br />
beginning of Turn 3, vision range is reduced to 24” and models<br />
may claim partial cover if within 1” of a full cover structure or<br />
terrain feature. At the beginning of Turn 4, vision range is<br />
reduced to 16”, models may claim partial cover if within 1” of a<br />
full cover structure or terrain feature, models may run and hide,<br />
and may not use the Fast Shot, Marksman, or Rapid Fire skills. At<br />
the beginning of Turn 5, all the above restrictions apply and<br />
models count Fumbles as double in HtH combat.<br />
The dome becomes fully dark at the end of Turn 6 and the game<br />
ends.<br />
SCENARIO OBJECTIVES<br />
Lightsdown objective is for either gang to kill the creature<br />
BEFORE THE END OF TURN 6! Whichever gang successfully kills<br />
the creature wins. If mutually agreed by both players, play may<br />
continue after the monster is killed. Experience and injuries are<br />
still generated if play continues after the creature is killed.<br />
If either gang fails a Bottle test (or voluntarily Bottles Out), the<br />
game ends immediately. The gang which bottled out loses and<br />
the opposing gang wins.<br />
If both gangs are still playing when the Judge calls time or if the<br />
creature is not killed by the end of Turn 6, the scenario is a Draw<br />
and neither player may win.<br />
SPECIAL CONDITIONS: CREATURE HUNT<br />
At the beginning of each player's turn, roll a D6 for each friendly<br />
fighter on the table. On a roll of 6 (Add +1 if the model is Down) ,<br />
that model is the first to encounter the creature (The creature<br />
automatically appears in the center of the table on Turn 4). Place<br />
the creature model within 4” of that model. On each player's<br />
turn before the Shooting phase, it moves towards the closest<br />
model and attempt to charge into HtH combat (if target is under<br />
6"). The opposing player makes any applicable rolls for the<br />
creature.<br />
He has the following profile:<br />
M WS BS S T W I A Ld<br />
5 5 -- 4 4 2 6 2 10<br />
Weapons: A variety of natural weapons counting as a Sword and<br />
Massive Club<br />
Armor: The creature has a 5+ armor save.<br />
Special: The creature is never Pinned and never suffers from<br />
Psychology effects.<br />
BONUS OBJECTIVES<br />
“I Call It Brobee.”: One of your models was able to kill the<br />
creature on the first turn it appeared.<br />
Expert Tracker: One of your models revealed the creature on<br />
Turn 1.<br />
Game Hunter: One of your model's made one successful<br />
shooting attack at long range this scenario.<br />
SCENARIO EXPERIENCE<br />
+D6 Survives: If the fighter survives the battle, it earns D6<br />
Experience, even if they are wounded or taken Out Of Action.<br />
+D6/Wounding Hit: A fighter earns D6 Experience per wounding<br />
hit he inflicts. Although it is possible to inflict several wounds<br />
from one weapon with each shot, only D6 Exp. are earned per<br />
Hit, not per wound.<br />
+D6 Winning Side: Each surviving fighter on the winning side<br />
earns D6 Experience<br />
+D6 Creature Killer: A fighter earns D6 Experience if he<br />
successfully kills the creature.<br />
+5 Winning Leader: The gang leader on the winning side receives<br />
5 Experience.
NECROMUNDA TOURNAMENT<br />
SCENARIO 2: BREAKTHROUGH TO THE MINEHEAD<br />
After eliminating the creature, the local miners' guild has tasked you with clearing the minehead for renewed operations. Unfortunately, a rival<br />
gang has been using the mine as a hideout and will defend it against any intrusion.<br />
As placed by event staff.<br />
TERRAIN<br />
SETUP<br />
The gang with the lowest gang rating chooses one table edge and<br />
deploys his models within 12” of that table edge. This gang is the<br />
defender and must nominate one building within 12” of their table<br />
edge as the Mine Office. The defending player may then leave the<br />
Mine Office where it is or move it anywhere within their deployment<br />
zone.<br />
The Mine Office needs to be defended at all costs and may be<br />
destroyed (it has a Toughness of 7).<br />
The opposing gang then deploys their models within 4” of the<br />
opposite table edge.<br />
Both players roll D6. The highest scorer goes first.<br />
SCENARIO CONDITIONS: VERY LOW LIGHT<br />
Because of the poor lighting, vision range is reduced to 36”, models<br />
may run and hide in the same turn, and models may not use the<br />
Marksmen or Fast Shot abilities. The above rule does NOT apply<br />
within 6” of the Mine Office or any other structure/terrain that has<br />
been “lit” (see below).<br />
SPECIAL RULE: LAMP-LIGHTING<br />
Each gang receives one Lamplighter model. This model is considered<br />
a friendly model and may benefit from the Gang Leader’s special<br />
rule. He has the following profile:<br />
M WS BS S T W I A Ld<br />
4 4 3 3 3 2 4 1 7<br />
Weapons: Lamplighters carry a Laspistol, Club, and Krak Grenades.<br />
He is so well-equipped that he does not have to take Ammo Rolls.<br />
He may be given no other weapons or equipment..<br />
Armor: Lamplighters have a 5+ armor save.<br />
Special: Lamplighters will only shoot as targets within 12”, defend<br />
itself in HtH combat, and may only charge an enemy if there is a<br />
friendly model within 6”.<br />
SCENARIO OBJECTIVES<br />
The specific objective is to force the opposing gang to Bottle Out or,<br />
in the attacker's case to destroy the Mine Office – this is NOT<br />
encouraged by the Miners' Guild!<br />
If either gang fails a Bottle test (or voluntarily Bottles Out), the game<br />
ends immediately. The gang which bottled out loses and the<br />
opposing gang wins. If the Attacker destroys the Mine Office, he<br />
wins (but at a lower point value and Experience loss) and the<br />
Defender loses.<br />
If both gangs are still playing when the Judge calls time, the scenario<br />
is a Draw and neither player may win.<br />
BONUS OBJECTIVES<br />
Watch It!: At least one of your models used a Blast or Template<br />
weapon to target an area or model within 6” of the Mine Office or<br />
Lamplighter model.<br />
Razorhawk-Eyed: At least one of your models hit an enemy model<br />
from Overwatch.<br />
Prometheus: Your Lamplighter “lit” at least 3 structures or<br />
Lampposts this scenario.<br />
SCENARIO EXPERIENCE<br />
+D6 Survives: If the fighter survives the battle, it earns D6<br />
Experience, even if they are wounded or taken Out Of Action.<br />
+D6/Wounding Hit: A fighter earns D6 Experience per wounding hit<br />
he inflicts. Although it is possible to inflict several wounds from one<br />
weapon with each shot, only D6 Exp. are earned per Hit, not per<br />
wound.<br />
+D6 Winning Side: Each surviving fighter on the winning side earns<br />
D6 Experience<br />
-2 Destroying Mine Office: A fighter LOSES 2 Experience for<br />
destroying the Mine Office.<br />
+10 Winning Leader: The gang leader on the winning side receives<br />
10 Experience.<br />
When any Lamplighter ends its movement in base-to-base contact<br />
with a Lamppost or structure (NOT scatter terrain), the Lamplighter<br />
may use its remaining turn to “light” that Lamppost or structure. To<br />
do so, the lamplighter rolls an Initiative test. If successful, the<br />
structure is “lit” (see Special Condition above). Place a unique token<br />
next to the structure to indicate your Lamplighter succeeded.<br />
If failed, the structure remains dark and the Lamplighter may try<br />
again next turn. In either case, the model may perform no other<br />
actions this turn, other than to defend itself in HtH combat.<br />
Opposing Lamplighters may not “re-light” or “turn off” already “lit”<br />
structures.
NECROMUNDA TOURNAMENT<br />
SCENARIO 3: SHOWDOWN AT FULL DARK<br />
Celebrating victories at the local watering hole can often lead to even more battles...and it looks like you just found one!<br />
As placed by event staff.<br />
TERRAIN<br />
SETUP<br />
Each player rolls a D6 to see how many fighters he has in the<br />
shootout: 1-2 = 2 fighters, 3-4 = 3 fighters, 5-6 = 4 fighters. These<br />
fighters are randomly selected. The two gangs are set up 16”<br />
apart at ground level and in positions where they are all in full<br />
view of each other. Each friendly model may not be placed more<br />
than 2” away from another friendly model.<br />
SPECIAL RULE: SHOOT-OUT<br />
Before regular play begins, a shootout must occur. First each<br />
player moves all their fighters 2” until at least 2 opposing fighters<br />
are within 6” of one another. When this happens, each player<br />
rolls a D6 in turn and adds that value to their Nerve Score (rolls<br />
of 6 are considered to be 0 value). When one player's Nerve<br />
Score reaches 15, their fighters have lost their nerve and pulled<br />
their weapons.<br />
After the Nerve is broken, each fighter's order of shooting is<br />
determined separately by rolling a D6 and adding that fighter's<br />
Initiative. Also, add +1 if equipped with a pistol or subtract -1 if<br />
equipped with a heavy weapon. The result is the Draw score.<br />
Once all Draw scores are worked out, each player shoots from<br />
highest to lowest. After this shooting is worked out, regular play<br />
begins – roll a D6, the highest scoring player goes first. All other<br />
models not involved in the shootout enter play on Turn 1 from<br />
their board edge.<br />
SPECIAL RULE: FULL DARK<br />
At Full Dark, the dome's lighting is turned down almost entirely,<br />
with only localized power to structures available - vision range is<br />
reduced to 16”, models may claim partial cover if within 1” of<br />
any “unlit” terrain feature, models may run and hide, any<br />
shooting attack at long range incurs an additional -1 To Hit<br />
penalty, and models count Fumbles as double in HtH combat.<br />
The above restrictions do not apply to any models being targeted<br />
within 6” of a “lit” structure, terrain feature, or lamppost. They<br />
will stand out prominently to all around.<br />
SPECIAL RULE: INEBRIATED<br />
Those fighters involved in the shootout were partaking heavily at<br />
the watering hole. Once normal play resumes, they suffer the<br />
effects of their intoxication, subtracting -1 from both BS & WS.<br />
However, they are not affected by Fear. They may attempt to<br />
clear their head by making a successful Initiative test. This does<br />
NOT affect fighters entering the table on Turn 1.<br />
SCENARIO OBJECTIVES<br />
The specific objective is for either gang to force the other to<br />
Bottle Out.<br />
If either gang fails a Bottle test (or voluntarily Bottles Out), the<br />
game ends immediately. The gang which bottled out loses and<br />
the opposing gang wins.<br />
If (during regular play) both gangs only have Inebriated fighters<br />
(not counting those Down or Out of Action) or if both gangs are<br />
still playing when the Judge calls time, the scenario is a Draw and<br />
neither player may win.<br />
BONUS OBJECTIVES<br />
Line of Eld: A fighter took an opposing model Down or Out of<br />
Action with a pistol weapon during the Shoot-out.<br />
Liquid Courage: One of your fighters stayed Inebriated until the<br />
end of the game.<br />
“Stay Out of the Light!”: One of your fighters was hit whilst<br />
standing within 6” of a “lit” structure.<br />
SCENARIO EXPERIENCE<br />
+? Held Nerve: Each surviving fighter of the side which held its<br />
nerve the longest scores a number of Experience equal to the<br />
difference between the two scores<br />
+D6 Survives: If the fighter survives the battle, it earns D6<br />
Experience, even if they are wounded or taken Out Of Action.<br />
+D6/Wounding Hit: A fighter earns D6 Experience per wounding<br />
hit he inflicts. Although it is possible to inflict several wounds<br />
from one weapon with each shot, only D6 Exp. are earned per<br />
Hit, not per wound.<br />
+D6 Winning Side: Each surviving fighter on the winning side<br />
earns D6 Experience
NECROMUNDA TOURNAMENT<br />
SCENARIO 4: MIDNIGHT RITUAL<br />
So there was a reason that mine was closed long ago. The Miners' Guild wants you to go back in and figure it out but they're not convinced your gang can do it<br />
alone. A little “unfriendly” competition never hurt anyone...too much.<br />
As placed by event staff.<br />
TERRAIN<br />
SETUP<br />
The gang with the highest gang rating chooses one table edge and deploys<br />
his models within 4” of that table edge.<br />
The opposing gang then deploys their models within 4” of the opposite table<br />
edge. The Magus is then deployed in the center of the table (or as close as<br />
possible).<br />
Each player rolls a D6 and adds their Leader's Initiative. The highest score<br />
goes first.<br />
SCENARIO CONDITIONS: FAULTY DOME<br />
This dome is suffering severe structural and electrical damage. At the<br />
beginning of every player turn, roll a D6 and consult the chart below.<br />
FAULTY DOME CHART<br />
1 High-speed Fans: Any model firing a weapon at long range<br />
suffers an additional -1 to hit modifier. Models which run on an<br />
elevated surface and end their movement within 2” of an edge<br />
must make an Initiative Test or suffer a fall.<br />
2 Major Water Leak: Vision range is reduced to 30” and models<br />
suffer a -2 to hit modifier when shooting from Overwatch.<br />
Models which Catch Fire may re-roll a test to put out the flames.<br />
3-4 All Clear: Previous conditions are stopped and return to normal.<br />
5 Gas Buildup: Any model in cover who shoots and rolls a 1 triggers<br />
one of these pockets! Resolve the effects like a Frag grenade<br />
centered on the firing model. Models in the open or more than<br />
8” from the ground level will not trigger these pockets.<br />
6 Power Failure: Vision range is reduced to 12” (unless a model<br />
possesses Night Goggles, Flash grenades, or some source of<br />
illumination) and models may not use the Fast Shot, Rapid Fire,<br />
or Marksman skills! Models may run and hide in the same turn.<br />
Additionally, if either player uses a Blast or Template weapon, roll a D6. On a<br />
roll of 6, the blast causes debris and crumbling support beams to rain down.<br />
Each model must take an Initiative Test (whoever has the current turn rolls<br />
for the Giant Creature). If failed, that model suffers D3 Strength 3 hits and is<br />
Pinned.<br />
SPECIAL RULE: MONSTERS IN THE SHADOWS<br />
Each player may roll a D6 at the start of the opposing player’s turn. On a roll<br />
of 1-5, nothing happens. On a roll of 6, mutant creatures have attacked a<br />
member of the rival gang. The fighter who is attacked is the one furthest<br />
from any other models, friend or foe. If there are models equally isolated,<br />
the one closest to a table edge is attacked.<br />
Roll a D6 to see what happens to the unlucky fighter and consult the chart<br />
below:<br />
MONSTER ATTACK CHART<br />
1 – 3 The fighter manages to beat off the creature, but just barely. The<br />
model may not make any voluntary actions this turn and must<br />
take an ammo roll.<br />
4 – 5 The fighter is successful in defending itself and may proceed<br />
normally.<br />
6 There is a gunshot, a shriek, and the mob cheers. The fighter is<br />
taken Out Of Action. If this fighter must roll on the Injury chart<br />
after the battle, the controlling player may re-roll the first result.<br />
SPECIAL RULE: CHAOS MAGUS<br />
The Chaos Magus is an independent model. On each player's turn before the<br />
Shooting phase, it will attack the closest model via a Wyrd shooting attack (if<br />
target is over 6" away) or charge into HtH combat (if target is under 6"). The<br />
opposing player makes any applicable rolls for the Magus.<br />
He has the following profile:<br />
M WS BS S T W I A Ld<br />
3 4 4 3 4 3 3 2 10<br />
Weapons: The Magus carries a Staff (counts as Club) and ornate Sword.<br />
Armor: The Magus has a 5+ armor save.<br />
Special: The Magus is a Wyrd and follows all applicable Wyrd rules, as per the<br />
<strong>Necromunda</strong> rulebook. He has the following psychic powers:<br />
• Terrify: The psyker may target one enemy model within 24” and<br />
LOS. That model takes an immediate Break test using its own Ld. If<br />
failed, the victim is broken and flee 2D6”. The victim recovers<br />
automatically on its next turn.<br />
• Flame Burst: The psyker creates a burst of flame, exactly as if the<br />
model were armed with a Flamer. No Ammo Roll is ever made for<br />
this power and it does not malfunction. The psyker may place the<br />
firing end of the flamer template anywhere with 2” of its base.<br />
This power may NOT be used while engaged in HtH combat.<br />
SCENARIO OBJECTIVE<br />
The specific objective is for either gang to take the Magus Out Of Action and<br />
as many of the opposing gang's models as possible. If the one gang succeeds<br />
in taking the Magus Out Of Action and the opposing bottles out, the game<br />
ends immediately and that gang has won (Major Victory).<br />
If an opposing gang bottles out but the Magus is still alive, the gang which<br />
bottled out takes control of the Magus and may control it during their turn<br />
normally (that player's gang leaves play as normal). If the remaining gang<br />
subsequently bottles out or fails to take the Magus Out Of Action before the<br />
game ends, that gang wins a Minor Victory. The gang that first bottled out<br />
still suffers a Loss.<br />
If both gangs are still playing when the Judge calls time, the scenario is a<br />
Draw.<br />
BONUS OBJECTIVES<br />
Wreck-It Roger: One of your fighters used a Blast or Template weapon that<br />
caused a Dome-in.<br />
Summoner: Your opponent’s models were attacked by the Monsters on at<br />
least three (3) consecutive turns.<br />
Kill The Witch! One of your models caused at least one wound to the Magus.<br />
EXPERIENCE<br />
+D6 Survives: If the fighter survives the battle, it earns D6 Experience, even if<br />
they are wounded or taken Out Of Action.<br />
+D6/Wounding Hit: A fighter earns 5 Experience per wounding hit he inflicts.<br />
Although it is possible to inflict several wounds from one weapon with each<br />
shot, only 5 Exp. are earned per Hit, not per wound.<br />
+D6 Gotcha!: A surviving model that takes the Magus Out Of Action earns 3<br />
Experience.<br />
+10 Winning Leader: The gang leader on the winning side receives 10<br />
Experience.
NECROMUNDA TOURNAMENT<br />
RESULTS FOR SCENARIO 4: MIDNIGHT RITUAL<br />
PLAYER NAME<br />
SCENARIO (CIRCLE ONE)<br />
ATTACKER DEFENDER<br />
SCENARIO OBJECTIVE (CIRCLE ONE)<br />
Win - Major +10<br />
Win – Minor 5<br />
Draw +5<br />
Lose +0<br />
BONUS OBJECTIVES (CIRCLE ALL THAT APPLY)<br />
Wreck-It Roger +1<br />
Summoner +1<br />
Kill the Witch! +1<br />
TOTAL POINTS:<br />
Opponent’s Signature: ___________________________________________<br />
Please hand to the Judge at the same time as your opponent.<br />
THANKS FOR PLAYING!
NECROMUNDA TOURNAMENT<br />
RESULTS FOR SCENARIO 3: SHOWDOWN AT FULL DARK<br />
PLAYER NAME<br />
SCENARIO (CIRCLE ONE)<br />
ATTACKER DEFENDER<br />
SCENARIO OBJECTIVE (CIRCLE ONE)<br />
Win - Major +10<br />
Win – Minor 5<br />
Draw +5<br />
Lose +0<br />
BONUS OBJECTIVES (CIRCLE ALL THAT APPLY)<br />
Line of Eld +1<br />
Liquid Courage +1<br />
“Stay Out of the Light!” +1<br />
TOTAL POINTS:<br />
Opponent’s Signature: ___________________________________________<br />
Please hand to the Judge at the same time as your opponent.<br />
----------------------------------------------------- TEAR HERE -----------------------------------------------------<br />
NIGHTRIDER AWARD<br />
Please provide your vote for the Nightrider Award.<br />
Player Name: ______________________________________________________<br />
Gang: _____________________________________________________________
NECROMUNDA TOURNAMENT<br />
RESULTS FOR SCENARIO 2: BREAKTHROUGH TO THE MINEHEAD<br />
PLAYER NAME<br />
SCENARIO (CIRCLE ONE)<br />
ATTACKER DEFENDER<br />
SCENARIO OBJECTIVE (CIRCLE ONE)<br />
Win +10<br />
Draw +5<br />
Lose +0<br />
BONUS OBJECTIVES (CIRCLE ALL THAT APPLY)<br />
Watch It! +1<br />
Razorhawk-eyed +1<br />
Prometheus +1<br />
TOTAL POINTS:<br />
Opponent’s Signature: ___________________________________________<br />
Please hand to the Judge at the same time as your opponent.<br />
THANKS FOR PLAYING!
NECROMUNDA TOURNAMENT<br />
RESULTS FOR SCENARIO 1: LIGHTS DOWN HUNT<br />
PLAYER NAME<br />
SCENARIO OBJECTIVE (CIRCLE ONE)<br />
Major Victory +10<br />
Minor Victory +5<br />
Minor Loss +2<br />
BONUS OBJECTIVES (CIRCLE ALL THAT APPLY)<br />
“I Call It Brobee” +1<br />
Expert Tracker +1<br />
Game Hunter +1<br />
TOTAL POINTS:<br />
Opponent’s Signature: ___________________________________________<br />
Please hand to the Judge at the same time as your opponent.<br />
THANKS FOR PLAYING!