Operation Manual
Operation Manual
Operation Manual

Create successful ePaper yourself
Turn your PDF publications into a flip-book with our unique Google optimized e-Paper software.
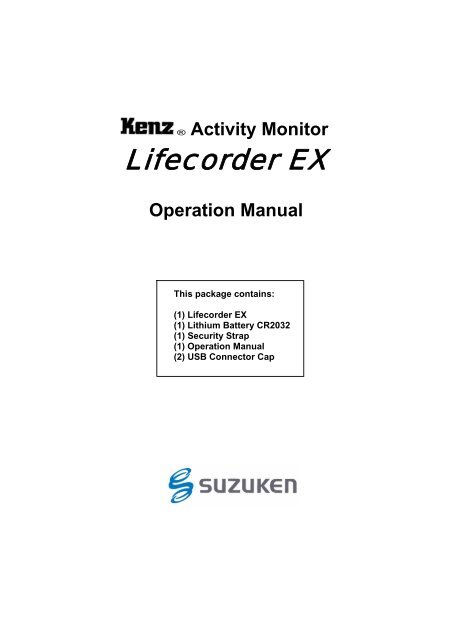
® Activity Monitor<br />
Lifecorder EX<br />
<strong>Operation</strong> <strong>Manual</strong><br />
This package contains:<br />
(1) Lifecorder EX<br />
(1) Lithium Battery CR2032<br />
(1) Security Strap<br />
(1) <strong>Operation</strong> <strong>Manual</strong><br />
(2) USB Connector Cap<br />
- 0 -
Table of Contents<br />
Page<br />
Attention to Users 1<br />
Warnings and Cautions 1<br />
1. Name and Function of Each Component 3<br />
2. Specifications and Functions 4<br />
3. 7-day Memory Display 7<br />
4. Installation<br />
-Things to Prepare 8<br />
-Preparation Steps 8<br />
-Inserting the Battery into the Device 8<br />
-Set up Data and Range 10<br />
-How to Set up Personal Data, Day and Time 11<br />
-Changing the Settings During <strong>Operation</strong> 18<br />
5. Wearing the Lifecorder EX 19<br />
6. <strong>Operation</strong> 19<br />
-Real Time Mode 19<br />
-Viewing Display During Real Time Mode 20<br />
-Degree of Achievement Display 21<br />
-Using the Event Key 21<br />
-Checking the Number of Days Saved in Memory 22<br />
7. Viewing 7-day Memory on the Display 23<br />
8. Post-Measurement<br />
-Data Download to a PC 24<br />
-Resetting Lifecorder EX 24<br />
-Replacing the Battery 25<br />
9. Energy Expenditure Calculation System of the Lifecorder EX<br />
-Basal Metabolic Rate (BMR) 25<br />
-Activity Energy Expenditure (Activity Cal) & Intensity Level 25<br />
-Daily Energy Expenditure 26<br />
-Micro Activity Energy Expenditure 26<br />
-Step Count 26<br />
10. Trouble Shooting 26<br />
1) Key Action 27<br />
2) Display 28<br />
3) Measurement Values 30<br />
- 1 -
LIFECORDER EX Activity Monitor<br />
Attention to Users<br />
Thank you very much for choosing the Kenz Lifecorder EX activity monitor. Please<br />
read this operation manual thoroughly before using the device.<br />
The Kenz Lifecorder is the accurate and durable activity monitor. It records the<br />
intensity of vertical body movement (Activity Intensity Level) using special<br />
accelerometer and step count. The step and intensity measurements calculate<br />
caloric expenditure and basal metabolic energy expenditure based on age, gender,<br />
height and weight.<br />
The Kenz Lifecorder EX is a community and home-based monitoring device<br />
with a maximum of 200 days memory for specialists interested in analyzing<br />
and improving people’s lifestyles by increasing their physical activity.<br />
Data from the Lifecorder can be downloaded to a personal computer using an<br />
optional cable, and analyzed using the Physical Activity analysis software<br />
sold separately.<br />
Warnings and Cautions<br />
Warnings<br />
• Do not ingest the battery, battery cover or security strap.<br />
• Keep the battery away from small children. Please consult a doctor<br />
immediately in the event the battery is swallowed.<br />
• Do not throw the battery or the device into a fire or open flame. Dispose of the<br />
battery and device properly.<br />
• When using this device to measure your physical activity, please<br />
consider your current physical condition. It is usually wise to consult<br />
your physician before beginning a new exercise program.<br />
• The target value of activity or exercise preset in the Lifecorder is the<br />
sample target value. However, these targets may not be suitable for all<br />
users. Do not follow the sample target value without consulting a<br />
medical specialist if the user has a medical condition or is taking<br />
medication.<br />
• Do not watch the display of the Lifecorder EX while walking or exercise.<br />
Please stop walking or exercising when you check numeric value in the<br />
display.<br />
- 2 -
Cautions<br />
• Use caution so that the belt clip or security strap does not damage clothing<br />
when affixing or removing the device.<br />
• Do not drop, hit or step on the device.<br />
• Do not swing the device using the security strap.<br />
• Use only the specified type of battery (CR-2032).<br />
• Insert the battery with (+) side facing upward.<br />
• Remove the battery from the device when not in use.<br />
• Do not use a pencil to remove the battery. It may damage the circuit board of<br />
the Lifecorder EX.<br />
• Do not force the case open.<br />
• Avoid exposure to direct sunlight, dust, rain, and moisture.<br />
• Do not clean the device using chemicals such as Benzene, Paint Thinner, or<br />
Alcohol. Use soap or a mild detergent and water.<br />
• Clean the device with a soft cloth.<br />
• Do not dismantle or modify the device.<br />
• Do not immerse the device in water. The device is designed with splashresistance.<br />
Strenuous exercise exposing the device to significant moisture or<br />
sweat should be avoided. The device cannot be repaired once the moisture<br />
sticker inside the battery component changes to solid red. This change of<br />
color indicates internal exposure of moisture.<br />
The place where the sticker indicates moisture invasion<br />
- 3 -
1. Name and Function of Each Component<br />
Activity Energy Expenditure<br />
(As Activity Cal)<br />
Daily Energy Expenditure<br />
(As Total Cal)<br />
Step<br />
Count<br />
Mode (+) Key<br />
Display<br />
* To display different modes<br />
* To increase the value by<br />
1 unit when in Set up mode<br />
Set Key<br />
Memory<br />
(-) Key<br />
*For setting the items<br />
under the selected<br />
mode<br />
*To advance to the<br />
next setting<br />
*To recall the previous<br />
seven days of data<br />
*To decrease the value by<br />
1 unit when in Set up<br />
mode<br />
Battery Cover<br />
Event Key<br />
Battery Compartment<br />
Reset Key<br />
- 4 -
2. Specifications and Functions<br />
Specifications<br />
Power Supply : Button type Lithium Battery CR2032 (One piece)<br />
Memory<br />
: 200 days.<br />
Data Transmission : USB Revision 1.1<br />
Life of Battery : Minimum of 5 months<br />
Dimensions : Width 2” 3/4 (72.5 mm) x Height 1” 4/6 (41.5 mm) x<br />
Thickness 1” 1/12 (27.5 mm)<br />
Weight<br />
: 2.12 oz (60 grams) including battery<br />
Operating Temperature: 41 F° ~ 104 F° (+5ºC ~ +40ºC) non-condensation<br />
Measurement Range & Unit<br />
Daily Energy Expenditure (Total Cal) : 0 ~ 99999 (1 kcal)<br />
Activity Energy Expenditure (Activity Cal): 0 ~ 99999 (1 kcal)<br />
Step count<br />
: 0 ~ 99999 (1 step)<br />
Clock<br />
: 0:00 ~ 23:59 (minutes)<br />
Event Marking<br />
: 10 events per day<br />
Activity Intensity Level : 0, 0.5 (only with PC), 1, 2, 3, 4, 5, 6,<br />
7, 8, 9<br />
Measurements taken every 4 seconds<br />
Set up Data<br />
User’s gender, age, height, weight, target of daily Activity Energy Expenditure<br />
for physical activity and date/time can be input into the Lifecorder EX.<br />
Measurement Data<br />
Measurement values: Step Count, Daily Energy Expenditure (Total Cal),<br />
Activity Energy Expenditure (Activity Cal) for an entire day and Physical Activity<br />
Intensity Level per 4-second intervals on the Lifecorder EX display. The amount<br />
of daily accumulated physical activity in minutes greater than moderate<br />
intensity can be displayed and analyzed using the software provided separately.<br />
Download Data to PC<br />
To download the data (maximum 200 days) to a personal computer, an optional<br />
USB cable and software for the Lifecorder EX are required.<br />
- 5 -
Event Input<br />
Event markings can be input up to 10 times per day. For example, a meal can<br />
be recorded as an event by pressing the [Event] key at the beginning of the<br />
meal and at the end. The event can be labeled as a “Meal” to evaluate the time<br />
spent for consuming a meal.<br />
An event can also be designated to show taking medication, exercise above the<br />
duration recommended, or to indicate a significant event.<br />
Optional Set up<br />
The following useful functions can be set from a personal computer using the<br />
optional software.<br />
Target setting for analysis report:<br />
Includes Daily Step Count, Daily Activity Minute with moderate-high intensity,<br />
Daily Activity Energy Expenditure, and Daily Energy intake (food intake) for<br />
energy balance comparison.<br />
Activity Intensity Level:<br />
Includes a calculation of the amount of daily accumulated physical activity in<br />
minutes greater than moderate intensity. A range of moderate intensity level<br />
can be set for detection of Activity Minutes using the optional software.<br />
Memory Loop or Lock:<br />
The default setting is Memory Loop that will delete the oldest day’s data when<br />
the memory becomes full and the 201st day of data is saved.<br />
Memory Loop<br />
Memory Lock<br />
In the event Memory Lock is set, the Lifecorder EX will show [FULL] on the<br />
display when the 200th day of data is saved to memory.<br />
Once full, the Lifecorder will not record new data unless all data are<br />
downloaded to a personal computer and the [Reset] key is activated or Memory<br />
Loop is selected again.<br />
Full memory in Memory Lock mode<br />
- 6 -
Key Lock:<br />
All the keys will be locked once this function is set. This function will not allow a<br />
user to change the display mode or any setting values in the Lifecorder EX<br />
once the Key is locked. Also, you can select either the display of measurement,<br />
clock or no display. You can unlock this function only using a personal<br />
computer.<br />
Key Lock Icon<br />
Auto Start:<br />
This function is useful when several Lifecorder EX are required to start<br />
measuring at a specific date and time, or to prevent unnecessary measurement<br />
such as during shipping or transportation of this device. If the Auto Start mode<br />
is set without a specific date and time, the Lifecorder EX begins measuring<br />
when any keys are pressed.<br />
Stand-by display in Auto Start mode<br />
Memory Capacity<br />
7-day memory: Data for the last 7 days can be recalled on the Lifecorder EX<br />
display. (Refer next page)<br />
200-day memory: Data for up to 200 days (maximum) can be viewed. This<br />
data must be transferred to a personal computer for viewing.<br />
The Lifecorder EX will automatically save all measurement<br />
data in the memory chip for every 30 minute interval.<br />
The data in the 200-day memory will be saved even when<br />
the battery is removed or when the battery is low. To erase<br />
the memory, press the [Reset] key when the battery is in its<br />
compartment.<br />
Important: The battery will not last for 200 days. Therefore, you<br />
should replace the battery every 5 months during use.<br />
- 7 -
3. 7-day Memory Display<br />
7-day memory<br />
The memory stores data for each measurement from the previous seven<br />
days. This data can be viewed on the Lifecorder EX display.<br />
Example: If the current day is Wednesday, data from the previous<br />
Wednesday until the current day are recorded and stored into<br />
memory.<br />
Back to Real<br />
Time Mode<br />
Current Day<br />
Wednesday<br />
Last 7 days total<br />
Previous day<br />
(Tuesday)<br />
Step Count<br />
1 week prior 2 days prior<br />
(Wednesday) Total Cal (Monday)<br />
Activity Cal<br />
6 days prior 3 days prior<br />
(Thursday)<br />
(Sunday)<br />
5 days prior 4 days prior<br />
(Friday)<br />
(Saturday)<br />
- 8 -
4. Installation<br />
Things to prepare<br />
1) Lifecorder EX.<br />
2) Button type lithium battery (CR-2032).<br />
3) Security strap.<br />
4) Label or sticker to designate the starting date and user name on the<br />
Lifecorder EX.<br />
Preparation Steps<br />
Step 1: Insert the battery into the device<br />
* Always use a new battery to ensure the maximum<br />
measurement period. The battery lasts for<br />
approximately 5 months.<br />
Step 2: Set up the initial data<br />
* Keep the necessary information such as the beginning date<br />
on a sticker and attach it to the inside of the belt clip.<br />
Step 3: Attach the Lifecorder EX to a waistband or belt.<br />
Monitor lifestyle activity and exercise<br />
Inserting the battery into the device<br />
1) Remove the battery cover<br />
Insert a coin into the slot on the upper side of the battery cover. Then, twist<br />
to open the cover.<br />
- 9 -
2) Insert the battery<br />
Insert the battery in the direction of the arrow with the [+] mark on the<br />
battery facing upward.<br />
Important: Please be careful not to bend the electrodes during<br />
insertion or removal.<br />
To ensure good contact, please clean the battery and<br />
remove any moisture from the battery surface before<br />
insertion.<br />
3) Close the battery cover<br />
4) Please be sure that the battery icon does not appear on the display with<br />
beeping sound. The display will show a gender setting when the battery is<br />
correctly inserted or replaced.<br />
Battery is properly inserted.<br />
Battery icon:<br />
Battery is not properly<br />
installed or low battery<br />
alert.<br />
- 10 -
How to remove the battery<br />
Remove the battery using a small non-metallic object such as a toothpick.<br />
Do not use a pencil to avoid damage of internal circuit board due to a lead.<br />
[Err02] The (Error 02) massage will<br />
appear when a battery is replaced<br />
before the data has been downloaded.<br />
Caution: Do not use a metal object as it could result in an<br />
electrical shock leading to injury.<br />
Set up Data and Range<br />
Set up Menu Input Range Input Unit Factory (Default)<br />
Set up<br />
Gender Male or Female Female<br />
Age 0 - 99 1 year 30 years old<br />
Height 0 – 6’6”<br />
(0 - 200 cm)<br />
1”<br />
(1 cm)<br />
5’5”<br />
(167 cm)<br />
Weight<br />
0 – 442 lb<br />
(0 - 200 kg)<br />
2 lb<br />
(1 kg)<br />
150 lb<br />
(67 kg)<br />
Target Activity<br />
Energy<br />
Expenditure<br />
Basal<br />
Metabolism<br />
0 - 1000 Cal 5 Cal 335 Cal<br />
(automatically<br />
calculated)<br />
Automatically<br />
calculated<br />
cannot<br />
change<br />
Year 2004 - 2050 1 year 2004<br />
Month 1 - 12 1 month 1 (January)<br />
Date 1 - 31 1 day 1<br />
Day<br />
Automatically<br />
calculated<br />
cannot<br />
change<br />
Hour 0-23 1 hour 0 hour<br />
Minute 0-59 1 minute 00 minute<br />
No<br />
No<br />
- 11 -
How to Set up Personal Data, Date and Time<br />
Press the [Set] key for 4 seconds in order to access the Set up mode. The<br />
gender setting display appears first as shown below.<br />
Set up mode will always appear first on the display when the battery is<br />
replaced.<br />
Note:<br />
• Personal data will remain in the memory when the battery is replaced or the<br />
[Reset] key is activated.<br />
• While in Set up mode, the Lifecorder EX will revert to Real Time mode<br />
automatically, if there is no activity for 5 minutes. Any new settings will be<br />
saved.<br />
• While in Set up mode, the Activity Energy Expenditure by physical movement<br />
and Step count functions will not operate nor will the clock keep time.<br />
• When there are changes to the settings during the operation of the device,<br />
the adjustments will become effective at the time of completion.<br />
= indicates flashing characters<br />
1) Set Gender: F = female, M = male<br />
Indication of the gender setting<br />
Select your gender by<br />
pressing either the [+] or [–]<br />
key to change the display.<br />
Press the [Set] key and proceed to the age<br />
setting.<br />
- 12 -
2) Set Age<br />
Increase age by 1<br />
Decrease age by 1<br />
Press the [Set] key and proceed to the height<br />
setting in feet and inches.<br />
3) Set Height in Feet and Inches<br />
If you wish to use centimeters and kilograms, proceed to Step 5.<br />
The height setting is shown in feet and inches at first. Please press [Mode/+] or<br />
[Memory/-] to set your height. To change unit of measurement, press [Mode/+]<br />
first and then press [Set]. Then, release the two keys. It will change to<br />
centimeter for height and kilogram for weight. (*Refer to next page for<br />
centimeter setting)<br />
Indication of the height setting<br />
Increase height by 1 inch<br />
Decrease height by 1 inch<br />
Press the [Set] key and proceed to the weight<br />
setting in pounds.<br />
- 13 -
4) Set Weight in Pounds<br />
Press [Mode/+] or [Memory/-] to set your weight in pounds. If you want to<br />
change the weight setting to kilograms, you must complete the Set up once,<br />
then begin Set up again. You can change the unit of measurement at height<br />
setting by pressing [Set] first and press [Mode/+]. Then, release two keys. It<br />
will change the unit of measurement to centimeter for height and kilogram for<br />
weight.<br />
Indication of the weight setting in pounds<br />
Increase weight by 1 pound<br />
Decrease weight by 1 pound<br />
*Proceed to Step 7<br />
Press the [Set] key and proceed to the Target<br />
Activity Calorie setting.<br />
5) Set Height in Centimeters<br />
Press [Mode/+] or [Memory/-] to set your height in centimeters. If you want to<br />
change the height setting to feet and inches, press [Mode/+] first and press<br />
[Set]. Then, release the two keys. It will change to feet and inches for height<br />
and pounds for weight.<br />
Indication of the height setting in centimeter<br />
Increase height by 1 cm<br />
Decrease height by 1 cm<br />
Press the [Set] key and proceed to the weight<br />
setting.<br />
- 14 -
6) Set Weight in Kilograms<br />
Press [Mode/+] or [Memory/-] to set your weight in kilograms. If you want to<br />
change the weight setting to pounds, complete the Set up, and begin Set up<br />
once again. You can change the unit of measurement by pressing [Set] first<br />
and then pressing [Mode/+] when height setting function. Then, release the<br />
two keys. It will change the unit of measurement to feet and inches for height<br />
and kilograms for weight.<br />
Indication of the weight setting in kilogram<br />
Increase weight by 1 kg<br />
Decrease weight by 1 kg<br />
Press the [Set] key and proceed to the Target<br />
Activity Cal setting.<br />
7) Set Target Activity Cal<br />
The Target Activity Energy Expenditure can be set by pressing [Mode/+]<br />
or [Memory/-].<br />
Increase target by 5 kcal<br />
Decrease target by 5 kcal<br />
Press the [Set] key confirming the basal metabolic rate per<br />
day on the display.<br />
Caution: The target value of activity or exercise preset in the<br />
Lifecorder is the sample target. However, these targets<br />
may not be suitable for all users. Do not follow the<br />
sample target value without consulting a medical<br />
specialist if the user has a medical condition or is<br />
taking medication.<br />
- 15 -
8) Confirming your Basal Metabolism Rate (BMR)<br />
The Basal Metabolic Rate per day is a calculation performed by the Lifecorder<br />
EX, and cannot be changed. The Basal Metabolic Rate is displayed with a “b”<br />
Press the [Set] key and proceed to the<br />
Year setting.<br />
9) Set Year<br />
Indication of the year setting<br />
Increase year by 1<br />
Decrease year by 1<br />
Press the [Set] key and proceed to the<br />
month setting.<br />
- 16 -
10) Set Month<br />
Indication of the month setting<br />
Increase month by 1<br />
Decrease month by 1<br />
Press the [Set] key and proceed to the<br />
date setting.<br />
11) Set Date<br />
Indication of the date setting<br />
Increase date by 1<br />
Decrease date by 1<br />
Press the [Set] key and proceed to the<br />
minute setting.<br />
Note: The day will be displayed automatically.<br />
- 17 -
12) Set Clock (24 Hour Clock)<br />
Increase hour by 1<br />
Decrease hour by 1<br />
Press the [Set] key and proceed to the<br />
minute setting.<br />
13) Set Clock (Minutes)<br />
Increase minute by 1<br />
Decrease minute by 1<br />
Press the [Set] key to complete the settings, and return<br />
to Real Time mode<br />
- 18 -
Changing the Settings During <strong>Operation</strong><br />
In Real Time mode, press and hold the [Set] key for MORE THAN 4<br />
SECONDS.<br />
Real Time Mode with Step count<br />
Press and hold the [Set]<br />
key for more than 4<br />
seconds.<br />
Set up Mode<br />
Important: If the date and time are changed backward or forward by<br />
pressing the [Set] key during operation, there is a<br />
possibility for replication of data for the same day or the<br />
absence of data for a certain period when the data is<br />
transferred to a PC.<br />
- 19 -
5. Wearing the Lifecorder EX<br />
1) Attach the security strap to the belt clip of the Lifecorder EX.<br />
2) Attach the Lifecorder EX over a belt.<br />
· Place the Lifecorder EX at the position shown below.<br />
· Clip the security strap to a belt, belt loop or fabric of your garment.<br />
Correct Position<br />
Incorrect Position<br />
Important: The Lifecorder EX can not perform accurate measurements<br />
if it is set near a belt buckle or centered under the navel. It<br />
must also remain in a horizontal position (not at an angle to<br />
the ground).<br />
6. <strong>Operation</strong><br />
Real Time Mode<br />
The Real Time mode allows for continuous 24-hour measurement for a maximum<br />
of 200 days. The Lifecorder EX can display Step Count, Activity Energy<br />
Expenditure as Activity Cal, and the Daily Energy Expenditure as Total Cal, and<br />
Clock and Activity Intensity Level by pressing the [Mode] key while in Real Time<br />
mode.<br />
24-hour range<br />
From 0:00 to 23:59 (According to the setting of the Lifecorder clock)<br />
Real Time Mode with<br />
Step Count<br />
- 20 -
Viewing Display during Real Time Mode<br />
In Real Time mode, the Step Count, Activity Cal, Total Cal, clock and Activity<br />
Intensity Level can be displayed by pressing the [Mode] key cyclically.<br />
Step Count<br />
Press [Mode]<br />
Activity Intensity Level<br />
Press [Mode]<br />
Activity Cal<br />
Each digit value represents Activity<br />
Level for each 4 second interval.<br />
The last digit (right side) represents<br />
the most recent level recorded.<br />
Press [Mode]<br />
Press [Mode]<br />
Total Cal<br />
Clock<br />
Press [Mode]<br />
- 21 -
Degree of Achievement Display<br />
The bar graph located at the bottom of the Lifecorder EX display indicates the<br />
achievement as a percentage of the targeted Activity Energy Expenditure by<br />
physical movement.<br />
Each bar " " represents 10% achievement of the target Activity Cal<br />
setting.<br />
Example (1) 50% Achievement<br />
When the target Activity Cal is 300 Cal, and the Activity Energy Expenditure<br />
achieved is 150 Cal, the percentage of the Target Activity Cal achieved is<br />
50% and 5 bars will be displayed.<br />
Example (2) Overachievement<br />
When the target Activity Cal is 300 Cal, and the Activity Energy Expenditure<br />
achieved is 450 Cal, the percentage of the Activity Cal achieved is 150 % and<br />
10 bars will be displayed; the 5 bars are flashing showing achievement<br />
beyond 100 %.<br />
The 5 bars ("<br />
flashing<br />
") are<br />
Note: All the bars ("<br />
more than 200%<br />
") flash when the target achieved is exceeded by<br />
Using the Event Key<br />
The [Event] key can be used during the Real Time mode. Up to 10 events can<br />
be stored per day. By pressing the [Event] key for more than 2 seconds, the<br />
time of the event will be saved in memory. The event data will be saved for a<br />
maximum of 200 days in the memory.<br />
The Lifecorder will beep when you press the [Event] key signaling the<br />
recording of an event.<br />
- 22 -
[Event] is a useful feature when you want to mark a time such as the start and<br />
finish of a meal or when taking medication.<br />
Important: Once an event is recorded, another event cannot be<br />
marked for one minute. After the tenth event is<br />
recorded, the device will make a longer beeping sound<br />
when the Event key is pressed, indicating the event<br />
marker memory is full.<br />
Checking the Number of Days Saved in Memory<br />
This feature allows you to confirm the number of days of data that have been<br />
saved on the Lifecorder EX display since the beginning of the recording date<br />
by connecting the optional USB cable to a personal computer. The display will<br />
change to the download display when the Auto download function is set.<br />
Number of days recorded<br />
The display while downloading<br />
- 23 -
7. Viewing 7-day Memory on the Display<br />
You can view the precious 7 days of data and 7 day total on the Lifecorder EX<br />
display. Sequentially pressing the [Memory] key shows the last 7 days of data<br />
and 7 day total. After 7 day total, it will revert to Real Time mode. While viewing<br />
Memory mode, pressing the [Mode] key allows you to view prior data on Daily<br />
Energy Expenditure (Total Cal), Activity Energy Expenditure (Active Cal) and<br />
the Step Count of the day.<br />
Real Time Mode<br />
Press the [Memory]<br />
key to review the<br />
previous day’s data.<br />
Press<br />
[Memory]<br />
Press<br />
[Memory]<br />
Sequentially pressing the [Memory]<br />
key shows the data of the period that<br />
will blink on the display.<br />
7 Day Total<br />
Press [Memory]<br />
Press [Memory]<br />
Press [Memory]<br />
Note: If no keys are pressed within 30 seconds, the device will<br />
automatically resume to Real Time mode.<br />
- 24 -
8. Post Measurement<br />
Data Download to a PC<br />
This function requires the optional software and USB cable. Please refer<br />
to the operation manual of the software for detailed instructions.<br />
Required specifications for your computer<br />
1) PC/AT compatible with USB port (USB Revision 1.0)<br />
2) Operating System: Windows 98SE/Millennium/2000 and XP only<br />
4) CPU: Recommended CPU for each Windows O.S.<br />
5) Main Memory: Recommended memory for your operating system.<br />
6) Hard disk capacity: 64 MB or higher<br />
7) CD-ROM drive<br />
Resetting Lifecorder EX<br />
For a new user, please delete all data using the [Reset] key after downloading<br />
the stored data. Then, reset the user information in Set up mode.<br />
When the memory is full, it will show [FULL] on the display, if [Reset] does not<br />
work, please unlock the Memory lock function using the software.<br />
Note: Personal data that is set previously will not be deleted when<br />
[Reset] key is activated.<br />
- 25 -
Replacing the Battery<br />
How to replace the battery<br />
Remove the battery using a small non-metallic object. Do not use a pencil<br />
to avoid damage to the internal circuit board due to lead contamination.<br />
[Err02] The (Error 02) massage will appear<br />
when replacing a battery before the data<br />
is downloaded.<br />
Refer to trouble shooting on<br />
page 27 if this occurs.<br />
Caution: Do not use a metal object to remove the battery as it could<br />
result in an electrical shock leading to injury.<br />
Note: Set up mode will always appear when the battery is<br />
replaced.<br />
9. Energy Expenditure Calculation System of<br />
the Lifecorder<br />
Basal Metabolism Rate (BMR)<br />
The basal metabolism caloric expenditure (BMR) of the Lifecorder can be calculated per<br />
minute using the age, gender, height and weight of the user. The basal metabolism<br />
caloric expenditure is the minimum metabolic energy necessary to physiologically<br />
maintain the body depending upon body surface area.<br />
Activity Energy Expenditure (Activity Cal) & Intensity Level<br />
The Activity Energy Expenditure of the Lifecorder is calculated using the energy<br />
expended during physical activity. The intensity of physical activity is measured by an<br />
accelerometer sensor, converted into caloric expenditure, and displayed as Activity Cal.<br />
(The Lifecorder displays a numeric value in kcal units only.)<br />
The maximum threshold frequency and step count of the piezoelectric ceramic in the<br />
accelerometer sensor generated by vertical movement is determined by adding the<br />
intensity level detected every four seconds. This activity intensity level can be confirmed<br />
by the Activity Intensity Level on the display. The most frequent intensity level during a<br />
two-minute interval will be recorded using the 10 intensity levels (1, 0.5, 2, 3, 4, 5, 6, 7, 8,<br />
- 26 -
and 9) with 9 being the highest intensity for the analysis and viewing in Circadian<br />
Physical Activity report using the optional software.<br />
The physical activity report will be created when data is downloaded and analyzed in<br />
personal computer using the software.<br />
To calculate Activity Energy Expenditure, the intensity level is the most important factor<br />
to validate the quality of physical activity and exercise.<br />
For example, when intensity level is high, the activity caloric expenditure is higher even<br />
with the same step count.<br />
Daily Energy Expenditure (Total Cal)<br />
The Daily Energy Expenditure displayed by the Lifecorder is calculated by combining<br />
the basal metabolism caloric expenditure (BMR) with the activity energy expenditure on<br />
a per minute basis.<br />
Caloric expenditure through digestion (diet-induced thermo genesis) and Micro Activity<br />
Energy Expenditure are also added each minute to the Daily Energy Expenditure.<br />
Micro Activity Energy Expenditure<br />
When the accelerometer of the Lifecorder detects physical movement, then no physical<br />
movement during the following three minutes, the Micro Activity Energy Expenditure<br />
(0.5) will be added to Activity Energy Expenditure Total. An example of Micro Activity<br />
Energy Expenditure would include movement during a standing conversation.<br />
Step Count<br />
The threshold frequency of vertical vibration above a particular level is measured as a<br />
step using the accelerometer sensor that displays the step counts on the Lifecorder<br />
display. A single step, however, will not be recorded and will be disregarded by the<br />
Lifecorder when a second step is not detected within one and one-half seconds<br />
following the first step.<br />
- 27 -
10. Trouble Shooting<br />
1) Key action<br />
[Set] key or other keys do not work.<br />
Did you insert a new battery?<br />
- Insert a new battery (CR2032).<br />
Did you press and hold [Set] key more than 5 seconds?<br />
- Press and hold [Set] key for more than 5 seconds.<br />
Is the Lifecorder in Memory mode to recall the previous day’s data on the<br />
display?<br />
- Complete viewing memory data through the 7 day total to change the display<br />
to Real time mode. Then, press [Set] key.<br />
Does the Lifecorder display show a numeric number or bars and running bars<br />
at the bottom?<br />
- Auto start function is set to start recording from a specific date and time using<br />
the software. Wait until the start day/time or cancel Auto start function using<br />
the software.<br />
Stand-by display with running<br />
bar at the bottom<br />
Did you set the Key Lock function using the software?<br />
- This function can only be unlocked by the software Set up. Please refer to the<br />
detailed instructions in the manual for the software.<br />
Key Lock icon<br />
with clock display<br />
- 28 -
The Lifecorder EX does not reset<br />
Did you check the battery? [Reset] may not work due to a low battery.<br />
- If you see a battery icon on the display, replace with a new battery. Then,<br />
press [Reset] key again.<br />
Low battery icon<br />
Important: Please download the data in the Lifecorder EX<br />
before deleting all data using the [Reset] function.<br />
2) Display<br />
No display appears.<br />
Did you insert a new battery?<br />
- Insert a new battery (CR2032). A battery that has not been used for 5 months<br />
may be dead depending on storage conditions.<br />
When did you replace the battery?<br />
- A new battery will last for a minimum of 5 months. However, the battery life is<br />
reduced by frequent use or storage and use at lower temperatures than<br />
normal operating condition.<br />
Did you insert the battery with the positive (+) face up?<br />
- Reset the battery properly into the battery compartment as shown on page 9.<br />
Did you immerse the Lifecorder in water or use under conditions where<br />
moisture or sweat was introduced into the device?<br />
- The device cannot be repaired when the white sticker with red dots inside<br />
the battery compartment turns solid red as shown in the drawing below.<br />
The change of color in the sticker indicates that moisture has invaded the<br />
inside of the Lifecorder EX.<br />
A red sticker indicates<br />
moisture invasion<br />
- 29 -
“Error” message on the display<br />
An Error message will appear when the battery is replaced in Memory lock<br />
mode showing the following numeric error codes.<br />
Error 1:<br />
There is still old data in the Lifecorder<br />
EX that has already been downloaded<br />
to a personal computer. Please<br />
download the data if it is still necessary,<br />
otherwise press the [Reset] key to<br />
delete all data. Refer to page 24.<br />
Error 2:<br />
There is old data, and recent data in the Lifecorder EX that has not been<br />
downloaded to a personal computer yet. Please download the latest data,<br />
and then press the [Reset] key to delete all data. Refer to page 24.<br />
Also, Error 2 can be cleared without downloading the data when [Mode] key<br />
and [Memory] key are simultaneously pressed, then, press [Reset] key.<br />
Important: Please always download the data in the Lifecorder EX<br />
before pressing the [Reset] key.<br />
Error 3 – Error 6:<br />
These messages will appear regardless of the Memory Lock or Loop<br />
Memory settings when the Key Lock function is set. They can be cleared<br />
by unlocking the Key Lock or all other settings form a personal computer<br />
using the optional software.<br />
Important: Please download the data in the Lifecorder EX<br />
to a PC before resetting, as this will delete all<br />
data.<br />
- 30 -
[FULL] message appears on the Lifecorder EX display.<br />
Did you set the Memory Lock function using a personal computer?<br />
When the Memory Lock is set and the 200-<br />
day memory is full, the display will show<br />
[FULL]. The Lifecorder EX will not record<br />
new data unless stored data are downloaded<br />
to a personal computer and the [Reset] key<br />
is activated.<br />
3) Measurement Value<br />
Activity Caloric Expenditure or Step Count is too high or too low<br />
Possible reasons for measurement errors.<br />
- Shuffling feet instead of picking them up.<br />
- Irregular walking rhythm.<br />
- Improper positioning of the device.<br />
• Device is attached too near the mid-line of the body.<br />
• Device is not horizontal.<br />
• Device is not upright.<br />
• Door of device is not completely closed.<br />
- Exposure to excessive vibration.<br />
• Activities that involve ascending and descending on a slanted surface.<br />
• Riding a bicycle or other activities whereby the vertical waist movement is<br />
minimal.<br />
• Traveling in a vehicle or in a place where the vibration is excessive.<br />
Event key does not work<br />
Did you press [Event] key for more than 2 seconds?<br />
- [Event] is designed to activate when it is pressed for more than 2 seconds in<br />
order to avoid accidental activation.<br />
Did you press the [Event] key more than 11 times per day?<br />
- The Lifecorder EX saves up to 10 events per day.<br />
- The Lifecorder EX does not save the next event within 60 seconds after the<br />
[Event] key is depressed.<br />
- 31 -
Cannot not download to personal to personal computer computer<br />
Did you connect the USB cable to the Lifecorder EX and your personal<br />
computer?<br />
- Connect the USB cable after installation of the software.<br />
Did you install the software for the Lifecorder EX to your personal computer?<br />
- When the following display shown below appears cyclically, the software is<br />
not installed correctly or did not start downloading correctly. Please install or<br />
start the software properly.<br />
- When correct downloading begins, the Lifecorder display will show 5 bars with<br />
an icon flashing as shown below.<br />
Clock often delays<br />
The digital clock in the Lifecorder display automatically resumes to zero<br />
seconds and stop when Set up mode is selected. Using Set up mode<br />
frequently will delay the clock.<br />
- 32 -
Manufactured by<br />
SUZUKEN CO., LTD.<br />
8 Higashikataha-cho, Higashi-ku,<br />
Nagoya 461-8701, Japan<br />
Phone: 81-52-950-6327<br />
Fax: 81-52-962-7440<br />
E-mail: kenz@suzuken.co.jp<br />
- 33 -