![[HOW-TO] How to update BIOS and EC for p2532f_v1 - gigabyte](https://img.yumpu.com/39745250/1/500x640/how-to-how-to-update-bios-and-ec-for-p2532f-v1-gigabyte.jpg)
[HOW-TO] How to update BIOS and EC for p2532f_v1 - gigabyte
[HOW-TO] How to update BIOS and EC for p2532f_v1 - gigabyte
[HOW-TO] How to update BIOS and EC for p2532f_v1 - gigabyte

Create successful ePaper yourself
Turn your PDF publications into a flip-book with our unique Google optimized e-Paper software.
2011/12/6 Total Pages:20<br />
《SOFTWARE RELEASE》<br />
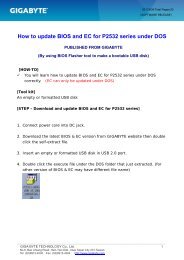
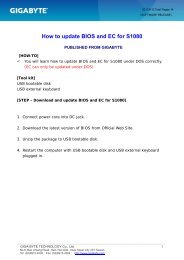
<strong>How</strong> <strong>to</strong> <strong>update</strong> <strong>BIOS</strong> <strong>and</strong> <strong>EC</strong> <strong>for</strong> P2532F under DOS<br />
PUBLISHED FROM GIGABYTE<br />
(By using <strong>BIOS</strong> Flasher <strong>to</strong>ol <strong>to</strong> make a bootable USB disk)<br />
[<strong>HOW</strong>-<strong>TO</strong>]<br />
You will learn how <strong>to</strong> <strong>update</strong> <strong>BIOS</strong> <strong>and</strong> <strong>EC</strong> <strong>for</strong> P2532F under DOS correctly.<br />
(<strong>EC</strong> can only be <strong>update</strong>d under DOS)<br />
[Tool kit]<br />
An empty or <strong>for</strong>matted USB disk<br />
[STEP – Download <strong>and</strong> <strong>update</strong> <strong>BIOS</strong> <strong>and</strong> <strong>EC</strong> <strong>for</strong> P2532F]<br />
1. Connect power core in<strong>to</strong> DC jack.<br />
2. Download the latest <strong>BIOS</strong> & <strong>EC</strong> version from GIGABYTE website then double<br />
click the self-extract file.<br />
3. Insert an empty or <strong>for</strong>matted USB disk in USB 2.0 port.<br />
4. Double click the execute file under the DOS folder that just extracted. (<strong>for</strong><br />
other version of <strong>BIOS</strong> & <strong>EC</strong> may have different file name)<br />
________________________________________________________________________________________________<br />
GIGA-BYTE T<strong>EC</strong>HNOLOGY Co., Ltd. 1<br />
No.6, Bao Chiang Road, Hsin-Tien Dist., New Taipei City 231,Taiwan<br />
Tel: (02)8912-4000 Fax: (02)8912-4004 http://www.<strong>gigabyte</strong>.com
5. Click [OK] on the warning message if you have already insert only one USB<br />
disk.<br />
6. Select the location of your USB disk. (You can check it under<br />
[ComputerDevices with Removable S<strong>to</strong>rage])<br />
7. Click [Bootable USB] but<strong>to</strong>n.<br />
________________________________________________________________________________________________<br />
GIGA-BYTE T<strong>EC</strong>HNOLOGY Co., Ltd. 2<br />
No.6, Bao Chiang Road, Hsin-Tien Dist., New Taipei City 231,Taiwan<br />
Tel: (02)8912-4000 Fax: (02)8912-4004 http://www.<strong>gigabyte</strong>.com
8. Click the folder icon.<br />
9. Select BOOT image file then click [save].<br />
10. Click [Write] <strong>to</strong> start <strong>to</strong> per<strong>for</strong>m writing image file.<br />
________________________________________________________________________________________________<br />
GIGA-BYTE T<strong>EC</strong>HNOLOGY Co., Ltd. 3<br />
No.6, Bao Chiang Road, Hsin-Tien Dist., New Taipei City 231,Taiwan<br />
Tel: (02)8912-4000 Fax: (02)8912-4004 http://www.<strong>gigabyte</strong>.com
11. Click [Yes] on warning message <strong>to</strong> clean all the data on USB disk <strong>and</strong> start <strong>to</strong><br />
write image file.<br />
12. Process starts.<br />
13. Once finish the process, now you have a bootable USB disk which includes the<br />
latest <strong>BIOS</strong> & <strong>EC</strong> files inside. Please click [Exit] <strong>and</strong> restart the computer.<br />
________________________________________________________________________________________________<br />
GIGA-BYTE T<strong>EC</strong>HNOLOGY Co., Ltd. 4<br />
No.6, Bao Chiang Road, Hsin-Tien Dist., New Taipei City 231,Taiwan<br />
Tel: (02)8912-4000 Fax: (02)8912-4004 http://www.<strong>gigabyte</strong>.com
14. Press F12 when boot screen shows then choose your USB bootable disk <strong>to</strong><br />
boot <strong>to</strong> DOS.<br />
15. Press any key <strong>to</strong> continue when warning message appears.<br />
________________________________________________________________________________________________<br />
GIGA-BYTE T<strong>EC</strong>HNOLOGY Co., Ltd. 5<br />
No.6, Bao Chiang Road, Hsin-Tien Dist., New Taipei City 231,Taiwan<br />
Tel: (02)8912-4000 Fax: (02)8912-4004 http://www.<strong>gigabyte</strong>.com
16. Start <strong>to</strong> flash <strong>BIOS</strong> & <strong>EC</strong> <strong>to</strong>gether under 2 min.<br />
(Please do not unplug the USB disk during flashing <strong>BIOS</strong> & <strong>EC</strong>.)<br />
17. Once finishing <strong>update</strong>, system will au<strong>to</strong>matically shut down.<br />
18. Power on the computer then press F2 <strong>to</strong> go <strong>to</strong> <strong>BIOS</strong> Setup Utility.<br />
19. Select Load Optimal Defaults then press enter.<br />
________________________________________________________________________________________________<br />
GIGA-BYTE T<strong>EC</strong>HNOLOGY Co., Ltd. 6<br />
No.6, Bao Chiang Road, Hsin-Tien Dist., New Taipei City 231,Taiwan<br />
Tel: (02)8912-4000 Fax: (02)8912-4004 http://www.<strong>gigabyte</strong>.com
20. Check the System <strong>BIOS</strong> <strong>and</strong> <strong>EC</strong> version if it be correct as the <strong>update</strong>d version.<br />
________________________________________________________________________________________________<br />
GIGA-BYTE T<strong>EC</strong>HNOLOGY Co., Ltd. 7<br />
No.6, Bao Chiang Road, Hsin-Tien Dist., New Taipei City 231,Taiwan<br />
Tel: (02)8912-4000 Fax: (02)8912-4004 http://www.<strong>gigabyte</strong>.com
Note: <strong>BIOS</strong> Flasher can only be used on GIGABYTE Notebook products. After finish flashing <strong>BIOS</strong> <strong>and</strong><br />
<strong>EC</strong>, you can res<strong>to</strong>re your USB disk size by [Format Your USB Drive] under <strong>BIOS</strong> Flasher <strong>to</strong>ol.<br />
________________________________________________________________________________________________<br />
GIGA-BYTE T<strong>EC</strong>HNOLOGY Co., Ltd. 8<br />
No.6, Bao Chiang Road, Hsin-Tien Dist., New Taipei City 231,Taiwan<br />
Tel: (02)8912-4000 Fax: (02)8912-4004 http://www.<strong>gigabyte</strong>.com
[<strong>HOW</strong>-<strong>TO</strong>]<br />
<br />
You can also <strong>update</strong> <strong>BIOS</strong> <strong>for</strong> P2532F under WINDOWS7.<br />
[STEP – Download <strong>and</strong> <strong>update</strong> <strong>BIOS</strong> <strong>for</strong> P2532F under WINDOWS7]<br />
1. Connect power core in<strong>to</strong> DC jack.<br />
2. Double click the execute file under the WINDOWS folder that just extracted.<br />
(<strong>for</strong> other version of <strong>BIOS</strong> may have different file name)<br />
3. Make sure the adapter is connected <strong>and</strong> press any key <strong>to</strong> start flashing <strong>BIOS</strong>.<br />
4. Once finish flashing <strong>BIOS</strong>, system shuts down au<strong>to</strong>matically.<br />
________________________________________________________________________________________________<br />
GIGA-BYTE T<strong>EC</strong>HNOLOGY Co., Ltd. 9<br />
No.6, Bao Chiang Road, Hsin-Tien Dist., New Taipei City 231,Taiwan<br />
Tel: (02)8912-4000 Fax: (02)8912-4004 http://www.<strong>gigabyte</strong>.com
About GIGABYTE Upgrade Your Life<br />
GIGABYTE, headquartered in Taipei, Taiwan, is known as a global leading br<strong>and</strong> in the IT industry, with employees <strong>and</strong><br />
business channels in almost every country. Founded in 1986, GIGABYTE started as a research <strong>and</strong> development team<br />
<strong>and</strong> has since taken the lead in the world's motherboard market. On <strong>to</strong>p of motherboards <strong>and</strong> graphics accelera<strong>to</strong>rs,<br />
GIGABYTE further exp<strong>and</strong>ed its product portfolio <strong>to</strong> include notebook <strong>and</strong> desk<strong>to</strong>p PCs, digital home entertainment<br />
appliances, networking servers, communications, mobile <strong>and</strong> h<strong>and</strong>held devices, servicing every facet of people's lives at<br />
home or business. Everyday GIGABYTE aims <strong>to</strong> “Upgrade Your Life” with the most innovative designs <strong>and</strong> impeccable<br />
quality <strong>and</strong> services. Visit www.<strong>gigabyte</strong>.com <strong>for</strong> more in<strong>for</strong>mation.<br />
________________________________________________________________________________________________<br />
GIGA-BYTE T<strong>EC</strong>HNOLOGY Co., Ltd. 10<br />
No.6, Bao Chiang Road, Hsin-Tien Dist., New Taipei City 231,Taiwan<br />
Tel: (02)8912-4000 Fax: (02)8912-4004 http://www.<strong>gigabyte</strong>.com
於 DOS 下 更 新 P2532F 的 <strong>BIOS</strong> 和 <strong>EC</strong><br />
PUBLISHED FROM GIGABYTE<br />
( 使 用 <strong>BIOS</strong> Flasher 工 具 製 作 可 開 機 的 USB 磁 碟 )<br />
[ 目 標 ]<br />
於 DOS 下 正 確 地 更 新 P2532F 的 <strong>BIOS</strong> 和 <strong>EC</strong>. (<strong>EC</strong> 僅 能 於 DOS 下 被 更 新 )<br />
[ 所 需 工 具 ]<br />
一 個 空 的 或 者 格 式 化 過 的 USB 磁 碟<br />
[ 更 新 步 驟 – 下 載 並 刷 新 P2532F 的 <strong>BIOS</strong> 和 <strong>EC</strong>]<br />
1. 將 電 源 插 頭 插 入 電 源 孔 並 確 認 電 力 由 變 壓 整 流 器 供 電 .<br />
2. 從 技 嘉 產 品 網 頁 下 載 最 新 版 的 <strong>BIOS</strong> 和 <strong>EC</strong> 自 動 壓 縮 檔 並 雙 擊 解 壓 縮 該 檔 .<br />
3. 插 入 一 個 空 的 或 者 格 式 化 過 的 USB 磁 碟 至 USB 2.0 阜 內 .<br />
4. 於 剛 才 已 解 壓 縮 的 DOS 資 料 夾 內 雙 擊 執 行 檔 . ( 對 於 不 同 版 本 的 <strong>BIOS</strong> & <strong>EC</strong> 可 能 會 有 不<br />
同 的 檔 案 名 稱 )<br />
________________________________________________________________________________________________<br />
GIGA-BYTE T<strong>EC</strong>HNOLOGY Co., Ltd. 11<br />
No.6, Bao Chiang Road, Hsin-Tien Dist., New Taipei City 231,Taiwan<br />
Tel: (02)8912-4000 Fax: (02)8912-4004 http://www.<strong>gigabyte</strong>.com
5. 確 認 僅 插 入 一 個 USB 磁 碟 後 請 按 [ 確 定 ].<br />
6. 於 下 拉 式 選 單 選 擇 USB 磁 碟 的 所 在 磁 碟 槽 名 稱 . ( 可 於 [ 電 腦 裝 置 中 含 有 卸 除 式 存 放 裝<br />
置 ] 檢 查 位 置 )<br />
7. 點 擊 [Bootable USB] 按 鈕 .<br />
________________________________________________________________________________________________<br />
GIGA-BYTE T<strong>EC</strong>HNOLOGY Co., Ltd. 12<br />
No.6, Bao Chiang Road, Hsin-Tien Dist., New Taipei City 231,Taiwan<br />
Tel: (02)8912-4000 Fax: (02)8912-4004 http://www.<strong>gigabyte</strong>.com
8. 點 擊 資 料 夾 圖 示 .<br />
9. 選 擇 BOOT 映 像 檔 並 點 擊 [ 存 檔 ].<br />
10. 點 擊 [Write] 開 始 執 行 寫 入 映 像 檔 .<br />
________________________________________________________________________________________________<br />
GIGA-BYTE T<strong>EC</strong>HNOLOGY Co., Ltd. 13<br />
No.6, Bao Chiang Road, Hsin-Tien Dist., New Taipei City 231,Taiwan<br />
Tel: (02)8912-4000 Fax: (02)8912-4004 http://www.<strong>gigabyte</strong>.com
11. 點 擊 [Yes] 後 將 清 除 USB 磁 碟 內 所 有 資 料 並 開 始 寫 入 映 像 檔 .<br />
12. 開 始 執 行 寫 入 流 程 .<br />
13. 完 成 寫 入 流 程 後 請 點 擊 [Exit], 此 USB 磁 碟 現 在 已 經 包 含 最 新 的 <strong>BIOS</strong> 和 <strong>EC</strong> 檔 案 且 已<br />
成 為 可 開 機 的 裝 置 . 請 重 新 開 機 您 的 電 腦 .<br />
________________________________________________________________________________________________<br />
GIGA-BYTE T<strong>EC</strong>HNOLOGY Co., Ltd. 14<br />
No.6, Bao Chiang Road, Hsin-Tien Dist., New Taipei City 231,Taiwan<br />
Tel: (02)8912-4000 Fax: (02)8912-4004 http://www.<strong>gigabyte</strong>.com
14. 進 入 開 機 時 的 POST 畫 面 按 下 F12 鍵 並 在 Boot Manager 下 選 擇 您 的 USB 可 開 機 磁 碟 .<br />
15. 當 出 現 警 告 訊 息 時 , 請 確 認 電 腦 已 連 接 電 源 插 頭 並 點 擊 鍵 盤 上 之 任 何 鍵 已 繼 續 <strong>BIOS</strong> 和<br />
<strong>EC</strong> 更 新 流 程 .<br />
________________________________________________________________________________________________<br />
GIGA-BYTE T<strong>EC</strong>HNOLOGY Co., Ltd. 15<br />
No.6, Bao Chiang Road, Hsin-Tien Dist., New Taipei City 231,Taiwan<br />
Tel: (02)8912-4000 Fax: (02)8912-4004 http://www.<strong>gigabyte</strong>.com
16. 更 新 <strong>BIOS</strong> 和 <strong>EC</strong> 的 時 間 將 不 超 過 2 分 鐘 .<br />
( 此 時 請 勿 移 除 USB 磁 碟 )<br />
17. 當 完 成 更 新 後 , 電 腦 將 會 自 動 關 機 .<br />
18. 按 下 電 源 鍵 開 機 並 在 POST 畫 面 按 F2 鍵 進 入 <strong>BIOS</strong> Setup Utility.<br />
19. 選 擇 Load Optimal Defaults 並 按 下 enter 鍵 .<br />
________________________________________________________________________________________________<br />
GIGA-BYTE T<strong>EC</strong>HNOLOGY Co., Ltd. 16<br />
No.6, Bao Chiang Road, Hsin-Tien Dist., New Taipei City 231,Taiwan<br />
Tel: (02)8912-4000 Fax: (02)8912-4004 http://www.<strong>gigabyte</strong>.com
20. 檢 查 紅 色 圈 選 處 以 確 認 系 統 <strong>BIOS</strong> 和 <strong>EC</strong> 的 版 本 為 最 新 版 .<br />
________________________________________________________________________________________________<br />
GIGA-BYTE T<strong>EC</strong>HNOLOGY Co., Ltd. 17<br />
No.6, Bao Chiang Road, Hsin-Tien Dist., New Taipei City 231,Taiwan<br />
Tel: (02)8912-4000 Fax: (02)8912-4004 http://www.<strong>gigabyte</strong>.com
備 註 : <strong>BIOS</strong> Flasher 僅 能 於 技 嘉 科 技 筆 記 型 電 腦 產 品 上 使 用 , 當 完 成 更 新 <strong>BIOS</strong> 和 <strong>EC</strong> 之 後 , 您 可 以 使 用 <strong>BIOS</strong><br />
Flasher 工 具 還 原 您 的 USB 磁 碟 之 原 始 容 量 , 請 點 擊 [Format Your USB Drive] 按 鈕 .<br />
________________________________________________________________________________________________<br />
GIGA-BYTE T<strong>EC</strong>HNOLOGY Co., Ltd. 18<br />
No.6, Bao Chiang Road, Hsin-Tien Dist., New Taipei City 231,Taiwan<br />
Tel: (02)8912-4000 Fax: (02)8912-4004 http://www.<strong>gigabyte</strong>.com
[ 目 標 ]<br />
<br />
您 也 可 以 於 WINDOWS7 下 更 新 P2532F 的 <strong>BIOS</strong>.<br />
[ 更 新 步 驟 – 下 載 並 刷 新 P2532F 的 <strong>BIOS</strong> 於 WINDOWS7 下 ]<br />
1. 將 電 源 插 頭 插 入 電 源 孔 並 確 認 電 力 由 變 壓 整 流 器 供 電 .<br />
2. 雙 擊 WINDOWS 目 錄 下 的 執 行 檔 案 . ( 對 於 不 同 的 <strong>BIOS</strong> 版 本 會 有 不 同 的 檔 案 名 稱 )<br />
3. 確 認 您 已 經 連 接 電 源 線 及 插 頭 並 按 下 任 何 鍵 開 始 刷 新 <strong>BIOS</strong>.<br />
4. 當 完 成 刷 新 程 序 , 系 統 會 自 動 關 機 .<br />
________________________________________________________________________________________________<br />
GIGA-BYTE T<strong>EC</strong>HNOLOGY Co., Ltd. 19<br />
No.6, Bao Chiang Road, Hsin-Tien Dist., New Taipei City 231,Taiwan<br />
Tel: (02)8912-4000 Fax: (02)8912-4004 http://www.<strong>gigabyte</strong>.com
About GIGABYTE Upgrade Your Life<br />
GIGABYTE, headquartered in Taipei, Taiwan, is known as a global leading br<strong>and</strong> in the IT industry, with employees <strong>and</strong><br />
business channels in almost every country. Founded in 1986, GIGABYTE started as a research <strong>and</strong> development team<br />
<strong>and</strong> has since taken the lead in the world's motherboard market. On <strong>to</strong>p of motherboards <strong>and</strong> graphics accelera<strong>to</strong>rs,<br />
GIGABYTE further exp<strong>and</strong>ed its product portfolio <strong>to</strong> include notebook <strong>and</strong> desk<strong>to</strong>p PCs, digital home entertainment<br />
appliances, networking servers, communications, mobile <strong>and</strong> h<strong>and</strong>held devices, servicing every facet of people's lives at<br />
home or business. Everyday GIGABYTE aims <strong>to</strong> “Upgrade Your Life” with the most innovative designs <strong>and</strong> impeccable<br />
quality <strong>and</strong> services. Visit www.<strong>gigabyte</strong>.com <strong>for</strong> more in<strong>for</strong>mation.<br />
________________________________________________________________________________________________<br />
GIGA-BYTE T<strong>EC</strong>HNOLOGY Co., Ltd. 20<br />
No.6, Bao Chiang Road, Hsin-Tien Dist., New Taipei City 231,Taiwan<br />
Tel: (02)8912-4000 Fax: (02)8912-4004 http://www.<strong>gigabyte</strong>.com
![[HOW-TO] How to update BIOS and EC for m2432_v1 - gigabyte](https://img.yumpu.com/39745180/1/184x260/how-to-how-to-update-bios-and-ec-for-m2432-v1-gigabyte.jpg?quality=85)
![[HOW-TO] How to update BIOS for q2532_en_cht_v2 - gigabyte](https://img.yumpu.com/39745175/1/184x260/how-to-how-to-update-bios-for-q2532-en-cht-v2-gigabyte.jpg?quality=85)