User's Manual - Aimpro21.com
User's Manual - Aimpro21.com
User's Manual - Aimpro21.com

Create successful ePaper yourself
Turn your PDF publications into a flip-book with our unique Google optimized e-Paper software.
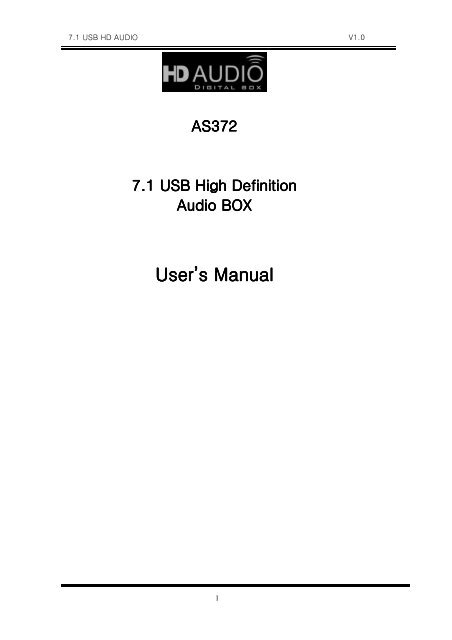
7.1 USB HD AUDIO V1.0<br />
AS372<br />
7.1 USB High Definition<br />
Audio BOX<br />
User’s s <strong>Manual</strong><br />
1
7.1 USB HD AUDIO V1.0<br />
Table of Contents<br />
OVERVIEW ................................................................................................................... 5<br />
PACKAGE CONTENTS ............................................................................................... 5<br />
SYSTEM REQUIREMENTS ........................................................................................ 5<br />
FIGURE OF AS372 AND CONNECTIONS ................................................................ 6<br />
CONNECTIONS ........................................................................................................... 6<br />
HARDWARE INSTALLATION .................................................................................... 7<br />
INSTALL AS372 7.1 USB HD AUDIO BOX ............................................................................................ 7<br />
ADJUST VOLUME ....................................................................................................... 7<br />
SOFTWARE INSTALLATION AND REMOVABLE .................................................. 8<br />
INSTALLATION ...................................................................................................................................... 8<br />
UN-INSTALLATION ................................................................................................................................ 9<br />
XEAR AUDIO CENTER INTRODUCTION ............................................................. 10<br />
OPEN USB AUDIO DEVICE SOFTWARE CPL ....................................................................................... 10<br />
XEAR AUDIO CENTER FUNCTION INTRODUCTION............................................................................... 14<br />
Selecte a Default Device ...................................................................................................... 14<br />
Master Volume / Mute & Un-Mute ....................................................................................... 16<br />
SVN (Smart Volume Normalizer) ......................................................................................... 17<br />
Function Pop Menu .............................................................................................................. 18<br />
Function Page Area ............................................................................................................. 19<br />
Audio Status Panel ............................................................................................................... 20<br />
Profile Panel ........................................................................................................................ 22<br />
SPEAKER DEVICE FUNCTION INTRODUCTION ...................................................................................... 23<br />
Volume control Page ............................................................................................................ 23<br />
Sample Rate Page ................................................................................................................ 24<br />
Equalizer .............................................................................................................................. 25<br />
Environment Effect ............................................................................................................... 27<br />
Virtual Speaker Shifter ......................................................................................................... 28<br />
Flex Bass II .......................................................................................................................... 30<br />
Xear SingFX ......................................................................................................................... 32<br />
SPDIF-OUT DEVICE FUNCTION INTRODUCTION ................................................................................. 33<br />
Volume control Page ............................................................................................................ 33<br />
Sample Rate Page ................................................................................................................ 34<br />
MIC、LINE-IN DEVICE FUNCTION INTRODUCTION ............................................................................. 35<br />
Volume control Page ............................................................................................................ 35<br />
Sample Rate Page ................................................................................................................ 36<br />
Xeae Magic Voice Page (Microphone device only) .............................................................. 37<br />
SPDIF-IN、STEREO MIX DEVICE FUNCTION INTRODUCTION ............................................................. 38<br />
Volume control Page ............................................................................................................ 38<br />
Sample Rate Page ................................................................................................................ 39<br />
2
7.1 USB HD AUDIO V1.0<br />
INFORMATION PAGE INTRODUCTION ................................................................................................... 40<br />
TRAY ICON FUNCTION INTRODUCTION ......................................................................................................... 41<br />
APPENDIX A - MULTI-LINGUAL SUPPORTING LIST ......................................... 46<br />
APPENDIX B – TROUBLE SHOOTING ................................................................ 464<br />
3
7.1 USB HD AUDIO V1.0<br />
FCC and CE Radiation Norm<br />
FCC<br />
This equipment has been tested and found to comply with limits for a<br />
Class B digital device pursuant to Part 15 of Federal Communication<br />
Commission (FCC) rules.<br />
CE<br />
This equipment has been tested and found to comply with the limits of<br />
the European Council Directive on the approximation of the law of the<br />
member states relating to electromagnetic compatibility (89/336/EEC)<br />
according to EN 55022 class B.<br />
FCC and CE Compliance Statement<br />
These limits are designed to provide reasonable protection against<br />
frequency interface in residential installation. This equipment generates<br />
uses and can radiate radio frequency energy, and if not installed or used in<br />
accordance with the instructions, may cause harmful interference to radio<br />
communication. However, there is no guarantee that interference will not<br />
occur in a television reception, which can be determined by turning the<br />
equipment off and on, the user is encouraged to try and correct the<br />
interference by one or more of the following measures:<br />
Reorient or relocate the receiving antenna<br />
Increase the separation between the equipment and the receiver<br />
Connect the equipment into an outlet on a circuit different from<br />
that to which the receiver is connect to<br />
CAUTION!<br />
The Federal Communication Commission warns the user that<br />
changes or modifications to the unit not expressly approved by the<br />
party responsible for compliance could void the user’s authority to<br />
operate the equipment.<br />
4
7.1 USB HD AUDIO V1.0<br />
Overview<br />
AS372 is a portable multi-channel device with USB AUDIO 2.0<br />
compliance. It has built-in real 7.1 output channels and every channel<br />
can support 24-bit/192kHz, 100dB SNR high quality audio. With<br />
supporting of the highest playback audio specification from Blu-ray<br />
disc, it lets audiophiles enjoy the amazing audio when they are<br />
watching the best videoes. AS372 comes with Line-in, standalone<br />
Microphone Input, Headphone Output, Optical Input and Output.<br />
Users can use it as a portable USB AUDIO DAC to upgrade notebook<br />
audio quality anytime and anywhere!<br />
Package Contents<br />
<br />
<br />
<br />
<br />
<br />
AS372 7.1 USB HD Audio<br />
USB 2.0 Cable (mini USB to Type A USB)<br />
Audio Cable (Stereo RCA to Stereo 3.5mm Jack)<br />
Quick Installation Guide<br />
Installation CD<br />
USB Audio 2.0 drivers for Windows 7/Vista/XP<br />
English User’s <strong>Manual</strong><br />
System Requirements<br />
Compatible with Microsoft ® Windows ® 7, Windows Vista ®,<br />
Windows XP, Mac and Linux<br />
Intel ® Core 2 Duo or AMD ® equivalent processor, 2.2 GHz or<br />
faster<br />
Available USB port<br />
10MB Hard Disk space<br />
1GB System Memory<br />
Available CD-ROM or DVD-ROM Drive<br />
5
7.1 USB HD AUDIO V1.0<br />
Figure of AS372 and Connections<br />
Connections<br />
Most of the audio devices, such as Speakers, Headphones and Hi-Fi<br />
Amplifier can be connected to the connectors of AS372. Below table<br />
shows the connectors and their descriptions:<br />
Connector<br />
Phone Out (3.5mm)<br />
Line In (3.5mm)<br />
Mic In (3.5mm)<br />
Line Out (RCA Left)<br />
Line Out (RCA Right)<br />
Rear Out (3.5mm)<br />
C/Sub Out (3.5mm)<br />
Side Out (3.5mm)<br />
S/PDIF Output (Optical)<br />
S/PDIF Input (Optical)<br />
Mini USB<br />
Connections<br />
to stereo Headphones<br />
to MP3 player or any audio players<br />
to Microphones<br />
to RCA connector of Speaker (Left Channel)<br />
to RCA connector of Speaker (Right Channel)<br />
to Rear Left and Right Speakers<br />
to Center and Subwoofer Speakers<br />
to Side Left and Right Speakers<br />
to the optical input of Digital Amplifier or Decoder<br />
to the optical output of Digital Player<br />
to the USB port of PC/NB System<br />
6
7.1 USB HD AUDIO V1.0<br />
Hardware Installation<br />
Install AS372 7.1 USB HD Audio Box<br />
First, make sure that Windows 7, Vista and XP in your system is<br />
running properly. Then follow the following steps while installing your<br />
AS372:<br />
1. Plug AS372 into any free USB port of the computer with the<br />
bundled USB cable.<br />
2. Wait for OS to process the identification process. If you are<br />
running Windows System, please refer to the “Software<br />
Installation and Removal” section to install the drivers.<br />
Adjust volume<br />
Rotate the wheel to adjust volume, clockwise to increase volume, and<br />
counterclockwise to decrease volume. Pushing the button down can<br />
mute the audio output, pushing down again can restore the volume.<br />
7
7.1 USB HD AUDIO V1.0<br />
Software Installation and Removable<br />
1.<br />
Notice:<br />
Ensure that you have plugged-in the USB HD Audio before installing the USB 2.0<br />
High-Speed True HD Audio driver. Otherwise, driver installation error may occur.<br />
Before installing/Uninstalling, you should close all audio programs to avoid the driver<br />
installation failure.<br />
Please make sure your USB 2.0 High-Speed True HD Audio hardware device<br />
is plugged-in and then double click the setup.exe file.<br />
Installation<br />
Start Driver installation, you can see a welcome window. Press “Next”<br />
button and follow the instruction of the popped windows until the end.<br />
Allow Computer restart to activate the driver.<br />
8
7.1 USB HD AUDIO V1.0<br />
Un-Installation<br />
Close all audio programs. Double click the “Programs/Uninstall a program”<br />
item from Windows Control Panel.<br />
Select “Xear Audio Center” item, then click the “Uninstall” button.<br />
Win7/Vista. Follow the instructions of the popped windows until the<br />
uninstallation finishes. Restart your computer to completely remove driver.<br />
Windows XP<br />
9
7.1 USB HD AUDIO V1.0<br />
Xear Audio Center Introduction<br />
Open USB Audio Device Software CPL<br />
After the driver is installed and the system is rebooted, you will find the USB<br />
Advanced Audio Device CPL (Xear Audio Center) icon on the system tray bar.<br />
Double-clicking on the icon to open CPL software.<br />
Win7/Vista Tray Icon<br />
XP Tray Icon<br />
The first time Xear Audio Center is opened, you can see a message as<br />
shown below. You can get the information about how to use Xear Audio<br />
Center.<br />
If you don’t want to see this window next time, check the “Don’t show<br />
this message again” option.<br />
10
7.1 USB HD AUDIO V1.0<br />
The “Xear Audio Center” will appear as the below diagram.<br />
If the tray icon does not appear in your system tray, please go to the<br />
Windows control panel and double click the “Xear Audio Center” CPL icon to<br />
open it.<br />
For Win7 / Vista<br />
11
7.1 USB HD AUDIO V1.0<br />
For XP<br />
12
7.1 USB HD AUDIO V1.0<br />
How to make CPL icon visible in the system tray?<br />
1. Open Xear Audio Center<br />
2. Click on the “setting” button to open the setting window.<br />
3. Check “Show System Tray Icon”. The Xear Audio center icon will be shown<br />
in the system tray.<br />
13
7.1 USB HD AUDIO V1.0<br />
Xear Audio Center Function Introduction<br />
You can control the USB Audio device configuration as shown in the<br />
diagram below.<br />
Selecte a Default Device<br />
Before the Audio device playback or recording operation starting, it<br />
needs to select a device as the default device. Windows OS will assign<br />
the system resource to the default device.<br />
Set Default Output Device (Speaker)<br />
Click mouse left button on the check box ( ) of the<br />
speaker device icon to set the default device is “Speakers”.<br />
14
7.1 USB HD AUDIO V1.0<br />
Set Default Input Device (Mic)<br />
Check on the check box (<br />
device in “Mic”.<br />
)to set the default<br />
Function Behavior<br />
<br />
Only one audio output device (Speaker or SPDIF-Out)<br />
can be set as the default audio output device.<br />
<br />
There is only one audio Input device (Mic-in, Line-in,<br />
SPDIF-In or Stereo Mix) can be set as the default<br />
audio input device.<br />
15
7.1 USB HD AUDIO V1.0<br />
Master Volume / Mute & Un-Mute<br />
Volume Adjusting<br />
You can increase or decrease the volume of<br />
device by this master volume bar ( ).<br />
Mute/ Un-Mute the volume<br />
You can mute/un-mute volume of default output device by the<br />
mute ( ) or Un-mute button ( ).<br />
16
7.1 USB HD AUDIO V1.0<br />
SVN (Smart Volume Normalizer)<br />
Function Introduction<br />
When click on the SVN button, the SVN function is activated.<br />
SVN (Smart Volume Normalization) normalizes the volume of all<br />
audio sources into a constant level and also enhances your 3D<br />
sound listening range that advantages to gaming.<br />
17
7.1 USB HD AUDIO V1.0<br />
Function Pop Menu<br />
Xear Audio Center provides several sound effects. Each output/input<br />
device comes with a pop menu and you can enter into the sound effect<br />
page to enjoy your music, movies and gaming.<br />
How to open the pop menu:<br />
I. Double click left mouse button on the Device Icon.<br />
II. One click right mouse button on the Device Icon.<br />
Device Icon<br />
18
7.1 USB HD AUDIO V1.0<br />
Function Page Area<br />
When you click one of the function items in a pop menu, a function page<br />
as below will be shown as below.<br />
Choose the Equalizer Page<br />
Pop up the Equalizer Function Page<br />
19
7.1 USB HD AUDIO V1.0<br />
Audio Status Panel<br />
3<br />
5<br />
1<br />
2<br />
1. Playback (Speakers Out)<br />
It indicates that Speaker is the output default device.<br />
4<br />
6<br />
7<br />
2. Capture (Mic In)<br />
It indicates that Mic In is the input default device.<br />
3. Speaker Numbers (2)<br />
It indicates the speaker numbers (for Speaker device only).<br />
4. Sample Rate<br />
It indicates the Playback sample rate for default output device.<br />
5. Audio Output effect indicator<br />
It indicates the playback sound effect status.<br />
Abbreviation Sound effect<br />
EQ<br />
Equalizer<br />
EM<br />
Environment Effects<br />
VSS<br />
7.1 Virtual Speaker Shifter<br />
FB<br />
Flex Bass II<br />
KS<br />
Xear SingFX Key Shifting<br />
VF<br />
Xear SingFX Vocal Fading<br />
20
7.1 USB HD AUDIO V1.0<br />
6. In effect indicator<br />
It indicates the playback sound effect status.<br />
Abbreviation Sound effect<br />
SF<br />
Xear SingFX Microphone Echo<br />
SF<br />
Xear SingFX Magic Voice<br />
7. Switch to Profile Panel button<br />
Click on this button will switch status bar to Profile panel.<br />
(Refer to 2.1.7 Profile Panel)<br />
21
7.1 USB HD AUDIO V1.0<br />
Profile Panel<br />
This is the profile for sound effect setting; it has the preset mode and the<br />
user define mode. The user define mode can be customized.<br />
2<br />
3<br />
4<br />
1. Profile Mode:<br />
You can set the preset profile mode by these profile buttons. When<br />
the preset mode is active, there is a Green-check symbol shown on<br />
the right-down corner.<br />
1<br />
2. Add Profile:<br />
You can adjust specific sound effects (Ex: EQ, EM etc…) settings and<br />
click this “+” add profile button to name and to create a user-define<br />
mode.<br />
3. Delete Profile:<br />
You can click this “-“ button to delete the user-define mode.<br />
4. Switch Button:<br />
This switches the Profile panel to Audio Status Panel.<br />
22
7.1 USB HD AUDIO V1.0<br />
Speaker Device function introduction<br />
Volume control Page<br />
1<br />
2<br />
3 4<br />
<br />
Function Introduction<br />
This function page provides a volume control for Speaker device.<br />
1. Volume control bar:<br />
Master – It can adjust volume level for all channels.<br />
Front - It can adjust volume level for front channel.<br />
2. Left/ Right Channel Lock (Front, Cen/LFE, Rear, Side):<br />
Clicking on the lock/ un-lock button can sync left-channel and<br />
right-channel.<br />
3. Mute / Un-mute:<br />
Clicking on the mute/ un-mute button can mute all channels.<br />
4. dB Input Area (Front, Cen/LFE, Rear, Side):<br />
You can directly fill-in a dB value into this text box to set the volume level.<br />
23
7.1 USB HD AUDIO V1.0<br />
Sample Rate Page<br />
1<br />
2<br />
<br />
Function Introduction<br />
This function page provides a sample rate setting for Speaker<br />
device.<br />
1. Sample Rate button<br />
44.1 KHz - set playback sample rate to 44.1K<br />
48 KHz - set playback sample rate to 48K<br />
96 KHz - set playback sample rate to 96K<br />
192 KHz - set playback sample rate to 192K<br />
2. Bit Depth button<br />
16bit - set playback bit depth to 16bit<br />
24bit - set playback bit depth to 24bit<br />
24
7.1 USB HD AUDIO V1.0<br />
Equalizer<br />
1<br />
3<br />
4<br />
2<br />
<br />
Function Introduction<br />
It provides a 10-band EQ function; you will be able to adjust the EQ<br />
band manually and create customized preset items or click on the<br />
preset EQ mode.<br />
1. EQ enable/disable switch<br />
Click this check box to enable/disable EQ<br />
2. Preset mode<br />
Select a pre-set mode of the equalizer that is designed<br />
accordingly. There are 12 preset modes such as Bass, Treble,<br />
Live, Rock, Jazz, etc.<br />
3. EQ band controller<br />
You can change the gain setting for each band<br />
(30/ 60/ 120/ 250/ 500/ 1K/ 2K/ 4K/ 8K/ 16K)<br />
25
7.1 USB HD AUDIO V1.0<br />
4. <strong>Manual</strong> mode<br />
You can change the gain setting for each band and then give it a<br />
name in the “A. Input Field” and then click “<br />
” to add your<br />
new setting into the “B. <strong>Manual</strong> Mode List”. Click “<br />
delete settings.<br />
” to<br />
B. <strong>Manual</strong> mode List<br />
Set to <strong>Manual</strong> Mode<br />
A. Input Field<br />
26
7.1 USB HD AUDIO V1.0<br />
Environment Effect<br />
1<br />
2<br />
3<br />
<br />
Function Introduction<br />
It provides 28 special environment emulations; you can hear<br />
different sound reflection and reverberation.<br />
1. Environment Effect enable/disable switch<br />
Click on this check box to enable/disable Environment Effect.<br />
2. Environment Effect mode<br />
Click on an Environment effect button or pull the dropdown list<br />
to choose an Environment effect.<br />
3. Zoom Size<br />
You can change the “Room Size” to simulate a larger or smaller<br />
space.<br />
27
7.1 USB HD AUDIO V1.0<br />
Virtual Speaker Shifter<br />
6<br />
1<br />
2<br />
7<br />
8<br />
3<br />
4<br />
5<br />
<br />
Function Introduction<br />
You can use this page to simulate the speaker direction and distance.<br />
1. 7.1 Virtual speaker shifter enable/disable switch<br />
Click on this check box to enable/disable 7.1 Virtual Speaker.<br />
2. Auto Rotation Mode<br />
The virtual speakers rotate clockwise or counterclockwise<br />
slowly.<br />
3. <strong>Manual</strong>ly Rotation Mode<br />
Use mouse to rotate the virtual speakers on the screen<br />
manually.<br />
4. <strong>Manual</strong> Shifting (Free Moving Mode)<br />
Use pointer and click-and-drag to move the locations of the<br />
28
7.1 USB HD AUDIO V1.0<br />
individual virtual speakers.<br />
5. Reset<br />
Reset the location of virtual speakers / virtual listener to default.<br />
6. Virtual Speaker (L/R/Ls/Rs/Lb/Rb/C/W)<br />
Each virtual speaker virtualizes one channel of the 7.1 channel<br />
speakers in the real world.<br />
7. Volume Control<br />
Each virtual speaker virtualizes one channel of the 7.1 channel<br />
speakers in the real world.<br />
8. Volume indicator<br />
Indicates the value for each channel.<br />
29
7.1 USB HD AUDIO V1.0<br />
Flex Bass II<br />
3<br />
1<br />
2<br />
4<br />
5<br />
Function Introduction<br />
You can use this function to increase/decrease the LFE strength.<br />
This function can cut the low frequency band (50~250Hz) of stereo<br />
music content (ex. Mp3, WMA, CD Audio) and transfer to<br />
subwoofer or each speaker.<br />
1. Flex Bass II enable/disable switch<br />
Click on this check box to enable/disable Flex Bass II.<br />
2. Cut Off Frequency:<br />
The cutting range of low frequency is from 50Hz to 250Hz.<br />
3. Bass Level:<br />
The bass level range is from -12 to 12dB.<br />
30
7.1 USB HD AUDIO V1.0<br />
4. Speaker Size (L/R/Ls/Rs/Lb/Rb/C/W)<br />
Small Speaker w/o bass<br />
When the speaker size is set to small, you can hear the<br />
sound resonance more obvious and reverberation from<br />
subwoofer.<br />
Large Speaker w/ bass:<br />
When the speaker size is setting to large, you can hear the<br />
sound resonance more obvious and reverberation from<br />
itself.<br />
5. Speaker Diagram<br />
You also can check the speaker size from this home<br />
theater diagram.<br />
Small Speaker<br />
Large Speaker<br />
31
7.1 USB HD AUDIO V1.0<br />
Xear SingFX<br />
1<br />
2<br />
Function Introduction<br />
Xear SingFX page provides 2 features for karaoke application.<br />
1. Key Shifting switch<br />
It provides the key change function, there are 4 shifting-up<br />
steps and 4 shifting-down steps, you can use slide bar to change<br />
the key level.<br />
2. Vocal Fading:<br />
It provides the vocal removal function for any stereo music<br />
content (ex. Mp3、WMA、CD), you can use slider bar to change<br />
the vocal fading level.<br />
32
7.1 USB HD AUDIO V1.0<br />
SPDIF-Out Device function introduction<br />
Volume control Page<br />
1<br />
3<br />
2<br />
4<br />
<br />
Function Introduction<br />
This function page provides a volume control for SPDIF-Out device.<br />
1. Volume control bar:<br />
SPDIF-Out – You can use this bar to increase/decrease volume<br />
level.<br />
2. Left/ Right Channel Lock:<br />
Clicking on the Lock/ Un-Lock button can sync the left-channel<br />
and right-channel volume.<br />
3. dB Input Area:<br />
You can directly fill-in a dB value into this text box to set the<br />
volume level.<br />
33
7.1 USB HD AUDIO V1.0<br />
4. Mute / Un-mute:<br />
Clicking on the mute/ un-mute button can mute SPDIF-Out.<br />
Sample Rate Page<br />
1<br />
2<br />
<br />
Function Introduction<br />
This function page provides a sample rate setting for SPDIF-Out<br />
device.<br />
1. Sample Rate button<br />
44.1 KHz - set playback sample rate to 44.1K<br />
48 KHz - set playback sample rate to 48K<br />
96 KHz - set playback sample rate to 96K<br />
192 KHz - set playback sample rate to 192K<br />
2. Bit Depth button<br />
16bit - set playback bit depth to 16bit<br />
24bit - set playback bit depth to 24bit<br />
34
7.1 USB HD AUDIO V1.0<br />
Mic、Line-in Device function introduction<br />
Volume control Page<br />
3<br />
1<br />
4<br />
2<br />
<br />
Function Introduction<br />
This function page provides the recording volume and monitor the<br />
volume control of Microphone device. (Same as Line-in device.)<br />
1. Volume control bar:<br />
Mic-In – It can adjust the volume level of recording.<br />
Monitor- It can adjust the volume level of Mic-in monitor.<br />
2. Left/ Right Channel Lock:<br />
Clicking on the Lock/ Un-Lock button can sync the left-channel<br />
and right-channel volume.<br />
3. Mute / Un-mute:<br />
Clicking on the Mute/ Un-Mute button can mute all channels.<br />
4. dB Input Area<br />
You can directly fill-in a dB value into this text box to set the<br />
volume level.<br />
35
7.1 USB HD AUDIO V1.0<br />
Sample Rate Page<br />
1<br />
2<br />
<br />
Function Introduction<br />
This function page provides a sample rate setting for Microphone<br />
device.<br />
1. Sample Rate button<br />
44.1 KHz - set Mic recording sample rate to 44.1K<br />
48 KHz - set Mic recording sample rate to 48K<br />
2. Bit Depth button<br />
16bit - set playback bit depth to 16bit<br />
24bit - set playback bit depth to 24bit<br />
36
7.1 USB HD AUDIO V1.0<br />
Xear Magic Voice Page (Microphone device only)<br />
1<br />
2<br />
<br />
Function Introduction<br />
When you are talking to your friends over the network like<br />
messenger, VOIP, online game applications, you can use “Magic<br />
Voice” effects to simulate some funny voice. Only one voice type can<br />
be chosen at one time.<br />
1. Microphone Echo,<br />
Click this check box to enable the Microphone echo effect; you<br />
can use the slide bar to change the echo level.<br />
2. Magic Voice mode (Monster/Carton/Male/Female)<br />
Click this check box to enable the Magic Voice effect; you can<br />
click on the any button to select the magic voice mode.<br />
37
7.1 USB HD AUDIO V1.0<br />
SPDIF-In、Stereo Mix Device function introduction<br />
Volume control Page<br />
3<br />
1<br />
4<br />
2<br />
<br />
Function Introduction<br />
This function page provides the adjustment of recording volume of<br />
SPDIF-In device. (Same as Stereo Mix device.)<br />
1. Volume control bar:<br />
SPDIF-In – It can adjust volume level for recording.<br />
2. Left/ Right Channel Lock:<br />
Clicking on the Lock/ Un-Lock button can sync the left-channel<br />
and right-channel volume.<br />
3. dB Input Area<br />
You can directly fill-in a dB value into this text box to set the<br />
volume level.<br />
4. Mute / Un-Mute:<br />
Clicking on the mute/ un-mute button can mute all channels.<br />
38
7.1 USB HD AUDIO V1.0<br />
Sample Rate Page<br />
1<br />
2<br />
<br />
Function Introduction<br />
This function page provides a sample rate setting.<br />
1. Sample Rate button<br />
44.1 KHz - set recording sample rate to 44.1K<br />
48 KHz - set recording sample rate to 48K<br />
2. Bit Depth button<br />
16bit - set recording bit depth to 16bit<br />
24bit - set recording bit depth to 24bit<br />
39
7.1 USB HD AUDIO V1.0<br />
Information Page Introduction<br />
This page lists the driver information and the technology trademark<br />
logo. You can get both hardware/software details and also the legal<br />
information references.<br />
Detail:<br />
40
7.1 USB HD AUDIO V1.0<br />
Tray Icon Function Introduction<br />
Open the “CPL Tray Icon Function List” by right-clicking the tray Icon on<br />
system tray.<br />
1. Open:<br />
Clicking the “Open” item will restore the USB Audio Software CPL.<br />
2. Volume Control:<br />
Clicking the “Volume Control” item will open the Volume Mixer of<br />
Windows OS. If you want to separately control the volume of your<br />
speakers and other sound devices or programs, use this Volume<br />
Mixer.<br />
41
7.1 USB HD AUDIO V1.0<br />
3. Windows Media Player:<br />
Clicking the “Windows Media Player” item will open the Microsoft<br />
Windows Media Player.<br />
4. Sound Recorder:<br />
Click the “Sound Recorder” item to open the Windows Sound<br />
recorder.<br />
42
7.1 USB HD AUDIO V1.0<br />
5. Multimedia Properties:<br />
Open the Multimedia Properties page of Windows OS, you can select<br />
the working sample rate & bit rate.<br />
I. Select the “Speakers” device and then click the “properties”<br />
button.<br />
II.<br />
Click the “Advanced” tag, enter the advanced page, and pull the<br />
dropdown list to open default format support list as shown in<br />
the below diagram.<br />
43
7.1 USB HD AUDIO V1.0<br />
III. Follow the same procedure to change the Sample Rate & Bit<br />
Rate of “Microphone” device on recording tag.<br />
44
7.1 USB HD AUDIO V1.0<br />
6. Setting<br />
Click setting item to open the “Xear Audio Center” setting page as<br />
below.<br />
I. Show System Tray Icon – Check “Show System Tray Icon” box,<br />
the Xear Audio center icon will be shown in the system tray.<br />
II. UI Transparent – It can adjust transparentness of the UI vision.<br />
III. Language Select – it can change the UI language. (Refer to<br />
Appendix A )<br />
IV. Don’t show start up message – it can enable/disable the UI<br />
start-up message.<br />
7. Exit:<br />
Clicking the “Exit” item will exit the tray Icon from system tray.<br />
45
7.1 USB HD AUDIO V1.0<br />
Appendix A - Multi-Lingual Supporting List<br />
AS372 USB HD Audio Driver Multi-Lingual Supporting List<br />
Support 17 lingual versions:<br />
1 English - English<br />
2 German - Deutsch<br />
3 French - Français<br />
4 Portuguese - Português<br />
5 Spanish - Español<br />
6 Russian - русский язык<br />
7 Italian - Italiano<br />
8 Dutch - Nederlands<br />
9 Indonesian - Bahasa Indonesia<br />
10 Danish - Dansk<br />
11 Chinese - Traditional<br />
12 Chinese - Simplified<br />
13 Korean - 한국어 ( 韓 國 語 )<br />
14 Japanese - 日 本 語<br />
15 Swedish - Svenska<br />
16 Turkish - Türkçe<br />
17 Thai - ไทย<br />
Installing to different country version of operation system can auto<br />
detect the language version and show a correct version.<br />
46
7.1 USB HD AUDIO V1.0<br />
Appendix B – Trouble Shooting<br />
1. Why I cannot enjoy the 24-bit/192kHz high definition audio quality from<br />
AS372?<br />
You may use AS372 under USB Audio mode 1.0, and it only delivers<br />
16-bit/48kHz audio quality. Adjust the slide switch on the bottom of AS372<br />
to U2 position and setup AS372 in USB Audio Device 2.0 mode. Unplug and<br />
re-plug AS372 USB cable to computer system.<br />
2. Why I need to install drivers under Windows environment?<br />
Windows does not have the native drivers for gears which comply with<br />
USB Audio device 2.0. Therefore, you have to install the drivers from the<br />
bundled installation CD.<br />
On the other hand, if you are running the latest Mac or Linux OS, they<br />
already have built-in native drivers for USB Audio Device 2.0. AS372 is a<br />
real plug and play device to execute the drivers automatically.<br />
3. System advises to install Microsoft Frame Network during installation.<br />
.NET Framework 3.5 builds incrementally on the new features added<br />
in .NET Framework 3.0. For example, feature sets in Windows Workflow<br />
Foundation (WF), Windows Communication Foundation (WCF), Windows<br />
Presentation Foundation (WPF) and Windows CardSpace. In addition, .NET<br />
Framework 3.5 contains a number of new features in several technology<br />
areas which have been added as new assemblies to avoid breaking changes.<br />
You can download it from<br />
http://www.microsoft.com/download/en/confirmation.aspx?id=25150<br />
4. If I do not install the drivers, can I use AS372 as a multi-channel USB Audio<br />
device?<br />
Yes, you still can use AS372 without any installation. Please switch the<br />
button slide switch to U1 and setup AS372 in USB Audio Device 1.0 mode.<br />
5. Why I cannot use my AS372 when it connects to a 4-port USB HUB.?<br />
AS372 needs fully 500mA from the USB port. The HUB might not provide<br />
such big current to AS372. Please connect AS372 to a PC system USB port<br />
directly, or connect it to USB HUB that has power adaptor.<br />
47
7.1 USB HD AUDIO V1.0<br />
6. Does AS372 support ASIO?<br />
AS372 cannot support ASIO from native driver, but you can still enjoy ASIO<br />
performance from 3 rd Party software. For example, you may download and<br />
install ASIO4ALL to your system. Then you can find out the ASIO drivers<br />
from output device list of ASIO supported application.<br />
48