You also want an ePaper? Increase the reach of your titles
YUMPU automatically turns print PDFs into web optimized ePapers that Google loves.
W E L C O M E T O<br />
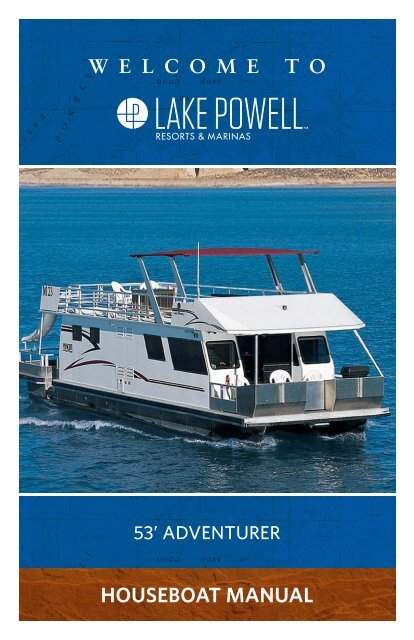
53’ ADVENTURER<br />
HOUSEBOAT MANUAL
TABLE OF CONTENTS<br />
Marine Radio......................................................................................................1<br />
Engines/Helm................................................................................................... 3<br />
<strong>Houseboat</strong> Batteries........................................................................................6<br />
Generator...........................................................................................................8<br />
Water Pressure............................................................................................... 10<br />
Hot Water........................................................................................................ 12<br />
Holding Tanks...................................................................................................13<br />
Gas/Propane................................................................................................... 15<br />
Refrigerator...................................................................................................... 17<br />
Range................................................................................................................. 19<br />
Grill.................................................................................................................... 20<br />
Heater................................................................................................................ 21<br />
Cooling..............................................................................................................22<br />
Accessories......................................................................................................23
MARINE RADIO<br />
Say “_________ (the name of the marina<br />
you are calling) BOAT RENTALS this is<br />
houseboat # _____” (number of your<br />
houseboat). For example: “Bullfrog Boat<br />
Rentals, this is houseboat # S11.”<br />
Your houseboat has come equipped with<br />
a VHF Marine Band Radio. It is located at<br />
the helm, to the left of the steering wheel.<br />
ON/OFF<br />
Turn on DC MAIN Breaker<br />
Turn on VHF RADIO Breaker on the<br />
DC Panel<br />
Turn the volume Knob in a clockwise<br />
direction to turn on the radio.<br />
Make sure the H/L (high/low frequency)<br />
button is on the Hi position which can be<br />
seen on the display.<br />
CHANNEL 16<br />
Use Channel 16 for hailing and<br />
emergencies only. Never use Channel 16<br />
for routine conversations.<br />
In case of an emergency, hail the National<br />
Park Service on channel 16. They monitor<br />
this channel 24 hours a day.<br />
When communication is established,<br />
we will direct you to another channel.<br />
Commonly used channels are 10, 12,<br />
68 and 72. Be sure to acknowledge<br />
that channel, before you change to the<br />
channel. Then turn to that channel, and<br />
we will continue the conversation.<br />
Information you will need when you<br />
call us:<br />
1. Your boat number.<br />
2. Your exact location, if known.<br />
3. Description of the problem.<br />
4. Any details on the trouble-shooting<br />
you have already tried.<br />
If you need assistance we will attempt<br />
to help you troubleshoot a problem over<br />
the radio. If we are not successful, we will<br />
dispatch a technician out to help you.<br />
For safety, our technicians can only be<br />
dispatched if they can fix the problem<br />
and return to our docks before dark. If<br />
we receive your call late in the day, we<br />
will gladly respond first thing the next<br />
morning.<br />
To hail Boat Rentals, turn radio ON and<br />
to Channel 16, depress button on side of<br />
handheld microphone to talk, and release<br />
the button when you are finished talking.<br />
The Boat Rentals Office monitors this<br />
channel during regular business hours.<br />
1
WEATHER<br />
W/X button or Channel 1 on your marine<br />
radio is the weather channel.<br />
This channel is updated periodically by<br />
the National Weather Service.<br />
Be sure to check this channel regularly<br />
during your trip to keep apprised of the<br />
changing weather conditions here at Lake<br />
Powell.<br />
REQUEST FOR ASSISTANCE CARD<br />
If for some reason you cannot reach us<br />
by Marine Radio, fill out your Request for<br />
Assistance Card located in your manual.<br />
Flag down a boat passing by and ask<br />
them to take it to the nearest marina for<br />
assistance.<br />
We will dispatch a technician out to your<br />
boat as soon as we can safely do so.<br />
OTHER INFO<br />
Do NOT use VHF antenna as a flag pole<br />
or hang anything on the antenna.<br />
Channel 26 is the Marine Operator.<br />
Marine Radios transmit line-of-sight. So if<br />
you are back in a canyon, you may have to<br />
ask assistance from another boater with a<br />
radio to help contact us if you cannot get<br />
through directly.<br />
Profanity over the public airways is a<br />
federal crime.<br />
Reminder: Your Marine Radio is not a<br />
toy and should be operated only by a<br />
responsible adult.<br />
A VHF marine radio is not the same<br />
as a Citizen’s Band Radio. CB lingo and<br />
10-codes are not used.<br />
COMMON TROUBLESHOOTING<br />
PROBLEM POSSIBLE CAUSES REMEDIES<br />
Not transmitting<br />
or receiving<br />
Low house battery<br />
Radio not set on USA<br />
Radio blocked by<br />
canyon walls<br />
Set on 1 watt mode<br />
Antenna has fallen<br />
down<br />
Charge house battery<br />
Push USA/Int button<br />
Move the houseboat to<br />
open water<br />
Push 1/25or Hi/Lo button<br />
to change to 25 watt<br />
Raise antenna<br />
2
ENGINES/HELM<br />
YOUR HOUSEBOAT HAS<br />
TWO ENGINES…<br />
• For greater maneuverability<br />
and power.<br />
• To provide you with a spare in case<br />
of engine failure.<br />
Your engines are well maintained, but<br />
occasional breakdowns can occur. The<br />
spare is to ensure your safety and save<br />
you inconvenience. Don’t let the loss of<br />
one engine delay your vacation. Proceed<br />
on your planned itinerary with the good<br />
engine and we will catch up to you as<br />
soon as possible and make necessary<br />
repairs.<br />
GAUGES<br />
Tachometer<br />
• Monitors the engine revolutions.<br />
• Wide-Open Throttle (WOT)<br />
should be 4800-5200 RPM’s.<br />
• The most efficient cruising RPM<br />
will be 3800-4200 RPM<br />
Horn<br />
• Turn on the breaker for Horn located<br />
on your DC panel.<br />
• Push in the HORN button<br />
at the helm.<br />
Fuel Gauge (Voyager XL Model Only)<br />
• Key must be on for fuel level<br />
to register.<br />
NAUTICAL NOTE: When leaving a dock,<br />
signal with 1 long blast (4 seconds) and<br />
3 short blasts (1 second each).<br />
THROTTLE<br />
Setting Neutral Throttle for Starting<br />
• With the throttle controls in neutral<br />
turn the key to start.<br />
• If the motor does not start push in<br />
the button at the base of the control<br />
throttle (side). Move the throttle<br />
forward 1/3 and turn key to start.<br />
• Once started bring throttle control<br />
back to neutral and let warm up for<br />
three minutes.<br />
THROTTLE (Voyager XL Model Only)<br />
Setting Neutral Throttle for Starting<br />
Neutral Throttle.<br />
• With the throttle controls in the<br />
neutral position turn the key to first<br />
click – beeper will sound.<br />
• Push and hold “Black” command<br />
button the red light will be solid<br />
to indicate that the shift control is<br />
activated, and lever movement will<br />
engage prop.<br />
• Turn key to engage starter. If the<br />
engine fails to start in 10 seconds,<br />
return key to on position wait 30<br />
second and try again.<br />
• If the motor still will not start try<br />
directions bellow:<br />
• Confirm that the throttle is in<br />
neutral<br />
position.<br />
Engines/Helm<br />
• Turn the key to first click- Beeper<br />
will sound.<br />
• Push and hold “black” command<br />
button while pushing throttle<br />
forward to the first detent<br />
3
• Red light will flash to indicate<br />
throttle only control.<br />
• Turn key to engage starter. If the<br />
engine fails to start in 10 seconds,<br />
return key to ON position, wait 30<br />
seconds and try again.<br />
• Once it starts, advance the throttles<br />
till the tachometer reads 2000<br />
rpm’s and allow engine to warm up<br />
for 3 minutes.<br />
• Return throttle lever to center<br />
position after warm-up. Red light<br />
will be solid to indicate that the<br />
shift control is activated, and lever<br />
movement will engage prop.<br />
• If engine is still difficult to start,<br />
squeeze primer bulb, located on the<br />
fuel line near the engine, until firm.<br />
Cold Start<br />
• Same as regular start, but warm up<br />
time needs to be extended.<br />
GETTING UNDER WAY<br />
From Neutral Throttle<br />
• Return throttle to neutral position.<br />
• Button will automatically pop out.<br />
• Push throttle lever forward to go<br />
forward or pull back for reverse.<br />
• Advance throttle to increase speed.<br />
• Always pause in neutral before<br />
changing gears.<br />
Shut Down<br />
• Return throttles to neutral position.<br />
• Turn key to off.<br />
Caused by<br />
• Overloading the back deck.<br />
• Large waves behind boat.<br />
• Dropping lake level which increases<br />
the angle of a beached boat.<br />
If you suspect your engine has become<br />
hydro-locked, get word to the nearest<br />
marina and a technician will be sent out<br />
help you.<br />
RAISING ENGINE<br />
Electric tilt toggle is located on the left<br />
side of the engine, below the cowling<br />
(cover).<br />
Changing the Prop<br />
• Remove keys from ignition<br />
(to avoid someone else accidentally<br />
starting the engine).<br />
• Raise engine.<br />
• Unscrew lock nut.<br />
• Remove spacer washer.<br />
HYDRO-LOCK<br />
Hydro-locking of an engine occurs when<br />
water enters the engine cylinders. The<br />
starter will click, but the engine won’t<br />
turn over.<br />
4
ENGINES/HELM<br />
• Remove Prop.<br />
• Reverse procedure to install the new<br />
propeller.<br />
COMMON TROUBLESHOOTING<br />
PROBLEM POSSIBLE CAUSES REMEDIES<br />
Engine doesn’t turn<br />
over<br />
Engine turns over<br />
slowly<br />
Is the throttle in neutral<br />
Low battery<br />
Hydrolock<br />
Low battery<br />
Put throttle in neutral<br />
Charge battery from the<br />
Generator<br />
Call the marina for help<br />
Charge battery from the<br />
Generator<br />
Engine turns over<br />
but won’t start<br />
Engine won’t turn off<br />
No light on control<br />
(Voyager XL Model<br />
Only)<br />
Flooded<br />
Short in the ignition l<br />
line switch<br />
Stuck in Neutral Throttle<br />
(All models except<br />
Voyager XL)<br />
Button didn’t pop out<br />
Jiggle the throttle until<br />
button pops out.<br />
See starting procedures for<br />
Flooded engine<br />
Fuel line disconnected<br />
Unplug the fuel line from<br />
the engine or reconnect<br />
the harness<br />
switch harness has t<br />
Engine become unplugged<br />
a the engine. (VoyagerXL<br />
Model Only)<br />
Unplug the fuel from the<br />
engine<br />
Reset the MMC breaker<br />
located in the Generator<br />
compartment on the rear<br />
deck<br />
Turn off key Reset the<br />
engine control breaker<br />
located underneath the<br />
rear stateroom bed.<br />
5
HOUSEBOAT BATTERIES<br />
The 12-volt house system includes cabin<br />
lights and navigational lights, water<br />
pumps, the horn and the VHF Radio.<br />
Battery Condition Gauge<br />
• A dash-mounted Battery gauge is<br />
located left of the steering wheel.<br />
The toggle switch selects battery<br />
1 (houseboa battery) or battery 2<br />
(engine crank battery).<br />
• When a battery reaches the<br />
YELLOW area, you must start the<br />
generator or engines to charge the<br />
low batteries. On the Voyager XL<br />
models the battery gauge is located<br />
to the right of the steering column.<br />
Charging<br />
• Start the Generator.<br />
• Turn on the AC main breaker.<br />
• The batteries will also charge<br />
directly from the engines. Operate<br />
the engines 2-3 hours at 1000-2000<br />
RPM to fully charge without the<br />
generator.<br />
DC Breaker Panel<br />
• DC Main<br />
• Refrigerator<br />
• Heater<br />
• Salon Lights<br />
• Cabin Lights- Port<br />
• Instrument panel<br />
• Radio<br />
• Deck Lights<br />
• Cabin Lights<br />
• Water heater<br />
• 12-volt DC Outlet<br />
• Navigational Lights<br />
• Horn<br />
• Bilge Pump<br />
• Shower Pump<br />
Please Note:<br />
• Turn off the LAKE WATER PUMP<br />
breaker while underway, beaching,<br />
or unbeaching. Once you are<br />
beached, leave this breaker off for<br />
an additional 15 minutes to let sand<br />
and sediment in the water settle.<br />
Remember: Each light or appliance will<br />
need to be turned on individually once<br />
the breaker is on.<br />
DC Breaker<br />
• If you should lose DC power and your<br />
batteries are fully charged, reset the<br />
DC breaker located on the electrical<br />
panel. See picture to the left.<br />
A/V.05 ELECT 1<br />
HOUSEBOAT BATTERIES<br />
Bilge Pumps<br />
• Located in the lower stateroom (if<br />
applicable) and in the below deck<br />
generator compartment. Use only<br />
when water is presentTurn on DC<br />
MAIN breaker.<br />
• Turn on BILGE PUMP breaker.<br />
• On helm, push Bilge 1 or Bilge 2<br />
switches ON to activate.<br />
6
HOUSEBOAT BATTERIES<br />
Tips for Getting the Most from your<br />
<strong>Houseboat</strong> Batteries<br />
• When generator is running ALWAYS<br />
have the AC MAIN and BATTERY<br />
CHARGER breakers on.<br />
• Charge daily.<br />
• The lake water pump draws a lot<br />
from the houseboat batteries. When<br />
using the shower or washing dishes,<br />
run the generator with the BATTERY<br />
CHARGER on.<br />
• Don’t use unnecessary lights such<br />
as running lights and anchor lights.<br />
• The INST, RADIO and HORN<br />
breakers should be ON when under<br />
way but may be turned OFF when<br />
beached.<br />
NOTE: Deep Cycle batteries are<br />
used to extend the time between<br />
charging. However, they also require<br />
more time to recharge when they<br />
are discharged for too long. When<br />
the lights dim and the pumps slow, a<br />
recharge is overdue.<br />
COMMON TROUBLESHOOTING<br />
PROBLEM POSSIBLE CAUSES REMEDIES<br />
No DC Power DC<br />
Breaker off<br />
Cabin Light Dim<br />
No Cabin Lights<br />
No Lake Water<br />
Pressure<br />
No Fresh Water<br />
Pressure<br />
House batteries low or<br />
dead<br />
Low house battery<br />
CABIN LIGHTS DC<br />
breakers not on<br />
LAKE WATER PUMP not<br />
on Air lock<br />
Fresh Water Empty<br />
Turn on DC Breaker<br />
Start generator and Turn<br />
on BATTERY CHARGER<br />
Breaker<br />
Start generator and Turn<br />
on BATTERY CHARGER<br />
Breaker<br />
House batteries low or<br />
dead Check Breaker<br />
Start generator and Turn<br />
on BATTERY CHARGER<br />
Breaker<br />
Check LAKE WATER<br />
BREAKER on DC panel<br />
HOLD down the toilet valve<br />
for 15-20 seconds<br />
Refill with Potable Water at<br />
any marina<br />
7
GENERATOR<br />
The Generator is located on the rear deck<br />
of your houseboat.<br />
If the engine fails to start, wait 20<br />
seconds and repeat.<br />
NOTE: The engine won’t start with a<br />
load on the circuit. By continually<br />
holding the starter switch, you can<br />
run down the battery or damage the<br />
starter.<br />
• Allow the engine to warm up for<br />
5 minutes.<br />
• Switch the AC MAIN breaker ON.<br />
• You may now turn on individual<br />
breakers to provide power to your<br />
houseboat.<br />
Note: On the Voyager XL model only, the<br />
generator should not be running when<br />
underway in choppy water as it is water<br />
cooled and could over heat if unable to<br />
draw enough water to cool the Gen.<br />
NOTE: Your generator also has an ON/<br />
OFF rocker switch on the generator itself.<br />
If your remote starter does not work, you<br />
can try this one. Remember to replace the<br />
panel cover, on above deck models after<br />
starting to avoid overheating.<br />
Starting/ Warm Up<br />
The remote start is located on the wall<br />
of the cabin just inside the rear door.<br />
(Voyager XL Models only: There is also<br />
a remote start located to the left of the<br />
steering wheel at the helm.<br />
• Confirm that the AC MAIN breaker<br />
and all other breakers are OFF.<br />
• Press start button until generator<br />
starts or for 20 seconds – no longer.<br />
AC Breaker Panel<br />
• AC Main<br />
• Battery Charger<br />
• Refrigerator<br />
• Cooler<br />
• Galley Outlets<br />
• Microwave<br />
• Heat Outlets<br />
• Outlets Port<br />
8
GENERATOR<br />
Fuel Tank Switch-Over Valve, On the<br />
Voyager XL model only<br />
• The fuel tank switch-over valve is<br />
to help balance fuel usage between<br />
port and starboard tanks.<br />
• Valve is located in the rear deck<br />
compartment.<br />
• Point handle left or right to change<br />
tanks.<br />
GFI Outlets<br />
Some electrical outlets have a GFI<br />
breaker. Push in the reset button to reset.<br />
• To Shut Down Generator Turn off all<br />
circuit breakers<br />
• Turn off AC MAIN breaker<br />
Generator<br />
• Push and hold STOP button<br />
until engine stops completely or<br />
approximately 15 seconds.<br />
1. Turn off the generator.<br />
2. Remove the brass top off thecooling<br />
system strainer.<br />
3. Empty the strainer and replace top.<br />
4. Be certain top is on straight and<br />
hand tightened all the way.<br />
Special Notes<br />
Your battery Charger is located in the<br />
back stateroom closet. It is plugged into<br />
an electric outlet. DO NOT unplug the<br />
charger.<br />
5. Restart generator.<br />
For Voyager XL models only:<br />
The generator is equipped with coolant<br />
(lake water) strainers. Do not open this<br />
unit unless no water is pumping from the<br />
side of the houseboat during generator<br />
operation, or you hear excessively loud<br />
operation:<br />
COMMON TROUBLESHOOTING<br />
PROBLEM POSSIBLE CAUSES REMEDIES<br />
No generator power<br />
AC MAIN breaker off<br />
Check breaker on panel<br />
9<br />
Outlet doesn’t work<br />
Generator Shut down<br />
Generator cranks but<br />
won’t start<br />
CO Alarm beeps<br />
4 beeps every 5<br />
seconds<br />
CO Alarm beeps 1<br />
beeps every minute<br />
Is the generator on? Start generator<br />
AC MAIN breaker off? Check breaker on panel<br />
Is that area’s breaker on? Check breaker on panel<br />
Is GFI tripped?<br />
Reset GFI Outletdeck<br />
Out of Fuel<br />
Check gauges<br />
Out of Fuel<br />
Refuel<br />
Engines/Generator<br />
running<br />
System Error<br />
Turn off Engines/Generator<br />
Evacuate crew out of cabin<br />
Open doors and windows<br />
Press the RESET/SILENCE<br />
Press the REST/SILENCE<br />
button for more than 15<br />
seconds to shut off.
WATER PRESSURE<br />
YOUR HOUSEBOAT IS<br />
SUPPLIED WITH 40<br />
GALLONS OF FRESH WATER.<br />
Holding Tank<br />
• Located on the top deck inside of<br />
abench box and on the Voyager XL<br />
Model only it is located in the front<br />
stateroom under the bed.<br />
Lake Water Pressure<br />
• Turn on the DC MAIN breaker<br />
located on the DC panel.<br />
• Turn on the WATER PUMP breaker<br />
on the DC panel.<br />
• Turn on the LAKE WATER switch on<br />
the wall above the dinette. (Note:<br />
Not all boats will have a LAKE<br />
WATER SWITCH. If your boat does<br />
not have one, disregard this last<br />
instruction.)<br />
• A chrome cap marked WATER is<br />
located under the bench cushion<br />
and on the Voyager XL model only<br />
this cap is located along the port<br />
side outside the cabin.<br />
• Open only when refilling tank from a<br />
POTABLE water hose located at any<br />
Marina. The fresh water is a gravityfed<br />
system.<br />
• Voyager XL model only: The fresh<br />
water is an on demand pump that<br />
operates only when a faucet is<br />
turned ON.<br />
• A pressure valve is located at the<br />
base of the tank, inside the bench.<br />
Faucets<br />
• The Large Faucet is lake water.<br />
• Small Faucet is fresh water.<br />
• The sinks and showers empty directly<br />
into the grey-water tank.<br />
Head/Toilet<br />
• LAKE WATER breaker must be on.<br />
• To fill toilet bowl with water, lift up<br />
on the foot pedal.<br />
• To flush, push down on the foot<br />
pedal slowly.<br />
NOTE: Make sure the pedal returns to the<br />
up position or flooding can occur.<br />
10
WATER PRESSURE<br />
COMMON TROUBLESHOOTING<br />
PROBLEM POSSIBLE CAUSES REMEDIES<br />
No Water<br />
No fresh water<br />
WATER PUMP breaker<br />
may not be on<br />
Low batteries<br />
Lost prime<br />
Turn on breaker<br />
Turn on Switch<br />
Out of water<br />
Low batteries (Voyager<br />
XL models only)<br />
LAKE WATER switch over<br />
the dinette not on<br />
Charge batteries<br />
Press down toilet flush<br />
for about a minute to<br />
restore prime<br />
Refill at marina with<br />
POTABLE water<br />
Charge batteries<br />
Note: Not all boats will have a LAKE WATER SWITCH.<br />
11
HOT WATER<br />
YOUR BOAT IS EQUIPPED<br />
WITH A 6-GALLON<br />
CAPACITY WATER HEATER.<br />
To Start<br />
• Turn ON the DC MAIN.<br />
• Turn ON the valve for your propane<br />
tank.<br />
• Turn ON the WATER HEATER<br />
breaker located on the DC panel.<br />
• Turn ON the SHOWER PUMP<br />
breaker located on the DC panel.<br />
• Turn ON the WATER HEATER<br />
switch located in the hall above the<br />
Thermostat.<br />
• The red light will be on until the<br />
water heater ignites.<br />
• Allow approximately 30 minutes for<br />
the water to heat.<br />
NOTE: If water is already hot, water<br />
heater will not come on nor will the water<br />
heater light.<br />
COMMON TROUBLESHOOTING<br />
PROBLEM POSSIBLE CAUSES REMEDIES<br />
Water Hear does<br />
not light<br />
Propane may not be on<br />
Propane might not<br />
be full<br />
Check your propane to be<br />
sure it is on<br />
Check your propane to be<br />
sure it is full.<br />
The red light on the<br />
master switch does<br />
not come on<br />
DC MAIN might not<br />
be on<br />
WATER HEATER breaker<br />
may not be on<br />
Water may already be hot<br />
Turn on DC MAIN<br />
TURN on WATER HEATER<br />
breaker on DC panel<br />
Ran out of hot water<br />
You only have 6 -gallons<br />
of hot water<br />
Allow 30 minutes to heat<br />
more water<br />
12
HOLDING TANKS<br />
YOUR HOUSEBOAT HAS BEEN<br />
EQUIPPED WITH A A COM-<br />
BINED BLACKWATER TANK<br />
AND A GREYWATER TANK<br />
WITH A TOTAL CAPACITY OF<br />
500-GALLON.<br />
Full Service Pumpout<br />
• Radio into any of the Rental Docks.<br />
• Give us an estimated time for<br />
arrival.<br />
• We will direct you where to park and<br />
will pump out your houseboat for you.<br />
• When finished, close the valve<br />
before removing the hose.<br />
• Remove the fitting from your<br />
houseboat and replace on dock.<br />
• Place the end of the lake water hose<br />
inside the pump out portal.<br />
• Fill the tank with approximately<br />
2 to 3 gallons of water.<br />
• Empty one packet of provided<br />
chemical into the head/toilet inside<br />
and flush.<br />
• Put all the hoses back and replace<br />
the cap on the WASTE opening.<br />
DONE!<br />
Self Service Pumpout<br />
• Located in any marina.<br />
• The silver tank openings are located<br />
on the port side of the boat. There<br />
along the side rub rails of your<br />
houseboat and are marked WASTE.<br />
• Unscrew the cap.<br />
• Screw the correct sized fitting<br />
into the pumpout port on your<br />
houseboat. (Fittings are available at<br />
the dock on the pumps)<br />
• Attach the pumpout hose to the<br />
fitting<br />
• Open valve and follow the direction<br />
on the pump.<br />
13
Remote Station Pumpout<br />
• See HELP PRESERVE in your<br />
Nautical Notes for locations of<br />
Remote Pumpouts.<br />
• Unscrew WASTE cap.<br />
• Place end of hose into opening.<br />
• Work the hand lever to pump.<br />
COMMON TROUBLESHOOTING<br />
PROBLEM POSSIBLE CAUSES REMEDIES<br />
Odor Holding tanks are full Pumpout at the nearest<br />
marina or remote station<br />
After pumping out, add<br />
a packet of chemical and<br />
two gallons of water in the<br />
head<br />
Leave some water in the<br />
bowl to trap any odor<br />
14
GAS/PROPANE<br />
Location of Fuel Tanks<br />
There are Port and Starboard tanks.<br />
• Fuel fittings are located on the rear<br />
deck, directly in front of engine<br />
covers.<br />
• Remove cap to check fuel level for<br />
refueling.<br />
• Voyager XL has Fuel gauges to<br />
check fuel level.<br />
Refueling<br />
• Turn off grill and cabin heater.<br />
• Turn off all propane tanks 10<br />
minutes prior to to entering the<br />
marina..<br />
• Turn OFF pilot light switches at<br />
refrigerator and hot water heater.<br />
• Turn OFF all electrical breakers.<br />
• Turn OFF the generator.<br />
• Close all doors and windows.<br />
Caution: NEVER siphon gas from your<br />
houseboat fuel tanks.<br />
NOTE: Captain and Crew must remain on<br />
board your houseboat. Wait for Fuel Dock<br />
personnel to assist you.<br />
Location of Propane Tank<br />
There are 2 tanks located in a metal box<br />
outside the rear cabin wall.<br />
Checking Fuel Level<br />
• Fuel level stick is located in the<br />
broom closet.<br />
• The ignition switch needs to be on<br />
for the fuel gauges to operate.<br />
15<br />
On/Off<br />
• A valve is located on the top of each<br />
tank. Turn counterclockwise to open.<br />
• Turn clockwise to close.<br />
• Only use one tank at a time. After<br />
turning ON propane re-light pilots<br />
and /or reset refrigerator. Use master<br />
switch to turn on hot water heater.
COMMON TROUBLESHOOTING<br />
PROBLEM POSSIBLE CAUSES REMEDIES<br />
Propane Smell<br />
The grill is not turned<br />
off all the way<br />
One of the propane<br />
appliances is not turned<br />
off all the way.<br />
Only use one bottle at a<br />
time<br />
Turn off any propane<br />
appliances unless they are<br />
in use.<br />
16
REFRIGERATOR<br />
How to Start<br />
• Confirm that the propane is ON or<br />
that the generator is running.<br />
(See below.)<br />
• Push the master switch on the<br />
refrigerator panel ON.<br />
• Choose between propane or 110V<br />
power to operate the refrigerator or<br />
push AUTO.<br />
If using the generator, you must<br />
have the DC MAIN ON as well as the<br />
BATTERY CHARGER breaker ON.<br />
Refer to the instructions located<br />
inside the refrigerator/freezer for<br />
more details.<br />
• Cover foods with strong odor.<br />
• Cover foods that easily absorb odor.<br />
• The coldest areas in the refrigerator<br />
are under the cooling fins and at the<br />
bottom.<br />
• Warmest areas are on the upper<br />
door shelves.<br />
• The refrigerator will operate more<br />
efficiently if houseboat is level.<br />
• Beach your houseboat so<br />
refrigerator side will be in the shade<br />
in the afternoon.<br />
• The refrigerator will not cool as<br />
efficiently as your household<br />
refrigerator.<br />
Getting the most out of your freezer<br />
• The freezer on your houseboat is not<br />
designed for deep or quick freezing.<br />
• Coldest part of your freezer is at the<br />
bottom of the aluminum liner.<br />
• Ice cubes can be made in the freezer<br />
if placed in direct contact with<br />
bottom of freezer.<br />
• Cool items in fridge before placing<br />
in freezer.<br />
• Condensation from warm items<br />
being placed in the freezer will<br />
adversely affect the operation of<br />
the freezer.<br />
Getting the most out of your Refrigerator<br />
• Put cold or frozen food into the<br />
refrigerator.<br />
• Open door only when necessary.<br />
• Use ice chest for beverages.<br />
• Don’t pack the refrigerator full, leave<br />
space for air to circulate freely.<br />
17
COMMON TROUBLESHOOTING<br />
PROBLEM POSSIBLE CAUSES REMEDIES<br />
Not cooling properly<br />
Check Light Comes<br />
On<br />
There is a clicking<br />
sound and a<br />
blinking orange light<br />
coming on from my<br />
refrigerator<br />
Is the refrigerator on?<br />
Is there too much in<br />
your refrigerator?<br />
Was everything cooled<br />
down before you put it<br />
in the refrigerator?<br />
How hot is the outside<br />
air temperature?<br />
You need to reset the<br />
igniter<br />
You are out of propane<br />
Turn ON the refrigerator.<br />
Check the bottles of<br />
propane to be sure they<br />
are ON and full.<br />
Leave plenty of room<br />
around items for air<br />
circulation.<br />
Put items on ice to cool<br />
down and then put them<br />
back in the refrigerator.<br />
Check your temperature<br />
setting. If it is the coldest<br />
setting, it is as cool as<br />
possible. Be sure to put<br />
perishables on the ice in<br />
the cooler.<br />
Turn OFF the master<br />
switch, then turn back ON<br />
at the master switch to<br />
reset<br />
Switch bottles of propane<br />
and go through restart.<br />
18
RANGE<br />
To Light the Burners<br />
• Confirm that the propane is on.<br />
• Light match.<br />
• Turn control knob counter clockwise<br />
to the LITE position.<br />
• Apply match immediately to the<br />
burner to light.<br />
• Adjust heat, with knob, to the<br />
desired flame size.<br />
To Light the Oven<br />
• Confirm that the propane is on.<br />
• Open oven door and and find pilot<br />
light area under the bottom shelf<br />
Light match.<br />
• Push and turn oven control knob<br />
counter clockwise to the desired<br />
temperature.<br />
• Apply match to light. It may take 30-<br />
60 seconds for the oven to light after<br />
the pilot is lit.<br />
To Shut Down<br />
• Turn all knobs to OFF.<br />
COMMON TROUBLESHOOTING<br />
PROBLEM POSSIBLE CAUSES REMEDIES<br />
Burners or oven won’t<br />
light<br />
Propane is not ON or is<br />
empty<br />
Check propane at bottle<br />
and be sure it is ON and<br />
is full.<br />
19
GRILL<br />
To Light<br />
• Confirm that the propane is on.<br />
• Open lid of grill.<br />
• Visually check to be certain where<br />
you will light the grill.<br />
• Turn knob to HIGH to allow propane<br />
to flow into the tube.<br />
• Use the igniter to light the grill.<br />
• Adjust flame to desired setting.<br />
Caution: NEVER stand over the grill when<br />
lighting.<br />
To Shut Down<br />
• After cooking, turn setting to HIGH<br />
for a few minutes to burn any excess<br />
food or grease from the grate.<br />
• Turn knob clockwise to shut off.<br />
• Close lid.<br />
• DO NOT remove lava rocks.<br />
NEVER put wood into the grill. Doing so<br />
could cause severe damage or injury.<br />
COMMON TROUBLESHOOTING<br />
PROBLEM POSSIBLE CAUSES REMEDIES<br />
Grill won’t light<br />
Propane is off<br />
Propane is empty<br />
Turn on propane<br />
Be sure propane is full<br />
20
HEATER<br />
On<br />
• Turn ON DC MAIN breaker on the<br />
DC panel.<br />
• Turn ON the HEATER breaker on the<br />
DC panel.<br />
• Be certain that the propane is on.<br />
On the thermostat, move the white<br />
switch on the bottom to the right for<br />
ON.<br />
• Set thermostat to desired<br />
temperature.<br />
• The fan will come on and run for 2-5<br />
minutes before you feel heat come<br />
out of the vents.<br />
• Turn OFF HEATER breaker at DC<br />
panel.<br />
• The fan will continue to run for 2-3<br />
minutes after you have shut down<br />
the heating system.<br />
NOTE: The fan draws a lot of DC<br />
power. You must run the generator<br />
whenever you run the heater. Be<br />
sure to have the Battery Charger<br />
breaker ON.<br />
• Generator should be running with<br />
battery charger on as the heater<br />
draws a lot power from the battery.<br />
Off<br />
• At thermostat, move white switch at<br />
button to OFF.<br />
COMMON TROUBLESHOOTING<br />
PROBLEM POSSIBLE CAUSES REMEDIES<br />
Heater won’t light<br />
Heat pump won’t<br />
work<br />
DC main is Off<br />
Heater breaker is off<br />
Thermostat is off<br />
Low battery<br />
Thermostat not set to<br />
heat.<br />
Breaker not turned on.<br />
Turn on DC MAIN<br />
Turn on the HEATER<br />
breaker<br />
Turn on the thermostat<br />
Charge the battery<br />
Set control to heat setting.<br />
Turn breaker on.<br />
21
COOLING<br />
On/Off<br />
• Generator must be running.<br />
• Turn on the AC Main.<br />
• Turn on AIR CONDITIONER<br />
breakeron the AC panel.<br />
• Choose “cooling setting” on the air<br />
handler control panel.<br />
• Choose “cooling” setting for air<br />
circulation.<br />
• Open the louvers to direct the flow<br />
of air.<br />
COMMON TROUBLESHOOTING<br />
PROBLEM POSSIBLE CAUSES REMEDIES<br />
Air Conditioner<br />
blowing warm air<br />
Compressor motor is<br />
frozen<br />
Turn OFF Air Conditioner<br />
for 1 hour<br />
22
ACCESSORIES<br />
Microwave<br />
• Generator must be running.<br />
• Turn on AC MAIN.<br />
• Turn on MICROWAVE breaker on<br />
the AC panel.<br />
• Use microwave as you would at<br />
home.<br />
Coffee Maker<br />
• Generator must be running.<br />
• Turn AC main.<br />
• Turn on GALLEY OUTLETS breaker<br />
on the AC panel.<br />
• Use the coffee maker as you would<br />
at home.<br />
Blender, Toaster and Can Opener<br />
• Generator must be running.<br />
• Turn AC main.<br />
• Turn on GALLEY OUTLETS breaker<br />
on the AC panel.<br />
• Use these appliances as you would<br />
at home.<br />
Stereo<br />
• Turn on DC MAIN on the DC panel<br />
• Turn on the RADIO breaker on the<br />
DC panel<br />
• Turn on the knob for the stereo for<br />
power.<br />
• Don’t forget to turn off when not in<br />
use so that the battery isn’t drained.<br />
The radio stations on the lake are<br />
limited and varied by location.<br />
.<br />
Speakers<br />
Switches are located near the stereo for:<br />
• Front Deck<br />
• Salon Area<br />
• Aft Stateroom<br />
• Rear Deck<br />
• Upper Deck<br />
Back Up Monitor (Voyager XL model<br />
only)<br />
• Turn on the DC MAIN on the DC<br />
breaker panel.<br />
• Turn on the BACK-UP MONITOR<br />
breaker.<br />
• Turn on POWER button on the<br />
monitor.<br />
GPS/Sonar (Voyager XL model only)<br />
• Turn on the DC MAIN on the DC<br />
breaker panel<br />
• Turn on the GPS breaker.<br />
• Press POWER button on the GPS/<br />
SONAR<br />
23
Boat Repair: 928-645-1149<br />
Rental Office: 928-645-1078<br />
NPS Emergency: 928-608-6300<br />
NPS Office: 928-608-6301<br />
Dangling Rope: 928-691-0206<br />
Bullfrog Marina: 435-684-3010


