Commercial Tower Dryer Operator's Manual - GSI Group, LLC
Commercial Tower Dryer Operator's Manual - GSI Group, LLC
Commercial Tower Dryer Operator's Manual - GSI Group, LLC

Create successful ePaper yourself
Turn your PDF publications into a flip-book with our unique Google optimized e-Paper software.
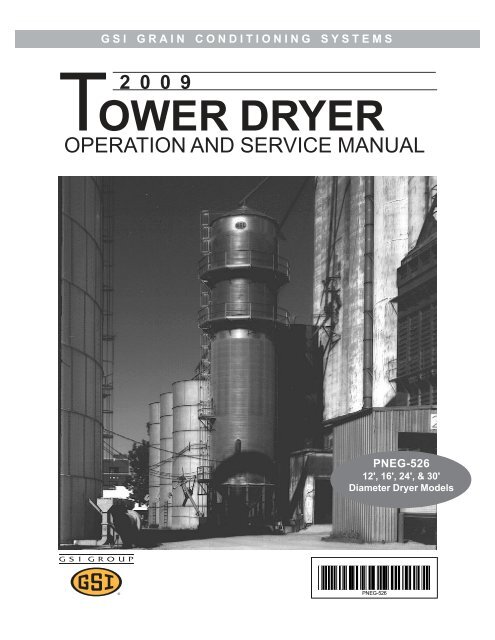
<strong>GSI</strong> GRAIN CONDITIONING SYSTEMS2009TOWER DRYEROPERATION AND SERVICE MANUALPNEG-526PNEG-526r0712', 16', 18', 24', && 30' 30'Diameter DIAMETER <strong>Dryer</strong> DRYER ModelsMODELSPNEG-526
THIS PRODUCT IS PROTECTED UNDER ONE OR MOREOFTHE FOLLOWING U.S. PATENTS:6233843, 6189235, 6141886, 6101742, 6098305, 6088929, 6076276,6073367, 6073364, 5570521, 6457256, 6035544, 5860221, 5653043,5651193, 5604996,5566470, 5400525
<strong>Tower</strong> <strong>Dryer</strong> Ops & ServiceTABLE OF CONTENTSDRYER OPERATIONSafetyFirst...........................................................................................................1SafetyPrecautions................................................................................................3Installation Requirements.................................................................................4<strong>Dryer</strong> Control Panel..........................................................................................5<strong>Dryer</strong> Start Up..................................................................................................7<strong>Dryer</strong> Shutdown..............................................................................................11Viewing Temperature/Moisture History...........................................................11Viewing Burner/Fuel Train Status...................................................................11Viewing Grain Flow Status.............................................................................11Setting the BPH Correction Factor..................................................................11TRI-POINT MOISTURE CONTROLLERMain Screen.....................................................................................................13Set-Up of the Controller..................................................................................14Operation Procedure........................................................................................15How the Controller Works...............................................................................16Alarms.............................................................................................................17Access Drying History.....................................................................................18WARRANTY........................................................................................................22MAINTENANCEPre-Seasonal Inspection And Service.............................................................25Seasonal Inspection And Service....................................................................26End Of Season Service.................................................................................26Lubrication Table...........................................................................................27Pre-Season/End of Season Checklist..............................................................29TROUBLE SHOOTINGDrying Issues..................................................................................................33Burner.............................................................................................................33General...........................................................................................................34OIU (Screen) Messages.................................................................................35ELECTRICAL DIAGRAMS<strong>Tower</strong> <strong>Dryer</strong> Control Panel Wiring Diagrams.................................................41COMPONENT MANUALSAllen-Bradley Variable Frequency DriveMaxon "NP-LE" BurnerMaxon "CV" Gas Control ValveMaxon "808" Gas Shut-Off ValveNord Gear Reduction Gear UnitSumitomo Cyclo-Drive Gear UnitHoneywell Modutrol IV Motor ActuatorInvensys 121 Gas RegulatorASCO Solenoid ValvesProtection Controls Protectofier Service <strong>Manual</strong>
DRYEROPERATIONS
<strong>Tower</strong> <strong>Dryer</strong> Ops & ServiceSAFETY GUIDELINESSAFETY FIRSTThis manual contains information that is important for you, the owner/operator, to know andunderstand. This information relates to protecting personal safety and preventingequipment problems. It is the responsibility of the owner/operator to inform anyoneoperating or working in the area of this equipment of these safety guidlines.To help yourecognize this information, we use the symbols that are defined below.Please read the manual and pay attention to these sections. Failure to read this manualand it’s safety instructions is a misuse of the equipment and may lead to serious injury or death.This is the safety alert symbol. It is used to alert youto potential personal injury hazards. Obey allsafety messages that follow this symbol to avoidpossible injury or death.DANGER indicates an imminently hazardous situationwhich, if not avoided, will result in death or serious injury.WARNING indicates a potentially hazardous situationwhich, if not avoided, could result in death or serious injury.CAUTION indicates a potentially hazardous situation which,if not avoided, may result in minor or moderate injury.CAUTION used without the safety alert symbol indicates apotentially hazardous situation which, if not avoided, mayresult in property damage.NOTE indicates information about the equipment that youshould pay special attention to.1
SAFETY FIRST<strong>Tower</strong> <strong>Dryer</strong> Ops & ServiceThe <strong>GSI</strong> <strong>Group</strong> Inc.'s principleconcern is your safety and thesafety of others associated withgrain handling equipment. Thismanual was written with thatthought in mind. We want tokeep you as a customer byhelping you understandsafe operating procedures, andsome of the problems that maybe encountered by the dryeroperator or other personnel.As owner and/or operator, it isyour responsibility to knowwhat requirements, hazards andprecautions exist, and to informall personnel associated withthe equipment or who are in thedryer area. Avoid any alterationsto the equipment. Suchalterations may produce a verydangerous situation, whereserious injury or death mayoccur.The <strong>GSI</strong> <strong>Group</strong>, Inc. recommends you contactyour local power company and have a representativesurvey your dryer installation, so your wiring will becompatible with their system and you will have adequatepower supplied to your unit.Safety decals should be read and understood byall people in and around the dryer area. If the followingsafety decals are not displayed on your dryer, or ifthey are damaged, contact The <strong>GSI</strong> <strong>Group</strong>, Inc. forreplacement:The <strong>GSI</strong> <strong>Group</strong>, Inc.1004 E. Illinois St.Assumption, Illinois 62510phone: 217-226-4421 • fax: 800-800-53292
<strong>Tower</strong> <strong>Dryer</strong> Ops & ServiceSAFETY PRECAUTIONS1. Read and understand the operating manual before trying to operatethe dryer.2. Never operate the dryer while any guards are removed.3. Power supply should be OFF for service of electrical components.Use CAUTION in checking voltage or other procedures requiringpower to be ON.4. Check for gas leaks at all gas pipe connections. If any leaks aredetected, do not operate dryer. Shut down and repair before furtheroperation.5. Never attempt to operate the dryer by jumping or otherwise bypassingany safety devices on the unit.6. Do not exceed maximum recommended drying temperatures.7. Keep the dryer clean. Do not allow fine material to accumulate inthe plenum chamber.8. Keep blower drive belts tight enough to prevent slippage.9. Use CAUTION in working around high speed fans, gas burners, augersand auxiliary conveyors which START AUTOMATICALLY.10. Do not operate in any area where combustible material will be drawn intothe fan.READ THESE INSTRUCTIONSBEFORE OPERATION AND SERVICESAVE FOR FUTURE REFERENCE11. Be certain that capacities of auxiliary conveyors are matched to dryermetering capacities.12. Clean grain is easier to dry. Fine material increases resistance to airflowand requires removal of extra moisture.13. Do not adjust any moving part on the dryer while it is running.Use Caution In TheOperation Of This EquipmentThe design and manufacture of thisdryer is directed toward operatorsafety. However, the very natureof a grain dryer having a gas burner,high voltage electrical equipment andhigh speed rotating parts, doespresent a hazard to personnel, whichcan not be completely safeguardedagainst, without interfering with efficientoperation and reasonable accessto components.Use extreme caution in workingaround high speed fans, gas-firedheaters, augers and auxiliary conveyors.KEEP THE DRYER CLEANDO NOT ALLOW FINEMATERIAL TOACCUMULATE IN THEPLENUM CHAMBEROR SURROUNDING THEOUTSIDE OF THE DRYERContinued safe, dependable operationof automatic equipment depends,to a great degree, upon theowner. For a safe and dependabledrying system, follow the recommendationswithin this manual, and makeit a practice to regularly inspect theoperation of the unit for any developingproblems or unsafe conditions.Take special note of the safetyprecautions listed above before attemptingto operate the dryer.3
INSTALLATION REQUIREMENTSElectricalThe dryer can be furnished to operate off of 240,480, or 575 volt, 60 Hz power or 380 volt, 50 cyclepower. The dryer is furnished with a power panelequipped with a main circuit breaker disconnect andmotor starters and branch breakers for the individualblower motors. Standard blower motor starting isacross-the-line starting. When necessary, the dryercan be equipped with optional soft-start motorstarting equipment.No dry grain conveyor is furnished with thedryer, however, a 10 hp motor starter for a dry grainconveyor is furnished in the control panel. If the dryeris ordered with a demand fill, a 10 hp motor starter isalso provided in the control panel to operate a wetconveyor.<strong>GSI</strong> personnel will perform all necessarydryer wiring from the power panel to the dryer. Thecustomer is responsible for bringing electrical powerinto the main circuit breaker and also for wiring theunload (and load) conveyor.<strong>Tower</strong> <strong>Dryer</strong> Ops & ServiceA wiring diagram is furnished with eachdryer. Extensive safety controls are used on thedryer for equipment and personnel protectionand should not be bypassed.FuelThe burner is designed to burn either natural gas orpropane vapor fuel. The volume of fuel supplied mustbe sufficient to maintain a minimum of 7 to 10 psipressure when the burner is operating at rated capacity.When propane is used as the fuel source,external propane vaporizers must be used in order tosupply vapor gas to the dryer. Vaporizers must besized to the burner capacity of the dryer. Fuelpressure to the dryer must be regulated to approximately10 psi.<strong>GSI</strong> personnel will plumb all necessary gaspiping from the dryer's gas shutoff valve to the burner.The customer must provide fuel to the gas shutoffvalve.The electrical box on the <strong>GSI</strong> <strong>Tower</strong> <strong>Dryer</strong>.4
<strong>Tower</strong> <strong>Dryer</strong> Ops & ServiceDRYER CONTROL PANEL1324CD E F71151314689 1012Figure 1: The grain dryer control panel with full color touch screen control.5
6DRYER CONTROL PANEL<strong>Dryer</strong> Control Panel Featuring TheAllen-Bradley PLC Control System1. Full Color Graphical Display provides continuousvisual feedback on the current dryer status as wellas a convenient means of setting operating parametersand options. Most set points and status screens areaccessed by simply touching an on-screen object.2. Message Center displays current dryer conditionsand alarm messages with toubleshooting tips ineasy to read language.3. <strong>Dryer</strong> View provides a quick visual indication ofprimary dryer functions as well as easy access tocurrent burner and grain flow status screens.4. Temperature/Moisture History Chart recordsup to 32 hours of dryer temperature and/or moisturedata (with optional moisture control). The chart can beeasily "rewound" to view earlier drying conditions.5. Control Power Switch energizes the control paneland the PLC Control System. (NOTE: It takesapproximately 60 seconds to power up the Full ColorGraphical Display once the Control Power Switchis turned on).6. Outside Light Switch turns the dryer service lighton or off. On "AUTO", the light turns on when thedryer is running and off when a shutdown occurs.7. Load Switch controls the filling of the dryer. The"ON" position initially fills the dryer. The "OFF"position turns the conveyor off/shuts the slide gate.The "AUTO" position enables automatic fill controland the OUT OF GRAIN TIMER.On dryers filled on demand with a conveyoror slide gate:In the "ON" or "AUTO" position the fill conveyorturns on / slide gate opens when the dryer is lowon grain and off / closes when the dryer is full.In the "AUTO" position only, the dryer will automaticallyshut down when the dryer is low on grainand the OUT OF GRAIN TIMER expires.On choke filled dryers:In the "AUTO" position only, the dryer will automaticallyshut down when the dryer is low on grainand the OUT OF GRAIN TIMER expires.<strong>Tower</strong> <strong>Dryer</strong> Ops & ServiceIn the "ON" or "OFF" position the OUT OFGRAIN TIMER IS DISABLED.The LOAD switch is illuminated whenever the loadconveyor is running.8. Low Grain Light flashes when the grain level islow and the OUT OF GRAIN TIMER is running. TheLOW GRAIN light is on steady when the timerexpires.9. Blowers Switch turns the blower(s) on or off. Onmultifan dryers, the blowers start sequentially. Thelighted switch flashes during blower start-up. Theswitch is illuminated when all of the blower airflowswitches close indicating that the blowers are operatingcorrectly. After the closure of all of the airflow,the dryer automatically goes through a 30 secondpurge cycle.10. Burner Switch turns the burner on or off. Whenthe switch is turned on, the burner pilot will automaticallylight, after the purging cycle is completed. Thelighted burner switch will flash during the 15 secondpilot ignition time. The switch illuminates when thepilot flame is sensed at the pilot. After the pilot flameis established the Maxon shut-off valves in the fueltrain are energized. Motorized valves will automaticallyopen to provide gas to the main burner. <strong>Manual</strong>valves must be opened manually to supply gas to themain burner.11. Unload Conveyor Switch turns the dry grainunload conveyor on or off. The switch illuminateswhen the conveyor is operating.12. Metering Device Switch turns the meteringdevice on or off in forward or reverse. The device willnot run unless the unload conveyor is on. The switchilluminates when the metering device is discharginggrain.13. <strong>Dryer</strong> Power Start Button initiates automaticoperation of the dryer. When depressed, the dryerbegins the startup cycle and operates based on thepositions of the selector switches on the control panel.To control the operation of individual components,first depress the DRYER POWER START button,then turn on the individual dryer components asdesired.14. <strong>Dryer</strong> Power Stop Button manually stops all dryerfunctions and automatic equipment in a controlledshutdown sequence.Important: In case of an automatic dryer shutdown,the DRYER POWER STOP button must bedepressed before the dryer can be restarted.
<strong>Tower</strong> <strong>Dryer</strong> Ops & Service1. Prepare dryer for start upPerform preseason inspection and service asoutlined in the Maintenance Section beforeattempting to operate the dryer.The dryer must have all Pre-Season andPost-Season maintenance to ensure reliableoperationMake sure all discharge doors, grain exchangercleanout doors, heat section door, louveredcooling section doors, etc. are closed. Make surethat all personnel are clear of the dryer and anygrain handling machinery.2. Open main gas valve to dryer.3. Switch on main breaker to provide electricalpower to the dryer by placing the main circuitbreaker handle located on the dryer power panelto the "ON" position.4. Pull out both Emergency Stop Buttons locatedon the side of the control and power box toenable the main PLC circuit.5.1 Switch on the control panel by turning theCONTROL POWER selector switch to the"ON" position. The switch will illuminate indicatingthat the control panel has power and isoperating correctly. After a short series of selfdiagnostictests, the LCD display screen willdisplay a copyright message and a start button.5.2 Press the on-screen Start button to enter thedryer status screen.6. Press the DRYER POWER "START" buttonto activate the LOAD, BLOWERS, BURNER,UNLOAD and METERING DEVICE selectorswitches on the control panel.7. Start auxiliary equipment needed for fillingDRYER START UPdryer. (ie. wet legs, conveyors, etc.)8. Fill the dryer by turning the LOAD selectorswitch to the "ON" position. On a demand filldryer, the wet conveyor will turn on / slide gatewill open and the dryer will start filling with grain.Once the dryer is full, a horn will sound and thewet conveyor will stop / slide gate will shut. Turnthe LOAD selector switch to the "AUTO"position to silence the alarm and begin normalThe burner should be covered before fillingthe dryer to prevent accumulation of foreignmaterial on the Ignitor, Flame Sensor, and BurnerPorts. Foreign material may interfere with burneroperation.dryer operation. In the "AUTO" position, thedryer automatically controls the conveyor / slidegate and the OUT OF GRAIN TIMER is enabled,allowing automatic shutdown if the dryerremains low on grain after a preset period of time.9. Set drying / plenum temperature by touchingthe P.L. Temp box on the LCD display. On thepop-up keypad that is displayed, enter the newdrying temperature.Recommended Drying TemperaturesCorn..............................180 o to 210 o FSoybeans......................140 o to 160 o FWheat...........................140 o to 160 o FMilo..............................160 o to 180 o FBarley...........................140 o to 160 o FOats..............................140 o to 160 o F10. Start the blower(s) by turning the BLOWERSselector switch to the "ON" position. Theblower(s) will automatically start. On multiblowerunits the PLC will automatically, start the blowerssequentially. Once the blower(s) are up to speedthe airswitches will close and the blower switchlight will illuminate.7
DRYER START UP<strong>Tower</strong> <strong>Dryer</strong> Ops & Service5.1 8 1011 146145.2915NOTE:PRESS TO ENTER NEW TEMP.OR UNLOAD RATE8
<strong>Tower</strong> <strong>Dryer</strong> Ops & ServiceDRYER START UP11. Start the burner by turning the BURNERselector switch to the "ON" position. The dryerautomatically goes through a 30 second purgeperiod once the blowers are started. The amountof time remaining on the purge cycle will bedisplayed on the LCD display screen. After thepurge period the burner pilot will automaticallylight. Once the flame control circuit on the dryersenses flame, the light in the BURNER selectorswitch will illuminate. If the pilot fails to light in 15seconds the burner will lock out and must berestarted by turning the BURNER switch "OFF"then back "ON".12. Cock and open the Maxon valves. After thepilot is ignited, the main burner can be lit bycocking and opening the two Maxon gas shutoffvalves. These valves will automatically open ondryers equipped with motorized Maxon Valves.The main burner will light and the dryer's plenumtemperature will be automatically controlled bythe modulating motor and maintained at theselected temperature.12.1 Open firing valve (Canadian dryers only)13. Let plenum come up to temperature andbegin drying. Depending upon ambient conditions,the dryer may take 10 minutes or more toreach the drying temperature.14. Start unload system. Before discharging grainfrom the dryer, first make sure all dry legs and conveyorsare operating ahead of the dryer. Turn theUNLOAD CONVEYOR selector switch to theThe metering device will not run unless the unloadconveyor is also running."ON" position to operate the dry grain conveyorleading from the dryer. Turn the METERING DE-VICE selector switch to the "FORWARD" positionto start discharging grain from the dryer.15. Set Unload Rate/Moisture Control Temperaturemanually. While operating the dryer inmanual mode, set the unload rate by touching theU.L. Rate box on the LCD display. On the popupkeypad, enter the new unload rate and pressreturn.16. Check discharge moisture content after 10minutes. Take five small samples from the dischargeand mix before taking a moisture reading.17. Switch over to Automatic Moisture Control.When the discharge moisture content has stabilizedat the desired amount for 20 to 30 minutes,the dryer may be switched over to AutomaticMoisture Control.17.1 Press the MOISTURE CONTROL button atthe bottom of the LCD screen.17.2 On the Moisture Control Setup screen, set theupper and lower limits by touching the correspondingbox and using the pop-up keypad.These values prevent the unload from moving toofast or too slow should the incoming moisture besignificantly greater or less than anticipated.17.3 Press the CONTROL MODE box to togglebetween <strong>Manual</strong> and Automatic moisture control.Note that the current and target grain temperturesare displayed next to the Temperature HistoryChart.If the discharge moisture content is consistentlytoo high or too low, adjust the target graintemperature as follows:5 o F increase = 1 moisture point decrease5 o F decrease = 1 moisture point increaseAllow 30 minutes between adjustments.9
DRYER START UP<strong>Tower</strong> <strong>Dryer</strong> Ops & Service17.117.2 17.217.310
<strong>Tower</strong> <strong>Dryer</strong> Ops & ServiceDRYER SHUTDOWN18. Shutdown dryer. The dryer will likely have to beshutdown from time to time. The steps used toshut it down will depend upon the duration of theshutdown. If the dryer will be shutdown for 4hours or less, follow the Short Shutdown procedure.For longer shutdowns, such as overnight,follow the Extended Shutdown procedureShort Shutdowns - Less than 4 hoursFor short shutdown periods, the dryer can beshutdown by pushing the DRYER POWERSTOP button. To restart the dryer, push theDRYER POWER START button. The PLC willrestart the dryer automatically based on selectorswitch settings.Extended Shutdowns - 4 hours or more1. Shut off the burner. Turn the BURNER selectorswitch to the "OFF" position. All gasvalves will immediately close and the burnerwill extinguish.2. Cool down grain. PLC will continue to operateblowers to cool grain. To avoid overdriedgrain upon restarting the dryer, continue tomove grain through the dryer during the coolingoff period.3. Shut off unload equipment. Turn METER-ING DEVICE and UNLOAD CONVEYORselector switches to "OFF" position.4. Shut off blowers. Turn BLOWER selectorswitch to "OFF" position.5. Shut off control panel. Turn the CONTROLPOWER selector switch to the "OFF" position.6. Turn off main circuit breaker located onthe power panel.8. Inspect the inside of the dryer after operationto insure against the possibility of hot spotsor fires.Viewing Temperature/MoistureHistoryPress the left and right arrows above the Temperature/MoistureHistory Chart to move backward andforward through the graph.Viewing Burner/Fuel Train StatusPress the Burner region in the <strong>Dryer</strong> View portion ofthe LCD display to switch to the Fuel Train Statusscreen. This screen displays the open/closed state ofall valves as well as the modulating valve controlvalue.Viewing Grain Flow StatusPress the Unload region in the <strong>Dryer</strong> View portionof the LCD display to switch to the Grain FlowStatus screen. This screen displays therunning statusof all controlled/interlocked equipment in the grainflow path.Modifying the Bushel Per Hour FactorThe bushel per hour reading given by the PLC is acalculated value based on metering device speed.Due to variations in grain test weight and unloadsystem settings, the correction factor may need tobe calibrated so that the calculated and actual grainflow rates agree. The bushel per hour factor isnormally set at 1.0. If, for example, the actual grainflow rate is 5 percent higher than displayed, changethe bushel per hour factor to 1.05. To adjust thecorrection factor, press the DRYER SETUP button,then the BUSHEL COUNTER button. Press theCORRECTION FACTOR box to adjust the value.7. Close main gas valve to the dryer.11
TRI-POINT MOISTURE CONTROLLER<strong>Tower</strong> <strong>Dryer</strong> Ops & ServiceOptional Tri-PointMoistureControllerOperation <strong>Manual</strong>12
<strong>Tower</strong> <strong>Dryer</strong> Ops & ServiceTRI-POINT MOISTURE CONTROLLERI. Main Screen98761 2 3 41. Two-hour moisture history chart -green line for incoming moisture; yellowline for outgoing moisture; and the red lineis the target moisture.6. Moisture target - To change the moisturetarget, press within the rectangular areaand key in the new target from the pop-upkeypad.52. Moisture Control button - to accessthe Moisture Control Set-up screen.3. Data Log button - to access the moisturehistory data (up to last 30 hours).4. Back browse button - to scroll thechart back in time.5. Forward browse button - to scroll the7. Current moisture coming out of thedryer.8. Current moisture coming into thedryer.9. Moisture control status - the LEDturns on if the moisture controller is in automodechart in forward time13
TRI-POINT MOISTURE CONTROLLER<strong>Tower</strong> <strong>Dryer</strong> Ops & ServiceII. Set-Up of the Controller*Press the “MOIST CONTROL” button from the main screen to access the moisture set-upscreen:1 2 36 5 41. Unload upper limit - the maximumunloading rate (%) in which dryer can berun without plugging any unloading conveyors.2. Current column grain temperature- measured from the RTD sensor atthe end of the drying section (it is not thetemperatureof the grain coming out of thedryer).by grain to get an accurate reading ofthe grain moisture.4. Calibration button - to accesssensor calibration screen (see Section III,Step 3).5. Control Mode button - toggle thecontrol mode between MANUAL andAUTO by pressing the button.3. Unload lower limit - the minimumunloading speed that can maintain the samplingbox of the dry sensor full of grain. Itis essential to have the sensor fully covered6. Moisture Control Diagnosisbutton - to access the diagnostic screen forfactory trouble shooting.14
<strong>Tower</strong> <strong>Dryer</strong> Ops & ServiceTRI-POINT MOISTURE CONTROLLERIII. Operation Procedure1. Start the dryer; set the dryer unload at adesired speed from the dryer control panel.2. Let the dryer run under manual modefor warming up until the column graintemperature has stabilized and the moisturecoming out of the dryer is within ± 2% ofthe target moisture.3. During the start-up period, calibrateboth the wet and dry sensors against abench meter as follows:a) Press “SENSOR CALIBRATION”button from the moisture control set-upscreen to open the sensor calibrationscreen.b) Take grain samples from the dryer,measure the moisture with a bench meterand then compare to the sensor readingduring the sampling period.Change the sensor offset if the sensorreading does not match the bench measurement.For example, if the offset was 1.0%,and the sensor reading is 0.5% lower thanthe bench meter, then change the offset to1.5% to match the sensor to the benchmeter. Likewise, if the sensor reading ishigher than the bench meter, the offsetshould be decreased accordingly.15
TRI-POINT MOISTURE CONTROLLERThe sensor should be calibrated 2-3 times aday. At the same time check and clean the sensorand sensor sampling box to make sure that there isno debris blocking the grain flow around thesensor.4. Check or change the target moisturefrom the main screen.5. Press “MOIST CONTROL” to accessthe moisture control set-up screen.<strong>Tower</strong> <strong>Dryer</strong> Ops & ServiceCheck upper/lower unloading limits andchange them if needed.6. Press the “CONTROL MODE”button from the moisture control set-upscreen and set the mode to AUTO. Themoisture controller will start adjusting theunload rate between the upper and lowerlimits of the unload speed to maintain themoisture coming out of the dryer.IV. How the Controller WorksThe controller continuously monitors themoisture coming in and out of the dryer,and the column grain temperature at the endof the drying section. The control action ismainly based on the dry sensor at the outletof the dryer. If the moisture coming out ofthe dryer is not right at the target, the controllerwill speed up or slow down theunload device accordingly. The wet sensorand the column grain temperature sensor areintended to detect moisture spikes cominginto the dryer so that the moisture controllercan react ahead of time. For example, if thewet sensor detects a jump of moisturecoming into the dryer, the controller willstart slowing down the unload speed rightaway. However, the controller does not actto the full scale immediately. Instead, itslows down the dryer gradually so that thegrain currently in the dryer will not beoverdried too much.In the first pass after the dryer started, thecontroller does not have enough informationof the grain in the dryer. It controls thedryer by using the manual speed setting as astarting point. In other words, the manualspeed setting is most responsible for thefirst pass of drying. Therefore, set themanual unloading speed as close as itshould be for the grain currently in the dryerbefore switching to AUTO control mode.The manual speed setting does not have tobe adjusted after the controller is switchedinto AUTO mode.16
<strong>Tower</strong> <strong>Dryer</strong> Ops & ServiceTRI-POINT MOISTURE CONTROLLERV. AlarmsThe controller checks the sensors and control status regularly. If abnormalconditions are detected, a corresponding alarm will go off, an alarm message will come upon the main screen and the dryer will be shut down.ALARM CAUSES SOLUTIONMoisture out of range -the moisture coming outof the dryer was 2.5%above or below the setpointfor more than onehour under AUTO controlmodeDry sensor error -sensor reading is less than6% or higher than 40%Dry grain temperature outof range (0-300F)Wet sensor error -sensor readng is less than6% or higher than 40%Wet grain temp. out ofrange(0-300F)Column grain temperatureRTD out of range(0-300F)• Sensor box plugged andsensor was not coveredby grain• Dry sensor out ofcalibration• Too big swing ofmoisture coming into thedryer• Bad wiring• Bad sensor• Bad circuit board• Bad wiring• Bad sensor• Bad circuit board• Bad wiring• Bad sensor• Bad circuit board• Bad wiring• Bad sensor• Bad circuit board• Bad wiring• Bad sensor• Bad circuit board• Clear the sampler andsensor box• Calibrate the sensor• Run the dryer manuallyfor one pass• Check connection• Change the sensor• Change the circuit board• Check connection• Change the sensor• Change the circuit board• Check connection• Change the sensor• Change the circuit board• Check connection• Change the sensor• Change the circuit board• Check connection• Change the sensor• Change the circuit board17
TRI-POINT MOISTURE CONTROLLER<strong>Tower</strong> <strong>Dryer</strong> Ops & ServiceVI. Access Drying History1. Press the “DATA LOG” button fromthe main screen to open the moisturehistory screen. The controller logsquarterly data up to 120 records (i.e. 30hours) into the archive.2. Press the browse buttons to browse therecord.1218
<strong>Tower</strong> <strong>Dryer</strong> Ops & ServiceNOTES____________________________________________________________________________________________________________________________________________________________________________________________________________________________________________________________________________________________________________________________________________________________________________________________________________________________________________________________________________________________________________________________________________________________________________________________________________________________________________________________________________________________________________________________________________________________________________________________________________________________________________________________________________________________________________________________________________________________________________________________________________________________________________________________________________________________________________________________________________________________________________________________________________________________________________________________________________________________________________________________________________________________________________________________________________________________________________________________________________________________________________________________________________________________________________________________________________________________________________________________________________________________________________________________________________________________________________________________________________________________________________________________________________________________________________________________________________________________________________________________________________________________________________________________________________________________________________________________________________________________________________________________________________________________________________________________________________________________________________________________________________________________________________________________________________________________________________________________________________________________________________________________________________________________________________________________________________________________________________________________________________________________________________________________________________________________________________________________________________________________________________________________________________________________________19
NOTES<strong>Tower</strong> <strong>Dryer</strong> Ops & Service_________________________________________________________________________________________________________________________________________________________________________________________________________________________________________________________________________________________________________________________________________________________________________________________________________________________________________________________________________________________________________________________________________________________________________________________________________________________________________________________________________________________________________________________________________________________________________________________________________________________________________________________________________________________________________________________________________________________________________________________________________________________________________________________________________________________________________________________________________________________________________________________________________________________________________________________________________________________________________________________________________________________________________________________________________________________________________________________________________________________________________________________________________________________________________________________________________________________________________________________________________________________________________________________________________________________________________________________________________________________________________________________________________________________________________________________________________________________________________________________________________________________________________________________________________________________________________________________________________________________________________________________________________________________________________________________________________________________________________________________________________________________________________________________________________________________________________________________________________________________________________________________________________________________________________________________________________________________________________________________________________________________________________________________________________________________________________________________20
<strong>Tower</strong> <strong>Dryer</strong> Ops & ServiceNOTES____________________________________________________________________________________________________________________________________________________________________________________________________________________________________________________________________________________________________________________________________________________________________________________________________________________________________________________________________________________________________________________________________________________________________________________________________________________________________________________________________________________________________________________________________________________________________________________________________________________________________________________________________________________________________________________________________________________________________________________________________________________________________________________________________________________________________________________________________________________________________________________________________________________________________________________________________________________________________________________________________________________________________________________________________________________________________________________________________________________________________________________________________________________________________________________________________________________________________________________________________________________________________________________________________________________________________________________________________________________________________________________________________________________________________________________________________________________________________________________________________________________________________________________________________________________________________________________________________________________________________________________________________________________________________________________________________________________________________________________________________________________________________________________________________________________________________________________________________________________________________________________________________________________________________________________________________________________________________________________________________________________________________________________________________________________________________________________________________________________________________________________________________________________________________21
NOTES<strong>Tower</strong> <strong>Dryer</strong> Ops & Service_________________________________________________________________________________________________________________________________________________________________________________________________________________________________________________________________________________________________________________________________________________________________________________________________________________________________________________________________________________________________________________________________________________________________________________________________________________________________________________________________________________________________________________________________________________________________________________________________________________________________________________________________________________________________________________________________________________________________________________________________________________________________________________________________________________________________________________________________________________________________________________________________________________________________________________________________________________________________________________________________________________________________________________________________________________________________________________________________________________________________________________________________________________________________________________________________________________________________________________________________________________________________________________________________________________________________________________________________________________________________________________________________________________________________________________________________________________________________________________________________________________________________________________________________________________________________________________________________________________________________________________________________________________________________________________________________________________________________________________________________________________________________________________________________________________________________________________________________________________________________________________________________________________________________________________________________________________________________________________________________________________________________________________________________________________________________________________________22
MAINTENANCE
<strong>Tower</strong> <strong>Dryer</strong> Ops & ServiceMAINTENANCEPRE-SEASONAL INSPECTION ANDSERVICEThe dryer is made of weather resistant material, and isdesigned to require minimum service. However, eachseason we recommend the following items be checkedbefore the unit is used, and any damaged or questionableparts replaced. These checks will help eliminatepossible failures, and assure dependable operation ofthe equipment.1. Shut off electrical power. Open power box andcontrol box, and inspect for moisture, rodent damageor accumulated foreign material present. Inspectand tighten any loose terminal connections.Replace any damaged or deteriorated wiring.2. Lubricate the blowers, motors, and metering systemas outlined in the Lubrication Table below.3. Check blower belts for proper tension.4. Inspect and clean the burner. Visually check thatno holes in the stainless steel air mixing plates areplugged. If burner ports are plugged, clear themwith a piece of wire or a drill bit. After a period ofseveral years, it may become necessary to drillout the burner ports to clear away accumulatedrust. Use a #43 drill bit to return burner ports totheir original diameter. (See burner drilling procedurein the Maxon Burner area of the COMPO-NENT MANUALS section of this book.)(NOTE: Pre-2002 model dryers require a #47drill bit.)8. On Zimmerman <strong>Dryer</strong>s equipped with theAccutrol sweep unload metering system, checkthe discharge area to insure that the area is cleanedof stalks and old grain. Inspect the sweeps forexcessive wear.9. On <strong>GSI</strong> <strong>Dryer</strong>s equipped with the hopperedmetering system, check the hopper area and thearea around the metering drum to insure that theyare cleaned of stalks and old grain. Check theedges of the metering drum for excessive wear.10. Important!! The covers to the dischargesections on both the Zimmerman and <strong>GSI</strong> <strong>Tower</strong>dryers must be in place and clamped down at alltimes when the dryer is in operation. If the coveris off during operation, the vacuum created by theblowers will suck foreign matter from thedischarge area and deposit it in the heat section ofthe dryer plugging the inside screens of the dryeralso creating a fire hazzard.SEE PRE-SEASON CHECKLIST ATTHE END OF THIS SECTION5. Check electrical connections at both the flame rodand spark plug. Clean spark ignitor and flamerod. Replace if necessary.6. Check drain valve on gas train to insure that thereis no water in the gas train. Valve should alwaysbe open when the dryer is not being used. Insurethat drain valve is closed prior to dryer operation.7. Lubricate linkage on gas modulating valve.25
MAINTENANCE<strong>Tower</strong> <strong>Dryer</strong> Ops & ServiceSEASONAL INSPECTION ANDSERVICE1. Important! The covers to the metering system access door(s)must be in place at all times when the dryer is in operation.Before turning blowers always make sure this door is clampedinto position.2. Follow lubrication guides as outlined in the LubricationTable.3. Do not let grain fines and dust accumulate inside thecooling section of the dryer. Bi-weekly if drying most productsor daily if drying milo, clean the cooling chamber floor offines and dust. Sweep down the cooling section sheets ifnecessary. Fines can be swept into the unload systems onboth the Zimmerman and <strong>GSI</strong> dryers.4. Do not let grain fines and dust accumulate inside theheat section of the dryer. Daily check the hopper dividerthat separates the heat section from the cooling section toinsure that it remains clean and open.5. When cleaning dryer, check the grain discharge area on thedryer. On <strong>GSI</strong> hopper bottom dryers check around the meteringdrum to insure that grain is flowing freely from each columnand that there is no trash build-up. On ZimmermanAccutrol sweep dryers check the sweeps for trash or stalkbuildups that could be obstructing grain flow.6. If undried grain is left in the dryer for more than a week duringthe drying season, inspect the plenum roof to make sure thatthere is no wet grain sticking to the roof that could restrictgrain flow. When the dryer is restarted make sure that all graincolumns are evenly unloading.7. When drying dirty corn in high humidity conditions, sludgemay build up in the upper outside sheets of the dryer. Thisbuild up can be removed by either washing the sheets downwith a high pressure water hose, or by shutting incoming grain,dropping the grain level to below the plugged area, and thenrunning the fans and burner to dry the affected area. Tappingor sweeping the sheets will dislodge debris. Attempting tosweep off the sheet build-up while it is still wet will usuallyplug the sheet more.IN CASE OF FIRE1. When you first detect a fire, the entire drying operation shouldbe shut down, including grain flow into and out of the dryer.The emergency controls may have already done this. Also,shut off the electrical and fuel supply to the dryer.4. Locate the area of the fire.5. If the fire can be extinguished with a fire extinguisher, waterhose or by removing the burning material, this should be doneright away. Watch the dryer closely for another fire after onehas occurred.6. Emergency discharge slide gates at the bottom of each columnas well as easy access gates located near the hopper dischargearea permit fast dumping of each individual grain column.7. A fire extinguisher should be located at or near the dryer, if afire seems to be getting out of control call the fire department.END OF SEASON SERVICE1. Empty the dryer at the end of the drying season. The dryershould not be used for grain storage. Grain left in there for anextended period of time can become wet, swell and spoil.Chunks of spoiled grain can plug the metering system andswelled grain places undue stress on the interior and exteriorsheeting of the dryer.2. Clean out the plenum roof grain cushion and remove any grainthat may be hanging up on the plenum roof.3. Make sure the grain exchangers are clean.4. Clean out the hopper that divides the heat section from thecooling section.5. Clean the cooling chamber floor.6. Remove all grain and trash from the metering drum floor. Thisgrain can be raked out by hand by opening the slide gateslocated in the hopper bottom of the dryer.7. Make sure gas supply is shut off to the dryer.8. Open the gas train drain valve located on the bottom of the gastrain.9. It is a good practice to cover the burner with a tarpaulin orplastic to insure a clean burner.2. Do not try to cool a fire by running fan(s).3. Never run grain from the dryer into the elevator or storage if afire is known or suspected.26
<strong>Tower</strong> <strong>Dryer</strong> Ops & ServiceMAINTENANCELOCATION INSTRUCTIONS TYPE OF LUBRICATIONLUBRICATION INTERVALMetering drum driveLubricate slowly until lube High quality; grade #2 Beginning of seasonshaft bearing (Onshows through seal. Wipe lithium based grease. (annually).<strong>GSI</strong> hopper bottomclean.dryers only).Accutrol (sweep unload)top and bottom drivebearings. (OnZimmerman flat bottomdryers only).Accutrol (sweep unload)coupling hub. (On Zimmerman<strong>Dryer</strong>s).Blower shaft bearings.(Both <strong>GSI</strong> andZimmerman <strong>Dryer</strong>s).Blower motor bearings(Both <strong>GSI</strong> andZimmerman <strong>Dryer</strong>s)Metering variable speeddrive motor (Both <strong>GSI</strong>and Zimmerman <strong>Dryer</strong>s)12 Diameter Accutrolgearbox (12 diametersweep unload gearbox)(Zimmerman <strong>Dryer</strong>sonly)18 & 24 DiameterAccutrol gearbox (18and 24 diameter sweepunload gearbox Zimmerman<strong>Dryer</strong>s only).Lubricate slowly until lubeshows through seal. Wipeclean.Remove the two lube plugsfrom the cover. Lubricateslowly until grease beginsseeping through relief plug.Lubricate bottom bearingplug slowly counting thegrease gun pump until lubeshows through the seal.Wipe clean. Use same # ofgrease gun pumps for topbearing.See motor lubrication1procedure belowSee motor lubrication1procedure belowLUBRICATION TABLEGrease filled gearbox. Replenishgrease to the first1st stage (upper) reductionmechanism through greasefitting provided (typicallyquantity= 0.3 oz. of greaseOil filled gearbox w/ oilpump. Maintain oil level toupper red line on oil levelgauge.High quality; grade #2lithium based grease.High quality; grade #2lithium based grease.High quality, grade #2lithium based grease.High quality, grade #2lithium based greaseHigh quality, grade #2lithium based greaseHigh quality, grade #2lithium based greaseISO VG 100 to 150 mineral-basedoil. AGMA ViscosityGrade 3EP to 4EP.(Mobilgear 627, 629 orequivalent).Beginning of season(annually).Beginning of season(annually).Every 4 weeks of dryeroperation.Every 2 years (Normal operation,ever 8-10 monthscontinuous operation).Every 2 years (Normal operation,ever 8-10 monthscontinuous operation).Beginning of season(annually). (Change greasein box every 3-5 years)Beginning of season.(Change every 2 years).Metering drum gearbox.(On <strong>GSI</strong> hopper bottomdryers only)Fill to check plug. ISO VG 220 mineral-basedoil. AGMA Viscos-ityGrade 5EP. (Mobilgear630 or equivalent).Beginning of season.(Change every 10,000hours or 2 years).1Lubricationof motors - Operate motor for 20 minutes. Clean grease fitting. Remove grease relief plug andusing a low pressure grease gun, pump in the required grease. After relubricating, allow motor to run for 10minutes before replacing relief hardware. Do NOT overgrease!27
MAINTENANCE<strong>Tower</strong> <strong>Dryer</strong> Ops & Service28
<strong>Tower</strong> <strong>Dryer</strong> Ops & ServiceMAINTENANCEPRE-SEASON SERVICE CHECKLIST_____ Lubricate blower bearings._____ Lubricate blower motor bearings, if needed._____ Check blower belts and adjust if necessary._____ Clean burner ports._____ Inspect flame rod and spark ignitor._____ Check oil levels in gearboxes._____ Inspect divider hopper between heat and cooling section. Clean if necessary._____ Inspect Bindicator grain level switches._____ Inspect metering system access door cover seals._____ Lube metering system access door cover hold down latches._____ Lube Modutrol motor linkage._____ Check butterfly operation in modulating valve._____ Check gas pressure gauges._____ Check interior of Maxon shutoff valves for corrosion. Clean if necessary._____ Clean control and power panels, tighten loose connections, and check for leaks._____ Inspect metering systems. Clean accumulated stalks and old grain._____ Start up dryer and check operating controls._____ Other: Itemize____________________________________________________END OF SEASON SHUT-DOWN PROCEDURE______ Start unload and and empty all grain from dryers.______ Clean out grain cushion (on plenum roof under fill spout). Clean plenum roof.______ Clean off grain exchangers.______ Clean out divider hopper, between heating and cooling section.______ Clean inside cooling sheets and cooling floor.______ Remove all grain and trash from unload section of dryer.______ Open emergency grain discharge doors (and drain doors in Zimmerman dryers).______ Open drain valve in gas train.______ Cover burner with a tarp or plastic sheeting.29
TROUBLESHOOTING
<strong>Tower</strong> <strong>Dryer</strong> Ops & ServiceTROUBLESHOOTINGThe <strong>GSI</strong> & Zimmerman <strong>Tower</strong> dryers are designed to be self diagnosing. Most electrical or operating problems aredisplayed on the screen of the operator interface and the problem area is graphically high lighted. Always insure that either240 or 480 volt 3 phase power is being provided to the dryer. All motor starters coils and the burner circuitry operate at 120vAC. All of the safety circuit on the dryer operates at 24v DC.Listed below are potential trouble shooting issues associated with the dryer and possible solutions to the problems.TROUBLESHOOTINGDRYING ISSUESProblemLow dryer capacity.What to do- Check to make sure the dryer is always full of grain.- Check all grain columns to make sure they are all moving.- Check outside dryer screen for dirt build up. Clean if necessary.Grain moisture dischargestoo wet.- Reduce unload rate.- Or increase drying temperature.Grain moisture dischargestoo dry.- Increase unload rate.- Or decrease drying temperature.Grain moisture dischargesinconsistently.- Check that plenum temperature is being held consistent.- Check for widely varying incoming moistures.- Check for plugged grain columns.- Verify that an adequate supply of grain is being provided to the dryer tomaintain a grain seal within the dryer.Burnt or scorched kernels - Some varieties of grain or frost damaged grain are sensitive to higherappear during drying. drying temperatures. Lower drying temperatures.- If dryer is equipped with an external LP vaporizer, insure that liquidpropane is not passing through the vaporizer and going to the dryer.Grain not moving throughgrain columns.- Check the dryer for fines build up within the column. Empty if necessary.- Do not leave the dryer full for extended periods of time or during rainyweather without occasionally moving grain through it.TROUBLESHOOTINGBURNERProblemPilot will not light.What to do- Check to see that the gas shutoff valve is open.- Verify that gas is being provided to the dryer by checking the presure gaugelocated in the pilot line.- Verify that the pilot solenoid is opening by listening for a clicking sound.- Remove the pilot line from the pilot solenoid with the dryer turned off to verifythat no water is in the pilot line. Blow the pilot line out with compressed air.- Before reattaching the pilot line attempt to light the pilot with the lineremoved. Gas should be flowing from the pilot solenoid.- If gas is flowing, reattach the pilot line and adjust of flow of gas by adjustingthe pilot regulator.33
TROUBLESHOOTINGProblemWhat to do<strong>Tower</strong> <strong>Dryer</strong> Ops & ServicePilot will not light.(Continued)- If pilot still doesn t light, check pilot area on burner. Clean if necessary.- If pilot area is hot indicating that the pilot was lighting, replace flame rod.- If pilot area is cold, replace spark plug.- If pilot still doesn t light, check the Protectofier components in the control box.Pilot lights but main burner - Check for water in gas train by opening drain valve.will not light - Maxon valve should offer some resistance when opening. If it doesn t,check latching solenoid inside Maxon valve.- Check for broken or bent butterfly valve.- Check to make sure burner ports around the pilot are clean.<strong>Dryer</strong> will not reach operatingtemperature.Plenum temperature fluctuates.<strong>Dryer</strong> loses flame at regularintervals while running.Modulating Valvedoes not open.- Increase gas pressure on main gas regulator.- Make sure dryer is completely full of grain.- Gas ports on burner need to be drilled. Clean by using a #43 drill bit.- Check to make sure butterfly valve is fully opening.- Check for water in gas train by opening drain valve.- Gas pressure is to high. Lower gas pressure on main gas regulator.- Loose or dirty flame rod. Clean and/or tighten.- Defective Protectofier SS3CP transformer in control box. Replace.- Check to see that Maxon shutoff valves are open.- Check to see that the plenum setpoint temperature is higher than the ambienttemperature.- Check to see that 120VAC is being provided to the black and white wires inthe modutrol motor.- Check the operation of the modutrol motor be momentary jumping the F and- terminals in the motor to see if the motor will open.TROUBLESHOOTINGGENERALProblemControl power switchwill not light.OIU fails to light.What to do- Check to see that main circuit breaker in power box is on.- Check fuses F1 , F2 , F3 in power box.- Check circuit breaker CB-04 in power box.- Check MicroLogix PLC in control box.- Check to see that main circuit breaker in power box is on.- Check fuses F1 , F2 , F3 in power box.- Check circuit breaker CB-04 in power box.<strong>Dryer</strong> shuts down, red light lights - Check for possible fire in heat section of dryer.and horn sounds, display shows: - Make sure the plenum high limit control is set at least 30 above the desiredOVERHEAT AT PLENUM drying temperature.POSSIBLE FIRE- Check for a malfunctioning gas train component that could be causing excessiveplenum temperatures.34
<strong>Tower</strong> <strong>Dryer</strong> Ops & ServiceTROUBLESHOOTINGProblem<strong>Dryer</strong> shuts down, red light lightsand horn sounds, display shows:OVERHEAT AT _________POSSIBLE FIREOIU displays message:UNLOAD DRIVE FAULTWhat to do- Check for possible fire in dryer at location indicated in message.- Check for a plugged or slow moving grain column.- Check for a plugged grain turner.- Check to insure that the dryer is full of grain and is continually being kept full.- Check for a defective high limit sensor.- Indicates that the metering system inverter drive has tripped.- Check for plugged metering drum or Accutrol metering system.- Reset drive by turning off the main circuit breaker for 15 seconds, or by pressing theSTOP button on the inverter.OIU displays message:- Indicates that any overload has occurred in the item indicated.CONTACT FAILED TO CLOSE - Reset the overload of the starter indicated in the power panel and fix theDRY CONVEYOR overloaded conditions.-or-WET CONVEYOR-oranyauxiliary starterOIU displays message:- Indicates that overload has occurred in the blower indicated.OVERLOAD TRIPPED - Reset the overload of the starter of the blower indicated and fix theBLOWER __ STARTER overload conditions.- Blower overload can be caused by overly tightened blower belts or inadequately greasedblower bearings.TROUBLESHOOTINGOIU (SCREEN) MESSAGESMessage What to doLOST COMM. TO MICROCycle the powerOVERHEAT AT TOP LEFT POSSIBLE FIRE!!! Check overheat condition and Term. 101OVERHEAT AT TOP RIGHT POSSIBLE FIRE!!! Check overheat condition and Term. 102OVERHEAT AT MID. LEFT POSSIBLE FIRE!!! Check overheat condition and Term. 103OVERHEAT AT MID. RIGHT POSSIBLE FIRE!!! Check overheat condition and Term. 104OVERHEAT AT LOWER LEFT POSSIBLE FIRE!!! Check overheat condition and Term. 105OVERHEAT AT LOWER RIGHT POSSIBLE FIRE!!! Check overheat condition and Term. 106OVERHEAT AT INSIDE LEFT POSSIBLE FIRE!!! Check overheat condition and Term. 107OVERHEAT AT INSIDE RIGHT POSSIBLE FIRE!!! Check overheat condition and Term. 108OVERHEAT AT PLENUM POSSIBLE FIRE!!! Check overheat condition and Term. 109OVERLOAD TRIPPED TRI-STARTER Check Term. 300OVERLOAD TRIPPED BLOWER 1 STARTER Check Term. 301OVERLOAD TRIPPED BLOWER 2 STARTER Check Term. 302OVERLOAD TRIPPED BLOWER 3 STARTER Check Term. 303OVERLOAD TRIPPED BLOWER 4 STARTER Check Term. 304AUXILIARY STUCK CLOSED TRI-STARTER Check Term. 200AUXILIARY STUCK CLOSED BLOWER 1 STARTER Check Term. 201AUXILIARY STUCK CLOSED BLOWER 2 STARTER Check Term. 20235
TROUBLESHOOTING<strong>Tower</strong> <strong>Dryer</strong> Ops & ServiceMessageWhat to doAUXILIARY STUCK CLOSED BLOWER 3 STARTER Check Term 203AUXILIARY STUCK CLOSED BLOWER 4 STARTER Check Term. 204AUX. CONTACT FAILED TO CLOSE TRI-STARTER Check Term. 200AUX. CONTACT FAILED TO CLOSE BLOWER 1 STARTER Check Term. 201AUX. CONTACT FAILED TO CLOSE BLOWER 2 STARTER Check Term. 202AUX. CONTACT FAILED TO CLOSE BLOWER 3 STARTER Check Term. 203AUX. CONTACT FAILED TO CLOSE BLOWER 4 STARTER Check Term. 204SWITCH OPEN AIR PRESSURE SWITCH 1 Check Term. 205SWITCH OPEN AIR PRESSURE SWITCH 2 Check Term. 206SWITCH OPEN AIR PRESSURE SWITCH 3 Check Term. 207SWITCH OPEN AIR PRESSURE SWITCH 4 Check Term. 306SWITCH OPEN AIR PRESSURE SWITCH OF Check Term. 115COMBUSTION BLOWERLOST FLAME Check BCU and Term. 114SWITCH STUCK CLOSED MAXON VALVE Check Term. 113FLAME DETECTED WHILE BURNER IS OFFCheck if pilot or Maxon valves stuck open and checkflame rod, BCU and Term. 114HI. GAS PRESSURE SWITCH OPEN Check Term. 111LOW GAS PRESSURE SWITCH OPEN MAKE Check gas pressure and Term. 110SURE MAIN GAS VALVE IS ONHI. GAS PRESSURE SWITCH OPEN GAS PRESSURE Check Term. 111TOO HIGHLOW GAS PRESSURE SWITCH OPEN GAS PRESSURE Check Term. 110TOO LOWMAXON VALVES NOT TURN ONPL. TEMPERATUR RTD CIRCUIT OPEN OR SHORTEDGRAIN TEMPERATUR RTD CIRCUIT OPEN OR SHORTEDReset and try againCheck the RTD wiringCheck the RTD wiringAUXILIARY STUCK CLOSED OIL PUMP STARTER Check Term. 307AUXILIARY STUCK CLOSED COMBUSTION Check Term. 308BLOWER STARTERAUX. CONTACT FAILED TO CLOSE OIL PUMP STARTER Check Term. 307AUX. CONTACT FAILED TO CLOSE COMBUSTION Check Term. 308BLOWER STARTERPLUG SWITCH OPEN DRY PATH PLUGGED Clear dry path and check Term. 309PLUG SWITCH OPEN HOPPER PLUGGED Clear hopper and check Term. 310UNLOAD DRIVE FAULT Check the drive and Term. 208OVERLOAD TRIPPED DRY CONVEYOR Check Term. 305PLUG SWITCH OPEN WET PATH PLUGGED Clear wet path and check Term. 311AUXILIARY STUCK CLOSED DRY CONVEYOR Check Term. 209AUXILIARY STUCK CLOSED AUX. DRY CONVEYOR Check Term. 210AUXILIARY STUCK CLOSED DRY LEG Check Term. 211AUXILIARY STUCK CLOSED TOP DRY CONVEYOR Check Term. 212UNLOAD MONITOR PROXIMITY SWITCH OPEN Check the unload device and Term. 313AUXILIARY STUCK CLOSED AUX. WET CONVEYOR Check Term. 215AUXILIARY STUCK CLOSED WET LEG Check Term. 21436
<strong>Tower</strong> <strong>Dryer</strong> Ops & ServiceTROUBLESHOOTINGMessageWhat to doAUXILIARY STUCK CLOSED TOP WET CONVEYOR Check Term. 213CONTACT FAILED TO CLOSE DRY CONVEYOR Check Term. 209CONTACT FAILED TO CLOSE AUX. DRY CONVEYOR Check Term. 210CONTACT FAILED TO CLOSE DRY LEG Check Term. 211CONTACT FAILED TO CLOSE TOP DRY CONVEYOR Check Term. 212CONTACT FAILED TO CLOSE AUX. WET CONVEYOR Check Term. 215CONTACT FAILED TO CLOSE WET LEG Check Term. 214CONTACT FAILED TO CLOSE TOP WET CONVEYOR Check Term. 213BINDICATOR ERROR UBS closed while LBS still open Check Term. 314 & 315SHUT DOWN OUT OF GRAIN Occurred atDRY SENSOR ERROR MOISTURE SIGNAL OUT OF RANGEDRY SENSOR ERROR GRAIN TEMP. SIGNAL OUT OF RANGEWET SENSOR ERROR MOISTURE SIGNAL OUT OF RANGEWET SENSOR ERROR GRAIN TEMP. SIGNAL OUT OF RANGECOLUMN GRAIN RTD SENSOR ERROR RTD OUT OF RANGESHUT DOWN BY MOISTURE CONTROLLERFAILED TO MAINTAIN TO THE TARGETREADY TO STARTREADY TO START BLOWERREADY TO START BURNEROUT OF GRAINSTART UNLOAD NOWDRYER COOLING OFF Current grain temp. = ____WET PATH NOT ONFILLING THE DRYERDRYER IS FULLEMPTYING THE DRYERNO POWER TO SLCSTART CHECKING Please wait ___ seconds leftTRI-START ON ___ seconds leftSTARTING BLOWER 1STARTING BLOWER 2STARTING BLOWER 3STARTING BLOWER 4PURGING ____ seconds leftOPEN MAIN FUEL VALVES or will shut down in ____ secondsIGNITION TRIAL ____ seconds leftCheck the sensor wiringCheck the sensor wiringCheck the sensor wiringCheck the sensor wiringCheck the sensor wiringTry again w/ close supervisionPress the dryer control STARTTurn blower switch to ON to startTurn burner switch to ON to startWill shut down in ___ secondsFIRING VALVE LIMIT SWITCH OPEN OPEN THE FIRING VALVE Check Term. 112INTERLOCKED START DRY CONVEYOR FIRSTINTERLOCKED START AUX. DRY CONVEYOR FIRSTINTERLOCKED START DRY LEG FIRSTOr will shut down ___ secondsBlower will shut down in ____ secs/*N:5or turn the blower switch off to shut down now.Turn load switch to MAN or AUTO to startPlease wait...Press control STOP button to reset alarm Then presscontrol START button to restartPlease wait...Pull E-STOP button out and check Term100 for 24VDC37
TROUBLESHOOTING<strong>Tower</strong> <strong>Dryer</strong> Ops & ServiceMessageWhat to doINTERLOCKED START TOP DRY CONVEYOR FIRST Check Term. 112INTERLOCKED START AUX. WET CONVEYOR FIRSTINTERLOCKED START WET LEG FIRSTINTERLOCKED START TOP WET CONVEYOR FIRST38
ELECTRICALDIAGRAMS
201202203204205206207208209148 1484LS63 64AUXBLW-0120163 64INTERLOCKBLW-0263 64INTERLOCK200202I:6.0/00I:6.0/01I:6.0/02ACK: TRI-STARTTRI-START CONTACT AUXLOC: POWER PANELACK: BLOWER 01BLW-01 STARTER AUXLOC: POWER PANELACK: BLOWER 02BLW-02 STARTER AUXLOC: POWER PANEL227228229230231232233234235226POWER FLEX 4/40R2 R1DRY CONV.63 64AUX DRY CONV.6364208209210I:6.0/08I:6.0/09I:6.0/10226ACK: DRIVE READY OKLOC: POWER PANELACK: DRY CONVDRY CONV AUXLOC: POWER PANELACK: AUX DRY CONVDRY CONV AUXLOC: POWER PANEL210211212213214215216217218219220221222223224BLW-0363 64INTERLOCKBLW-046364INTERLOCKAPS-01BLW-01APS-02BLW-02APS-03BLW-03203204205206207I:6.0/03I:6.0/04I:6.0/05I:6.0/06I:6.0/07ACK: BLOWER 03BLW-03 STARTER AUXLOC: POWER PANELACK: BLOWER 04BLW-04 STARTER AUXLOC: POWER PANELACK: AIR PRESS.SWITCH 01LOC: APS-1ACK: AIR PRESS.SWITCH 02LOC: APS-2ACK: AIR PRESS.SWITCH 03LOC: APS-3236237238239240241242243244245246247248249DRY LEG CONV.63 64TOP DRY CONV.63 64TOP WET CONV.63 64WET LEG63 64AUX WET CONV.63 64211212213214215I:6.0/11I:6.0/12I:6.0/13I:6.0/14I:6.0/15301 301ACK: DRY LEGDRY CONV AUXLOC: POWER PANELACK: TOP DRY CONVTOP DRY CONV AUXLOC: POWER PANELACK: TOP WET CONVTOP WET CONV AUXLOC: POWER PANELACK: WET LEGTOP DRY CONV AUXLOC: POWER PANELACK: AUX WET CONVAUX WET CONV AUXLOC: POWER PANELLIMITS UNLESS OTHERWISE SPECIFIED.0= ±.0625 .00= ±.0312 .000= ±.0156 ANGLES= ±1°225226227227TERMINALS IN POWER PANELFIELD WIRINGPART NO.THE <strong>GSI</strong> GROUP1004 E. ILLINOIS ST. ASSUMPTION, IL 62510TITLEMAT'L DESC.TOWER DRYER CONTROL PANELWIRING DIAGRAMP/NDWG BYDATEQL 04-10-04SCALESHEET06 OF 18DWG NO.2004XX-06
301302303304305306307308309310311312313314315316317318319320321322323324325326249 2494LS66 86OLBLW-0130166 86OLBLW-023026686OLBLW-033036686OLBLW-043046686OLDRY CONV3056686OL6686300APS-04306BLW-04OIL PUMP307COMB. BLW308I:7.0/00I:7.0/01I:7.0/02I:7.0/03I:7.0/04I:7.0/05I:7.0/06I:7.0/07I:7.0/086686327327OL: TRI-STARTTRI-START OVERLOADLOC: POWER PANELOL: BLOWER 1BLW-1 OVERLOADLOC: POWER PANELOL: BLOWER 2BLW-2 OVERLOADLOC: POWER PANELOL: BLOWER 3BLW-3 OVERLOADLOC: POWER PANELOL: BLOWER 4BLW-4 OVERLOADLOC: POWER PANELOL: DRY CONV.DRY CONV OVERLOADLOC: POWER PANELACK: AIR PRE. SWITCH 04LOC: APS-4ACK: OIL PUMPOIL PUMP AUXLOC: POWER PANELACK: COMBUSTION AIR BLOWERCOMB. BLOWER AUXLOC: POWER PANEL327328329330331332333334335336337338339340341342343344345346347348349326ENDYELLOW JUMPER309 I:7.0/09YELLOW JUMPER310 I:7.0/10YELLOW JUMPER311 I:7.0/11CR-MC312 I:7.0/12RELAYSWEEP/DRUM313 I:7.0/13MONITORUBSCN.O.314 I:7.0/14L-1.1MTR L-2 (SEE PAGE 14)LBS315 I:7.0/15L-1.1CMTRN.O.L-2 (SEE PAGE 14)TERMINALS IN POWER PANELFIELD WIRING326ENDPLUG SWITCH: DRY PATHLOC: FIELD DEVICEPLUG SWITCH: HOPPERLOC:DISCHARGE AREAPLUG SWITCH: WET PATHLOC: DISCHARGE AREAACK: STANDALONE M. CTR.LOC: POWER PANELMONITOR: UNLOAD ROTATIONLOC: UNLOADUPPER BINDICATOR SWITCHLOC: ROOFNOTE: 120VAC FOR UB. MOTORLOWER BINDICATOR SWITCHLOC: UPPER GARNERNOTE: 120VAC FOR LB. MOTORLIMITS UNLESS OTHERWISE SPECIFIED.0= ±.0625 .00= ±.0312 .000= ±.0156 ANGLES= ±1°PART NO.THE <strong>GSI</strong> GROUP1004 E. ILLINOIS ST. ASSUMPTION, IL 62510TITLEMAT'L DESC.DWG BYQLSCALETOWER DRYER CONTROL PANELWIRING DIAGRAMDATE04-10-04SHEET07OF18P/NDWG NO.2004XX-07
FIELD WIRING7 WIRES 4 WIRES12 WIRESPLC+PLC+OVERHEATOUTSIDEUPPER-LEFT 101OVERHEATOUTSIDEUPPER-RIGHT102PLC+PLC+OVERHEATINSIDELEFTOVERHEATINSIDERIGHT107108BURNERFLAME ELECTRODEASSEMBLY EGAS PILOTIGNITERTo IGN XformerPC8/PC7/PC6/SHLDPLC+OVERHEATOUTSIDEMIDDLE-LEFT103PLC+PLENUMHI-LIMITSWITCH109PLENUM RTDMC8/MC7/MC6/SHLDPLC+PLC+PLC+ALARM HORNALARM HORNOVERHEATOUTSIDEMIDDLE-RIGHTOVERHEATOUTSIDELOWER-LEFTOVERHEATOUTSIDELOWER-RIGHT415To: L-2104105106314PLC+L-1.1L-2315PLC+L-1.1L-2MMUBSLBSN.O.C4 WIRESN.O.CN.C.N.C.FIELD INSTALLEDWORK LIGHTGRAIN RTDFIELD INSTALLEDALARM LIGHTTo: L-2414To: L-2409RTDPCWHTBLKREDPC8PC7PC6WHTBLKREDFIELD INSTALLEDPLUG SW.PLUG SW.HOPPERRTDMCWHTBLKREDBlackWhiteBlueRedMC8MC7MC6WHTBLKREDINSULATETo: PLC+To: PLC-310& STORE (RED WIRE)505 L-2 PLC+ 110 MVS L-2 MVSL-2 PLC+ 113 L-1.1 L-2 CM+ CM- PLC+ 111PILOT GASSOL. VALVELPS7 9MAXON VALVE #1 MAXON VALVE #2MAIN GAS AUX(7-9) CLOSES MAIN GAS AUX(7-9) CLOSESENABLESOLENOIDWITH VALVEPARTIALLY OPENENABLESOLENOIDWITH VALVEPARTIALLY OPEN79L2L1+-+-HONEYWELLM7284A-1012MODUTROL MOTORHPSLIMITS UNLESS OTHERWISE SPECIFIED.0= ±.0625 .00= ±.0312 .000= ±.0156 ANGLES= ±1°PART NO.THE <strong>GSI</strong> GROUP1004 E. ILLINOIS ST. ASSUMPTION, IL 62510TITLEMAT'L DESC.DWG BYQLSCALETOWER DRYER CONTROL PANELWIRING DIAGRAMDATE04-10-04SHEET14OF18P/NDWG NO.2009XX-14
WET CONVEYOR's "A" & "B" - These wet grain transports can be either: conveyors, or slide gates.Either "A" or "B" can be selected from the "WET PATH" selector switch.THE WET PATHWet coveyor starter wiring is like this:STARTERSTARTER404 (115VAC)coilL-2 405 (115VAC)coilL-2Conv.AConv.BTOP WET CONVEYOR (408).Wet slide gate wiring is like this:404 for GATE A or 405 for GATE B (115VAC)CR-SLIDEL-1.121 OPEN319 5 22LSRE2RE1/OPENCR-SLIDEA2 66 86L-2HWET LEG (407)Interlocked with theTOP WET CONVEYOR ACK(213)CR-SLIDE122 CLOSE32AUX WET CONVEYOR, WET LEG AND TOP WET CONVEYOR:LS22RE1RE2/CLOSETOWERDRYERL1) You may purchase the optional starters, push buttons, & pilot lights installed in thedryer panel, which are connected as shown by the draws in left and center columns.2) If you have an existing starter system, connect the aux contact of your device as shownin the draws to the right column.3) Do not forget to select the device option from the DRYER SETUP screen of the operatorafter the device is installed.AUX WET CONVEYOR:DCC+(24VDC)stopstartIN20IN21406(115VAC)PLC+(24VDC)STARTERcoilauxL-2auxPLC+(24VDC) 215xxxxxxxxxxxFAN-1FAN-2FAN-3UNLOADWET CONVEYOR "A" (404)Interlocked with theAUX WET CONVEYOR(215).---- OR ----OUT13(24VDC)onaDCC-215note:located in control panelWET LEG:DCC+(24VDC)stopIN18note:located in power panelSTARTERcoil407(115VAC)L-2note:located in power panelWET CONVEYOR "B" (405)Interlocked with theAUX WET CONVEYOR(215).OUT12(24VDC)startonaIN19DCC-PLC+(24VDC)214auxPLC+(24VDC) aux214AUX WET CONVEYOR (406).Interlocked with theWET LEG (214).note:located in control panelnote:located in power panelnote:located in power panelTOP WET CONVEYOR:DCC+(24VDC)stopIN22408(115VAC)coilSTARTERL-2startonOUT14(24VDC)anote:located in control panelIN23DCC-auxPLC+(24VDC)213note:located in power panelPLC+(24VDC) aux213note:located in power panelLIMITS UNLESS OTHERWISE SPECIFIED.0= ±.0625 .00= ±.0312 .000= ±.0156 ANGLES= ±1°PART NO.THE <strong>GSI</strong> GROUP1004 E. ILLINOIS ST. ASSUMPTION, IL 62510TITLEMAT'L DESC.TOWER DRYER CONTROL PANELWIRING DIAGRAMP/NDWG BYDATEQL 04-10-04SCALESHEET16OF18DWG NO.2004XX-16
DRY CONVEYOR:This is the dry grain transport located directly under the dryer discharge hopper.All tower dryer control panels include a starter to control this function. Simply hookup the motor T leads to the starter & check rotation. The included dry Conveyor starteraux is the run-permissive for the dryer unload. Please use this starter!THE DRY PATHIf you wish to add plug switches to the Dry Conveyor, remove the yellow jumper wirebetween PLC+ and 309, and install a N.C. dry contacts, in series between PLC+ & 309.Do not forget to select the DRY CONVEYOR and DRY PATH PLUG options from the DRYER SETUPscreen of the operator interface if those device are installed.AUX DRY CONVEYOR:If the Dry Conveyor dumps into another conveyor (in addition to the DRY LEG), thatmust be running before starting Dry Conveyor, we call this device AUX DRY CONVEYOR.1) You may purchase the optional starter, push buttons, & pilot light installed in thedryer panel, which are connected as shown in the left and center draws.2) If you have an existing starter system for the AUX Dry Conveyor function, connect theaux contact of your device as shown in the draw to the right.3) Do not forget to select the AUX DRY CONVEYOR option from the DRYER SETUP screen of theoperator interface after the AUX DRY CONVEYOR is installed.STARTERTOP DRY CONVEYOR (403).HTOWERDRYERLDCC+(24VDC)stopIN14401(115VAC)coilL-2startIN15PLC+(24VDC)auxPLC+(24VDC)aux210xxxFAN-1OUT7(24VDC)note:located in control panelonaDCC-210note:located in power panelnote:located in power panelxxxxxxFAN-2FAN-3DRY LEG:1) If an optional DRY LEG STARTER was not provided with your panel, connect yourstarter as shown in the lest and center draws.2) If you have an existing DRY LEG STARTER with a separate control, you must provideeither a N.O. aux contact from your starter or a leg monitor contact that closeswhen the leg is running OK. Connect the contact as shown in the draw to the right.3) Do not forget to select the DRY LEG option from the DRYER SETUP screen of theoperator interface after the DRY LEG is installed.DRY LEG (402)Interlocked with theTOP DRY CONVEYOR ACK(212)xxUNLOADSTARTERDCC+(24VDC)stopIN12402(115VAC)coilL-2startIN13PLC+(24VDC)auxPLC+(24VDC)aux211onOUT6(24VDC) DCC- 211anote:located in control panelTOP DRY CONVEYOR:note:located in power panelIf there is another conveyor after the Dry Leg, we call this device TOP DRY CONVEYOR.note:located in power panelDRY CONVEYOR (400).Interlocked with theAUX DRY CONVEYOR ACK(210)1) You may purchase the optional starter, push buttons, & pilot light installed in thedryer panel, which are connected as shown in the left and center draws.2) If you have an existing starter system for the Top Dry Conveyor function, connectaux contact of your device as shown in the draw to the right.3) Do not forget to select the TOP DRY CONVEYOR from the DRYER SETUP screen of theoperator interface after the TOP DRY CONVEYOR is installed.DCC+(24VDC)stopIN16403(115VAC)STARTERcoilL-2AUX DRY CONVEYOR (401).Interlocked with theTOP DRY CONVEYOR ACK(211)LIMITS UNLESS OTHERWISE SPECIFIED.0= ±.0625 .00= ±.0312 .000= ±.0156 ANGLES= ±1°startIN17PLC+(24VDC)auxPLC+(24VDC)aux212PART NO.THE <strong>GSI</strong> GROUP1004 E. ILLINOIS ST. ASSUMPTION, IL 62510OUT8(24VDC)onaDCC- 212TITLEMAT'L DESC.TOWER DRYER CONTROL PANELWIRING DIAGRAMP/Nnote:located in control panelnote:located in power panelnote:located in power panelDWG BYDATEQL 04-10-04SCALESHEET17OF18DWG NO.2004XX-17
COMPONENTMANUALS
<strong>Tower</strong> <strong>Dryer</strong> Ops & ServiceCOMPONENTSCOMPONENT MANUALSI. AC FREQUENCY DRIVEII. MAXON BURNERIII. GAS CONTROL VALVEIV. GAS SHUT-OFF VALVEV. GEARBOXESVI. MODUTROL MOTORVII. GAS REGULATORSVIII. ASCO PILOT VALVEIX. PROTECTOFIER
<strong>Tower</strong> <strong>Dryer</strong> Ops & ServiceCOMPONENTSICOMPONENT MANUALSAC FREQUENCY DRIVE
PowerFlex 4 AdjustableFrequency AC DriveFRN 3.xxQuick StartThis Quick Start guide summarizes the basic steps needed to install,start-up and program the PowerFlex 4 Adjustable Frequency AC Drive.The information provided Does Not replace the User <strong>Manual</strong> and isintended for qualified drive service personnel only.For detailed PowerFlex 4 information including EMC instructions,application considerations and related precautions refer to thePowerFlex 4 User <strong>Manual</strong>, Publication 22A-UM001… on the CDsupplied with the drive or at www.ab.com/manuals/dr.General Precautions!!!!!ATTENTION: The drive contains high voltage capacitors which taketime to discharge after removal of mains supply. Before working ondrive, ensure isolation of mains supply from line inputs [R, S, T (L1,L2, L3)]. Wait three minutes for capacitors to discharge to safe voltagelevels. Failure to do so may result in personal injury or death.Darkened display LEDs is not an indication that capacitors havedischarged to safe voltage levels.ATTENTION: Equipment damage and/or personal injury may resultif parameter A092 [Auto Rstrt Tries] or A094 [Start At PowerUp] isused in an inappropriate application. Do not use this function withoutconsidering applicable local, national and international codes,standards, regulations or industry guidelines.ATTENTION: Only qualified personnel familiar with adjustablefrequency AC drives and associated machinery should plan orimplement the installation, start-up and subsequent maintenance of thesystem. Failure to comply may result in personal injury and/orequipment damage.ATTENTION: This drive contains ESD (Electrostatic Discharge)sensitive parts and assemblies. Static control precautions are requiredwhen installing, testing, servicing or repairing this assembly.Component damage may result if ESD control procedures are notfollowed. If you are not familiar with static control procedures,reference A-B publication 8000-4.5.2, “Guarding Against ElectrostaticDamage” or any other applicable ESD protection handbook.ATTENTION: An incorrectly applied or installed drive can result incomponent damage or a reduction in product life. Wiring or applicationerrors, such as, undersizing the motor, incorrect or inadequate ACsupply, or excessive ambient temperatures may result in malfunction ofthe system.
English-2Mounting Considerations• Mount the drive upright on a flat, vertical and level surface.– Install on 35 mm DIN Rail.or– Install with screws.Minimum Panel Thickness Screw Size Mounting Torque1.9 mm (0.0747 in.) M4 (#8-32) 1.56-1.96 N-m (14-17 lb.-in.)• Protect the cooling fan by avoiding dust or metallic particles.• Do not expose to a corrosive atmosphere.• Protect from moisture and direct sunlight.Minimum Mounting ClearancesSee page 12 for mounting dimensions.25 mm(1.0 in.)120 mm(4.7 in.)Mounting Option ANo clearance requiredbetween drives.120 mm(4.7 in.)Mounting Option B120 mm(4.7 in.)120 mm(4.7 in.)Ambient Operating TemperaturesAmbient Temperature Enclosure Rating Minimum MountingMinimum MaximumClearancesIP 20/Open TypeUse Mounting Option A40°C (104°F)-10°C (14°F)IP 30/NEMA 1/UL Type 1 (1) Use Mounting Option B50°C (122°F) IP 20/Open Type Use Mounting Option B(1)Rating requires installation of the PowerFlex 4 IP 30/NEMA 1/UL Type 1 option kit.General Grounding RequirementsImportant: Remove the MOV to ground jumper if thedrive is installed on an ungrounded distribution system.Tighten screw after jumper removal.JumperLocationR/L1S/L2T/L3U/T1V/T2W/T3SHLDCE ConformityRefer to the PowerFlex 4 User <strong>Manual</strong> on the CD supplied with thedrive for details on how to comply with the Low Voltage (LV) andElectromagnetic Compatibility (EMC) Directives.
Specifications, Fuses and Circuit BreakersEnglish-3Drive RatingsOutput Ratings Input Ratings Branch Circuit ProtectionPowerCatalogDissipationNumberVoltage140M MotorIP20 OpenkW (HP) Amps Range kVA Amps Fuses Protectors (2) Contactors Watts100 - 120V AC (±10%) – 1-Phase Input, 0 - 230V 3-Phase Output22A-V1P5N104 0.2 (0.25) 1.5 90-126 0.75 6.0 10 140M-C2E-C10 100-C09 2522A-V2P3N104 0.4 (0.5) 2.3 90-126 1.15 9.0 15 140M-C2E-C16 100-C12 3022A-V4P5N104 0.75 (1.0) 4.5 90-126 2.25 18.0 30 140M-D8E-C20 100-C23 5022A-V6P0N104 1.1 (1.5) 6.0 90-126 3.0 24.0 40 140M-D8E-C25 100-C37 70200 - 240V AC (±10%) – 1-Phase (1) Input, 0 - 230V 3-Phase Output, NO BRAKE22A-A1P4N103 0.2 (0.25) 1.4 180-265 0.7 3.2 6 140M-C2E-B40 100-C09 2522A-A2P1N103 0.4 (0.5) 2.1 180-265 1.05 5.3 10 140M-C2E-B63 100-C09 3022A-A3P6N103 0.75 (1.0) 3.6 180-265 1.8 9.2 15 140M-C2E-C16 100-C12 5022A-A6P8N103 1.5 (2.0) 6.8 180-265 3.4 14.2 25 140M-C2E-C16 100-C16 7522A-A9P6N103 2.2 (3.0) 9.6 180-265 4.8 19.6 30 140M-D8E-C25 100-C23 100200 - 240V AC (±10%) – 1-Phase (1) Input, 0 - 230V 3-Phase Output22A-A1P5N104 0.2 (0.25) 1.5 180-265 0.75 5.0 10 140M-C2E-B63 100-C09 2522A-A2P3N104 0.4 (0.5) 2.3 180-265 1.15 6.0 10 140M-C2E-B63 100-C09 3022A-A4P5N104 0.75 (1.0) 4.5 180-265 2.25 10.0 15 140M-C2E-C16 100-C12 5022A-A8P0N104 1.5 (2.0) 8.0 180-265 4.0 18.0 30 140M-D8E-C20 100-C23 80200 - 240V AC (±10%) – 3-Phase Input, 0 - 230V 3-Phase Output22A-B1P5N104 0.2 (0.25) 1.5 180-265 0.75 1.8 3 140M-C2E-B25 100-C09 2522A-B2P3N104 0.4 (0.5) 2.3 180-265 1.15 2.5 6 140M-C2E-B40 100-C09 3022A-B4P5N104 0.75 (1.0) 4.5 180-265 2.25 5.2 10 140M-C2E-C10 100-C09 5022A-B8P0N104 1.5 (2.0) 8.0 180-265 4.0 9.5 15 140M-C2E-C16 100-C12 8022A-B012N104 2.2 (3.0) 12.0 180-265 5.5 15.5 25 140M-C2E-C16 100-C16 11522A-B017N104 3.7 (5.0) 17.5 180-265 8.6 21.0 35 140M-F8E-C25 100-C23 165380 - 480V AC (±10%) – 3-Phase Input, 0 - 460V 3-Phase Output22A-D1P4N104 0.4 (0.5) 1.4 340-528 1.4 1.8 3 140M-C2E-B25 100-C09 3022A-D2P3N104 0.75 (1.0) 2.3 340-528 2.3 3.2 6 140M-C2E-B40 100-C09 4022A-D4P0N104 1.5 (2.0) 4.0 340-528 4.0 5.7 10 140M-C2E-B63 100-C09 6022A-D6P0N104 2.2 (3.0) 6.0 340-528 5.9 7.5 15 140M-C2E-C10 100-C09 9022A-D8P7N104 3.7 (5.0) 8.7 340-528 8.6 9.0 15 140M-C2E-C16 100-C16 145Input/Output RatingsApprovalsOutput Frequency: 0-240 Hz (Programmable)Efficiency: 97.5% (Typical)Digital Control Inputs (Input Current = 6mA)SRC (Source) Mode:18-24V = ON0-6V = OFFSNK (Sink) Mode:0-6V = ON18-24V = OFFAnalog Control Inputs4-20mA Analog: 250 ohm input impedance0-10V DC Analog: 100k ohm input impedanceExternal Pot: 1-10k ohms, 2 Watt minimumControl Output (Programmable Output, form C relay)Resistive Rating: 3.0A at 30V DC, 125V AC and 240V AC Inductive Rating: 0.5A at 30V DC, 125V AC, and 240V ACRecommended Fuses and Circuit BreakersFuse: UL Class J, CC, T or Type BS88; 600V (550V) or equivalent. Circuit Breakers: HMCP or Bulletin 140U or equivalent.Protective FeaturesMotor Protection: I 2 t overload protection - 150% for 60 Secs, 200% for 3 Secs (Provides Class 10 protection)Overcurrent: 200% hardware limit, 300% instantaneous faultOver Voltage: 100-120V AC Input – Trip occurs at 405V DC bus voltage (equivalent to 150V AC incoming line)200-240V AC Input – Trip occurs at 405V DC bus voltage (equivalent to 290V AC incoming line)380-460V AC Input – Trip occurs at 810V DC bus voltage (equivalent to 575V AC incoming line)Under Voltage: 100-120V AC Input – Trip occurs at 210V DC bus voltage (equivalent to 75V AC incoming line)200-240V AC Input – Trip occurs at 210V DC bus voltage (equivalent to 150V AC incoming line)380-480V AC Input – Trip occurs at 390V DC bus voltage (equivalent to 275V AC incoming line)Control Ride Through: Minimum ride through is 0.5 Secs - typical value 2 SecsFaultless Power Ride Through: 100 millisecondsDynamic BrakingInternal brake IGBT included with all ratings except No Brake versions. Refer to Appendix B of the PowerFlex 4 User <strong>Manual</strong>on CD for ordering information.(1) 200-240V AC - 1-Phase drives are also available with an integral EMC filter. Catalog suffix changes from N103 to N113and N104 to N114.(2) Refer to the Bulletin 140M Motor Protectors Selection Guide, publication 140M-SG001… to determine the frame andbreaking capacity required for your application.CUL ®USUL508CCSA 22.2No. 14EMC Directive 89/336/EEC, LV Dir. 73/23/EECLV: EN 50178EMC: EN 61800-3
English-4Power Wire RatingPower WiringUnshielded 600V, 75°C (167°F) THHN/THWNShielded 600V, 75°C or 90°C (167°F or 194°F) RHH/RHW-2Shielded Tray rated 600V, 75°C or 90°C (167°F or 194°F) RHH/RHW-2TerminalR/L1, S/L2R/L1, S/L2, T/L3U/T1V/T2W/T3BR+, BR-Power Terminal Block (A Frame Shown)Description1-Phase Input3-Phase InputTo Motor U/T1To Motor V/T2To Motor W/T3Power Terminal Block SpecificationsInput Power ConditionsI/O Terminal Block Specifications=Recommended Copper Wire15 Mils insulated, dry locationBelden 29501-29507 or equivalentShawflex 2ACD/3ACD or equivalentR/L1 S/L2 T/L3 U/T1 V/T2 W/T3Dynamic Brake Resistor Connection [0.75 kW (1 HP) ratings and higher]Safety Ground - PEFrame Maximum Wire Size (1) Minimum Wire Size (1) TorqueA 3.3 mm 2 (12 AWG) 0.8 mm 2 (18 AWG)B 5.3 mm 2 (10 AWG) 1.3 mm 2 (16 AWG)(1)Maximum/minimum sizes that the terminal block will accept - these are not recommendations.Input Power ConditionCorrective ActionLow Line Impedance (less than 1% line reactance) • Install Line Reactor (2)Greater than 120 kVA supply transformerLine has power factor correction capacitorsLine has frequent power interruptionsLine has intermittent noise spikes in excess of 6000V (lightning)Refer to the PowerFlex 4 User <strong>Manual</strong> on CD for maximum power andcontrol cable length recommendationsBR+BR-Switch any two motor leads tochange forward direction.• or Isolation Transformer1.7-2.2 N-m (16-19 lb.-in.)Phase to ground voltage exceeds 125% of normal line to line voltage • Remove MOV jumper to ground.• or Install Isolation Transformer withUngrounded Distribution Systemgrounded secondary if necessary.(2)Refer to Appendix B of the PowerFlex 4 User <strong>Manual</strong> on CD for accessory ordering information.I/O Wiring Recommendations (3)Wire Type(s) Description Minimum Insulation RatingBelden 8760/9460(or equiv.)Belden 8770(or equiv.)(3)0.8 mm 2 (18AWG), twisted pair, 100% shield withdrain.0.8 mm 2 (18AWG), 3 conductor, shielded forremote pot only.300V60 degrees C(140 degrees F)If the wires are short and contained within a cabinet which has no sensitive circuits, the use of shielded wire may not benecessary, but is always recommended.Maximum Wire Size (4) Minimum Wire Size (4) Torque1.3 mm 2 (16 AWG) 0.13 mm 2 (26 AWG) 0.5-0.8 N-m (4.4-7 lb.-in.)(4)Maximum / minimum that the terminal block will accept - these are not recommendations.
English-5Control Terminal Block(1) Important: I/O Terminal 01 isalways a coast to stop input exceptwhen P036 [Start Source] is set to“3-Wire” control. In three wirecontrol, I/O Terminal 01 is controlledby P037 [Stop Mode]. All other stopsources are controlled by P037[Stop Mode].Important: The drive is shipped witha jumper installed between I/OTerminals 01 and 11. Remove thisjumper when using I/O Terminal 01as a stop input.(2) Two wire control shown. For threewire control use a momentary inputon I/O Terminal 02 tocommand a start. Use a maintainedinput for I/O Terminal 03 tochange direction. Relay N.O.Relay CommonRelay N.C.P036[Start Source]R1R2R3StopI/O Terminal 01StopKeypad Per P037 Coast3-Wire Per P037 Per P0372-Wire Per P037 CoastRS485 Port Per P037 Coast+24V+10V010203040506111213141516Stop (1)Start/Run FWD (2)Dir/Run REVDigital CommonDigital Input 1Digital Input 2+24V DC+10V DC0-10V InAnalog Common4-20mA InRS485 ShieldRefer to the PowerFlex 4User <strong>Manual</strong> on CD fordetailed I/O wiring examples.TypicalSRC WiringTypicalSNK WiringPotentiometermust be1-10k ohm2 Watt Min.01 02 03 04 05 0630V DC 125V AC 240V ACResistive 3.0A 3.0A 3.0AInductive 0.5A 0.5A 0.5AR1 R2 R3SNKSRC (1)11 12 13 14 15 16RS485(DSI)8 1No. Signal Default Description Param.R1 Relay N.O. Fault Normally open contact for output relay. A055R2 Relay Common – Common for output relay.R3 Relay N.C. Fault Normally closed contact for output relay. A055Sink/Source DIP SwitchSource (SRC)Inputs can be wired as Sink (SNK) or Source (SRC) via DIP Switchsetting.01 Stop (1) Coast02 Start/Run FWD Not Active03 Direction/Run REV Not ActiveThe factory installed jumper or a normally closed inputmust be present for the drive to start.Command comes from the integral keypad by default. Todisable reverse operation, see A095 [Reverse Disable].P036 (1)P036, P037P036, P037,A09504 Digital Common –For digital inputs. Electronically isolated with digital inputsfrom analog I/O.05 Digital Input 1 Preset Freq Program with A051 [Digital In1 Sel]. A05106 Digital Input 2 Preset Freq Program with A052 [Digital In2 Sel]. A05211 +24V DC –Drive supplied power for digital inputs.Maximum output current is 100mA.12 +10V DC –Drive supplied power for 0-10V external potentiometer.Maximum output current is 15mA.P03813 0-10V In (3) Not ActiveFor external 0-10V input supply(input impedance = 100k ohm) or potentiometer wiper.P03814 Analog Common –For 0-10V In or 4-20mA In. Electronically isolated withanalog inputs from digital I/O.15 4-20mA In (3) Not ActiveFor external 4-20mA input supply(input impedance = 250 ohm).P03816 RS485 (DSI) Shield –Terminal should be connected to safety ground - PE whenusing the RS485 (DSI) communications port.(3)Only one analog frequency source may be connected at a time. If more than one reference is connected at the sametime, an undetermined frequency reference will result.
English-6Prepare For Drive Start-Up!ATTENTION: Power must be applied to the drive to perform thefollowing start-up procedures. Some of the voltages present are atincoming line potential. To avoid electric shock hazard or damage toequipment, only qualified service personnel should perform thefollowing procedure. Thoroughly read and understand the procedurebefore beginning. If an event does not occur while performing thisprocedure, Do Not Proceed. Remove All Power including usersupplied control voltages. User supplied voltages may exist even whenmain AC power is not applied to the drive. Correct the malfunctionbefore continuing.Before Applying Power to the Drive❏ 1. Confirm that all inputs are connected to the correct terminals and aresecure.❏ 2. Verify that AC line power at the disconnect device is within the ratedvalue of the drive.❏ 3. Verify that any digital control power is 24 volts.❏ 4. Verify that the Sink (SNK)/Source (SRC) Setup DIP Switch is set tomatch your control wiring scheme. See page 5 for location.Important: The default control scheme is Source (SRC). The Stopterminal is jumpered (I/O Terminals 01 and 11) to allowstarting from the keypad. If the control scheme is changedto Sink (SNK), the jumper must be removed from I/OTerminals 01 and 11 and installed between I/O Terminals01 and 04.❏ 5. Verify that the Stop input is present or the drive will not start.Important: If I/O Terminal 01 is used as a stop input, the jumperbetween I/O Terminals 01 and 11 must be removed.Applying Power to the Drive❏ 6. Apply AC power and control voltages to the drive.❏ 7. Familiarize yourself with the integral keypad features (see next page)before setting any Program <strong>Group</strong> parameters.Start, Stop, Direction and Speed ControlFactory default parameter values allow the drive to be controlled fromthe integral keypad. No programming is required to start, stop, changedirection and control speed directly from the integral keypad.Important: To disable reverse operation, see A095 [Reverse Disable].If a fault appears on power up, refer to page 11 for an explanation of thefault code. For complete troubleshooting information, refer to thePowerFlex 4 User <strong>Manual</strong> on the CD supplied with the drive.
English-7Integral Keypad➏➋➊RUNFWDREV➍PROGRAM➐➎FAULT➌VOLTSAMPSHERTZ➑MenuDescriptionDisplay <strong>Group</strong> (View Only)Consists of commonly viewed drive operatingconditions.Basic Program <strong>Group</strong>Consists of most commonly usedprogrammable functions.Advanced Program <strong>Group</strong>Consists of remaining programmable functions.➒Fault DesignatorConsists of list of codes for specific faultconditions. Displayed only when fault is present.No. LED LED State Description➊ Run/Direction Steady Red Indicates drive is running and commanded motor direction.Status Flashing Red Drive has been commanded to change direction. Indicatesactual motor direction while decelerating to zero.➋ Alphanumeric Steady Red Indicates parameter number, parameter value, or fault code.Display Flashing Red Single digit flashing indicates that digit can be edited.All digits flashing indicates a fault condition.Displayed Units Steady Red Indicates the units of the parameter value being displayed.➌➍➎➏➐Program Status Steady Red Indicates parameter value can be changed.Fault Status Flashing Red Indicates drive is faulted.Pot Status Steady Green Indicates potentiometer on Integral Keypad is active.Start Key Status Steady Green Indicates Start key on Integral Keypad is active.The Reverse key is also active unless disabled by A095[Reverse Disable].No. Key Name Description➑ Escape Back one step in programming menu.Cancel a change to a parameter value and exit ProgramMode.Select Advance one step in programming menu.Select a digit when viewing parameter value.Up ArrowDown ArrowEnterScroll through groups and parameters.Increase/decrease the value of a flashing digit.Advance one step in programming menu.Save a change to a parameter value.➒ Potentiometer Used to control speed of drive. Default is active.Controlled by parameter P038.StartReverseStopUsed to start the drive. Default is active.Controlled by parameter P036.Used to reverse direction of the drive. Default is active.Controlled by parameters P036 and A095.Used to stop the drive or clear a fault.This key is always active.Controlled by parameter P037.
English-8Viewing and Editing ParametersThe last user-selected Display <strong>Group</strong> parameter is saved when power is removed and isdisplayed by default when power is reapplied.The following is an example of basic integral keypad and display functions. This exampleprovides basic navigation instructions and illustrates how to program the first Program<strong>Group</strong> parameter.Step Key(s) Example Displays1. When power is applied, the last user-selectedDisplay <strong>Group</strong> parameter number is brieflydisplayed with flashing characters. The displaythen defaults to that parameter’s current value.PROGRAM FAULT(Example shows the value of d001 [OutputFreq] with the drive stopped.)2. Press Esc once to display the Display <strong>Group</strong>parameter number shown on power-up. Theparameter number will flash.PROGRAMFAULTVOLTSAMPSHERTZVOLTSAMPSHERTZ3. Press Esc again to enter the group menu. Thegroup menu letter will flash.VOLTSAMPSHERTZ4. Press the Up Arrow or Down Arrow to scrollthrough the group menu (d, P and A).orPROGRAMFAULT5. Press Enter or Sel to enter a group. The rightdigit of the last viewed parameter in that groupwill flash.orPROGRAMFAULTVOLTSAMPSHERTZ6. Press the Up Arrow or Down Arrow to scrollthrough the parameters that are in the group.or7. Press Enter or Sel to view the value of aparameter. If you do not want to edit the value,press Esc to return to the parameter number.orPROGRAMFAULTVOLTSAMPSHERTZ8. Press Enter or Sel to enter program mode toedit the parameter value. The right digit willflash and the Program LED will illuminate if theparameter can be edited.orPROGRAMFAULTVOLTSAMPSHERTZ9. Press the Up Arrow or Down Arrow to changethe parameter value. If desired, press Sel tomove from digit to digit or bit to bit. The digit orbit that you can change will flash.or10. Press Esc to cancel a change. The digit willstop flashing, the previous value is restored andthe Program LED will turn off.OrPress Enter to save a change. The digit will stopflashing and the Program LED will turn off.VOLTSAMPSHERTZPROGRAMFAULT11. Press Esc to return to the parameter list.Continue to press Esc to back out of theprogramming menu.If pressing Esc does not change the display,then d001 [Output Frequency] is displayed.Press Enter or Sel to enter the group menu.PROGRAMFAULTVOLTSAMPSHERTZ
See the PowerFlex 4 User <strong>Manual</strong> on CD for more information on parameters.English-9Display <strong>Group</strong> ParametersNo. Parameter Min/Max Display/Optionsd001 [Output Freq] 0.0/[Maximum Freq] 0.1 Hzd002 [Commanded Freq] 0.0/[Maximum Freq] 0.1 Hzd003 [Output Current] 0.00/(Drive Amps × 2) 0.01 Ampsd004 [Output Voltage] 0/Drive Rated Volts 1 VACd005 [DC Bus Voltage] Based on Drive Rating 1 VDCd006 [Drive Status] 0/1 (1 = Condition True) Bit 3 Bit 2 Bit 1 Bit 0Decelerating Accelerating Forward Runningd007- [Fault x Code] F2/F122 F1d009d010 [Process Display] 0.00/9999 0.01 – 1d012 [Control Source] 0/9 Digit 1 = Speed Command Digit 0 = Start Command(See P038; 9 = “Jog Freq”) (See P036; 9 = “Jog”)d013 [Contrl In Status] 0/1 (1 = Input Present) Bit 3 Bit 2 Bit 1 Bit 0Reserved Stop Input Dir/Run REV Start/Run FWDd014 [Dig In Status] 0/1 (1 = Input Present) Bit 3 Bit 2 Bit 1 Bit 0Reserved Reserved Digital In2 Sel Digital In1 Seld015 [Comm Status] 0/1 (1 = Condition True) Bit 3 Bit 2 Bit 1 Bit 0Fault Occurred RS485 Option Transmitting Receivingd016 [Control SW Ver] 1.00/99.99 0.01d017 [Drive Type] 1001/9999 1d018 [Elapsed Run Time] 0/9999 Hrs 1 = 10 Hrsd019 [Testpoint Data] 0/FFFF 1 Hexd020 [Analog In 0-10V] 0.0/100.0% 0.1%d021 [Analog In 4-20mA] 0.0/100.0% 0.1%d024 [Drive Temp] 0/120 degC 1 degCSmart Start-Up with Basic Program <strong>Group</strong> ParametersThe Program <strong>Group</strong> contains the most commonly used parameters.= Stop drive before changing this parameter.No. Parameter Min/Max Display/Options DefaultP031 [Motor NP Volts] 20/Drive Rated Volts 1 VAC Based on Drive RatingSet to the motor nameplate rated volts.P032 [Motor NP Hertz] 10/240 Hz 1 Hz 60 HzSet to the motor nameplate rated frequency.P033 [Motor OL Current] 0.0/(Drive Rated Amps×2) 0.1 Amps Based on Drive RatingSet to the maximum allowable motor current.P034 [Minimum Freq] 0.0/240.0 Hz 0.1 Hz 0.0 HzSets the lowest frequency the drive will output continuously.P035 [Maximum Freq] 0/240 Hz 1 Hz 60 HzSets the highest frequency the drive will output.P036 [Start Source] 0/5 0 = “Keypad” (1) 3 = “2-W Lvl Sens” 0Sets the control scheme used to start the drive. 1 = “3-Wire”2 = “2-Wire”4 = “2-W Hi Speed”5 = “Comm Port”(1) When active, the Reverse key is also active unless disabled by A095 [Reverse Disable].P037 [Stop Mode] 0/7 0 = “Ramp, CF” (1) 4 = “Ramp” 0Active stop mode for all stop sources [e.g. keypad, 1 = “Coast, CF” (1) 5 = “Coast”run forward (I/O Terminal 02), run reverse (I/O 2 = “DC Brake, CF” (1) 6 = “DC Brake”Terminal 03), RS485 port] except as noted below. 3 = “DCBrkAuto,CF” (1) 7 = “DC BrakeAuto”Important: I/O Terminal 01 is always a coast to stop input except when P036 [Start Source] is set for “3-Wire” control.When in three wire control, I/O Terminal 01 is controlled by P037 [Stop Mode].(1) Stop input also clears active fault.P038 [Speed Reference] 0/5 0 = “Drive Pot”Sets the source of the speed reference to the 1 = “InternalFreq”drive.2 = “0-10V Input”3 = “4-20mA Input”4 = “Preset Freq”5 = “Comm Port”Important: When A051 or A052 [Digital Inx Sel] is set to option 2, 4, 5, 6, 13 or 14, and the digital input is active, A051or A052 will override the speed reference commanded by this parameter. Refer to Chapter 1 of the PowerFlex 4 User<strong>Manual</strong> on CD for details.P039 [Accel Time 1] 0.0/600.0 Secs 0.1 Secs 10.0 SecsSets the rate of accel for all speed increases.P040 [Decel Time 1] 0.1/600.0 Secs 0.1 Secs 10.0 SecsSets the rate of decel for all speed decreases.P041 [Reset To Defalts] 0/1 0 = “Idle State”0Resets all parameter values to factory defaults. 1 = “Reset Defaults”0
English-10See the PowerFlex 4 User <strong>Manual</strong> on CD for more information on parameters.Advanced <strong>Group</strong> ParametersNo. Parameter Min/Max Display/Options DefaultA051A052[Digital In1 Sel]I/O Terminal 05[Digital In2 Sel]I/O Terminal 0640/26 0 = “Not Used”1 = “Acc 2 & Dec 2”2 = “Jog”3 = “Aux Fault”4 = “Preset Freq”5 = “Local”6 = “Comm Port”7 = “Clear Fault”A055 [Relay Out Sel] 0/21 0 = “Ready/Fault”1 = “At Frequency”2 = “MotorRunning”3 = “Reverse”4 = “Motor Overld”5 = “Ramp Reg”8 = “RampStop,CF”9 = “CoastStop,CF”10 = “DCInjStop,CF”11 = “Jog Forward”12 = “Jog Reverse”13 = “10V In Ctrl”14 = “20mA In Ctrl”26 = “Anlg Invert”6 = “Above Freq”7 = “Above Cur”8 = “Above DCVolt”9 = “Retries Exst”10 = “Above Anlg V”20 = “ParamControl”21 = “NonRec Fault”A056 [Relay Out Level] 0.0/9999 0.1 0.0A067 [Accel Time 2] 0.0/600.0 Secs 0.1 Secs 20.0 SecsA068 [Decel Time 2] 0.1/600.0 Secs 0.1 Secs 20.0 SecsA069 [Internal Freq] 0.0/240.0 Hz 0.1 Hz 60.0 HzA070A071A072A073[Preset Freq 0] (1)[Preset Freq 1][Preset Freq 2][Preset Freq 3]0.0/240.0 Hz 0.1 Hz 0.0 Hz5.0 Hz10.0 Hz20.0 Hz(1) To activate [Preset Freq 0] set P038 [Speed Reference] to option 4.Input State of Digital In 1(I/O Terminal 05)Input State of Digital In 2(I/O Terminal 06)Frequency Source Accel / Decel Parameter Used (2)0 0 [Preset Freq 0] [Accel Time 1] / [Decel Time 1]1 0 [Preset Freq 1] [Accel Time 1] / [Decel Time 1]0 1 [Preset Freq 2] [Accel Time 2] / [Decel Time 2]1 1 [Preset Freq 3] [Accel Time 2] / [Decel Time 2](2) When a Digital Input is set to “Accel 2 & Decel 2”, and the input is active, that input overrides the settings in this table.A078 [Jog Frequency] 0.0/[Maximum Freq] 0.1 Hz 10.0 HzA079 [Jog Accel/Decel] 0.1/600.0 Secs 0.1 Secs 10.0 SecsA080 [DC Brake Time] 0.0/90.0 Secs 0.1 Secs 0.0 SecsA081 [DC Brake Level] 0.0/(Drive Amps × 1.8) 0.1 Amps Amps × 0.05A082 [DB Resistor Sel] 0/99 0 = Disabled1 = Normal RA Res2 = NoProtection3-99 = % of Duty CycleA083 [S Curve %] 0/100% 1% 0% (Disabled)A084 [Start Boost] 1/14 Settings in % of base voltage.Only active when A125 [Torque Perf Mode] is 0 = “Custom V/Hz”87 (5 HP Drives)set to 0 “V/Hz”.Variable Torque Constant Torque1 = “30.0, VT” 5 = “0.0, no IR” 10 = “10.0, CT”2 = “35.0, VT” 6 = “0.0” 11 = “12.5, CT”3 = “40.0, VT” 7 = “2.5, CT” 12 = “15.0, CT”4 = “45.0, VT” 8 = “5.0, CT” 13 = “17.5, CT”9 = “7.5, CT” 14 = “20.0, CT”A088 [Maximum Voltage] 20/Rated Volts 1 VAC Rated VoltsA089 [Current Limit] 0.1/(Drive Amps × 1.8) 0.1 Amps Amps × 1.5A090 [Motor OL Select] 0/2 0 = “No Derate” 1 = “Min Derate” 02 = “Max Derate”A091 [PWM Frequency] 2.0/16.0 kHz 0.1 kHz 4.0 kHzA092 [Auto Rstrt Tries] 0/9 1 0A093 [Auto Rstrt Delay] 0.0/300.0 Secs 0.1 Secs 1.0 SecsA094 [Start At PowerUp] 0/1 0 = “Disabled” 1 = “Enabled” 0A095 [Reverse Disable] 0/1 0 = “Rev Enabled” 1 = “Rev Disabled” 0A096 [Flying Start En] 0/1 0 = “Disabled” 1 = “Enabled” 0A097 [Compensation] 0/3 0 = “Disabled”2 = “Mechanical” 11 = “Electrical”3 = “Both”A098 [SW Current Trip] 0.0/(Drive Amps × 2) 0.1 Amps 0.0 (Disabled)A099 [Process Factor] 0.1/999.9 0.1 30.0A100 [Fault Clear] 0/2 0 = “Ready/Idle” 1 = “Reset Fault”2 = “Clear Buffer”0A101 [Program Lock] 0/1 0 = “Unlocked” 1 = “Locked” 000
See the PowerFlex 4 User <strong>Manual</strong> on CD for more information on parameters.English-11No. Parameter Min/Max Display/Options DefaultA102 [Testpoint Sel] 0/FFFF 1 Hex 400A103 [Comm Data Rate] (3) 0/5 0 = “1200”3 = “9600”31 = “2400”2 = “4800”4 = “19.2K”5 = “38.4K”A104 [Comm Node Addr] (3) 1/247 1 100A105 [Comm Loss Action] 0/3 0 = “Fault”2 = “Stop”01 = “Coast to Stop” 3 = “Continu Last”A106 [Comm Loss Time] 0.1/60.0 0.1 5.0A107 [Comm Format] (3) 0/5 0 = “RTU 8-N-1”1 = “RTU 8-E-1”2 = “RTU 8-O-1”3 = “RTU 8-N-2”4 = “RTU 8-E-2”5 = “RTU 8-O-2”A110 [Anlg In 0-10V Lo] 0.0/100.0% 0.1% 0.0%A111 [Anlg In 0-10V Hi] 0.0/100.0% 0.1% 100.0%A112 [Anlg In4-20mA Lo] 0.0/100.0% 0.1% 0.0%A113 [Anlg In4-20mA Hi] 0.0/100.0% 0.1% 100.0%A114 [Slip Hertz @ FLA] 0.0/10.0 Hz 0.1 Hz 2.0 HzA115 [Process Time Lo] 0.00/99.99 0.01 0.00A116 [Process Time Hi] 0.00/99.99 0.01 0.00(3) Power to drive must be cycled before any changes will affect drive operation.Fault CodesTo clear a fault, press the Stop key, cycle power or set A100 [Fault Clear] to 1 or 2.No. Fault DescriptionF2 Auxiliary Input (1) Check remote wiring.F3 Power Loss Monitor the incoming AC line for low voltage or line power interruption.F4 UnderVoltage (1) Monitor the incoming AC line for low voltage or line power interruption.F5 OverVoltage (1) Monitor the AC line for high line voltage or transient conditions. Bus overvoltage can also becaused by motor regeneration. Extend the decel time or install dynamic brake option.F6 Motor Stalled (1) Increase [Accel Time x] or reduce load so drive output current does not exceed the current setby parameter A089 [Current Limit].F7 Motor Overload (1) An excessive motor load exists. Reduce load so drive output current does not exceed thecurrent set by parameter P033 [Motor OL Current].F8 Heatsink OvrTmp (1) Check for blocked or dirty heat sink fins. Verify that ambient temperature has not exceeded40°C (104°F) for IP 30/NEMA 1/UL Type 1 installations or 50°C (122°F) for Open type installations.Check fan.F12 HW OverCurrent (1) Check programming. Check for excess load, improper DC boost setting, DC brake volts set toohigh or other causes of excess current.F13 Ground Fault Check the motor and external wiring to the drive output terminals for a grounded condition.F33 Auto Rstrt Tries Correct the cause of the fault and manually clear.F38 Phase U to Gnd Check the wiring between the drive and motor. Check motor for grounded phase.F39 Phase V to Gnd Replace drive if fault cannot be cleared.F40 Phase W to GndF41 Phase UV Short Check the motor and drive output terminal wiring for a shorted condition.F42 Phase UW Short Replace drive if fault cannot be cleared.F43 Phase VW ShortF48 Params Defaulted The drive was commanded to write default values to EEPROM. Clear the fault or cycle power tothe drive. Program the drive parameters as needed.F63 SW OverCurrent (1) Check load requirements and A098 [SW Current Trip] setting.F64 Drive Overload Reduce load or extend Accel Time.F70 Power Unit Cycle power. Replace drive if fault cannot be cleared.F81 Comm Loss If adapter was not intentionally disconnected, check wiring to the port. Replace wiring, portexpander, adapters or complete drive as required. Check connection. An adapter wasintentionally disconnected. Turn off using A105 [Comm Loss Action].F100 Parameter Checksum Restore factory defaults.F122 I/O Board Fail Cycle power. Replace drive if fault cannot be cleared.(1) Auto-Reset/Run type fault. Configure with parameters A092 and A093.0
<strong>Tower</strong> <strong>Dryer</strong> Ops & ServiceCOMPONENTSIICOMPONENT MANUALSMAXON BURNER
mCORPORATION 201 East 18th Street, P.O. Box 2068, Muncie, Indiana, 47307-0068. Phone: (765) 284-3304. Fax (765) 286-8394Bulletin 5550Series NP-LE AIRFLO ® Burners• Designed for direct-fired make-up air and process applications• Improved emissions performance over Maxon's standard NP AIRFLO ® Burner, withsignificantly lower levels of CO and NO 2• Higher capacity - up to 1,000,000 Btu/hr/ft• Shorter flame length• Easily meets ANSI/CSA standards• Available in low pressure version and corrosion-resistant materials
Page 5552Design and Application DetailsSpecificationsInputRatingAirstream Profile Differential PressurePilotCapacityBurnerTurndown30: 1Maximum Upstream TemperatureMaximum Downstream TemperatureMaximum Temperature RiseMinimum Upstream OxygenBurner BodiesBurner Section ConfigurationsMixing PlatesAssembly Material AvailabilityUp to 1,000,000 Btu/hr/ft0.3 to 1.0 "wc25,000 Btu/hr @ 4"-6" wc600°F cast iron; 450°F aluminum1000°F cast iron; 850°F aluminum760° F18%O2NP1-LE Cast iron and aluminumNP2-LE Cast iron6" Straight12" Straight12" Straight with Back Inlet6" x 12" Tee6" x 6" Elbow (cast iron only)36" Back Inlet (12" x 12" H-configuration)430 Stainless SteelNP1-LE:- Standard- AL-- ALSS-Cast Iron Body, Cast Iron End PlatesAluminum Body, Cast Iron End Plates-Aluminum Body & Back-up Bars, Nickle Plated End Plates, Stainless SteelFastenersAccessoriesNP2-LE:- Standard-Spark IgnitorCast Iron Body, Cast Iron End PlatesUV Flame Scanner ConnectionFlame RodAdjustable Pilot OrificeDivision PlateExternal Mounting AssembliesNO2 ppm (as measured)NO 2Emissions ProfileNominal ConditionsNP1-LE NO 2 vs. Temperature Rise0.700.60Natural Gas0.50Propane0.400.300.200.100.000 20 40 60 80 100 120 140 160 180 200Temperature Rise (F)CO ppm (as measured)5.04.54.03.53.02.52.01.51.00.5CO Emissions ProfileNominal Conditions NP1-LECO vs. Temperature Rise0.00 20 40 60 80 100 120 140 160 180 200Temperature Rise (F)NaturalGasPropane
Typical Applications for Maxon Series NP-LEAIRFLO ® BurnersPage 5553Packaged Make-up Air Systemswith 100% Outside AirNP-LE AIRFLO® BurnerPackaged Make-up Air Systemswith Partially Recirculated AirNP-LE AIRFLO® BurnerFanFanFreshAirFreshAirSupplyAirSupplyAirReturnAirSingle-stage Burner Heated Paint SprayBooths with Re-heat OptionHumidity Controlled, 2-stage BurnerHeated Paint Spray BoothsAir IntakeAir IntakePreheatNP-LE AIRFLO® BurnerReheatNP-LE AIRFLO® Burner(If Required)StagedNP-LE AIRFLO® BurnerFanFanBagFiltersHumidifierSupplyAirBagFiltersHumidifierSupplyAirDrying, Baking & Curing OperationsGrain <strong>Dryer</strong>sFilterFanNP-LE AIRFLO® BurnerFreshAirHeatedAirHot AirChamberGrain BinNP-LEAIRFLO® BurnerFilterNP-LE AIRFLO® BurnerFreshAirFanHeatedAirCoolingChamberFanIntakeAir
Page 5554Design and Application DetailsSystem components normally used in conjunction with a Maxon NP-LEAIRFLO ® Burner applicationIntake LouversProfile PlateNP-LE AIRFLO® Burner12Duct Walls4310Block & Bleed Main Gas TrainPilot Gas Train5 6789MainVolumeFanLegend:ItemDescriptionNumber1 Outside thermostat2 Intake high temperature limit switch3 Control valve4 Vent valve5 Strainer6 Drip leg7 Differential air switch8 High temperature switch9 Discharge air thermostat10Sequencing Control PanelmCORPORATION 201 East 18th Street, P.O. Box 2068, Muncie, Indiana, 47307-0068. Phone: (765) 284-3304. Fax (765) 286-83941/01
Series NP-LE AIRFLO ® BurnersPage 5550-S-1Installation InstructionsGeneralImportant: Do not discard packing material untilall loose items are accounted for.Avoid bending or damaging the steel mixing platesof your Series NP-LE AIRFLO ® Burner duringuncrating and installation.These burners are usedfor the heating of fresh airin motion. Mount theburners so they fire parallelto and in the same directionas the movement ofthe air (see sketch 1 atright).Velocity and flow of airat operating temperaturemust be uniform. Minimumsilhouette profile plates of6" should be installed induct to completely surround burner assembly.SupportsSeries NP-LE AIRFLO ® Burner assemblies must beadequately supported and positioned.Avoid rigid mounting. Burner assembly expandsand contracts with temperature variations.Maintain smooth, even air flow over the burner bydesigning supports to provide minimum interference,deflection and turbulence.The sketches below show typical installation andsupport methods:Strap IronFrameMaxonSupportBracketsAirMovementBolt or RodLong enough to permitbrackets to move withburner expansionAllow Spacefor BurnerExpansionAirMovement2 3Strap IronFrameAngle IronSupportSketch 2 shows the burner suspended from a strapiron frame using Maxon USB support brackets. Notethat rigid mounting is avoided by the bracket holewhich slips loosely over a bolt or steel rod attached tothe support. Gas piping would need independentsupport.Sketch 3 shows the burner assembly resting uponangle iron brackets and not attached to them in anyway. Be sure the angle iron supports allow the burnerflanges to expand and contract. Gas manifoldingwould be independently supported and preventforward movement of the burner.Sketch 4 shows simple strap iron used to supportthe burner. Note that narrow edge of strap faces airflow to avoid undue turbulence.Sketch 5 shows gas manifolding used to supportthe burner. If there aremultiple inlets, you mustavoid rigid connection byAngleIronusing the oversize U-boltSupport(loosely drawn up) illustrated.Support for down-firedRodburners can be accomplishedas shown in the illustration atright. Always avoid rigid3/4"Holemounting.Sketch 6 shows MaxonAirUSB support bracketsMovementsuspending the burner froman overhead angle iron.Sketch 7 shows an alternatearrangement which6offers the advantage of morecontrolled positioning.SupportBracketsAirMovement6/03Maxon practices a policy of continuous product improvement. It reserves the right to alter specifications without prior notice.INDUSTRIAL COMBUSTION EQUIPMENT AND VALVESmCORPORATIONMUNCIE, INDIANA, USA
Page 5550-S-2 Series NP-LE AIRFLO ® BurnersInstallation Instructions (cont'd.)Gas TrainSee piping layout below to identify various typicalsystem components.Pipe size of gas line must be large enough toassure ample fuel pressure at maximum systemcapacity. Burner capacity is totally dependent on fueldifferential being maintained. (See capacity/specificationdata for the actual fuel pressure required at theburner to achieve its rated capacity.)Clean fuel lines are essential to prevent blockageof pipe train components or burner gas ports. All dirt,scale and pipe dope should be blown out of any gasline before actually connecting to the burner system.Main shut-off cock should be upstream of bothsystem regulator and pilot line take-off. Use it to shutoff fuel to both pilot and main burner during extendedshutdown periods. Maxon Control Valves are notintended for tight shutoff. Main system shut-off shouldalways be accomplished with a manual fuel cock.Main gas regulator is essential to maintain auniform system supply pressure. A separate regulatorshould be provided in the branch leading to eachburner system if more than one is served by a commonmain. Size regulator for full system capacity atrequired pressure, including pipe train losses.The gas train piping illustrated should be installedas close to the burner as possible.Pilot take-off should be upsteam of main gasregulator, but downstream of main gas cock. Itnormally includes pilot shut-off cock, pilot gas regula-tor and pilot solenoid valves. For pilot adjustment, afixed orifice, or adjustable orifice is recommended at ornear the pilot gas inlet.Fuel shut-off valves, when properly wired to asafety control system, shuts the fuel supply off when ahazardous operating condition is sensed by yourcontrol circuit. <strong>Manual</strong> reset valves require operatorattendence each time the system is started up (orrestarted after a trip-out). Motorized shut-off valvespermit automatic start/restart when used with appropriatecontrol system.Fuel control valve controls burner heat release bythrottling gas flow to it. It should include provision foran adjustable minimum and throttling over a turndownrange that matches burner capabilities. The illustrationshows a Series "CV" Flow Control Valve; butadjustable gradient SYNCHRO ® and/or "Q" FlowControl Valves may be used.Gas pressure test connections are provided inmost Series NP-LE Burner end plate sets, but it isalso helpful to provide an additional test connection inthe piping between main gas regulator and fuelcontrol valve. All connections must be plugged unlessan actual pressure measuring device (gauge ormanometer) is being used.Maxon assumes no responsibility for the useor misuse of the piping layouts shown.Specific piping and wiring diagrams shouldalways be submitted to the appropriateagencies for approval on each application.Strap IronFrameTypical Piloted SystemAirMovement7SupportBracketsAirMovementmCORPORATIONMUNCIE, INDIANA, USAINDUSTRIAL COMBUSTION EQUIPMENT AND VALVESMaxon practices a policy of continuous product improvement. It reserves the right to alter specifications without prior notice.
Series NP-LE AIRFLO ® BurnersPage 5550-S-3Start-Up InstructionsRead complete instructions before proceeding, andfamiliarize yourself with all the system's equipmentcomponents. Verify that your equipment has beeninstalled in accordance with the original manufacturer'scurrent instructions.CAUTION: Initial adjustment and light-off shouldbe undertaken only by trained and experiencedpersonnel familiar with combustion systems,with control/safety circuitry and with knowledgeof the overall installation. Instructions providedby the company and/or individuals responsiblefor the manufacture and/or overall installation ofcomplete system incorporating Maxon burnerstake precedence over these provided by Maxon.If Maxon instructions conflict with any codes orregulations, contact Maxon Corporation beforeattempting start-up.For initial system start-up:1. Close all burner fuel valves and/or cocks. Makepreliminary adjustments to fuel regulators.2. Check all electric circuitry. Verify that all safetydevices and interlocks are operable and functioningwithin their respective settings/ranges.Be sure all manifolds are tight and that test portsare plugged if not being used.3. Check that all duct and chamber dampers areproperly positioned and locked into operatingpositions.4. Start main volume air fan. Check for propermotor rotation and impeller direction. Verify allsafety interlocks are working. Allow air handlingequipment to run adequate purge of manifoldand combustion chamber plenums. Verify airvolume and velocity across burner element to bewithin burner operating specifications.CAUTION: Do not by-pass control panel timerstypically controlling sequential operations.5. Disconnect the automatic control motor linkagefrom your Maxon Control Valve by loosening thecontrol motor's connecting rod from the valve'stoggle linkage. Initial start-up adjustment shouldonly be accomplished during a "manual" controlmode. <strong>Manual</strong>ly set and secure control valve inits "minimum" position.6. To light and adjust gas pilot: Pilot gas regulatorshould initially be set at 2-5” wc. With pilot gassolenoid valves closed, open main fuel gas andpilot gas cock. Energize spark ignitor and openpilot gas solenoid. Turn adjustable orifice screwout (counter-clockwise) several turns from itsfully seated position or adjust regulator pressurewhen fixed orifice is used. Observe pilot ignitionthrough a sight port and/or by viewing micro-ampsignal metered from flame safeguard relay circuit.Refine pilot setting for a hard blue flame (and/orstrongest micro-amp signal) by adjusting gasflow through pilot orifice and/or pilot regulator.7. Prepare to ignite main burner by adjusting maingas regulator to approximately midpoint of itsadjustment range. Linkage arrangement for theuse of Series "CV" Gas Control Valve is illustratedabove for a typical control motor. Arrangeaccordingly.8. With control valve at "minimum," ignite mainburner by opening main fuel shut-off valves.Adjust main gas regulator to give the desiredoutlet pressure. Refine pilot adjustment if it hasbeen affected. Adjust burner "minimum" byturning in on the minimum stop screw of the gascontrol valve until stable flame appears in thenarrow zipper channel at the base of burnermixing plates.6/03Maxon practices a policy of continuous product improvement. It reserves the right to alter specifications without prior notice.INDUSTRIAL COMBUSTION EQUIPMENT AND VALVESmCORPORATIONMUNCIE, INDIANA, USA
Page 5550-S-4Series NP-LE AIRFLO ® BurnersStart-Up Instructions (cont'd.)A good minimum fire should provide uniformflame across the entire burner face, containedwithin the zipper flame channel at the base ofburner mixing plates. Any thin spots or gapsindicate uneven air velocity over the burnerwhich must be corrected or a higher minimumfire established by continuing to turn in on theminimum stop screw. (See drawing on page5550-S-2.)NOTE: If your Maxon NP-LE AIRFLO ® Burnerwas furnished with an adjustable gradient typeSeries "Q" or SYNCHRO ® Control Valveinstead of a Series "CV" Valve, refer to step8A through 8I for specific instructions anddifferences in adjustment procedures.For Series “CV” Valves, skip to step 9.Adj. Screws(under cover)Handle for<strong>Manual</strong>OperationPositionIndicatorPointerLocking Screwfor manualoperationA. From step #5, the automatic control motorlinkage has already been disconnected fromyour adjustable gradient type control valveand the valve is at its "minimum" position.B. Open fuel supply and begin adjustment ofappropriate adjustable gradient valve byturning in minimum (or lowest numbered)screw until desired flame is achieved. (Mainfuel regulator may need adjusted at thispoint.)C. Once your flame is established and refinedat this position, and without advancing thescrew carrier quadrant higher, screw allremaining screws down to at least the samelevel as your first adjusted screw.NOTE: A preliminary setting can be establishedwith all the remaining adjustingscrews. Generally, each succeeding screwneeds to be screwed in approximately onefull turn deeper than its preceeding screw. Asmooth "stair-step" gradient pre-set at thispoint from low to high will simplify theremaining adjustment steps.D. Without advancing the SYNCHRO ® Valvequadrant, screw down on #2 screw (one ortwo turns). Then slowly advance theSYNCHRO ® Valve quadrant to the #2position. Refine flame appearance at thisnew position #2.E. Turn all higher-numbered screws in at leastas far as the one just adjusted, then turnnext one in as necessary to achieve desiredflame while rotating valve mechanism to thatposition on indicator strip.F. Repeat for each remaining screw.NOTE: To avoid possible damage to camstrips, always turn all higher-numberedscrews in as far as the last one adjusted.G. Refine adjustment as needed, alwaysturning valve so that position indicatormatches screw being adjusted.For more fuel, turn screw in (clockwise). forless fuel, turn screw out (counter-clockwise).If screws must be turned in flush with carriercasting, increase fuel pressure and readjustby starting at minimum over again.H. Cycle system off and on, and through allfiring rates until satisfied with performance.I. Reconnect control motor linkage and checkthat operator does not "bind" and that allinterlocks are performing properly.9. Adjust burner "high fire" by slowly rotating fuelcontrol valve crank arm towards its maximum.Observe flame characteristics carefully. Flameshould remain a bright blue color with a lengthbeyond the mixing plates as indicated in capacity/specificationdata. If flame becomes long andyellow, gas pressure is too high and/or airvelocity is too low.NOTE: Dust and/or chemicals entrained intopassing air stream may effect physical color offlame. In this case, adjust burner for stable flameshape and geometry.To measure gas pressure, connect watercolumn (manometer) to the test connection inburner's end plate. To determine air velocity, usea velometer at the profile opening. Correctvelocities by increasing or decreasing profileopening size.If flame is too short, gas pressure may be toolow and should be increased or velocities aretoo high and may need to be decreased. Notethat air velocities should be measured onlywhen the fan is handling air at the desiredcontrol temperature.mCORPORATIONMUNCIE, INDIANA, USAINDUSTRIAL COMBUSTION EQUIPMENT AND VALVESMaxon practices a policy of continuous product improvement. It reserves the right to alter specifications without prior notice.
Series NP-LE AIRFLO ® BurnersPage 5550-S-5Start-Up Instructions (cont'd.)The desired maximum capacity may beachieved with less than full control valve opening.Mark with a pencil or scribe the point onvalve crank arm where the desired maximum isobtained, then return crank arm to low positionand shut system off.10. If using Maxon Series “CV” Valve, reconnectcontrol motor linkage (with control motor in lowor minimum position) by loosening toggle clampscrew 1 and moving toggle clamp 2 along theconnecting linkage to a point where toggleclamp bolt 3 can be placed at the outermostposition of control motor crank slot. Then tightentoggle clamp screw 1, thus fixing clamp tolinkage.Allowing toggle clamp bolt 3 to slide in the crankarm slot, cycle control motor towards its maximumposition and move fuel control valve crank4 to the previously-determined maximum firingrate position. Tighten toggle clamp bolt 3, thusfixing clamp to motor crank.Cycle control motor back to minimum, watchingcarefully that it does not bind before reachingminimum.If it is stopped or if minimum is not reached,loosen toggle clamp screw 1 and move toggleclamp along the connecting linkage so bothmotor and valve can assume their minimumpositions. Then retighten toggle clamp screw 1.Refine adjustment by cycling several timesbetween low and high control motor positionwhile readjusting toggle clamp bolt 3 as necessaryuntil control motor travels through its fullcycle while moving control valve crank arm fromits minimum only up to the desired maximumpreviously determined.11. Relight burner and cycle control system fromlow to high fire several times to observe performance.Refine adjustments of pilot and mainburner minimum if necessary.Warning: Test every UV Flame SensorSystem for dangerous spark excitation fromignitors and other burners, as well as otherpossible sources of direct or reflected UVradiation.12. Check carefully that all interlocks and limits arein full operating condition. Before system isplaced into full service, instruct operator personnelon proper start-up, operation and shut-downof system. Establish written instructions forreference.1/01Maxon practices a policy of continuous product improvement. It reserves the right to alter specifications without prior notice.INDUSTRIAL COMBUSTION EQUIPMENT AND VALVESmCORPORATIONMUNCIE, INDIANA, USA
Page 5550-S-6Series NP-LE AIRFLO ® BurnersMaintenance and Component Identification/Spare PartsNP-1-LE64823910515see7 notebelowseenotebelowseenotebelow711171To order replacement parts:1. See burner nameplate and indicate burner type.2. Sketch burner arrangement (as viewed from casting side).3. Specify replacement items required from diagrams above.4. Specify quantity of each and assembly numbers from table below:ItemNo.16" Str.105037312" Str.1050376QuantityRequired for Indicated Section18" Str.1050373+105037624" Str.105037612" x 6"Tee10503876" x 6"Elbow105038912"B.I.105038536"B.I.1050390Asby. No.Part DescriptionBurner Body2 2 4 6 8 2 2 4 4 1049073Mixing Plate3 2 1 4 1052004Mixing Plate: Inside Corner4 1 1049075Mixing Plate: Wedge5 2 4 6 8 4 18049Back Up Bar6 2 2 2 4 1 2 2 4 1049071Gasket/Shim (Metal)7 4 202448182020481051567M5 K-Nut Plated8 1212246 1212241051583M5 x 10 ISO 4017 Plated Hex Bolt9 4 8 1216128 8 241051570M5 x 45 ISO 4017 Plated Hex Bolt102 2 4 1050679Outside Corner Back Up Bar114 2 8 1050672Inside Corner Back Up BarNOTE: These items included with fastener kits. See pages 5567 & 5568 for fastener kit details.mCORPORATIONMUNCIE, INDIANA, USAINDUSTRIAL COMBUSTION EQUIPMENT AND VALVESMaxon practices a policy of continuous product improvement. It reserves the right to alter specifications without prior notice.
Series NP-LE AIRFLO ® BurnersPage 5550-S-7Maintenance and Component Identification/Spare PartsNP-1-LE-AL64823910515see7 notebelowseenotebelowseenotebelow711171To order replacement parts:1. See burner nameplate and indicate burner type.2. Sketch burner arrangement (as viewed from casting side).3. Specify replacement items required from diagrams above.4. Specify quantity of each and assembly numbers from table below:ItemNo.16" Str.1050375QuantityRequired for Indicated Section12" Str.105038412" x 6"Tee10503886" x 6"Elbow---12"B.I.105038636"B.I.1050391Asby. No.Burner Body2 2 4 2 4 4 1049073Mixing PlatePart Description3 2 4 1052004Mixing Plate: Inside Corner4 1049075Mixing Plate: Wedge5 2 4 4 18049Back Up Bar6 2 2 1 2 4 1049071Gasket/Shim (Metal)7 4 201820481051567M5 K-Nut Plated8 126 12241051583M5 x 10 ISO 4017 Plated Hex Bolt9 4 8 128 241051570M5 x 45 ISO 4017 Plated Hex Bolt102 4 1050679Outside Corner Back Up Bar114 8 1050672Inside Corner Back Up BarNOTE: These items included with fastener kits. See pages 5567 & 5568 for fastener kit details.1/01Maxon practices a policy of continuous product improvement. It reserves the right to alter specifications without prior notice.INDUSTRIAL COMBUSTION EQUIPMENT AND VALVESmCORPORATIONMUNCIE, INDIANA, USA
Page 5550-S-8Series NP-LE AIRFLO ® BurnersMaintenance and Component Identification/Spare PartsNP-1-LE-AL-SS6482931051127seenotebelowseenotebelowseenotebelow711171To order replacement parts:1. See burner nameplate and indicate burner type.2. Sketch burner arrangement (as viewed from casting side).3. Specify replacement items required from diagrams above.4. Specify quantity of each and assembly numbers from table below:ItemNo.16" Str.1050375Quantity Required for Indicated Section12" Str.105038412" x 6"Tee10503886" x 6"Elbow105038912"B.I.105038636"B.I.1050391Asby. No.Burner Body2 2 4 2 4 4 1049073Mixing PlatePart Description3 2 4 1052004Mixing Plate: Inside Corner4 1049075Mixing Plate: Wedge5 2 4 4 45613Back Up Bar (Aluminum)6 2 2 1 2 4 1049071Gasket/Shim (Metal)7 4 201820481051566M5 Nut Stainless Steel8 126 122454619M5 x 10 ISO 4017 Hex Head Screw (Stainless Steel)9 4 8 128 241051569M5 x 45 Hex Head Screw Class A (Stainless Steel)102 4 1050680Outside Corner Back Up Bar (Aluminum)114 8 1050673Inside Corner Back Up Bar (Aluminum)124 201820481051853M5 Stainless Steel LockwasherNOTE: These items included with fastener kits. See pages 5567 & 5568 for fastener kit details.mCORPORATIONMUNCIE, INDIANA, USAINDUSTRIAL COMBUSTION EQUIPMENT AND VALVESMaxon practices a policy of continuous product improvement. It reserves the right to alter specifications without prior notice.
Series NP-LE AIRFLO ® BurnersPage 5550-S-9Maintenance and Component Identification/Spare PartsNP-2-LE64823910515see7 notebelowseenotebelowseenotebelow711171To order replacement parts:1. See burner nameplate and indicate burner type.2. Sketch burner arrangement (as viewed from casting side).3. Specify replacement items required from diagrams above.4. Specify quantity of each and assembly numbers from table below:ItemNo.16" Str.105163412" Str.1051636QuantityRequired for Indicated Section18" Str.1051634+105163624" Str.1051636(qty. 2)12" x 6"Tee10516406" x 6"Elbow105164412"B.I.105163836"B.I.1051642Asby. No.Part DescriptionBurner Body2 2 4 6 8 2 2 4 4 1049073Mixing Plate3 2 1 4 1052004Mixing Plate: Inside Corner4 1 1049075Mixing Plate: Wedge5 2 4 6 8 4 18049Back Up Bar6 2 2 2 4 1 2 2 4 1049071Gasket/Shim (Metal)7 4 202440182020481051567M5 K-Nut Plated8 1212246 1212241051583M5 x 10 ISO 4017 Plated Hex Bolt9 4 8 1216128 8 241051570M5 x 45 ISO 4017 Plated Hex Bolt102 2 4 1050679Outside Corner Back Up Bar114 2 8 1050672Inside Corner Back Up BarNOTE: These items included with fastener kits. See pages 5567 & 5568 for fastener kit details.9/03Maxon practices a policy of continuous product improvement. It reserves the right to alter specifications without prior notice.INDUSTRIAL COMBUSTION EQUIPMENT AND VALVESmCORPORATIONMUNCIE, INDIANA, USA
Page 5550-S-10Series NP-LE AIRFLO ® BurnersMaintenance and Component Identification/Spare PartsFastener KitsEnd Plate Fastener KitBody to Body Fastener KitEnd PlateGasketShimGasketM5 x 20Hex Head ScrewM5 Lock Washer(SS only)M5 K-NutShimGasketM5 x 10Hex Head ScrewM5 NutM5 Lock Washer(SS only)M10 x 1.5Hex NutM10 x 1.5Hex NutM10 Lock WasherBody GasketBody GasketM10 x 40Hex Head ScrewM10 Lock WasherBody GasketReplacement ItemsNP1LEAssembly NumbersNP1LEALNP1LEALSSNP2LEFlangeto Flange Fastener Kit (includes gaskets)1051879105187910518801051879EndPlate to Flange Fastener Kit (includes gaskets) 1051881105188110518821051881BodyGasket1050424105042410504241050424MetalShim Gasket1049071104907110490711049071MetalEnd Plate Gasket1050423105042310504231050423LT Plain End Plate to Flange Gasket Kit10578961057896N/A 1057896LT Pilot End Plate to Flange Gasket Kit10578931057893N/A 1057893LT - Metal End Plate Gasket - Pilot10566031056603N/A 1056603LT - Metal End Plate Gasket - Plain10566041056604N/A 1056604mCORPORATIONMUNCIE, INDIANA, USAINDUSTRIAL COMBUSTION EQUIPMENT AND VALVESMaxon practices a policy of continuous product improvement. It reserves the right to alter specifications without prior notice.
Series NP-LE AIRFLO ® BurnersPage 5550-S-11Maintenance InstructionsPeriodic maintenance will insure continued troublefreeoperation of your Series NP-LE AIRFLO ® Burnersystem.At least a yearly inspection is recommended formake-up air heating installations and more frequentlyfor process applications in year-round operation. Yourown experience is the best guide in determiningfrequency of inspection. As a minimum, the followingprocedure should be followed:1. Shut the system down totally. Disconnect or lockout power supply so there can be no accidentalstart-up during inspection.2. Inspect the burners carefully, including upstreamand downstream sides of mixing plates as well asburner body face. Any accumulation of scale orforeign material on either side of the mixing platesshould be removed with a wire brush. Checkvisually that no holes in the mixing plates areblocked. See next page (5550-S-12) for inspectionand maintenance instructions for gas ports.WARNING: Do not enlarge burner ports orperformance may be drastically affected.If any mixing plates are loose or missing fasteners,tighten/replace as necessary. Always use zinc platedor stainless metric fasteners.3. Put system back into operation and, if possible,view from downstream side while cycling burnerthrough full firing range. This will give a visualcheck for blocked burner ports.4. Observe flame pattern and, if necessary, takesteps to correct velocity and/ or air distributionproblems.Repair / Replacement ProceduresIf adverse operating conditions or accidentaldamage make it necessary to replace either individualmixing plates or complete burner sections, follow thisprocedure:1. Identify necessary replacement parts fromcomponent identification drawings on precedingpages, then order required quantities of each.Consider carefully the economics of installing acomplete replacement burner instead of replacingindividual parts. Once exposed to actual flametemperatures, burner castings harden and theremoval and replacing of fasteners can be timeconsuming and difficult. Accessibility may also beseverely limited requiring removal of completeassembly in any case.2. When necessary parts have been received,remove damaged mixing plates or burner sections,taking care not to damage remainingportion of burner. If new burner bodies are beinginstalled, place body gasket on the matingflanges of loose cast iron bodies. (This is necessaryto provide a gas-tight seal after assembly.)Insert new section into place, making sure thatboth flanges are square and flush, then boltsections together.3. Install new mixing plates, back up bars and platesupport brackets to the new body castings.4. If end plate sets must be installed, put in positionbetween mixing plates and insert fastenersloosely. Do not tighten at this time.5. Tighten burner body bolts making sure thatmating cast iron flanges remain square and flush.6. Align mixing plates and check that body gasketsare in position and properly aligned. Tighten allmixing plate mounting screws and bolts.7. Double check that all fasteners are secure.8. Return burner to operation, observing flamecarefully at all firing rates.1/01Maxon practices a policy of continuous product improvement. It reserves the right to alter specifications without prior notice.INDUSTRIAL COMBUSTION EQUIPMENT AND VALVESmCORPORATIONMUNCIE, INDIANA, USA
Page 5550-S-12Series NP-LE AIRFLO ® BurnersInspection and Maintenance of Gas Ports– Conduct initial inspection within the first monthafter commissioning. Visually check the gas portsof new burner assemblies for any piping scale ordebris. Use Pin Vise with drill bit to remove.– Annual inspections are normally adequate oncethe initial piping debris is removed. The operatingconditions of the burner will determine howfrequently maintenance is actually required.– Use of an electric drill motor is not suggestedunless both Pin Vise and Drill (as shown below)can be chucked up in a vari-speed drill unit. Usecaution, because it is easy to snap the bits off in aport when using a drill motor. Removal of brokenbits from the gas ports is difficult.– Contact your Maxon representative to answerquestions or address any problems.Pin ViseNP-LE AIRFLO®Burner Body(Mixing Plates Not Shown)1 inchGas PortsAll are #43 Drill Size(Exception is several #47holes at the intersection of12x6 tee's and 36 BI's)#47HolesHere#43Holes36" BI Sections 12" x 6"Tee SectionsAll Straight Sections6", 12", 18" & 24"mCORPORATIONMUNCIE, INDIANA, USAINDUSTRIAL COMBUSTION EQUIPMENT AND VALVESMaxon practices a policy of continuous product improvement. It reserves the right to alter specifications without prior notice.
<strong>Tower</strong> <strong>Dryer</strong> Ops & ServiceCOMPONENTSIIICOMPONENT MANUALSGAS CONTROL VALVE
Page 7002Flow Control ValvesSeries “Q” Gas Control Valves provide the highcapacity and low pressure drop benefits of a butterflyvalve construction, plus an adjustable gradient featurefor accurate fuel flow control.They are used independently for throttling of fuelgases and with PREMIX ® Blower Mixers andAIRFLO ® Mixers for stand-by fuel systems, wherethey allow change-over to alternate fuels without readjustment.Series “Q” Valves are UL (UnderwritersLaboratories) listed for use with air, natural gas andliquefied petroleum gases.3" Series “Q” ValveSeries “CV” Control Valves incorporate a fullflow,fixed gradient butterfly valve design for highcapacities at low pressure drops, using minimumoperating torque.This economical assembly includes a minimumstop screw and can be supplied with connecting baseand linkage assembly to mount your electric controloperator.Versions available with UL (UnderwritersLaboratories) listing for air, natural gas and liquefiedpetroleum gas service.Series “BV” Balancing Valves are used tobalance gas or air flows in multiple-burner systemsfed by a common manifold. They feature a full-flowbutterfly design with provision for locking in anyposition.2" Series “CV” Valve withoptional connecting baseand linkage assembly2-1/2" Series“BV” ValveAir Control Valves permit throttling control of air toburners. They feature a fixed gradient butterfly valvedesign with an adjustable minimum stop, frictionbrake screw and provision for manual or automaticoperation. Air control valves are offered in 1-1/2"through 18" pipe sizes.A complete system using Maxon Flow ControlValves will typically include burner, gas and/or oil pipetrains, mixing equipment, pressure blower and acontrol panel. Your Maxon representative can helpyou choose from the broad range available.M-6" <strong>Manual</strong> AirControl Valve withoptional Low FireStart Switch11/90CORPORATION 201 East 18th Street, P.O. Box 2068, Muncie, Indiana, 47307-0068. Phone: (765) 284-3304. FAX (765) 286-8394
Flow Control ValvesPage 7000-S-1Installation Instructions– Support weight of piping independently. Do notplace any Maxon Flow Control Valve in a pipingbind. Provide pipe hangers and/or special supportfor related manifolds.– Maxon connecting base and linkage assembliesare designed to locate and/or position thecontrol operator for its interaction with the FlowControl Valve assembly. They are not intended tosupport the weight of the control motor. Specialprovisions will be required to support the weight ofthe control operators.– Use of pipe heavier than schedule #40 cancause interference with butterfly-type Flow ControlValves and restrict the valve from full opening.– Flow Control Valves provide the means toadjust fluid and/or gas flows. They should beinstalled with at least four pipe diameter lengths ofstraight pipe before and after the valve. Thislessens the chance of internal flow turbulence beingset-up in the piping manifolds and control valve.– Check fluid flow direction through “-P” and “-O”poppet-type valves. It must flow only in directionmatching the arrow cast into valve body. If necessary,valve body may be rotated per instructionsgiven on page 7016.– Install flow control valves carefully and maintainadequate dimensional clearance to allow fullstroke and travel of the valve’s control linkage.Internal drive mechanisms within a control motormay be damaged if linkage is restricted as to causebinding in high or low flow position.CAUTION: All Flow Control Valves are designedfor throttling service only and are not intendedfor tight shut-off.– Main system shut-off should always use amanual “leak-tight” upstream fuel cock.Mounting Instructions for motor operator on Series “CV” Flow Control ValvesFor those Series “CV” Valve assemblies furnished withconnecting base and linkage, the accompanying diagramsillustrate mounting procedures relative to each specific typeoperator.First, mount your control motor to connecting base inaccordance with diagrams at right.Secondly, determine if your electric operator travelsthrough 90° or 180° rotations. Then arrange connectinglinkage and motor crank arm as shown below for yourspecific operator.Honeywell#M644, M744,M941 or M944(7616BR Crank)Mount with four short boltsand nuts at indicated holes.Barber-ColmanEA50Crank & Linkage SideMount with three short boltsand nuts at indicated holes.Crank & Linkage Side90° Control Motor 160° – 180° Control MotorPenn/JohnsonM80, M81(MD3-600 Crank)Mount with two short boltsand nuts and long boltscrewed into operator basethrough slotted hole.Crank & Linkage Side11/90Maxon practices a policy of continuous product improvement. It reserves the right to alter specifications without prior notice.INDUSTRIAL COMBUSTION EQUIPMENT AND VALVESmCORPORATIONMUNCIE, INDIANA, USA
Page 7000-S-2Flow Control ValvesAdjusting InstructionsNotice: Only generalized instructions can be providedhere. Detailed adjusting instructions are provided witheach individual Maxon burner and/or mixer system.General InstructionsImportant: Do not discard packing materialsuntil all loose items are accounted for.To prevent damage in transit, some connectingbase and linkage components may be packedseparately and shipped loose with your new MaxonFlow Control Valve.The Flow Control Valve is normally only a part ofyour complete combustion system. Additional pipetrain accessories and control components may berequired for a complete system installation.Read complete instructions before proceeding,and familiarize yourself with all the system’sequipment components. Verify that your equipmenthas been installed in accordance with the originalmanufacturer’s current instructions.CAUTION: Initial adjustment and light-off ofburner systems should be undertaken only bytrained and experienced personnel familiar withcombustion systems, with control/safetycircuitry, and with knowledge of the overallinstallation. Instructions provided by thecompany and/or individuals responsible for themanufacture and/or overall installation ofcomplete system incorporating Maxon burnerstake precedence over these provided by Maxon.If Maxon instructions conflict with any codes orregulations, contact Maxon Corporation beforeattempting start-up.For initial adjustment and/or burner start-up:1. Close all burner fuel valves and cocks. Makepreliminary adjustments to fuel gas regulators.2. Check all electric circuitry. Verify that allcontrol devices and interlocks are operable andfunctioning within their respective settings/ranges. Be sure all air and fuel manifolds aretight and that test ports are plugged if not beingused.3. Check that any air handling dampers areproperly positioned and locked into operatingpositions.4. Disconnect the automatic control motor’slinkage from your control valve’s operating crankarm by loosening the control motor’s connectingrod from the burner’s toggle linkage.Initial adjustment should only beaccomplished during a “manual” controlmode.5. Start all system-related fans and blowers.Check for proper motor rotation and impellerdirection. Verify that all control interlocks areworking. Allow air handling equipment to run foradequate purge of your manifolds.CAUTION: Do not by-pass control panel timerstypically controlling sequential operations.6. With MICRO-RATIO ® Valve combinations ofair and fuel valves, the minimum differentialpressure setting is initially established withthe air valve only.A. By disconnecting the linkage between the airbutterfly valve and interconnected fuelvalve(s), the minimum and maximum limits oftravel on the air valve may be determined.For example, a combustion system mayneed the air valve to be 15° open for the“minimum” setting and the “maximum”requirements are satisfied with the air valveopen to 60°. By marking these points on theair valve’s indicating strip, you are ready toreconnect the SYNCHRO Fuel Valve’slinkage to the air valve.B. The next step involves adjusting theconnecting linkage between the air valveand the fuel valve(s) so that each fuel valvetravels its full quadrant range (i.e. fromminimum to maximum), while the air valveswings from its pre-determined minimum andmaximum positions.C. With Series “CV” Valves and Series “Q”adjustable-gradient Flow Control Valves,the minimum flow position is set by theirminimum stop screw. This adjustable stop islocated on the side of the screw carrier ofSeries “Q” Valves and at the base of crankarm of Series “CV” Valves. Screwing “in” onthe minimum stop screw produces a physicalstop on the quadrant’s travel that prohibitsvalve from being completely closed off.mCORPORATIONMUNCIE, INDIANA, USAINDUSTRIAL COMBUSTION EQUIPMENT AND VALVESMaxon practices a policy of continuous product improvement. It reserves the right to alter specifications without prior notice.
<strong>Tower</strong> <strong>Dryer</strong> Ops & ServiceCOMPONENTSIVCOMPONENT MANUALSGAS SHUT-OFF VALVE
Page 6102Normally open or normally closed valves4" Series 5000-SCPposition “L”1.5" Series STO-Mposition “L”• Sanctioned service valve approvals:– FM (Factory Mutual) sanctioned– UL (Underwriters Laboratories) sanctioned– CGA (Canadian Gas Association) sanctioned– IRI (Industrial Risk Insurers) approvable for block/bleed/vent systems– Contact your Maxon sales representative for international sanctions information• Handles flowing fluid temperatures:– Rising stem bodies from -20°F (-28°C) to +140°F (+60°C)– Swinging gate bodies from -20°F (-28°C) to +550°F (+288°C)– Any ambient temperature from -20°F (-28°C) to +140°F (+60°C)4" Series 7000position “L”• Valve body connections designed to ANSI (American National Standards Institute)standards. ISO (International Standards Organization) standards also available.• Various application requirements met with manual reset or automatic resetmotorized operators.• Minimize line pressure drops with straight-through flow swinging gate or rising stem(guillotine action) valve bodies
Electro-Mechanical ValvesPage 6100-S-1Installation Instructions1. Read complete instructions before proceedingand do not discard packing materials until any/allloose items are located. Also, make sure that theinstallation of the Maxon valves will be in compliancewith all applicable governmental, insuranceand/or agency requirements or codes, such asNFPA-70, National Electric Code, CSA C22.1,Canadian Electric Code, etc.2. General considerations:A. Prior to shipment, each valve is operatedelectrically and cycled at rated and 1-1/2rated pressure while being leak tested. EveryMaxon valve is operationally tested andmeets the requirements of ANSI B16.104Class VI Seat Leakage when it leaves ourplant.B. Inspect your valve for any shipping damage.Contact Maxon Corporation with the valve’sserial number (printed on the valve's nameplate)for replacement and/or repair parts.C. Read the nameplate on your valve. Thisgives the maximum pressure, temperaturelimitation, voltage requirements and serviceconditions of your specific valve. DO NOTexceed nameplate ratings.D. Select mounting location carefully. YourMaxon valve is designed to operate for manyyears if installed in a location that is cool,clean and dry.3. Pipe the valve in the direction of the flow arrow[3] on the valve body. The Maxon valve body canshut off flow in one direction only.A. Remove all thread and flange protectorsbefore installing valve in your service line.B. Teflon tape acts as a lubricant and greatlyreduces the pipe wrench turning force requiredto seal the threads.Take care not to overtighten threads asthis can damage the valve.C. Good piping practice dictates that piping beindependently supported, so that valve bodiesare not placed in a bind. In addition, largevalves may require support.D. Clean pipe lines of foreign materials beforeinstalling valve into line.For new installations, a gas filter or strainer shall beinstalled in the fuel gas piping to protect thedownstream safety shut-off valves.per NFPA 86-4-2.4.3 (1999)NFPA 86C-4-2.4.3 (1999)NFPA 86D-4-2.4-3 (1999)If normal inlet pressure to the fuel pressure regulatorimmediately upstream from the valve exceedsthe valve’s pressure rating, a relief valve shall beprovided and it shall be vented to a safe location.per NFPA 86-5-7.1.7 (1999)NFPA 86C-5-7.1.7 (1999)NFPA 86D-5-7.1.7 (1999)E. Mount valve so that open/shut windowindicator [1] will be visible to your operatingpersonnel. The open/shut window indicatorshould never face downward. With Maxonelectro-mechanical top assemblies, the motoraccess side plate [2] should always bevertical to the ground. Valves are usuallyinstalled in horizontal piping; however, other12542514125431/00Maxon practices a policy of continuous product improvement. It reserves the right to alter specifications without prior notice.INDUSTRIAL COMBUSTION EQUIPMENT AND VALVESmCORPORATIONMUNCIE, INDIANA, USA
Page 6100-S-2Electro-Mechanical ValvesInstallation Instructions (cont'd.)orientations are acceptable, subject to theabove limitations. The top assemblies of allMaxon valves are field rotatable to allowinstallations involving conflicts with thesemounting restrictions.F. Main system shut-off should always use amanual leak-tight upstream fuel cock.G. Time lag between valve action and fluid flow(or flame response) is reduced if valve islocated near the burner (or outlet).4. Wire the valve in accordance with all applicablecodes and standards. Supply voltages must agreewith valve’s nameplate voltage within -15%/+10%AC or DC for proper operation. For electricalwiring schematics, refer to appropriate Maxoncatalog literature and/or the wiring schematicdiagram affixed inside your valve’s access coverplate or in the terminal block cover housing.A. The Maxon valve must be electricallyinterlocked with your safety-limit devices inaccordance with all applicable codes, standards,and the authority having jurisdictionover the safety requirements for your overallsystem installation. Normally, Maxon valvesare electrically wired in series with all of yoursafety-limit devices. Therefore, any onedevice can cause the valve to react. Eachvalve was production tested when manufactured.If it now appears inoperative, makesure it is being powered properly from andthrough your control circuit.B. Maintain integrity of Maxon top assemblyenclosure by using dust and water-tightelectrical connectors. Use cable-sealing gripsand strain-relief loops for any cord or cable.Use internal sealing materials on all conduitconnections. Moisture can have a harmfuleffect on valve internals if permitted to enterthrough wiring connectors. Make sure that allaccess cover plates are in place and securelyfastened. All cover screws should be tightenedusing an alternate cross corner tighteningpattern to the values shown below.C overTorque (in-lbs)# 10-24 Operator Cover25. 25"-20 All other access covers50. 25"-20 Extended Access Cover Plate 96While all covers are torqued at time of productiontesting, torque should be recheckedperiodically to ensure adequate sealingprotection.5. Pre-operational exercising:Prior to initial fluid flow start-up and with upstreammanual cock still closed, operate the valveelectrically for 10-15 cycles. This not only providesan electrical check, but also wipes valvebody disc and seat free of accumulated foreignmatter.mCORPORATIONMUNCIE, INDIANA, USAINDUSTRIAL COMBUSTION EQUIPMENT AND VALVESMaxon practices a policy of continuous product improvement. It reserves the right to alter specifications without prior notice.
Electro-Mechanical ValvesPage 6100-S-3Installation Instructions (cont'd.)Top Assembly Rotation1254251425413Series 5000-CPSeries 808Series 25300with socket weldednipples & flangesMaxon valves can and should be ordered in a configurationcompatible with planned piping, but if open/shut indicator window is not visible and/or valve orientationis not proper, the top assembly can be rotated in90° increments around the valve body centerline axisby the following procedure:1. Shut off all electrical power and close off upstreammanual cock.2. Remove wiring access cover plate [2] anddisconnect power lead wires. (Tag carefully for laterre-assembly.)3. Remove conduit and electrical leads.4. Note physical position of any signal switchactuator wands on auxiliary signal switches (seeswitch arrangement sketch).5. Unscrew the two body bolts [4] screwed up fromthe bottom to 1/4 inch. DO NOT completely remove.These bolts secure the valve body [3] to thevalve’s top assembly housing [5].6. Gently lift the top assembly [5] (not more than1/4" in height); just enough to break the sealbetween the valve body assembly and the rubbergasket adhering to the bottom of the top housing.WARNING: LIFTING TOO FAR MAY DISLODGESOME SMALL PARTS INSIDE THE TOPHOUSING, REQUIRING COMPLEX RE-ASSEMBLY AND RETESTING BY TRAINEDFACTORY PERSONNEL.Auxiliary Switch ArrangementWiring DiagramA– Number Coded Wires H– Mounting ScrewsB– Rubber Grommet I – Spring Retainer ExtensionC– Mounting Screws J– Switch WandD– Normal (de-energized) K– Actual (energized)Position SwitchPosition SwitchE– Insulating Barrier L– Switch WandF– Bracket Mounting Pad M–Switch Mounting BracketG– Drive Pin & Locating Hole N– Gasket1/99Maxon practices a policy of continuous product improvement. It reserves the right to alter specifications without prior notice.INDUSTRIAL COMBUSTION EQUIPMENT AND VALVESmCORPORATIONMUNCIE, INDIANA, USA
Page 6100-S-4Electro-Mechanical ValvesInstallation Instructions (cont'd.)Top Assembly Rotation (cont'd.)7. Remove the two body bolts [4] screwed upfrom the bottom (were partially unscrewed instep 5).8. Carefully rotate top assembly to the desiredposition in a plane parallel to the top of the valvebody casting. Rotate the top housing about 30°beyond this position, and then rotate it back.Reposition the top housing back down onto thevalve body casting. This should align the open/shut indicator with its window and provide properalignment of the internal mechanism.9. Realign holes in valve body casting with thecorresponding tapped holes in the bottom of thetop assembly housing. Be sure the gasket is stillin place between the body and top housing.10. Reinsert the body bolts up from the bottomthrough the body and carefully engage threads ofthe top assembly. Tighten securely.11. Reconnect conduit and electrical leads, thencheck that signal switch wands are properlypositioned and that open/shut indicator movesfreely. Failure to correct any such misalignmentcan result in extensive damage to theinternal mechanism of your valve.12. Energize valve and cycle several times fromclosed to full open position. Also electrically tripthe valve in a partially opened position to provevalve operates properly.13. Replace and secure side cover access plateand place valve in service.CoverTorque# 10-24 Operator Cover25 in/lbs. 25"-20 All other access covers50 in/lbs. 25"-20 Extended Access Cover Plate 96 in/lbs. 31" Body Bolts15 ft/lbs. 38" Body Bolts40 tl/lbsAlternate Top Assembly Positions“R” “L” “AW” “TO”Four top assembly positions are available formost Maxon valves. When looking at the open/shutwindow indicator of an electro-mechanical valveassembly, the motor (for motorized version), or theoperating handle (for manual version), will be on theright side of the top assembly. The valve body is onthe bottom. From this view, the unidirectional valvebody and the arrow on the valve body casting pointsin direction of fluid flow: to the right (position "R"), tothe left (position "L"), towards you (position "TO") oraway from you (position "AW"). With smaller sizeswinging gate valve bodies, only position "R" andposition "TO" may be used.mCORPORATIONMUNCIE, INDIANA, USAINDUSTRIAL COMBUSTION EQUIPMENT AND VALVESMaxon practices a policy of continuous product improvement. It reserves the right to alter specifications without prior notice.
Electro-Mechanical ValvesPage 6100-S-5Operating InstructionsRefer to appropriate catalog bulletin and specificationpage for operating sequence applying to yourspecific valve. Never operate valve until all essentialallied equipment is operative and any necessarypurges completed. Failure of electro-mechanicallyoperated valve to operate normally indicates thatit is not powered. Check this first! Then checkinternal holding solenoid and/or motor operator.Main system shut-off should always be accomplishedwith an upstream leak-tight manual fuelcock.All Maxon valves react within a fraction of asecond when de-energized (can drop out if electricalpower is interrupted for less than 1/2 cycle [8 ms]).All electro-mechanical manual reset valves maybe operated manually when solenoid is electricallyenergized, but electrical tripping is recommendedfor normal shut-downs.Electro-mechanical manual reset valves requiretwo positive actions to open: a half rotation ofhandle to latch internal mechanism, and a reversedhalf rotation of handle to open valve. This refers tonormally closed valves. With normally open valves,the procedure is the same, but the valve body position(i.e., open or closed) is opposite to the normallyclosed version.Remotely located manual reset valves may beequipped with wheel-and-chain assembly. Instructionsto operate the valve are on hand grip. Locate counterweightoverhead at pipe level and hand grip can bebrought down to convenient operating personnelheight.Normally closed motorized valves begin openingcycle immediately upon being powered; motorruns only until full open position is reached. Normallyopen valves begin to close immediately, and motorruns until fully closed position is reached.Operator should be aware of and observe characteristic opening/closing action of the valve. Should operationever become sluggish, remove valve from service and contact Maxon for recommendations.Address inquiries to: Maxon Corporation, P.O. Box 2068, Muncie, IN 47307Phone (765) 284-3304FAX (765) 286-8394www.maxoncorp.comAlways include valve serial number and nameplate information to insure positive identification.1/99Maxon practices a policy of continuous product improvement. It reserves the right to alter specifications without prior notice.INDUSTRIAL COMBUSTION EQUIPMENT AND VALVESmCORPORATIONMUNCIE, INDIANA, USA
Page 6100-S-6Electro-Mechanical ValvesMaintenance InstructionsMaxon valves are endurance tested far in excess ofthe most stringent requirements of the various approvalagencies. They are designed for long life evenif frequently cycled, and to be as maintenance-freeand trouble-free as possible.Every Maxon valve is operationally tested andmeets the requirements of ANSI B16.104 Class VISeat Leakage when it leaves our plant.Top assembly components require no fieldlubrication and should never be oiled.Auxiliary switches, motors and solenoids, may bereplaced in the field.WARNING: Do not attempt field repair of valvebody, top assembly or motor drive unit. Anyalterations void all warranties.Valve leak test, performed with valve in line asprescribed by jurisdictional authorities, is stronglyencouraged and should be done on a regularlyscheduled basis. In rare instances where valve showsleakage, perform Pre-Operational Exercising (seebelow) and retest. If leakage does not stop, removevalve from service.Pre-operational exercising: Prior to initial fluidflow start-up and with upstream manual cock stillclosed, operate the valve electrically for 10-15 cycles.This not only provides an electrical check, but alsowipes valve body disc and seat free of accumulatedforeign matter.Maxon valves are designed to be used withclean fluids. If foreign material is present in thefuel line, it will be necessary to inspect thevalve to make certain it is operating properly. Ifabnormal opening or closing is observed, thevalve should be removed from service. Contactyour Maxon representative for instructions.Insurance authorities agree . . .. . . that the safety of any industrial fuel burninginstallation is dependent upon well-trainedoperators who are able to follow instructions andto react properly in cases of emergency. Theirknowledge of, and training on, the specificinstallation are both vital to safe operation.Safety controls may get out of order without theoperator becoming aware of it unless shutdownsresult. Production-minded operators have beenknown to bypass faulty controls without reportingthe trouble.Continued safe operation of any installation isthen assured only if the plant managementcarefully develops an exact schedule for regularperiodic inspection of all safety controls, insistingthat it then be rigidly adhered to.A main gas shut-off cock should be locatedupstream from all other fuel train piping componentsand used to shut off all flow of fuel forservicing and other shutdowns.All safety devices should be tested at leastmonthly* and more often if deemed advisable.Periodic testing for tightness of manual or motorizedshut-off valve closure is equally essential.*per NFPA 86-Appendix B-4 (1995)Operator should be aware of and observe characteristic opening/closing action of the valve. Should operationever become sluggish, remove valve from service and contact Maxon for recommendations.Address inquiries to: Maxon Corporation, P.O. Box 2068, Muncie, IN 47307Phone (765) 284-3304FAX (765) 286-8394www.maxoncorp.comAlways include valve serial number and nameplate information to insure positive identification.mCORPORATIONMUNCIE, INDIANA, USAINDUSTRIAL COMBUSTION EQUIPMENT AND VALVESMaxon practices a policy of continuous product improvement. It reserves the right to alter specifications without prior notice.
#1 BLACK TOTERMINAL #1#3 BLACK TOTERMINAL #3COMNONCTO CLUTCH12 11 10 9 8 7 6 5 4 3 2 1BLACK TO MOTOR21Electro-Mechanical ValvesPage 6100-S-7Auxiliary Signal SwitchesField Installation InstructionsNOTE: Instructions below are written for normallyclosed valves. For normally open versions (STO-M, STO-A, Fig. 1 & 2), reverse switch nomenclature.(VOS becomes VCS and vice versa.)General: Shut off fuel supply upstream of valve, thende-energize valve electrically.– Remove top or side cover to provide access, beingcareful not to damage gasket.– Compare with illustrations at right to identify YOURvalve type.To replace existing switches:– Note wand position and mounting hole locationcarefully, then remove 2 screws and lift existing switch.– Install replacement switch in same mounting holes onbracket and verify correct wand position.– Replace existing wiring one connection at a time,following original route and placement.To add switches to existing valve:– Check illustrations at right. If your valve uses a switchmounting bracket as in Fig. 1 & 2, mount switches tobracket using the mounting holes appropriate for valvetype and size.– Position bracket so VCS wand just touches top ofactuator, then move downward slightly, depressingwand until switch clicks, then tighten mounting screwsto hold this position.– Pin bracket by drilling 1/8" dia. holes 1/4" deep intobracket mounting pad through drive pin holes, then tapdrive pin in until flush.– Route wires to wiring compartment as shown, thencomplete wiring connections and clean out metaldrilling chips from previous procedure.– Cycle valve, checking switch actuation points carefully.(VCS actuates at top of stem stroke, VOS at bottom.)Simultaneously the valve body must be tested forswitch continuity and seat leakage. Bend VOS switchwands slightly if necessary to insure valve is openingfully.– Replace gasket and cover, then return valve toservice.C overTorque (ft-lbs)# 10-24 Operator Cover25. 25"-20 All other access covers50. 25"-20 Extended Access Cover Plate 96Fig. 1.75" – 3"non-CPRemoveside cover plate.Switches mounton bracket. (See"A" below)Fig. 22.5" – 4" -CP6" 808Removeside cover plate.Switches mounton bracket. (See"B" below)Fig. 34" – 6" 7000Remove 2-piece top cover.Switches mount on supportstand.Fig. 4.375" – .75" 8700Remove top cover.Switches mount on actuatorframeWand PositionVOS switch wandshould be actuatedfrom above.VCS switch wandshould be actuatedfrom below.For 1", 1.25" C.I.& 2", 3" non-CPVCS switch mountson back of bracketOil SOV &2"-6" Gas1-1/2"1-1/4"3/4", 1"VOS switchon frontAMounting BracketsDrivePinsBracketMountingSlotsSHUT3",4",6"(-2)3",4",6"(-2)2-1/2"(-2)2-1/2"(-1)VCS Switchon backBBracketMountingHolesVOS switchon front1/00Maxon practices a policy of continuous product improvement. It reserves the right to alter specifications without prior notice.INDUSTRIAL COMBUSTION EQUIPMENT AND VALVESmCORPORATIONMUNCIE, INDIANA, USA
Page 6100-S-8Electro-Mechanical ValvesElectrical DataNormally Closed Valves<strong>Manual</strong> Reset Series:.375" – 3" Series 808, 818 (-S);1" – 1.25" Series 730, 760, 790 (-S);1" – 1.25" Series 33790 (-S):2.5" – 4" Series 808-CP (-S); 818-CP (-S);6" Series 808, 818 (-S)Automatic Reset Series:.375" – 3" Series 5000, 5100 (-S);1" – 1.25" Series 4730, 4760, 4790 (-S);1" – 1.25" Series 33479;2.5" – 4" Series 5000-CP(-S); 5100-CP(-S)4" – 6"Series 7000, 7100 (-S).375" – .75"Series 8730, 8760,and 8790 (-S)mCORPORATIONMUNCIE, INDIANA, USAINDUSTRIAL COMBUSTION EQUIPMENT AND VALVESMaxon practices a policy of continuous product improvement. It reserves the right to alter specifications without prior notice.
Electro-Mechanical ValvesPage 6100-S-9Electrical DataNormally Open Valves.75" – 2" Series STO-M and STO-A (-S)2.5" – 4" Series STO-MCP and STO-ACP (-S)1/99Maxon practices a policy of continuous product improvement. It reserves the right to alter specifications without prior notice.INDUSTRIAL COMBUSTION EQUIPMENT AND VALVESmCORPORATIONMUNCIE, INDIANA, USA
Page 6100-S-10Electro-Mechanical ValvesTandem Arrangements(for simultaneous opening of main and blocking valves)Installation InstructionsReview and comply with all general valve installationinstructions provided separately. (See sketchbelow.)1. Mount both valves in fuel line with center to centerspacing as originally specified, and blocking valve(without handle) downstream of main valve (withhandle).2. Check valve alignment to be certain that operatingwheels lie in the same plane.3. Remove tape from the wheel of the main valveand unwind the attached chain. Do not removethe screw holding chain to wheel; it has beenfactory positioned to assure correct alignment. Donot remove tension spring attached to one end ofchain or the wooden block insert which preloadsthe spring.4. Take free end of chain and loop it around thewheels of both main and blocking valve as shownin sketch below. Depending on the specific valveseries and arrangement, tension spring may belocated either above or below the wheel centerline.5. Draw free end of chain and tension spring togetherso that as much slack as possible iseliminated, then insert the open eye of the spring"S" hook through the link in the chain that willmost nearly maintain this position.6. Crimp the "S" hook shut around the chain link,then cut and discard excess chain.7. Remove spring preload wood block insert fromthe tension spring, and verify that the chain isdrawn tight.8. Rotate the operating handle of the main valvefully to latching position for your particular valve,then hold handle firmly in this position whileperforming the next few steps.9. Rotate blocking valve wheel fully counter-clockwiseuntil it strikes a stop (it will slide within theloop of chain).10. Still holding main valve wheel in place, moveblocking valve wheel approximately 1/4 to 1/2inch back in the clockwise direction. Insert the#10-24 X 1/2" screw (furnished) through the chainlink that lines up with the tapped hole on bottomof blocking valve wheel, then fasten securely.11. Verify that the valves are wired in parallel asshown in wiring schematic on page 6121.To add wheel & chain assembly toexisting tandem valves:1. Verify that both valves are in the same topassembly position (TO or AW). Rotate if necessary.(See top assembly rotation instructions onpages 6100-S-3 and 6100-S-4.)2. Bend handle of main valve outward about 25°.3. Cut off handle of blocking valve at outer wheelface.4. Remove hardware holding main valve wheel inplace and mount new wheel and spacer to theexisting wheel with new hardware provided.5. Cut chain loop to the desired length and secure toboth wheels.BlockingValveTensionSpringPiping by othersFlowmCORPORATIONMUNCIE, INDIANA, USAINDUSTRIAL COMBUSTION EQUIPMENT AND VALVESMaxon practices a policy of continuous product improvement. It reserves the right to alter specifications without prior notice.
Electro-Mechanical ValvesPage 6100-S-11Overhead Wheel & Chain AssemblyOverhead wheel and chain assembly allowsoperation of a manual reset valve in an otherwiseinaccessible overhead location. A wheel is mountedonto the handle of the valve. The attached chain isweighted on one end and has a paddle handgrip onthe other.Once the valve is electrically energized, pullingdown on the paddle will open normally closed versionsor close normally open versions.Maxon valve's free-handle design permits valve totrip to its rest position on any power interruption.Wheel and chain assembly includes a length ofchain to position the paddle handgrip slightly belowpipe centerline. A standard length of 7 feet of chain isincluded with CP and larger valve sizes and 5 feet isincluded with all other valves. Extra chain (in one footincrements) may be specified to fit your specificlocation.Approximate envelope dimensions (nominal, in inches)Swinging gate valvesRising stem valves6.9412.19Maximum7.2512.19Maximum2.31 dia.5.25Maximum4.06NOTE: Overhead wheel & chain can only be mountedon swinging gate valves with the top assemblyposition TO.2/00Maxon practices a policy of continuous product improvement. It reserves the right to alter specifications without prior notice.INDUSTRIAL COMBUSTION EQUIPMENT AND VALVESmCORPORATIONMUNCIE, INDIANA, USA
Page 6100-S-12Electro-Mechanical ValvesMaintenance InstructionsCAUTION: Valve leak testing should be undertakenonly by trained and experienced personnel.Instructions provided by the company and/orindividuals responsible for the manufacture and/oroverall installation of complete system incorporatingMaxon valves take precedence over theseprovided by Maxon. If Maxon instructions conflictwith any codes or regulations, contact MaxonCorporation before attempting this procedure.Valve leak test should be performed on aquarterly basis to assure continued safe andreliable operation. Each valve should be checkedwith available line pressure. Absolute zero leakagemay not be obtained in the field. Any valve thatexceeds the allowable leakage, as set forth by yourlocal codes or insurance requirements (15 bubblesper minute), should be removed from service andyour Maxon representative should be contacted.Every Maxon valve is operationally tested andmeets the requirements of ANSI B16.104 ClassVI seat leakage when it leaves our plant.Example of a gas piping diagram for leak test<strong>Manual</strong>ValveAStrainerGas PressureRegulatorLGPSwitchShut-offValve#1Suggested leak test procedure fordouble-blocking shut-off valves (withoutvent line)(a) Shut down combustion system per manufacturer’srecommended procedure.(b) Close manual valves A and B.(c) Visually inspect to verify that shut-off valves #1and #2 are closed.(d) Remove the 1/4” pipe plug from downstream sideof shut-off valve #1. Install leak test apparatus.Safely vent any trapped gas pressure.(e) Open manual shut-off valve A, then close leaktest apparatus. Insert tube into a container ofwater just below the surface.(f)Open test apparatus and test valve for leakage.As a guideline, valve should be tested for 2minutes per inch of pipe diameter. Large diameterpipes or long piping runs between shut-off valvesmay need additional testing time.(g) If valve testing indicates leakage exceeding 15bubbles per minute, perform pre-operationalexercising as outlined on Page 6100-S-2 andretest the valve. If valve continues to exceedallowable leakage limit, remove from service andcontact Maxon.Shut-offValve#2HGPSwitch<strong>Manual</strong>ValveBDripLegTo CombustionSystemExample of a wiring diagram for leak testHotFrom FlameSafeguardNeutralNOTES:Push button must be tamper resistant.LS-SVMomentary LeakTest Push ButtonShut-offValve #1Shut-offValve #2LS-SV – Closes when Shut-off Valve #1is fully open.The “From Flame Safeguard” line isenergized only when all conditions forsafe operation have been satisfied.mCORPORATIONMUNCIE, INDIANA, USAINDUSTRIAL COMBUSTION EQUIPMENT AND VALVESMaxon practices a policy of continuous product improvement. It reserves the right to alter specifications without prior notice.
Electro-Mechanical ValvesPage 6100-S-13Maintenance InstructionsSuggested leak test procedure for double-blocking shut-off valves (without vent line) - continued(h) Secure test apparatus on valve #1.(i) Remove the 1/4” pipe plug from downstream sideof shut-off valve #2. Install leak test apparatus.(j) With an auxiliary power supply connected to valve#1, open test apparatus and test valve for leakage.As a guideline, valve should be tested for 2minutes per inch of pipe diameter. Large diameterpipes or long piping runs between shut-off valvesmay need additional testing time.(k) If valve testing indicates leakage exceeding 15bubbles per minute, perform pre-operationalexercising as outlined on Page 6100-S-2 andretest the valve. If valve continues to exceedallowable leakage limit, remove from service andcontact Maxon.(l) Secure test apparatus on valve #2.(m) Upon completion of valve leak testing, test allother safety interlocks per manufacturer’s instructionsand verify they are operational.(n) Restore combustion system to operationalcondition. Be sure to remove all auxiliary powersupplies and jumpers that may have been usedduring testing.Suggested leak test procedure for double-blocking shut-off valves with vent lineExample of a gas piping diagram for leak test with vent lineIf vent valve ispresent, use auxiliarypower supply topower vent valve toclosed positionduring this testprocedure. Followtest instructionsabove. Once test iscomplete, be surevent valve is restoredto normaloperation.DripLeg<strong>Manual</strong>ValveAStrainerGas PressureRegulatorLGPSwitchShut-offValve#1VentValveShut-off Valve #2HGPSwitch<strong>Manual</strong>ValveBTo CombustionSystemExample of a wiring diagram for leak test with vent lineNOTES:Push button must be tamperresistant.LS-VV – Closes when VentValve is fully closedLS-SV – Closes when ShutoffValve #1 is fully open.HotFrom FlameSafeguardShut-off Valve #2Momentary LeakTest Push ButtonShut-off Valve #1Momentary LeakTest Push ButtonNeutralVentValveThe “From Flame Safeguard”line is energized onlywhen sall conditions forsafe operation have beensatisfied.LS-VVLS-SVShut-offValve #1Shut-offValve #22/00Maxon practices a policy of continuous product improvement. It reserves the right to alter specifications without prior notice.INDUSTRIAL COMBUSTION EQUIPMENT AND VALVESmCORPORATIONMUNCIE, INDIANA, USA
<strong>Tower</strong> <strong>Dryer</strong> Ops & ServiceCOMPONENTSVCOMPONENT MANUALSGEARBOXESAll <strong>GSI</strong> Hopper Bottom <strong>Dryer</strong>s --- Nord #SK5382All Zimmerman 12’ Diameter <strong>Dryer</strong>s --- Sumitomo #6145DBAll Zimmerman 18’ Diameter <strong>Dryer</strong>s --- Sumitomo #6185DBAll Zimmerman 24’ Diameter <strong>Dryer</strong>s --- Sumitomo #6195DB
UNICASE ® Shaft Mount GearboxesInstallation and Maintenance InstructionsRetain These Safety Instructions For Future UseBIM 1020USACDNINSPECTION OF UNITThoroughly inspect the equipment for any shipping and handling damage before accepting shipment from the freight company. If any of thegoods called for in the bill of lading or express receipt are damaged or the quantity is short, do not accept until the freight or express agentmakes an appropriate notation on your freight bill or express receipt. If any concealed loss or damage is discovered later, notify your freightcarrier or express agent at once and request him to make an inspection. We will be very happy to assist you in collecting claims for loss ordamage during shipment; however, this willingness on our part does not remove the transportation company’s responsibility in reimbursingyou for collection of claims or replacement of material. Claims for loss or damage in shipment must not be deducted from the NORD Gearinvoice, nor should payment of the NORD Gear invoice be withheld awaiting adjustment of such claims, as the carrier guarantees safedelivery.If considerable damage has been incurred and the situation is urgent, contact the nearest NORD Gear Sales Office for assistance. Pleasekeep a written record of all communications.RECORD NAMEPLATE DATALocate the gear reducer nameplate and record all nameplate data for future reference.SK ________________________________________________________ S/N _________________________________RATIO ______________ MAX TORQUE ____________________ RPM ______________ MTG. POS ______________STORAGEPROPER STORAGE UNTIL INSTALLEDKeep unit in a dry, temperature controlled area. If stored otherthan said, long term storage methods must be applied to the unitincluding complete fill with lubricant. Protect machined surfacesand rotate shafts periodically. Prior to putting unit into service,drain lubricant and refill to proper level as determined by themounting position.PROPER HANDLING OF THE UNITExercise care to prevent damage to the unit when moving. LiftonIy at designed Iifting points. Do not attach other machinery andlift by the unit lifting points. The lifting points are to be used to liftthe unit only. Insure that adequate safety measures are taken toprotect personneI during transportation. Protect the mountingsurface from damage.BIM 1020/2005/03 1 www.nord.com
INSTALLATION OF UNITTo ensure Iong service and dependabIe performance, an encIosed gear drive must be rigidIy supported and the shafts accurateIy aIigned.The foIIowing describes the minimum precautions required to accompIish this end.FOUNDATIONThe responsibiIity for the design and construction of thefoundation Iies with the user. The foundation must be adequateto withstand normaI operating Ioads and possibIe overIoads whiIemaintaining aIignment to attached system components undersuch Ioads.MOUNTING POSITIONUnIess a unit is specificaIIy ordered for incIined mounting, thefoundation must be IeveI and fIat. The Iubrication system maynot operate properIy if the unit is not mounted in the position forwhich it is designed. It may be desirabIe to eIevate thefoundation to faciIitate oiI drainage.CONCRETE FOUNDATIONIf a concrete foundation is used, steeI mounting pads and boIts ofsufficient size to distribute the stress into the concrete shouId begrouted into the foundation.STEEL FOUNDATIONIf a structuraI steeI foundation is used (i.e. wide fIange beams orchanneIs), a base pIate or soIe pIate of suitabIe thickness shouIdbe used and shouId extend under the entire unit.FOOT MOUNTED UNITSUse shims under the feet of the unit to aIign the output shaft tothe driven equipment. Make sure that aII feet are supported sothat the housing wiII not distort when it is boIted down. Impropershimming wiII reduce the Iife of the unit and may cause faiIure.DoweI pins may be instaIIed to prevent misaIignment and ensureproper reaIignment if removed for service.SHAFT MOUNTED UNITSShaft mounted drives should be mounted as close to the drivenequipment bearing support as possible to minimize bearing loadsdue to overhung load. Design of the joint connection between thetorque reaction arm and the foundation is the user’s responsibility.HoIIow Shaft Diameter toIeranceMetric (mm) 18 = +0.018/-0.000 18 30 = +0.021/-0.000 30 50 = +0.025/-0.000 50 80 = +0.030/-0.000 80 120 = +0.035/-0.000 120 180 = +0.040/-0.000Inch 4.375 = +0.0010 / -0.0000 4.375 = +0.0015 / -0.0000Customer shaft diameter toIerances with keyed hoIIow shaftsMetric (mm) 18 = +0.000/-0.011 18 30 = +0.000/-0.013 30 50 = +0.000/-0.016 50 80 = +0.000/-0.019 80 120 = +0.000/-0.022 120 180 = +0.000/-0.025Inch 1.500 = +0.000/-0.002 1.500 2.500 = +0.000/-0.003 2.500 7.000 = +0.000/-0.004Shaft finish to be 125 micro inches or smoother.Customer shaft diameter toIerance with Shrink Disc fit h6Metric (mm) 18 = +0.000/-0.011 18 30 = +0.000/-0.013 30 50 = +0.000/-0.016 50 80 = +0.000/-0.019 80 120 = +0.000/-0.022 120 180 = +0.000/-0.025Inch 0.750 = +0.0000/-0.0004 0.750 1.125 = +0.0000/-0.0005 1.125 2.000 = +0.0000/-0.0006 2.000 3.000 = +0.0000/-0.0007 3.000 4.750 = +0.0000/-0.0008 4.750 7.000 = +0.0000/-0.0010Shaft finish to be 125 micro inches or smoother.Customer shaft diameter toIerance with Shrink Disc fit f6(Iooser fit)Metric (mm) 18 = -0.016/-0.024 18 30 = -0.020/-0.029 30 50 = -0.025/-0.036 50 80 = -0.030/-0.043 80 120 = -0.036/-0.051 120 180 = -0.043/-0.061Inch 0.750 = -0.0006/-0.0011 0.750 1.125 = -0.0008/-0.0013 1.125 2.000 = -0.0010/-0.0016 2.000 3.000 = -0.0012/-0.0019 3.000 4.750 = -0.0014/-0.0023 4.750 7.000 = -0.0017/-0.0027Shaft finish to be 125 micro inches or smootherFLANGE MOUNTED UNITSIf a structuraI steeI foundation is used (i.e. wide fIange beams orchanneIs), a base pIate or soIe pIate of suitabIe thickness shouIdbe used and shouId extend under the entire unit. If a buIk headpIate is used it shouId be of proper strength to minimize buckIingdistortions.FIange PiIot ‘AK’ or ‘AK1’ toIeranceMetric (mm) 50 80 = +0.012/-0.007 80 120 = +0.013/-0.009 120 180 = +0.014/-0.011 180 230 = +0.016/-0.013 230 315 = +0.000-0.032 315 400 = +0.000/-0.036 400 500 = +0.000/-0.040BIM 1020/2005/03 2 www.nord.comInch 1.969 3.150 = +0.005/-0.0003 3.150 4.724 = +0.005/-0.0004 4.724 7.087 = +0.006/-0.0004 7.087 9.055 = +0.006/-0.0005 9.055 12.402 = +0.000/-0.0013 12.402 15.748 = +0.000/-0.0014 15.748 19.685 = +0.000/-0.0016BOLT STRENGTHBoIt size, strength and quantity shouId be verified to insure propertorque reaction capacity whatever the mounting arrangement.LUBRICATE SHAFTSBoth the hollow shaft and the driven shaft should be liberallylubricated before assembly. The unit must slide freely onto thedriven shaft. Do not hammer or force the unit into place. Forshrink disc, follow instructions below.
AXIAL RETENTIONEach drive shaft must be retained in place relative to the gearreducer. Or each gear reducer must be retained in place relativeto the drive shaft. Either way NORD recommends the use ofshaft shoulders, locking collars or FIXING ELEMENTS to axiallyretain the shaft or gear reducer in position.SET SCREWSIf set screws are used for axial retention, they should be tightenedevenly. Flats may be filed on the driven shaft and a threadlockingadhesive used for more position retention.SNAP RING RETENTIONPlacing external snap rings on drive shafts must be performedwith caution. The groove, which the snap ring fits into, mayweaken the drive shaft causing premature failure. NORD doesnot recommend this type of shaft retention.THRUST PLATEIn applications, which are subject to high vibratory loads, a thrustplate will provide greater resistance to axial movement. Followthe manufacturer’s recommendations for assembly.SHRINK DISCIf a shrink disc is used to secure a reducer hollow shaft to thedriven shaft, follow this assembly procedure. Start with the shrinkdisc mounted onto the extension of the hollow shaft disc lockingbolts loosened.1. Clean reducer bore and mating solid shaft to be free of anylubricants or dirt.2. Slide reducer onto the solid shaft until it is about half waythrough.3. Lubricate the remaining portion of the solid shaft with a #2grease or similar lubricant. This part will be located underthe bronze bushing. Do not install grease under theshrink disc gripping area. Finish installing the solid shaftinto the reducer hollow bore.4. Finger tighten all shrink disc bolts. Now, moving a circularpattern, tighten each shrink disc locking bolt 1/4 to 1/2 turn.Do not use criss cross pattern. Continue tightening in thesame circular direction with 1/4 or 1/2 turn increments untilall bolts reach the specified bolt tightening torque. Bolttightening torque is shown on the shrink disc label for theparticular unit.5. Run unit for 24 hours, then retighten shrink disc locking boltsto the proper bolt torque as indicated above.Output and Input shaft Diameter toIeranceMetric (mm) 18 = +0.012/+0.001 18 30 = +0.015/+0.002 30 50 = +0.018/+0.002 50 80 = +0.030/+0.011 80 120 = +0.035/+0.013 120 180 = +0.040/+0.015Inch 1.750 = +0.0000/-0.0005 1.750 = +0.0000/-0.0010Output and Input shaft DriII and tap shaft endMetric (mm) 16 = M5 16 21 = M6 21 24 = M8 24 30 = M10 30 38 = M12 38 50 = M16 50 85 = M20 85 130 = M24Inch 0.438 = #10-24 x 0.4 deep 0.438 0.813 = 1/4-20 x 0.6 deep 0.813 0.938 = 5/16-18 x 0.7 deep 0.938 1.125 = 3/8-16 x 0.9 deep 1.125 1.375 = 1/2-13 x 1.1 deep 1.375 1.875 = 5/8-11 x 1.4 deep 1.875 3.250 = 3/4-10 x 1.7 deep 3.250= 1-8 x 2.2 deepOutboard pinion and sprocket fits shouId be as recommended bythe pin sprockets with interference fits shouId be heatedaccording to the manufacturer’s recommendations, generaIIy250F to 300F, (120C to 150 C) before assembIing to the shaft.LOCATIONCoupIing hubs shouId be mounted fIush with the shaft ends,unIess specificaIIy ordered for overhung mounting. Pinions,TORQUE REACTION ARMOn the shaft mount ‘Clincher’, torque is reacted through theintegral torque tab, which is part of the casting. Commonly,NORD’s optional RUBBER BUFFER bushings are installed oneach side of the integral torque tab to dampen torque shocks andallow for mis-alignment received from the machinery duringoperation.Torque arm connection fabrications should always be mountedperpendicular to a line through the output shaft center and thepoint at attachment of the torque arm to the unit housing. In thisposition the minimum load on the attachment structure arm will beexperienced. The attachment structure must be rigid and may notdeflect under any load. Doing so will place extra loads on theoutput bearings of the reducer.PRIME MOVER MOUNTINGAIign the prime mover to the reducer-input shaft using shimsunder the feet. Make sure that the feet are supported. DoweI theprime mover to its foundation.SHAFT CONNECTIONSWhen connecting shafts to either the input or output of thereducer, consider the foIIowing instructions.sprockets and sheaves shouId be mounted as cIose as possibIeto the unit housing to minimize bearing Ioads and shaftdefIections.FITSCIearance or interference fits for coupIing hubs shouId be inaccordance with ANSI/AGMA 9002-A86 or as follows.BIM 1020/2005/03 3 www.nord.com
COUPLING ALIGNMENTShaft coupIings shouId be instaIIed according to the coupIingmanufacturer’s recommendations for gap, anguIar and paraIIeIaIignment. In many instaIIations, it is necessary to aIIow forthermaI and mechanicaI shaft movement when determining shaftaIignment. The coupIing manufacturer’s recommendationsshouId be foIIowed.AXIAL DISPLACEMENTThe gap between shaft ends shouId be the same as the specifiedcoupIing gap unIess overhung mounting of the coupIing hub isspecified. The coupIing gap and shaft gap must be sufficient toaccommodate any anticipated thermaI or mechanicaI axiaImovement.ANGULAR ALIGNMENTInsert a spacer or shim stock equaI to the required coupIing gapbetween the coupIing hub faces and measure the cIearance usingfeeIer gauges. Repeat this at the same depth at 90-degreeintervaIs to determine the amount of anguIar misaIignment.PARALLEL ALIGNMENTMount a diaI indicator to one coupIing hub, and rotate this hub,sweeping the outside diameter of the other hub. The paraIIeImisaIignment is equaI to one-haIf of the totaI indicator reading.Another method is to rest a straight edge squareIy on the outsidediameter of the hubs at 90-degree intervaIs and measure anygaps with feeIer gauges. The maximum gap measurement is theparaIIeI misaIignment.CHECKING ALIGNMENTAfter both anguIar and paraIIeI aIignments are within specifiedIimits, tighten aII foundation boIts secureIy and repeat the aboveprocedure to check aIignment. If any of the specified Iimits foraIignment are exceeded, reaIign the coupIing.SPROCKET OR SHEAVE ALIGNMENTAIign the sheaves or sprockets square and paraIIeI by pIacing astraight edge across their faces. AIignment of bushed sheavesand sprockets shouId be checked after bushings have beentightened. Check horizontaI shaft aIignment by pIacing a IeveIverticaIIy against the face of the sheave or sprocket. Adjust beItor chain tension per the manufacturer’s specified procedure.CHANGES IN PERFORMANCE SPECIFICATIONSOwner has the responsibiIity to consult with NORD GEAR if suchitems such as applied Ioads, operating speeds or other operatingconditions have changed.WARNING:LOCK OUT POWER before any maintenance is performed.Make absolutely sure that no voltage is applied while work isbeing done on the gearbox.START-UP1. Ensure that switches, aIarms, heaters, coolers and othersafety and protection devices are instaIIed and operationalfor their intended purpose.2. Verify that the installed mounting position is the same as thenametag mounting position. If not, adjust the oil levelaccordingly and relocate the vent plug, fill plug and drainplug according to the mounting position. See following.AUTOVENT PLUGThe Autovent plug is brass in color and will be located at thehighest point on the gearbox. It operates like a check-valve toallow the reducer to relieve internal pressure while preventinglubricant contamination during cooling. A spring presses a ball orplunger against a machined orifice until pressure exceeds 2 psi.Above 2 psi the air is allowed to escape depressurizing thegearcase. When internal pressure drops below 2 psi, theautovent re-seals closing the unit to the outside environment.After shutdown, the reducer cools along with the air inside thereducer. The unit will temporarily maintain a slight vacuum untilnormalization occurs. NORD Gear supplies an Autovent as astandard feature.OUTBOARD PINION ALIGNMENTAIign the pinion by adjusting the gear tooth cIearance accordingto the manufacturer’s recommendations and checking foracceptabIe outboard pinion tooth contact. The foundation boItsmay have to be Ioosened and the unit moved sIightIy to obtainthis contact. When the unit is moved to correct tooth contact, theprime mover shouId be reaIigned.RECHECK ALIGNMENTAfter a period of operation, recheck aIignment and adjust asrequired.1. Properly install unit on a rigid foundation adequateIy supported secureIy boIted into pIace IeveIed so as not to distort the gear case2. Properly install couplings suitabIe for the application andconnected equipment.3. Ensure accurate aIignment with other equipment.4. Furnish and install adequate machinery guards as needed toprotect operating personneI and as required by theappIicabIe standards of the OccupationaI Safety and HeaIthAdministration (OSHA), and by other appIicabIe safetyreguIations;5. Ensure that driving equipment is running in the correctdirection before coupling to reducers with backstops(designed to operate onIy in a specific direction) ormachinery designed to operate only in one direction.The Autovent releases built-up air pressure frominside the gearbox (Max. pressure 2 psi).BIM 1020/2005/03 4 www.nord.com
FILL LEVEL & DRAIN PLUGSThe drain plugs are metric socket head cap screws. They will belocated at the lowest part of the gearbox for ease of draining. Thefill level plug is a hex head cap screw. It will be located betweenthe Autovent and drain plug. Both types of plugs will have gasketsincluded to prevent oil from leaking.LUBRICANTAII NORD reducers are shipped from the factory properIy fiIIedwith Iubricant and all plugs are installed according to the mountingposition given on the reducer nametag. Acceptable oil fill level iswithin ½ inch of the bottom of the fill plug threads.OPERATION AND MAINTENANCE CHECKLIST1. Operate the equipment as it was intended to be operated2. Do not overIoad.3. Run at correct speed.4. Maintain Iubricant in good condition and at proper IeveI.5. Dispose of used Iubricant in accordance with appIicabIeIaws and reguIations.6. AppIy proper maintenance to attached equipment atprescribed intervaIs recommended by the manufacturer.7. Perform periodic maintenance of the gear drive asrecommended by NORD.Two types of plugs for maintenanceMOUNTING POSITIONSThese charts detail the mounting positions for horizontal and vertical mounting. The Autovent, oil fill plug and drain plug are indicated on eachmounting position picture. The factory set mounting position and plug locations match that shown on the gearbox nametag. For mountingorientations other than shown consult NORD Gear.Horizontal positionSK 6282 - SK 11282SK 6382 - SK 12382SK 6282 - SK 11282SK 6382 - SK 12382SK 1282 - SK 5282SK 6382 - SK 12382SK 1282 - SK 5282SK 1282 - SK 5282SK 2382 - SK 5382SK 2382 - SK 5382H 1 H 2 H 3 H 4Vertical positionH 5 * H 6Symbols: Vent plug Oil level Drain plug* Mounting position H5 with lubricantexpansion unit recommendedSK0182NB & SK1382NB have no vent or drain plugs. They are filled with synthetic oil so the units are“Lubed for Life”.BIM 1020/2005/03 5 www.nord.com
MAINTENANCEMineral lubricant should be changed every 10,000 service hours or after two years. For synthetic oils, the lube should be changed every20,000 service hours or after four years. In case of extreme operating (e.g. high humidity, aggressive environment or large temperaturevariations), shorter intervals between changes are recommended.OIL SPECIFICATIONSNORD supplies aII reducers fiIIed with oiI from the factory. Consult the sticker adjacent to the fill plug to determine the type of lubricantinstalled at the factory. Standard lubricant is ISO VG220 mineral-based oil. However, some units have special lubricants designed to operatein certain environments or to extend the service life of the lubricant. If in doubt about which lubricant is needed, contact NORD Gear.STANDARD OIL – ISO VG220Ambient TemperatureFormuIation20 to 104F (-5 to 40C) MineraITYPICAL OILSViscosityISO NLGIFormulationConventionalMineralVG 460SyntheticPAOConventionalMineralVG 320SyntheticPAOConventionalMineralVG 220SyntheticPAOConventionalVG 150Mineral&VG 100SyntheticPAOConventionalMineralVG 68SyntheticPAOSyntheticVG 32PAOPAO = Poly Alpha OlefinServiceTemperatureRange20C to +50C68F to +122F-30C to +80C-22F to +176F0C to +30C32F to +86F-35C to +80C-31F to +176F-5C to +40C+20F to +104F-34C to +80C-30F to +176F-15C to +25C5F to +77F-37C to +10C-35F to +50F-15C to +25C5F to +77F-40C to +10C-40F to +50F-40C to +10C-40F to +50FMobilgear634MobilSHC 634Mobilgear632MobilSHC 632Mobilgear630MobilSHC 630Mobilgear629MobilSHC 629Mobilgear626MobilSHC 626MobilSHC 624ShellOmala460Omala460 HDOmala320Omala320 HDOmala220Omala220 HDOmala100Omala150 HDOmala68N/AN/ACastrol7EPIsolubeEP 4606EPIsolubeEP 4605EPIsolubeEP 2204EPIsolubeEP 1502EPIsolubeEP 68N/AKlüberoilGEM 1-460KlübersynthEG 4-460KlüberoilGEM 1-320KlübersynthEG 4-320KlüberoilGEM 1-220KlübersynthEG 4-220KlüberoilGEM 1-150KlübersynthEG 4-150KlüberoilGEM 1-68EnergolGR-XP 460N/AEnergolGR-XP 320N/AEnergolGR-XP 220N/AEnergolGR-XP 100N/AEnergolGR-XP 68Tribol1100/460Tribol1510/460Tribol1100/320Tribol1510/320Tribol1100/220Tribol1510/220Tribol1100/100N/ATribol1100/68N/A N/A N/AKlüber-SummitHySyn FG-32N/AN/ASPECIAL PURPOSE LUBRICANTSAmbient Temperature FormuIation Manufacturer Oil Brand Name20 to 104F (-5 to 40C) Food Grade Oil - Synthetic Chevron FM ISO 22020 to 104F (-5 to 40C) Food Grade Oil - Synthetic OilJAX MagnapIate 85W140-FG5 to 125F (-20 to 50C) FIuid Grease MobiI MobiIux EP023-30 to 140F (-35 to 60C) FIuid Grease - Synthetic MobiI MobiIith SHC 007-30 to 140F (-35 to 60C) FIuid Grease - Synthetic SheII Albida LCSTANDARD BEARING GREASE – NLGI 2EP LithiumAmbient TemperatureFormuIation-20 to 140F (-30 to 60C) MineraIOPTIONAL BEARING GREASESAmbient Temperature FormuIation Manufacturer Grease Brand Name-40 to 230F (-40 to 110C) Synthetic SheII AerosheII 6-40 to 230F (-40 to 110C) Food Grade - Synthetic LubripIate SFL1BIM 1020/2005/03 6 www.nord.com
LUBRICANT CAPACITYEach reducer has the oil level and oil quantity adjusted according to the mounting position shown in the tables. When replacing the oil, consultthe tables below to determine the proper amount of oil to be installed according to the reducer size and mounting position. Note that this isapproximate and the final level will be adjusted when the reducer is installed. Acceptable oil fill level is within ½ inch of the bottom of the fillplug threads.LUBRICATION CAPACITY - SHAFT MOUNT 'CLINCHER' GEARBOXESMOUNTING POSITIONMOUNTING POSITIONHorizontal Vertical Horizontal VerticalH1 H2 H3 H4 H5 H6 H1 H2 H3 H4 H5 H6SK 0182NB quarts 0.42 0.63 0.53 0.53 0.58 0.58 SK 1382NB quarts 1.37 1.48 2.01 2.11 2.22 2.43liters 0.40 0.60 0.50 0.50 0.55 0.55 liters 1.30 1.40 1.90 2.00 2.10 2.30SK0282NB quarts 0.74 0.85 0.95 0.95 1.16 1.06 SK 2382 quarts 1.80 2.01 1.59 1.59 3.28 2.75liters 0.70 0.80 0.90 0.90 1.10 1.00 liters 1.70 1.90 1.50 1.50 3.10 2.60SK 1282 quarts 0.95 0.95 1.00 1.00 1.27 1.37 SK 3382 quarts 4.33 3.49 3.49 3.49 5.92 4.33liters 0.90 0.90 0.95 0.95 1.20 1.30 liters 4.10 3.30 3.30 3.30 5.60 4.10SK 2282 quarts 1.74 2.01 1.90 1.90 2.11 2.54 SK 4382 quarts 6.24 5.18 5.18 5.18 8.77 7.19liters 1.65 1.90 1.80 1.80 2.00 2.40 liters 5.90 4.90 4.90 4.90 8.30 6.80SK 3282 quarts 3.33 3.44 3.33 3.33 4.33 4.33 SK 5382 quarts 13.21 7.08 8.77 8.77 14.80 12.68liters 3.15 3.25 3.15 3.15 4.10 4.10 liters 12.50 6.70 8.30 8.30 14.00 12.00SK 4282 quarts 4.97 5.02 4.97 4.97 5.71 6.45 SK 6382 quarts 17.4 10.1 13.2 14.8 19.0 13.7liters 4.70 4.75 4.70 4.70 5.40 6.10 liters 16.5 9.6 12.5 14.0 18.0 13.0SK 5282 quarts 7.93 7.93 7.61 7.61 9.30 9.30 SK 7382 quarts 23.3 16.9 20.1 24.3 26.4 21.1liters 7.50 7.50 7.20 7.20 8.80 8.80 liters 22 16 19 23 25 20SK 6282 quarts 18.0 12.7 14.8 10.6 18.5 14.8 SK 8382 quarts 35.9 26.4 31.7 37.0 40.2 33.8liters 17.0 12.0 14.0 10.0 17.5 14.0 liters 34 25 30 35 38 32SK 7282 quarts 26.4 21.1 22.2 16.9 28.5 22.2 SK 9382 quarts 77.2 47.6 63.4 68.7 78.2 74.0liters 25 20 21 16 27 21 liters 73 45 60 65 74 70SK 8282 quarts 39.1 31.7 32.8 32.8 43.3 34.9 SK 10382 quarts 90 77 85 85 93 93liters 37 30 31 31 41 33 liters 85 73 80 80 88 88SK 9282 quarts 78.2 58.1 62.4 72.9 76.1 74.0 SK 11382 quarts 169 148 143 164 222 164liters 74 55 59 69 72 70 liters 160 140 135 155 210 155SK 10282 quarts 95 42 87 63 95 95 SK 12382 quarts 169 148 143 164 222 164liters 90 40 82 60 90 90 liters 160 140 135 155 210 155SK 11282 quarts 174 153 148 106 206 169liters 165 145 140 100 195 160Note: Filling quantities are approximate figures. Oil level must be checked according to oil level plug after final installtion.Acceptable oil fill level is within 1/2 inch of the bottom of the fill plug threads. For mounting angles not shown, consult factory.BIM 1020/2005/03 7 www.nord.com
SK 1382 - SK 5382SK6382 - SK11382PARTS LIST5 Driving gear27 Hexagon screw28 Seal29 Supporting disc30 Third reductiongearcase45 Ball bearing46 Key48 Ball bearing52 Circlip53 Key54 Circlip55 Intermediate shaft,plain56 Intermediate shaft,gearcut57 Circlip58 Circlip59 Shim60 Circlip61 Circlip62 Drain plug63 Seal203 Driving gea204 Pinion shaftSK 6382 -SK 9382206 Driving pinion207 Output shaft208 Key223 Locking cap229 Supporting disc234 Drain plug235 Seal244 Circlip245 Ball bearing246 Key247 Shim248 Ball bearing249 Supporting disc250 Locking cap254 SpacerBIM 1020/2005/03 9 www.nord.com
TROUBLE SHOOTINGPROBLEM WITH THE REDUCER POSSIBLE CAUSES SUGGESTED REMEDYRuns HotRuns NoisyOutput ShaftDoes Not TurnOil LeakageOverloadingImproper lubricationLoose foundation boltsWorn RV DiscFailure of BearingsInsufficient LubricantInternal parts are brokenWorn SealsLoad exceeds the capacity of thereducerInsufficient lubricationExcessive lubricationWrong lubricationWeak mounting structureLoose hold down boltsOverloading unit may result indamage to discMay be due to lack of lubricantOverloadLevel of lubricant in the reducer notproperly maintained.Overloading of reducer can causedamage.Key missing or sheared off on inputshaft.Coupling loose or disconnected.Caused by dirt or grit entering seal.Overfilled reducer.Autovent clogged.Improper mounting position, such aswall or ceiling mount of horizontalreducer.Check rated capacity of reducer, replacewith unit of sufficient capacity or reduceloadCheck lubricant level and adjust up torecommended levelsCheck lubricant level and adjust down torecommended levelsFlush out and refill with correct lubricant asrecommendedInspect mounting of reducer. Tighten loosebolts and/ or reinforce mounting andstructureTighten boltsDisassemble and replace disc. Recheckrated capacity of reducer.Replace bearing. Clean and flush reducerand fill with recommended lubricant.Check rated capacity of reducer.Check lubricant level and adjust to factoryrecommended level.Replace broken parts. Check rated capacityof reducer.Replace key.Properly align reducer and coupling.Tighten coupling.Replace seals. Autovent may be clogged.Replace or clean.Check lubricant level and adjust torecommended level.Clean or replace, being sure to prevent anydirt from falling into the reducer.Check mounting position. Name tag & verifywith mounting chart in manual.BIM 1020/2005/03 12
SM-CYCLOBSPEED REDUCERS
SECTION A CONTENTSMounting ................................ A-2 Allowable Oil Viscosity ................ A-9General Construction .................... A-3,4 Oilchange ......................... A-9Lubrication ............................ A-5-10 Forced Lubrication ................... A-9Grease Units ......................... A-7,8 Oil Level Dimensions ................ A-10Designated Greases .................. A-7Bearings, Oil Seals & Gaskets ........... A-11-13Grease Replenishment & Change ....... A-7 Dissassembly, Assembly ............... A-14,15Quantities of Grease ................ A-7,8 Daily Inspection ......................... A-16Oil Units .......................... A-8 - 10 Ordering Correct Replacement Units & Parts ... A-16Oil Fill Procedure, Oil Gauge ........... A-8 Storage &Operation After Storage .......... A-16Standard Oils ....................... A-8 Trouble Shooting ......................... A-17Oil Quantities ........................ A-9 Notes .................................. A-18Mounting1. Mounting on Exact PlanesThe Horizontal Type oil-lubricated units must bemounted on horizontal surfaces. Where they aremounted on inclined surfaces, some modifications maybe necessaly. Specify mounting plane inclination at timeof ordering.2. Accurate AlignmentWhere the reducer is connected to the motor and thedriven machine through couplings, align the shaftsaccuratelv. Where the reducer is connected through Vpulleys oi sprockets, insure that the belts or chains areneither too tight nor too slack.3. Overhung Load PositionsOverhung loads should be located as close to thebearing as possible. (See the SM-CYCLP 6000 SeriesCatalog page E-8.)4. FoundationsFoundations must be rugged enough to withstand shockand stress applied from the load side through thereducer.5. Secure HousingWhere the reduction units are operated under conditionsof vibration and/or frequent starts and stops, it isrecommended to secure them on their mountingsurfaces by inserting dowel plns into the knock-holesprovided on the foot of the casing. This will insure thatbending or shearing forces are reduced on the mountingbolts. Pins must be securely inserted, particularly whenthe units are to be operated under conditions of severerecurrent peak loads.6. Mounting AccessibilityThe reduction units must be mounted in locations witheasy accessibility for lubrication maintenance purposes.7. VentilationWhen the SM-CYCLOB Speed Reducer is mounted in aSeDarate enclosure, be sure that adeauate ventilation isprovided.Comct Incorrect Square And Parallel Correct Method Incorrect MeUlodReducer WallReducer Wall
GENERAL CONSTRUCTIONFig. A-1 Speed Reducer - Horizontal Foot Mount, Single ReductionTable A-1. Speed ReducerMain PartsFig. A-2 Speed Reducer - Vertical Base Mount, Single ReductionNote: For details of oil seals, bearings or gaskets, refer to A-1 1 - 13.tRefer to Table A-I6 on Pg. A-9 for units which require a positive displacement pump.'Pt. No. 58 -frame sizes 6195-6275 only; Pt. No. 59 -frame sizes 6205-6275 only."See Fig. A-3, Page A-4; + See Fig. A-4, Page A-4.
GENERAL CONSTRUCTIONFig. A-3 Speed ReducerlSingle DiscType (Frame Size 6060-6095)Fig. A-4 Speed Reducermouble ReductionSpeed Reducer - Single DiscMultiple Reduction ReducersSM-CYCLOa single reduction, Models No. 6060-6095, Multiple reduction SM-CYCLP Reducers are a combiemploythe use of a single planetary gear (Cycloidnation of standard reduction mechanism assembliesDisc) and a balance weight. connected using an intermediate shafl (Part No. 5-01)and intermediate cover (Part No. 55) between them.Table A-2. Frame Sizes and Ratio Combination of Double Reduction ModelsFrame Size ComblnationReduction Ratio CornbinatlonNote: [I] For frame sizes 6205DA, DB or DC -.6265DA, D8 orDC, second stage ratio is 59 and firs1 t stage ratio is 87
~LUBRICATIONStandard Type Mounted Reducer (Slow Speed Shaft Horizontal)wlTable A-3. Horizontal Mounted Single Reduction ReducersTable A-4. Horizontal Mounted Double Reduction Reducers6235DA 6235006245DA 6245DB6255DA 625506.-, P~,;T,Y.T,..-- ..-.'.7'...... i..E--.~--,.--I,r .. ,.,; .......... .?- .ii... .r....ry. ..yr,:7;... ;: .. . &.... s :*, .i,.' ,;;r"a.,,:-' , : , . : . " . ' . ; : ,,, ,, +,a ..,, ....................". ,,;-: :,\ ;.y,..:. . . . .;'.:-'-.:. ,:;:;* 6:. .,..A .... 2.:. ..... ,*,. . ....i .:.-~'.'. +.,.>'r.., . :. . . . . . . 6. .: ..'.... .. ,,+.,* .;. . : :....d .; .,!,*. ; .>... ..........; ... .,;-;,..'.. . ;:. .. . . '..5,'..j.:.$'. j';*'" m>.2..: .
LUBRICATIONStandard Vertical Mounted Reducer (Slow Speed ShaftTable A-5. Vertical Mounted Single Reduction ReducerFr:n:ed O!! iubr'cnt~on (PiTable A-6. Vertical Mounted Double Reduction ReducerNotes: [I] Please consult the factory for applications where the slow speed shaft is up.[Z] Tables A-5 and A-6 show the standard lubrication method when the Cyclo drive is driven at the standard input speed.[3] Ratios shown in white in Tables A-5 and A-6 are unavailable for the given unit sizes.A-6
LubricantsGrease Lubricated ModelsThose models listed in Tables A-3 - A-6 as greaselubricated are filled with grease before shipment to thecustomer and are ready for use.Table A-7. Standard Greases[lITable A-8. Grease Replenishment and Change IntervalI Slngle and Double ReducbonMahtenance Free TypeI Double ReductLonI ''-r'-'''-''''- '.1 0verhaul[~11 Replen~shmentLss Than l o Hours Per DayOperation. . - . . . - - -. . - -Every 20,000 Hours orEvery 4 - 5 Years- Monms1 10 - 24 Hours Per Day Operation I Evely 500 - 1M)OI Snaed Redtcfir Meohanism Hmh IReplenishment and Change GuidelinesReplenish grease to the reduction mechanism 113 to 112 ofthe quantity listed in Table A-9 or A-10 for the first reductionstage at the interval recommended in Table A-8.When the unit is disassembled for overhauling, refill withthe grease quantities indicated in Table A-9 or A-10. Oraltefnatively, 80% of the space around the reductionmechanism and slow s~eed shall bearinqs of sinalereduction units, and 50% around the rediction mechanismof both the first and second stage of double reduction units.Slightly larger quantities may be supplied to lowerratio units, and somewhat smaller auantities for hiahreduction ratio units.Apply grease liberally to the central pan (i.e., around theeccentric bearings) of the mechanism. Apply grease to boththe slow speed and high speed shaft bearings as you wouldOrdinary bearings at the time Of re-assemblb'.If excessive grease is added, agitation heating of the greasewill raise theoperating temperature of the unit. Avoidexcessiveareasina. but do not suoolv an insufficient amountof grease. -when [he grease is ins~iffkient, it will raise theunit's operating temperature due to breakdown of thelubrication films on the eccentric bearing. In this case, if theoperating temperature rises, supply grease immediately.Table A-9. Single Reduction Grease Quantities - oz. (g.)I Sbw Speed Shaft Bearing I 1.2 (35) 1 2.5 (70) 1 3.5 (100) 1 3.2 (90) 1 4.2, (120) INotes: 111 Avoid the use of arease other than shown in Table A.7.i2jconsult the fact06 when the drives are used under widely fluctuating temperatures, ambient temperatures other than those listed inTable A-7 .,. or an" -.., other soecinl .-.. conditions .[3]&gie reduction frame sizes 6060 - 612H ana dobble red~ction frame sizes 6060DA - 6125DB are malntenance free units. Greaserepfenlshment is not necessary. Wnere longer life of the ar ve is expected or if re- Jbrcat~ng is prelerrea before the recommendeainterval, refer to Tables A-7, A-8. A-9 and A-10.[4] Overhauling consists of disassembling the unit, replacing the seals and gaskets, cleaning the internal palis and then repacking the unitwith designated grease.
~ ~LUBRICATIONTable A-10. Double Reduction Grease Quantities - oz. fa.) .-.Mechanism (1st Stage)~echanism (2nd Stage) I (750) (1000) (1100) (1500)Slow Speed Shaft 10.6 17.6 21.2 24.7Bearing (2nd Stage) (300) (500) (600) (700)Oil Lubricated ModelsOil Fill Procedure011 lubricated models are not filled with oil prior to shipping.Before start-up, remove the oil fill plug (See Pg. A-3,Fig. A-2, Part #28) and fill the reducer with recommendedoil. Refer to Tables A-11-A-14 for standard oil, allowableviscosity, quantity, and change interval. The oil level mustbe to the upper red line on the oil level gauge while the unitis not o~eratina. and above the lower red line durinaoperation. If tco much oil is supplied, the unit's o Gatingtemperature will rise due to the churning heat of tEe oil, oroil will leak across the high speed shaft oil seal.Before fillin a vertical base pe unit with oil, remove thevent plug (8g. A-3, Fig. A-2, {att #14). After filling, applyteflon sealina - taDe . to threads of the vent . olua - beforeinstalling.When draining oil, remove drain plug (Fig. A-5, Part #46) orlower side plug of the oil level gauge.Oil Level GaugeThe auge must be replaced when it becomes difficult tocheci the oil level due to discoloration of the vinyl hose.Use the standard vinyl oil auge for a reducer operatin inambient temperature -4"Qto 100°F (-20% to 40°C). &herethe reducer is used at ambient temperatures greater than100°F (40°C) or less than -4°F (-2O0C), a glass gauge setor a di~stick is recommended.The oi; level gauge can be attached on either side of thecasing on horizontal units, Attach on the side that is mostconvenient for checking the oil level. (The oil level gauge ISusually attached on the right side when viewed from theslow speed shaft end.)Table A-1 1. Standard OilsIEP Lubricant Spartan' MobilgeaP 626 Omalae Oil EnergorHD 68 EP 68 (IS0 VG 66) 68 GR-XP 68EP Lubr~cant Spartan' EnergoleHD 100 EP MobllgeaP 627,629 Omalae 011GR.XPHD 150 ~p 150 (IS0 VG 100.150) 100,150 (j~.~p 750EP Lubricant I Spartan" I MobilaeaP I I EneraolaHD 220 EP 220 630,6321 1HD 320 EP 320 633,634HD 460 EP46O IISOVG220-460, GR-XP 460I IFig. A-5Notes: [I] Use the lower viscosity oil specified for each ambient temperature range for use in winter or relatively low ambient temperatures,[21 Please consult the factory for consistent use in ambient temperatures other than 32°F - 104°F (OQC - 40°C).A-8
Table A-12. Oil Fill Quantities[ll( )with tmchoid pumpTable A-13. Allowable 011 ViscositvTable A-14. Oil Change IntervalForced Lubrication For Vertical UnitsTable A-15. Plunger Pump TypePlunger Pump LubricationThe plunger pump (Fig. A-2, Part #42) is automaticallyoperated by a cam (Fig. A-2, Part #40) fitted on the slowspeed shaft (Fig. A-2, Palt #I-01). The number of pumpingcam teeth required is in direct relation to the reduction ratioand frame size. Please consult the factoly for input speedsother than standard.Table A-16. Positive Displacement (Trochotd) Pump TypePositive Displacement (Trochoid) Pump LubricationForced oil lubrication is accomplished by using a positivedisolacement DU~Dand motor that reauires an additionalelectric power'sou~ce. It is recommended that the mainmotor be interlocked with the pump motor to avoid operationwithout lubrication. The DU~D must be started 30 secondsor longer before the main motor is operated.holes [I] Please consu t the factory for 011 quantlrles when the reducer/gearmotor 6 mounted in any other poslllon or angle[2] Cons~lthe factory when Lsng an Inverter[3] A rel~ef valve, pressure set at 42.7 ps (3 kgl~crnz). 15 a standara anacnment on the tmhold pump
BEARINGS, OIL SEALS, GASKETSFig. A-9 18 1-02 1-03 3-02 3-04 3-03 19Table A-20. Slow Speed Shaft BearingSlow Speed ShafiHigh Speed ShaflTable A-21. High Speed Shaft Bearing
BEARINGS, OIL SEALS, GASKETSFig. A-10Slow Speed ShaftTable A-22. Eccentric BearingIntermediate Shaft(For Double Reduction Units)-RetainingRingHigh Speed ShaftFip. A-11A-12Eccentric Bearing Single Type Eccentric Bearing Double Type Eccentric And Bearings For EccentricFrame Sizes Frame Sizes Frame Sizes
Table A-23. Intermediate Shaft Bearing120x.155~16Note: [I] D indicates lip (dust proof and seal lip) type.
DisassemblySM-CYCLOm Reducers aredesigned to providemaximum ease when disassembing and reassembling;they require no special maintenance skills.1. Remove the complete SM-CYCLO' Reducer withadaptor (motorized type) from the driven machine.2. Remove the plug at the bottom of the oil gauge todrain all oil from the unit.3. Remove the cooling fan cover and fan from thoseSpeed Reducers (not motorized) equipped with acooling fan, and stand the unit on a solid base with itshigh speed shaft side down. Remove the through boltsfor the high speed end shield, ring gear housing, andlift the slow speed side, thus separating the unit intotwo parts so that the inner mechanism can be removed(Figs. A-12 - A17).Note: If the reducer is motorized (C-adaptor andcoupling) remove the motor and coupling beforefollowing the procedure outlined above. As a final step,remove the adaptor and cooling fan.4. If the unit will not separate easily, gently drive awedge at the line X shown in Fig. A-1 on page A-3 (ifthis produces a burr, be sure to remove it beforereassembly).5. To lift the slow speed side, attach an eyebolt to thetapped hole on the end of the slow speed shaft anduse a hoist or chain block (Fig. A-12).6. Take out the slow speed shaft rollers, item 1-06,page A-3 (Fig. A-13). Check the slow speed shaft pins(1-01) to see whether any rollers have adhered tothem.7. Using both hands, lift out the top cycioid disc (2-04)on the slow speed side (Fig. A-14).AssemblySM-CYCLP Reducers are reassembled by reversingthe disassembly procedure. Care must be taken toexclude dust or foreign matter from the moving parts,and to see tnat aaskets are . oro~erlv . .. olaced to make theassembly oil-tight.Following are some helpful points to remember whenassembling SM-CYCLO" Reducers.1. Set the ring gear housing and insert the ring gearpins and rollers; then test-rotate the pins and rollers byhand. (Apply grease liberally to the ring gear pins androllers before they are inserted in grease lubricatedSM-CYCLP Reducers.)2. Cycloid discs are a matched pair. Each carries thesame number stamped on one side of the disc.3. Set the cycloid disc with the stamped number face upas shown in Fig. A-17.8. Remove the spacer ring (2-05).9. The eccentric (3-04) can be removed from theinput shaft (3-01) after taking out the retaining ring(3-10) and the inner bearing raceway (Figs. A-15,A-16).Note: In certain sizes, the eccentric bearings areroller bearings without a retainer. Remove bearings ofthe top disc before proceeding with the next step.10. Take out the second disc located on the motorside. (Also remove second disc bearings andeccentric with inner bearing raceway if required.)11. Remove the ring gear housing (2-01).12. Follow these steps to remove the slow speedshaft (1-01) with its bearings from the casing (26): (a)Remove the horizontal oil seal housing (25). (b) Witha wooden or hard rubber mallet, rap the inner end ofthe slow speed shaft to expose the retaining ring*from the outer raceway of the bearing. (c) Removethe retaining rina. - Id) .. RaD the outer end of the slowspeed shafwith a wooden or hard rubber mallet, andremove it from the casing.13. The high speed shaft (3-01) with bearings isremoved from the high speed shaft end shield (8) bytapping the shaft end after first taking off the retainingring (3-11).14. The cvcloid disc is made from heat-treatedbearing sieel and the spacer ring is cast iron. Takecare not to strike them together while handling.The above instructions cover complete disassembly.In ordinary cases, however, only the removal of thecycloid discs and the eccentric, and removal of theslow speed shaft from the slow speed end cap isnecessary.*Note: Retaining ring is part of bearing A(Part No. 1-02).4. lnsert the spacer (3-07) and then insert theeccentric w~th bearlngs by rapplng wtth a wooden orhard rubber mallet (Fig. A-16).5. lnsert the other spacer and the inner bearingraceway. Secure them with the retaining ring(Fig. A-15).6. Set the spacer ring in place.7. lnsert top disc in such a way that the mark is180" opposed to the mark on the bottom disc(Fig. A-1 3).8. lnsert slow speed shaft rollers (Fig. A-13).9. Put the slow speed shaft pins into the rollers (Fig.A-12). The above instructions are for eccentricbearings with retainer. Following are the instructionssuggested for roller bearings without retainer.a. First insert the eccentric with inner raceways ofbearings by rapping with a wooden or hard rubbermallet.
iIII, & . Flg. A-16Fig. A-1 2- vrlkve-. -,!4Note: number exam Insen IW fadng mopposedtoslow d speed disc number with side.b. Apply grease to the raceway of the eccentric on the Assembly Of Output Slde (6080812H)disc. Fix the rollers and set disc in place.1. Assemble the "B" bearing (Part No. 1-03) on the slowc. Insert the spacer ring and set second disc in such a speed shaft (Part No. 1-01). Heating of '6" bearing isway that mark is 180' opposed to mark on the bottom recommended for easter assembly.disc.Note. Do not exceed temperature of 200°F.Eccentric Bearing Replacement Pre~autlonS2. Assemble Me casing (Part No. 26) over the slow speedThe eccentric bearings are specially designed for'in- shaft (Part No. 1-01), being sure to maintain "X" (Fig. A-18).stallation on SM-CYCLO. Reducers. They are special 3. Carefully tap bearing 'A" (Part No. 1-02) onto the slowroller bearings without outer raceways (refer to the list speed shaft (Part No. 1-01) until the bearing is flush with theof bearings on pages A-12 - A-13).shoulder of the casing.It is necessary to insert replacement bearings with 4. Place the collar (Part No. 1-04H) onto the slownumbered surfaces of the inner raceways facingspeed shaft (Part No. 1-01). Heating Me collar isoutward. Note that incorrect insertion of the bearings recommended for easier assembly.(i.e., insertion of bearings with numbered surfaces 5. Insert the oil seal (Part No. 18), lip in, into the casinginside) causes trouble. (Palt No. 26).Disassembly and Assembly of Skee 60608095SM-CYCLtY ReducersNote: Measure for dimension "X" preferably in 3 places toSmall sizes 6060-6095 have a single disc system, so insure proper spacing.they differ in construction from larger sizes in theFig. A18following ways:1. A balance weight is provided in lieu of the two-discsystem. Refer to figure A-18.2. The balance weight must be positioned exactly 180"ias opposed to that of the eccentric.3. There are no end plates on either side of theeccentnc. In all other respects, 6060-6095 have; exactly the same construction as the larger sizes.I Follow the instructions given under "Disassembly andAssembly".Disassembly Of Output Side (6060812H)1. With casing supported, tap output shaft until it isdisengaged from casing.I2. Remove bearing "A" by using pulling tool.3. Replace all bearings, gaskets and seals whenreassembling. (Pages A-1 1 - A-13).w
DAILY INSPECTION1. Visually check the oil level gauge on the verticalunit, forced-lubricated type. Check lubrication flow byviewing piping set and oil signal (Part No. 41). Faultyoperation is caused by a lack of lubrication oil,damage to the plunger pump (Part No. 42) or thepositive displacement pump (Part No. 43) or theclogging of pipes, etc. In case of faulty operation, stopand inspect the unit immediately.2. A temperature rise of approximately 105°F (40.6%)above ambient on the surface of the ring gear housing(Part No. 2-01) is allowable if the temperaturefluctuation is small. If temperature rises rapidly from astable condition, add the recommended oil or grease(Tables A-7 and A-1 1). A rapid temperature rise maybe caused from a lack of lubrication.If after lubricating unit, the problem persists, stopoperation and consult factory.3. When an abnormal sound is heard from inside theunit, stop operation and inspect the unit.4. If the lubrication oil leaks, replace the damaged orworn part with a new one. (Refer to Part No. 1-04H,Page A-3.)Ordering Correct Replacement Units Or Partslr S- ..-CYCLO" @'The SM-CYCLOe is fully standardized to offer maximum Name Plate on SM-CYCLO'part interchangeability among models of the same frame I -isize. However, there are many frame sizes, models andtypes in the production range of SM-CYCLO? Thereforeto get correct replacement units or parts, properCHESAPEAKE, VIRGINIAinformation to identifv the meed reducer in auestion isMUUtLessential. The name'plate, which is secured'to the bodyof the drive, provides this identifying data.RATIOSERVICE FACTORPlease give the full description shown on the name plate INPUT HP RPMto your distributor. Be sure to include the SERIALOUTPUT TORQUEIN-LBNUMBER and MODEL NUMBER. This information,SERIAL NO.along with our production records, will enable us toprovide you with the correct replacement unit or parts.SUMITOMO~%;~".'".EY~=~,~Storage And Operation After StorageStorage 6 Months-1 YearOil-Lubricated1. Completely fill unit@) with a rust-preventive oil(NP20 or equivalent) or a circulating oil (Shell VSI No.100 or equivalent).2. At approximately 3 month intervals, rotate the inputshaft a sufficient number of times to insure all internalcomponents remain coated. (The higher the ratio, thegreater the amount of rotations needed for properlubrication.)Grease-LubricatedGrease-lubricated models do not require any specialattention during storage. (Inspect unit beforeoperation.)Note: For both the Oil-Lubricatedand Grease-Lubricated models, if units are to be stored for aperiod exceeding 1 year, consult factory.Operation After Storage 6 Months-1 YearOil-Lubricated1. Completely drain the rust preventive, or circulatingoil from unit.2. Flush unit with the recommended operating oil asshown in Table A-1 1.3. After flushing, fill the unit to the proper oil level withthe recommended lubricating oil.Grease-LubricatedAdd %of the recommended quantity of new grease asshown in Table A-10.Note: Consult the factory before operating units storedfor periods greater than 1 year.
TROUBLESHOOTING AND REPAIRThis troubleshooting guide is to help you identify and overcome common problems of reducers. If you have a problemnot listed below, please consult factory.nsufficient lubrication.Loose hold dodisc. Recheck rated
<strong>Tower</strong> <strong>Dryer</strong> Ops & ServiceCOMPONENTSVICOMPONENT MANUALSMODUTROL MOTOR
Series 72Modutrol IV MotorsFEATURESPRODUCT DATAAPPLICATIONThe Series 72 Modutrol IV Motors are used to controldampers and valves. The motors accept a current or voltagesignal from an electronic controller to position a damper orvalve at any point between open and closed.• Replaces M744S,T,Y and M745S,T,Y Motors.• M7261, M7274, M7281, M7284, and M7294 arenon-spring return motors; M7272, M7282, M7285,and M7286 are spring return motors.• Oil immersed motor and gear train for reliableperformance and long life.• Wiring box provides NEMA 3 weather protection.• Actuator motor and circuitry operate from 24 Vac.Models available with factory installed transformeror an internal transformer can be field added.• Quick connect terminals standard—screw terminaladapter available.• Adapter bracket for matching shaft height of oldermotors is standard with replacement motors.• Nominal timing of 30 seconds for 90° stroke and60 seconds for 160° stroke.• Valve and damper linkages, explosion-proof housing,and auxiliary switches available as accessories.• Spring return motors are rated for 25 lb.-in. and60 lb.-in torque.• Non-spring return motors are rated for 35 lb.-in.,75 lb.-in., 150 lb.-in., and 300 lb.-in. torque.• Models available with adjustable start (zero) and span.• Models available with 4 to 20 mA input signal.• Models available with 2 to 10 Vdc input signal.• Die-cast aluminum housing.ContentsApplication ........................................................................ 1Features ........................................................................... 1Specifications ................................................................... 2Ordering Information ........................................................ 2Installation ........................................................................ 5Settings and Adjustments ................................................. 10Operation and Checkout .................................................. 12® U.S. Registered TrademarkCopyright © 2000 Honeywell • All Rights Reserved ®63- 2202- 4
SERIES 72 MODUTROL IV MOTORSSPECIFICATIONSModels: TRADELINE models are selected and packaged toprovide ease of stocking, ease of handling and maximumreplacement value. TRADELINE model specifications are thesame as those of standard models unless specified otherwise.TRADELINE models have auxiliary switch cams.IMPORTANTThe specifications given in this publication do notinclude normal manufacturing tolerances. Therefore,an individual unit may not exactly match the listedspecifications. Also, this product is tested andcalibrated under closely controlled conditions andsome minor differences in performance can beexpected if those conditions are changed.NOTE:Auxiliary switches can only be added to motors thatinclude auxiliary switch cams. (These cams cannotbe field-added.)Modutrol IV Order Number Guide: See Table 1.Dimensions: See Fig. 1.MTable 1. Modutrol IV Order Number Guide.Motor72 4-20 mA or 2-10 Vdc Control a6 — 35 lb-in. Non-Spring Return7 25 lb-in. Spring Return 75 lb-in. Non-Spring Return8 60 lb-in. Spring Return 150 lb-in. Non-Spring Return9 — 300 lb-in. Non-Spring Return1 Single-ended shaft Non-Spring Return2 Normally Closed b Spring Return4 Dual-ended shaft Non-Spring Return5 Normally Closed b Spring Return6 Normally Open c Spring ReturnA 0 Auxiliary Switches Fixed Stroke Normally Closed bB 1 Auxiliary SwitchC 2 Auxiliary SwitchesD 0 Auxiliary Switch Adjustable StrokeF 2 Auxiliary SwitchesG 0 Auxiliary Switch Fixed Stroke Normally Open cL 1 Auxiliary Switch Adjustable StrokeQ 2 Auxiliary Switches Fixed Stroke Normally Closed bM 61 8 4 A XXXX See Catalog for Complete O.S. Numbera Adjustable zero and span.b Electrically normally closed. Shaft rotates clockwise (viewed from the power end) with increase in control signal. Motor drives tonormally closed position when powered with control wiring not connected.c Electrically normally open. Shaft rotates counterclockwise (viewed from the power end) with increase in control signal. Motordrives to normally open position when powered with control wiring not connected.ORDERING INFORMATIONWhen purchasing replacement and modernization products from your TRADELINE® wholesaler or distributor, refer to theTRADELINE® Catalog or price sheets for complete ordering number.If you have additional questions, need further information, or would like to comment on our products or services, please write orphone:1. Your local Home and Building Control Sales Office (check white pages of your phone directory).2. Home and Building Control Customer RelationsHoneywell, 1885 Douglas Drive NorthMinneapolis, Minnesota 55422-4386In Canada—Honeywell Limited/Honeywell Limitée, 35 Dynamic Drive, Scarborough, Ontario M1V 4Z9.International Sales and Service Offices in all principal cities of the world. Manufacturing in Australia, Canada, Finland, France,Germany, Japan, Mexico, Netherlands, Spain, Taiwan, United Kingdom, U.S.A.63-2202—4 2
SERIES 72 MODUTROL IV MOTORSTOP VIEWTOP VIEW OF BRACKET4-7/8(124)4-1/4(107)5-1/2(140)4-5/8(116)2-5/16(58)5-13/16(148)11/16(17)1/4(7)534-1/16 (103)44-1/16 (103)4-1/16 (103)13/16(20)1-1/2 (37)POWER END1/4 (7)4-7/8 (124)5-9/16 (141)1-1/2 (37)WIRINGBOX3/4(19)1AUXILARYENDPOWERENDMOTOR2-9/16(66)5-3/8(137)6-7/16(164)SPRING RETURN MODEL SHOWN12SOME MODELS DO NOT HAVE AN AUXILIARYSHAFT. ALL OTHER DIMENSIONS ARE THE SAME.FOR HIGH TORQUE (60 LB-IN.) SPRING RETURNMODELS 8-3/4 (222); FOR LOW TORQUE (25 LB-IN.)SPRING RETURN MODELS 8-1/4 (210);NON-SPRING RETURN MODELS 7-5/16 (185).9/16 (15)23FOR HIGH TORQUE (60 LB-IN.) SPRINGRETURN MODELS (SHOWN).ADAPTERBRACKET3/4(19)45FOR LOW TORQUE (25 LB-IN.) SPRINGRETURN MODELS.FOR NON-SPRING RETURN MODELS.M17089BBFig. 1. Series 72 Modutrol IV Motor dimensions in in. (mm).Controller: These motors can be used with any electroniccontroller that provides a stable noise-free proportionalcurrent output as specified in Electrical Ratings, InputRange below.Electrical Ratings:Power Consumption: See Table 2.Input Range:Current, Nonadjustable: 4 to 20 mA nominal, 25 mAmaximum.Current, Adjustable: 4 to 20 mA adjustable, 50 mAmaximum.Zero/Null (Motor Closed): 0.08 to 18 mA.Span: 1.8 to 18 mA.Voltage, Nonadjustable: 2 to 10 Vdc.Input Impedance:4 to 20 mA Input: 100 ohms.2 to 10 Vdc Input: 400K ohms.Table 2. Series 72 Modutrol IV Motor PowerConsumption Ratings (at 120 Vac, 50/60 Hz).Power ConsumptionModelWattsAmpsM7261 19 0.20M7272 26 0.26M7274 15 0.71M7281 23 0.24M7282 28 0.28M7284 23 0.24M7285 28 0.28M7286 23 1.00M7294 23 0.243 63-2202—4
SERIES 72 MODUTROL IV MOTORSAuxiliary Switch Ratings (in Amps): See Table 3.Table 3. Auxiliary Switch Ratings (in Amps).One ContactRating a 120V 240VFull Load 7.2 3.6Locked Rotor 43.2 21.6a 40 VA pilot duty, 120/240 Vac on opposite contact.Stroke: Fixed 90° or 160° models available. Other modelsavailable with field adjustable strokes from 90° to 160°.Stroke adjusted by means of cams located in the wiringcompartment.Timing: Nominal 30 seconds for 90° stroke and 60 secondsfor 160° stroke.Dead Weight Load On Shaft: 200 lb (91 kg) on motor poweror auxiliary end; maximum combined load of 300 lb (136 kg).Motor Rotation:Closed: Counterclockwise rotation limit as viewed from motorpower end.Open: Clockwise rotation limit as viewed from motor powerend.Mechanically Normally Closed: Spring return. Normally closedmotors rotate to closed position on power loss.Mechanically Normally Open: Spring return. Normally openmotors rotate to open position on power loss.Electrically Normally Closed: Both spring return and nonspringmotors return to closed position on minimum signal.Electrically Normally Open: Both spring return and non-springreturn motors return to open position on minimum signal.Ambient Temperature Ratings: -40 to 150°F (-40 to 66°C).Shaft: 3/8 in. [9.5 mm] square.Approvals:Underwriters Laboratories Inc. Listed: File No. E4436; GuideNo. XAPX.Canadian Standards Association Certified: General listed FileNo. LR1620; Guide No. 400-E.Accessories:198162AA Internal Transformer 120/208/240 Vac 50/60 Hzprimary, 24 Vac secondary.198162EA Internal Transformer; 120 Vac 50/60 Hz primary,24 Vac secondary.198162GA Internal Transformer; 220 Vac 50/60 Hz primary,24 Vac secondary.198162JA Internal Transformer; 24 Vac 50/60 Hz primary,24 Vac secondary (for electrical isolation).220736A Internal Auxiliary Switch Kit; one switch, can befield-installed on TRADELINE models.220736B Internal Auxiliary Switch Kit; two switches, can befield-installed on TRADELINE models.220738A Adapter Bracket raises motor shaft height by 19 mmto match that of previous Modutrol ® Motor models.220741A Screw Terminal Adapter converts the standardquick-connect terminals to screw terminals.221455A Infinitely Adjustable Crank Arm, can rotate throughdownward position and clear motor base without requiringan adapter bracket.4074ERU Weatherproofing Kit provides NEMA 3 rating forModutrol IV Motors mounted in position other than upright.4074EZE Bag Assembly with parts that can provide CEcompliance.7617ADW Crank Arm, can rotate through downward positionand clear motor base without requiring an adapter bracket.ES650-117 Explosion-Proof Housing encloses motor for usein explosive atmospheres. Not for use with Q5001 (or anyother valve linkages). Order separately from O-Z/GedneyInc. To order, contact: O-Z/Gedney, Nelson Enclosures andControls,(918) 641-7381 or (918) 641-7374; or write to:O-Z/Gedney, Nelson Enclosures and ControlsP.O. Box 471650Tulsa, OK 74147-1650(Requires Honeywell 7617DM Coupling.)Q100 Linkage connects Modutrol ® Motor to V51 ButterflyValve. Requires the 220738A Adapter Bracket.Q181 Auxiliary Potentiometer for sequence or unison controlof 1 to 4 additional modulating (Series 90) motors.Q5001 Bracket and Linkage Assembly connects Modutrol IVMotor to water or steam valve.Q605 Damper Linkage connects motor to damper. Includesmotor crank arm.Q607 External Auxiliary Switch controls auxiliary equipmentas a function of motor position.63-2202—4 4
SERIES 72 MODUTROL IV MOTORSINSTALLATIONWhen Installing this Product...1. Read these instructions carefully. Failure to follow themcould damage the product or cause a hazardouscondition.2. Check the ratings given in the instructions and on theproduct to make sure the product is suitable for yourapplication.3. Installer must be a trained, experienced servicetechnician.4. After installation is complete, check out productoperation as provided in these instructions.CAUTIONElectrical Shock or Equipment Damage Hazard.Can shock individuals or short equipmentcircuitry.Disconnect all power supplies before installation.Motors with auxiliary switches can have more thanone disconnect.CAUTIONEquipment Damage Hazard.Can damage the motor beyond repair.Never turn the motor shaft by hand or with a wrench.Forcibly turning the motor shaft damages the geartrain and stroke limit contacts.IMPORTANTAlways conduct a thorough checkout wheninstallation is complete.LocationAllow enough clearance for accessory installation and motorservicing when selecting a location (see Fig. 1). If locatedoutdoors, use liquid-tight conduit connectors with the junctionbox to provide NEMA 3 weather protection. If mountedoutdoors in a position other than upright, install a 4074ERUWeatherproofing Kit and liquid-tight connectors to provideNEMA 3 protection.CAUTIONMotor Damage Hazard.Deteriorating vapors and acid fumes can damagemetal parts.Install motor in areas free of acid fumes and otherdeteriorating vapors.In excessive salt environments, mounting base and screwsshould be zinc or cadmium plated, not stainless steel or brass.Use the 220738A Adapter Bracket for mounting on thesesurfaces.MountingUse the following guidelines for proper motor mounting:• Always install motors with the crankshaft horizontal.• Mounting flanges extending from motor housing base aredrilled for 1/4 inch (6.4 mm) machine screws or bolts.• Non-Spring Return Motors are shipped from the factory inthe closed position (at the counterclockwise rotation limit,as viewed from the motor power end).• Spring Return Motors are shipped from the factory in theirnormal position.• Normally closed models are shipped at the counterclockwiserotation limit, as viewed from the motor power end.• Normally open models are shipped at the clockwiserotation limit, as viewed from the motor power end.10VERTICALREFERENCE90 DEGREE STROKEVERTICALREFERENCEM7272, M7282, M7285, M7286FULLY CLOSED90FULLY OPENFULLYCLOSEDFULLYOPENVERTICALREFERENCEFULLY CLOSEDFULLY OPEN160 DEGREE STROKEM5509160Fig. 2. Motor shaft position at limit of rotation(viewed from motor power end).10SPRING RETURN MOTORSM7261, M7274, M7281, M7284, M72944590VERTICALREFERENCEFULLY CLOSED10FULLY OPEN90 DEGREE STROKE 160 DEGREE STROKENON-SPRING RETURN MOTORS1605 63-2202—4
SERIES 72 MODUTROL IV MOTORSAdapter BracketThe 220738A Adapter Bracket, positioned between the motorand the equipment, raises motor shaft height by 0.75 in.(19 mm) to match that of previous Modutrol ® Motor models.The following applications require this bracket:• Q607 External Auxiliary Switch.• Damper linkage applications requiring added clearance toallow:— Crank arm rotation through the downward position.— Sufficient damper linkage to reach the motor shaft.• All valve linkages except the Q5001.NOTE:When the bracket is not used in a replacementapplication, the damper linkage requires adjustmentfor the new shaft position.To mount the motor with the bracket:1. Mount the bracket to the equipment with existing orstandard bolts.2. Using the provided bolts, mount the motor to the bracketthreaded holes. See Fig. 3.For valve linkage applications (other than the Q5001):1. Mount the bracket to the linkage.2. Position the motor on the bracket to align the motorshaft with the linkage.3. Attach the motor to the bracket with the four boltsprovided. See Fig. 4.Damper LinkagesThe motor does not include a crank arm. Order the crank armseparately (see Accessories in the Specifications section). Fordetailed instructions on the assembly of specific linkages,refer to the Installation Instructions packed with the linkage.CAUTIONEquipment Damage Hazard.Stalling a motor can damage the drive shaft.Ensure installation of motors and linkages allows themotor to drive through full stroke without obstruction.Valve LinkagesThe Q100 Linkage requires a 220738A Adapter Bracket for allvalve applications. Applications with the Q5001 Valve Linkagedo not require the 220738A Adapter Bracket (see Fig. 4).For detailed instructions on specific linkage assemblies, referto the instruction sheet packed with the linkage. In general,check the following points when installing a motor and linkage:• Adjust valve and louver-type damper linkages so thedamper or valve moves through only the maximum requireddistance while the motor moves through its full stroke.• With modulating control, maximum damper opening shouldbe no more than 60 degrees. Little additional airflow isprovided beyond this point.• Do not exceed load and torque ratings in any application.Junction BoxWhen used with liquid-tight conduit connectors, the junctionbox provides NEMA 3 weather protection for the motor. Thejunction box, standard with replacement motors, encloses theterminals and provides knockouts for wiring conduits. Housingan internal transformer or internal auxiliary switches requiresusing a junction box.63-2202—4 6
SERIES 72 MODUTROL IV MOTORSSTANDARDBOLTS (4)1BOLTSPROVIDED (4)WIRINGBOXMOTORPOWER ENDADAPTERBRACKETEQUIPMENTBASEPOWER ENDPOWER END1No. 12 OR 1/4 in. ZINC PLATEDMACHINE SCREWS OR BOLTSM452ENON-SPRING RETURNSPRING RETURNFig. 3. Mounting the motor with an adapter bracket.WIRINGBOXPOWEREND OFMOTORMOTORQ5001VALVELINKAGEVALVE1/4-20 UNC1 in. LONGMOUNTINGBOLTSM17092Fig. 4. Mounting the motor on a Q5001 Valve Linkage.7 63-2202—4
SERIES 72 MODUTROL IV MOTORSWiringCAUTIONElectrical Shock or Equipment Damage Hazard.Can shock individuals or short equipment circuitry.Disconnect all power supplies before installation.Motors with auxiliary switches can have more thanone disconnect.IMPORTANTAll wiring must agree with applicable codes,ordinances and regulations.1. Ensure that the voltage and frequency stamped on themotor correspond with the power supply characteristics.2. When connecting several motors in parallel, ensure thatthe power supply VA rating is large enough to providepower to all motors used without overloading.A3. Fig. 5 shows that motor terminals are quick-connectslocated on top of the printed circuit board.4. To access the wiring compartment:a. Remove the four screws from the junction box top.b. Lift off the cover.5. Fig. 6 shows the internal wiring schematic.6. Refer to Fig. 7 and 8 for typical wiring.Wire the motor as follows:1. Remove the wiring box cover by removing the fourscrews holding the cover to the motor.2. Wire motor to system using quick-connect terminals inwiring box.3. Replace wiring box cover.BRIGHT/INNERAUXILIARYSWITCH(+)RIGHT/INNERAUXILIARYSWITCHF (TEST)INNER AUXILIARYSWITCH CAM (BLUE)FINNER AUXILIARYSWITCH CAM (BLUE)V(-)Y(+)POWERENDPOWERENDT2OUTER AUXILIARYSWITCH CAM (RED)(-)T2OUTER AUXILIARYSWITCH CAM (RED)T1LEFT/OUTERAUXILIARYSWITCHT1LEFT/OUTERAUXILIARYSWITCHNOTE: FEATURES AVAILABLE ON SOME MODELS ONLY.NOTE: FEATURES AVAILABLE ON SOME MODELS ONLY.2 TO 10 VDC INPUT MOTORS 4 TO 20 mA NONADJUSTABLE INPUT MOTORSC(+)FSPAN ADJUSTMIN MAXSPAN ADJUSTPOTENTIOMETERRIGHT/INNERAUXILIARYSWITCHINNER AUXILIARYSWITCH CAM (BLUE)POWEREND(–)T2T1START ADJUSTMIN MAXOUTER AUXILIARYSWITCH CAM (RED)LEFT/OUTERAUXILIARYSWITCHSTART ADJUST POTENTIOMETERNOTE: FEATURES AVAILABLE ON SOME MODELS ONLY.4 TO 20 mA ADJUSTABLE INPUT MOTORSM5777Fig. 5. Terminals and adjustments.63-2202—4 8
SERIES 72 MODUTROL IV MOTORSTRIACSWITCHING+ – FELECTRONICCIRCUITTRIACSWITCHINGBRAKECIRCUITRY4T2T131L1(HOT)L2CONTROLLER1-+MOTORT1T2-+F24VL1(HOT)L2POWER SUPPLY. PROVIDE DISCONNECT MEANS ANDOVERLOAD PROTECTION AS REQURED.21FEEDBACKPOTENTIOMETER2CONNECTING F TO – WILL DRIVE MOTOR TO FULLY OPEN.Fig. 7. Typical system wiring.M5778CLOSELIMITOPENLIMIT-20 mAONTROLLERMOTORL1 L2(HOT)1CCWWINDING(CLOSE)12 2CWWINDING(OPEN)POWER SUPPLY. PROVIDE DISCONNECT MEANS ANDOVERLOAD PROTECTION AS REQUIRED.-+-+F 2MOTOR-+T1T2T1T22DIRECTION OF MOTOR TRAVEL AS VIEWED FROM POWER END.F234INTERNALLY MOUNTED TRANSFORMER. DO NOT CONNECTPOWER SUPPLY TO T1 AND T2.BRAKE CIRCUITRY ONLY ON SPRING RETURN MODELS.M5511Fig. 6. Series 72 motor internal wiring schematic.MOTOR-+F 2T1T212POWER SUPPLY. PROVIDE DISCONNECT MEANS ANDOVERLOAD PROTECTION AS REQURED.CONNECTING F TO – WILL DRIVE MOTOR TO FULLY OPEN.M5774Fig. 8. Driving up to six motors fromone 4 to 20 mA controller.9 63-2202—4
SERIES 72 MODUTROL IV MOTORSSETTINGS AND ADJUSTMENTSZero and Span Adjustment for M7284Q andM7285Q Motors (Fig. 5.)1. Adjust the start potentiometer fully clockwise (maximumzero) and the span potentiometer fully counterclockwise(minimum span).2. Set the controller current to the value required to drivethe motor to the closed position.3. Turn the start potentiometer slowly counterclockwiseuntil the motor begins to open. This is defined as thestart or zero setting.4. Set the controller current to the value required to drivethe motor to the fully open position. The motor will open.5. Turn the span potentiometer clockwise until the motorstarts to close. The difference between the fully openspan position current and the zero position current isdefined as the operating span.6. Recheck the start and readjust the span potentiometerP1 if necessary. Turn the start potentiometer clockwiseto increase the zero position.7. Recheck the span and readjust the span potentiometerif necessary. Turn it clockwise to increase the full spanposition.8. For sequential operation, as shown in Fig. 9, repeat theabove steps for each motor.CONTROL OUTPUTmA CURRENT (OR VOLTS DC)SEQUENTIAL OPERATIONFOR ADJUSTABLE ZERO AND SPAN MODELS20(10)16(8)12(6)8(4)4(2)Auxiliary SwitchesCAUTIONElectrical Shock or Equipment Damage Hazard.Can shock individuals or short equipmentcircuitry.Disconnect all power supplies before installation.Motors with auxiliary switches can have more thanone disconnect.CAUTIONEquipment Damage Hazard.Can damage the motor beyond repair.Never turn the motor shaft by hand or with a wrench.Forcibly turning the motor shaft damages the geartrain and stroke limit contacts.Adjustable cams actuate the auxiliary switches. These camscan be set to actuate the switches at any angle within themotor stroke. Select switch differential of 1° or 10°.Motors with factory added auxiliary switches are shipped inthe closed position (fully counterclockwise, as viewed from themotor power end) with auxiliary cams set to actuate switches30° from the closed position and to provide 1° degreedifferential. With the motor in the closed (fullycounterclockwise) position, the auxiliary switch breakscontacts R-B. See Fig. 10 for auxiliary switch wiring.TRADELINE Motors are shipped with auxiliary switch camsthat permit acceptance of 220736A,B Internal Auxiliary SwitchKits. Refer to form 63-2228 for 220736A,B InstallationInstructions.0CLOSED OPEN CLOSED OPEN CLOSED OPENMOTOR 1 MOTOR 2 MOTOR 31 3 3 31 MOTOR 1 PROPORTIONS BETWEEN 4 AND 12 mA; FULLYCLOSED AT 4 mA, FULLY OPENED AT 12 mA.2MOTOR 2 PROPORTIONS BETWEEN 8 AND 16 mA; FULLYCLOSED AT 8 mA, FULLY OPENED AT 16 mA.MOTOR 3 PROPORTIONS BETWEEN 12 AND 20 mA SIGNAL;FULLY CLOSED AT 12 mA, FULLY OPENED AT 20 mA.23UP TO 6 MOTORS CAN BE DRIVEN SEQUENTIALY OR INUNISON FROM ONE CONTROLLER.ADJUST ZERO ADJUST AND SPAN ADJUST POTENTIOMETERSTO ACHIEVE DESIRED SEQUENCE.M2893AFig. 9. Sequential operation of motors.63-2202—4 10
SERIES 72 MODUTROL IV MOTORSAuxiliary Switch AdjustmentIMPORTANTWhen adjusting the auxiliary switch cams use thefollowing procedure:1.Insert 1/8 in. screwdriver blade into a slot on camand move the screwdriver top as far as possible inthe required direction. See Fig. 10.2.Repeat step 1 in successive cam slots until thecam is in the required position.Use the following procedure to obtain the desired auxiliaryswitch settings:1. Remove the top cover from the motor to gain accessto the motor terminals and auxiliary cams.2. Disconnect the controller from the motor.3. Connect a current source to the positive and negativeterminals.4. Drive the motor to the position where the auxiliaryequipment is to be switched by increasing or decreasingthe current.5. For a switch differential of 1°, check continuity of auxiliaryswitch contacts R-B and rotate the cam as follows:a. If the contacts are open, rotate the cam clockwiseuntil the R-B contacts close.b. If the contacts are closed, rotate the camcounterclockwise until the R-B contacts open.6. For a switch differential of 10° rotate the camapproximately 180° so the slow-rise portion of thecam actuates the switch.7. Check continuity of the auxiliary switch contacts R-B.8. Rotate the cam as follows:a. If the contacts are open, rotate the camcounterclockwise until the R-B contacts close.b. If the contacts are closed, rotate the cam clockwiseuntil the R-B contacts open.c. Make final adjustment in the proper direction toobtain contact make or break at the desired position.9. Check for the proper differential and switching of theauxiliary equipment by driving the motor though the fullstroke in both directions.10. Disconnect power, remove current source, reconnectthe controller, and replace the top cover on the motor.NOTE:Changing the differential from 1° to 10° reverses theswitching action. For example, with a 10° differential,switch contacts R-B make and R-W break on acounterclockwise (closed) rotation. With a 1°differential, switch contacts R-W make and R-Bbreak on a counterclockwise (closed) rotation.1/8 INCHSTRAIGHT-BLADESCREWDRIVERMOVE SCREWDRIVER ATTOP ONLY TO ADJUST CAM.NOTE: CAMS ARE OFFSETVERTICALLY TO PROVIDEBETTER VIEW OF BACK CAM.SLOW RISEPORTION(APPROX.10° DIFF.)INNERAUXILIARYCAM(BLUE)RIGHT/INNERAUXILIARYSWITCHFAST RISEPORTION(APPROX.1° DIFF.)LEFT/OUTERAUXILIARYSWITCHFAST RISEPORTION(APPROX.1° DIFF.)OUTERAUXILIARYCAM(RED)SLOW RISEPORTION(APPROX.10° DIFF.)RIGHT/INNERAUXILIARY SWITCHINNER AUXILIARYCAM (BLUE)MOTOROPENPOWERENDMOTORCLOSELEFT/OUTERAUXILIARYSWITCHPOWER ENDOF MOTOROUTER AUXILIARYCAM (RED)M17101Fig. 10. Auxiliary switch adjustment.11 63-2202—4
SERIES 72 MODUTROL IV MOTORSOPERATION AND CHECKOUTOperationThe motor feedback potentiometer and control current inputcircuit form a bridge circuit. As long as the final controlelement remains at the position proportional to the inputcurrent from the controller, the circuit is balanced, and themotor does not run. When the value of the controlled mediumchanges, the current from the controller changes, andunbalance is amplified to energize the Triac switching to runthe motor in the proper direction to correct the change in thetemperature or the pressure. The motor turns the feedbackpotentiometer to rebalance the circuit and stop the motor.CheckoutAfter installation and linkage adjustment, operate the motorthrough the controller. Make sure that:• The motor properly operates the damper or valve.• The motor responds properly as the input is varied.• The auxiliary switch, if used, operates at the desired pointof motor rotation.Inspect the motor, linkage, and valve or damper to see that allmechanical connections are correct and secure.In damper installations, the pushrod should not extend morethan a few inches past the ball joints. Check to see thatthere is adequate clearance for the linkage to move throughits stroke without binding or striking other objects.See controller or system instructions for additional checkoutprocedures.Motor Operation CheckoutCheck motor operation as follows:1. To close the motor, open terminals +, -, and F.2. To open the motor, connect terminal F to thenegative (-) motor terminal.Home and Building Control Home and Building Control Honeywell Asia Pacific Inc. Honeywell Europe S.A. Honeywell Latin AmericanHoneywell Honeywell Limited-Honeywell Limitée Room 3213-3225 3 Avenue du Bourget Region1985 Douglas Drive North 35 Dynamic Drive Sun Hung Kai Centre 1140 Brussels 480 Sawgrass Corporate ParkwayGolden Valley, MN 55422 Scarborough, Ontario No. 30 Harbour Road Belgium Suite 200M1V 4Z9 Wanchai Sunrise FL 33325Hong Kong63-2202—4 B.B. Rev. 11-00Printed in U.S.A. on recycledpaper containing at least 10%www.honeywell.compost-consumer paper fibers.
<strong>Tower</strong> <strong>Dryer</strong> Ops & ServiceCOMPONENTSVIICOMPONENT MANUALSGAS REGULATORS
RM-1328 Rev. 9Regulator Installation andMaintenance InstructionsModel 121RegulatorsIntroductionThe Model 121 Regulator represents a combination of capacity,performance and value...Streamlined body passages provide large capacity. An externalcontrol line is required from lower case to control piping. The 121has a fast speed of response, yet is stable in operation. Soft seatsassure positive tight shutoff. Orifices are replaceable. Springsare color coded.And it is also available as a zero governor or atmospheric regulator,a differential regulator, a relief valve or backpressure regulator,vacuum regulator or vacuum breaker.Installation1. Examine the regulator for shipping damage.2. Check nameplate data. Be sure regulator conforms withwhat was ordered.3. Inside of regulator and piping must be clean and free ofdirt. Remove all dirt and debris before installing regulator.Failure to remove dirt/debris could result in regulator damageor trouble.4. Remove all shipping screens and covers from the regulator.Do not let dirt get inside the regulator.5. Install the regulator.Make sure the inlet and outlet are correctly connected.High pressure connects to the inlet. The flow arrow mustpoint downstream.6. Screwed connections must conform with good piping practicefree of excess thread engagement per ANSI B2.1Apply pipe joint compound to male threads only.7. The Model 121 Regulator is usually right side-up as shownon the Typical Installation drawing (See Page 2). It may,however, be installed upside down. Although, when invertedit may be necessary to readjust the set-point.Caution: Do not install sideways. The diaphragm shouldbe horizontal.8. On indoor installations requiring venting outdoors, run thevent piping as short and direct as possible with minimumbends and elbows. Use the same size or larger pipe asthe vent connections on the regulator. With natural gas, orany other hazardous gas, vent to a safe place outdoors incase gas should accidentally be discharged. Screen andprotect the opening outdoors to guard against water, ice,dirt, debris or insects.Install the control line. Connect it into the outlet piping atleast 5 pipe diameters downstream from the regulator.CAUTIONS:a. On backpressure regulators and relief valves theexternal control line connects into the inlet piping,5 pipe diameters upstream from the regulator.b. Do not install any automatic shutoff device thatcloses completely between the regulator and thecontrol line connection into the piping.To avoid excessive turbulence, the connection should beclean and smooth on the inside and be located in straightpipe clear of valves and fittings. Keep the inside of thecontrol line clean and protect it from corrosion. Pitch itaway from the regulator and avoid moisture pockets. Itmust be strong ( 1 / 4 " for 121-8 and 121-12, 1 / 2 " for 121-16, or larger steel tubing or pipe is preferred). It must bewell protected against breakage (remember...regulatorsopen wide if the control line breaks).9. Make sure the regulator is correctly connected andadequately supported and pipe joints are tight.Start-UpA. The inlet and outlet shutoff valves should both be closed. If aby-pass is used, the by-pass valve should also be closed.B. Note the set-point (set-point is the outlet pressure the regulatoris adjusted to deliver). Regulator is factory adjusted to theset-point specified on the order.CAUTION: This caution applies where the piping downstreamof the outlet shutoff valve is pressured. That pressuremust not exceed the regulator set-point bymore than the pressure noted (see “MaximumEmergency Pressures”, Page 18).C. Slowly and carefully open the inlet shutoff valve just enoughto allow inlet pressure to build up slowly in the regulator untilit is fully pressured.CAUTION: During start-up, a pressure gauge must be usedon the regulator outlet pressure and carefullywatched. While inlet pressure builds up, outletpressure must not exceed set-point by more than1 psi. If outlet pressure begins to exceed set-pointby more than 1 psi, close the inlet shutoff valve.This indicates the regulator is not closing properly.Check and make necessary corrections before proceedingwith start-up.If regulator outlet pressure exceeds set-point bymore than the pressure noted, refer to “MaximumEmergency Pressures”, Page 18 for instructions.D. Check installation for leaks.E. Slowly open the outlet shutoff valve to allow a small flow (approximately1000 SCFH). Make sure the flow of gas doesnot create a hazard.NOTE: If piping downstream of outlet shutoff valve is pressured,see “CAUTION” under B.F. With gas flowing, check for correct inlet and outlet pressures.It may be necessary to further open the inlet shutoff valve tomaintain full inlet pressure.G. Make sure the regulator closes tight (tight lock-up). To do this,reduce flow to zero by slowly closing the outlet shutoff valve.Outlet pressure should not exceed set-point by more than6" w.c.H. Fully open inlet and outlet shutoff valves. Do this slowly andcarefully. Watch pressure gauges.I. Complete start-up by making sure there are no leaks.NOTE• Do not exceed the regulator’s pressure ratings. Theregulator outlet has a lower pressure rating than theinlet. Do not expose the regulator outlet or control lineto inlet pressure.Regulator with external control may be used as anupstream monitor or upstream regulator in a monitorset. The control line must connect into the outlet pipingdownstream of the downstream regulator.• If the regulator is to be moved to another location,make sure its construction is compatible with the pressureand flow conditions.Temperature LimitsThe Model 121 Regulator can be used for flowing temperaturesfrom –20°F to 150°F.Buried ServiceThe Model 121 Regulator is not recommended for buried service.
Set Point AdjustmentA. The 121 is factory adjusted as specified on the order. To changethe set-point, readjust as follows:1. Remove the top cap 1.2. Adjust set-point with adjustment button 3, 3a or 6. Turn clockwiseto increase and counterclockwise to decrease theoutlet pressure.NOTE: a. Only make this adjustment when gas is actuallyflowing through the regulator. The flow should besmall (approximately 1000 SCFH). Do not adjustwhen the regulator is closed and there is no flow.To Change Springb. Do not increase the set-point beyond the upperlimit of the outlet pressure range for the spring 9(refer to spring tables, Page 3).c. Always check the outlet pressure with a pressuregauge while adjusting the set-point.3. When adjustment is complete, replace top cap 1. Screw itsecurely into place. Leaving it off could cause unstable regulatoroperation.A. The outlet pressure ranges of spring 9 are given in the tableson Pages 3 and 4. To change the spring:1. Remove top cap 1.CAUTIONIt is the user’s responsibility to assure that allregulator vents and/or vent lines exhaust to anon-hazardous location away from any potentialsources of ignition. Where vent linesare used, it is the user’s responsibility to assurethat each regulator is individually ventedand that common vent lines are not used.2. Unscrew and remove adjustment button 3, 3a or 6 by turningcounterclockwise, and remove spring 9.3. Insert new spring. Make sure it is positioned correctly at thebottom before replacing adjustment button 3, 3a or 6.4. Adjust for the desired outlet pressure per previous section“Set Point Adjustment”.5. When adjustment is complete, replace top cap 1. Screw itsecurely into place. Leaving it off could result in unstableregulator operation.6. New spring range should be marked on regulator. If old springrange appears on regulator, it should be removed.ShutdownCAUTIONThe diaphragm case vent must be positionedto protect against flooding, drain water, iceformation, traffic, tampering, etc. The ventmust be protected against nest buildinganimals, bees, insects, etc. to minimize thechances for foreign material from collectingin the vent side of the regulator diaphragm.A. To take the regulator out of service, close the inlet stop valvefirst. Close it carefully. Then close the outlet stop valve.Before working on regulator, read the next section “GeneralServicing Instructions” and the applicable servicing instructions.CAUTIONTurn gas on very slowly. If an outlet stop valve isused, it should be opened first. Do not overloaddiaphragm with a sudden surge of inlet pressure.Monitor the outlet pressure during start-up toprevent an outlet pressure overload.General Servicing InstructionsA. Before any disassembly of the regulator make sure it is completelydepressured. Pressure must be fully released from theinlet, the outlet and the control line connection. Failure to adequatelydepressure could result in serious personal injury.B. Carefully note the location and position of all disassembledparts to be certain reassembly is correct. Inspect each partcarefully and replace any that are worn or damaged or otherwiseunsatisfactory.C. Upon completion of servicing, make certain that the regulatorinstallation is entirely free of leaks.CAUTIONRegulators are pressure control devices withnumerous moving parts subject to wear thatare dependent upon particular operatingconditions. To assure continuous satisfactoryoperation, a periodic inspection schedulemust be adhered to with the frequency ofinspection determined by the severity ofservice and applicable laws and regulations.2
Outlet Pressure Ranges and SpringsSIZEOUTLETPRESSURERANGESPRINGCOLORSPRINGPART NUMBERMAXIMUMINLETPRESSURENOMINALDIAPHRAGMSIZE1 1 /2" to 3 1 /2" w.c.Blue-BlackBlack-Red143-82-021-01 (main spring)121-10-021-50 (counterspring)3/4", 1" and 1 1 /4"**Model121-81 1 /2" to 12" w.c.3 1 /2" to 6 1 /2" w.c.5" to 8 1 /2" w.c.6" to 14" w.c.12" to 28" w.c.1 psi to 2 psi2 psi to 4 1 /4 psiGreen-BlackBlack-RedRed-BlackBlue-BlackGreen-BlackGreen (2" O.D.)Orange (2" O.D.)Black143-82-021-02 (main spring)121-10-021-50 (counterspring)143-82-021-00143-82-021-01143-82-021-02143-16-021-05143-16-021-06143-16-021-0760 psi8"3/4", 1" and 1 1 /4"**Model 121-8HP3 psi to 6 1 /2 psi6 psi to 10 psi1 1 /2" to 3 1 /2" w.c.Cadmium*Cadmium*WhiteRed–143-16-021-08143-16-021-08 (outer)143-16-021-13 (inner)143-16-021-03 (main spring)120-10-021-10 (counterspring)60 psi8"1 1 /2", 2" and 2 1 /2"Model121-121 1 /2" to 12" w.c.3 1 /2" to 6 1 / 2" w.c.5" to 8 1 /2" w.c.6" to 14" w.c.12" to 28" w.c.1 psi to 2 psi1 1 /2 psi to 3 psiMaroon–Red (2" O.D.)Blue (2" O.D.)Green (2" O.D.)Orange (2" O.D.)BlackCadmium121-42-021-00 (main spring)120-10-021-10 (counterspring)143-16-021-03143-16-021-04143-16-021-05143-16-021-06143-16-021-07143-16-021-0860 psi12"1 1 /2", 2" and 2 1 /2"Model 121-81 psi to 2 psi2 psi to 4 1 /4 psiOrange (2" O.D.)Black143-16-021-06143-16-021-0760 psi8"1 1 /2", 2" and 2 1 /2"Model 121-8HP3 psi to 6 1 /2 psi6 psi to 10 psiCadmium*Cadmium*White143-16-021-08143-16-021-08 (outer)143-16-021-13 (inner)60 psi8"3" and 4"Model 121-163 1 /2" to 6 1 /2" w.c.5" to 8 1 /2" w.c.6" to 14" w.c.14" to 28" w.c.1/2 psi to 1 1 /4 psiRed (3" O.D.)Blue (3" O.D.)Green (3" O.D.)Orange (3" O.D.)Yellow121-62-021-50121-62-021-51121-62-021-52121-62-021-53121-62-021-5640 and 15†16"3" and 4"Model 121-121 psi to 2 psi1 1 /2 psi to 3 psiBlackCadmium143-16-021-07143-16-021-0840 and 15†12"*Requires High Pressure Spring Adjustment. †3" 121 is 40 psi. and 4" 121 is 15 psi. ** 3 / 4" x 3 / 4" not available.Atmospheric Regulator or Zero GovernorSIZE3/4", 1" and 1 1 /4" 121-81 1 /2", 2" and 2 1 /2" 121-123" and 4" 121-16OUTLET PRESSURE RANGE1 1 /2" w.c. vacuum (–1 1 /2" w.c.) to + 1 1 /2" w.c.1" w.c. vacuum (–1" w.c.) to + 1 1 /2" w.c.1 1 /4" w.c. vacuum (–1 1 /4" w.c.) to +1 1 /4" w.c.SPRINGSMain Spring (Red-Black) ................. 143-82-021-00Counterspring (Red-Black) ............. 121-10-021-50Main Spring (Red-Black) ................. 143-82-021-00Counterspring ................................. 120-10-021-10Main Spring only ............................. 121-62-021-543
Differential RegulatorSIZEDIFFERENTIALPRESSURERANGESPRINGCOLORSPRINGPARTNUMBERMAXIMUMBODYPRESSUREMAXIMUMDIAPHRAGMPRESSUREDIFFERENTIALMAXIMUMDIAPHRAGMCASEPRESSURE3/4", 1" and 1 1 /4"121-8**1 1 /2", 2" and 2 1 /2"121-123" and 4"121-163" and 4"121-123 1 /2" to 6 1 /2" w.c.5" to 8 1 /2" w.c.6" to 14" w.c.12" to 28" w.c.1 psi to 2 psi3 1 /2" to 6 1 / 2" w.c.5" to 8 1 /2" w.c.6" to 14" w.c.12" to 28" w.c.1 psi to 2 psi3 1 /2" to 6 1 /2" w.c.5" to 8 1 /2" w.c.6" to 14" w.c.12" to 28" w.c.1 psi to 2 psi1 1 /2 psi to 3 psiRed-BlackBlue-BlackGreen-BlackGreenOrange (2" O.D.)Red (2" O.D.)Blue (2" O.D.)Green (2" O.D.)Orange (2" O.D.)BlackRed (3" O.D.)Blue (3" O.D.)Green (3" O.D.)Orange (3" O.D.)BlackCadmium143-82-021-00143-82-021-01143-82-021-02143-16-021-05143-16-021-06143-16-021-03143-16-021-04143-16-021-05143-16-021-06143-16-021-07121-62-021-50121-62-021-51121-62-021-52121-62-021-53143-16-021-07143-16-021-0860 psi60 psi40 and 15*40 and 15*2 psi2 psi1 psi2 psi35 psi20 psi10 psi20 psi*3" 121-16 is 40 psi. and 4" 121-16 is 15 psi. ** 3 /4" x 3 /4" not available.Back Pressure Regulator or Relief ValveSIZERELIEF OR BACKPRESSURE RANGESPRING COLORPARTNUMBERMAX. DIAPHRAGMCASE PRESSURE3/4" thru 2 1 /2"121-8**3" to 5 1 /2" w.c.5" to 7 1 /2" w.c.6" to 13" w.c.10" to 15" w.c.12" to 25" w.c.Red-BlackBlue-BlackGreen-BlackBlue (2" O.D.)Green (2" O.D.)143-82-021-00143-82-021-01143-82-021-02143-16-021-04143-16-021-0510 psi3/4" thru 2 1 /2"121-8**1 1 /2", 2" and 2 1 /2"121-121 1 /2" thru 4"121-1218" w.c. to 2 psi1 psi to 4 psi3 psi to 6 psi6 psi to 10 psi3" to 5 1 /2" w.c.5" to 7" w.c.6" to 12" w.c.12" to 25" w.c.20" w.c. to 1 3 /4 psi1 1 /2" to 2 3 /4 psiOrange (2" O.D.)BlackCadmium*Cadmium (outer)*White (inner)[ ]Red (2" O.D.)Blue (2" O.D.)Green (2" O.D.)Orange (2" O.D.)BlackCadmium143-16-021-06143-16-021-07143-16-021-08143-16-021-08143-16-021-13143-16-021-03143-16-021-04143-16-021-05143-16-021-06143-16-021-07143-16-021-0820 psi10 psi3" and 4"121-163" to 4 1 /2" w.c.3" to 6" w.c.5" to 11" w.c.10" to 24" w.c.14" w.c. to 1 1 /4 psiRed (3" O.D.)Blue (3" O.D.)Green (3" O.D.)Orange (3" O.D.)Yellow121-62-021-50121-62-021-51121-62-021-52121-62-021-53121-62-021-565 psi*Require High Pressure Spring Adjustment (121-8HP).** 3 /4" x 3 /4" not available.4
1 1 / 2 ", 2" and 2 1 / 2 " Model 121Standard, Differential, Atmospheric or Zero Governors1" NPT Ventconnection1" NPT Ventconnection1/ 4" NPT Ventconnection1 /4" NPT Controlline connection121-8 (Standard)121-12 (Standard)Fig. 1ADJUSTMENT 3and VENT CONNECTION21b for Differential Regulators,Atmospheric Regulatorsand Zero Governors3121-8 HP (High Pressure)1" NPT Ventconnection1/ 4" NPT Controlline connectionPIPE SIZES (inlet x outlet)1 1 /2" x 1 1 /2"}1 1 /2" x 2"2" x 2" Screwed, NPT2 1 /2" x 2 1 /2"2" x 2" Flanged ANSI 125 lb. FF1 1 / 2 ", 2" and 2 1 / 2 " Model 121123Back Pressure1"NPT Ventconnection1/ 4 " NPT Controlline connection212223241" NPT Ventconnection21a9 4521a25262729a 29121-8 (Back Pressure)b22232425cdfh112627 132929a1 4 " NPT Controlline connection3033abcd121" NPT Ventconnection34351/ 4 " NPT Controlline connection2414a 14b 15 16a 16b 13 19a 19 18 38 37 32121-12 (Back Pressure)25262729a 29121-8 HP (High Pressure)(Back Pressure)8
Condensed Parts List 1 1 / 2 ", 2" and 2 1 / 2 "ILL.NO.11a22a33a457a7b911111112DESCRIPTIONSeal CapSeal CapTetraseal (or O-Ring) 2 1 /4" x 2 3 /8"Tetraseal (or O-Ring) 1 1 /2" x 1 5 /8"Adjustment Spring ButtonSpring Adjusting ScrewHex Steel NutHousing CoverTop Spring ButtonThrust Bearing, stainless ball,3/8" diameterSpring, see table “Spring Ranges”121-12 Diaphragm Assembly (3 1 /2" w.c.to 2 psi outlet pressure)11a Elastic Stop Nut 52-NTE-06611b Bottom Spring Button11c Diaphragm Pan11d Molded Diaphragm, Buna-N11d Diaphragm, Viton11f Seal Washer11h Diaphragm Stud, stainless steel121-8 Standard Diaphragm Assembly1 psi to 4 1 /4 psi outlet pressure)11a Elastic Stop Nut 29-NE-06611b Bottom Spring Button11c Diaphragm Pan11d Diaphragm, Buna-N11d Diaphragm, Viton11f Seal Washer11h Diaphragm Stud, stainless steel121-8 HP High Pressure DiaphragmAssembly (3 psi to 10 psioutlet pressure)11a Elastic Stop Nut 29-NE-06611b Bottom Spring Button11c Diaphragm Pan11d Diaphragm, Buna-N11d Diaphragm, Viton11e Upper Plate11f Seal Washer11g Lower Plate11h Diaphragm Stud, stainless steel121 Seal Diaphragm Assembly12a Piston12b Seal Diaphragm, Buna-N12b Seal Diaphragm, Viton12c Plate12d Stem, stainless steelPART NUMBER143-16-005-00121-10-005-52905241906534143-16-009-00906537921005121-10-005-51121-10-009-51930510121-16-550-51908561121-10-022-50121-16-017-50121-16-150-53121-16-150-55121-10-178-50121-16-058-52121-10-551-52903955121-10-022-50121-10-017-50121-10-150-50121-10-150-52121-10-178-50091-16-058-02121-10-550-55903955121-10-022-53121-10-017-50121-10-150-50121-10-150-52121-10-022-52121-10-178-50121-10-079-52091-16-058-02121-16-564-51121-16-053-51121-16-364-50121-16-364-51121-16-010-53121-16-016-53ILL.NO.13141516a16b181919a2629a30323334454612144647DESCRIPTIONO-Ring, Buna-N, 3 /8" x 1 /2"O-Ring, Viton, 3 /8" x 1 /2"Wave WasherMolded Valve, Buna-N (45-50 Duro)Molded Valve, Viton-A (65-75 Duro)Retaining RingPliers for retaining ring 16a, Truarc 0200Valve Holder, split (pair required),stainless steelTetraseal (or O-Ring) 2 1 /2" x 2 11 /16"Orifice, 2 5 /32" dia., steelOrifice, 2 5 /32" dia., stainless steelRetaining Ring, stainlessPliers for retaining ring 19a, Truarc 0600GasketCopper WasherO-Ring, 3 1 /8" x 3 1 /2"Tetraseal (or O-Ring) 3 1 /4" x 3 1 /2"Seal Diaphragm RingGasketTravel IndicatorRepair Kits, consisting of Buna-N Mainand Seal Diaphragms, Buna-N MoldedValve plus Wave Washer and RetainingRing, Buna-N O-Rings, Tetraseals andGaskets:For 121-12For 121-8For 121-8 HPFOR BACK PRESSURE MODELSItem 12d above, Stem, Stainless Steel - substituteStem, Back PressureItem 14 above, Wave Washer - substitutePoly-U DiskRetainerItem 46 above, Repair Kits - substituteFor 121-12 Back PressureFor 121-8 Back PressureFor 121-8 HP Back PressureAdd Item 47Valve, Seal Diaphragm and Stem AssemblyPART NUMBER934007902418905479121-16-311-50121-16-311-519044471190646121-16-130-51904207121-16-023-51121-16-023-529046571190648121-16-063-51121-16-178-51934041904078121-16-008-50121-16-104-50091-00-365-00121-16-598-50121-86-598-50121-86-598-51121-16-016-55121-16-102-52121-16-103-50121-16-598-52121-86-598-54121-86-598-55121-16-511-519
Servicing – General Instructions1. Make sure the regulator is entirely depressured before servicing.2. Carefully note location and position of all disassembled parts to becertain reassembly is correct. Inspect each one carefully and replacethose that are worn or damaged or otherwise unsatisfactory.3. A moderate application of lubricant to O-ring 13 will help assure freestem movement and a tight seal. Similar application of lubricant tothe other O-rings or Tetraseals will help assure theirtightness.Do not use petroleum base lubricants.4. Bolted connections should be tightened evenly and firmly.Carefully tighten diaphragms into place. Bolts must be tight enoughto prevent leakage, but not so tight that the diaphragm material iscrushed or damaged.5. Upon completion of servicing, make certain that regulator installationis entirely free of leaks.To Service Valve (15)1. Remove bolts 38 and remove bottom cap 37 and Tetraseal 32.2. Remove retaining ring 16a. Use Truarc 0200 pliers, Invensys PartNo. 1190646.3. Remove both halves of valve holder 16b.4. Remove valve 15 (wave washer 14 will probably also come off...donot lose it).– To reassemble, replace parts in reverse sequence.To Service Main Diaphragm (11d)1. Remove top cap 1, and release and remove adjustment 3. On highpressure Model remove cap 1a, release adjustment 3a, and removecover 5 and button 7a. Mark or measure position of adjustment 3 or3a. Use this to return adjustment to this setting during reassembly.2. Remove spring 9.3. Remove bolts 22 and upper case 21.4. Rotate diaphragm assembly 11 counterclockwise (this unscrews 11hfrom 12d) and remove.5. To disassemble diaphragm assembly, remove nut 11a. Carefullynote location and position of all parts to be certain of correct reassembly.Abrasive side of emery cloth washers face againstdiaphragm.– To reassemble, replace parts in reverse sequence.Make the screwed connection between 11h and 12d loose byapproximately 1 /2 turn. To do this, carefully rotate diaphragmassembly 11 clockwise until this screwed connection bottoms (donot jam it together). Then, back-off diaphragm assembly 11 counterclockwiseapproximately 1 /2 turn...this is very important...the 11h to12d screwed connection must not be tight.To Service Orifice (19)1. Remove valve 15 per section “To Service Valve (15)”.2. Remove main diaphragm assembly 11 per steps 1 through 4 “ToService Main Diaphragm (11d)”.3. Remove seal diaphragm assembly 12 per steps 3 and 4 under “ToService Seal Diaphragm (12b)”.4. Remove retaining ring 19a. Use Truarc 0600 pliers, Invensys PartNo. 1190648.5. Remove orifice 19 through top opening.– To reassemble, replace parts in reverse sequence.(On reassembly, be sure that 19a is fully seated in its groove. Also,beveled edge of 19a faces downward toward bottom cap 37.)To Service Seal Diaphragm (12b)1. Remove valve 15 per section “To Service Valve (15)”.2. Remove main diaphragm assembly 11 per steps 1 through 4 “ToService Main Diaphragm (11d)”.3. Remove bolts 25 and lower diaphragm case 24.4. Remove bolts 29 and centerpiece 27, and then remove sealdiaphragm assembly 12.5. To disassemble 12, unscrew piston 12a from stem 12d. Use aspanner wrench in notch in skirt of piston (this can also be done byinserting a standard 7 /32" Allen wrench in the notch).– To reassemble, replace parts in reverse sequence.Make certain that fabric side of seal diaphragm 12b faces upwardand “rubber” side faces downward toward body.Do not pinch loop in seal diaphragm 12b between ring 33 andcenterpiece 27. Also, rounded edge of 33 faces upward towardseal diaphragm 12b.Periodic Inspection: Regulators are pressure control devices withnumerous moving parts subject to wear that is dependent uponparticular operation conditions. To assure continuous satisfactoryoperation, a periodic inspection schedule must be adhered to withthe frequency of inspections, determined by the severity of serviceand applicable laws and regulations.10
3" and 4" Model 121Standard1" NPT Ventconnection1" NPT Ventconnection1/ 2" NPT Controlline connection121-121/4" NPT Controlline connection3" x 3"4" x 4"PIPE SIZES (inlet x outlet)}Flanged ANSI 125 lb. FF1" NPT Ventconnection11abcdfh121-161 2 " NPT Control13line connectionab12cd143" 121 as shown.4" 121 uses a spacer,15a 15 16a 16b 17 18 19 19aapprox. 1" O.D. x 3 4 " I.D.x 3 16 " thick.21a1234526121-162a879104538 37 32 353" and 4" Model 121Back Pressure2122232425262728293233341" NPT Ventconnection222324252621a1239 4527 292821121-12 (Back Pressure)29aabcdfh111 4 " NPT Controlline connectionabcd1212
Condensed Parts List 3" and 4"3" and 4" Model 121ILL.NO.123891111131416a16b1726284614DESCRIPTIONSeal Cap for 121-16Seal Cap for 121-12Seal Cap Gasket for 121-16Tetraseal for 121-12, 2 1 /4", x 2 3 /8"Adjustment Spring Button for 121-12Thrust WasherSpring, see table “Spring Ranges”121-16 Diaphragm Assembly11a Elastic Stop Nut 52-NTE-06611b Bottom Spring Button11c Diaphragm Pan11d Diaphragm, Buna-N11d Diaphragm, Viton11f Seal Washer11h Diaphragm Stud, stainless steel121-12 Diaphragm Assembly (3 1 /2" w.c. to 2 psioutlet pressure)11a Elastic Stop Nut 29-NE-06611b Bottom Spring Button11c Diaphragm Pan11d Molded Diaphragm, Buna-N11d Diaphragm, Viton11f Seal Washer11h Diaphragm Stud, stainless steelO-Ring, Buna-N, 3 /8" x 1 /2"O-Ring, Viton, 3 /8" x 1 /2"Wave WasherRetaining RingPliers for retaining ring 16a, Truarc 0400Valve Holder, split (pair required), stainless steelO-Ring, Buna-N, 5 /8" x 3 /4"O-Ring, Viton, 5 /8" x 3 /4"Tetraseal (or O-Ring) 4 3 /8" x 4 5 /8"Tetraseal (or O-Ring) 2 3 /4" x 3"Repair Kits, consisting of Buna-NMain and Seal Diaphragm, Buna-NMolded Valve plus Wave Washerand Retaining Ring, Buna-NO-Rings, Tetraseals and Gaskets:For 3" 121-163" 121-124" 121-164" 121-12FOR BACK PRESSURE MODELSItem 14 above, Wave Washer - substitutePoly-U DiskRetainerPART NUMBER138-02-005-01143-16-005-00120-08-066-00905241143-16-009-00141-10-160-01908561121-62-022-50121-62-017-50121-62-150-50121-62-150-52121-10-178-50121-16-058-52121-16-550-51903955121-10-022-50121-16-017-50121-16-150-53121-16-150-55121-10-178-50121-16-058-529340079024189054819044481190647121-22-130-51902922902698904085904079121-60-598-50121-20-598-50121-62-598-50121-22-598-50121-22-102-52121-22-103-504" Model 121 only 3" Model 121 onlyILL.NO.121515a181919a323334451247121515a181919a2020a323334451247DESCRIPTION12a Piston12b Seal Diaphragm, Buna-N12b Seal Diaphragm, Viton12c Plate12d Stem, stainless steelMolded Valve, Buna-N (45-50 Duro)Molded Valve, Viton-A (65-75 Duro)Valve WingValve Wing, stainless steelTetraseal (or O-RIng) 3 3 /4" x 4"Orifice, 3 1 /4" dia., steelOrifice, 3 1 /4" dia., stainless steelRetaining Ring, stainlessPliers for retaining ring 19a, Truarc 0600Tetraseal (or O-Ring) 5" x 5 1 /4"Seal Diaphragm RingGasketTravel Indicator (specify scale 091-00-008-02)FOR BACK PRESSURE MODELSItem 12d above, Stem - substituteStem, Back PressureAdd Item 47Valve, Seal Diaphragm and StemAssembly12a Piston12b Seal Diaphragm, Buna-N12b Seal Diaphragm, Viton12c Plate12d Stem, steel12d Stem, stainless steelMolded Valve, Buna-N (45-50 Duro)Molded Valve, Viton-A (65-75 Duro)Valve SpacerTetraseal (or O-Ring) 4 3 /4" x 5"Orifice, 4 7 /32" dia., steelRetaining RingOrifice, 4 7 /32" dia., Stainless steelRetaining Ring, stainlessPliers for retaining ring 19a, Truarc 0600O-Ring 6 1 /4" x 6 1 /2"Seal Diaphragm RingGasketTravel Indicator (specify scale 091-00-008-02)FOR BACK PRESSURE MODELSItem 12d above, Stem - substituteStem, Back PressureAdd Item 47Valve, Seal Diaphragm and StemAssemblyPART NUMBER121-20-053-50121-20-364-50121-20-364-51121-20-010-50121-20-016-51121-20-311-50121-20-311-51121-20-018-50121-20-018-51904200121-20-023-50121-20-023-519046581190648934328121-20-008-50121-20-104-50091-00-365-00121-20-016-53121-20-511-50121-22-053-50121-22-364-50121-22-364-51121-22-010-50121-22-016-50121-22-016-51121-22-311-50121-22-311-51121-22-038-50950625121-22-023-50904429121-22-023-52121-22-130-521190648934337121-22-008-50121-22-104-50091-00-365-00121-20-016-53121-20-511-5013
Servicing – General InstructionsSame general instructions as listed on Page 6.To Service Valve (15)1. Remove bolts 38 and remove bottom cap 37.2. Remove retaining ring 16a. Use Truarc 0400 pliers, Invensys PartNo. 1190647.3. Remove both halves of valve holder 16b.4. Remove valve 15, and wing 15a or spacer (wave washer 14 willprobably also come off...do not lose it).– To reassemble, replace parts in reverse sequence.To Service Main Diaphragm (11d)1. Remove top cap 1.2. Release adjustment 3 (count the turns of adjustment 3 and use forreturning the adjustment to this setting during reassembly).3. Remove bolts 10 and housing 5 (3" and 4" 121-16 only).4. Remove spring 9.5. Remove bolts 22 and upper case 21.6. Rotate diaphragm assembly 11 counterclockwise (this unscrews11h from 12d) and remove.7. To disassemble diaphragm assembly, remove nut 11a. Carefullynote location and position of all parts to be certain of correct reassembly.Abrasive side of emery cloth washers face againstdiaphragm.– To reassemble, replace parts in reverse sequence.Make the screwed connection between 11h and 12d loose byapproximately 1 /2 turn. To do this, carefully rotate diaphragmassembly 11 clockwise until this screwed connection bottoms (donot jam it together). Then, back-off diaphragm assembly 11 counterclockwiseapproximately 1 /2 turn...this is very important...the 11h to12d screwed connection must not be tight.To Service Orifice (19)1. Remove valve 15 per section “To Service Valve (15)”.2. Remove seal diaphragm assembly 12 per step 2 under “To ServiceSeal Diaphragm (12b)”.3. Remove retaining ring 19a. Use Truarc 0600 pliers, Invensys PartNo. 1190648.4. Remove ring 33 and orifice 19 through top opening.– To reassemble, replace parts in reverse sequence.(On reassembly, be sure that 19a is fully seated in its groove. Also,beveled edge of 19a faces downward toward bottom cap 37).To Service Seal Diaphragm (12b)1. Remove valve 15 per section “To Service Valve (15)”.2. Remove bolts 29 and upper case assembly. Then remove sealdiaphragm assembly 12.3. To disassemble 12, unscrew piston 12a from stem 12d. Use aspanner wrench in notch in skirt of piston (this can also be done byinserting a standard 7 /32" Allen wrench in the notch).– To reassemble, replace parts in reverse sequence.Make certain that fabric side of seal diaphragm 12b faces upwardand “rubber” side faces downward toward body.Do not pinch loop in seal diaphragm 12b between ring 33 and centerpiece27. Also, rounded edge of 33 faces upward toward sealdiaphragm 12b.Make the screwed connection between 11h and 12d loose byapproximately 1 /2 turn. To do this, carefully rotate seal diaphragmassembly 12 clockwise until this screwed connection bottoms (donot jam it together). Then, back-off seal diaphragm assembly 12counterclockwise approximately 1 /2 turn...this is very important...the11h to 12d screwed connection must not be tight.14
RM-1399 Rev. 6General Safety Instructions forGas RegulatorsKeep this sheet for future reference.
-I 8.Check the regulator "set-point" and "lock-up" pressure. (Set-point is the outlet pressure the regulator is adjusted to deliver.Lock-up is the pressure where tight shutoff is achieved).IMPORTANT: During start-up, a pressure gauge must beconnected to the outlet piping between the regulator outlet andthe downstream shutoff valve to closely monitor the outletpressure. When checking the regulator for set-point and lock-up,provision must be made to PERMIT FREE FLOW of gas beyondthe outlet valve.The regulator set-point is factory adjusted as specified on theorder. Set-point should be checked with small gas flow (10% ofmaximum regulator capacity or less). Open the valve downstreamof the regulator before turning on gas. Slowly open theinlet valve while monitoring the outlet pressure gauge. Small flowshould be set by adjusting the outlet valve.A WARNING: Always closely monitor the outlet pressure gaugeduring start-up while opening or closing valves and makingadjustments. If the outlet pressure continues to increase abovethe specified lock-up pressure, open the downstream valve todischarge the excess pressure and close the inlet valve.Only adjust set-point when gas is flowing through the regulator.DO NOT adjust if regulator is locked-up (tight shutoff).IMPORTANT: Small flow during set-point adjustment is particularlyimportant where set-point is in the top third of the springrange. Large flow could result in over-stressing the spring or lossof lock-up from the spring compressing solid. If the set-pointadjustment must be made at large flow (60% to 100% of maximumregulator capacity) and set-point is in upper third of springrange, use the next higher range spring.After set-point has been determined to be correct, check for lockupby slowly closing the outlet valve. Again closely monitor theregulator outlet pressure gauge. Regulator must be fully capableof tight lock-up. If outlet pressure continues to rise above thelock-up pressure, open the downstream valve to dischargeexcess pressure and close the inlet shutoff valve. If the pressuregoes above lock-up the regulator is not closing properly. Makethe necessary corrections before resuming start-up.9. Prompt attention is essential if there is regulator trouble, ifgas leaks from the vent or elsewhere from the regulator, or ifleaks develop in the piping. Failure to shut down the regulatormay cause serious hazards.10. The outlet of the vent piping must allow for the free andunobstructed passage of air and gas.The diaphragm case vent must be positioned to protect againstflooding, drain water, ice formation, traffic, tampering, etc. Thevent must be protected against nest building animals, bees,insects, etc. to prevent vent blockage and minimize the chancesfor foreign material from collecting in the vent side of theregulator diaphragm.A It is the user's responsibility to assure that all regulatorvents andor vent lines exhaust to a non-hazardous locationaway from any potential sources of ignition. Where ventlines are used, it is the user's responsibility to assure thateach regulator is individually vented and that common ventlines are not used.MONITOR REGULATORS ANDEXTERNAL CONTROL LINESWhen bypassing a regulator with an external control line, thecontrol line valve must be closed before the bypass valve isopened. Failure to do so could result in the diaphragm beingexposed to the inlet pressure.USE WITH OTHER GASES1. Do not use Equimeter regulators on corrosive gases unlessauthorized by Equimeter for a specific corrosive condition.2. Where the gas is propane or butane (LPG) and theregulator has an internal relief valve (IRV), special care isrequired with the regulator vent. Because propane and butaneare heavier than air, they do not disperse readily in the atmosphere.Instead, they tend to collect in low places. Since largevolumes can discharge from the regulator vent at times ofemergency, care must be taken to pipe any such discharge toatmosphere at a safe place to prevent any gathering or migrationof explosive mixtures in low areas.GENERAL INSPECTION ANDSERVICE INSTRUCTIONS1. lnspect the regulator periodically to make sure it is in satisfactoryworking condition. Establish the frequency of inspectionon the basis of severity of service and applicable laws andregulations. As a minimum recommendation, pressure regulatingand limiting equipment should be inspected at intervals notexceeding 15 months, but at least once each calendar year.2. If the regulator is to be moved to another location, makesure its construction is compatible with the new pressure andflow conditions.AwARNING: Before any disassembly of the regulator, make sureit is completely depressurized. Pressure must be fully releasedfrom the inlet, the outlet and any control line connections. Failureto adequately depressurize could result in serious injury.3. Carefully note the location and position of all disassembledparts to be certain reassembly is correct. lnspect each partcarefully and replace any that are worn, damaged or otherwiseunsatisfactory.4. Adjustment screw lubrication should be checked wheneverthe regulator is serviced. Make sure the threads are fully coatedwith lubricant. Where there is evidence of thread wear, such asloose fit or excessive sideplay, the worn parts must be replaced.AwmNING: Failure from worn threads can result in seriouspersonal injury. Even at 10 psig outlet pressure, the forceexerted on the adjustment screw by spring compression canbe great. Therefore, adjustment screw lubrication and threadcondition must be given careful attention.5. Upon completion of servicing, make certain that the regulatorinstallation is entirely free of leaks.Equimeter Incorporated805 Liberty BoulevardDuBois, Pennsylvania 15801(8 14) 37 1-8000NUPP8198250MCOPYRIGHT0 1998 EQUIMETER. INC.
<strong>Tower</strong> <strong>Dryer</strong> Ops & ServiceCOMPONENTSVIIICOMPONENT MANUALSASCO PILOT VALVE
∅
<strong>Tower</strong> <strong>Dryer</strong> Ops & ServiceCOMPONENTSIXCOMPONENT MANUALSPROTECTOFIER
OPERATING SEQUENCE42-VAuwuuwummumCOMBUSTION SAFEOUARDForm 6642 VASingle Burner Supervision, <strong>Manual</strong> Pushbutton Ignition,Plug-in SSlOOA FLAME -PAK, Plug-in Control RelaysPower on PROTECTOFIER terminals LI and L2 3) N.O. "F' contact in main valve circuit closesprovides power to electronic network.to energize main valve (thru N.O. CHECKrelay "C" contact). Neon indicator light onPROTECTOFIER chassis will glow to in-Terminal L I must be powered before terminal 12. dicate flame is established.Power on PROTECTOFIER terminal 12 (thru permissivesafety limits circuit) permits manual pushbutton ignition.IPress and hold "START pilot pushbutton.a. "ACF" CHECK relay "C" is energized thru N.C.contact of "ACF FLAME relay "F'.b. Ignition transformer is energized thru contact of"START" button (from PROTECTOFIERterminal 4) to provide spark ignition to the pilot.c. Pilot solenoid valve is energized to open (fromPROTECTOFIER terminal 4).3. Release "START" button. Ignition transformer isde-energized.Flame failure during operation de-energizes fuel valvesPower interruption to PROTECTOFIER terminal I Ide-energizes relays and fuel valves.Failure of Check Relay "C" lo prove safe-start check \ill1prevent energizing fuel valves and ignition 3ystem.2. With pilot flame established "ACF' FLAME relay " Fis energized.a. FLAME relay " F contacts transfer.I ) N.C. "F" contact in safe-start checking circuitopens.2) N.O. "F" contact between terminal 12 andterminal 13 closes providing holding circuitaround "START" pilot push-button contact.Power Equipment CompanyManufacturers Representative201 1 Williamsburg Rd. Richmond. VA 2323 1(804) 2-36-3800 Fax (804) 236-3882INSTALLATION, OPERATION AND MAINTE-NANCE SHALL CONFORM WITH NATIONALFIRE PROTECTION ASSOCIATION STAND-ARDS, NATIONAL AND LOCAL CODES, ANDAUTHORITIES HAVING JURISDICTION. ANYMODIFICATION VOIDS APPROVALS.PRINTED IN U 5 A ' I92
~-115~~-60~2. -dFU StO POWER SUPPLY.MANUAL OPERATIONOlhGRAM BELOW.WHEN FLCIMZ IS€BTk8L\SWED ANDQtTEfTLD.C-CHECK RELAYF- FLAME RELAYSINGLE BURNERPROTECTOFIER(FORMbb42 VAGROUP MZiOla )NO CONNECTION.\NTLRNAL WIRtNb.- -- - E XTERNAL WIRING.I---------------ALARM WORM- SAFETY INTLK.SLRiLS CIRCUIT.FUEL AND AIRPRESS.SWS.,V€NT.FANS, ETC. AS REP'O.SINGLE BURNERPROTLCTOlrIER( F o R M ~ ~ YA ~ ZGROUPMZIO~.>NCJTES'.-lISV~-bOMZ.FUSLOPDWtRSUPPLY.FLAML W\RtTOBENO~l+TVPETWl COOY. INSULhTCD WIRE OREQUAL. FLAME WIRE MUST NOTBE wswf CONDUITS wtsnPOWER W\RINb.IGWlTlON CABLE MUST BERUNIN SEPARATE CONDU\'I TO SPhRKLLZCTRODE . (DO NOT M\X WITHLLSV. WlR\NG.\TRANS.WIRING AUQ INST ALLAT ION TOOPLRhTlWC 8lGNhLCOWFORM WITHNATIONAL ANDFROM P-C"X" ORLOCAL LLECTR\C)rL CODES.FLhUEROD.ALL WIRlWG AND EQUIPMENT 1ExTERNkCTO PRUT€CTOF\ER?a 8C FURN\SHFD BY OTWZRSUNLESS OTHIRWISC %PZC\F\LD.UISYALLfitlON, OPPIhT\QN AN0m t w ~ t ~ h wswau c ~ touro~~WITHv a t a w w I t RC ?Rot ctt\ow CrsSoCsaTImWbTC+UDAROS, Uh~lOWh& AUO LOCAL COOLShM0 hUTHORlTl€S WClulnG JURISD\CT#OW.INTERCtlNhlECTION DIAGRAMREVISED AblD REDRAWN. REV. 9.30-81
Limited WarrantyThe <strong>GSI</strong> <strong>Group</strong>, <strong>LLC</strong>. (“<strong>GSI</strong>”) warrants products which it manufactures to be free of defects in materialsand workmanship under normal usage and conditions for a period of 12 months after sale to the original enduseror if a foreign sale, 14 months from arrival at port of discharge, whichever is earlier. The enduser’s soleremedy (and <strong>GSI</strong>’s only obligation) is to repair or replace, at <strong>GSI</strong>’s option and expense, products that in<strong>GSI</strong>’s judgment, contain a material defect in materials or workmanship. Expenses incurred by or on behalfof the enduser without prior written authorization from the <strong>GSI</strong> Warranty <strong>Group</strong> shall be the soleresponsibility of the enduser.Warranty Extensions: The Limited Warranty period is extended for the following products:AP Fans andFlooringCumberlandFeeding/WateringSystemsGrain SystemsProductWarranty PeriodPerformer Series Direct DriveFan Motor3 YearsAll Fiberglass HousingsLifetimeAll Fiberglass PropellersLifetimeApex Flooring 10 Years *Feeder System Pan Assemblies 5 Years **Feed Tubes (1.75" & 2.00") 10 Years *Centerless Augers 10 Years *Watering Nipples 10 Years *Grain Bin Structural Design 5 YearsPortable <strong>Dryer</strong>s2 YearsPortable <strong>Dryer</strong> Frames, Screensand Internal Infrastructure †5 Years* Warranty prorated from list price:0 to 3 years – no cost to enduser3 to 5 years – enduser pays 25%5 to 7 years – enduser pays 50%7 to 10 years – end user pays 75%** Warranty prorated from list price:0 to 3 years – no cost to enduser3 to 5 years – enduser pays 50%† Motors, burner components andmoving parts not includedConditions and Limitations:THERE ARE NO WARRANTIES THAT EXTEND BEYOND THE LIMITED WARRANTY DESCRIPTIONSET FORTH ABOVE. SPECIFICALLY, <strong>GSI</strong> MAKES NO FURTHER WARRANTY OF ANY KIND, EXPRESSOR IMPLIED, INCLUDING, WITHOUT LIMITATION, WARRANTIES OF MERCHANTABILITY ORFITNESS FOR A PARTICULAR PURPOSE OR USE IN CONNECTION WITH: (i) PRODUCTMANUFACTURED OR SOLD BY <strong>GSI</strong> OR (ii) ANY ADVICE, INSTRUCTION, RECOMMENDATION ORSUGGESTION PROVIDED BY AN AGENT, REPRESENTATIVE OR EMPLOYEE OF <strong>GSI</strong> REGARDING ORRELATED TO THE CONFIGURATION, INSTALLATION, LAYOUT, SUITABILITY FOR A PARTICULARPURPOSE, OR DESIGN OF SUCH PRODUCTS.<strong>GSI</strong> shall not be liable for any direct, indirect, incidental or consequential damages, including, without limitation,loss of anticipated profits or benefits. The sole and exclusive remedy is set forth in the Limited Warranty, whichshall not exceed the amount paid for the product purchased. This warranty is not transferable and applies only to theoriginal enduser. <strong>GSI</strong> shall have no obligation or responsibility for any representations or warranties made by or onbehalf of any dealer, agent or distributor.<strong>GSI</strong> assumes no responsibility for claims resulting from construction defects or unauthorized modifications toproducts which it manufactured. Modifications to products not specifically delineated in the manual accompanyingthe equipment at initial sale will void the Limited Warranty.This Limited Warranty shall not extend to products or parts which have been damaged by negligent use, misuse,alteration, accident or which have been improperly/inadequately maintained. This Limited Warranty extends solelyto products manufactured by <strong>GSI</strong>.Prior to installation, the enduser has the responsibility to comply with federal, state and local codes which apply tothe location and installation of products manufactured or sold by <strong>GSI</strong>.9101239_1_CR_rev5.DOC (revised April 2009)
This equipment shall be installed in accordance withthe current installation codes and applicableregulations which should be carefully followed in allcases. Authorities having jurisdiction should beconsulted before installations are made.<strong>GSI</strong> <strong>Group</strong>1004 E. Illinois St.Assumption, IL 62510-0020Phone: 1-217-226-4421Fax: 1-217-226-4420www.gsiag.comCopyright © 2009 by <strong>GSI</strong> <strong>Group</strong>Printed in the USA